

Page 1

BC-4000 Service Manual No. 085-6693-02
BC-4000
Service Manual
Second Edition (2008.05.15)
IMPORTANT
x Do not carry out installation, operation, service, or
maintenance until thoroughly understanding the
contents of this manual.
x Keep this manual available at all times for
installation, operation, service, and maintenance.
Page 2

© Ishida Co., Ltd. 2005 All rights are reserved.
No part of this publication may be reproduced, stored in a retrieval system, or transmitted in any form or by any means
mechanical, electronic, photocopying, recording, or otherwise without prior written permission of Ishida. No patent
liability is assumed with respect to the use of the information contained herein. Moreover, because Ishida is constantly
striving to improve its high-quality products, the information contained in this manual is subject to change without notice.
Every precaution has been taken in the preparation of this manual. Nevertheless, Ishida assumes no responsibility for
errors or omissions. Neither is any liability assumed for damages resulting from the use of the information contained in
this publication.
BC-4000 Service Manual No. 085-6693-02
Page 3

IMPORTANT NOTICE
Thank you for purchasing the ISHIDA BC-4000.
This manual explains the procedures to perform installation, operation, service, or maintenance of the
machine.
Those who handle the machine must be aware of the hazards involved. These dangers may not be
obvious, so it is imperative to follow the instructions detailed in this manual when installing, operating,
inspecting, or servicing the machine. Therefore, we recommend that you thoroughly read and
understand this manual before installing, operating, inspecting, or servicing the machine, and keep
this manual in a safe place where you can refer to it whenever necessary.
ISHIDA is not liable for any damage, loss or injury that results from incorrect operation, insufficient
caution, unauthorized modifications to the machine, or failure to follow the instructions contained in
this manual.
In the recent weighing industry, the latent hazards involved with handling the machine have increased
due to new materials, new processing methods, and higher processing speeds, and it is impossible to
predict all of the possible dangers.
Likewise, there are far too many operations that cannot or should not be performed to fully describe all
of them in the manual. Please assume that any handling or operation not specifically described in this
manual should never be performed.
Safety countermeasures should be carefully considered and implemented before performing any
installation, operation, inspection, or maintenance procedure not specifically described in this manual
or indicated on the machine itself.
CHANGE IN SPECIFICATIONS
Machine specifications and accessories may be changed at any time due to improvements or other
reasons. Consult with your ISHIDA representative at any time to confirm the actual specifications of
the purchased machine.
ERRORS AND OMISSIONS
The information in this manual has been carefully checked and is believed to be accurate. However,
please understand that the descriptions in this manual may not agree with the actual machine due to
machine improvements. The information is subject to change without prior notice in the future. ISHIDA
assumes no responsibility for clerical, typographical or proofreading errors, or omissions.
LIMITATIONS OF LIABILITY
ISHIDA assumes no responsibility for special, indirect, or consequential damages, loss of profits or
commercial loss in any way connected with the machine, whether such claim is based on contract,
warranty, negligence, or strict liability.
ISHIDA shall assume responsibility for problems with the machine or the system based on an
individual maintenance contract. However, ISHIDA shall not be responsible for secondary problems.
ISHIDA assumes no responsibility for the user's programming of this machine, or any consequence
thereof.
In no event shall ISHIDA be responsible for warranty, repair, or other claims regarding the machine
unless ISHIDA’s analysis confirms that the machines were properly handled, stored, installed, and
maintained and not subject to contamination, abuse, misuse, or inappropriate modification or repair.
BC-4000 Service Manual No. 085-6693-02 i
Page 4

SAFETY CONSIDERATIONS
This operation manual contains information necessary for operating the OMNi-4000ST.
It is strongly advised that the following safety measures must be observed to ensure the
safe operation of the machine:
Properly ground machinery
As a Class 1 electrical device, this machine requires protective grounding for safe operation. To
avoid any potential electrical shock, securely attach the protective ground wire to the main grounding
provision.
Do not remove covers or enclosures
To avoid personal injury and shock, do not open or remove any covers or enclosures of the
machine unless specified in the manual.
Do not perform unspecified maintenance
For your personal safety, do not perform any maintenance procedures which are not specified in
the manual.
Disconnect power supply before servicing
To ensure your personal safety, disconnect the power supply before servicing.
Take precaution against residual electrical charge hazard
Capacitors inside the machine may still hold an electrical charge even after power is disconnected.
ii BC-4000 Service Manual No. 085-6693-02
Page 5

CAUTIONS FOR INSTALLATION
Do not install the machine in the following types of places:
x Places subject to high
temperatures or high
humidity
x Places exposed to direct
sunlight
x Places where water or other
liquids are easily spilled on
the machine
x Places subject to excessive
vibration or unstable
foundations
x Places exposed to direct
cold air from air conditioners
or refrigerators
x Places where the floor or
foundation is unstable
x Places subject to a lot of
dust or dirt
x Places with large voltage
fluctuations
CAUTIONS FOR POWER SUPPLY
Heed the following precautions about power supply:
xUse a power supply with rated voltage ground.
xPrepare a dedicated power source.
A power supply that generates voltage variation may cause a malfunction.
xDo not stand on the power cord, and do not place anything heavy on the cord.
Doing so may damage the cord, resulting in accident or trouble.
BC-4000 Service Manual No. 085-6693-02 iii
Page 6

CAUTIONS FOR HANDLING
f Do not disassemble the machine. fDo not allow any liquids to come into
contact with the machine.
fDo not drop or apply a strong shock to the
machine.
f When cleaning the machine, only use a
soft dry cloth or a cloth wetted with a
neutral cleanser.
Never use thinner or other volatile
liquids.
iv BC-4000 Service Manual No. 085-6693-02
Page 7

LEVEL ADJUSTMENT
Ensure that the machine is level:
WARNING SYMBOLS
This machine is manufactured for use according to proper procedures by qualified service personnel
and only for the purposes described in this manual.
The warning symbols in this manual and warning stickers affixed to the machine itself are divided into three
categories depending on the level of danger or seriousness of potential injury. The definition for each of
these warnings and precautions are shown below. Failure to heed these warnings and precautions may
result in bodily injury or damage to the machine.
Indicates information that, if not heeded, is likely to result in loss of life or
serious injury.
Indicates information that, if not heeded, could possibly result in loss of life or
serious injury.
Indicates information that, if not heeded, could result in relatively serious or
minor injury, damage to the machine, or faulty operation.
BC-4000 Service Manual No. 085-6693-02 v
Page 8

CONTENTS
Chapter 1 OVERVIEW ............................................................................... 1-1
1.1 FRONT VIEW.............................................................................................1-1
1.2 REAR VIEW............................................................................................... 1-1
1.3 DISPLAY ....................................................................................................1-2
1.4 KEY SHEET............................................................................................... 1-2
1.5 SPECIFICATIONS ..................................................................................... 1-3
Chapter 2 SETUP MODE (B mode)........................................................... 2-1
2.1 ENTERING SETUP MODE........................................................................ 2-1
2.2 B01 LABEL FORMAT.................................................................................2-2
2.2.1 B01-01 Print Setup..............................................................................2-2
2.2.2 B01-02 Label Format ..........................................................................2-7
2.3 B02 BARCODE SETTING..................................................................... 2-12
2.3.1 B02-01 POS Flag..............................................................................2-12
2.3.2 B02-02 10 Digit Flag .........................................................................2-12
2.3.3 B02-03 Barcode Type .......................................................................2-13
2.3.4 B02-04 POS Type .............................................................................2-14
2.3.5 B02-05 ITF 18 Digit Barcode Type ....................................................2-15
2.3.6 B02-06 Manufacturer Code...............................................................2-15
2.3.7 Returning to B01..................................................................................2-15
2.4 B03 BARCODE .....................................................................................2-16
2.4.1 B03-01 Item Code Position ...............................................................2-16
2.4.2 B03-02 Department Code Position ...................................................2-16
2.4.3 B03-03 Group Code Position ............................................................2-17
2.4.4 Returning to B01..................................................................................2-17
2.5 B04 DEFAULT SETTING.......................................................................2-18
2.5.1 B04-01 Date Print .............................................................................2-18
2.5.2 B04-02 Use By Days.........................................................................2-18
2.5.3 B04-03 Pack Time Print ....................................................................2-19
2.5.4 B04-04 Expiry Time Print ..................................................................2-19
2.5.5 B04-05 Best Before Date Print..........................................................2-20
2.5.6 B04-06 Best Before Date ..................................................................2-20
2.5.7 B04-07 Unit Type ..............................................................................2-21
2.5.8 Returning to B01..................................................................................2-21
2.6 TOTAL MODE SELECTION .....................................................................2-22
2.6.1 B05-01 Daily Total.............................................................................2-22
2.6.2 B05-02 Weekly Total .........................................................................2-22
2.6.3 B05-03 Monthly Total ........................................................................2-23
2.6.4 Returning to B01..................................................................................2-23
2.7 B07 OPEN PRICE.................................................................................2-24
2.7.1 B07-01 Open Price Selection............................................................2-24
2.7.2 Returning to B01..................................................................................2-24
vi BC-4000 Service Manual No. 085-6693-02
Page 9

2.8 PLU SELECTION..................................................................................... 2-25
2.8.1 B08-02 Sales Mode ..........................................................................2-25
2.8.2 B08-03 Unit Price..............................................................................2-25
2.8.3 B08-04 Markdown Flag.....................................................................2-26
2.8.4 B08-05 Markdown Price....................................................................2-26
2.8.5 B08-06 Fixed Weight ........................................................................2-27
2.8.6 B08-07 Quantity................................................................................2-27
2.8.7 B08-08 Tare ......................................................................................2-28
2.8.8 B08-09 Date Print .............................................................................2-28
2.8.9 B08-10 SHELF LIFE .........................................................................2-29
2.8.10 B08-11 Best Before Date Flag ..........................................................2-29
2.8.11 B08-12 Best Before Date Data..........................................................2-30
2.8.12 B08-13 Pack Time Flag.....................................................................2-30
2.8.13 B08-14 Pack Time Data ....................................................................2-31
2.8.14 B08-15 Expiry Time Flag...................................................................2-31
2.8.15 B08-16 Expiry Time Data ..................................................................2-32
2.8.16 B08-17 Item Code.............................................................................2-32
2.8.17 B08-18 Barcode Type .......................................................................2-33
2.8.18 B08-19 POS Type .............................................................................2-33
2.8.19 B08-20 POS Flag..............................................................................2-34
2.8.20 B08-21 POS Code ............................................................................2-34
2.8.21 B08-22 Open Price ...........................................................................2-35
2.8.22 B08-23 Commodity Message............................................................2-35
2.8.23 B08-24 Ingredients Message ............................................................2-36
2.8.24 B08-25 Nutrition information panel Message ....................................2-36
2.8.25 B08-27 Coupon Message .................................................................2-37
2.8.26 B08-27 Logo Image 1 .......................................................................2-37
2.8.27 B08-28 Logo Image 2 .......................................................................2-38
2.8.28 B08-29 Label Format Number...........................................................2-38
2.8.29 B08-32 Upper Limit...........................................................................2-39
2.8.30 B08-33 Lower Limit...........................................................................2-39
2.8.31 B08-34 Unit Type ..............................................................................2-40
2.8.32 B08-35 Department Code .................................................................2-40
2.8.33 B08-36 Group Code..........................................................................2-41
2.8.34 B08-37 Register Code ......................................................................2-41
2.8.35 B08-38 Cost Price.............................................................................2-42
2.8.36 B08-39 POP Number ........................................................................2-42
2.8.37 B08-41 Storage Message .................................................................2-43
2.8.38 B08-42 Advisory Message ................................................................2-43
2.8.39 Returning to B01..................................................................................2-43
2.9 B09 SYSTEM ........................................................................................2-44
2.9.1 B09-01 PLU Registration ..................................................................2-44
2.9.2 B09-02 Commodity Name Registration.............................................2-44
2.9.3 B09-04 Preset Key............................................................................2-45
2.9.4 B09-05 Store Name & Address .........................................................2-45
2.9.5 B09-06 Date and Time ......................................................................2-46
2.9.6 B09-07 Commodity Message............................................................2-46
2.9.7 B09-08 Open PLU.............................................................................2-47
2.9.8 B09-09 Item List................................................................................2-47
2.9.9 B09-10 RS232C Communications ....................................................2-48
BC-4000 Service Manual No. 085-6693-02 vii
Page 10

2.9.10 B09-20 Coupon Message .................................................................2-48
2.9.11 B09-21 Ingredients Message ............................................................2-49
2.9.12 B09-22 NIP Message........................................................................2-49
2.9.13 B09-23 TCP/IP Communication........................................................2-50
2.9.14 B09-24 Operator System ..................................................................2-50
2.9.15 B09-25 Title Message .......................................................................2-51
2.9.16 B09-26 Advertisement Message.......................................................2-51
2.9.17 B09-27 Department...........................................................................2-52
2.9.18 B09-28 Group ...................................................................................2-52
2.9.19 B09-29 Campaign.............................................................................2-53
2.9.20 Returning to B01..................................................................................2-53
2.10 B10 ETHERNET SETTINGS................................................................. 2-54
2.10.1 B10-01 IP Address Setting ................................................................2-54
2.10.2 B10-02 Gateway Address Settings ...................................................2-55
2.10.3 B10-03 Subnet Mask ........................................................................2-57
2.10.4 B10-04 Server Address.....................................................................2-59
2.10.5 B10-05 Login Name Registration......................................................2-60
2.10.6 B10-06 Password Registration for FTP Communication...................2-61
2.10.7 B10-07 MAC Address .......................................................................2-61
2.10.8 B10-08 DHCP Communication Setup ...............................................2-62
2.10.9 B10-09 Network Status .....................................................................2-63
2.11 B11 SYSTEM TIMER ............................................................................ 2-65
2.12 B12 PASSWORD REGISTRATION....................................................... 2-66
2.12.1 B12-01 Password for Registration Mode ..........................................2-66
2.12.2 B12-02 Password for Total Mode ......................................................2-66
2.12.3 B12-03 Password for Subtraction Mode ...........................................2-67
2.12.4 B12-04 Password for Setup Mode ....................................................2-67
2.12.5 B12-06 Password Change ................................................................2-67
2.12.6 Returning to B01..................................................................................2-67
2.13 B13 MACHINE NUMBER ......................................................................2-69
2.14 EXITING THE MODE...............................................................................2-70
Chapter 3 TEST MODE (C mode) ............................................................. 3-1
3.1 ENTERING TEST MODE...........................................................................3-1
3.2 C01 HARDWARE TEST.......................................................................... 3-2
3.2.1 C01-01 A/D Check ..............................................................................3-2
3.2.2 C01-02 Key Check..............................................................................3-3
3.2.3 C01-03 Display Check ........................................................................3-4
3.2.4 C01-04 RS232C Check ......................................................................3-5
3.2.5 C01-05 Application Program Number .................................................3-5
3.2.6 C01-06 BIOS Program Number ..........................................................3-6
3.2.7 C01-07 Reset Count ...........................................................................3-7
3.3 C02 RAM CLEAR....................................................................................3-8
3.3.1 C02-01 SRAM Clear ...........................................................................3-8
3.3.2 C02-02 Set Data Clear........................................................................3-8
3.3.3 C02-03 Test Data Clear.......................................................................3-8
3.3.4 Returning to C01 ...................................................................................3-9
viii BC-4000 Service Manual No. 085-6693-02
Page 11

3.4 C03 THERMAL HEAD........................................................................... 3-10
3.4.1 C03-01 Thermal Head Resistance....................................................3-10
3.4.2 C03-02 Print Usage Distance............................................................3-10
3.4.3 C03-03 Resistance Value Adjustment ............................................... 3-11
3.4.4 Returning to C01 ................................................................................. 3-11
3.5 C04 LABEL SENSOR CHECK ..............................................................3-12
3.5.1 C04-00 Label Sensor ........................................................................3-12
3.5.2 Returning to C01 .................................................................................3-12
3.6 C05 TOTAL MEMORY...........................................................................3-13
3.6.1 C05-00 Total Memory & Remaining Memory ....................................3-13
3.6.2 Returning to C01 .................................................................................3-13
3.7 C06 ROM SWITCH ...............................................................................3-14
3.7.1 C06-00 ROM Switch Selection..........................................................3-14
3.7.2 Returning to C01 .................................................................................3-15
3.8 C07 PEEL SENSOR CHECK ................................................................3-16
3.8.1 C07-00 Peel Sensor..........................................................................3-16
3.8.2 Returning to C01 .................................................................................3-16
3.8.3 Exiting the Mode..................................................................................3-16
Chapter 4 COMPONENT REPLACEMENT ............................................... 4-1
4.1 THERMAL HEAD REPLACEMENT ...........................................................4-1
4.2 PRINT ROLLER REPLACEMENT .............................................................4-2
4.3 LOAD CELL REPLACEMENT ...................................................................4-4
4.4 MAIN BOARD REPLACEMENT ................................................................4-6
4.5 KEY SHEET REPLACEMENT ...................................................................4-8
4.6 A/D BOARD REPLACEMENT .................................................................4-10
4.7 POWER SUPPLY BOARD REPLACEMENT ...........................................4-12
4.8 DISPLAY UNIT REPLACEMENT.............................................................4-14
Chapter 5 ERROR LIST & TROUBLESHOOTING .................................... 5-1
5.1 ERROR LIST .............................................................................................5-1
5.2 TROUBLESHOOTING ...............................................................................5-2
Chapter 6 Electric Assembly.................................................................... 6-1
6.1 BLOCK DIAGRAM .....................................................................................6-1
6.2 PS-990 MAIN BOARD ...............................................................................6-2
6.2.1 I/O SIGNALS .........................................................................................6-2
6.3 PS-229A SCALE BOARD .......................................................................... 6-3
6.4 P-986 LCD JUNCTION BOARD & LCD DISPLAY ...................................6-4
6.5 PS-037 KEY BOARD & MEMBRANE KEYS .............................................6-5
6.6 POWER SUPPLY.......................................................................................6-6
6.7 PS-990 MAIN BOARD CIRCUIT DRAWING..............................................6-7
BC-4000 Service Manual No. 085-6693-02 ix
Page 12

x BC-4000 Service Manual No. 085-6693-02
Page 13

1.
OVERVIEW
1.1 FRONT VIEW
1.2 REAR VIEW
Weigh platter
Height adjustment foot
Key sheet
Operator display
Customer display
Printer
Chapter 1 OVERVIEW
BC-4000 Service Manual No. 085-6693-02 1-1
Page 14

Chapter 1 OVERVIEW
1.4 KEY SHEET
1.3 DISPLAY
1-2 BC-4000 Service Manual No. 085-6693-02
Page 15

Chapter 1 OVERVIEW
BC-4000 Service Manual No. 085-6693-02 1-3
1.5 SPECIFICATIONS
Item Content
Product Name BC-4000 L2
Products Lineup Full dot + 7-segment LCD type
Weighing Capacity 15Kg: 0 - 6,000g / 2g, 6,000g - 15,000g / 5g, Multiple interval
Weighing Accuracy 1/3000
Scale Unit 0.002Kg / 0.005Kg
Minimum Weighing
Capacity
0.04Kg
OS specification µiTRON
Standard I/O 100BASE LAN × 1
Display
192 ×16dots, 23-digit segment monochrome LCD,
2 backlight colors
Number of Keys 112 keys (92 membrane keys + 20 tact keys)
Printing Method Direct, thermal method
Thermal Head 2-inch (448 dots, 8 dots/mm) monochrome thermal head
Printing Speed 80mm/sec.
Effective Print Size Width 60mm
Label Size
Label external:
I
100mm, Paper core: I40mm
Label width: Min. 38mm – Max. 64mm
Power Supply AC220V ±10% 50/60Hz
Operating Temperature -10°C - +35°C
Operating Humidity 20-85% (non condensing)
External Dimensions 400(W) × 460(D) × 480(H)mm (including the pole height)
Weight 10kg or less
Option Wireless LAN unit
Page 16

memo
memo
memomemo
Page 17

2.
SETUP MODE (B Mode)
2.1 ENTERING SETUP MODE
KEY IN ITEM No.
0.000 0.000 0.00 0.00
Key in the numeric value "6000" and press the [MODE] key.
Then, the machine enters Setup Mode.
Æ SETUP PRESS [¾] KEY
b00 SETUP
Chapter 2 SETUP MODE
BC-4000 Service Manual No. 085-6693-02 2-1
Page 18

Chapter 2 SETUP MODE
1 LABEL FORMAT [ENTER]
b01 LABEL FORMAT
2.2.1 B01-01 PRINT SETUP
Press the [ENTER] key to enter B01-01 menu.
Æ PRINT SETUP [ENTER]
b01-01 PRINT 1
2.2.1.1 B01-01-01 Label Format Number
Label print format number can be set.
Operation
1. Press the [ENTER] key to enter B01-01-01menu.
LABEL FORMAT No.
b01-01-01 LABEL FMT 30
2. Key in the desired label format number and press the [ENTER] key.
#01 - #04: Standard label format (01: default value).
#31 - #99: Can be additionally.registered.
¨
2.2.1.2 B01-01-02 Label Length + Gap
Operation
1. Press the [¾] or [ENTER] key to enter B01-01-02 menu.
or
LENGTH+GAP(32.5to242.5)
b01-01-02 LENGTH 39.5
2. Measure the length of the label and the gap.
3. Key in the numeric value (0,1mm units), and press the [ENTER] key.
¨
2.2 B01 LABEL FORMAT
Press the [¾] key to enter B01 menu.
2-2 BC-4000 Service Manual No. 085-6693-02
Page 19

Chapter 2 SETUP MODE
BC-4000 Service Manual No. 085-6693-02 2-3
2.2.1.3 B01-01-03 Label Width
Operation
1. Press the [¾] or [ENTER] key to enter B01-01-03 menu.
or
WIDTH (30.0 to 200.0mm)
b01-01-03 WIDTH 0.0
2. Measure the label width.
3. Key in the numeric value (0.1mm units), and press the [ENTER] key.
¨
2.2.1.4 B01-01-04 Label Sensor Distance
Operation
1. Press the [¾] or [ENTER] key to enter B01-01-04 menu.
or
SENSOR DISTANCE (0.1mm)
b01-01-04 DISTANCE 73.0
2. Key in the label sensor distance (between the label sensor and the thermal head), and press the
[ENTER] key.
Note: Normally, this value is fixed at 73.0mm.
¨
2.2.1.5 B01-01-05 Label Type Selection
Operation
1. Press the [¾] or [ENTER] key to enter B01-01-05 menu.
or
DIE-CUT=0, CONTINUOU=1
b01-01-05 CONTINUOUS 0
2. Key in the label type number (0: Die-cut labels (standard) or 1: Continuous labels) and press the
[ENTER] key.
or
¨
Page 20

Chapter 2 SETUP MODE
2-4 BC-4000 Service Manual No. 085-6693-02
2.2.1.6 B01-01-06 Store Name/Address Print Selection
Operation
1. Press the [¾] or [ENTER] key to enter B01-01-06 menu.
or
NAME,ADDRESS ¼ 1:ENABLE
b01-01-06 STORE 1
2. Use the [»] or [¼] key to confirm the meaning of each item (code).
or
3. Key in the desired number (0 or 1) to determine whether or not to print the store name and address,
and press the [ENTER] key.
0: Disable
1: Enable
or
¨
2.2.1.7 B01-01-07 Title (Unit Price or Weight) Print Selection
Operation
1. Press the [¾] or [ENTER] key to enter B01-01-07 menu.
or
FIELD TITLE ¼ 1:ENABLE
b01-01-07 TITLE 1
2. Use the [»] or [¼] key to confirm the meaning of each item (code).
or
3. Key in the desired number (0 or 1) to determine whether or not to print the title (unit price or weight)
and press the [ENTER] key.
0: Disable
1: Enable
or
¨
Page 21

Chapter 2 SETUP MODE
BC-4000 Service Manual No. 085-6693-02 2-5
2.2.1.8 B01-01-08 Peel Sensor Selection
Operation
1. Press the [¾] or [ENTER] key to enter B01-01-08 menu.
or
PEEL SENSOR ¼ 1:ENABLE
b01-01-08 PEEL 1
2. Use the [»] or [¼] key to confirm the meaning of each item (code).
or
3. Key in the desired number (0 or 1) to determine whether or not to use the peel sensor and press the
[ENTER] key.
0: Disable
1: Enable
or
¨
2.2.1.9 B01-01-09 PLU Number Setting for Test Printing
Operation
1. Press the [¾] or [ENTER] key to enter B01-01-09 menu.
or
TEST ITEM No.
b01-01-09 ITEM 00000001
2. Key in the desired PLU number for test printing and press the [ENTER] key.
¨
2.2.1.10 B01-01-10 Thermal Head Check Selection
Operation
1. Press the [¾] or [ENTER] key to enter B01-01-10 menu.
or
HEAD CHECK ¼ 1:ENABLE
b01-01-10 HEAD CHECK 1
2. Use the [»] or [¼] key to confirm the meaning of each item (code).
or
Page 22

Chapter 2 SETUP MODE
2-6 BC-4000 Service Manual No. 085-6693-02
3. Key in the desired number (0 or 1) to determine whether or not to check the thermal head and press
the [ENTER] key.
0: Disable
1: Enable
or
¨
Note: When using this function, the buzzer sounds if the thermal head fails in Normal Mode.
2.2.1.11 B01-01-11 Subtotal Label Format Number
Operation
1. Press the [¾] or [ENTER] to enter B01-01-11 menu.
or
SUB TOTAL FORMAT No.
b01-01-11 SUB TOTAL 20
2. Key in the desired label format number for subtotal and press the [ENTER] key.
¨
2.2.1.12 B01-01-12 Store Number Print Selection
Operation
1. Press the [¾] or [ENTER] to enter B01-01-12 menu.
or
STORE No. PRN ¼ 1:ENABLE
b01-01-12 STORE No. 1
2. Use the [»] or [¼] key to confirm the meaning of each item (code).
or
3. Key in the desired number (0 or 1) to determine whether or not to print the store number and press
the [ENTER] key.
0: Disable
1: Enable
or
¨
Page 23

Chapter 2 SETUP MODE
BC-4000 Service Manual No. 085-6693-02 2-7
2.2.1.13 B01-01-13 Machine Number Print Selection
Operation
1. Press the [¾] or [ENTER] to enter B01-01-13 menu.
or
MACH. No. PRN ¼ 1:ENABLE
b01-01-13 STORE No. 1
2. Use the [»] or [¼] key to confirm the meaning of each item (code).
or
3. Key in the desired number (0 or 1) to determine whether or not to print the machine number and
press the [ENTER] key.
0: Disable
1: Enable
or
¨
2.2.1.14 Returning to B01
Operation
Press the [END] key to return to B01 menu.
1 LABEL FORMAT [ENTER]
b01 LABEL FORMAT
2.2.2 B01-02 LABEL FORMAT
Operation
1. Press the [ENTER] key to enter B01-01 menu.
Æ PRINT SETUP [ENTER]
b01-01 PRINT 1
2. Press the [¾] key to enter B01-02 menu.
Æ LABEL EDIT [ENTER]
b01-02 FORMAT
3. To proceed further steps, key in “4141” and press the [SIZE] key.
¨
Page 24

Chapter 2 SETUP MODE
2-8 BC-4000 Service Manual No. 085-6693-02
2.2.2.1 B01-02-01 Label Format Copy
Operation
1. Press the [ENTER] key to enter B01-02-01 menu.
Æ FORMAT No. + [PLU] (30)
b01-02-01 FORMAT No 30
2. Key in the desired label format number (copy destination) and press the [PLU] key.
Example: Label format number “50”
¨
Æ FORMAT No. + [PLU] (50)
b01-02-01 FORMAT No 50
3. Key in the desired label format number (copy origin) and press the [COPY] key.
Example: Label format number “2”
¨
Æ FORMAT No. + [PLU] (02)
b01-02-01 FORMAT No 02
Note: Format #1 thorugh #4 are standard label formats and cannot be changed.
For format # 31 thorugh #99, edit the format after copying a standard format.
2.2.2.2 B01-02-02 Print Position Data
Printing position can be set for each unit.
Operation
1. Press the [¾] key to enter B01-02-02 menu.
Æ UNIT [ENTER]
b01-02-02 UNIT
2. Press the [ENTER] key to proceed to the next step.
0:X AXIS POSITION (0552)
b01-02-02 0n00 0
3. Select “1” (Y axis) or “0” (X axis) using the [»] or [¼] key.
or
0:Y AXIS POSITION (0490)
b01-02-02 1n00 0
0: X axis
1: Y axis
Unit number (1-22)
Print position
(in 0.1mm units)
Page 25

4. Select the desured unit number using the [½] or [¾] key.
or
0:Y AXIS POSITION (0055)
b01-02-02 1n31 0
or
0:X AXIS POSITION (0019)
b01-02-02 0n01 0
5. Key in the print position data (axis value) in 0.1mm units and press the [ENTER] key.
Note: Print position data cannot be changed for standard format #1 through #4.
¨
6. Press the [END] key to return to the B01-02-01 menu.
Æ FORMAT No. + [PLU] (30)
b01-02-01 FORMAT No 30
2.2.2.3 B01-02-03 Default PLU Number
Operation
1. Press the [¾] key twice to enter 01-02-03 menu.
Æ DEFAULT PLU [ENTER]
b01-02-03 PLU 00000001
2. Key in the desired PLU number and press the [ENTER] key.
Example: PLU number “2”
¨
Æ DEFAULT PLU [ENTER]
b01-02-03 PLU 00000002
3. Press the [PRINT] key to issue a test label to confirm print position for eack print unit.
2.2.2.4 Returning to B01-02-01
Operation
Press the [END] key to return to B01-02-01 menu.
Æ FORMAT No. + [PLU] (30)
b01-02-01 FORMAT No 30
Chapter 2 SETUP MODE
BC-4000 Service Manual No. 085-6693-02 2-9
Page 26

Chapter 2 SETUP MODE
yyy
Æ UNIT DATA [ENTER]
b01-02-04 UNIT DATA
2. Press the [ENTER] key.
FMT No / Unit No / Addr / Data
b01-02-04 30 01 1d 1A30
3. Select the desired psotion using the [»] [¼] [½] [¾] keys.
4. Key in the desired print unit data and press the [ENTER] key.
¨
2.2.2.6 Returning to B01-02-01
Operation
Press the [END] key to return to B01-02-01 menu.
Æ FORMAT No. + [PLU] (30)
b01-02-01 FORMAT No 30
2.2.2.7 B01-02-05 Number of Units
Operation
1. Press the [¾] key repeatedly until 01-02-05 menu appears, or key in “5” and press the [¾] key to
enter 01-02-05 menu directly.
yyy
NUMBER OF UNIT [ENTER]
b01-02-05 No OF UNIT
2. Press the [ENTER] key.
NUMBER OF
b01-02-05 No OF UNIT 22
Label format
number
Unit
number
A
ddress
data
Input data
2.2.2.5 B01-02-04 Print Unit Data
Operation
1. Press the [¾] key repeatedly until 01-02-04 menu appears, or key in “4” and press the [¾] key to
enter 01-02-04 menu directly.
2-10 BC-4000 Service Manual No. 085-6693-02
Page 27

Chapter 2 SETUP MODE
¨
2.2.2.8 Returning to B01-02-01
Operation
Press the [END] key to return to B01-02-01 menu.
Æ FORMAT No. + [PLU] (30)
b01-02-01 FORMAT No 30
2.2.2.9 B01-02-06 Length + Gap
Operation
1. Press the [¾] key repeatedly until 01-02-06 menu appears, or key in “6” and press the [¾] key to
enter 01-02-06 menu directly.
yyy
LENGTH + GAP (32.5 to 242.5)
b01-02-06 LENGTH 0.0
2. Key in the desired data (Length + Gap) in 0.1mm units and press the [ENTER] key.
¨
2.2.2.10 Returning to B01-01
Press the [END] key to return to B01-01.
Æ PRINT SETUP [ENTER]
b01-01 PRINT 1
2.2.2.11 Returning to B01
Operation
Press the [END] key again to return to B01.
1 LABEL FORMAT [ENTER]
b01 LABEL FORMAT
3. Key in the desired number of units and press the [ENTER] key.
BC-4000 Service Manual No. 085-6693-02 2-11
Page 28

Chapter 2 SETUP MODE
2 POS CODE [ENTER]
b02 POS CODE
2.3.1 B02-01 POS FLAG
POS flag can be set.
Example: Set “202” as a POS flag.
Operation
1. Press the [ENTER] key to enter B02-01 menu.
FLAG 8: 1 Digit, 13:2 Digits
b02-01 POS FLAG 202
2. Key in the desired POS flag code (barcode prefix) and press the [ENTER] key.
¨
2.3.2 B02-02 10 DIGIT FLAG
Operation
1. Press the [¾] or [ENTER] key to enter B02-02 menu.
or
10 DIGIT FLAG 8(13):2 Dig
b02-02 10 DIG FLAG 4949
FFДДДДДДДДДДC/D or FFДДДДДC/D
10-digit fixed POS code 5-digit fixed POS code
2. Key in the desired flag code for source marking and press the [ENTER] key.
¨
POS flag 8 POS flag 13
PLU8 PLU13
2.3 B02 BARCODE SETTING
Operation
Press the [¾] key to enter B02 menu.
2-12 BC-4000 Service Manual No. 085-6693-02
Page 29

2.3.3 B02-03 BARCODE TYPE
or
BAR TYPE ¼ 1:NON PLU 13
b02-03 BAR TYPE 1
2. Use the [»] or [¼] key to confirm the meaning of each item (code).
1: NON PLU 13 (EAN code)
2: NON PLU 8 (EAN code)
3: PLU 13 (EAN code)
4: PLU 8 (EAN code)
5: ITF 18
or
3. Key in the desired barcode type number and press the [ENTER] key.
¨
Operation
1. Press the [¾] or [ENTER] key to enter B02-03 menu.
Chapter 2 SETUP MODE
BC-4000 Service Manual No. 085-6693-02 2-13
Page 30

Chapter 2 SETUP MODE
2-14 BC-4000 Service Manual No. 085-6693-02
2.3.4 B02-04 POS TYPE
Operation
1. Press the [¾] or [ENTER] key to enter B02-04 menu.
or
POS TYPE ¼ 1:F2C5 (CP) P4
b02-04 POS TYPE 1
2. Use the [»] or [¼] key to confirm the meaning of each item (code).
or
3. Key in the desired POS type number and press the [ENTER] key.
¨
<POS Type Numebr>
1: F F C C C C C (C/P) P P P P (C/D)
2: F F C C C C C C P P P P (C/D)
3: F C C C C C C (C/P) P P P P (C/D)
4: F F C C C C C P P P P P (C/D)
5: F C C C C C C P P P P P (C/D)
6: F F C C C C (C/P) P P P P P (C/D)
7: F F C C C C C C C W W W W (C/D)
8: F C C C C C C W W W W W (C/D)
9: F C C C C C I I I I I I (C/D)
10: F F C C C C C P P P P (C/D)
11: F F C C C C C C W W W W (C/D)
12: F F C C C C (C/P) W W W W W (C/D)
13: F F M M M C C P P P P P (C/D)
14: F F M M C C C P P P P P (C/D)
15: F F C C C C C (0) P P P P (C/D)
16: F F C C C C C W W W W W (C/D)
17: F F C C C C C P P P P P (C/D)
18: F F C C C C C (C/P) P P P P (C/D)
19: F F C C C C C (C/P) W W W W (C/D)
20: F C C C C C P P P P P P (C/D)
21: F F C C C C P P P P P P (C/D)
22: F C C C W W W W P P P P (C/D)
23: F F C C C C Q Q P P P P (C/D)
24: F I I I I I I P P P P P (C/D)
25: F F I I I I I I P P P P (C/D)
26: F C C C C P P P P P P P (C/D)
27: F I I I I I I P P P P P (C/D)
28: F F I I I I I I P P P P (C/D)
29: F C C C C C C P P P P P (C/D)
30: F F C C C C C C P P P P (C/D)
31:F F C C C C C Q Q Q Q Q (C/D)
(F: Flag, C: Commodity code, P: Price, W: Weight, I: Item code, Q: Quantity,
M: Manufacturer code, C/P: Check price, C/D: Check didit)
Page 31

2.3.5 B02-05 ITF 18 DIGIT BARCODE TYPE
or
ITF ¼ 1:F2C5P5W5/Q5
b02-05 ITF BAR 0
2. Use the [»] or [¼] key to confirm the meaning of each item (code).
or
3. Key in the desired barcode type number and press the [ENTER] key.
¨
<ITF 18 Digit Barcode Type Number> (U: Unit price)
1: F F C C C C C P P P P P W W W W W W(C/D)/
F F C C C C C P P P P P Q Q Q Q Q (C/D)
2: F F C C C C C U U U U U W W W W W (C/D)
3: F F C C C C C P P P P P W W W W W (C/D)
4: F F C C C C C P P P P P Q Q Q Q Q (C/D)
2.3.6 B02-06 MANUFACTURER CODE
Operation
1. Press the [¾] or [ENTER] key to enter B02-06menu.
or
MANUFACTURE CODE (4 Dig)
b02-06 MANUFACTURE 0000
2. Key in the desired manufacturer code and press the [ENTER] key.
¨
2.3.7 RETURNING TO B01
Operation
Press the [END] key to return to B01 menu.
1 LABEL FORMAT [ENTER]
b01 LABEL FORMAT
Operation
1. Press the [¾] or [ENTER] key to enter B02-05 menu.
Chapter 2 SETUP MODE
BC-4000 Service Manual No. 085-6693-02 2-15
Page 32

Chapter 2 SETUP MODE
yyy
3 ITEM CODE SET [ENTER]
b03 CODE POSITION
2.4.1 B03-01 ITEM CODE POSITION
Operation
1. Press the [ENTER] key.to enter B03-01 menu.
ITEM CODE SET (BARCODE)
b03-01 BARCODE 45
2. Key in the item code position (starting position and the number of digits in the barcode), and press
the [ENTER] key.
Note: Three types are available, “45”, “36” and “27” (default value is “45”).
¨
Example: Item code “4567892” Set value “45”
“45” means 5 digits from the 4th digit of the item code.
In this example, the item code is “67892”.
2.4.2 B03-02 DEPARTMENT CODE POSITION
Operation
1. Press the [¾] or [ENTER] key to enter B03-02 menu.
or
ITEM CODE SET (DEPT)
b03-02 DEPARTMENT 34
2. Key in the item code position (starting position and the number of digits in the department code),
and press the [ENTER] key.
¨
Example: Item code: “34567892”, Set value: “34”.
In this example, the department code is “5678” that are 4 digits from the 3rd digit.
2.4 B03 BARCODE
Press the [¾] key repeatedly until B03 menu appears, or key in “3” and press the [¾] key to enter B03
menu directly.
2-16 BC-4000 Service Manual No. 085-6693-02
Page 33

2.4.3 B03-03 GROUP CODE POSITION
or
ITEM CODE SET (GROUP)
b03-03 GROUP 32
2. Key in the item code position (starting position and the number of digits in the group code) and
press the [ENTER] key.
¨
Example: Item code: “12345678”, Set value: “32”.
In this example, the group code is “34” that are 2 digits from the 3rd digit.
2.4.4 RETURNING TO B01
Operation
Press the [END] key to return to B01 menu.
1 LABEL FORMAT [ENTER]
b01 LABEL FORMAT
Operation
1. Press the [¾] or [ENTER] key to enter B03-03 menu.
Chapter 2 SETUP MODE
BC-4000 Service Manual No. 085-6693-02 2-17
Page 34

Chapter 2 SETUP MODE
yyy
4 DEFAULT [ENTER]
b04 DEFAULT
2.5.1 B04-01 DATE PRINT
Operation
1. Press the [ENTER] key to enter B04-01 menu.
DATE PRINT¼ 4:BOTH
b04-01 DATE FLAG 4
2. Use the [»] or [¼] key to confirm the meaning of each item (code).
1: Prohibit (No print)
2: Pack date
3: Use-by date
4: Both (Print both)
or
3. Key in the desired number to determine whether or not to print dates and press the [ENTER] key.
¨
2.5.2 B04-02 USE BY DAYS
Operation
1. Press the [¾] or [ENTER] key to enter B04-02 menu.
or
USE BY (0 to 999)
b04-02 USE BY 1
2. Key in the number of days for Use By period and press the [ENTER] key.
¨
2.5 B04 DEFAULT SETTING
Operation
Press the [¾] key repeatedly until B04 menu appears, or key in “4” and press the [¾] key to enter B04
menu directly.
2-18 BC-4000 Service Manual No. 085-6693-02
Page 35

Chapter 2 SETUP MODE
BC-4000 Service Manual No. 085-6693-02 2-19
2.5.3 B04-03 PACK TIME PRINT
Operation
1. Press the [¾] or [ENTER] key to enter B04-03 menu.
or
PACK TIME ¼ 1:PROHIBIT
b04-03 P TIME 1
2. Use the [»] or [¼] key to confirm the meaning of each item (code).
1: Prohibit (No print)
2: Installed (System time print)
3: Designated time print
or
3. Key in the desired number to determine whether or not to print the pack time and press the
[ENTER] key.
¨
2.5.4 B04-04 EXPIRY TIME PRINT
Operation
1. Press the [¾] or [ENTER] key to enter B04-04 menu.
or
EXPIRY TIME ¼ 1:PROHIBIT
b04-04 E TIME 1
2. Use the [»] or [¼] key to confirm the meaning of each item (code).
1: Prohibit (No print)
2: Relative time print
3: Designated time print
or
3. Key in the desired number to determine whether or not to print the expiry time and press the
[ENTER] key.
¨
Page 36

Chapter 2 SETUP MODE
2-20 BC-4000 Service Manual No. 085-6693-02
2.5.5 B04-05 BEST BEFORE DATE PRINT
Operation
1. Press the [¾] or [ENTER] key to enter B04-05 menu.
or
BEST BEFORE ¼ 1:NO PRINT
b04-05 BEFORE F 1
2. Use the [»] or [¼] key to confirm the meaning of each item (code).
1: No print
2: Print
or
3. Key in the desired number to determine whether or not to print the Best Before date and press the
[ENTER] key.
¨
2.5.6 B04-06 BEST BEFORE DATE
Operation
1. Press the [¾] or [ENTER] key to enter B04-06 menu.
or
BEST BEFORE DATE (0 – 999)
b04-06 BEFORE D 1
3. Key in the desired number of days for Best Before date and press the [ENTER] key.
¨
Page 37

Chapter 2 SETUP MODE
BC-4000 Service Manual No. 085-6693-02 2-21
2.5.7 B04-07 UNIT TYPE
Operation
1. Press the [¾] or [ENTER] key to enter B04-07 menu.
or
UNIT TYPE ¼ 5:PC(S).
b04-07 UNIT TYPE 5
2. Use the [»] or [¼] key to confirm the meaning of each item (code).
1: oz
2: lb
3: kg
4: g
5: PC(S).
6: BOX(ES)
7: BUNDLE(S)
8: PACK(S)
9: CUT(S)
10: SLICE(S)
11: CUP(S)
12: PKT(S)
13: BAG(S)
14: BUCH(S)
15: BOTTLE(S)
16: LB
or
3. Key in the desired number to select the unit type and press the [ENTER] key.
¨
2.5.8 RETURNING TO B01
Operation
Press the [END] key to return to B01.
1 LABEL FORMAT [ENTER]
b01 LABEL FORMAT
Page 38

Chapter 2 SETUP MODE
DAILY TOTAL ¼1:ENABLE
b05-01 DAILY 1
2. Use the [»] or [¼] key to confirm the meaning of each item (code).
0: Disable
1: Enable
or
3. Key in the desired number to determine whether or not to use the daily total function and press the
[ENTER] key.
¨
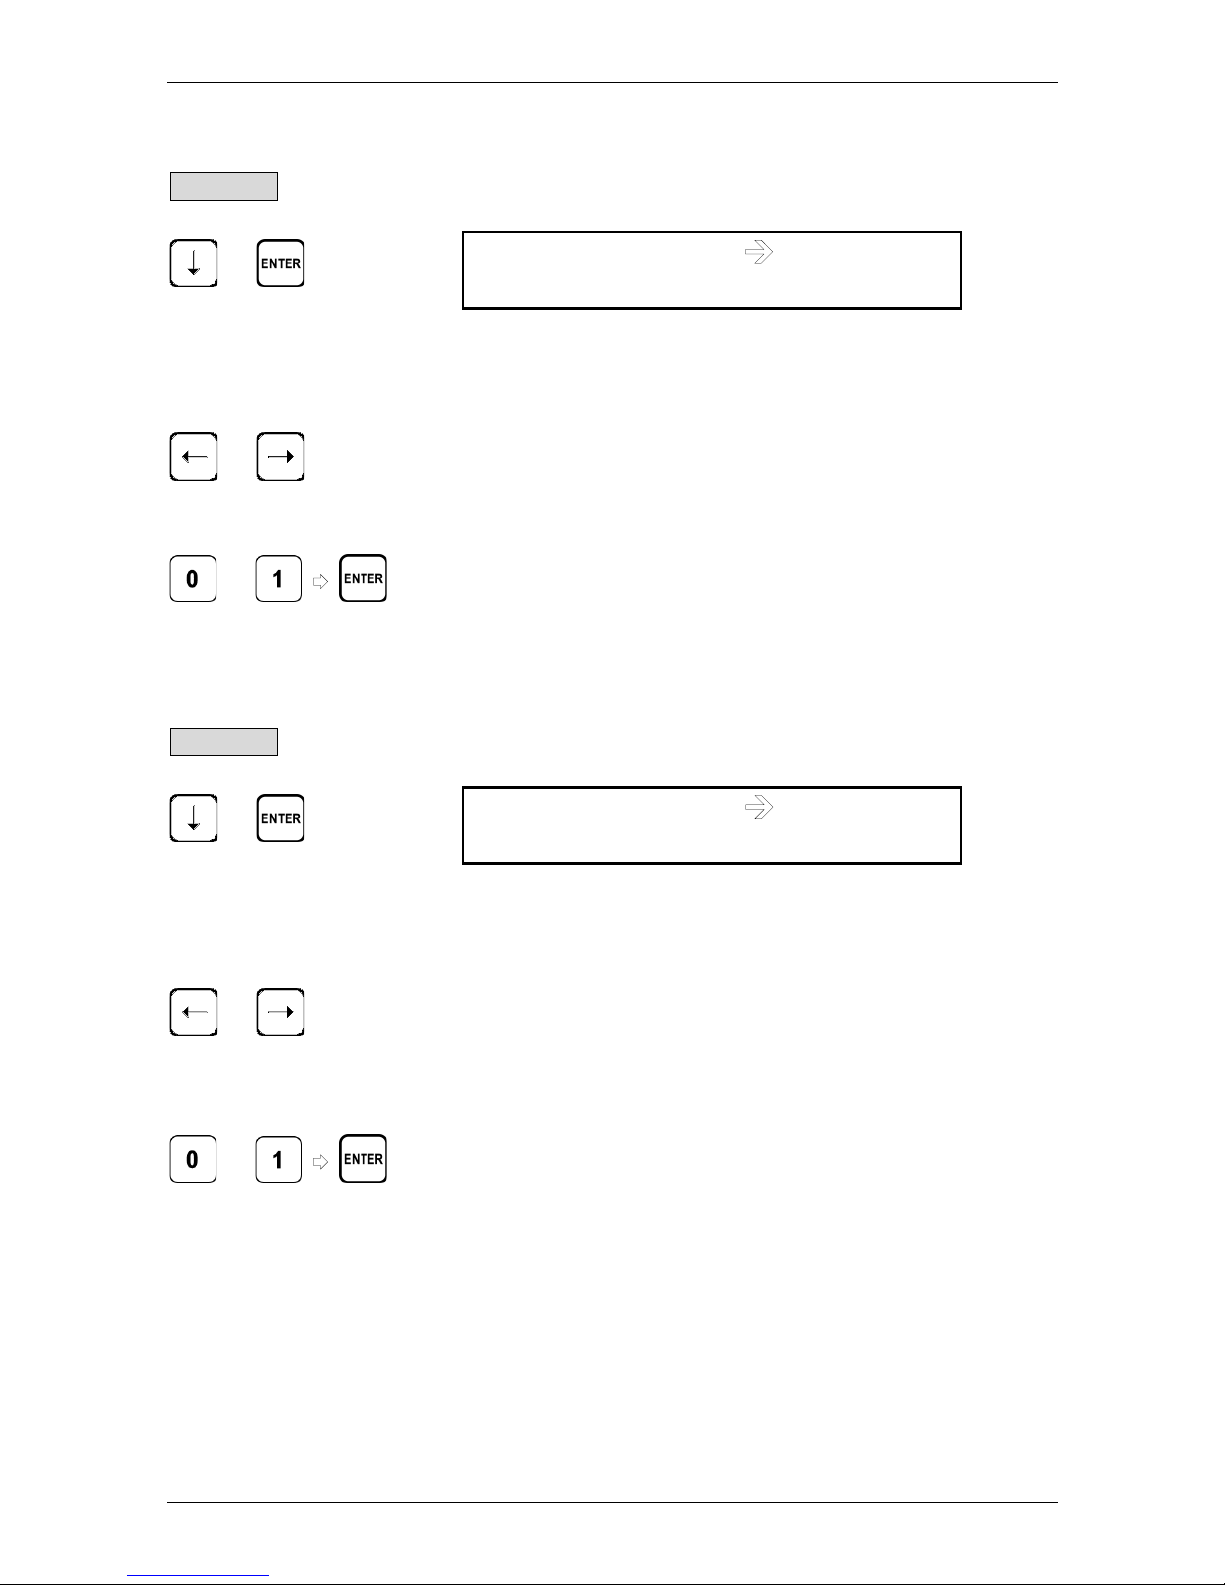
2.6.2 B05-02 WEEKLY TOTAL
Operation
1. Press the [ENTER] key to enter B05-02 menu.
WEEKLY TOTAL ¼1:ENABLE
b05-02 WEEKLY 1
2. Use the [»] or [¼] key to confirm the meaning of each item (code).
0: Disable
1: Enable
or
3. Key in the desired number to determine whether or not to use the weekly total function and press
the [ENTER] key.
¨
2.6 TOTAL MODE SELECTION
Operation
Press the [(] key repeatedly until B05 menu appears, or key in “5” and press the [(] key to enter B05
menu directly.
(((
5 TOTAL SELECT [ENTER]
b05 TOTAL SELECT
2.6.1 B05-01 DAILY TOTAL
Operation
1. Press the [ENTER] key to enter B05-01 menu.
2-22 BC-4000 Service Manual No. 085-6693-02
Page 39

Chapter 2 SETUP MODE
BC-4000 Service Manual No. 085-6693-02 2-23
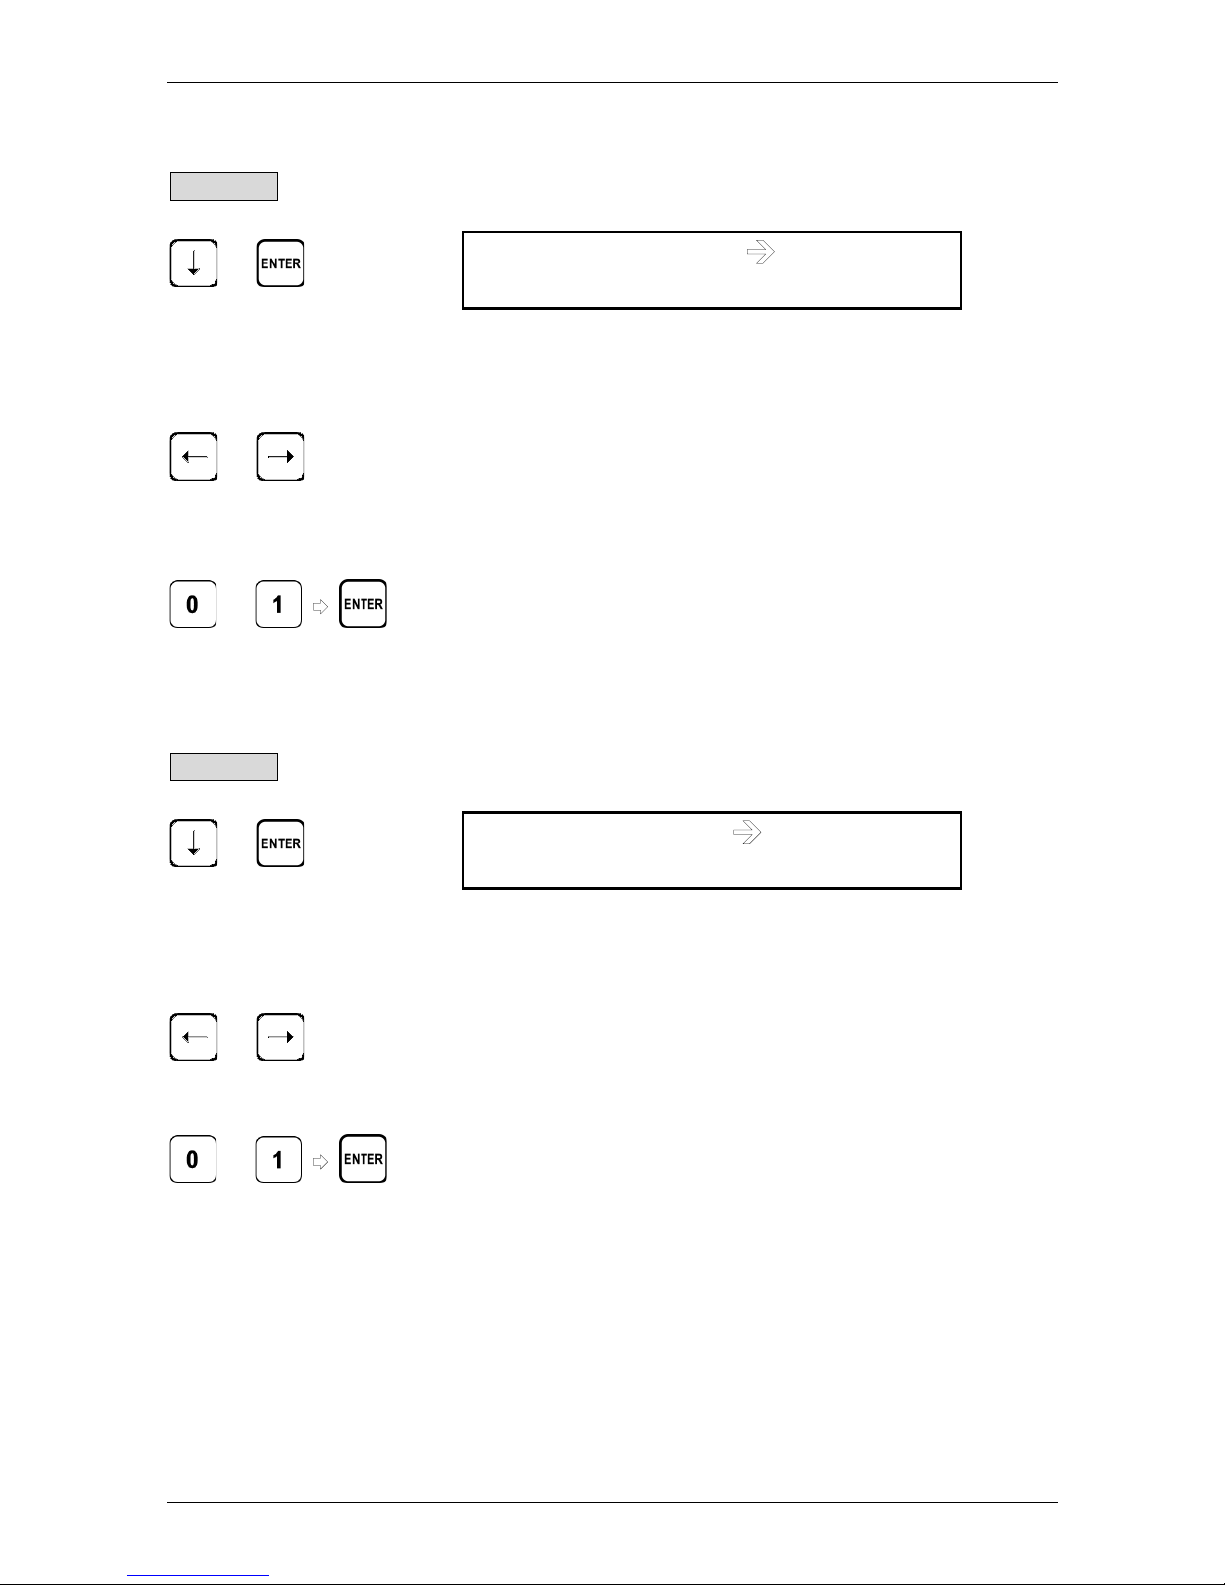
2.6.3 B05-03 MONTHLY TOTAL
Operation
1. Press the [ENTER] key to enter B05-03 menu.
MONTHLY TOTAL ¼1:ENABLE
b05-03 MONTHLY 1
2. Use the [»] or [¼] key to confirm the meaning of each item (code).
0: Disable
1: Enable
or
3. Key in the desired number to determine whether or not to use the weekly total function and press
the [ENTER] key.
¨
2.6.4 RETURNING TO B01
Operation
Press the [END] key to return to B01 menu.
1 LABEL FORMAT [ENTER]
b01 LABEL FORMAT
Page 40

Chapter 2 SETUP MODE
yyy
7 OPEN PRICE [ENTER]
b07 OPEN PRICE
2.7.1 B07-01 OPEN PRICE SELECTION
Operation
1. Press the [ENTER] key to enter B07-01 menu.
OPEN PRICE ¼ 0:ALLOW
b07-01 OPEN PRICE 0
2. Use the [»] or [¼] key to confirm the meaning of each item (code).
0: Allow
1: Prohibit
or
3. Key in the number (0 or 1) to determine whether or not to allow open price function and press the
[ENTER] key.
or
¨
2.7.2 RETURNING TO B01
Operation
Press the [END] key to return to B01 menu.
1 LABEL FORMAT [ENTER]
b01 LABEL FORMAT
2.7 B07 OPEN PRICE
Operation
Press the [¾] key repeatedly until B07 menu appears, or key in “7” and press the [¾] key to enter B07
menu directly.
2-24 BC-4000 Service Manual No. 085-6693-02
Page 41

Chapter 2 SETUP MODE
yyy
8 PLU SELECT [ENTER]
b08 PLU SELECT
2.8.1 B08-02 SALES MODE
Operation
1. Press the [¾] or [ENTER] key to enter B08-02 menu.
or
SALES MODE
b08-02 SALES MODE 1
2. Use the [»] or [¼] key to confirm the meaning of each item (code).
0: Disable
1: Enable
or
3. Key in the number (0 or 1) to determine whether or not to use the sales mode function and press
the [ENTER] key.
or
¨
2.8.2 B08-03 UNIT PRICE
Operation
1. Press the [(] or [ENTER] key to enter B08-03 menu.
or
UNIT PRICE ( 1:ENABLE
b08-03 PRICE 1
2. Use the [»] or [¼] key to confirm the meaning of each item (code).
0: Disable
1: Enable
or
3. Key in the number (0 or 1) to determine whether or not to use the unit price function and press the
[ENTER] key.
or
¨
2.8 PLU SELECTION
Operation
Press the [¾] key repeatedly until B08 menu appears, or key in “8” and press the [¾] key to enter B08
menu directly.
BC-4000 Service Manual No. 085-6693-02 2-25
Page 42

Chapter 2 SETUP MODE
2-26 BC-4000 Service Manual No. 085-6693-02
2.8.3 B08-04 MARKDOWN FLAG
Operation
1. Press the [¾] or [ENTER] key to enter B08-04 menu.
or
MD FLAG ¼ 1:ENABLE
b08-04 MD FLAG 1
2. Use the [»] or [¼] key to confirm the meaning of each item (code).
0: Disable
1: Enable
or
3. Key in the number (0 or 1) to determine whether or not to use the markdown function and press the
[ENTER] key.
or
¨
2.8.4 B08-05 MARKDOWN PRICE
Operation
1. Press the [¾] or [ENTER] key to enter B08-05 menu.
or
MD PRICE ¼ 1:ENABLE
b08-05 MD PRICE 1
2. Use the [»] or [¼] key to confirm the meaning of each item (code).
0: Disable
1: Enable
or
3. Key in the number (0 or 1) to determine whether or not to use the markdown price function and
press the [ENTER] key.
or
¨
Page 43

Chapter 2 SETUP MODE
BC-4000 Service Manual No. 085-6693-02 2-27
2.8.5 B08-06 FIXED WEIGHT
Operation
1. Press the [¾] or [ENTER] key to enter B08-06 menu.
or
FIXED WEIGHT ¼ 1:ENABLE
b08-06 FIXED WEIGHT 1
2. Use the [»] or [¼] key to confirm the meaning of each item (code).
0: Disable
1: Enable
or
3. Key in the number (0 or 1) to determine whether or not to use the fixed weight function function and
press the [ENTER] key.
or
¨
2.8.6 B08-07 QUANTITY
Operation
1. Press the [¾] or [ENTER] key to enter B08-07 menu.
or
PCS ¼ 1:ENABLE
b08-07 PCS 1
2. Use the [»] or [¼] key to confirm the meaning of each item (code).
0: Disable
1: Enable
or
3. Key in the number (0 or 1) to determine whether or not to use the quantity function function and
press the [ENTER] key.
or
¨
Page 44

Chapter 2 SETUP MODE
2-28 BC-4000 Service Manual No. 085-6693-02
2.8.7 B08-08 TARE
Note that “Tare 2” is not available.
Operation
1. Press the [¾] or [ENTER] key to enter B08-08 menu.
or
TARE1 ¼ 1:ENABLE
b08-08 TARE1 1
2. Use the [»] or [¼] key to confirm the meaning of each item (code).
0: Disable
1: Enable
or
3. Key in the number (0 or 1) to determine whether or not to use the tare function and press the
[ENTER] key.
or
¨
2.8.8 B08-09 DATE PRINT
Operation
1. Press the [¾] or [ENTER] key to enter B08-09 menu.
or
DATE PRINT ¼ 1:ENABLE
b08-09 DATE PRNT 1
2. Use the [»] or [¼] key to confirm the meaning of each item (code).
0: Disable
1: Enable
or
3. Key in the number (0 or 1) to determine whether or not to use the date print function and press the
[ENTER] key.
or
¨
Page 45
Chapter 2 SETUP MODE
BC-4000 Service Manual No. 085-6693-02 2-29
2.8.9 B08-10 SHELF LIFE
Operation
1. Press the [¾] or [ENTER] key to enter B08-10 menu.
or
DATE PRINT ¼ 1:ENABLE
b08-10 SHELF LIFE 1
2. Use the [»] or [¼] key to confirm the meaning of each item (code).
0: Disable
1: Enable
or
3. Key in the number (0 or 1) to determine whether or not to use the Shelf Life function and press the
[ENTER] key.
or
¨
2.8.10 B08-11 BEST BEFORE DATE FLAG
Operation
1. Press the [¾] or [ENTER] key to enter B08-11 menu.
or
B BEFORE FLAG ¼ 1:ENABLE
b08-11 B BEF FLG 1
2. Use the [»] or [¼] key to confirm the meaning of each item (code).
0: Disable
1: Enable
or
3. Key in the number (0 or 1) to determine whether or not to use the Best Before date function and
press the [ENTER] key.
or
¨
Page 46

Chapter 2 SETUP MODE
2-30 BC-4000 Service Manual No. 085-6693-02
2.8.11 B08-12 BEST BEFORE DATE DATA
Operation
1. Press the [¾] or [ENTER] key to enter B08-12 menu.
or
B BEFORE DATE ¼ 1:ENABLE
b08-12 B BEF DATE 1
2. Use the [»] or [¼] key to confirm the meaning of each item (code).
0: Disable
1: Enable
or
3. Key in the number (0 or 1) to determine whether or not to use the Best Before date data function
and press the [ENTER] key.
or
¨
2.8.12 B08-13 PACK TIME FLAG
Operation
1. Press the [¾] or [ENTER] key to enter B08-13 menu.
or
P.TIME FLAG ¼ 1:ENABLE
b08-13 P TIME FLG 1
2. Use the [»] or [¼] key to confirm the meaning of each item (code).
0: Disable
1: Enable
or
3. Key in the number (0 or 1) to determine whether or not to use the pack time function and press the
[ENTER] key.
or
¨
Page 47

Chapter 2 SETUP MODE
BC-4000 Service Manual No. 085-6693-02 2-31
2.8.13 B08-14 PACK TIME DATA
Operation
1. Press the [¾] or [ENTER] key to enter B08-14 menu.
or
P TIME DATA ¼ 1:ENABLE
b08-14 P TIME DATA 1
2. Use the [»] or [¼] key to confirm the meaning of each item (code).
0: Disable
1: Enable
or
3. Key in the number (0 or 1) to determine whether or not to use the pack time data function and press
the [ENTER] key.
or
¨
2.8.14 B08-15 EXPIRY TIME FLAG
Operation
1. Press the [¾] or [ENTER] key to enter B08-15 menu.
or
E. TIME FLAG ¼1:ENABLE
b08-15 E TIME FLG 1
2. Use the [»] or [¼] key to confirm the meaning of each item (code).
0: Disable
1: Enable
or
3. Key in the number (0 or 1) to determine whether or not to use the expiry time function and press the
[ENTER] key.
or
¨
Page 48
Chapter 2 SETUP MODE
2-32 BC-4000 Service Manual No. 085-6693-02
2.8.15 B08-16 EXPIRY TIME DATA
Operation
1. Press the [¾] or [ENTER] key to enter B08-16 menu.
or
E. TIME DATA ¼ 1:ENABLE
b08-16 E TIME DATA 1
2. Use the [»] or [¼] key to confirm the meaning of each item (code).
0: Disable
1: Enable
or
3. Key in the number (0 or 1) to determine whether or not to use the expiry time data function and
press the [ENTER] key.
or
¨
2.8.16 B08-17 ITEM CODE
Operation
1. Press the [¾] or [ENTER] key to enter B08-17 menu.
or
ITEM CODE ¼ 1:ENABLE
b08-17 ITEM CODE 1
2. Use the [»] or [¼] key to confirm the meaning of each item (code).
0: Disable
1: Enable
or
3. Key in the number (0 or 1) to determine whether or not to use the item code function and press the
[ENTER] key.
or
¨
Page 49

Chapter 2 SETUP MODE
BC-4000 Service Manual No. 085-6693-02 2-33
2.8.17 B08-18 BARCODE TYPE
Operation
1. Press the [¾] or [ENTER] key to enter B08-18 menu.
or
BAR TYPE ¼1:ENABLE
b08-18 BAR TYPE 1
2. Use the [»] or [¼] key to confirm the meaning of each item (code).
0: Disable
1: Enable
or
3. Key in the number (0 or 1) to determine whether or not to use the barcode type function and press
the [ENTER] key.
or
¨
2.8.18 B08-19 POS TYPE
Operation
1. Press the [¾] or [ENTER] key to enter B08-19 menu.
or
POS TYPE ¼ 1:ENABLE
b08-19 POS TYPE 1
2. Use the [»] or [¼] key to confirm the meaning of each item (code).
0: Disable
1: Enable
or
3. Key in the number (0 or 1) to determine whether or not to use the POS type function and press the
[ENTER] key.
or
¨
Page 50

Chapter 2 SETUP MODE
2-34 BC-4000 Service Manual No. 085-6693-02
2.8.19 B08-20 POS FLAG
Operation
1. Press the [¾] or [ENTER] key to enter B08-20 menu.
or
POS FLAG ¼ 1:ENABLE
b08-20 POS FLAG 1
2. Use the [»] or [¼] key to confirm the meaning of each item (code).
0: Disable
1: Enable
or
3. Key in the number (0 or 1) to determine whether or not to use the POS function and press the
[ENTER] key.
or
¨
2.8.20 B08-21 POS CODE
Operation
1. Press the [¾] or [ENTER] key to enter B08-21 menu.
or
POS CODE ¼ 1:ENABLE
b08-21 POS CODE 1
2. Use the [»] or [¼] key to confirm the meaning of each item (code).
0: Disable
1: Enable
or
3. Key in the number (0 or 1) to determine whether or not to use the POS code function and press the
[ENTER] key.
or
¨
Page 51

Chapter 2 SETUP MODE
BC-4000 Service Manual No. 085-6693-02 2-35
2.8.21 B08-22 OPEN PRICE
Operation
1. Press the [¾] or [ENTER] key to enter B08-22 menu.
or
OPEN PRICE ¼ 1:ENABLE
b08-22 OPEN PRICE 1
2. Use the [»] or [¼] key to confirm the meaning of each item (code).
0: Disable
1: Enable
or
3. Key in the number (0 or 1) to determine whether or not to use the open price function and press the
[ENTER] key.
or
¨
2.8.22 B08-23 COMMODITY MESSAGE
Note that “Commodity message” can also be called “Extra message”.
Operation
1. Press the [¾] or [ENTER] key to enter B08-23 menu.
or
COMMODITY MSG¼1:ENABLE
b08-23 COMMODITY MSG 1
2. Use the [»] or [¼] key to confirm the meaning of each item (code).
0: Disable
1: Enable
or
3. Key in the number (0 or 1) to determine whether or not to use the commodity message function and
press the [ENTER] key.
or
¨
Page 52

Chapter 2 SETUP MODE
2-36 BC-4000 Service Manual No. 085-6693-02
2.8.23 B08-24 INGREDIENTS MESSAGE
Operation
1. Press the [¾] or [ENTER] key to enter B08-24 menu.
or
INGRED MSG ¼ 1:ENABLE
b08-24 INGREDIENTS MSG 1
2. Use the [»] or [¼] key to confirm the meaning of each item (code).
0: Disable
1: Enable
or
3. Key in the number (0 or 1) to determine whether or not to use the ingredients message function and
press the [ENTER] key.
or
¨
2.8.24 B08-25 NUTRITION INFORMATION PANEL MESSAGE
Operation
1. Press the [¾] or [ENTER] key to enter B08-25 menu.
or
NIP MESSAGE ¼ 1:ENABLE
b08-25 NIP MESSAGE 1
2. Use the [»] or [¼] key to confirm the meaning of each item (code).
0: Disable
1: Enable
or
3. Key in the number (0 or 1) to determine whether or not to use the NIP message function and press
the [ENTER] key.
or
¨
Page 53

Chapter 2 SETUP MODE
BC-4000 Service Manual No. 085-6693-02 2-37
2.8.25 B08-27 COUPON MESSAGE
Operation
1. Press the [¾] or [ENTER] key to enter B08-26 menu.
or
COUPON MSG ¼ 1:ENABLE
b08-26 COUPON 1
2. Use the [»] or [¼] key to confirm the meaning of each item (code).
0: Disable
1: Enable
or
3. Key in the number (0 or 1) to determine whether or not to use the coupon message function and
press the [ENTER] key.
or
¨
2.8.26 B08-27 LOGO IMAGE 1
Operation
1. Press the [¾] or [ENTER] key to enter B08-27 menu.
or
LOGO IMAGE 1 ¼ 1:ENABLE
b08-27 LOGO 1 1
2. Use the [»] or [¼] key to confirm the meaning of each item (code).
0: Disable
1: Enable
or
3. Key in the number (0 or 1) to determine whether or not to use the Logo Image1 function and press
the [ENTER] key.
or
¨
Page 54

Chapter 2 SETUP MODE
2-38 BC-4000 Service Manual No. 085-6693-02
2.8.27 B08-28 LOGO IMAGE 2
Operation
1. Press the [¾] or [ENTER] key to enter B08-28 menu.
or
LOGO IMAGE 2 ¼ 1:ENABLE
b08-28 LOGO 2 1
2. Use the [»] or [¼] key to confirm the meaning of each item (code).
0: Disable
1: Enable
or
3. Key in the number (0 or 1) to determine whether or not to use the Logo Image 2 function and press
the [ENTER] key.
or
¨
2.8.28 B08-29 LABEL FORMAT NUMBER
Operation
1. Press the [¾] or [ENTER] key to enter B08-29 menu.
or
LABEL FMT No. ¼ 1:ENABLE
b08-29 FORMAT 1 1
2. Use the [»] or [¼] key to confirm the meaning of each item (code).
0: Disable
1: Enable
or
3. Key in the number (0 or 1) to determine whether or not to use the label format number function and
press the [ENTER] key.
or
¨
Note: Steps “b08-30” and “b08-31” are not available.
Page 55

2.8.29 B08-32 UPPER LIMIT
or
UPPER LIMIT ¼ 1:ENABLE
b08-32 UPPER 1
2. Use the [»] or [¼] key to confirm the meaning of each item (code).
0: Disable
1: Enable
or
3. Key in the number (0 or 1) to determine whether or not to use the upper limit function and press the
[ENTER] key.
or
¨
2.8.30 B08-33 LOWER LIMIT
Operation
1. Press the [¾] or [ENTER] key to enter B08-33 menu.
or
LOWER LIMIT ¼ 1:ENABLE
b08-33 LOWER 1
2. Use the [»] or [¼] key to confirm the meaning of each item (code).
0: Disable
1: Enable
or
3. Key in the number (0 or 1) to determine whether or not to use the lower limit function and press the
[ENTER] key.
or
¨
Operation
1. Press the [¾] or [ENTER] key to enter B08-32 menu.
Chapter 2 SETUP MODE
BC-4000 Service Manual No. 085-6693-02 2-39
Page 56

Chapter 2 SETUP MODE
2-40 BC-4000 Service Manual No. 085-6693-02
2.8.31 B08-34 UNIT TYPE
Operation
1. Press the [¾] or [ENTER] key to enter B08-34 menu.
or
UNIT TYPE ¼ 1:ENABLE
b08-34 UNIT TYPE 1
2. Use the [»] or [¼] key to confirm the meaning of each item (code).
0: Disable
1: Enable
or
3. Key in the number (0 or 1) to determine whether or not to use the unit type function and press the
[ENTER] key.
or
¨
2.8.32 B08-35 DEPARTMENT CODE
Operation
1. Press the [¾] or [ENTER] key to enter B08-35 menu.
or
DEPT CODE ¼ 1:ENABLE
b08-35 DEPARTMENT 1
2. Use the [»] or [¼] key to confirm the meaning of each item (code).
0: Disable
1: Enable
or
3. Key in the number (0 or 1) to determine whether or not to use the department code function and
press the [ENTER] key.
or
¨
Page 57

Chapter 2 SETUP MODE
BC-4000 Service Manual No. 085-6693-02 2-41
2.8.33 B08-36 GROUP CODE
Operation
1. Press the [¾] or [ENTER] key to enter B08-36 menu.
or
GROUP CODE ¼ 1:ENABLE
b08-36 GROUP 1
2. Use the [»] or [¼] key to confirm the meaning of each item (code).
0: Disable
1: Enable
or
3. Key in the number (0 or 1) to determine whether or not to use the group code function and press the
[ENTER] key.
or
¨
2.8.34 B08-37 REGISTER CODE
Operation
1. Press the [¾] or [ENTER] key to enter B08-37 menu.
or
REGIST CODE ¼ 1:ENABLE
b08-37 REGISTER 1
2. Use the [»] or [¼] key to confirm the meaning of each item (code).
0: Disable
1: Enable
or
3. Key in the number (0 or 1) to determine whether or not to use the register code function and press
the [ENTER] key.
or
¨
Page 58

Chapter 2 SETUP MODE
2-42 BC-4000 Service Manual No. 085-6693-02
2.8.35 B08-38 COST PRICE
Operation
1. Press the [¾] or [ENTER] key to enter B08-38 menu.
or
COST PRICE ¼ 1:ENABLE
b08-38 COST PRICE 1
2. Use the [»] or [¼] key to confirm the meaning of each item (code).
0: Disable
1: Enable
or
3. Key in the number (0 or 1) to determine whether or not to use the cost price function and press the
[ENTER] key.
or
¨
2.8.36 B08-39 POP NUMBER
Operation
1. Press the [¾] or [ENTER] key to enter B08-39 menu.
or
POP NUMBER ¼ 1:ENABLE
b08-39 POP 1
2. Use the [»] or [¼] key to confirm the meaning of each item (code).
0: Disable
1: Enable
or
3. Key in the number (0 or 1) to determine whether or not to use the POP number function and press
the [ENTER] key.
or
¨
Note: Step “b08-40” is not available.
Page 59

2.8.37 B08-41 STORAGE MESSAGE
or
STORAGE MSG ¼ 1:ENABLE
b08-41 STORAGE MSG 1
2. Use the [»] or [¼] key to confirm the meaning of each item (code).
0: Disable
1: Enable
or
3. Key in the number (0 or 1) to determine whether or not to use the storage message function and
press the [ENTER] key.
or
¨
2.8.38 B08-42 ADVISORY MESSAGE
Operation
1. Press the [¾] or [ENTER] key to enter B08-42 menu.
or
ADVISORY MSG ¼ 1:ENABLE
b08-42 ADVISORY MSG 1
2. Use the [»] or [¼] key to confirm the meaning of each item (code).
0: Disable
1: Enable
or
3. Key in the number (0 or 1) to determine whether or not to use the advisory message function and
press the [ENTER] key.
or
¨
2.8.39 RETURNING TO B01
Operation
Press the [END] key to return to B01 menu.
1 LABEL FORMAT [ENTER]
b01 LABEL FORMAT
Operation
1. Press the [¾] or [ENTER] key to enter B08-41 menu.
Chapter 2 SETUP MODE
BC-4000 Service Manual No. 085-6693-02 2-43
Page 60

Chapter 2 SETUP MODE
or
9 SYSTEM [ENTER]
b09 SYSTEM
2.9.1 B09-01 PLU REGISTRATION
Operation
1. Press the [¾] or [ENTER] key to enter B09-01 menu.
or
PLU ¼ 1:ENABLE
b09-01 PLU 1
2. Use the [»] or [¼] key to confirm the meaning of each item (code).
0: Disable
1: Enable
or
3. Key in the number (0 or 1) to determine whether or not to use the PLU registration function and
press the [ENTER] key.
or
¨
2.9.2 B09-02 COMMODITY NAME REGISTRATION
Operation
1. Press the [¾] or [ENTER] key to enter B09-02 menu.
or
COMMODITY ¼ 1:ENABLE
b09-02 COMMODITY 1
2. Use the [»] or [¼] key to confirm the meaning of each item (code).
0: Disable
1: Enable
or
2.9 B09 SYSTEM
Operation
Press the [¾] key repeatedly until B09 menu appears, or key in “9” and press the [¾] key to enter B09
menu directly.
2-44 BC-4000 Service Manual No. 085-6693-02
Page 61

Chapter 2 SETUP MODE
BC-4000 Service Manual No. 085-6693-02 2-45
3. Key in the number (0 or 1) to determine whether or not to use the commodity name registration
function and press the [ENTER] key.
or
¨
2.9.3 B09-04 PRESET KEY
Operation
1. Press the [¾] or [ENTER] key to enter B09-04 menu.
or
PRESET KEY ¼ 1:ENABLE
b09-04 PRESET 1
2. Use the [»] or [¼] key to confirm the meaning of each item (code).
0: Disable
1: Enable
or
3. Key in the number (0 or 1) to determine whether or not to use the preset key function and press the
[ENTER] key.
or
¨
2.9.4 B09-05 STORE NAME & ADDRESS
Operation
1. Press the [¾] or [ENTER] key to enter B09-05 menu.
or
STORE ADDR. ¼ 1:ENABLE
b09-05 STORE 1
2. Use the [»] or [¼] key to confirm the meaning of each item (code).
0: Disable
1: Enable
or
3. Key in the number (0 or 1) to determine whether or not to use the store name and address function
and press the [ENTER] key.
or
¨
Page 62

Chapter 2 SETUP MODE
2-46 BC-4000 Service Manual No. 085-6693-02
2.9.5 B09-06 DATE AND TIME
Operation
1. Press the [¾] or [ENTER] key to enter B09-06 menu.
or
DATE ¼ 1:ENABLE
b09-06 DATE 1
2. Use the [»] or [¼] key to confirm the meaning of each item (code).
0: Disable
1: Enable
or
3. Key in the number (0 or 1) to determine whether or not to use the date and time function and press
the [ENTER] key.
or
¨
2.9.6 B09-07 COMMODITY MESSAGE
Operation
1. Press the [¾] or [ENTER] key to enter B09-07 menu.
or
COMMODITY ¼ 1:ENABLE
b09-07 COMMODITY MSG 1
2. Use the [»] or [¼] key to confirm the meaning of each item (code).
0: Disable
1: Enable
or
3. Key in the number (0 or 1) to determine whether or not to use the commodity message function and
press the [ENTER] key.
or
¨
Page 63

Chapter 2 SETUP MODE
BC-4000 Service Manual No. 085-6693-02 2-47
2.9.7 B09-08 OPEN PLU
Operation
1. Press the [¾] or [ENTER] key to enter B09-08 menu.
or
OPEN PLU ¼ 1:ENABLE
b09-08 OPEN PLU 1
2. Use the [»] or [¼] key to confirm the meaning of each item (code).
0: Disable
1: Enable
or
3. Key in the number (0 or 1) to determine whether or not to use the open PLU function and press the
[ENTER] key.
or
¨
2.9.8 B09-09 ITEM LIST
Operation
1. Press the [¾] or [ENTER] key to enter B09-09 menu.
or
ITEM LIST ¼ 1:ENABLE
b09-09 LIST 1
2. Use the [»] or [¼] key to confirm the meaning of each item (code).
0: Disable
1: Enable
or
3. Key in the number (0 or 1) to determine whether or not to use the item list function and press the
[ENTER] key.
or
¨
Page 64

Chapter 2 SETUP MODE
2-48 BC-4000 Service Manual No. 085-6693-02
2.9.9 B09-10 RS232C COMMUNICATIONS
Operation
1. Press the [¾] or [ENTER] key to enter B09-10 menu.
or
RS232C COMM ¼ 1:ENABLE
b09-10 RS232C 1
2. Use the [»] or [¼] key to confirm the meaning of each item (code).
0: Disable
1: Enable
or
3. Key in the number (0 or 1) to determine whether or not to use the RS232C communication function
and press the [ENTER] key.
or
¨
Note: Steps “b09-11” through ““b09-19” are not available.
2.9.10 B09-20 COUPON MESSAGE
Operation
1. Press the [¾] or [ENTER] key to enter B09-20 menu.
or
COUPON MSG ¼1:ENABLE
b09-20 COUPON 1
2. Use the [»] or [¼] key to confirm the meaning of each item (code).
0: Disable
1: Enable
or
3. Key in the number (0 or 1) to determine whether or not to use the coupon message function and
press the [ENTER] key.
or
¨
Page 65

Chapter 2 SETUP MODE
BC-4000 Service Manual No. 085-6693-02 2-49
2.9.11 B09-21 INGREDIENTS MESSAGE
Operation
1. Press the [¾] or [ENTER] key to enter B09-21 menu.
or
INGRED MSG ¼ 1:ENABLE
b09-21 INGRED MSG 1
2. Use the [»] or [¼] key to confirm the meaning of each item (code).
0: Disable
1: Enable
or
3. Key in the number (0 or 1) to determine whether or not to use the ingredients message function and
press the [ENTER] key.
or
¨
2.9.12 B09-22 NIP MESSAGE
Operation
1. Press the [¾] or [ENTER] key to enter B09-22 menu.
or
NIP MESSAGE ¼ 1:ENABLE
b09-22 NIP MESSAGE 1
2. Use the [»] or [¼] key to confirm the meaning of each item (code).
0: Disable
1: Enable
or
3. Key in the number (0 or 1) to determine whether or not to use the NIP message function and press
the [ENTER] key.
or
¨
Page 66

Chapter 2 SETUP MODE
2-50 BC-4000 Service Manual No. 085-6693-02
2.9.13 B09-23 TCP/IP COMMUNICATION
Operation
1. Press the [¾] or [ENTER] key to enter B09-23 menu.
or
TCP/IP COMM ¼ 1:ENABLE
b09-23 TCP IP 1
2. Use the [»] or [¼] key to confirm the meaning of each item (code).
0: Disable
1: Enable
or
3. Key in the number (0 or 1) to determine whether or not to use the TCP/IP communication function
and press the [ENTER] key.
or
¨
2.9.14 B09-24 OPERATOR SYSTEM
Operation
1. Press the [¾] or [ENTER] key to enter B09-24 menu.
or
OPERATOR ¼ 1:ENABLE
b09-24 OPERATOR 1
2. Use the [»] or [¼] key to confirm the meaning of each item (code).
0: Disable
1: Enable
or
3. Key in the number (0 or 1) to determine whether or not to use the operator system function and
press the [ENTER] key.
or
¨
Page 67

Chapter 2 SETUP MODE
BC-4000 Service Manual No. 085-6693-02 2-51
2.9.15 B09-25 TITLE MESSAGE
Operation
1. Press the [¾] or [ENTER] key to enter B09-25 menu.
or
TITLE MSG ¼ 1:ENABLE
b09-25 TITLE 1
2. Use the [»] or [¼] key to confirm the meaning of each item (code).
0: Disable
1: Enable
or
3. Key in the number (0 or 1) to determine whether or not to use the tiltle message function and press
the [ENTER] key.
or
¨
2.9.16 B09-26 ADVERTISEMENT MESSAGE
Operation
1. Press the [¾] or [ENTER] key to enter B09-26 menu.
or
SCROLL MSG ¼ 1:ENABLE
b09-26 AD MSG 1
2. Use the [»] or [¼] key to confirm the meaning of each item (code).
0: Disable
1: Enable
or
3. Key in the number (0 or 1) to determine whether or not to use the advertisement message function
and press the [ENTER] key.
or
¨
Page 68

Chapter 2 SETUP MODE
2-52 BC-4000 Service Manual No. 085-6693-02
2.9.17 B09-27 DEPARTMENT
Operation
1. Press the [¾] or [ENTER] key to enter B09-27 menu.
or
DEPARTEMNT ¼ 1:ENABLE
b09-27 DEPARTMENT 1
2. Use the [»] or [¼] key to confirm the meaning of each item (code).
0: Disable
1: Enable
or
3. Key in the number (0 or 1) to determine whether or not to use the department function and press the
[ENTER] key.
or
¨
2.9.18 B09-28 GROUP
Operation
1. Press the [¾] or [ENTER] key to enter B09-28 menu.
or
GROUP ¼ 1:ENABLE
b09-28 GROUP 1
2. Use the [»] or [¼] key to confirm the meaning of each item (code).
0: Disable
1: Enable
or
3. Key in the number (0 or 1) to determine whether or not to use the group function and press the
[ENTER] key.
or
¨
Page 69

Chapter 2 SETUP MODE
BC-4000 Service Manual No. 085-6693-02 2-53
2.9.19 B09-29 CAMPAIGN
Operation
1. Press the [¾] or [ENTER] key to enter B09-28 menu.
or
CAMPAIGN ¼ 1:ENABLE
b09-29 CAMPAIGN 1
2. Use the [»] or [¼] key to confirm the meaning of each item (code).
0: Disable
1: Enable
or
3. Key in the number (0 or 1) to determine whether or not to use the campaign function and press the
[ENTER] key.
or
¨
2.9.20 RETURNING TO B01
Operation
Press the [END] key to return to B01 menu.
1 LABEL FORMAT [ENTER]
b01 LABEL FORMAT
Page 70

Chapter 2 SETUP MODE
yyy
10 ETHERNET [ENTER]
b10 ETHERNET
2.10.1 B10-01 IP ADDRESS SETTING
Operation
1. Press the [¾] or [ENTER] key to enter B10-01 menu.
or
Æ IP ADDRESS SET [ENTER]
b10-01 IP ADDRESS
2.10.1.1 B10-01-01 IP Address 1
Operation
1. Press the [ENTER] key to enter B10-01-01 menu.
IP ADDRESS 1
b10-01-01 ADDR 1 194
2. Key in the desired address and press the [ENTER] key.
¨
2.10.1.2 B10-01-02 IP Address 2
Operation
1. Press the [¾] or [ENTER] key to enter B10-01-02 menu.
or
IP ADDRESS 2
b10-01-02 ADDR 2 39
2. Key in the desired address and press the [ENTER] key.
¨
2.10 B10 ETHERNET SETTINGS
Operation
Press the [¾] key repeatedly until B10 menu appears, or key in “10” and press the [¾] key to enter
B10 menu directly.
2-54 BC-4000 Service Manual No. 085-6693-02
Page 71

Chapter 2 SETUP MODE
BC-4000 Service Manual No. 085-6693-02 2-55
2.10.1.3 B10-01-03 IP Address 3
Operation
1. Press the [¾] or [ENTER] key to enter B10-01-03 menu.
or
IP ADDRESS 3
b10-01-03 ADDR 3 78
2. Key in the desired address and press the [ENTER] key.
¨
2.10.1.4 B10-01-04 IP Address 4
Operation
1. Press the [¾] or [ENTER] key to enter B10-01-04 menu.
or
IP ADDRESS 4
b10-01-04 ADDR 4 1
2. Key in the desired address and press the [ENTER] key.
¨
2.10.1.5 Returning to B10-01
Operation
Press the [END] key to return to B10-01 menu.
Æ IP ADDRESS SET [ENTER]
b10-01 IP ADDRESS
2.10.2 B10-02 GATEWAY ADDRESS SETTINGS
Operation
1. Press the [¾] key to enter B10-02.
ÆGATEWAY ADDRESS [ENTER]
b10-02 GATEWAY
Page 72

Chapter 2 SETUP MODE
or
GATEWAY
ADDRESS 1
b10-02-01 ADDR 1 255
2. Key in the desired address and press the [ENTER] key.
¨
2.10.2.2 B10-02-02 Gateway Address 2
Operation
1. Press the [¾] or [ENTER] key to enter B10-02-02 menu.
or
GATEWAY
ADDRESS 2
b10-02-02 ADDR 2 255
2. Key in the desired address and press the [ENTER] key.
¨
2.10.2.3 B10-02-03 Gateway Address 3
Operation
1. Press the [¾] or [ENTER] key to enter B10-02-03.
or
GATEWAY
ADDRESS 3
b10-02-03 ADDR 3 255
2. Key in the desired address and press the [ENTER] key.
¨
2.10.2.4 B10-02-04 Gateway Address 4
Operation
1. Press the [¾] or [ENTER] key to enter B10-02-04.
or
GATEWAY
ADDRESS 4
b10-02-04 ADDR 4 255
2.10.2.1 B10-02-01 Gateway Address 1
Operation
1. Press the [¾] or [ENTER] key to enter B10-02-01 menu.
2-56 BC-4000 Service Manual No. 085-6693-02
Page 73

Chapter 2 SETUP MODE
¨
2.10.2.5 Returning to B10-01
Operation
Press the [END] key to return to B10-01 menu.
Æ IP ADDRESS SET [ENTER]
b10-01 IP ADDRESS
2.10.3 B10-03 SUBNET MASK
Subnet Address is usually fixed as 255.255.255.0.
Operation
Press the [¾] key repeatedly until B10-03 menu appears, or key in “3” and press the [¾] key to enter
B10-03 menu directly.
yyy
ÆSUBNET MASK SET [ENTER]
b10-03 SUBNET
2.10.3.1 B10-03-01 Subnet Mask Address 1
Operation
1. Press the [¾] or [ENTER] key to enter B10-03-01.
or
SUBNET MASK
1
b10-03-01 ADDR 1 255
SUBNET MASK
1
b10-03-01 ADDR 1 255
2. Key in the desired address and press the [ENTER] key.
¨
2. Key in the desired address and press the [ENTER] key.
BC-4000 Service Manual No. 085-6693-02 2-57
Page 74

Chapter 2 SETUP MODE
2-58 BC-4000 Service Manual No. 085-6693-02
2.10.3.2 B10-03-01 Subnet Mask Address 2
Operation
1. Press the [¾] or [ENTER] key to enter B10-03-02.
or
SUBNET MASK
2
b10-03-02 ADDR 2 255
2. Key in the desired address and press the [ENTER] key.
¨
2.10.3.3 B10-03-01 Subnet Mask Address 3
Operation
1. Press the [¾] or [ENTER] key to enter B10-03-03.
or
SUBNET MASK
3
b10-03-03 ADDR 3 255
2. Key in the desired address and press the [ENTER] key.
¨
2.10.3.4 B10-03-01 Subnet Mask Address 4
Operation
1. Press the [¾] or [ENTER] key to enter B10-03-04.
or
SUBNET MASK
4
b10-03-04 ADDR 4 0
2. Key in the desired address and press the [ENTER] key.
¨
2.10.3.5 Returning to B10-01
Operation
Press the [END] key to return to B10-01 menu.
Æ IP ADDRESS SET [ENTER]
b10-01 IP ADDRESS
Page 75

Chapter 2 SETUP MODE
yyy
ÆSERVER ADDRESS [ENTER]
b10-04 SERVER
2.10.4.1 B10-04-01 Server Address 1
Operation
1. Press the [¾] or [ENTER] key to enter B10-04-01.
or
SERVER ADDRESS 1
b10-04-01 ADDR 1 255
2. Key in the desired address and press the [ENTER] key.
¨
2.10.4.2 B10-04-01 Server Address 2
Operation
1. Press the [¾] or [ENTER] key to enter B10-04-02.
or
SERVER ADDRESS 2
b10-04-02 ADDR 2 255
2. Key in the desired address and press the [ENTER] key.
¨
2.10.4.3 B10-04-01 Server Address 3
Operation
1. Press the [¾] or [ENTER] key to enter B10-04-03.
or
SERVER ADDRESS 3
b10-04-03 ADDR 3 255
2. Key in the desired address and press the [ENTER] key.
¨
2.10.4 B10-04 SERVER ADDRESS
Operation
Press the [¾] key repeatedly until B10-04 menu appears, or key in “4” and press the [¾] key to enter
B10-04 menu directly.
BC-4000 Service Manual No. 085-6693-02 2-59
Page 76

Chapter 2 SETUP MODE
2-60 BC-4000 Service Manual No. 085-6693-02
2.10.4.4 B10-04-01 Server Address 4
Operation
1. Press the [¾] or [ENTER] key to enter B10-04-04.
or
SERVER ADDRESS 4
b10-04-04 ADDR 4 255
2. Key in the desired address and press the [ENTER] key.
¨
3. Press the [END] key to return to B10-01 menu.
Æ IP ADDRESS SET [ENTER]
b10-01 IP ADDRESS
2.10.5 B10-05 LOGIN NAME REGISTRATION
Operation
1. Press the [¾] key repeatedly until B10-05 menu appears, or key in “5” and press the [¾] key to
enter B10-05 menu directly.
yyy
Æ LOGIN NAME SET [ENTER]
b10-05 LOGIN
2. Press the [ENTER] key to enter text editing screen.
LOGIN NAME
TEST
3. Key in alpha-numeric characters using the keyboard and press the [ENTER] key.
LOGIN NAME
ISHIDA
4. Press the [END] key to return to B10-01 menu.
Æ IP ADDRESS SET [ENTER]
b10-01 IP ADDRESS
Page 77

Chapter 2 SETUP MODE
yyy
Æ PASSWORD SETUP [ENTER]
b10-06 PASSWORD
2. Press the [ENTER] key to enter text editing screen.
PASSWORD
USNET
3. Key in alpha-numeric characters using the keyboard and press the [ENTER] key.
PASSWORD
KYOTO
4. Press the [END] key to return to B10-01 menu.
Æ IP ADDRESS SET [ENTER]
b10-01 IP ADDRESS
2.10.7 B10-07 MAC ADDRESS
Operation
1. Press the [¾] key repeatedly until B10-07 menu appears, or key in “7” and press the [¾] key to
enter B10-07 menu directly.
yyy
ÆMAC ADDRESS SET [ENTER]
b10-07 MAC
2.10.7.1 B10-07-01 MAC Address 1
Operation
1. Press the [¾] or [ENTER] key to enter B10-07-01.
or
MAC ADDRESS 1 (0030)
b10-07-01 ADDR 1
Note: Basically, MAC Address cannot be changed. When changing the address, key in the password
“495344” and press the [SIZE] key to proceed further step.
2. Key in the desired address and press the [ENTER] key.
¨
2.10.6 B10-06 PASSWORD REGISTRATION FOR FTP COMMUNICATION
Operation
1. Press the [¾] key repeatedly until B10-06 menu appears, or key in “6” and press the [¾] key to
enter B10-06 menu directly.
BC-4000 Service Manual No. 085-6693-02 2-61
Page 78

Chapter 2 SETUP MODE
2-62 BC-4000 Service Manual No. 085-6693-02
2.10.7.2 B10-07-02 MAC Address 2
Operation
1. Press the [¾] or [ENTER] key to enter B10-07-02.
or
MAC ADDRESS 2 (1604)
b10-07-02 ADDR 2
2. Key in the desired address and press the [ENTER] key.
¨
2.10.7.3 B10-07-03 MAC Address 3
Operation
1. Press the [¾] or [ENTER] key to enter B10-07-03.
or
MAC ADDRESS 3 (0017)
b10-07-03 ADDR 3
2. Key in the desired address and press the [ENTER] key.
¨
3. Press the [END] key to return to B10-01 menu.
Æ IP ADDRESS SET [ENTER]
b10-01 IP ADDRESS
2.10.8 B10-08 DHCP COMMUNICATION SETUP
Operation
1. Press the [¾] key repeatedly until B10-08 menu appears, or key in “8” and press the [¾] key to
enter B10-08 menu directly.
or
Æ DHCP SETUP [ENTER]
b10-08 DHCP
2. Press the [ENTER] key to enter B10-08-01 menu.
DHCP ¼1:ENABLE
b10-08-01 DHCP 1
Page 79

Chapter 2 SETUP MODE
or
4. Key in the desired number (0 or 1) to determine whether or not to use the DHCP communication
method and press the [ENTER] key.
or
¨
5. Press the [END] key to return to B10-01 menu.
Æ IP ADDRESS SET [ENTER]
b10-01 IP ADDRESS
2.10.9 B10-09 NETWORK STATUS
Each setting related to network can be confirmed.
Operation
1. Press the [¾] key repeatedly until B10-09 menu appears, or key in “9” and press the [¾] key to
enter B10-09 menu directly.
yyy
Æ NETWORK STATUS [ENTER]
b10-09 STATUS
2.10.9.1 B10-09-01 DHCP Status Confirmation
Operation
Press the [ENTER] key to enter B10-09-01 menu to confirm DHCP status.
DHCP STATUS
b10-09-01 DHCP 0
2.10.9.2 B10-09-02 IP Address Confirmation
Operation
Press the [¾] or [ENTER] key to enter B10-09-02 menu to confirm IP address.
or
IP ADDR.
b10-09-02 194.039.078.001
3. Use the [»] or [¼] key to confirm the meaning of each item (code).
0: Disable
1: Enable
BC-4000 Service Manual No. 085-6693-02 2-63
Page 80

Chapter 2 SETUP MODE
or
MAC ADDR.
b10-09-03 003016-040017
2.10.9.4 B10-09-04 Subnet Mask Confirmation
Operation
Press the [¾] or [ENTER] key to enter B10-09-04 menu to confirm Subnet Mask.
or
SUBNET MASK
b10-09-04 S255.255.255.000
2.10.9.5 B10-09-05 Gatway Address Confirmation
Operation
Press the [¾] or [ENTER] key to enter B10-09-05 menu to confirm Gatway address.
or
GATEWAY ADDR.
b10-09-05 G255.255.255.255
2.10.9.6 Returning to B10-01
Operation
Press the [END] key to return to B10-01 menu.
Æ IP ADDRESS SET [ENTER]
b10-01 IP ADDRESS
2.10.9.7 Returning to B01
Operation
Press the [END] key again to return to B01 menu.
1 LABEL FORMAT [ENTER]
b01 LABEL FORMAT
2.10.9.3 B10-09-03 MAC Address Confirmation
Operation
Press the [¾] or [ENTER] key to enter B10-09-03 menu to confirm MAC address.
2-64 BC-4000 Service Manual No. 085-6693-02
Page 81

Chapter 2 SETUP MODE
yyy
11 SYSTEM TIMER [ENTER]
b11 SYSTEM TIMER
2. Press the [ENTER] key to enter B11-01 menu.
SYSTEM TIMER (10-1000sec)
b11-01 TIMER 60
3. Key in the desired time (seconds) and press the [ENTER] key.
¨
4. Press the [END] key to return to B01 menu.
1 LABEL FORMAT [ENTER]
b01 LABEL FORMAT
2.11 B11 SYSTEM TIMER
Time until returning to the initial screen since the last PLU was called can be set.
Setting range: 10 – 1,000 seconds (default value: 60 seconds)
Operation
1. Press the [¾] key repeatedly until B11 menu appears, or key in “11” and press the [¾] key to enter
B11 menu directly.
BC-4000 Service Manual No. 085-6693-02 2-65
Page 82

Chapter 2 SETUP MODE
yyy
12 PASSWORD [ENTER]
b12 PASSWORD
2. Press the [ENTER] key to enter B12-00 menu.
PASSWORD SETUP ( - - - - - - )
b12-00
2.12.1 B12-01 PASSWORD FOR REGISTRATION MODE
Operation
1. Key in “495344” and press the [ENTER] key to enter B12-01 menu.
ª
REGISTRATION ( - - - - )
b12-01 REGISTRATION
2. Key in a password (4 digits) for entering Registration Mode and press the [ENTER] key.
Note: Default value is “9000”
¨
2.12.2 B12-02 PASSWORD FOR TOTAL MODE
Operation
1. Press the [¾] or [ENTER] key to enter B12-02 menu.
or
TOTAL ( - - - - )
b12-02 TOTAL
2. Key in a password (4 digits) for entering Total Mode and press the [ENTER] key.
Note: Default value is “8000”
¨
2.12 B12 PASSWORD REGISTRATION
Operation
1. Press the [¾] key repeatedly until B12 menu appears, or key in “12” and press the [¾] key to enter
B12 menu directly.
2-66 BC-4000 Service Manual No. 085-6693-02
Page 83

Chapter 2 SETUP MODE
BC-4000 Service Manual No. 085-6693-02 2-67
2.12.3 B12-03 PASSWORD FOR SUBTRACTION MODE
Operation
1. Press the [¾] or [ENTER] key to enter B12-03 menu.
or
SUBTRACT ( - - - - )
b12-03 SUBTRACTION
2. Key in a password (4 digits) for entering Subtraction Mode and press the [ENTER] key.
Note: Default value is “7000”
¨
2.12.4 B12-04 PASSWORD FOR SETUP MODE
Operation
1. Press the [¾] or [ENTER] key to enter B12-04 menu.
or
SETUP ( - - - - )
b12-04 SETUP
2. Key in a password (4 digits) for entering Setup Mode and press the [ENTER] key.
Note: Default value is “6000”
¨
2.12.5 B12-06 PASSWORD CHANGE
This procedure is to change the password by which password change mode can be accessed.
Operation
1. Press the [¾] or [ENTER] key to enter B12-06 menu.
or
PASSWORD CHANGE( - - - - - - )
b12-06
2. Key in a password (6 digits) for proceeding further steps and press the [ENTER] key.
Note: Default value is “495344”
¨
2.12.6 RETURNING TO B01
Operation
Press the [END] key to return to B01 menu.
1 LABEL FORMAT [ENTER]
Page 84

Chapter 2 SETUP MODE
b01 LABEL FORMAT
2-68 BC-4000 Service Manual No. 085-6693-02
Page 85

Chapter 2 SETUP MODE
or
13 MACHINE NUM. [ENTER]
b13 MACHINE NUMBER
2. Press the [ENTER] key to enter B13-01.
MACHINE NUMBER(IP ADDR)
b13-01 NUMBER 0
3. Key in the desired machine number for communications and press the [ENTER] key.
¨
Note: Usually, the last digit of IP address is set as the machine number to avoid double registration.
4. Press the [END] key to return to B01 menu.
1 LABEL FORMAT [ENTER]
b01 LABEL FORMAT
2.13 B13 MACHINE NUMBER
Operation
1. Press the [¾] key repeatedly until B13 menu appears, or key in “13” and press the [¾] key to enter
B13 menu directly.
BC-4000 Service Manual No. 085-6693-02 2-69
Page 86

Chapter 2 SETUP MODE
KEY IN ITEM No.
0.000 0.000 0.00 0.00
2.14 EXITING THE MODE
Operation
Press the [MODE] key to exit the current mode.
2-70 BC-4000 Service Manual No. 085-6693-02
Page 87

Chapter 3 TEST MODE
TEST MODE (C Mode)
3.1 ENTERING TEST MODE
When the power is turned ON,
KEY IN ITEM No.
0.000 0.000 0.00 0.00
Press the [RESET] key to reset the machine,
Keep pressing any key other than the [RESET] key for a while until C00 menu appears on the display.
ÆTEST MODE PRESS [¾] KEY
C00
When the power is turned OFF,
Turn ON the power, and immediately press and keep pressing any key other than the [RESET] key for
a while until C00 menu appears on the display.
¨
ÆTEST MODE PRESS [¾] KEY
C00
Note: It will take approximately 30 seconds to enter test mode.
3.
BC-4000 Service Manual No. 085-6693-02 3-1
Page 88

Chapter 3 TEST MODE
1 HARDWARE TEST [ENTER]
C01
3.2.1 C01-01 A/D Check
Operation
Press the [ENTER] key to enter C01-01 menu.
1. A/D CHECK [ENTER]
C01-01
3.2.1.1 C01-01-00 Zero Point & Span Adjustment
Operation
1. Press the [ENTER] key to enter C01-01-00 menu. The original A/D data appears.
ZERO=[ZERO]:SPAN=[TARE]
C01-01-00 20008 20008
2. Press the [ZERO] key to make the A/D initial value “20000”.
Note: “2000” is a data output from the A/D board, and “0” denotes that “2000” are regarded as zero
point.
ZERO=[ZERO]:SPAN=[TARE]
C01-01-00 20000 0
3. After a zero point adjustment, place the same weight as the maximum weighing capacity on the
weigh platter and press the [TARE] key to execute the span adjustment automatically.
¨
ZERO=[ZERO]:SPAN=[TARE]
C01-01-00 95000 75000
3.2 C01 HARDWARE TEST
Operation
Press the [¾] key to enter C01 menu.
3-2 BC-4000 Service Manual No. 085-6693-02
Page 89

Chapter 3 TEST MODE
5. Turn OFF and ON the power to restart the machine.
¨
3.2.1.2 Returning to C01-01
Operation
Press the [END] key to return to C01-01 menu.
1. A/D CHECK [ENTER]
C01-01
3.2.2 C01-02 Key Check
Operation
Press the [¾] key to enter C01-02 menu.
2. KEY CHECK [ENTER]
C01-02
4. Remove the weight from the weigh platter and press the Memory Switch to store the data in
E2ROM.
BC-4000 Service Manual No. 085-6693-02 3-3
Page 90

Chapter 3 TEST MODE
3-4 BC-4000 Service Manual No. 085-6693-02
3.2.2.1 C01-02-00 Key Check
Operation
1. Press the [ENTER] key to enter C01-02-00 menu.
Æ KEY CHECK KEY DATA
C01-02-00
2. Press each key to check its function.
The corresponding key number appears on the screen.
<Key Number Table>
1 2 3 4 5 6 7 8 9 10 11 12 13 14
15 16 17 18 19 20 21 22 23 24 25 26 28
29 30 31 32 33 34 35 36 37 38 39 40 41 42
43 44 45 46 47 48 49 50 51 52 53 54 55 56
57 58 59 60 61 62 63 64 65 66 67 68 69 70
71 72 73 74 75 76 77 78 79 80 81 82 83 84
85 86 87 88 89 90 91 92 93 94 95 96 97 98
99 100 101 102 103 104 105 106 107 108 109 110 111 112
3.2.2.2 Returning to C01-01
Operation
Press the [RESET] key to exit the key check menu and return to C01-01 menu.
1. A/D CHECK [ENTER]
C01-01
3.2.3 C01-03 Display Check
Operation
1. Press the [¾] key repeatedly until C01-03 menu appears.
yyy
3. DISPLAY CHECK [ENTER]
C01-03
2. Press the [ENTER] key to execute the display check.
Page 91

Chapter 3 TEST MODE
BC-4000 Service Manual No. 085-6693-02 3-5
3. Press the [END] key to finish the display check.
The screen will return to C01-01 menu.
1. A/D CHECK [ENTER]
C01-01
3.2.4 C01-04 RS232C Check
A loop back test can be performed to carry out the RS232C input test. Engage the TXD and RXD
short-circuited connector with D-SUB 9.
Operation
1. Press the [¾] key repeatedly until C01-04 menu appears.
yyy
4. RS232C CHECK [ENTER]
C01-04
2. Press the [ENTER] key to enter C01-04-00 menu.
Æ RS232C CHECK [PRINT]
C01-04-00
3. Press the [PRINT] key to output test data and judge by verifying received test data and sent data.
When the data matches, “PASS” is displayed and “OK” buzzer sounds.
Æ RS232C CHECK [END]
C01-04-00 PASS
4. To finish the check, press the [END] key. The screen will return to C01-01 menu.
1. A/D CHECK [ENTER]
C01-01
3.2.5 C01-05 Application Program Number
Operation
Press the [¾] key repeatedly until C01-05 menu appears.
yyy
5. APLY PROG. No. [ENTER]
C01-05
Page 92

Chapter 3 TEST MODE
Æ APLY No.: APLY
C01-05-00
0
3.2.5.2 Returning to C01-01
Operation
Press the [END] key to return to C01-01 menu.
1. A/D CHECK [ENTER]
C01-01
3.2.6 C01-06 BIOS Program Number
Operation
Press the [¾] key repeatedly until C01-06 menu appears.
yyy
6. BIOS PROG. No. [ENTER]
C01-06
3.2.6.1 C01-06-00 Program Number & Version Display
Operation
Press the [ENTER] key to enter C01-06-00 menu. Program number and version of the BIOS program
are displayed.
Æ BIOS No.: B0500
C01-06-00
0
3.2.6.2 Returning to C01-01
Operation
Press the [END] key to return to C01-01 menu.
1. A/D CHECK [ENTER]
C01-01
3.2.5.1 C01-05-00 Apply Number
Operation
Press the [ENTER] key to enter C01-05-00 menu.
The program number and version of the main program are displayed.
Note: The program number for the prototype is the development code “APLY”.
3-6 BC-4000 Service Manual No. 085-6693-02
Page 93

Chapter 3 TEST MODE
yyy
7. RESET COUNT [ENTER]
C01-07
3.2.7.1 C01-07-00 Number of Reset Times
Operation
1. Press the [ENTER] key to enter C01-07-00 menu.
The number of reset times is displayed.
CLEAR? YES = (ZERO+ZERO)
C01-07-00 0000
2. To clear the record, press the [ZERO] key twice.
Otherwise, press the [END] key. The screen will return to C01-01 menu.
3.2.7.2 Returning to C01
Operation
Press the [END] key to return to C01-01 menu.
1. A/D CHECK [ENTER]
C01-01
3.2.7 C01-07 Reset Count
The number of automatic reset counts is recorded in case of Error “40” occurrence.
Before resetting the number in case particular problems occur, ensure to confirm the record.
Operation
Press the [¾] key repeatedly until C01-07 menu appears.
BC-4000 Service Manual No. 085-6693-02 3-7
Page 94

Chapter 3 TEST MODE
yyy
2 RAM CLEAR [ENTER]
C02
3.3.1 C02-01 SRAM Clear
Operation
1. Press the [ENTER] key to enter C02-01 menu.
Æ SRAM CLEAR [ ]
C02-01
2. Press the [ZERO] key twice to clear SRAM data.
“PASS” is displayed and “OK” buzzer sounds when data clear is completed.
Æ SRAM CLEAR [OK]
C02-01 PASS
3.3.2 C02-02 Set Data Clear
Operation
1. Press the [ENTER] key to enter C02-02 menu.
Æ SETUP CLEAR [ ]
C02-02
2. Press the [ZERO] key twice to clear the set data.
“PASS” is displayed and “OK” buzzer sounds when data clear is completed.
Æ SETUP CLEAR [OK]
C02-02 PASS
3.3.3 C02-03 Test Data Clear
Operation
1. Press the [ENTER] key to enter C02-03 menu.
Æ TEST DATA SET [ ]
C02-03
3.3 C02 RAM CLEAR
Operation
Press the [¾] key repeatedly until C02 menu appears.
3-8 BC-4000 Service Manual No. 085-6693-02
Page 95

2. Press the [ZERO] key twice to clear the test data.
Æ TEST DATA SET [OK]
C02-03 PASS
3.3.4 Returning to C01
Operation
Press the [END] key to return to C01 menu.
1 HARDWARE TEST [ENTER]
C01
“PASS” is displayed and “OK” buzzer sounds when data clear is completed.
Chapter 3 TEST MODE
BC-4000 Service Manual No. 085-6693-02 3-9
Page 96

Chapter 3 TEST MODE
yyy
3 PRINT HEAD [ENTER]
C03
3.4.1 C03-01 Thermal Head Resistance
Operation
1. Press the [ENTER] key to enter C03-01 menu.
The thermal head resistance can be set.
Note: The resistance must be set after the thermal head is replaced.
Æ RESISTANCE (960)
C03-01
2. Press the [COPY] key to read the ID from the thermal head and set it automatically, or key in the
resistance described on the head and press the [ENTER] key to save it in E2ROM.
or
¨
3.4.2 C03-02 Print Usage Distance
Operation
1. Press the [¾] key to enter C03-02 menu.
Total print distance of the thermal head can be confirmed.
It is displayed in 100m (0.1Km) units and stored.
Æ PRINT USAGE ( 0.0 km)
C03-02
2. To reset the distance, key in the password “495344” and press the [SIZE] key.
¨
3. Key in the desired usage distance and press the [ENTER] key.
¨
3.4 C03 THERMAL HEAD
Operation
Press the [¾] key repeatedly until C03 menu appears, or key in “3” and press the [¾] key to enter C03
menu directly.
3-10 BC-4000 Service Manual No. 085-6693-02
Page 97

Chapter 3 TEST MODE
BC-4000 Service Manual No. 085-6693-02 3-11
3.4.3 C03-03 Resistance Value Adjustment
Operation
1. Press the [¾] key to enter C03-03 menu. The thermal head print density can be adjusted.
Æ RESIST. VALUE ÆADJ (5)
C03-03
2. Key in the desired level (1 – 9) and press the [ENTER] key.
Density range: 1 (thinnest) through 9 (thickest) Default value: 5
¨
3.4.4 Returning to C01
Operation
Press the [END] key to return to C01 menu.
1 HARDWARE TEST [ENTER]
C01
Page 98

Chapter 3 TEST MODE
yyy
4 LABEL SENS. CHK [ENTER]
C04
3.5.1 C04-00 Label Sensor
Operation
1. Press the [ENTER] key to enter C04-00 menu.
Æ LABEL SENSOR 32 24
C04-00
2. Key in the label sensor resistance value (0 and 255) and press the [ENTER] key.
The difference between the label sensor output value when a label is detected and when a label is not
detected must be 50 or greater.
Adjustment target value of the label sensor is as follows:
y When a label is not detected: 150±10
y When a label is detected: 50±10 or less
¨
Æ LABEL SENSOR 32 228
C04-00
3.5.2 Returning to C01
Operation
Press the [END] key to return to C01 menu.
1 HARDWARE TEST [ENTER]
C01
Resistance
Output value
(with label)
Resistance
Output value
(without label)
3.5 C04 LABEL SENSOR CHECK
Operation
Press the [¾] key repeatedly until C04 menu appears, or key in “4” and press the [¾] key to enter C04
menu directly.
3-12 BC-4000 Service Manual No. 085-6693-02
Page 99

Chapter 3 TEST MODE
yyy
5 TOTAL MEMORY [ENTER]
C05
3.6.1 C05-00 Total Memory & Remaining Memory
Operation
Press the [ENTER] key to enter C05-00. Total memory capacity and remaining memory capacity are
shown on the screen.
Æ MEM 878[KB] REM 845[KB]
C05-00
3.6.2 Returning to C01
Operation
Press the [END] key to return to C01 menu.
1 HARDWARE TEST [ENTER]
C01
3.6 C05 TOTAL MEMORY
Operation
Press the [¾] key repeatedly until C05 menu appears, or key in “5” and press the [¾] key to enter C05
menu directly.
BC-4000 Service Manual No. 085-6693-02 3-13
Page 100

Chapter 3 TEST MODE
yyy
6 ROM SWITCH [ENTER]
C06
3.7.1 C06-00 ROM Switch Selection
Operation
1. Press the [ENTER] key to enter C06-00.
ÆROM SWITCH No. SEL. [¼»]
C06-00 0 4
2. Use the [»] or [¼] key to select ROM switch (E2ROM address).
or
3. To change data, key in a hexadecimal value (0-9, A-F) and press the [ENTER] key.
¨
Details of ROM Switch
Address Content Default
0 Number of weight display digits 04
1 Number of price display digits 03
2 Number of unit price display digits 03
3 DC motor 2B
4 Fixed price product count addition (0: Price, 1: Number) 00
5 Weighing unit 00
6 Price calculation rounding (0: 4/5, 1: 0/5) 00
7 Relish period calculation of days (0: That day, 1: Next day) 00
8 Time rounding 00
9 Sub-total label commodity name mode 00
10 RESET key (0: Use, 1: Prohibit) 00
11 Auto clear after total data sending (0: Off, 1: On) 00
12 Expiry date printing 00
13 Print cash drawer (0: Off, 1: On) 00
14 Weighing mode (0: 15Kg, 1: 30lb) 00
15 Price calculation 00
E2ROM
address
E2ROM
address data
3.7 C06 ROM SWITCH
Operation
Press the [¾] key repeatedly until C06 menu appears, or key in “6” and press the [¾] key to enter C06
menu directly.
3-14 BC-4000 Service Manual No. 085-6693-02
 Loading...