

iSAPPOS 12A+, 9A+, 12B, 9B, 9C User Manual
...
iSAPPOS 9/12 Stand
(Model A+ / B / C)

Getting ready with
the stand
Package Contents
System Overview
Getting Started

1. iPad not included. Compatible only with iPad 2017 (Optional : iPad Air 2, 9.7” iPad Pro) and 12.9” iPad Pro.
1 x Micro-USB cable (for data-syncing)
2 x Screws for the Jacket
4 x thumb screws for the Stand base plate
Quick user guide
Quick user guide
1. iPad not included. Compatible only with iPad 2017 (Optional : iPad Air 2, 9.7” iPad Pro) and 12.9” iPad Pro.
Model C
Aluminum base plate w/ 2 x coin screws
Aluminum Stand body
Jacket for iPad
19V/4.7A 90W power adapter
2 x RJ-48 COM port cables
1
Quick user guide
1. iPad not included. Compatible only with iPad 2017 (Optional : iPad Air 2, 9.7” iPad Pro) and 12.9” iPad Pro.
2
Section 1
Package Contents
Model B
Aluminum base plate w/ 2 x coin screws
Aluminum Stand body
Jacket for iPad
5V/4A 20W power adapter
3 x RJ-48 COM port cables
1 x Micro-USB cable (for data-syncing)
2 x Screws for the Jacket
4 x thumb screws for the Stand base plate
1
Model A
+
Aluminum base plate w/ 2 x coin screws
Aluminum Stand body
Jacket for iPad
1 x Micro-USB cable (for power in)
2 x Screws for the Jacket
4 x thumb screws for the Stand base plate
1
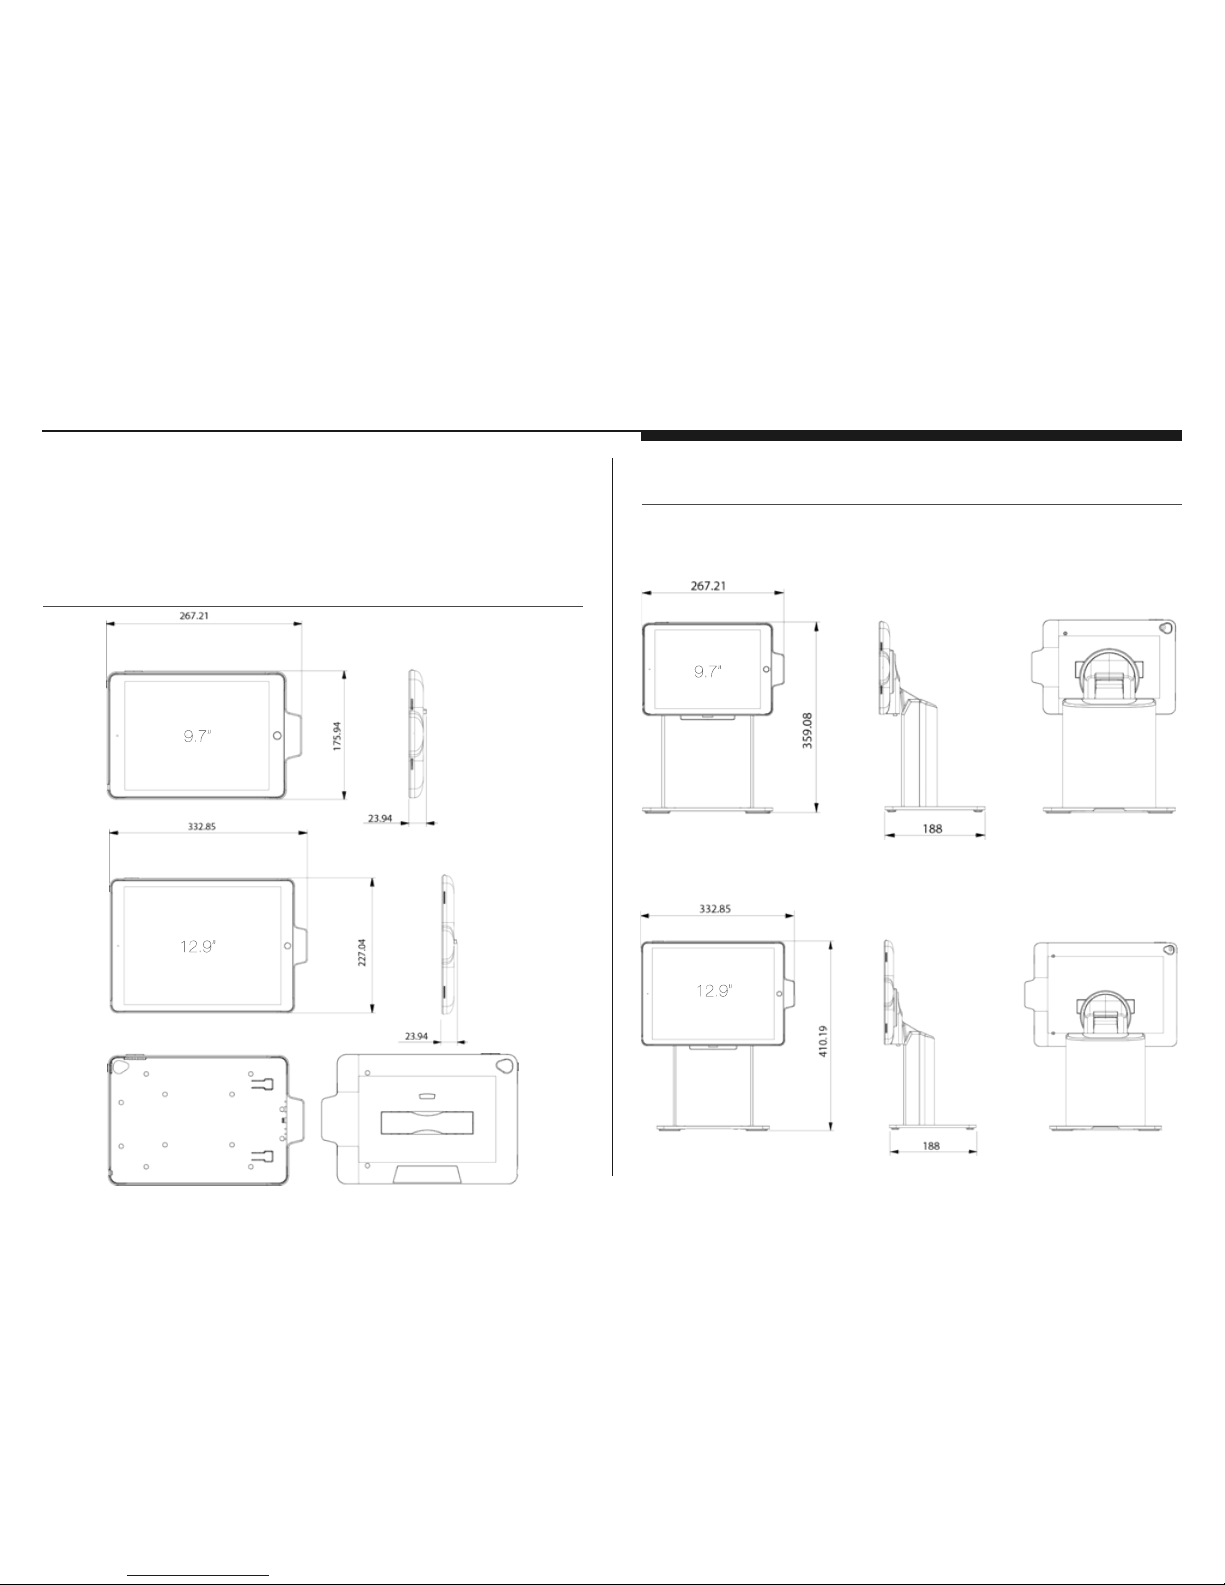
The Jacket
3
The Stand
Section 2
System Overview
(unit: mm)
(unit: mm)
Model 9A
+
/ 9B
Model 12B
4
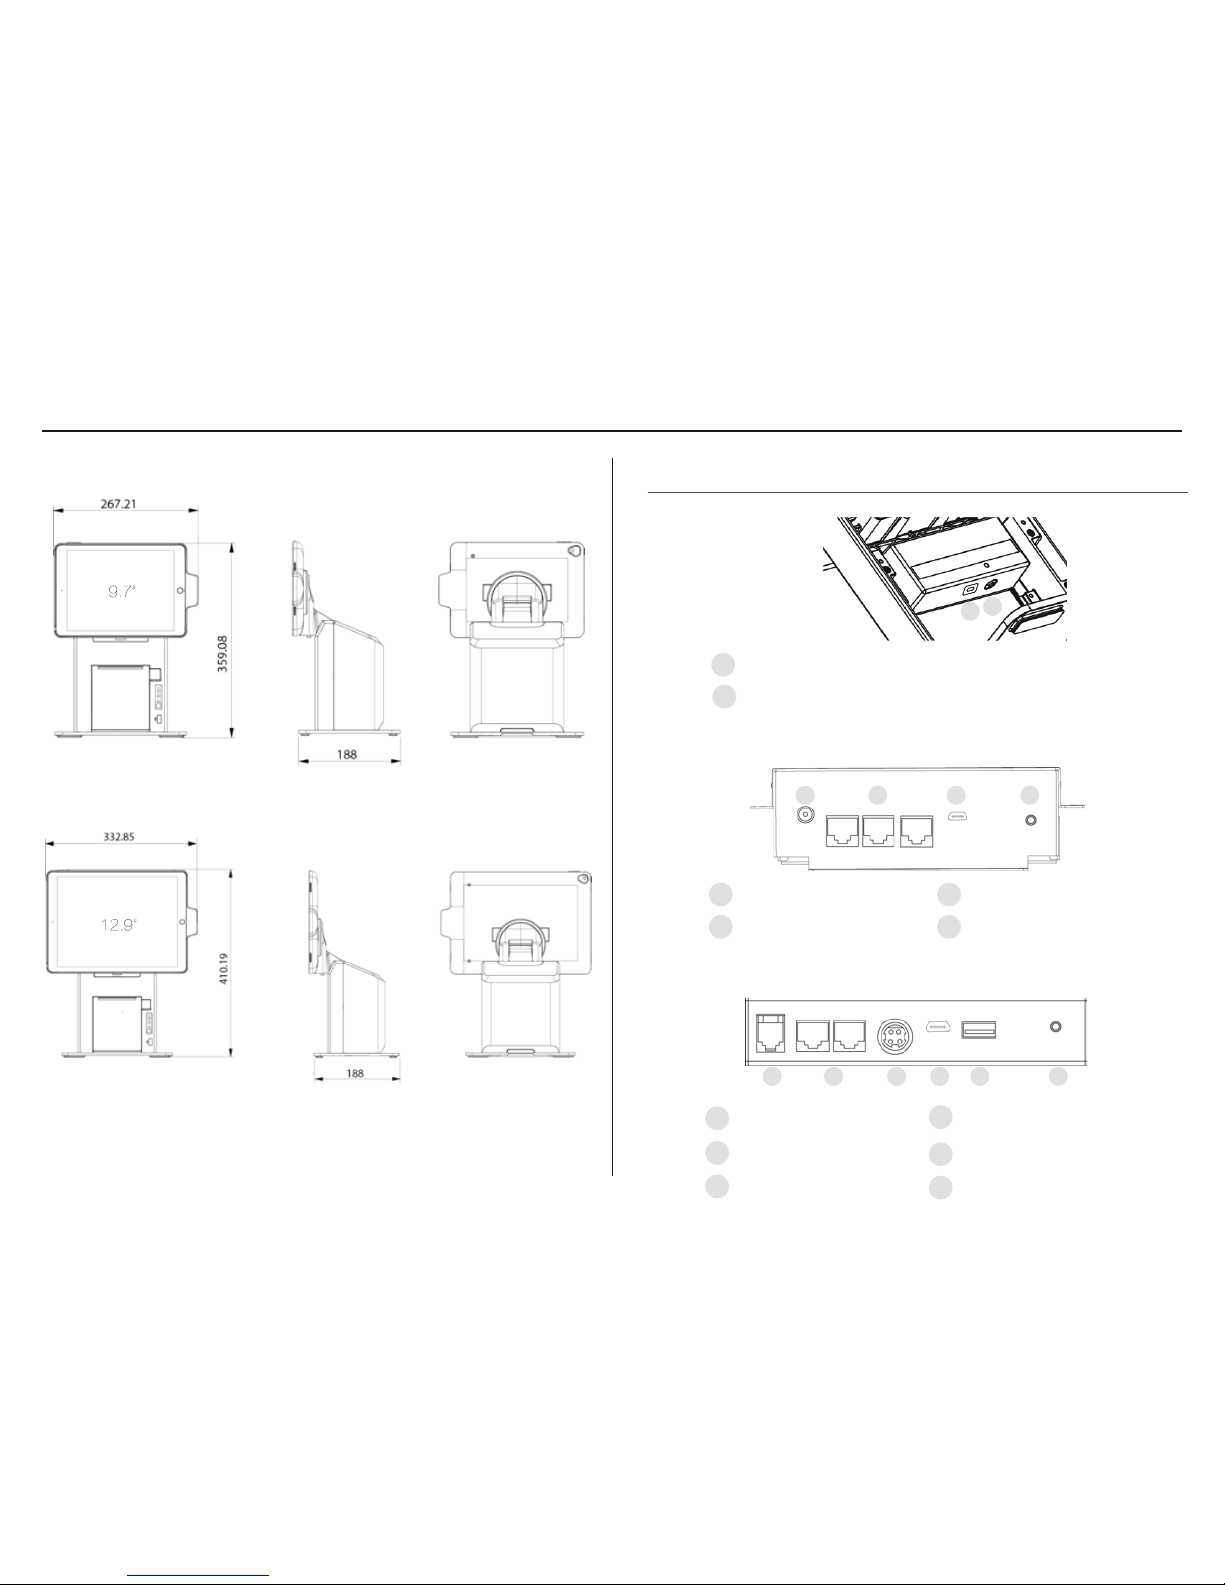
Model 9C
Model 12C
I/O Ports
Model B
Model A
+
1
Power connector
1
Model C
1
RJ-11 cash drawer port
4
Micro-USB port (iPad data syncing)
2
RJ-48 to COM ports
5
USB port (peripheral charging)
3
Power connector
6
Bluetooth Pair button
1 2 3 4 5 6
Bluetooth Pair button
2
2
1
2
Power connector
RJ-48 to COM ports
3
4
Micro-USB port (iPad data syncing)
Bluetooth Pair button
1 2 3 4
5
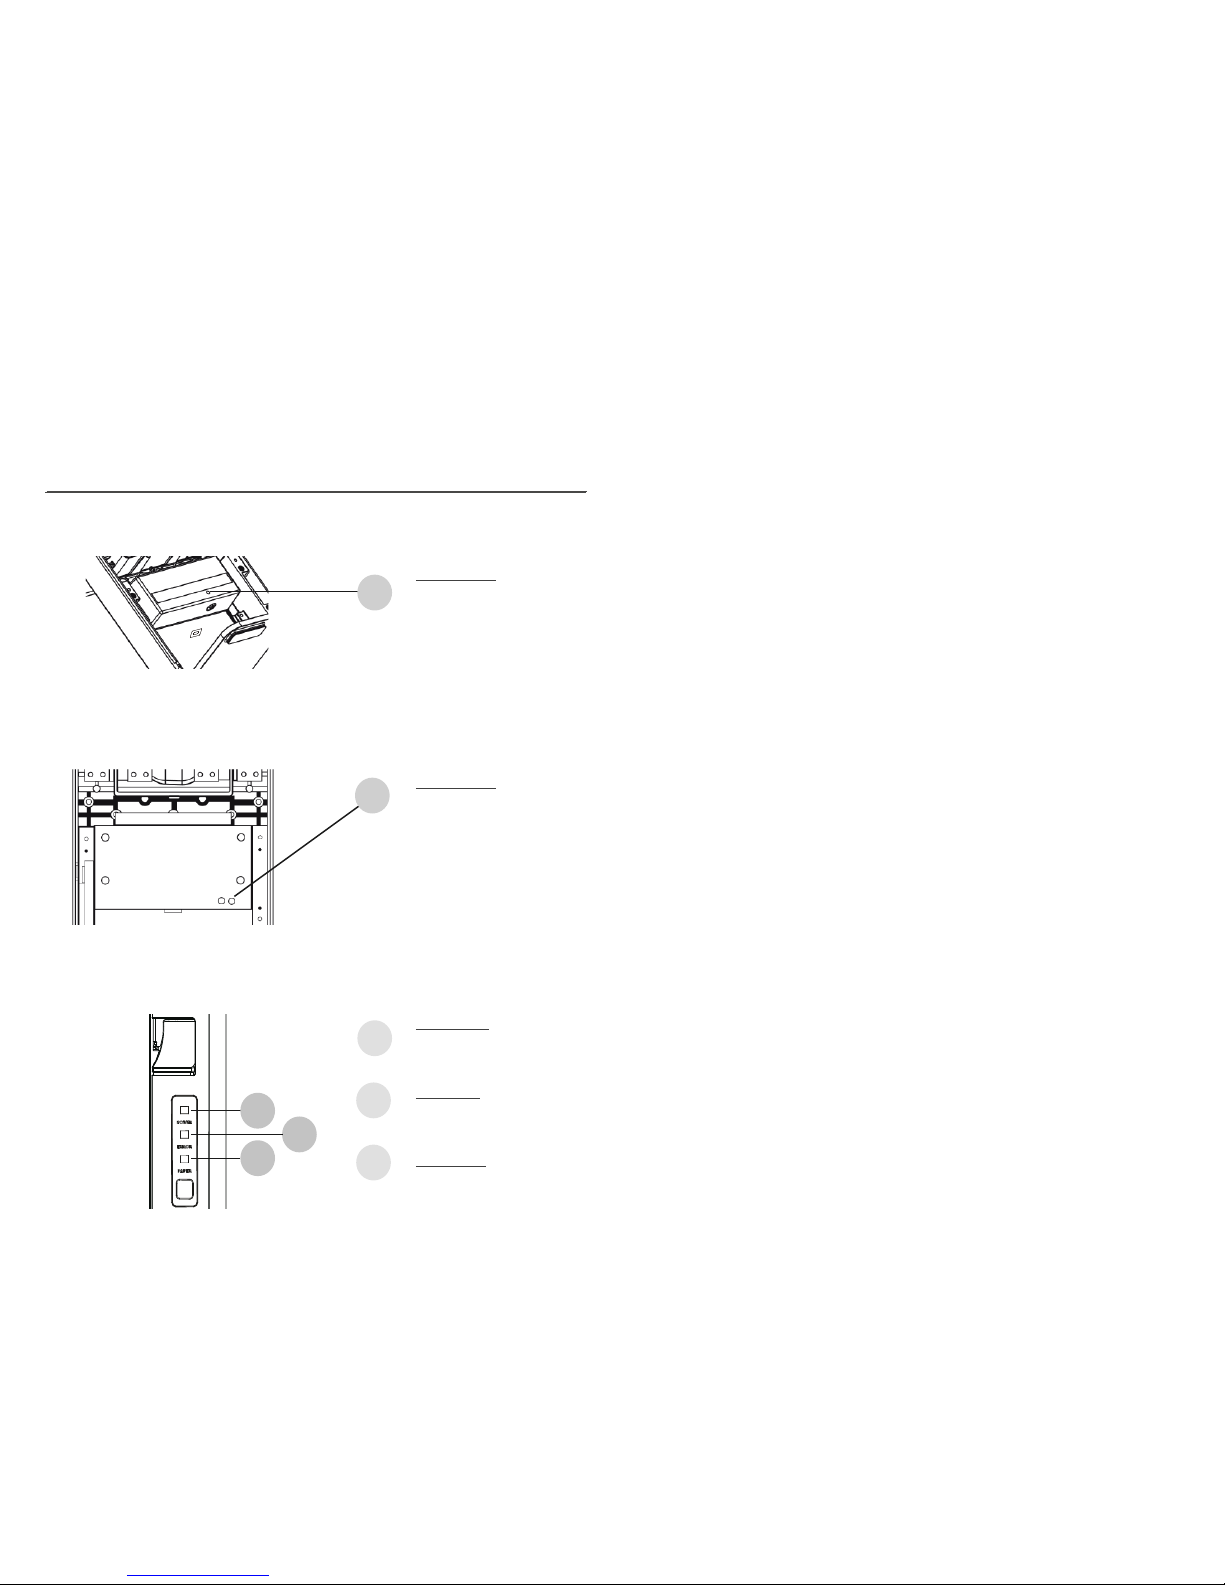
L E Ds
2
3
1
2
3
Power LED:
Solid green System on
Off: System off
Error LED
:
Solid red System error
Off: System normal
Paper LED
:
Solid green Printer normal
Solid red: printer error
Model B/C
Model A
+
(rear view of the Stand with rear plastic cover removed)
Model C
Pairing LED:
Blinking green: Stand
Bluetooth pairing mode on
Pairing LED:
Blinking green: Stand
Bluetooth pairing mode on
1
(rear view of the Stand with rear plastic cover removed)
1
1
6
Getting started
Assemble iPad and the Stand
Tools needed - Phillips(+) #0 Screwdriver
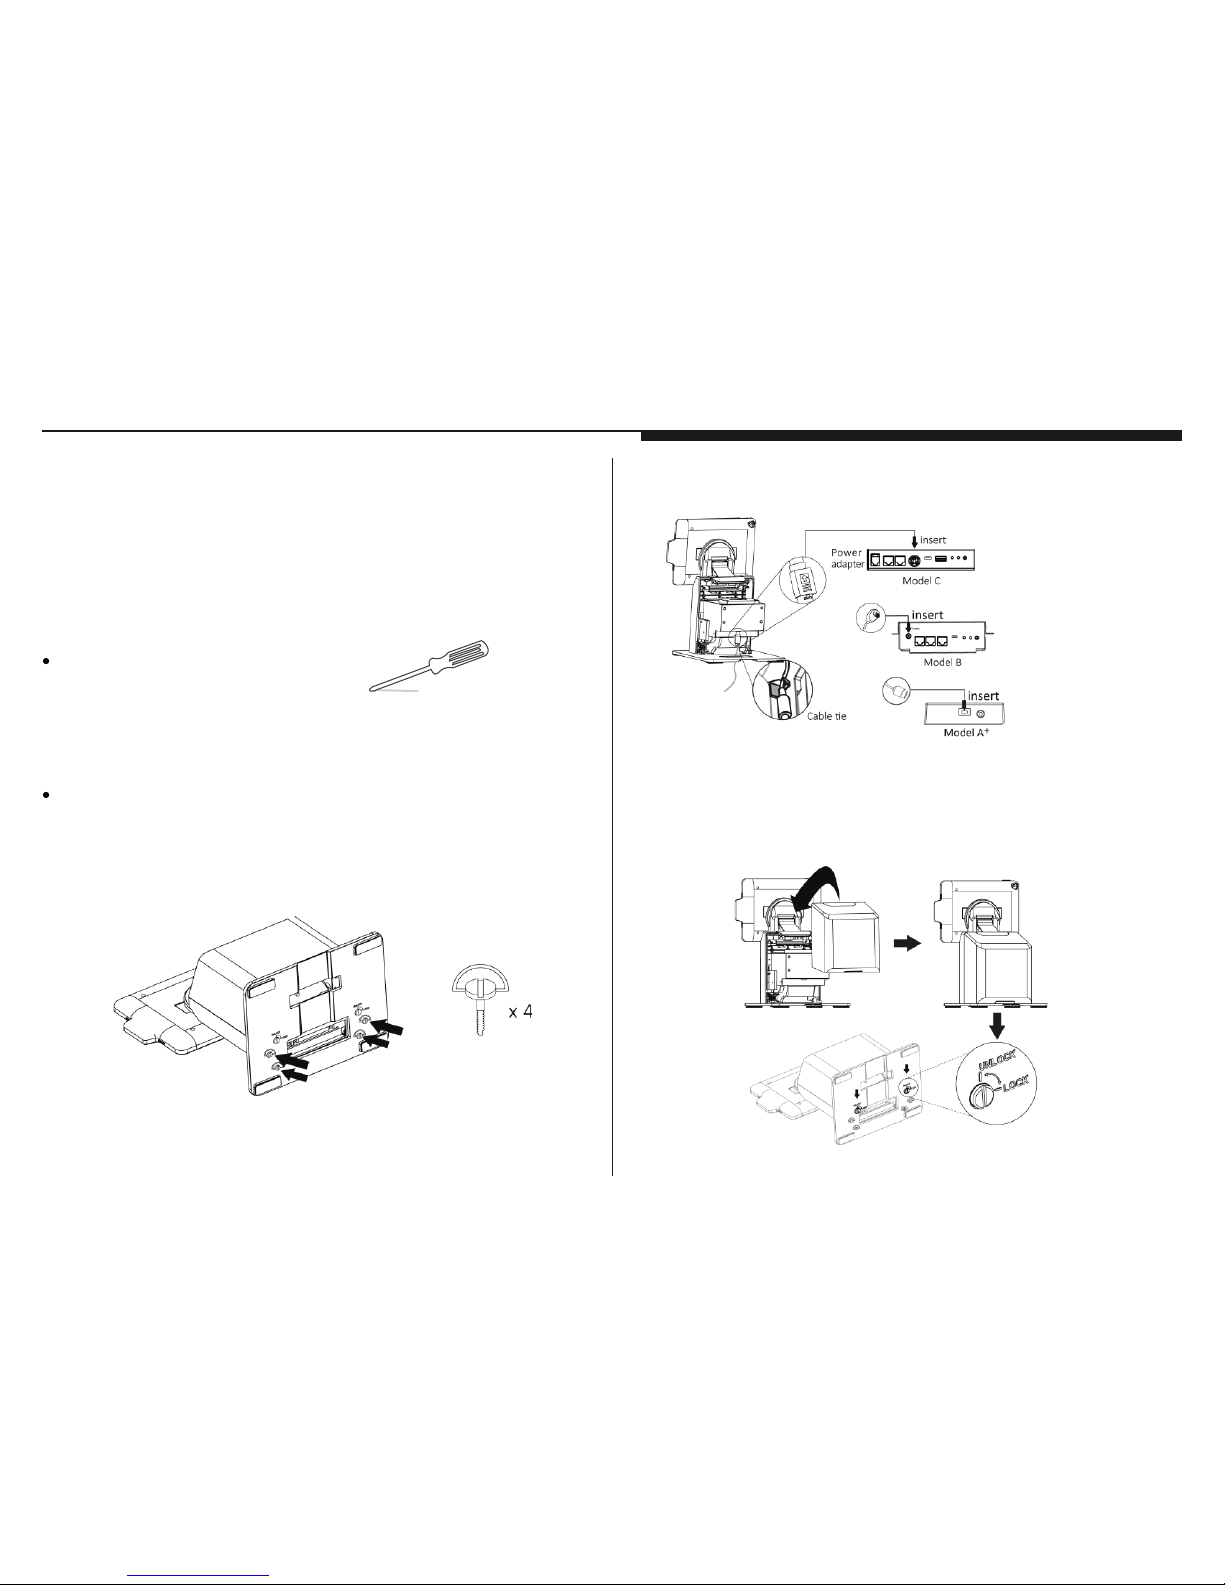
Assemble the stand
1. Secure the base plate and Stand body with M4 thumb screws (x4) found
in the accessory box.
Section 3
Getting started
2. Connect the power adapter for charging.
3. Place the back cover to the back of the stand. Secure the back cover and the
base plate using the coin screws (x2) found in the accessory box. Tighten
them with a coin.
* Please make sure the
power adapter is plugged
in before connecting the
3rd party peripherals
7
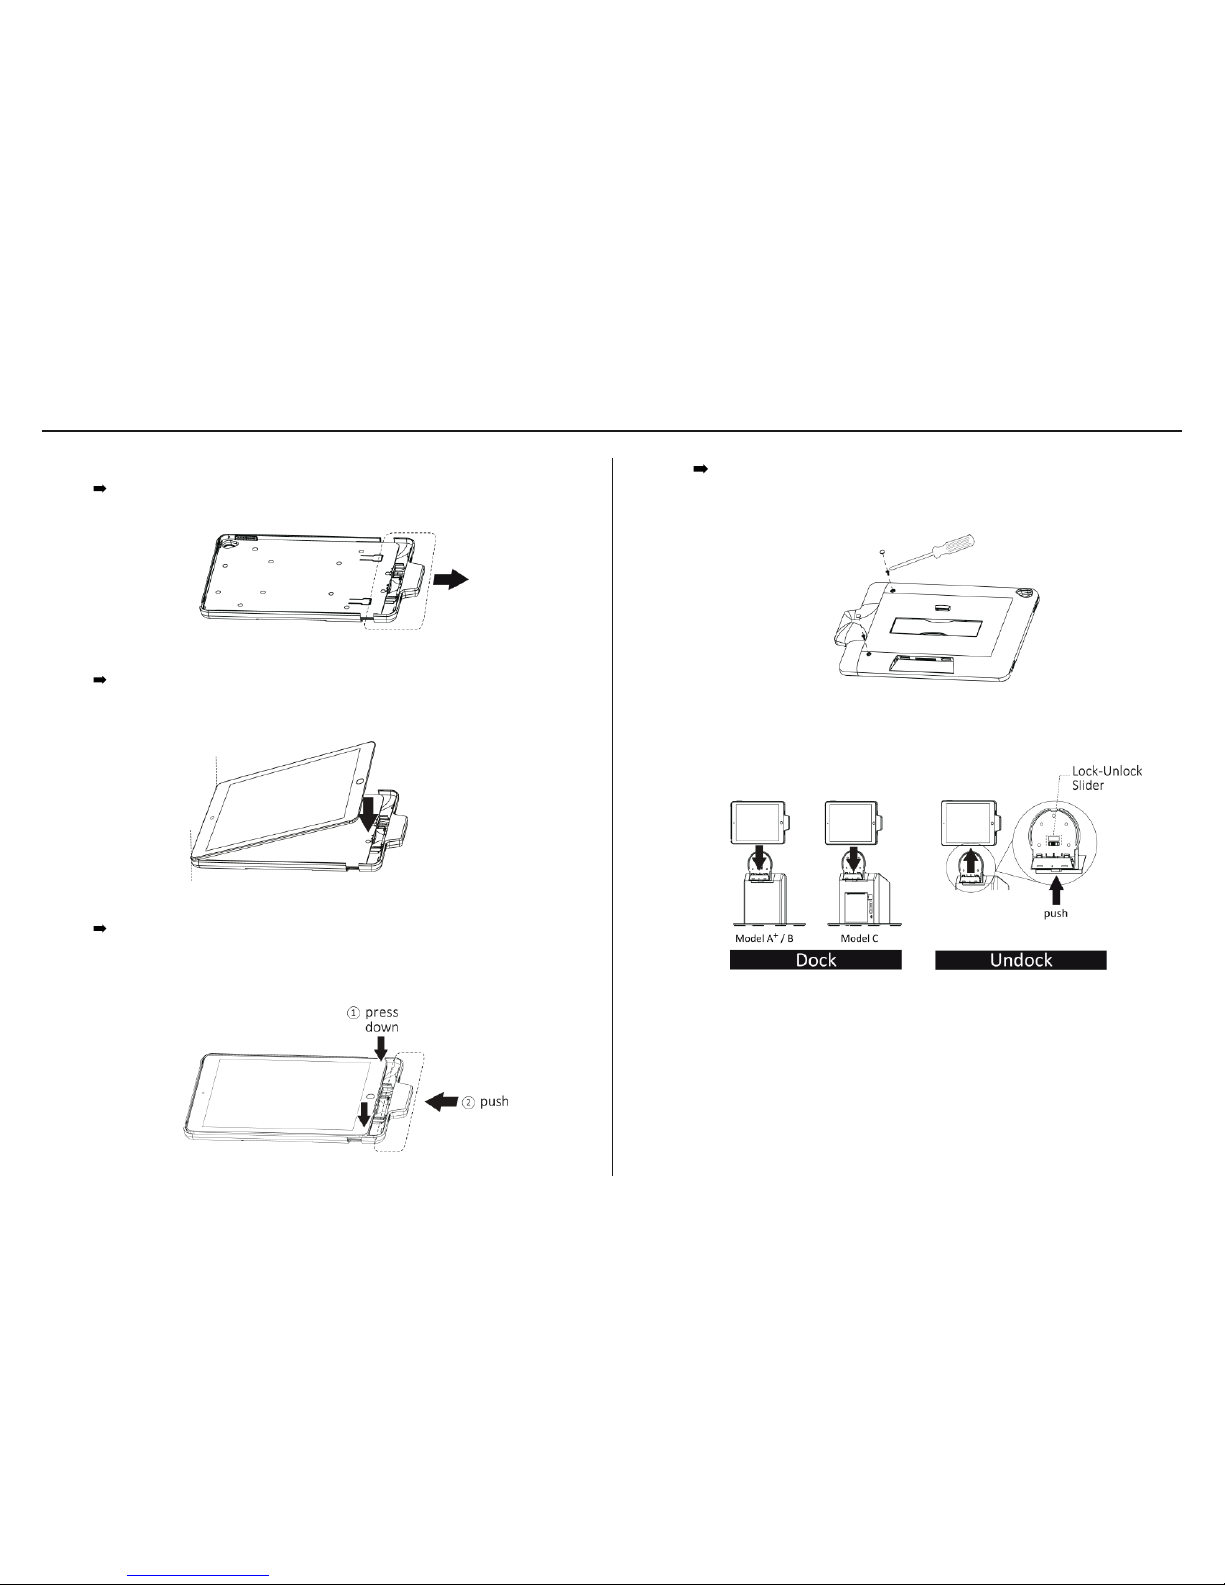
4. Insert the iPad to the jacket
Slide open the jacket
Insert and align iPad with the jacket (It’s normal to see the side with
the home bottom is higher than the other side)
Place the jacket onto the Stand’s dock. (make sure the lock-unlock switch
is in the unlock position)
Slide close the jacket gently and slowly. While sliding close the jacket,
press down both corners of the iPad like indicated in the picture and
make sure it’s aligned with the jacket.
Remove the paddings of the indicated screw holes. Secure the iPad
and the jacket with Phillips(+) #0 Screwdriver and M2 screws (x2) found
in the accessory box. Place the paddings to cover the indicated screw
holes.
5.
* Undock : Push the button at the bottom of the cradle and lift up the jacket to detach it from the Stand.
 Loading...