


Label Picture Description QTY
A Ottoman 1
B Wooden Leg 4
Assembly Instructions
Caution: You must read this before you proceed.
Ottoman
Part List
Page 1 OF 5
Label Picture Description QTY
① Gasket 7
Hardware
Assembly Preparation
Before
Beginning
Assembly:
Page 2 OF 5

Step 1
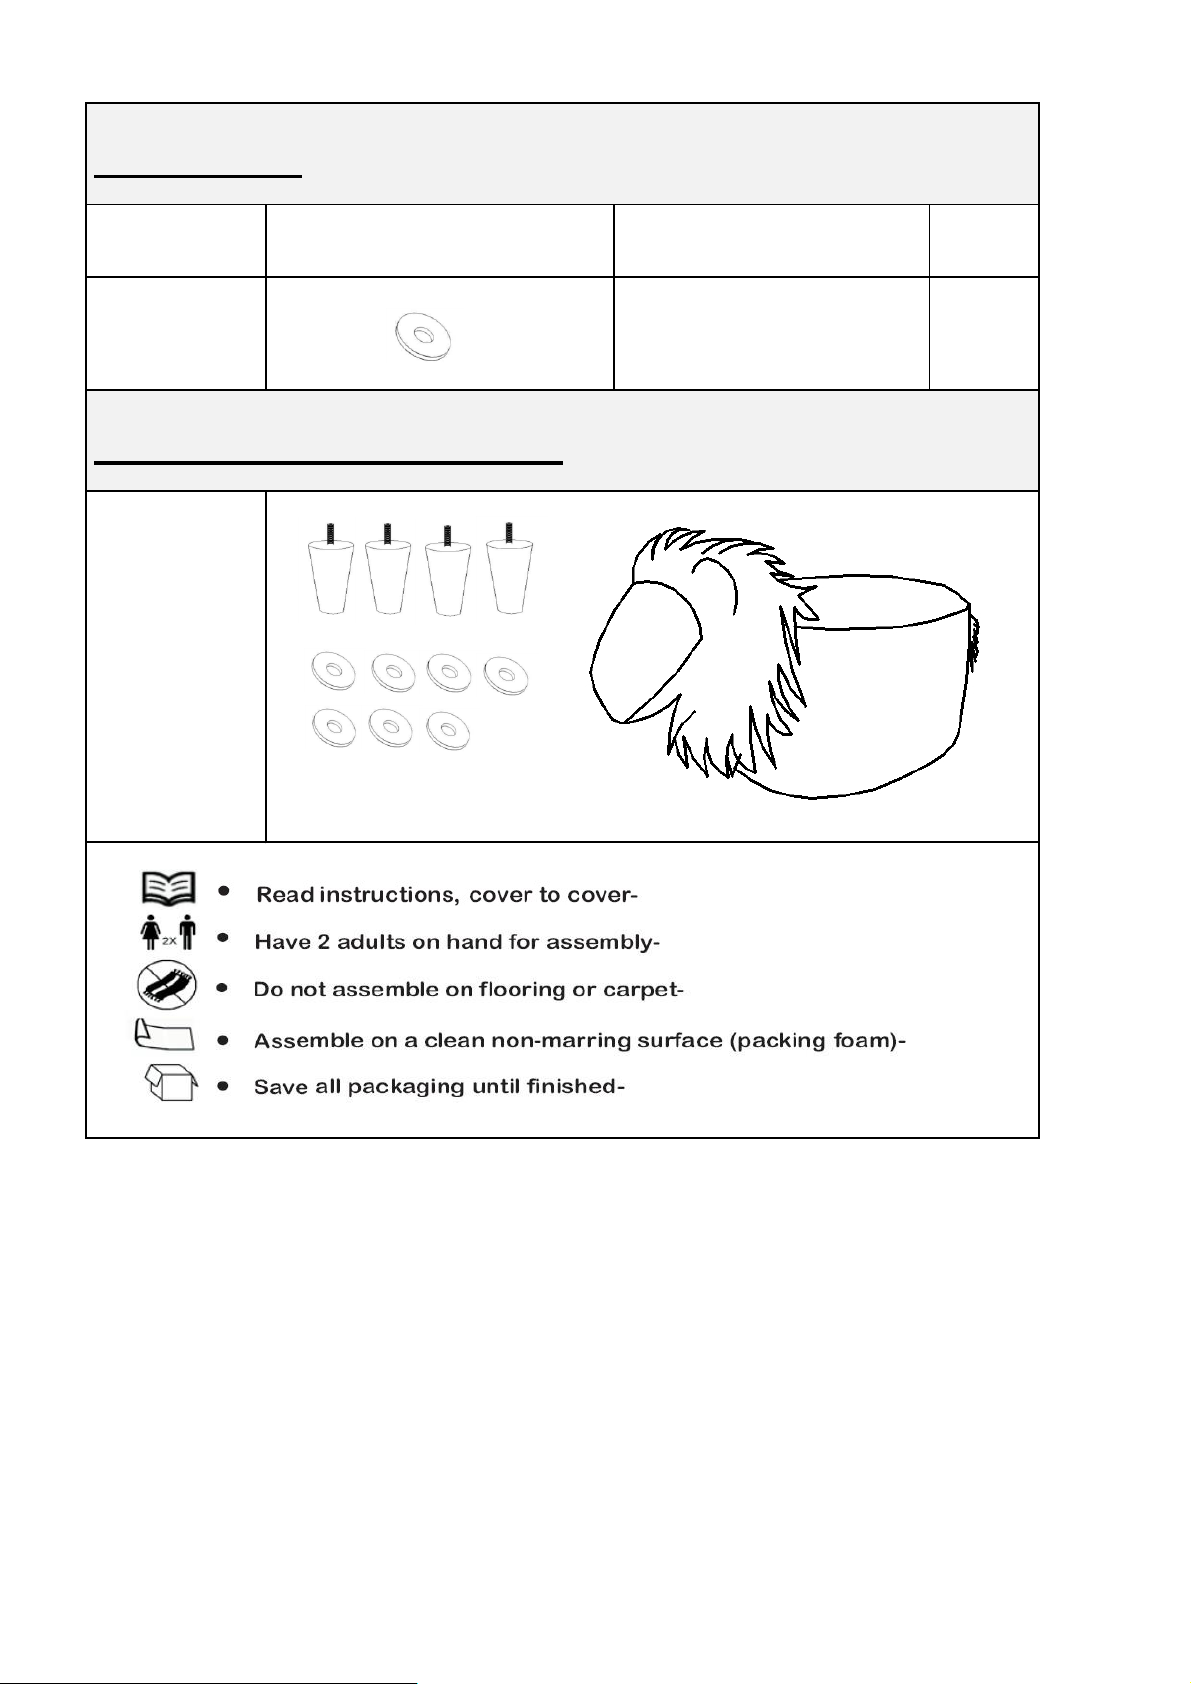
Assembly Steps
Overview
This Ottoman has multiple parts and may require up to 15 minutes to
assemble. To give you an overview of the Ottoman parts, the above picture
is to help you put the various parts into perspective. Please read through
the instructions below to familiarise yourself with the parts and steps before
assembly.
Unpack and place all parts on a clean, non-marring surface.
FRONT FACING
Wooden Leg (B)
Ottoman (A)
Page 3 OF 5

Step 2
Step 3
Position the Ottoman(A) on its back, as shown in above picture.
Install Wooden Leg(B) to Ottoman(A) by putting a Gasket(①) onto the
threaded stem.
Insert the threaded stem of Wooden Leg(B) into the mounting position of
Ottoman(A) then tighten by turning the Leg clockwise until the Leg is
completely secure.
Repeat this process with the remaining three Wooden Legs.
Position Ottoman right side up and test for stability on a Level Surface.
If you find the Ottoman is uneven, identify the corresponding Leg and "add
or remove" a Gasket to achieve evenness.
Note: The use of Gaskets are OPTIONAL and are especially useful to
help alleviate slight wobbles. Some Legs may need more than one
whilst some Legs may not need any.
Your Ottoman is ready for use.
This Ottoman can only be used on a flat, level surface.
A
B
①
Page 4 OF 5

Page 5 OF 5
 Loading...