

Page 1

ON-PBD-705 series
Line Voltage OS-NET Button
INSTALLATION INSTRUCTIONS
OVERVIEW
The ON-PBD-705 series is an optional device of IR-TEC’s
OS-NET wireless mesh network solution designed to replace
an existing wall switch/dimmer and broadcast manual
on/off/dim control commands to the lighting group assigned.
This sleek, low profile device can be mounted into a
standard NEMA wall box, operated by line voltage power,
and provide wireless control required by users. Each
ON-PBD-705 can be assigned to control up to 4 lighting
groups via a 2-way handheld remote programmer.
DIMENSIONS
1.22”
2.75”
4.13”
3.28”
1.77”
3.81”
2.73”
4.47”
Indoor dry location use only
Utilisation a L'interieur Uniquement
WARNING & CAUTION
Risk of Electrical Shock – Turn off the power at circuit breaker
before installing or servicing.
This device should be installed by a qualified electrician in
accordance with electrical codes and regulations.
Install the sensor at least 1 ft. away from any occupant.
AVERTISSEMENT & PRUDENCE
Risque de choc électrique - Débranchez l'alimentation avant
l'entretien.
Installer et utiliser ce dispositif conformément aux codes et
règlements électriques.
Industry Canada statement: Radiation Exposure Statement:IC: 22993-705WS4WP401
This device complies with ISED’s licence-exempt RSSs. Operation is subject to the
following two conditions: (1) This device may not cause harmful interference, and (2) this
device must accept any interference received, including interference that may cause
undesired operation.
Le présent appareil est conforme aux CNR d’ ISED applicables aux appareils radio
exempts de licence. L’exploitation est autorisée aux deux conditions suivantes : (1) le
dispositif ne doit pas produire de brouillage préjudiciable, et (2) ce dispositif doit accepter
tout brouillage reçu, y compris un brouillage susceptible de provoquer un fonctionnement
indésirable.
www.irtec.com
This product may be covered by one or more U.S. patents or patent applications.
Please visit www.irtec.com for more information.
A screwless snap-on Decora wall plate is supplied to create
a modern, high-end appearance for all spaces. By grouping
the ON-PBD-705 with OS-NET sensors, you can effortlessly
achieve an energy-efficient, code-compliant smart lighting
control through a state-of-the-art wireless sensor mesh
network with manual controls capability for presentation or
special event.
Federal Communication Commission Interference Statement
FCC ID: NRIWS470500
This device complies with Part 15 of the FCC Rules. Operation is subject to the following two
conditions: (1) This device may not cause harmful interference, and (2) this device must
accept any interference received, including interference that may cause undesired operation.
This equipment has been tested and found to comply with the limits for a Class B digital
device, pursuant to Part 15 of the FCC Rules. These limits are designed to provide
reasonable protection against harmful interference in a residential installation. This
equipment generates, uses and can radiate radio frequency energy and, if not installed and
used in accordance with the instructions, may cause harmful interference to radio
communications. However, there is no guarantee that interference will not occur in a
particular installation. If this equipment does cause harmful interference to radio or television
reception, which can be determined by turning the equipment off and on, the user is
encouraged to try to correct the interference by one of the following measures:
-Reorient or relocate the receiving antenna.
-Increase the separation between the equipment and receiver.
-Connect the equipment into an outlet on a circuit different from that to
which the receiver is connected.
-Consult the dealer or an experienced radio/TV technician for help.
FCC Caution: Any changes or modifications not expressly approved by the party responsible
for compliance could void the user's authority to operate this equipment.
This transmitter must not be co-located or operating in conjunction with any other antenna or
transmitter.
Radiation Exposure Statement:
The product comply with the FCC portable RF exposure limit set forth for an uncontrolled
environment and are safe for intended operation as described in this manual. The further RF
exposure reduction can be achieved if the product can be kept as far as possible from the
user body or set the device to lower output power if such function is available.
The product comply with the Canada portable RF exposure limit set forth for an uncontrolled
environment and are safe for intended operation as described in this manual. The further RF
exposure reduction can be achieved if the product can be kept as far as possible from the
user body or set the device to lower output power if such function is available.
Déclaration d'exposition aux radiations:
Le produit est conforme aux limites d'exposition pour les appareils portables RF pour les
Etats-Unis et le Canada établies pour un environnement non contrôlé.
Le produit est sûr pour un fonctionnement tel que décrit dans ce manuel. La réduction aux
expositions RF peut être augmentée si l'appareil peut être conservé aussi loin que possible du
corps de l'utilisateur ou que le dispositif est réglé sur la puissance de sortie la plus faible si une
telle fonction est disponible.
P/N: 058-70502-001 Printed in Taiwan
WIRING DIAGRAM
Line
120/277VAC
Neutral
Black
Green
White
Ground
INSTALLATION
Lead the wires and strip the insulation with proper
1.
length for connecting.
2.
Connect the wires with the device according to the
wiring diagram shown above.
NOTE: The ON-PBD-705 requires connecting neutral
wire for operation. To replace the existing wall switch
with no neutral wire, you may substitute the switched
line wire for the neutral of lighting in accordance with
electrical codes and regulations.
Carefully set the wires and mount the device into the
3.
wall box with screws provided.
UP
NOTE: Do NOT mount the device upside down.
Page 2
CONFIGURATION OPERATION
Programming Guide
After complete the installation, each
OS-NET Button should be grouped and
linked with the OS-NET network to enable
group control. An ungrouped OS-NET
Button is functionless.
NOTE: For the first time configuration, please learn the basic
operation of SRP-281 from the OS-NET Programming Guide.
CREATE A NEW OS-NET NETWORK
NOTE: You may skip this section and start grouping the
device if the target network has been created.
To create a new OS-NET network, you can use EZ-GROUP to
group two OS-NET devices with the same group within 1
minute. More details are available from the OS-NET
Programming Guide.
NOTE: The button will automatically exit configuration mode
after grouping successfully. If grouping fails, the button will
remain in the configuration mode for another 90 seconds. If
no configuration has been conducted within 90 seconds, the
OS-NET Button will automatically exit configuration mode.
To exit configuration mode manually, press and hold the
UPPER and LOWER parts of button for more than 3 seconds.
CHANGE GROUP
To change the group assignment of an OS-NET Button,
follow the instructions below;
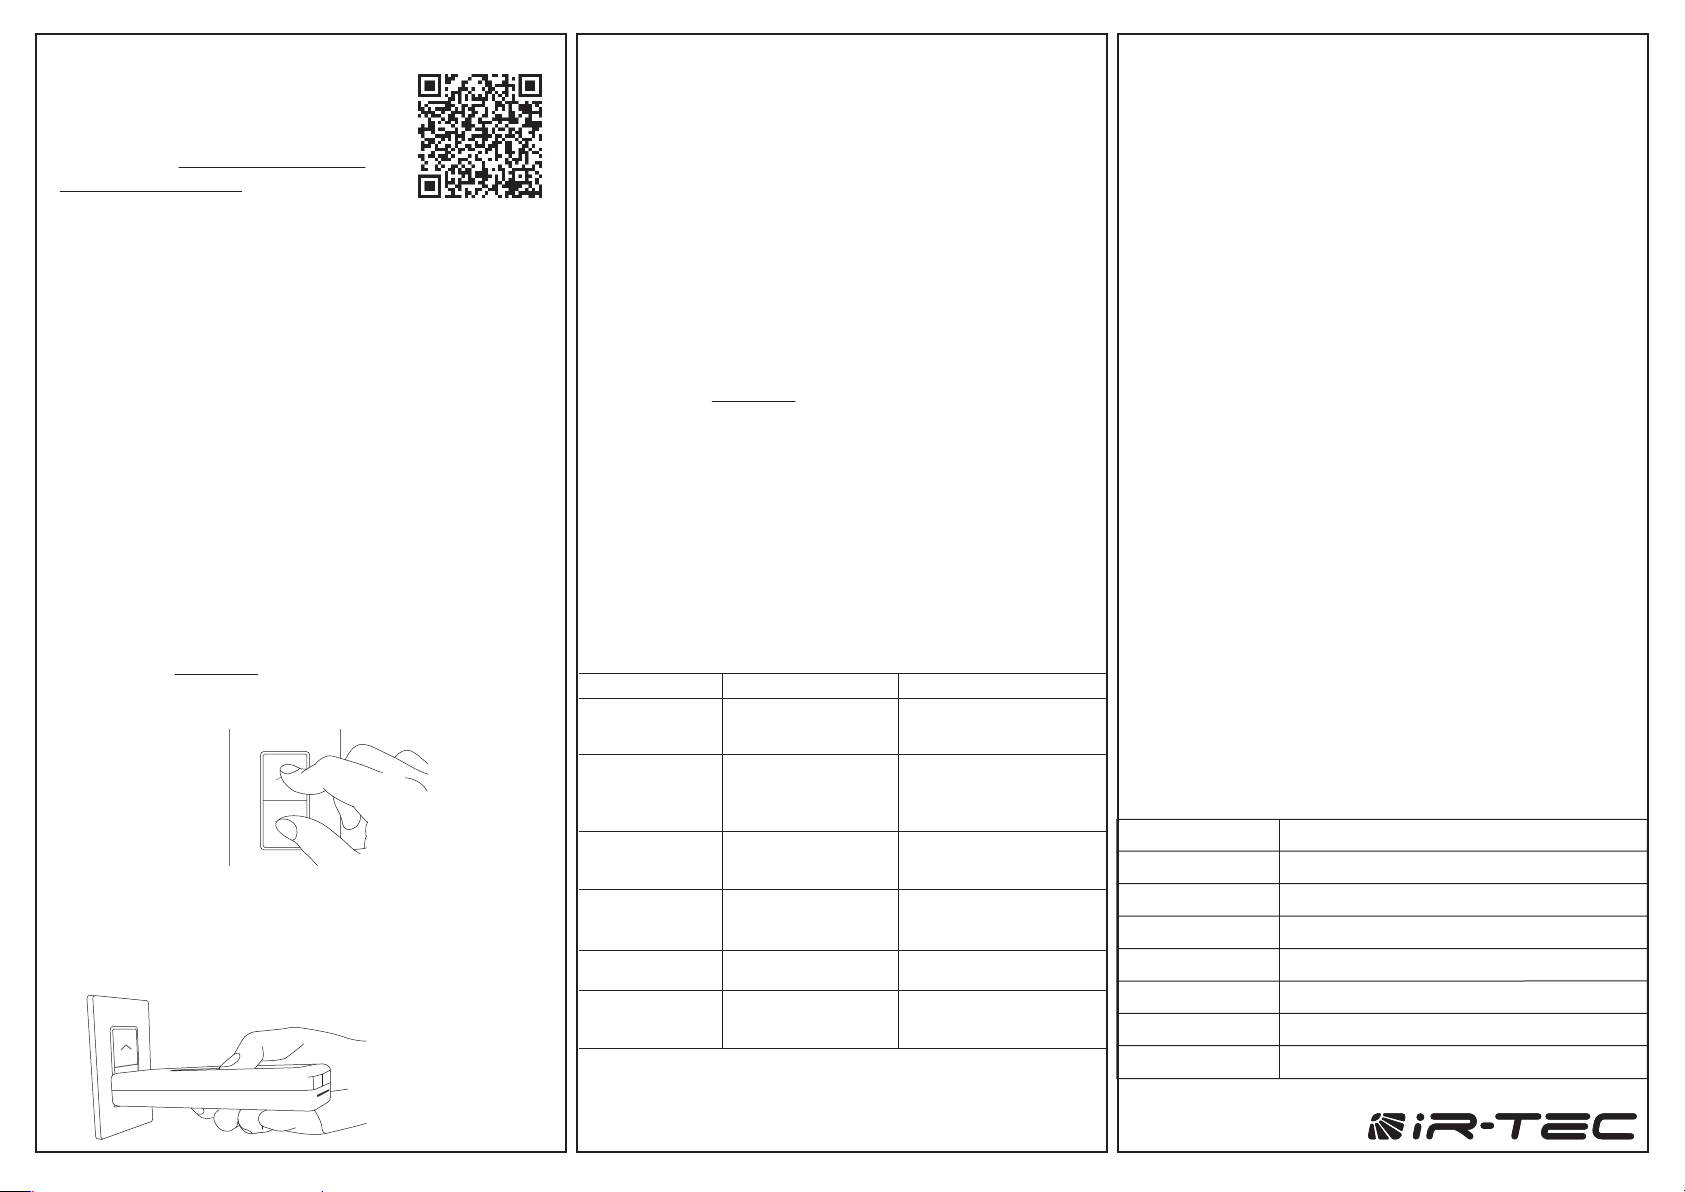
1. Enter Configuration Mode
Press and hold the UPPER and LOWER parts of the button
for more than 3 seconds to enter the configuration mode.
The LED indicator of OS-NET Button will blink twice per
second in GREEN (grouped).
A short press at upper/lower part of the button will transmit a
command to turn on/off the lighting of groups assigned. Press
and hold at upper/lower part of the button will
increase/decrease the output level of grouped lighting
respectively.
1. Turn On the light
A SHORT press (≤0.5 second) at the UPPER part of button will
transmit a command to turn on the grouped lighting. Light will
stay on as long as the grouped sensor(s) detects the
occupancy, and the grouped sensor will resume control after
the area is vacated.
2. Turn Off the light
A SHORT press (≤0.5 second) at the LOWER part of button will
transmit a command to turn off the grouped lighting. The
grouped sensor will resume control after the delay time
elapsed.
3. Ramp up the light
A LONG press (≧0.5 second) at the UPPER part of button will
enter into dimming adjustment mode to increase the output
level of grouped lighting. Intermittent press on the button during
INITIAL GROUPING
Every installed OS-NET Button should be assigned with its
controlled group(s) to enable group control. For an
ungrouped OS-NET Button, please follow the instructions
below for initial grouping.
1. Enter Configuration Mode
Press and hold the UPPER and LOWER parts of the button
for more than 3 seconds to enter the configuration mode.
The LED indicator of OS-NET Button will blink twice per
second in BLUE (ungrouped).
Press and
hold for
more than
3 seconds.
2. Assign to the group(s)
Conduct EZ-GROUP process and assign to the group(s) via
the OS-NET Remote Programmer (SRP-281) as below
shown. Refer to the EZ-GROUP instructions of Programming
Guide for more details.
Hold the remote
close to the OS-NET
2. Change to the new group(s)
Input the new group number(s) on the EZ-GROUP setting
page. Assign the OS-NET Button to the new group(s) in the
same was as INITIAL GROUPING.
DEVICE ACKNOWLEDGEMENT
The OS-NET Button will acknowledge setting success or
failure with different indications by device LED.
DEVICE LED ACKNOWLEDGEMENT REMARKS
Slow blinking (once
per 2 seconds) in
BLUE.
Blinks twice per
second in BLUE.
Blinks irregularly
in BLUE or GREEN.
Fast blinking in
GREEN and
BLUE intermittently.
Lit for 2 seconds in
GREEN.
Blinks twice per
second in GREEN.
The button is unlinked. IR communication disabled.
The button is in
configuration mode but
not grouped.
Receiving commands
from the remote.
Scanning for an open
network and linking.
Grouping completed.
The button is linked and
in configuration mode.
IR communication enabled.
Device will exit configuration
mode after 90 seconds if no
configuration is performed.
GREEN means the device is
network linked. BLUE means
the device is unlinked.
Fast blinking only appears
during network linking.
Exit configuration mode
automatically.
Device will exit configuration
mode after 90 seconds if no
configuration is performed.
dimming control mode will adjust the output level step by step.
The device will exit from dimming adjustment mode 2 seconds
after the last button operation.
4. Fade down the light
A LONG press (≧0.5 second) at the LOWER part of button will
enter into dimming adjustment mode to decrease the output
level of grouped lighting. Intermittent press on the button during
dimming control mode will adjust the output level step by step.
The device will exit from dimming adjustment mode 2 seconds
after the last button operation.
NOTE: After changing the dim level, allow the LED bar to turn
off before trying to switch on/off.
When the OS-NET Button is in configuration mode, all operation
through the button will be void.
SPECIFICATIONS
Power voltage
Wireless protocol
Radio frequency
Radio range
Radio Power output
Op. humidity
Op. temperature
Dimensions
Button as shown to
conduct grouping.
www.irtec.com
www.irtec.com
120/277VAC, 50/60 Hz
Modified Zigbee Light Link (ZLL)
2.4 GHz
Typical 50 ft. @ indoor
2.27 dBm
Max 95% non-condensation
14°F ~ 122°F (-10°C ~ 50°C)
4.13”H x 1.77”W x 1.65”D (w/mounting plate)
 Loading...