

Page 1
LC-780
Passive Infrared SenSwitch
Installation Instructions
INTRODUCTION
Thank you for your purchasing IR-TEC Passive Infrared
SenSwitch. It applies the advanced infrared sensing
technology to provide automatic light control by
detecting the human body motion. It will turn on the
light instantly when motion is detected and turn off
automatically after the delay time expires. SenSwitch
provides not only convenience and energy saving, but
also security as the unexpected, sudden light is a well
know, effective means to frighten the unwanted intruder
away.
INSTALLATION HINTS
Avoid aiming the sensor head at direct or reflected
sunlight which could cause permanent damage of
the sensor or false operation.
Avoid locating the SenSwitch at areas at which
contain objects likely to produce a rapid
temperature change such as heating vents, air
conditioners dryer…etc.
Avoid installing the SenSwitch nearby trees or at
the area where public/traffic may be detected.
Select a location where the direction of movement
will be “across” the detection pattern for better
sensitivity. To obtain proper detection, mounting
height should be 1.8 ~ 3.0 meter on the wall or
ceiling.
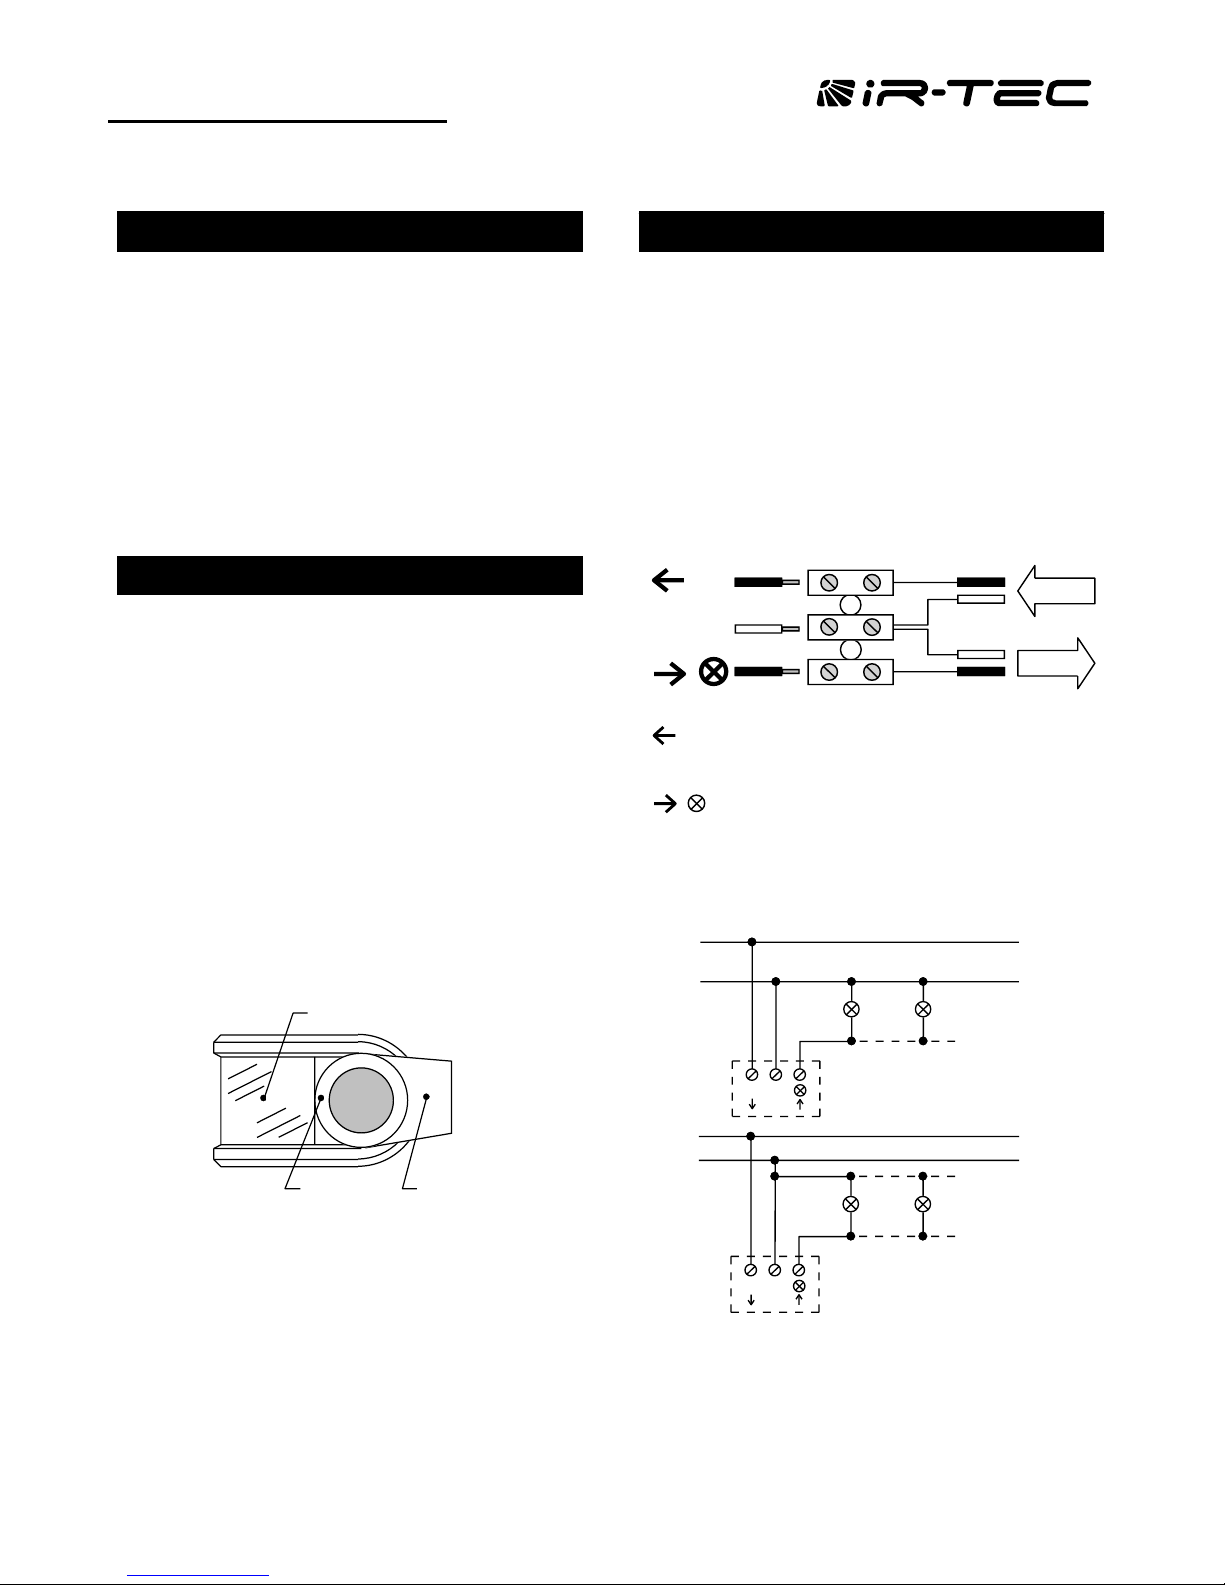
Sensor head
Front cover
Mounting base
WARNING !
Some local building codes may require
installation by a qualified electrician. Consult
an electrician about correct wiring.
The main power must be switched of before
installing.
INSTALLATION & WIRING
1. Remove front cover and sensor head from the
mounting base by releasing two fixing screws..
2. Apply the mounting guide sticker at the selected
position for drilling mounting holes. Insert dowels
and mount the base with mounting screws.
3. Lead the wires from power source and light
through passage hole on rubber gasket beneath
the base. Connect wires to correct terminals
according to following instruction for different
operation mode.
L
N
power
load
: Live wire from power source
L
N
: Neutral wire
: Live wire to load (light)
A. Automatic control
The following wiring enables SenSwitch to control the
light automatically by detecting the motion.
L
N
L
N
Existing light
L
N
L
N
New light
Page 2
B. Automatic with manual override
The following wiring enables SenSwitch to control the
light automatically while the manual switch is off. The
light will remain constantly on if manual switch is on,
regardless of any motion or light level.
L
N
L
N
WARNING ! It is vitally important to connect the “live”
and “neutral” wires of AC mains correctly. Wrong
connection could cause malfunction or permanent
damage to the unit.
TEST & ADJUSTMENTS
Note: Before testing, ensure the LUX is set at right end
( ) and the TIME is set at left end ( ).
1. Aim sensor head at desired detection area. Apply
the mains power and wait about 30 seconds for
sensor to warm up. Light will be on during warm
up period and off once warm up finished.
2. Walk across within the detection area at normal
speed, light should be switched on when sensor
detects the motion. Stop and wait for light off,
repeat same process until the whole coverage is
identified and satisfied.
3. After walk test completed, adjust the LUX and
TIME trimmers as desired.
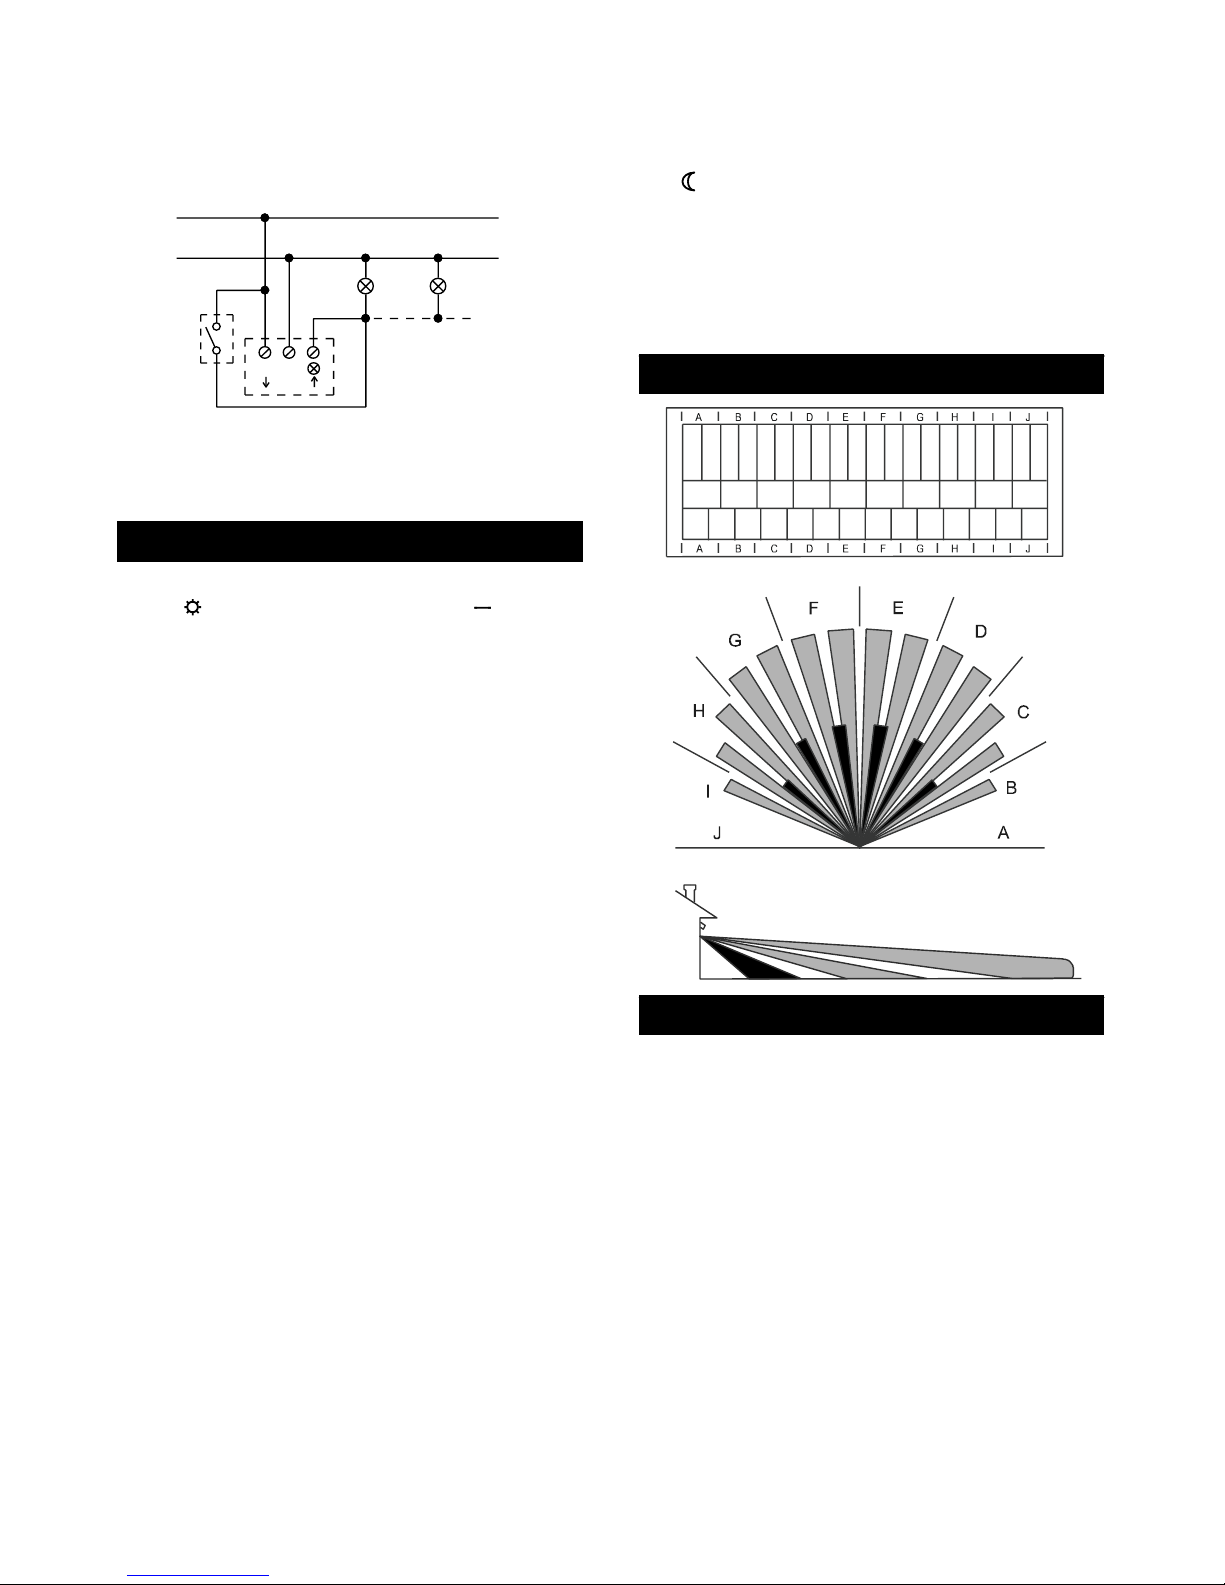
A. Range Adjustment
Maximum range can be obtained when the sensor
head is set horizontal. The range can be reduced
by tilting sensor head downward. The detection
zones can also be masked by applying the
provided masking label on the lens segments.
Firstly, refer to the detection pattern diagram and
locate the respective segments should be masked.
Cut the masking label and stick on the segments.
Range adjustment can eliminate the detections that
cause unwanted light switching.
B. TIME Adjustment
TIME trimmer controls light-off delay time after the
last motion is detected. Turn the trimmer clockwise
to increase the delay time.
C. LUX Adjustment
LUX trimmer controls the SenSwitch operation by
sensing the ambient light level. After testing
completed, adjusting LUX trimmer to the left end
( ), so that SenSwitch only switch on the light at
certain darkness.
To set proper darkness for SenSwitch operation,
rotate the trimmer clockwise from left end position
slowly when the ambient light level is preferred,
stop rotating once the light is on.
DETECTION PATTERN
SPECIFICATIONS
Power supply ........ 100-250 VAC
Maximum load ...... 10A resistive
Detection angle ..... 150 wide
Detection range .... 18 meter (60 ft) at 25C
Detection speed .... 0.15 ~ 3 m/sec.
Mounting height .... 1.8 ~ 3.0 m
Delay time ............. 8 seconds ~ 8 minutes (approx.)
Lux range .............. 2 ~ 2000 lux (approx.)
Sensor head tilt ..... 80 vertical
Protection rate....... IP54
Op. temperature .... -20C~50C (-4F ~122F)
Dimensions ........... 125 x 105 x 62 mm
Specifications are subject to change without prior notice.
058-78002-002 V4.0 2/6/17’
 Loading...