

Irrigatia SOL-C12, SOL-C24 Installation And Operation Manual
Getting Started
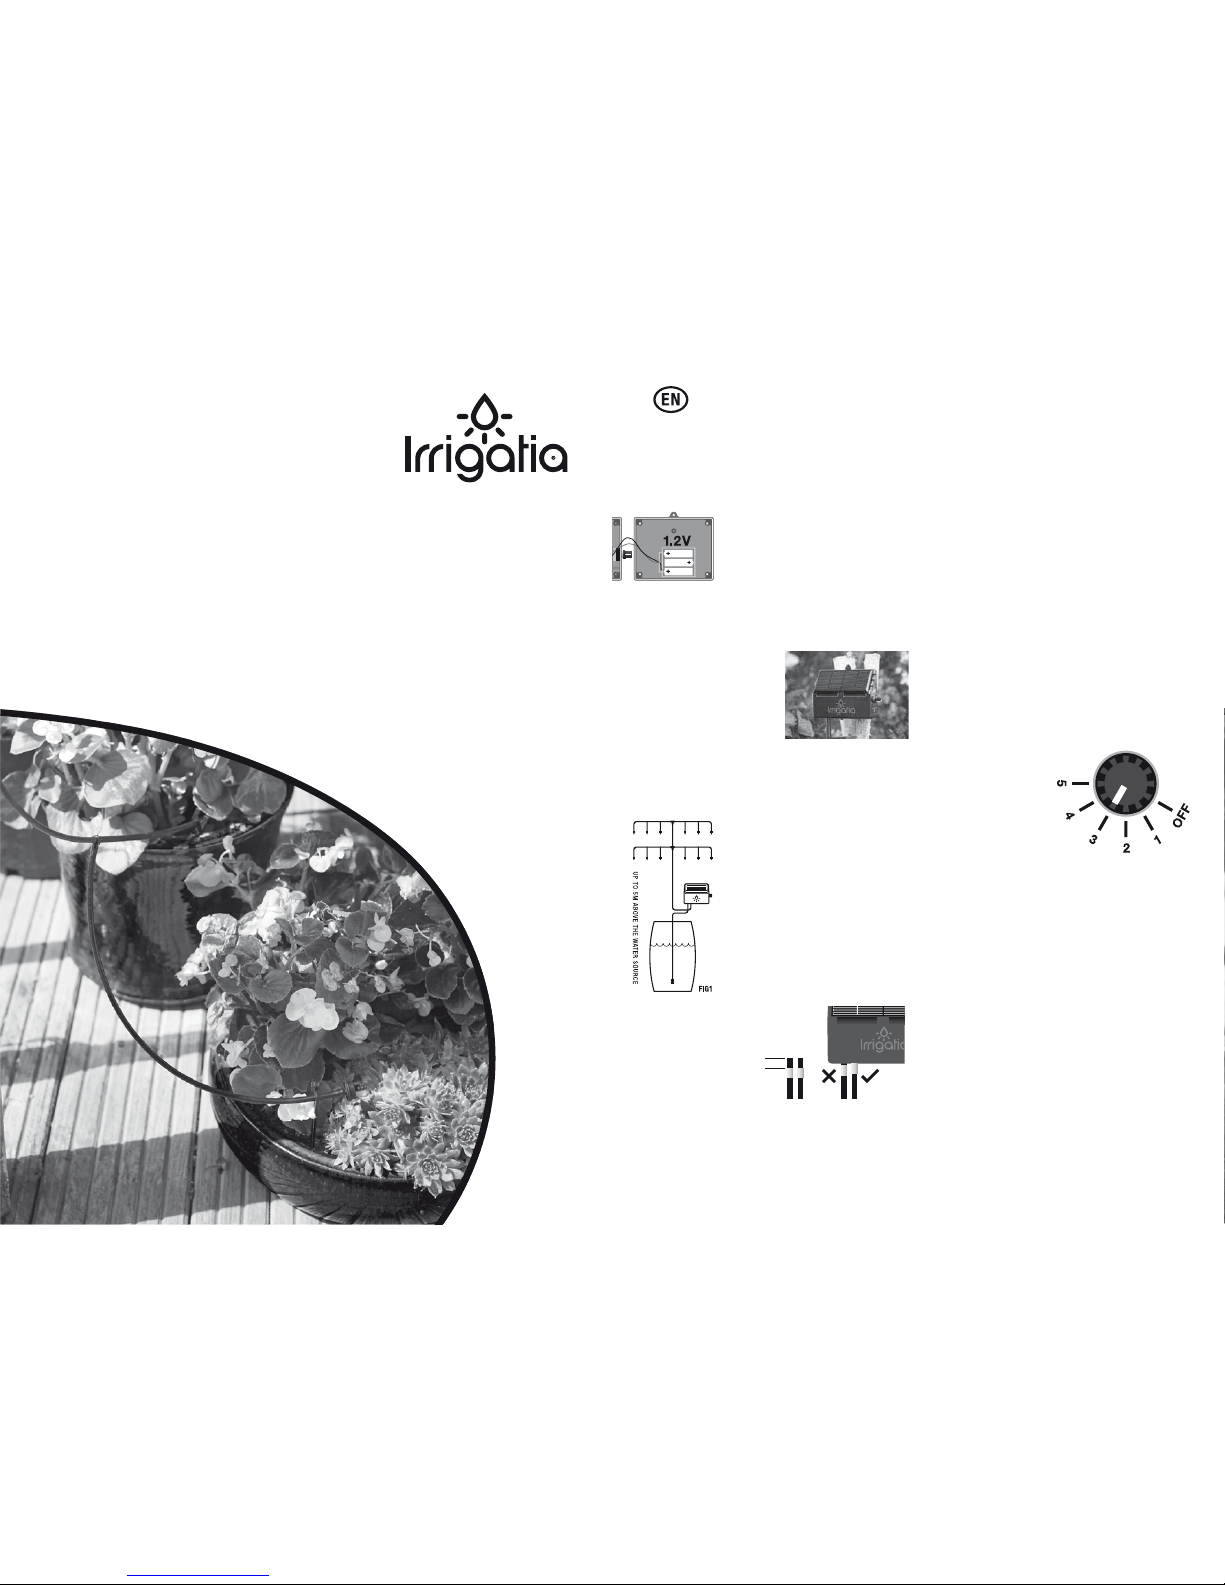
The control unit requires 3 x AA rechargeable
batteries ( NOT NORMALLY INC LUDED – please
check the box). To insert bat teries
remove the lid carefully by removing
5 screws (taking care not to detach
the wire connecting it to the case).
Insert the bat teries into the case
ensuring the + is in the correct
position, then replace the lid and screws.
Attaching the control unit
The CONT ROL UNIT
should be fixed to a wall
or post facing in a sunny
direction. If your water
barrel is in a shady
position, the control
unit may be sited some
distance from the water barrel. It should be no more
than 2 metres higher than the bottom of the barrel
or more than 20m distant.
Connect to the water barrel
Drill a 5.5mm hole in the lid, or near
the top of the water barrel, above
the water line. Thread some tubing
through the hole and attach the filter
to it. Adjust the tubing so the filter
hangs about 10cm above the bottom
of the barrel. The other end of the
tube should be taken to the control
unit, cut cleanly to length and
attached to the pump inlet – the left
hand connector marked I.
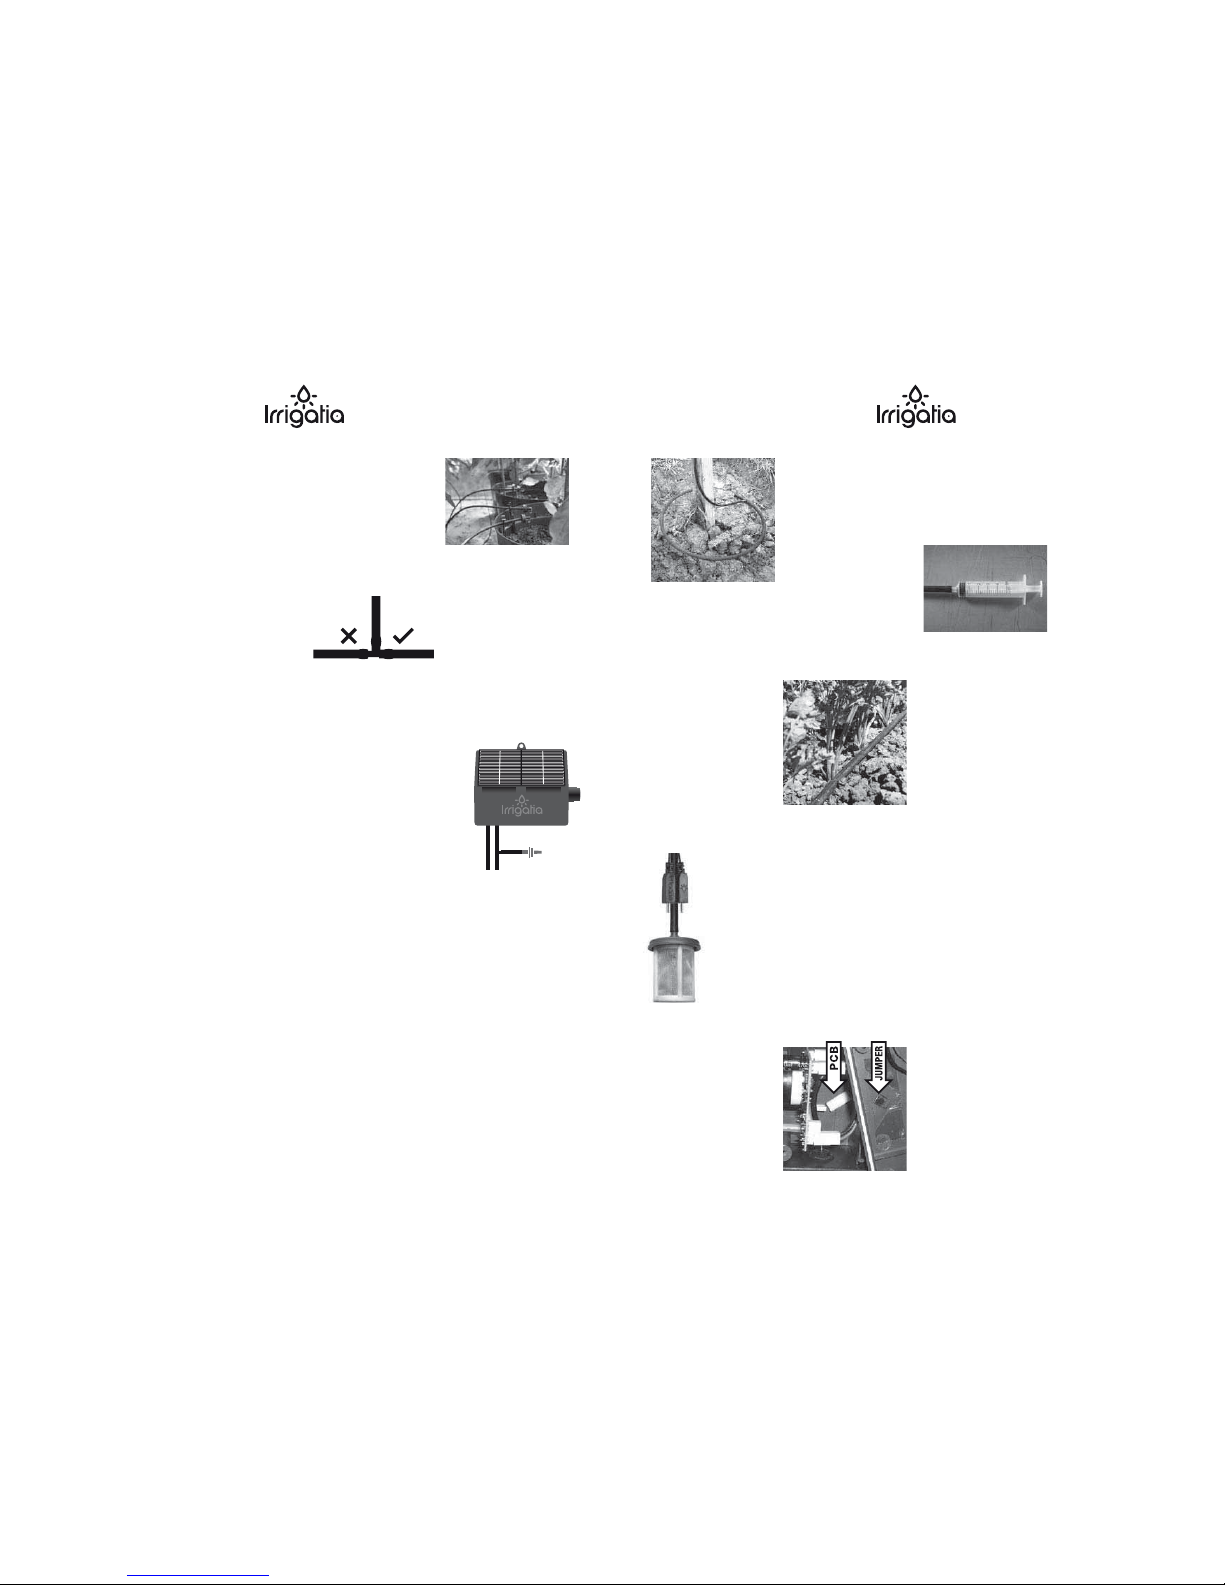
The connections to
the pump should be
straight (to avoid
leakage) and should
not pull the control
unit out of vertical.
5mm of tube needs
pushing into the connector por t to ensure a good
connection and avoid potentially serious problems.
You can easily measure, then mark 5mm with a
piece of tape.
Check the PUMP
In a new control unit the bat teries may be charged
or flat. If they have charge in them, before
connecting to the irrigation system, using a piece of
tube connected to the outlet ( marked O) discharging
back to the water barrel, allow the unit to run until
it stops.
Connect to the irrigation system
The control unit is designed to work with between
6 and 24 drippers. Using less than 6 may cause
damage. As you increase the number of drippers,
less water will be emitted by each one, additionally
there will be less back-pressure in the system so it
will become less tolerant of height differences. With
12 drippers in place height differences of 2m are
normally ok.
Switch on
Turn the knob to 3. Do
not worry if the pump
does not start it should
start itself after 3 hours
in good daylight. Please
note the unit will not run
in the dark. If after 24h
the pump has watered too much, turn in down, or if
too little turn it up. Repeat until you are happy.
If your pots/baskets drain a lit tle after the af ternoon
watering on a sunny day, this is about right for
most plants.
Monitoring
The timer on the control unit is zeroed by turning
the unit off and on again. In daylight the pump will
start automatically after a few seconds ( if there
is sufficient battery charge) and thereaf ter at
roughly 3 hour intervals. The duration of pumping is
determined by how much light/sunshine has fallen
on the solar panel and the position of the control
knob since it last ran. Put a dripper in a jug to see
how much each dripper is delivering.
IMPORTANT – the batteries will NOT charge if
the control unit is turned off.
Irrigatia SOL-C12/24 installation and operation
5MM
T
h
e
w
e
a
t
h
e
r
r
e
s
p
o
n
s
i
v
e
S
M
A
R
T
i
r
r
i
g
a
t
i
o
n
c
o
n
t
r
o
l
l
e
r
Solar Automatic
Watering System
Irrigatia SOL-C12/24 installation and operation
Pump priming
The PUMP is self-priming, but if the outlet tubes
are full of water disconnect it until all of the air
has been pumped out of the inlet line, as a head
of water above the pump can prevent it priming
properly. In some situations it may be helpful to
lower the pump until prime is established.
Control unit status indications
• LED on continuously – pump running
• LED charge rate indication – flashes per 5
second cycle – corresponds to switch position
number.
1 = 20%
2 = 40%
3 = 60%
4 = 80%
5 = 100%
• LED flashes 10x per second and warning bleep
sounds – water sensor detects low water. (Unit
also stops watering)
• LED flashes 10x per second, then of f 1
second. Soil moisture sensor ( not included &
not available with all models) detects soil wet
enough. (unit stops watering )
• LED flashes once every 10 seconds – night
mode, pump will not run and bleeper will not
sound
Maintenance
Keep the control unit in a frost-free place in winter.
Battery life is typically around 1 – 2 years but
will vary considerably depending on the nature of
usage. For peace of mind if the bat teries are more
than 1 year old, put in new batteries before going
away on holiday then use the old ones up when you
come back.
Laying the irrigation tubes
A typical layout is shown in fig1. The tube can be
cut and joined in any way you wish to reach your
plants. The highest dripper should be no more than
5m higher than the water source or 2m higher
than the lowest dripper.
Branches leading to
groups of drippers are
no problem and extra
drippers can be put in
bigger pots/baskets.
The tube must be
pushed/screwed right onto the drippers and tees to
avoid leakage. Drippers should be staked in place.
Typically a SOL-C12
kit will supply enough
water for 5 well grown
35cm hanging baskets,
12 tomato plants, 20 x
10 litre pots or a 12m
by 30cm strip (about 4m2) of bed, though these
figures will vary depending on soil and plant types.
A SOL-C24 will supply twice as much water.
Installation of anti-siphon
device
Where the level of the source
water is higher than the
first dripper or seep hose,
an air release device will be
required to prevent siphoning.
1. Remove the outlet tube
from the control unit.
2. Cut tube 5 – 10cm from the end.
3. Screw the anti-siphon device onto the end of the
tube leading to the drippers.
4. Screw the remaining short piece of tube on, then
reconnect to the control unit outlet (marked O ).
When the pump has been running, the drippers will
continue to drip for a short time while the delivery
tube drains, but should then stop.
Installation of optional seep-hose kit (available
to purchase separately)
Up to a metre of seep hose can be pushed onto
each of the 12 drippers supplied with the star ter kit.
A stopper should be put in the other end and stakes
can be used to hold it in position. This arrangement
can be used to spread water over a larger area
than the dripper alone and is useful for large pots/
baskets, germinating short rows of seedlings,
burying with the roots
of valuable plants to
aid establishment.
Drippers can be at
different heights, but
the individual lengths of
seep hose must be kept
level.
Installation of optional micro-porous hose kit
(purchase separately)
Between 6 and 24 metres, of micro -porous tube
can be used, in one or more lengths with either the
SOL-C12 or 24 control units, depending on how
heavy an application of
water is required.
The micro-porous hose
is useful for long rows
and beds. It can be laid
on the surface, covered
with a mulch or buried
so is also useful for
establishing hedgerows.
Water Level Sensor
The water level sensor is designed to
detect low water in your rain barrel.
When low water is detected, the unit
will stop pumping and the LE D will
flicker rapidly (10x per second), if the
unit is in day mode it will also beep
every 10 seconds as a warning.
Installation:
The sensor probe should be attached
to the water inlet tube a few
centimetres above the filter.
The filter should then be lowered into the rain barrel
and suspended about
10cm above the bottom,
where it is in clear
water.
If the water level sensor
is not required it should
be unplugged from the
PCB and the jumper
(little plastic square)
which is taped inside the lid, put in its place. A pair
of needle nosed pliers will help facilitate this.
Troubleshooting – using the syringe to resolve
occasional pumping problems
• After storage,
pumps may fail to
pump because the
internal valves are
stuck open or closed.
To resolve, disconnect
the inlet tube, connect
a syringe full of water and squirt it through the
pump. Sometimes pumps which have lost prime
are difficult to re-prime (usually older ones). If this
happens disconnect the outlet tube, connect an
empty syringe to the outlet and while the pump is
running draw in with the syringe until water reaches
the pump.
• Drippers which have become blocked can
sometimes be cleared by using the syringe to push
water into the outlet. It is best to remove the dripper
from the irrigation system first so that dirt is not
pushed back into the irrigation pipework.
• Drippers which have been used with mains water
can become blocked with scale. Use the dripper
to push mild acid or descaler into the dripper to
dissolve it.
• Drippers blocked with organic material (including
algae and bacterial slime) can be cleared by
cleaning with mild hydrogen peroxide solution.
 Loading...