

Page 1
Mete-On 3
Instructions for use
Berdienungsanleitung
Notice d'utilisation
Istruzioni per l'uso
Page 2

English..........................................................................page 3
Deutsch......................................................................Seite 13
Français.....................................................................page 23
Italiano...................................................................pagina 34
Cities / Städte / Villes / Città....................................pagina 45
s
2
2
Page 3

Instructions for use for the METE-ON 3
Table of contents
Introduction Page 4
1. Check of the accessories supplied with the system Page 4
2. Basic information about the Mete-On 3 Page 4
3. Determine place of installation Page 6
4. Putting the device into operation Page 6
5. Basic settings of the Mete-On 3 Page 7
5.1 Time zone / language setting / snooze time Page 7
5.2 Setting the display location Page 8
6. Operating the device Page 8
6.1 Display options in the INFO WINDOW Page 8
6.2 Display options in the WEATHER WINDOW Page 8
6.3 Wake-up call function Page 10
6.4 Lighting Page 10
7. TEST function / The Meteotime symbol
8. Batteries Page 11
9. More information about the device ‘METEOTIME’ Page 12
10. Possible faults, their causes and their correction Page 12
Page 11
3
3
Page 4

Introduction
With the Mete-On 3, you hold a genuine global innovation in your hands! In addition to the
Mete-On 1 from Irox, the Mete-On 3 was only the second appliance with the METEOTIME
function at the time of going to press of these instructions for use!
Accordingly, putting it into operation and operating it requires a new kind of procedure.
Please therefore take the time and proceed as follows when putting the device into operation:
1- Please be sure to read through the brochure ‘Personal Meteo Centre PMC Important’
2- Make the basic settings as described in these instructions for use.
3- Carry out the ‘TEST’!
If you follow these steps exactly, the Mete-On 3 will give you a reliable weather forecast for each day and
the following night every time it wakes you. Everything straight away and at a glance!
The functions described in these instructions may deviate from the programme installed on the device.
You can download the latest instructions for use on your PC from the Internet (www.irox.com).
Product number of these instructions for use: IRM03.06.S01
1. Check of the accessories supplied with the device
• Mete-On 3 (main device) • Instructions for use (this document)
• Personal Meteo Centre PMC ‘Important’ • 2 x LR 6 AA batteries (in the device)
2. Basic information about the Mete-On 3
The Mete-On 3 is a highly developed product based on the radio clock technology with the additional
function of the Meteotime weather data reception depicting the weather forecasts for the current day.
With the wake-up signal, you can see the forecasts in the morning for both the day and the evening by
means of one of the 15 weather symbols. Furthermore, you can also see the expected temperatures and
the precipitation probability for the whole day in %.
These weather forecasts are broadcast via the time signal transmitters HBG in Switzerland and DCF77
in Germany. The Meteotime device broadcasts the weather forecasts for a particular location and day
once a day.
The weather forecasts depicted by the Mete-On 3 are received between 10 pm and 4 am
(UTC time; in Central Europe this is +1 hour in the winter and +2 hours in the summer).
This means that to be able to read the fi rst forecasts after the device is put into operation
you need to wait a night!
The new forecasts for the day are available from 3 am.
The new forecasts for the night are available from 6 am.
4
4
Page 5

Display (front side)
Time signal reception
from HBG or DCF 77
Alarm time
Weather window
Metotime Symbol
View from the top
Operating keys
Time window
Info window
View from the bottom
Battery compartment opened
5
5
Page 6

3. Determine place of installation
Look for a place to install the Mete-On 3 where, if possible, no electrically interfering devices can restrict the
reception of the time and the weather data.
More detailed instructions regarding the place of location can be found in the Meteotime brochure ‘Important
information’. We strongly recommend that you assess the place of installation using the ‘TEST’ function.
The description of the ‘TEST’ function can be found in Chapter 7.
4. Putting the device into operation
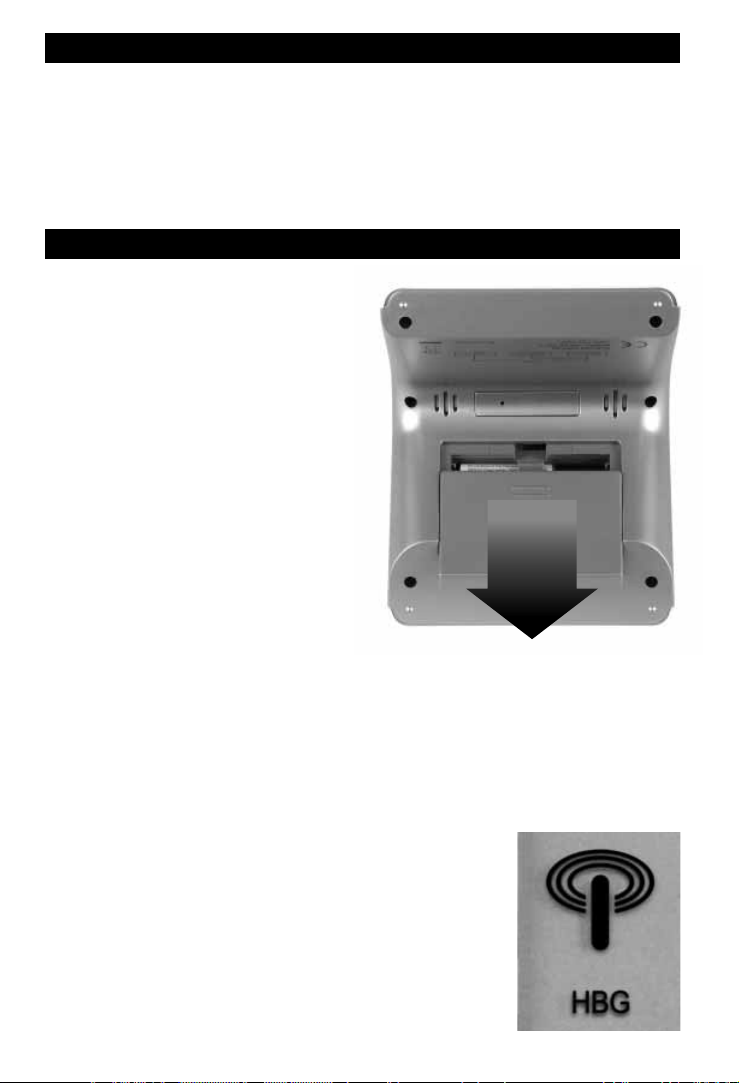
The Mete-On 3 device is battery-operated.
The batteries installed when the device is
shipped are deactivated with isolating strips.
To activate the batteries, the isolating strips
have to be removed. To do this, you need to
open the battery compartment. For this, the
cover on the inner side of the device is pulled
downwards.
Now remove the isolating strips. The Mete-On
3 then starts according to the sequence described below.
If this should not be the case, you need to remove the two batteries from the device and
put them back in again after approx 1 minute
in the right polarity.
Start procedure of the Meteo-On 3:
• The full segment display appears briefl y, the snooze button lights up briefl y and a short acoustic signal
sounds out. The seconds in the display then begin to run.
• After approx. 10 seconds, the measured interior temperature appears and a rolling weather symbol
(4 symbols alternating). The clock now begins to receive the time. Now the settings described in the fol lowing chapters can already be started.
Depending on the signal quality, the time reception lasts between 3 and 10 minutes. The following displays appear on the left of the time:
Flashes cyclically: Data is being received and the signal is good
Firmly displayed: Time has been received and is synchronous
No display (or fl ashes irregularly) There is interference to reception of the
time or reception is not possible. If the symbol is not on the display for a
longish period of time, the time has not aligned itself to the transmitter
for more than 12 hours.
HBG or DCF: Displays which transmitter the device is receiving data from.
The Mete-On 3 searches independently for the best transmitter in each case
DST Summer time is active (‘Daylight Saving Time’). This symbol does not
appear in the winter.
6
6
Page 7
5. Basic settings of the Mete-On
The Mete-On 3 has two basic settings that can be made and which are described in Chapters 5.1 and
5.2 below.
In every setting the following general rule applies:
If no key is pressed for approx. 20 seconds, the settings made are adopted and the Mete-On 3 exits the
setting mode independently.
5.1 Time zone / language setting / snooze time
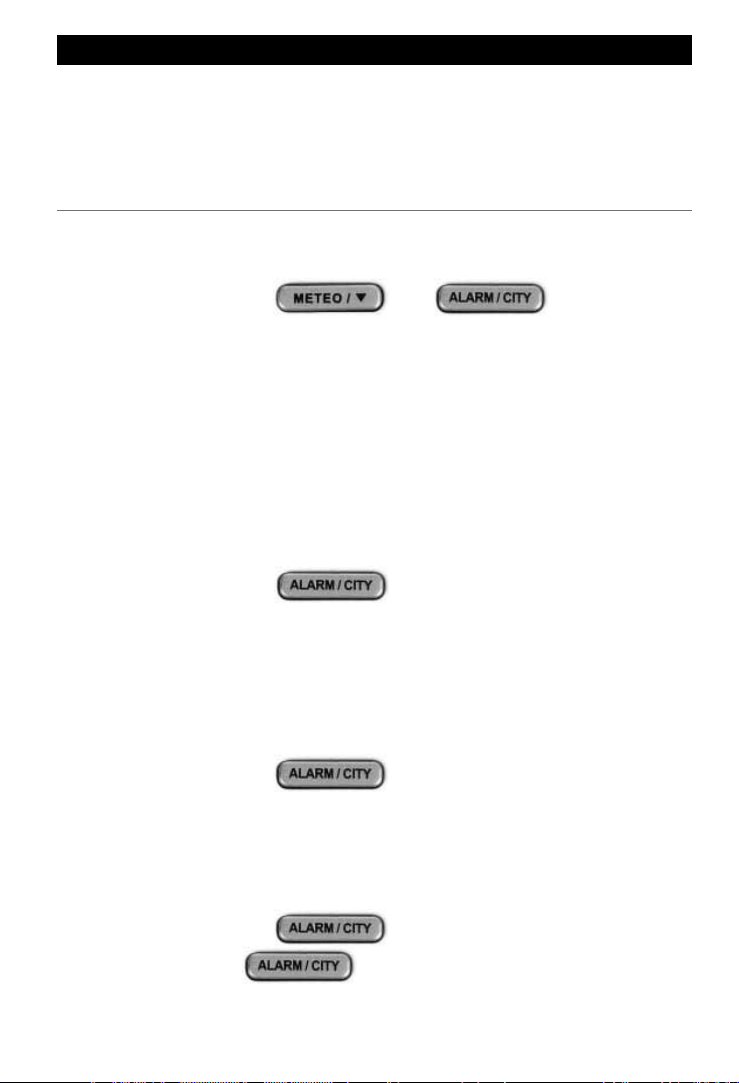
The SET mode is activated by simultaneously pressing and holding (3 seconds) the keys
•
Time zone (-11 to +12 hours, deviation from the valid time in Central Europe)
The time received by the time signal transmitters HBG and DCF77 is the time valid in Central Europe. For Central Europe, therefore, you do not need to make any settings here.
As a presetting, you get the current hour (e.g. 14:-- if the current time is 14:38)
The value can be changed with the keys ▼/▲ .
In order to adjust the time zone for England, for instance (England = –1 hour), the key ▼ is pressed
once.
In the example above, 14:-- thus becomes a 13:--
Note: If a time zone is entered that deviates by more than -+3 hours from the time received, the synchronisation and the weather forecast reception will be deactivated.
Continue to the next setting: Press
Language setting
•
The language selection of the display of the day in 3 letters is:
D: German (basic setting) NL: Dutch
GB: English I: Italian
F: French E: Spanish
The language can be changed with the keys ▼/▲.
and
Settings can be made to the respective fl ashing segment.
once.
Continue to the next setting: Press
Snooze time
•
The alarm clock has a SNOOZE function (slumber function or wake-up call repeat after x minutes if the
SNOOZE key is pressed during the acoustic wake-up signal. This SNOOZE time x can be set in this menu:
4, 8 or 12 minutes.
The snooze time can be changed with the keys ▼/▲.
Continue to the next setting: Press
Exit SET function: Press the
pears again.
once.
once.
key for at least 3 seconds until the normal display ap-
7
7
Page 8
5.2 Setting the display location
The Mete-On 3 can display weather information of up to 60 regions in Europe. You will fi nd a pre-programmed selection of towns and cities in these regions in the device.
The weather region Berne/Switzerland is pre-set on delivery. Another location can be set as follows:
Press and hold (3 seconds) the key
The following settings can be made to the respective fl ashing segment.
•
Country
Sixteen countries are available (the pre-programmed list of towns and cities in the Mete-On 3 is attached at the end of these instructions).
The abbreviation for vehicles is used for each country (e.g. CH for Switzerland, D for Germany, F for
France, etc.)
The country can be selected with the keys ▼/▲.
Continue to the next setting: Press
City
•
A different number of places is available per country. Please select the location nearest to your place
of residence. If you are unsure, there is a tool on the Internet page www.meteotime.com where the
region valid for your place is residence is indicated.
Each location is displayed with a 4-letter abbreviation (see list at the end of these instructions).
The appropriate location in the selected country can be selected with the keys ▼/▲.
Exit SET function: Press the key
The normal display then appears. If weather forecasts are available, these now appear in the display.
More on this in Chapter 6.2.
The required location can be changed at any time. The Mete-On 3 has all data received stored in the
memory.
once.
6. Operating the device
6.1 Display options in the INFO WINDOW
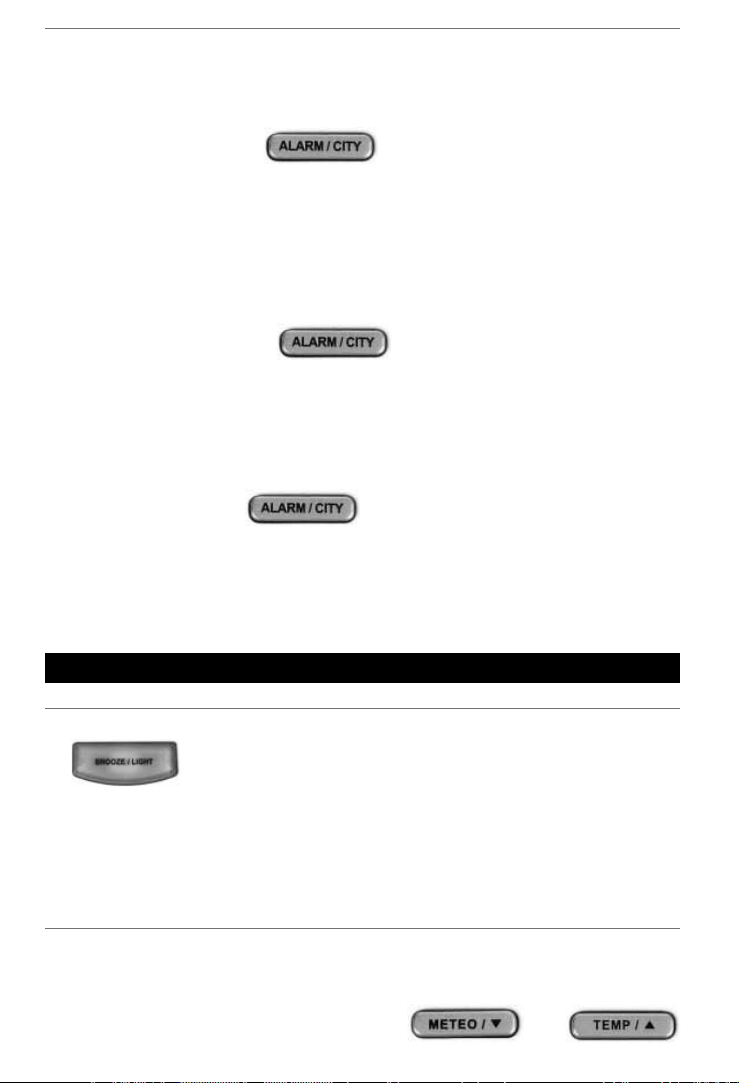
Key Press down for approx. 3 seconds (until a short acoustic signal sounds out).
Each time the key is pressed like this, the following info will be displayed sequentially:
- Running seconds (basic setting)
- Date (‘DATE’) in the format date/month
- Day of the week (according to the language selected, see Chapter 5.1)
- Selected location (‘CITY’)
- Precipitation probability (‘RAIN’) in % (if no data are yet available, dashes appear before the % sign)
6.2 Display options in the WEATHER WINDOW
• Weather and temperature forecasts
The forecasts and the temperature measured in the device are displayed here.
You can switch between the potential displays with the keys
8
8
and
Page 9
Alternating of the display between the weather forecast DAY (‚DAY‘) and night
(‚NIGHT‘)
Switching between the temperature forecast (‘FORECAST’) for the period (day/
night) selected with the key above and the room temperature (‘INDOOR’). Temperatures are displayed in °C
In addition to this manual selection, an integrated logic system will add the valid forecast to the display
at specifi ed times: 03:00 The forecast day (‘DAY’) is added to the display
18:00 The forecast night (‘NIGHT’) is added to the display
Note: If weather data is not yet available, dashes appear in the display of the forecast
temperature (‘
FORECAST’). As a forecast, 4 different alternating symbols are displayed.
When fi rst weather data are received is described in Chapter 2!
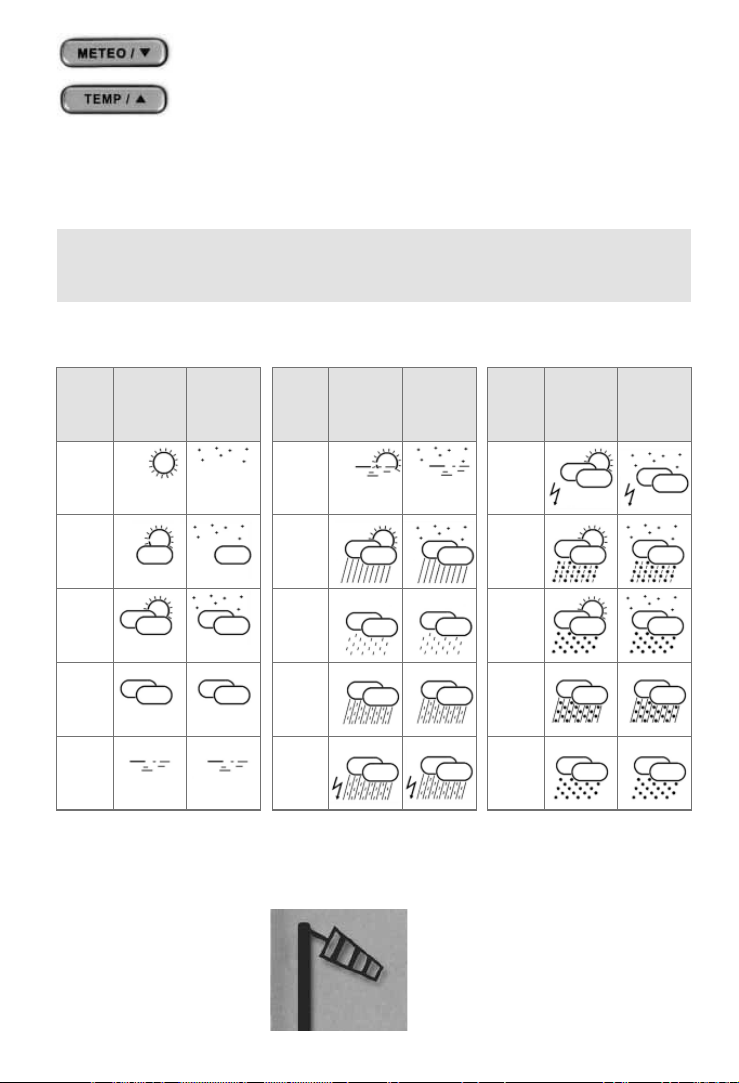
The weather forecast is displayed using the 15 different pictograms listed here. The forecast ‘Sunny’
means ‘clear’ at night.
Signifi -
Day Night
cance
Signifi -
Day Night
cance
Signifi -
Day Night
cance
Sunny
(Clear at
night)
Light
cloud
Mostly
cloudy
Overcast
Stratus
clouds
Fog
Showers
Light rain
Heavy rain
Frontal
storms
Heat
storms
Sleet
showers
Snow
showers
Sleet
Snow
New forecasts are made on a daily basis by professional meteorologists in the Meteotime network. Forecast reliability is therefore based at all times on state-of-the-art technology and the most up-to-date
weather models available
• Forecast of weather
situations that require
special attention
This symbol indicates storm
or gusty wind
9
9
Page 10
6.3 Wake-up call function
The wake-up call function is operated via the following keys:
Short press once: The wake-up time fl ashes and can now be set via the keys ▼/▲
eingestellt werden. Each time the ▼/▲ keys are pressed, the wake-up call time is
increased or reduced by 1 minute. If the corresponding key is pressed and held, the
wake-up time changes rapidly. After 10 seconds of holding the key, the display jumps
forwards/backwards in 10-minute steps.
As soon as the wake-up time is changed, the wake-up alarm is activated (the pictogram of the bell appears on the left of the set wake-up time)
This key has 3 functions:
1) Short press: The background light is switched on (see Chapter 6.4) and…
2) … when the alarm is active, the snooze cycle is started.
The adjustment of the SNOOZE time is described in Chapter 5.1. The following times are available: 4 minutes, 8 minutes or 12 minutes.
3) Long press (≥ 3 seconds): Selection of the display options in the INFO WINDOW
(see Chapter 6.1)
An active wake-up alarm also triggers, in addition to the acoustic sound, a fl ashing of the SNOOZE key
(permits the device to be found easily in a dark room). The acoustic signal has the following sequence:
First wake-up signal at the specifi ed time: 2 minutes in total, in 4 levels
Level 1: Slow and gentle Level 2: Slow and loud
Level 3: Medium speed and loud Level 4: Fast and loud
If the key SNOOZE is not pressed within 2 minutes, the alarm clock switches itself off automatically until
the next day (‘24h OFF’).
In the case of the SNOOZE cycle activated via the key ‘SNOOZE’, the alarm clock signal
is reactivated when the snooze time has expired. But now straight to Level 4!
During a snooze cycle, the bell fl ashes in the display. During this time, no setting can
be made on the Mete-On 3. For this, the SNOOZE cycle needs to be interrupted via
the key (y).
6.4 Lighting
10
10
With this key, the display is illuminated for approx. 5 seconds.
This key can be pressed repeatedly at any time, including during settings. During the setting of the wake-up time, the display lighting stays on when this is activated once and a setting
with the keys ▼/▲ is made within 5 seconds.
Page 11
7. TEST function / The Meteotime symbol
As described in the brochure «Personal Meteo Centre PMC Important» the ‘TEST’ function serves to
fi nd a place where the device has a good reception. During this test, each individual unit of data transmitted is verifi ed and rated as good or bad.
This function is started with the combination of the keys
Proceed as follows:
1) Press both keys together and hold them like this for approx. 3 seconds until ‘TEST’ appears on the dis play in the INFO WINDOW.
2) On the left at the bottom of the display you will see the Meteotime symbol. This has the following signi fi cance as long as the test is running (=TEST in the info window):
Flashing: The test is running; reception is good (you can leave the appliance in this position)
Flashing: The test is running; reception poor (please continue to look for a better position)
3) Keep the device upright (as if you were placing it on a table or hanging it on the wall) and look for a
place in your room where the symbol is displayed in its entirety. Please be sure to keep the required
distance to possible sources of interference (as described in the PMC brochure).
4) The test lasts approx. 1 minute. You can stop the test at any time by pressing one of the two keys
If, after completion of the test, you would like to set up the device in another position, even if it’s only in
another direction, we recommend that you do the test again.
or
and
During normal operation, the METEOTIME Symbol
weather data. During reception of the relevant data at night, at least 75% of the data must be received
well. The symbol is thus displayed in its entirety during the day. If this is not the case, the symbol is
‘empty’:
If during the day, including straight after the device is put into operation, the TEST function is started and
the reception is rated as good, the METEOTIME symbol appears completely and remains so after conclusion of the TEST function. However, particularly after the device is put into operation for the fi rst time, this
does not mean that the weather data are also already being received. This does not occur until at night
as described in Chapter 2. Only after such a reception does the symbol indicated whether at least 75%
of the receptions were good or not.
serves to assess the quality of reception of the
8. Batteries
At night, the Mete-On 3 has continuous reception in order to ensure a constant depiction of the forecasts
of all regions. Nevertheless, the device has a high battery lifetime of approx. 12 months.
Please, however, note the following:
- The battery lifetime also depends on how often you use the background lighting. Regular and repeated
use of the background light shortens the battery lifetime.
- The type of battery used has a major infl uence on the lifetime. Please therefore only use batteries of the
type ‘alkaline’ or ‘lithium’; others could have perceptibly shorter lifetimes!
11
11
Page 12

- Weak batteries that need to be changed can be detected by a weakening contrast in the LCD. Increasing
problems in data reception can also be caused by weak batteries. Consequently, please replace batteries with diffi cult-to-read displays like this immediately.
- All data and settings are lost when the battery is changed.
9. More information about the ‘METEOTIME’ device
More info about the system can be found on the Internet at www.meteotime.com
10. Possible faults, their causes and their correction
ERROR
• incorrect time and
date in the display
• the Meteotime symbol in
the status area is not
fully displayed
• there are gaps in the
weather forecasts or
they are not available
• the rings on the
radio tower
are missing
• the contrast in the display
is becoming weaker
or is poor.
• the forecast pictogram is
constantly alternating, in
the temperature forecast
there are only dashes.
Nevertheless, the
Meteotime symbol is
fully on
CAUSE
The radio reception of
Mete-On 3 has been
disrupted.
There was interference
to the radio reception
of Mete-On 3in the
night and less than
75% ofthe data received are correct.
It has not been possible to update the time
during the previous 12
hours.
The batteries have
been used up.
In normal operation:
It has not been possible to receive the
respective weather
data for 2 days.
After the system is put
into operation for the
fi rst time or after a
change in batteries.
CORRECTION
The place of installation of the Mete-On 3 is
unsuitable.
Find a place of installation where there is no
interference to the radio reception.
Use the ‚TEST‘ function from the
instructions for use.
There is electrical interference at the place of
installation of the Mete-On 3 or the reception is
too weak.
Use the ‚TEST‘ function from the instructions for
use to fi nd a more favourable place of installation
or to remove the interfering device.
As the interference may occur at night, please look
for another place as a precautionary measure.
It may be suffi cient to turn the device 30-90°.
There is interference to the reception at the place
of installation of the Mete-On 3.
Use the ‚TEST‘ function from the instructions for
use to fi nd a more favourable place of installation.
Replace the batteries.
(2 x LR6 AA battery - alkaline or lithium)
This interference to reception may be temporary;
if it occurs often, a more favourable place of
installation should be sought.
No data have yet been received.
Wait until the morning (see Chapter 2)
12
12
Page 13

Bedienungsanleitung METE-ON 3
Inhaltsverzeichnis
Einführung Seite 14
1. Überprüfen des mitgelieferten Zubehörs Seite 14
2. Grundsätzliches zum Mete-On 3 Seite 14
3. Aufstellungsort festlegen Seite 16
4. Inbetriebnahme des Gerätes Seite 16
5. Grundeinstellungen des Mete-On 3 Seite 17
5.1 Zeitzone / Spracheinstellung / Snooze-Zeit Seite 17
5.2 Einstellen des Anzeigeortes Seite 18
6. Bedienung des Gerätes Seite 18
6.1 Anzeige-Optionen im INFO-FENSTER Seite 18
6.2 Anzeige Optionen im WETTER FENSTER Seite 18
6.3 Wecker-Funktion Seite 20
6.4 Beleuchtung Seite 20
7. Funktion TEST / Das Meteotime Symbol
8. Batterien Seite 21
9. Weitere Infos zum System «METEOTIME» Seite 22
10. Mögliche Fehler, deren Ursache und Behebung Seite 22
Seite 21
13
13
Page 14

Einführung
Sie haben mit dem Mete-On 3 eine echte Weltneuheit in Ihren Händen! Neben dem Mete-On 1
von Irox, ist das Mete-On 3 bei der Drucklegung dieser Anleitung erst das zweite Gerät mit
der METEOTIME-Funktion!
Die Inbetriebnahme und der Betrieb erfordern entsprechend ein neues Verhalten. Nehmen
Sie sich deshalb die Zeit und gehen Sie bei der Inbetriebnahme des Gerätes folgendermassen
vor:
1- Lesen Sie die Broschüre «Personal Meteo Centre PMC Important» unbedingt durch
2- Machen Sie die Grundeinstellungen wie in dieser Anleitung beschrieben
3- Führen Sie den «TEST» durch!
Wenn Sie diese Schritte genau befolgen, wird Ihnen das Mete-On 3 jeden Tag mit dem Wecken zuverlässig die Wettervorhersage für den neuen Tag und die kommende Nacht geben. Alles sofort und auf
einen Blick!
Die in dieser Anleitung beschriebenen Funktionen können gegenüber dem sich im Gerät befi ndenden
Programms abweichen. Vom Internet (www.irox.com) können Sie jederzeit die neueste Anleitung auf
Ihren PC herunterladen. Produktnummer dieser Anleitung: IRM03.06.S01
1. Überprüfen des mitgelieferten Zubehörs
• Mete-On 3 (Hauptgerät) • Bedienungsanleitung (dieses Dokument)
• Personal Meteo Centre PMC «Important» • 2x Batterie LR6 AA (im Gerät)
2. Grundsätzliches zum Mete-On 3
Das Mete-On 3 ist ein hochentwickeltes Produkt auf der Basis der Funkuhrtechnologie mit der zusätzlichen Funktion des Meteotime-Wetterdatenempfangs mit der Darstellung der Wettervorhersagen für den
aktuellen Tag.
Mit dem Wecksignal können Sie am Morgen gleich die Vorhersagen sowohl für den Tag wie auch den
Abend mittels eines der 15 Wettersymbole ablesen. Zusätzlich sehen Sie auch die zu erwartenden Temperaturen und die Niederschlagswahrscheinlichkeit für den ganzen Tag in %.
Diese Wetterprognosen werden über die Zeitzeichensender HBG in der Schweiz und DCF77 in Deutschland übertragen. Das System Meteotime überträgt die Wettervorhersagen für einen bestimmten Ort und
Tag einmal pro Tag.
Die vom Mete-ON 3 dargestellten Wettervorhersagen werden zwischen 22:00 und 4:00
morgens empfangen (UTC Zeit, in Zentraleuropa ist das im Winter +1 Stunde und im Sommer +2 Stunden). Um nach der Inbetriebnahme erste Vorhersagen ablesen zu können, müssen Sie also eine Nacht abwarten!
Die neuen Tagesvorhersagen stehen ab 3:00 morgens zur Verfügung.
Die neuen Nachtvorhersagen stehen ab 6:00 morgens zur Verfügung
14
14
Page 15

Anzeige (Vorderseite)
Anzeige Zeitzeichenemp-
fang (HBG oder DCF77)
Weckzeit
Wetterfenster
Metotime Symbol
Ansicht von oben
Bedientasten
Zeitfenster
Infofenster
Ansicht von unten
Batteriefach geöffnet
15
15
Page 16
3. Aufstellungsort festlegen
Suchen Sie einen Aufstellungsort für das Mete-On 3, an dem möglichst keine elektrisch störenden Geräte den
Empfang der Uhrzeit und der Wetterdaten beeinträchtigen.
Nähere Hinweise zum Aufstellungsort entnehmen Sie bitte der Meteotime Broschüre «Wichtige Hinweise».
Wir empfehlen stark, den von Ihnen ausgewählten Aufstellungsort über die Funktion «TEST» zu bewerten.
Die Beschreibung der Funktion «TEST» fi nden Sie im Kapitel 7.
4. Inbetriebnahme des Gerätes
Das Gerät Mete-On 3 wird mit Batterie betrieben.
Die bei der Auslieferung bereits eingelegten Batterien sind mit Isolierstreifen abgeschaltet. Zum Aktivieren der Batterien sind
die Isolierstreifen zu entfernen. Dazu ist das
Batteriefach zu öffnen indem der Deckel
in der Innenseite des Gerätes nach unten
gezogen wird.
Entfernen Sie nun den Isolierstreifen. Danach startet das Mete-On 3 nach dem unten beschriebenen Ablauf.
Sollte dies nicht der Fall sein, müssen Sie
die beiden Batterien aus dem Gerät entfernen und nach ca. einer Minute in der
richtigen Polarität wieder einlegen.
Aufstart Prozedere des Mete-On 3:
• Die Vollsegment-Anzeige erscheint kurz, der Snooze-Knopf leuchtet kurz auf und ein kurzes akustisches
Signal ertönt. Danach beginnen die Sekunden in der Anzeige zu laufen.
• Nach ca. 10 Sekunden erscheinen die gemessene Innentemperatur und ein rollendes Wettersymbol
(alternierend 4 Symbole). Die Uhr beginnt jetzt mit dem Empfang der Zeit. Jetzt kann bereits mit den in
den folgenden Kapiteln beschriebenen Einstellungen begonnen werden.
Der Zeitempfang dauert je nach Qualität des Signals 3 bis 10 Minuten. Folgende Anzeigen erscheinen
links neben der Uhrzeit:
Blinkt zyklisch: Ein Empfang fi ndet statt und das Signal ist gut
Fest angezeigt: Zeit wurde empfangen und ist synchron
Keine Anzeige (oder blinkt unregelmässig): Der Zeitempfang ist gestört
oder nicht möglich. Ist das Symbol längere Zeit nicht auf der Anzeige,
hat sich die Zeit seit mehr als 12 Stunden nicht mit dem Sender abgeglichen
HBG oder DCF: Zeigt an, von welchem Sender das Gerät empfängt. Das
Mete-On 3 sucht sich jeweils den besten Sender selbstständig aus
DST Die Sommerzeit ist aktiv («Daylight Saving Time»). Dieses Zeichen
16
16
Page 17

5. Grundeinstellungen des Mete-On 3
Das Mete-On 3 hat zwei Grundeinstellungen die vorgenommen werden können und in den folgenden
Kapiteln 5.1 und 5.2 beschrieben werden.
Es gilt allgemein in jeder Einstellung:
Wenn für ca. 20 Sekunden keine Taste gedrückt wird, werden die gemachten Einstellungen übernommen
und das Mete-On 3 verlässt den Einstellmodus selbstständig.
5.1 Zeitzone / Spracheinstellung / Snooze-Zeit
Der SET Modus wird durch gleichzeitiges Drücken und halten (3 Sekunden) der Tasten
aktiviert. Am jeweils blinkenden Segment können Einstellungen vorgenommen werden:
•
Zeitzone (-11 bis +12 Stunden, Abweichung von der gültigen Zeit in Mitteleuropa)
Die von den Zeitzeichensendern HBG und DCF77 empfange Zeit ist die in Mittel-Europa
gültige Zeit. Für Zentral-Europa brauchen Sie hier also nichts einzustellen.
Als Vorgabe erhalten Sie die aktuelle Stunde (z.B. 14:-- wenn die aktuelle Zeit 14:38 ist)
Mit den Tasten ▼/▲ kann der Wert verändert werden.
Um z.B. die Zeitzone für England einzustellen (England = –1 Std.), wird einmal die Taste ▼
gedrückt. In obigem Beispiel wird dann aus 14:-- ein 13:--.
Achtung: Wenn eine Zeitzone eingegeben wird die mehr als ± 3 Std. von der empfangenen Zeit abweicht, werden die Synchronisation sowie der Wettervorhersageempfang
abgeschaltet!
und
Weiter zur nächsten Einstellung: Einmal
Einstellung der Sprache
•
Die Sprachauswahl der Anzeige des Tages in 3 Buchstaben ist:
D: Deutsch (Grundeinstellung) NL: Holländisch
GB: Englisch I: Italienisch
F: Französisch E: Spanisch
Mit den Tasten▼/▲ kann die Sprache verändert werden.
Weiter zur nächsten Einstellung: Einmal
Snooze Zeit
•
Der Wecker hat eine SNOOZE Funktion (Schlummerfunktion resp. Weckwiederholung nach x Minuten
wenn bei aktivem Wecksignal die SNOOZE Taste gedrückt wird).
Die SNOOZE Zeit ist einstellbar: 4, 8 oder 12 Minuten.
Mit den Tasten ▼/▲ kann die Snooze Zeit verändert werden.
Zurück zur Einstellung der Zeitzone: Einmal
SET Funktion verlassen: Die Taste
erscheint.
drücken.
drücken.
drücken.
gedrückt halten bis wieder die Normalanzeige
17
17
Page 18

5.2 Einstellen des Anzeigeortes
Das Mete-On 3 kann Wetterinformationen von bis zu 60 Gebieten von Europa anzeigen. Sie fi nden eine
Auswahl von Städten dieser Regionen im Gerät vorprogrammiert.
Bei der Auslieferung ist als Wetterregion Bern/Schweiz eingestellt. Ein anderer Ort kann wie folgt eingestellt werden:
Drücken und halten (3 Sekunden) Sie die Taste
Hier können am jeweils blinkenden Segment folgende Einstellungen vorgenommen werden:
•
Land (COUNTRY)
Es stehen 16 Länder zur Verfügung (am Ende dieser Anleitung ist die Ortsliste angefügt).
Für jedes Land wird das Kurzzeichen wie bei Fahrzeugen gebraucht (z.B. CH für die Schweiz, D für
Deutschland etc.)
Mit den Tasten ▼/▲ kann das Land ausgewählt werden.
Weiter zur nächsten Einstellung: Einmal
Ort (CITY)
•
Es stehen pro Land eine unterschiedliche Anzahl Orte zur Verfügung. Wählen Sie den Ort aus, der Ihrem
Wohnort am nächsten liegt.
Jeder Ort wird mit einer 4 Buchstaben Abkürzung angezeigt (siehe Liste am Ende dieser Anleitung).
Mit den Tasten ▼/▲ kann der passende Ort im ausgewählten Land eingestellt werden.
Einstell-Funktion verlassen: Die Taste
Danach erscheint wieder die Normalanzeige. Wenn Wettervorhersagen vorhanden sind, erscheinen diese
jetzt in der Anzeige. Der gewünschte Ort kann jederzeit verändert werden. Das Mete-On 3 hält im Speicher immer alle empfangenen Daten bereit.
drücken.
drücken.
6. Bedienung des Gerätes
6.1 Anzeige-Optionen im INFO-FENSTER
Taste für ca. 3 Sekunden gedrückt halten (bis ein kurzes akustisches Signal ertönt).
Nach jedem solchen Drücken kriegen Sie sequentiell folgende Infos dargestellt:
- laufende Sekunden (Grundeinstellung)
- Datum («DATE») im Format Tag/Monat
- Tag der Woche (gemäss der ausgewählten Sprache, siehe Kapitel 5.1)
- Ausgewählter Ort («CITY»)
- Niederschlagswahrscheinlichkeit («RAIN») in % (sind noch keine Daten vorhanden, erscheinen Striche
vor dem % Zeichen)
6.2 Anzeige Optionen im WETTER FENSTER
• Wetter- und Temperaturvorhersagen
Hier werden die Vorhersagen und die im Gerät gemessene Temperatur angezeigt.
Mit den Tasten
umgeschaltet.
18
18
und wird zwischen den möglichen Anzeigen
Page 19

Umschalten der Anzeige zwischen der Wetter-Vorhersage Tag («DAY») und
Nacht («NIGHT»)
Umschalten zwischen der Temperatur-Vorhersage («FORECAST») für den mit obi ger Taste gewählten Zeitraum (Tag/Nacht) und der Raumtemperatur («INDOOR»).
Die Anzeige ist in °C.
Zusätzlich zu dieser manuellen Anwahl wird eine eingebaute Logik zu vorgegeben Zeiten die gültige
Vorhersage in die Anzeige setzen:
03:00 Die Vorhersage Tag («DAY») wird in die Anzeige gestellt
18:00 Die Vorhersage Nacht («NIGHT») wird in die Anzeige gestellt
Achtung: Sind noch keine Wetter-Daten vorhanden, erscheinen Striche bei der Anzeige
der Vorhersage-Temperatur («FORECAST»). Als Vorhersage werden alternierend 4 verschiedene Symbole angezeigt. Wann erste Wetterdaten empfangen werden, fi nden Sie
im Kapitel 2 beschrieben!
Die Wettervorhersage wird mittels den hier aufgeführten 15 verschiedenen Piktogrammen angezeigt. Die
Vorhersage «sonnig» hat in der Nacht die Bedeutung «klar».
Bedeutung
Bedeutung
Tag Nacht
Tag Nacht
Bedeutung
Tag Nacht
sonnig
leicht
bewölkt
vorwiegend
bewölkt
bedeckt
Hochnebel
Nebel
Regenschauer
leichter
Regen
starker
Regen
Frontengewitter
Wärmegewitter
Schneeregenschauer
Schneeschauer
Schneeregen
Schneefall
Die Vorhersagen werden durch professionelle Meteorologen im Meteotime Verbund täglich neu produziert. Die Verlässlichkeit entspricht daher immer dem neuesten Stand der Technik und dem neusten Stand
der verfügbaren Wettermodelle.
• Vorhersage von speziell
zu beachtenden
Wettersituationen
Dieses Zeichen bedeutet
Sturm oder böiger Wind
19
19
Page 20

6.3 Wecker-Funktion
Die Weckerfunktion wird über folgende Tasten bedient:
Kurzes einmaliges Drücken: Die Weckzeit blinkt und kann nun über die Tasten ▼/▲
eingestellt werden. Mit jedem drücken der ▼/▲ Tasten, wird die Weckzeit um 1 Minute erhöht resp. reduziert. Wird die entsprechende Taste gedrückt gehalten, verändert
sich die Weckzeit rasch. Nach 10 Sekunden wird in 10 Minuten Schritten vor/rückwärts
gesprungen. Sobald die Weckzeit verändert wird, ist der Weckalarm aktiviert (das Piktogramm der Glocke erscheint links der eingestellten Weckzeit)
Diese Taste kann links und rechts der SNOOZE Taste gedrückt werden. Die Funktion
ist dabei identisch.
Kurzes Drücken: Ein aktiver Alarm (während des Wecktones oder während der
SNOOZE Zeit) schaltet den Alarm für 24 Stunden aus
Langes Drücken (ca. 3 Sekunden gedrückt halten bis ein kurzes akustisches Signal
ertönt): Der Wecker wird ein- resp. ausgeschaltet (das Piktogramm der Glocke erscheint links der eingestellten Weckzeit wenn aktiviert oder erlischt wenn deaktiviert).
Diese Taste hat 3 Funktionen:
1) Kurzes Drücken: Das Hintergrundlicht wird eingeschaltet (siehe Kap. 6.4)
2) Kurzes Drücken: Bei aktivem Alarm wird der Snooze Zyklus gestartet
In Kapitel 5.1 wird die Anpassung der SNOOZE Zeit beschrieben. Zur Auswahl
stehen folgende Zeiten: 4 Minuten, 8 Minuten, 12 Minuten.
3) Langes Drücken (≥ 3 Sekunden): Auswahl der Anzeige Option im Info Fenster siehe
Kap. 6.1)
Ein aktiver Weckalarm löst neben dem akustischen Ton auch ein blinken der SNOOZE Taste aus (erlaubt
ein einfaches Finden des Gerätes in einem dunklen Raum). Das akustische Signal hat folgenden Ablauf:
Erster Weckton zur eingegeben Zeit: 2 Minuten total, in 4 Stufen
Stufe 1: Langsam und sanft Stufe 3: Mittelschnell und laut
Stufe 2: Langsam und laut Stufe 4: Schnell und laut
Wird innerhalb der 2 Minuten die Taste SNOOZE nicht gedrückt, schaltet sich der Wecker automatisch bis
zum folgenden Tag aus («24h OFF»)
Im Falle des über die Taste «SNOOZE» aktivierten SNOOZE Zyklus, wird der Weckton
nach Ablauf der Snooze Zeit wieder aktiviert. Aber nun direkt auf der Stufe 4!
Während eines Snooze Zyklus blinkt die Glocke in der Anzeige. In dieser Zeit kann am
Mete-On 3 keine Einstellung vorgenommen werden. Dazu muss der SNOOZE Zyklus
über die Taste «Glocke» unterbrochen werden.
6.4 Beleuchtung
20
20
Mit dieser Taste wird die Anzeige während ca. 5 Sekunden
beleuchtet. Diese Taste kann jederzeit, auch während den Einstellungen, wiederholt gedrückt werden. Während der Weckzeiteinstellung bleibt die Anzeigenbeleuchtung an, wenn diese
einmal akitiviert wurde und innerhalb der 5 Sekunden eine
Einstellung mit den Tasten ▼/▲ vorgenommen wird.
Page 21

7. Funktion TEST / Das Meteotime Symbol
Wie in der Broschüre «Personal Meteo Centre PMC Important» beschrieben, dient die Funktion
«TEST» dazu, einen Ort zu fi nden, wo das Gerät einen guten Empfang hat. Während dieses Tests wird
jede einzelne übertragene Daten-Einheit geprüft und für gut oder schlecht befunden.
Diese Funktion wird mit der Tasten-Kombination
Gehen Sie folgendermassen vor:
1) Drücken Sie die beiden Tasten zusammen und halten Sie diese für ca. 3 Sekunden gedrückt bis auf der
Anzeige im INFO FENSTER «TEST» erscheint.
2) Links unten auf der Anzeige sehen Sie das Meteotime Symbol. Das hat, solange der Test läuft (=TEST
im Infofenster), folgende Bedeutung:
Blinkend: Der Test läuft, der Empfang ist gut (an dieser Stelle können Sie das Gerät
belassen)
Blinkend: Der Test läuft, Empfang schlecht (suchen Sie weiter einen besseren Platz)
3) Halten Sie das Gerät während des Test aufrecht (wie Sie es auf einem Tisch hinstellen würden) und
suchen Sie in Ihrem Raum einen Platz, wo das Meteotime-Symbol ganz erscheint. Halten Sie unbedingt
den nötigen Abstand zu möglichen Störquellen (wie in der PMC Broschüre beschrieben).
4) Der Test dauert ca. 1 Minute. Sie können den Test mittels einer der beiden Tasten
jederzeit abbrechen.
Wenn Sie nach Abschluss des Tests das Gerät an einem anderen Ort aufstellen möchten, sei es auch nur
in einer anderen Ausrichtung, empfehlen wir Ihnen, den Test wieder zu machen.
Das METEOTIME Symbol
zu bewerten. Während des Empfangs der relevanten Daten in der Nacht, müssen mindestens 75% der
Daten gut empfangen werden. Damit erscheint das Symbol über den Tag vollständig. Ist dies nicht der
Fall, ist das Symbol «leer»:
Wenn während des Tages, auch gleich nach der Inbetriebnahme, die Funktion TEST gestartet wird und der
Empfang als gut beurteilt wird, erscheint das METEOTIME Symbol vollständig und bleibt nach Abschluss
der Funktion TEST auch so stehen (bis die Taste
Gerade nach der ersten Inbetriebnahme heisst das aber nicht, dass bereits auch die Wetterdaten empfangen wurden. Das passiert erst nachts wie in Kapitel 2 beschrieben. Erst nach einem solchen Empfang sagt
das Symbol aus, ob mindestens 75% der Empfänge gut waren oder nicht.
dient im Normalbetrieb dazu, die Qualität des Empfangs der Wetterdaten
und gestartet.
oder
gedrückt wird).
8. Batterien
Das Mete-On 3 empfängt in der Nacht dauernd um eine lückenlose Darstellung der Vorhersagen aller
Regionen zu gewährleisten. Trotzdem hat das Gerät eine hohe Batterielebensdauer von ca. 12 Monaten.
Beachten Sie aber folgendes:
- Die Batterielebensdauer hängt auch davon ab, wie oft Sie die Hintergrundbeleuchtung gebrauchen. Eine
regelmässige und wiederholte Benutzung des Hintergrundlichts verkürzt die Batterielebenszeit.
- Der verwendete Batterie-Typ hat grossen Einfl uss auf die Lebenszeit. Verwenden Sie deshalb nur Batte-
rien des Typs «Alkaline» oder «Lithium», andere können merkbar kürzere Lebenszeiten haben!
21
21
Page 22

- Schwache zu ersetzende Batterien kündigen sich durch einen schwächer werdenden Kontrast der LCD
an. Auch zunehmende Probleme beim Datenempfang können eine Ursache in schwachen Batterien
haben. Wechseln Sie deshalb Batterien bei solchen schwer lesbaren Anzeigen sofort aus.
- Während eines Batteriewechsels gehen alle Daten und Einstellungen verloren.
9. Weitere Infos zum System «METEOTIME»
Mehr Infos zum System fi nden Sie auf dem Internet unter www.meteotime.com
10. Mögliche Fehler, deren Ursache und Behebung
PROBLEM
• keine richtige Uhrzeit und
Datum in der Anzeige
• das Meteotime-Symbol im
Statusbereich ist nicht voll
angezeigt;
• die Wetterprognosen sind
lückenhaft oder nicht
vorhanden
• am Funkturm
fehlen die Kreise
• der Kontrast der Anzeige
nimmt ab oder
ist schlecht.
• das Vorhersage Pikto gramm alterniert dauernd,
in der Vorhersage Tempe ratur hat es nur Striche.
Trotzdem ist das Meteo time Symbbol voll an
URSACHE
Der Funkempfang vom
Mete-On 3 ist gestört.
Der Funkempfang
vom Mete-On 3 war
in der Nacht gestört
und weniger als 75%
der empfangenen
Daten sind korrekt
Die Uhrzeit konnte
innerhalb der letzten
12 Std. nicht aktualisiert werden.
Die Batterien sind
verbraucht.
Im normalen Betrieb:
Die betroffenen Wetterdaten konnten seit
2 Tagen nicht empfangen werden.
Nach der ersten
Inbetriebnahme oder
dem Batteriewechsel
BEHEBUNG
Der Aufstellungsort der Mete-On 3 ist ungeeignet.
Finden Sie einen Aufstellungsort, bei dem der
Funkempfang nicht gestört ist.
Benutzen Sie die Funktion «TEST» aus der
Bedienungsanleitung.
An dem Aufstellungsort des Mete-On 3 gibt es
elektrische Störungen oder der Empfang ist zu
schwach.
Benutzen Sie die Funktion «TEST» aus der
Bedienungsanleitung, um einen günstigeren Aufstellungsort zu fi nden oder das störende Gerät zu
entfernen. Da die Störung möglicherweise nur
Nachts vorkommt, suchen Sie vorsichtshalber
gleich einen anderen Ort. Eventuell reicht auch
ein Drehen des Gerätes um 30-90°.
An dem Aufstellungsort des Mete-On 3 ist der
Empfang gestört.
Benutzen Sie die Funktion «TEST» aus der Bedienungsanleitung, um einen günstigeren Aufstellungsort zu fi nden.
Austausch der Batterien
(2x Batterie LR6 AA - Alkaline oder Lithium)
Bei dieser Empfangsstörung handelt es sich eventuell um eine zeitweise Störung, bei häufi gerem
Auftreten sollte ein günstigerer Aufstellungsort
gefunden werden
Es wurden noch keine Daten empfangen.
Warten Sie die Nacht ab (siehe Kap. 2)
22
22
Page 23

Notice d’utilisation METE-ON 3
Sommaire
Introduction Page 24
1. Vérifi cation des accessoires fournis Page 24
2. Informations générales sur Mete-On 3 Page 24
3. Défi nir le lieu d’installation Page 26
4. Mise en service de l’appareil Page 26
5. Réglages de base du Mete-On 3 Page 27
5.1 Fuseau horaire / Réglage de la langue/ Heure Snooze Page 27
5.2 Régler le lieu d’affi chage Page 28
6. Manipulation de l’appareil Page 28
6.1 Options d’affi chage dans la FENÊTRE INFO Page 28
6.2 Options d’affi chage dans la FENÊTRE MÉTÉO Page 29
6.3 Fonction réveil Page 30
6.4 Éclairage Page 31
7. Fonction TEST / Le symbole Meteotime
8. Piles Page 32
9. Autres infos sur le système «METEOTIME» Page 32
10. Erreurs possibles, leurs causes et suppression Page 32
Page 31
23
23
Page 24

Introduction
Avec Mete-On 3 vous tenez entre les mains une véritable nouveauté mondiale! En plus du
Mete-On 1 d’Irox, lors de l’impression de cette notice, le Mete-On 3 est devenu le deuxième
appareil possédant la fonction METEOTIME!
La mise en service et le fonctionnement nécessitent donc un nouveau comportement. Pour
cette raison, prenez votre temps et pour la mise en service de l’appareil, procédez comme
suit:
1- Lisez impérativement toute la brochure «Personal Meteo Centre PMC Important»
2- Faites les réglages de base comme décrit dans cette notice
3- Effectuez le «TEST»!
Si vous suivez ces étapes avec précision, le Mete-On 3 vous donnera chaque jour fi dèlement en vous
réveillant les prévisions météorologiques pour le jour et la nuit à venir. Le tout, immédiatement, en un
coup d’œil!
Les fonctions décrites dans cette notice peuvent différer de ce qui se trouve dans le programme de l’appareil. Vous pouvez à tout moment télécharger la toute dernière notice sur votre PC en allant sur Internet
à l’adresse (www.irox.com). Numéro de produit de cette notice: IRM03.06.S01
1. Vérifi cation des accessoires fournis
• Mete-On 3 (appareil principal) • Notice d’utilisation (ce document)
• Personal Meteo Centre PMC «Important» • 2 piles LR6 AA (dans l’appareil)
2. Informations générales sur Mete-On 3
Le Mete-On est un produit de grande qualité construit sur la base de la technologie de l’horloge radiopilotée avec comme fonction supplémentaire la réception des données météorologiques Meteotime avec
représentation des prévisions météorologiques pour le jour actuel.
Avec le signal de réveil, vous pouvez, tous les matins, voir les prévisions météorologiques pour la journée
mais aussi pour le soir au moyen d’un des 15 symboles météorologiques. De plus, vous voyez aussi les
températures attendues et les estimations de précipitations pour toute la journée en %.
Ces prévisions météorologiques sont transmises par l’émetteur horaire HBG en Suisse et DCF77 en Allemagne. Le système Meteotime transmet les prévisions météorologiques pour un certain lieu et jour, une
fois par jour.
Les prévisions météorologiques représentées sur Mete-ON 3 sont reçues entre 22h et 4h du
matin (temps universel, en Europe centrale, en hiver + 1 heure et en été + 2 heures). Afi n
de pouvoir lire les premières prévisions météorologiques après la mise en service, il faut
attendre une nuit!
Les nouvelles prévisions météorologiques du jour sont disponibles à partir de 3h du matin.
Les nouvelles prévisions météorologiques de la nuit sont disponibles à partir de 6h du matin
24
24
Page 25

Affi chage (face)
Réception du signal
(HBG ou DCF 77)
Heure de réveil
Fenêtre prevision météo
Symbole Metotime
Touches de commande
Fenêtre horaire
Fenêtre
d´information
Logement des piles, ouvert
25
25
Page 26

3. Défi nir le lieu d’installation
Pour le Mete-On 3, recherchez un lieu d’installation où aucun appareil électrique parasite ne pourra perturber
la réception de l’heure et des données météorologiques.
Vous trouverez plus d’indications sur le lieu d’installation dans la brochure Meteotime «Remarques importantes».
Nous recommandons fortement d’évaluer le lieu d’installation que vous avez choisi avec la fonction «TEST».
Vous trouverez la description de la fonction «TEST» au chapitre 7.
4. Mise en service de l’appareil
L’appareil Mete-On 3 fonctionne sur piles.
Les piles déjà installées lors de la livraison
sont désactivées par des bandes d’isolation.
Pour activer les piles, il faut enlever les bandes d’isolation. Pour ce faire, il faut ouvrir
le logement des piles. Pour ce faire, il faut
tirer vers le bas le couvercle à l’intérieur de
l’appareil.
Enlevez maintenant les bandes d’isolation.
Ensuite, le Mete-On 3 démarre selon la procédure décrite ci-dessous.
Si ce n’était pas le cas, vous devez retirer les
deux piles de l’appareil et les remettre en
place, avec la bonne polarité, au bout d’environ 1 minute.
Démarrage de la procédure du Mete-On 3:
- L’affi chage à segments pleins apparaît un court instant, le bouton Snooze s’allume un court instant et
un court signal acoustique retentit. Ensuite, les secondes commencent à défi ler sur l’affi chage.
- Au bout d’environ 20 secondes, apparaissent la température intérieure et un symbole météorologique
déroulant (4 symboles par alternance). L’horloge commence maintenant à recevoir l’heure. Maintenant,
on peut commencer à effectuer les réglages expliqués dans les chapitres suivants.
La réception de l’heure dure, selon la qualité du signal, de 3 à 10 minutes. Les affi chages suivants apparaissent à gauche à côté de l’heure:
Clignotement cyclique: une réception a lieu et le signal est bon
Affi chage du temps: l’heure est reçue et est synchrone
Aucun affi chage (ou clignote irrégulièrement): la réception de l’heure
est perturbée ou pas possible. Si le symbole n’est pas visible durant une
longue période sur l’écran, alors l’heure n’a pas été compensée depuis
plus de 12 heures avec l’émetteur
HBG ou DCF: indique depuis quel émetteur l’appareil reçoit. Le Mete-On
3 recherche toujours automatiquement le meilleur émetteur
DST L’heure d’été est activée («Daylight Saving Time»). Ce symbole n’apparaît pas en hiver.
26
26
Page 27

5. Réglages de base du Mete-On 3
Le Mete-On 3 possède deux réglages de base qui peuvent être effectués. Ceux-ci sont décrits dans les
chapitres 5.1 et 5.2.
Généralités pour chaque réglage:
Si pendant environ 20 secondes, aucune touche n’est appuyée, les réglages faits sont enregistrés et le
Mete-On 3 quitte automatiquement le mode réglage.
5.1 Fuseau horaire / Réglage de la langue / temps de Snooze
Le mode SET est activé en appuyant et maintenant appuyées (pendant 3 secondes) en même temps les
touches
À chaque segment clignotant, on peut effectuer des réglages:
Fuseau horaire (-11 à +12 heures, déviation de l’heure actuelle en vigueur en Europe centrale)
•
L’heure reçue par les émetteurs horaires HBG et DGF77 est l’heure valable en Europe centrale. Pour l’Europe centrale, vous n’avez donc rien à changer.
Comme indication, vous recevez l’heure actuelle (p. ex. 14:-- lorsque l’heure actuelle est 14:38)
Avec les touches ▼/▲ on peut modifi er la valeur.
Par exemple, pour régler le fuseau horaire en Angleterre (Angleterre = –1 heure), on appuie une fois
sur la touche ▼
Dans l’exemple ci-dessus, 14:-- devient 13:--
Attention: Lorsque vous rentrez un fuseau horaire qui dévie de ± 3 heures par rapport à
l’heure reçue, la synchronisation ainsi que la réception des prévisions météorologiques
sont coupées!
et
Poursuite du réglage: appuyer une fois sur
Réglage de la langue
•
La sélection de la langue de l’affi chage du jour en trois lettres est:
D: Allemand (réglage de base) NL: Hollandais
GB: Anglais I: Italien
F: Français E: Espagnol
Avec les touches ▼/▲ kann die Sprache verändert werden.
Poursuite du réglage: appuyer une fois sur
• Temps de Snooze
Le réveil possède une fonction SNOOZE (fonction de grasse matinée ou de répétition de réveil au bout de
x minutes, à condition que durant le signal acoustique, la touche SNOOZE ait été appuyée). Ce temps de
SNOOZE x se règle dans ce menu: 4, 8 ou 12 minutes.
Avec les touches ▼/▲ on peut modifi er le temps de Snooze.
Retour au réglage du fuseau horaire: appuyer une fois sur
Quitter la fonction SET: maintenir appuyée la touche
des jusqu’à ce que l’affi chage normal revienne.
pendant au moins 3 secon-
27
27
Page 28

5.2 Réglage du lieu d’affi chage
Le Mete-On 3 peut affi cher des informations météorologiques de 60 régions d’Europe. Dans l’appareil,
vous trouvez un choix préprogrammé de villes de ces régions.
À la livraison, c’est la région météorologique de Berne/Suisse qui est réglée par défaut. On peut régler
un autre lieu comme suit:
Maintenir appuyée pendant 3 secondes la touche
À chaque segment clignotant, vous pouvez effectuer les réglages suivants:
Pays (COUNTRY)
•
Vous disposez de 16 pays (à la fi n de cette notice, vous trouverez la liste des lieux programmées dans
le Mete-On 3).
Pour chaque pays, on utilise un code, comme pour les voitures (p. ex. CH pour la Suisse, D pour l’Allemagne, F pour la France etc.)
Avec les touches ▼/▲ on peut sélectionner le pays.
Poursuite du réglage: appuyer une fois sur
Lieu (CITY)
•
Pour chaque pays, vous disposez d’un nombre différent de lieux. Sélectionnez le lieu le plus proche de
votre domicile. Si vous n’êtes pas certain, sur le site Internet www.meteotime.com vous disposez
d’un outil vous permettant de trouver la région correspondant à votre domicile.
Chaque lieu est affi ché avec une abréviation à 4 lettres (Cf. liste à la fi n de cette notice).
Avec les touches ▼/▲ on peut régler le lieu adapté au pays sélectionné.
Quitter la fonction de réglage: Appuyer sur la touchee
Ensuite apparaît de nouveau l’affi chage normal. S’il y a des prévisions météorologiques, celles-ci appa-
raissent maintenant sur l’écran. Plus d’informations à ce sujet au chapitre 6.2.
Le lieu souhaité peut être modifi é à tout moment. Le Mete-On 3 garde en mémoire toutes les données
reçues.
6. Options d’affi chage dans la FENÊTRE INFO
6.1 Anzeige-Optionen im INFO-FENSTER
Maintenir appuyée la touche pendant environ 3 secondes (jusqu’à ce qu’un court
signal sonore retentisse).
Après chaque action de ce type, vous obtenez successivement les informations suivantes:
- les secondes (réglage de base)
- la date («DATE») en format jour/mois
- le jour de la semaine (selon la langue sélectionnée, Cf. chapitre 5.1)
- le lieu sélectionné («CITY»)
- la probabilité de précipitations («RAIN») en % (si aucune donnée n’existe, des traits apparaissent devant
le signe %)
28
28
Page 29

6.2 Options d’affi chage dans la FENÊTRE MÉTÉO
• Prévisions météorologiques et de température
Ici sont affi chées les prévisions météorologiques et la température mesurée dans l’appareil.
Avec les touches
sibles.
Commutation de l’affi chage entre les prévisions météorologiques du jour («DAY»)
et de la nuit («NIGHT»)
Commutation entre les prévisions de température («FORECAST») pour la période
sélectionnée avec la touche ci-dessus (jour/nuit) et la température ambiante
(«INDOOR»). L’affi chage est en °C.
En plus de cette sélection manuelle, une logique installée permet d’affi cher la prévision valable aux heures données: 03:00 Affi chage de la prévision de jour («DAY»)
18:00 Affi chage de la prévision de la nuit («NIGHT»)
et on peut commuter entre les affi chages pos-
Attention: s’il n’existe encore aucune donnée météorologique, des barres apparaissent
dans l’affi chage de la prévision de température (
«FORECAST»). Pour la prévision, 4 sym-
boles différents s’alternent. Dans le chapitre 2 est expliqué le moment où sont reçues les
données météorologiques!
Les prévisions météorologiques sont affi chées au moyen de 15 pictogrammes différents. La prévision
«Ensoleillé» signifi e «Clair» pour la prévision de nuit.
Signifi -
Signifi -
Jour Nuit
cation
Ensoleillé
(Clair pour
la nuit)
Légèrement
nuageux
Fortement
nuageux
Couvert
Stratus
Jour Nuit
cation
Bouillard
Averses
Pluies
légères
Fortes
pluies
Fronts
orageux
Signifi -
Jour Nuit
cation
Orages de
chaleur
Averses
de neige
fondue
Averses
de neige
Pluies de
neige
fondue
Chutes
de neige
Les prévisions météorologiques sont produites chaque jour par des météorologues professionnels de
l’alliance Meteotime. Pour cette raison, la fi abilité correspond toujours au dernier état de la technique et
au dernier état des modèles météorologiques disponibles.
29
29
Page 30

• prévisions météorologiques
des situations météorologiques
à prendre spécialement en compte
Ce symbole indique «tempête»
ou «rafales violentes»
6.3 Fonction de réveil
La fonction de réveil est actionnée par les touches suivantes
Appuyer une fois rapidement: l’heure du réveil clignote et peut être réglée avec les
touches ▼/▲. À chaque fois que vous appuyez sur les touches ▼/▲ vous augmentez
ou réduisez l’heure du réveil d’une minute. Si vous maintenez la touche correspondante appuyée, l’heure du réveil change rapidement. Si vous maintenez la touche pendant
10 secondes, l’heure saute par pas de 10 minutes, en avant/en arrière.
Dès que l’heure de réveil a été modifi ée, l’alarme de réveil est activée (le pictogramme
de la Cloche apparaît à gauche de l’heure de réveille réglée).
Cette touche peut être appuyée à gauche ou à droite de la touche SNOOZE. La fonction
est identique.
Appuyer un court instant pendant le signal ou pendant le temps de SNOOZE, cette
opération désactive l’alarme pendant 24 heures
Appuyer longtemps (maintenir environ 3 secondes appuyé jusqu’à ce qu’un court
signal sonore retentisse): le réveil est activé/désactivé (le pictogramme de la Cloche
apparaît à gauche de l’heure de réveil lorsqu’elle est activée et s’efface lorsqu’elle est
désactivée)
Cette touche a 3 fonctions:
1) Appuyer un court instant: le rétro-éclairage est activé (Cf. chapitre 6.4) et...
2) ...si l’alarme est activée, le cycle de Snooze est démarré
Dans le chapitre 5.1 on trouve l’explication du réglage du temps de SNOOZE. Au
choix, il y a les 4 temps suivants: 4 minutes, 8 minutes, 12 minutes.
3) Appuyer longtemps (plus de 3 secondes): sélection de l’affi chage de l’option dans
la fenêtre d’info (Cf. chapitre 6.1)
Une alarme de réveil déclenche, en plus d’une tonalité, un clignotement de la touche SNOOZE (permet de
trouver facilement l’appareil dans la pièce sombre). Le signal sonore se déroule comme suit:
Première tonalité de réveil à l’heure programmée: 2 minutes au total, en 4 niveaux
Niveau 1: lentement et doucement Niveau 3: assez rapidement et fort
Niveau 2: lentement et fort Niveau 4: rapidement et fort
Si, dans les 2 minutes, la touche SNOOZE n’est pas appuyée, le réveil s’arrête automatiquement jusqu‘au
jour suivant («24h OFF»)
Si le cycle SNOOZE est activé par la touche «SNOOZE», la tonalité de réveil est de nouveau activée lorsque le temps de Snooze est écoulé. Et directement sur le niveau 4!
Durant un cycle de Snooze, la cloche clignote dans l’affi chage. Durant cette période,
on ne peut effectuer aucun réglage sur Mete-On 3. Pour ce faire, il faut interrompre le
cycle SNOOZE avec la touche (y).
30
30
Page 31

6.4 Éclairage
Avec cette touche, l’affi chage est éclairé durant environ 5 secondes. Cette touche peut être de nouveau appuyée à tout
moment durant les réglages. Durant le réglage de l’heure de
réveil, l’éclairage d’affi chage reste allumé si celui-ci a été activé une fois et si dans les 5 secondes un réglage a été effectué
avec les touches ▼/▲.
7. Fonction TEST / Le symbole Meteotime
Comme ceci est décrit dans la brochure «Personal Meteo Centre PMC Important» «, la fonction
«TEST» sert à trouver un lieu où l’appareil a une bonne réception. Durant ce test, chaque unité de données
transmises est contrôlée et évaluée comme bonne ou mauvaise.
Cette fonction est démarrée avec la combinaison de touches
Procédez de la manière suivante:
1) Appuyez sur les deux touches en même temps et maintenez-les appuyées pendant environ 3 secondes
jusqu’à ce que «TEST» apparaisse dans l’affi chage de la FENÊTRE INFO.
2) À gauche, en bas de l’affi chage, vous voyez le symbole Meteotime. Tant que le test fonctionne (= TEST
dans la fenêtre Info) ceci a la signifi cation suivante:
clignotant: le test fonctionne, la réception est bonne (vous pouvez laisser l’appareil
à cet endroit)
clignotant: le test fonctionne, la réception est mauvaise (cherchez un meilleur endroit)
3) Durant le test, maintenez l’appareil droit (comme s’il était posé sur une table) et cherchez dans votre
pièce un endroit où le symbole Meteotime apparaît en entier. Gardez impérativement suffi samment de
distance par rapport aux sources parasites (comme décrit dans la brochure PMC).
4) Le test dure environ 1minute. Vous pouvez interrompre à tout moment le test avec une des deux touches
et
À la fi n du test, si vous souhaitez placer l’appareil à un autre endroit, même dans une autre direction,
nous vous recommandons de recommencer le test.
Le symbole METEOTIME
météorologiques. Durant la réception des données importantes la nuit, il faut qu’au moins 75% des
données soient bien reçues. Ensuite, le symbole apparaît en entier durant tout le jour. Si ce n’est pas le
cas, alors le symbole est «vide»:
Si, pendant la journée, même immédiatement après la mise en service, la fonction TEST est démarrée
et que la réception est bonne, apparaît alors le symbole METEOTIME en entier il reste ainsi après achèvement de la fonction TEST. Après la première mise en service, ceci ne signifi e pas que les prévisions
météorologiques sont déjà reçues. Ceci se passe seulement la nuit, comme décrit dans le chapitre 2. Ce
n’est qu’après une telle réception que le symbole indique si au moins 75% des réceptions étaient bonnes
ou pas.
ou
sert, en mode normal, à évaluer la qualité de la réception des données
31
31
Page 32

8. Piles
Le Mete-On 3 reçoit en permanence la nuit pour garantir une représentation sans faille des prévisions
météorologiques de toutes les régions. Malgré tout, l’appareil a une longue durée de vie des piles d’environ 12 mois.
Veuillez tenir compte des éléments suivants:
- La durée de vie des piles dépend de la fréquence d’utilisation du rétro-éclairage. Une utilisation régu lière et répétée du rétro-éclairage raccourcit la durée de vie des piles.
- Le type de piles utilisé a une grande infl uence sur la durée de vie. Pour cette raison, veuillez n’utiliser
que des piles de type «alcalin» ou «lithium», d’autres pourraient avoir une durée de vie beaucoup plus
courte!
- Lorsque les piles sont faibles et doivent être remplacées, ceci se manifeste par une faiblesse de contraste
de l’écran LCD. Des problèmes fréquents de réception des données peuvent aussi être dus à des piles
faibles. Pour cette raison, si la lecture est diffi cile, veuillez remplacer immédiatement les piles.
- Durant le changement de piles, toutes les données et réglages sont perdus.
9. Autres informations sur le système «METEOTIME»
Vous trouverez plus d’informations sur le système sur le site Internet www.meteotime.com
10. Erreurs possibles, leurs causes et suppression
ERREUR
• l‘heure et la date affi chées
sont incorrectes
• le symbole Meteotime
dans le secteur d‘état
n‘est pas affi ché en entier;
• les prévisions météoro logiques ne sont pas
complètes ou
n‘existent pas
• sur la tour
d‘émission
les cercles
manquent
CAUSE
La réception radio de
Mete-On 3 est
perturbée
La réception radio de
Mete-On 3 a été
perturbée durant la
nuit et moins de 75%
des données reçues
sont correctes.
L‘heure n‘a pas pu être
actualisée durant
les 12 dernières heures
SUPPRESSION
Le lieu d‘implantation de Mete-On 3 ne convient
pas.
Trouvez un lieu d‘installation où la réception du
signal n‘est pas perturbée.
Utilisez la fonction «TEST» décrite dans la
notice d‘utilisation
Sur le lieu d‘installation de Mete-On 3 il y a des
perturbations électriques ou bien la réception est
trop faible
Utilisez la fonction «TEST» comme décrit dans la
notice d‘utilisation pour trouver un meilleur
lieu d‘installation ou bien enlever l‘appareil
qui perturbe. Comme la panne ne se produit que
la nuit, recherchez par précaution un autre
endroit. Éventuellement, il suffi t parfois de pivoter
l‘appareil de 30 à 90°.
Sur le lieu d‘installation du Mete-On 3, la
réception est perturbée.
Utilisez la fonction «TEST» de la notice d‘utilisation pour trouver un lieu d‘installation favorable
32
32
Page 33

10. Erreurs possibles, leurs causes et suppression
ERREUR
• le contraste de l‘affi chage
diminue et s‘affaiblit
• Le pictogramme de
prévision alterne sans
cesse, dans la prévision
de température, il n‘y a
que des traits, malgré
tout le symbole Meteo time est entier
Notes
CAUSE
Les piles sont usées.
En mode normal:
Les données météo
concernées ne peuvent
pas être reçues depuis
2 jours.
Après la première mise
en service ou après le
remplacement des piles
SUPPRESSION
Remplacement des piles
(2 piles LR6 AA - alcalines ou au lithium)
Cette panne de réception est éventuellement une
panne provisoire, si elle survient souvent
il faudra chercher un lieu d‘installation plus
favorable
Aucune donnée n‘a été reçue.
Attendez la nuit (Cf. chapitre 2
33
33
Page 34

Istruzioni per l‘uso METE-ON 3
Indice
Introduzione Pagina 35
1. Verifi ca degli accessori forniti Pagina 35
2. Informazioni generali su Mete-ON 3 Pagina 35
3. Luogo di posizionamento Pagina 37
4. Messa in funzione dell‘apparecchio Pagina 37
5. Impostazioni di base di Mete-On 3 Pagina 38
5.1 Fuso / Impostazione della lingua / Tempo della funzione Snooze Pagina 38
5.2 Impostazione della località indicata Pagina 39
6. Uso dell‘apparecchio Pagina 39
6.1 Opzioni di indicazione nella FINESTRA INFORMAZIONI Pagina 39
6.2 Opzioni di indicazione nella FINESTRA TEMPO Pagina 39
6.3 Funzione sveglia Pagina 40
6.4 Illuminazione Pagina 42
7. Funzione TEST / L‘icona Meteotime
8. Batterie Pagina 43
9. Ulteriori informazioni sul sistema «METEOTIME» Pagina 43
10. Possibili errori: cause e soluzioni Pagina 43
34
34
Pagina 42
Page 35

Introduzione
Mete-On 3 rappresenta un‘autentica novità a livello mondiale! Al momento della stampa,
Mete-On 3 è il secondo apparecchio, dopo Mete-On 1 di Irox, a essere dotato della funzione
METEOTIME!
La messa in funzione e il relativo funzionamento richiedono dunque un approccio altrettanto
nuovo. Procedere quindi con la dovuta attenzione, mettendo in funzione l‘apparecchio come
descritto di seguito:
1- È importante leggere l‘opuscolo «Personal Meteo Centre PMC Important».
2- Eseguire le impostazioni di base come descritto in queste istruzioni.
3- Eseguire il «TEST»!
Seguendo queste istruzioni, ogni giorno Mete-On 3 fornirà con la sveglia una previsione meteorologia
affi dabile per il nuovo giorno e la notte. Tutto ciò subito, in modo chiaro e schematico!
Le funzioni descritte in queste istruzioni possono differire dal programma contenuto nell‘apparecchio.
La versione più aggiornata delle istruzioni può essere scaricata da Internet (www.irox.com) in qualsiasi
momento. Codice prodotto di queste istruzioni: IRM03.06.S01
1. Verifi ca degli accessori forniti
• Mete-On 3 (apparecchio principale) • Istruzioni per l‘uso (questo documento)
• Personal Meteo Centre PMC «Important» • 2 batterie LR6 AA (nell‘apparecchio)
2. Informazioni generali su Mete-On 3
Mete-On 3 è un prodotto avanzato sviluppato sulla base della tecnologia degli orologi radiocontrollati,
con la funzione aggiuntiva Meteotime che consente la ricezione dei dati meteorologici con la visualizzazione delle previsioni per il giorno corrente.
La mattina, con la sveglia, è possibile vedere contemporaneamente la previsione meteo sia per il giorno
che per la sera, rappresentata con 15 icone. Inoltre vengono visualizzate le temperature previste e la
probabilità di precipitazioni in % per l‘intero giorno.
Queste previsioni meteo sono trasmesse dal trasmettitore del segnale orario HBG in Svizzera e DCF77 in
Germania. Il sistema Meteotime trasmette una volta al giorno le previsioni meteo per una determinata
località e un determinato giorno.
Le previsioni meteo visualizzate da Mete-ON 3 sono ricevute tra le ore 22:00 e le 4:00 del
mattino (tempo UTC, nell‘Europa centrale in inverno è +1 ora e in estate +2 ore). Dunque,
per poter leggere le prime previsioni meteorologiche dopo la messa in funzione, è necessario lasciar trascorrere una notte!
Le nuove previsioni meteo diurne sono disponibili dalle ore 3:00 del mattino.
Le nuove previsioni meteo notturne sono disponibili dalle ore 6:00 del mattino.
35
35
Page 36

Display (lato anteriore)
Ricezione del segnale
(HBG o DCF 77)
Ora sveglia
Finestra previsioni meteo
Simbolo Metotime
Tasti di comando
Finestra oraria
Finestra
informazioni
Vano batterie aperto
36
36
Page 37

3. Luogo di posizionamento
Mete-On 3 deve essere posizionato in un luogo in cui non vi sono apparecchi elettrici che potrebbero pregiudicare la ricezione del segnale orario e dei dati meteorologici.
Per ulteriori indicazioni sul luogo di posizionamento consultare l‘opuscolo Meteotime «Indicazioni importanti». Si raccomanda vivamente di verifi care il luogo di posizionamento mediante la funzione «TEST».
La descrizione della funzione «TEST» è riportata nel capitolo 7.
4. Messa in funzione dell‘apparecchio
L‘apparecchio Mete-On 3 è alimentato a batteria.
Le batterie già inserite al momento della consegna sono disattivate mediante strisce isolanti. Per attivare le batterie, rimuovere le strisce
isolanti. A tale scopo, aprire il vano batterie.
Spingere verso il basso il coperchio nel lato
interno dell‘apparecchio.
Rimuovere le strisce isolanti. Successivamente,
Mete-On 3 si avvia secondo la procedura di
seguito descritta.
Qualora ciò non si verifi casse, in tal caso,
rimuovere entrambe le batterie dall‘apparecchio, attendere circa un minuto e quindi
inserirle nuovamente nell‘apparecchio con la
polarità corretta.
Procedura di avviamento di Mete-On 3:
• Il segmento pieno viene visualizzato brevemente, il tasto Snooze si accende brevemente e si percepisce
un breve segnale acustico. Successivamente sul display iniziano a scorrere i secondi.
• Dopo circa 10 secondi compare la temperatura ambiente rilevata e un‘icona meteorologica variabile (si
alternano 4 icone). Ora l‘orologio inizia a ricevere il segnale orario. A questo punto è possibile iniziare
a eseguire le impostazioni descritte nei capitoli successivi.
La ricezione del segnale orario dura dai 3 ai 10 minuti, a seconda della qualità del segnale orario. A
sinistra, accanto all‘ora, vengono visualizzate le seguenti indicazioni:
Indicazione lampeggiante ciclica: la ricezione è in corso e il segnale è buono
Visualizzazione fi ssa: l‘ora è stata ricevuta e sincronizzata
Nessuna visualizzazione (o lampeggia in modo irregolare): la ricezione
del segnale orario è disturbata o impossibile. Qualora l‘icona non sia
presente sul display per lungo tempo, signifi ca che l‘ora non è stata sincronizzata con il trasmettitore per più di 12 ore
HBG o DCF: indica il trasmettitore da cui l‘apparecchio riceve il segnale.
Mete-On 3 ricerca automaticamente il trasmettitore migliore
DST è attiva l‘ora legale («Daylight Saving Time»). Questa indicazione
non appare in inverno.
37
37
Page 38

5. Impostazioni di base di Mete-On 3
Mete-On 3 è dotato di due impostazioni di base, descritte nei seguenti capitoli 5.1 e 5.2.
In generale, per ogni impostazione vale quanto segue:
se per circa 20 secondi non viene premuto nessun tasto, saranno registrate le impostazioni eseguite e
Mete-On 3 esce automaticamente dalla modalità impostazione.
5.1
Fuso / Impostazione della lingua / Tempo della funzione Snooze
La modalità SET si attiva tenendo premuti (3 secondi) contemporaneamente i tasti
È possibile eseguire le impostazioni per il segmento che lampeggia:
Fuso (da -11 a +12 ore, differenza dall‘ora valida nell‘Europa centrale)
•
Il segnale orario ricevuto dai trasmettitori HBG e DCF77 è l‘ora valida nell‘Europa centrale.
Dunque, per l‘Europa centrale non deve essere eseguita alcuna impostazione.
Viene indicata come modello l‘ora attuale (es. 14:-- se sono le 14:38)
L‘indicazione può essere modifi cata con i tasti ▼/▲.
Per esempio, per impostare il fuso per l‘Inghilterra (Inghilterra = –1 ora.), premere una volta il tasto ▼
Nell‘esempio precedente, 14:-- diventerà 13:-- .
Attenzione: inserendo un fuso con una differenza oraria maggiore di ± 3 ore rispetto al
segnale orario ricevuto, la sincronizzazione e la ricezione delle previsioni meteorologiche
saranno disattivate!
und
Per passare all‘impostazione successiva: premere una volta
Impostazione della lingua
•
L‘indicazione del giorno con tre lettere può essere visualizzata nelle seguenti lingue:
D: tedesco (impostazione di base) NL: olandese
GB: inglese I: italiano
F: francese E: spagnolo
La lingua può essere modificata con i tasti ▼/▲.
Per passare all‘impostazione successiva: premere una volta
Tempo della funzione Snooze
•
La sveglia ha una funzione SNOOZE (ossia la ripetizione della sveglia dopo x minuti, attivata premendo
il tasto SNOOZE durante il segnale acustico della sveglia). Il tempo della funzione SNOOZE può essere
impostato in questo menu: 4, 8 o 12 minuti.
Il tempo della funzione Snooze può essere modifi cato con i tasti ▼/▲.
Tornare all‘impostazione del fuso: premere una volta
Uscire dalla funzione SET: tenere premuto il tasto
comparire nuovamente l‘indicazione normale.
38
38
per almeno 3 secondi fi no a far
Page 39

5.2 Impostazione della località indicata
Mete-On 3 può visualizzare le informazioni meteorologiche di 60 località in Europa. Una lista di città di
queste regioni è già programmata nell‘apparecchio.
Alla consegna, la regione meteorologia programmata è quella di Berna/Svizzera. Per impostare un‘altra
località, procedere come segue:
Tenere premuto (per 3 secondi) il tasto
È possibile eseguire le seguenti impostazioni per il segmento che lampeggia:
Paese (COUNTRY)
•
Sono disponibili 16 paesi (alla fi ne di queste istruzioni è inserito l‘elenco delle località già programmate
in Mete-On 3).
Per ogni paese è utilizzata la relativa sigla automobilistica (es. CH per Svizzera, D per Germania, F per
Francia ecc.)
Il paese può essere selezionato con i tasti
▼/▲ kann das Land ausgewählt werden.
Per passare all‘impostazione successiva: premere una volta
Località (CITY)
•
Per ogni paese sono disponibili diverse località. Selezionare la località più vicina al proprio luogo di
residenza. Se non si è sicuri, sul sito Internet www.meteotime.com è disponibile una funzione per
conoscere la regione valida per la propria località.
Ogni località è indicata con un‘abbreviazione di 4 lettere (vedere l‘elenco alla fi ne di queste istruzioni).
La località del paese impostato può essere selezionata con i tasti ▼/▲.
Uscire dalla funzione impostazione: premere il tasto
Comparirà nuovamente l‘indicazione normale. Se sono disponibili delle previsioni meteorologiche, queste
compariranno sul display. Ulteriori informazioni nel capitolo 6.2 .
La località desiderata può essere modifi cata in qualsiasi momento. Mete-On 3 memorizza sempre tutti i
dati ricevuti, rendendoli immediatamente disponibili.
6. Uso dell‘apparecchio
6.1 Opzioni di indicazione nella FINESTRA INFORMAZIONI
Tasto tenere premuto per circa 3 secondi (fi no ad udire un breve segnale acustico).
Dopo ogni pressione saranno visualizzate in sequenza le seguenti informazioni:
- secondi correnti (impostazione di base)
- data («DATE») nel formato giorno/mese
- giorno della settimana (nella lingua selezionata, vedere il capitolo 5.1)
- località selezionata («CITY»)
- probabilità di precipitazioni («RAIN») in % (se ancora i dati non sono disponibili, il segno % è preceduto
da lineette)
39
39
Page 40

6.2 Opzioni di indicazione nella FINESTRA TEMPO
• Previsioni meteorologiche e delle temperature
Qui vengono visualizzate le previsioni e le temperature rilevate nell‘apparecchio.
Con i tasti
Cambio dell‘indicazione tra previsione meteorologica diurna («DAY») e notturna
(«NIGHT»)
Cambio dell‘indicazione della temperatura prevista («FORECAST») per il periodo
Oltre a questa scelta manuale, una funzione logica integrata attiverà la visualizzazione della previsione
valida ad orari indicati: 03:00 viene visualizzata la previsione diurna («DAY»)
18:00 viene visualizzata la previsione notturna («NIGHT»)
Attenzione: se i dati meteorologici non sono ancora disponibili, anziché la temperatura prevista («FORECAST») compariranno delle lineette. La previsione verrà visualizzata alternando
4 diverse icone. Nel capito 2 è descritto quando saranno ricevuti i primi dati meteorologici!
Signifi cato
Giorno Notte
e è possibile passare da un‘indicazione all‘altra.
di tempo selezionato con il tasto precedente (giorno/notte) e della temperatura
ambiente («INDOOR»). L‘indicazione è in °C.
Signifi cato
Giorno Notte
Signifi cato
Giorno Notte
Sole
(limpido
di notte)
Leggermente
nuvoloso
Nuvoloso
Coperto
Strato
Nebbia
Rovescio
Pioggia
leggera
Pioggia
intensa
Temporale
Temporale
di calore
Rovescio
di pioggia
mista
a neve
Precipitazione
nevosa
Pioggia
mista
a neve
Nevicata
Le previsioni sono realizzate e aggiornate quotidianamente da meteorologi professionisti dell‘associazione Meteotime. L‘affi dabilità rispecchia dunque sempre l‘ultima versione tecnologica e gli ultimi prodotti
dei modelli meteorologici disponibili.
40
40
Page 41

• Previsione di situazioni
meteorologiche da
osservare con attenzione
Questo simbolo indica che per la regione
selezionata è prevista tempesta o raffi che di vento.
6.3 Funzione sveglia
La funzione sveglia viene utilizzata mediante i seguenti tasti:
Una breve pressione: lampeggia l‘ora della sveglia, che può essere impostata con i tasti
▼/▲ Ad ogni pressione dei tasti ▼/▲ l‘ora della sveglia aumenta o diminuisce di 1 minu-
to. Tenendo premuto uno dei due tasti, l‘ora aumenta o diminuisce rapidamente. Tenendo premuto il tasto per 10 secondi, l‘ora avanza o arretra con una cadenza di 10 minuti.
Cambiando l‘ora della sveglia, viene attivata la suoneria (a sinistra dell‘ora impostata
della sveglia viene visualizzata l‘icona della campana).
Questo tasto può essere premuto a sinistra o a destra del tasto SNOOZE. La funzione
è identica.
Breve pressione: durante il segnale della sveglia o durante il tempo di SNOOZE,
questa operazione disattiva la suoneria per 24 ore.
Pressione prolungata (tenere premuto circa 3 secondi fi no ad udire un breve segnale acustico): la sveglia viene attivata o disattivata (l‘icona della campana è visualizzata a sinistra dell‘ora della sveglia impostata quando la sveglia è attivata e scompare
quando la sveglia è disattivata)
Questo tasto ha 3 funzioni:
1) breve pressione: viene attivata la retroilluminazione (vedere il capitolo 6.4) e...
2) ...in caso di sveglia attiva viene avviato il ciclo di Snooze
Nel capitolo 5.1 è descritta l‘impostazione del tempo della funzione SNOOZE.
Sono disponibili i seguenti tempi: 4, 8 o 12 minuti.
3) Pressione prolungata (≥ 3 secondi): Selezione dell‘opzione di indicazione nella fi nestra informazioni
(vedere il capitolo 6.1)
Una sveglia attiva, oltre alla suoneria fa scattare anche l‘illuminazione lampeggiante del tasto SNOOZE
(permettendo di trovare facilmente l‘apparecchio in una stanza buia). Il segnale acustico si attiva come
segue:
Prima attivazione della suoneria all‘ora impostata: 2 minuti totali, in 4 fasi
Fase 1: lenta e a volume basso Fase 3: media velocità e a volume alto
Fase 2: lenta e a volume alto Fase 4: veloce e a volume alto
Se il tasto SNOOZE non viene premuto entro i due minuti, la sveglia si disattiva automaticamente fi no al
giorno successivo («24h OFF»)
Nel caso in cui venga attivato il ciclo di SNOOZE mediante il tasto «SNOOZE», la suoneria della sveglia verrà nuovamente attivata al termine del tempo della funzione Snooze.
Ma direttamente alla fase 4!
Durante il ciclo di Snooze sul display lampeggia la campana. In questo periodo non
è possibile eseguire alcuna impostazione su Mete-On 3. A tale scopo è necessario
interrompere il ciclo di SNOOZE con il tasto (y).
41
41
Page 42

6.4 Illuminazione
Con questo tasto è possibile illuminare il display per circa 5 secondi. Questo tasto può essere premuto più volte in qualsiasi
momento, anche durante le impostazioni. Durante l‘impostazione dell‘ora della sveglia, l‘illuminazione del display rimane
accesa se è stata precedentemente attivata e se, entro i 5 secondi, è stata eseguita un‘impostazione con i tasti ▼/▲.
7. Funzione TEST / L‘icona Meteotime
Come descritto nell‘opuscolo «Personal Meteo Centre PMC Important» «, la funzione «TEST» serve
per trovare un luogo in cui l‘apparecchio abbia una buona ricezione. Questo test verifi ca ogni singola
unità dati trasmessa e la classifi ca come buona o scadente.
Questa funzione viene avviata con la combinazione dei tasti
Procedere come segue:
1) Premere entrambi i tasti contemporaneamente e tenerli premuti per circa 3 secondi, fi no a quando sul
display apparirà la FINESTRA INFORMAZIONI «TEST».
2) Sul display in basso a sinistra è presente l‘icona Meteotime. Durante il test questa ha il seguente signifi cato (= TEST nella fi nastra informazioni):
Lampeggiante: il test è in corso, la ricezione è buona (lasciare il dispositivo in questa
posizione)
Lampeggiante: il test è in corso, la ricezione è scadente (cercare una posizione migliore)
3) Durante il test, mantenere l‘apparecchio diritto (come se fosse appoggiato su un piano) e cercare una
posizione nell‘ambiente in cui l‘icona Meteotime appaia completamente. È importante mantenere la
distanza prevista dalle possibili fonti di disturbo (come descritto nell‘opuscolo PMC).
4) Il test dura un minuto circa. Il test può essere interrotto in qualsiasi momento con uno dei due tasti
o
e
Se al termine del test si desidera posizionare l‘apparecchio in un altro luogo, o anche soltanto orientarlo
in un‘altra direzione, si consiglia di eseguire il test nuovamente.
Nel funzionamento normale, l‘icona METEOTIME
dei dati meteorologici. Durante la ricezione notturna dei dati, è necessario che almeno l‘75% dei dati sia
ben ricevuto. Così, di giorno l‘icona sarà visualizzata completamente. In caso contrario, l‘icona appare
«vuota»:
Se durante il giorno, anche dopo la messa in funzione, viene avviata la funzione TEST e la ricezione è
buona, l‘icona METEOTIME è visualizzata completamente e rimane così anche dopo la conclusione della
funzione TEST. Ma in particolare dopo la prima messa in funzione, ciò non vuol dire che siano già stati
ricevuti i dati meteorologici. Ciò accade di notte, come descritto nel capitolo 2. Solo dopo questa ricezione
l‘icona indica realmente se è stato ricevuto almeno l‘75% dei dati.
42
42
permette di valutare la qualità della ricezione
Page 43

8. Batterie
Mete-On 3 ha una ricezione notturna costante per garantire una rappresentazione completa delle previsioni di tutte le regioni. Nonostante ciò la durata delle batterie è molto elevata, circa 12 mesi.
Si prega di osservare però anche quanto segue:
- La durata delle batterie dipende anche dall‘intensità dell‘utilizzo della retroilluminazione. Un impiego
regolare e ripetuto della retroilluminazione riduce la durata delle batterie.
- Il tipo di batterie utilizzato infl uisce molto sulla durata. Utilizzare pertanto esclusivamente batterie di tipo
«alcalino» o al «litio», poiché le altre potrebbero avere una durata notevolmente inferiore!
- Quando le batterie stanno per scaricarsi, il contrasto del display LCD si fa più debole. Anche una ricezione diffi coltosa dei dati può essere causata dalle batterie in esaurimento. Pertanto, in questi casi si
consiglia di sostituire le batterie.
- Sostituendo le batterie, tutti i dati e le impostazioni andranno perduti.
9. Ulteriori informazioni sul sistema «METEOTIME»
Ulteriori informazioni sul sistema sono disponibili in Internet al sito www.meteotime.com
10. Possibili errori: cause e soluzioni
ERRORE
• Ora e data sul display
non esatte
• L‘icona Meteotime
nell‘area dello stato non
è visualizzata
completamente;
• le previsioni meteoro logiche non sono
complete o non sono
disponibili
• il pilone radio
è senza cerchi
• il contrasto del display
diminuisce o è scarso.
CAUSA
La ricezione di MeteOn 3 è disturbata.
La ricezione di MeteOn 3 durante la notte
è stata disturbata e
meno dell‘75% dei
dati ricevuti sono
corretti
Non è stato possibile
aggiornare l‘ora
nell‘arco delle ultime
12 ore.
Le batterie sono
scariche.
SOLUZIONE
Il luogo di posizionamento di Mete-On 3 non è
adatto.
Trovare un altro luogo di posizionamento
in cui la ricezione non sia disturbata.
Utilizzare la funzione «TEST» come
descritto nelle istruzioni.
Nel luogo di posizionamento di Mete-On 3 ci sono
disturbi elettrici o la ricezione è troppo debole.
Utilizzare la funzione «TEST» come descritto nelle
istruzioni per trovare un luogo di posizionamento
migliore o allontanare l‘apparecchio che crea
disturbo. Poiché il disturbo si verifi ca probabilmente solo di notte, si consiglia di cercare un
nuovo luogo di posizionamento. Può essere suffi ciente anche solo ruotare l‘apparecchio di 30-90°.
Nel luogo di posizionamento di Mete-On 3
la ricezione è disturbata.
Utilizzare la funzione «TEST» come descritto nelle
istruzioni per trovare un luogo di posizionamento
migliore.
Sostituire le batterie
(2 batterie LR6 AA - alcaline o al litio)
43
43
Page 44

10. Possibili errori: cause e soluzioni
ERRORE
• l‘icona delle previsioni
cambia costantemente,
nella previsione tempe ratura ci sono solo
lineette. Tuttavia l‘icona
Meteotime è piena
Note
CAUSA
Nel funzionamento
normale:
non è stato possibile
ricevere i dati meteorologici per 2 giorni
Dopo la prima messa
in funzione o
la sostituzione delle
batterie
SOLUZIONE
Probabilmente si tratta di un disturbo
temporaneo.
Se si verifi ca frequentemente, è necessario
trovare un luogo di posizionamento migliore.
I dati non sono ancora stati ricevuti.
Attendere una notte (vedere il capitolo 2)
44
Page 45

Cities
Meteotime Region No.
Country
City
48 A Bregenz BREG
49 A Eisenstadt EIST
46 A Graz GRAZ
47 A Innsbruck INSB
46 A Klagenfurt X KLAG
26 A Linz LINZ
48 A Salzburg X SALZ
50 A Sankt Pölten SPOL
49 A Wien WIEN
6 B Antwerpen ANTW
6 B Brugge BRUG
6 B Bruxelles X BRUX
6 B Liège LIEG
33 CH Adelboden X ADEL
45 CH Basel BASL
32 CH Bern BERN
32 CH Biel BIEL
34 CH Brig BRIG
36 CH Davos X DAVO
31 CH Fribourg FRIB
31 CH Genève GENE
35 CH Glarus X GLAR
33 CH Grindelwald GRIN
11 CH La Chaux de Fonds X CHDF
31 CH Lausanne X LAUS
38 CH Locarno X LOCA
38 CH Lugano LUGA
32 CH Luzern LUZN
31 CH Montreux MONX
31 CH Neuchâtel NEUC
32 CH Schaffhausen SCHA
34 CH Sion X SION
35 CH St. Gallen SGAL
32 CH Zürich X ZURI
50 CZ Brno BRNO
51 CZ Decin X DECI
50 CZ Plzen PLZN
50 CZ Praha X PRAG
25 D Augsburg AUGS
28 D Bayreuth BAYR
Centre of region
Code
Meteotime Region No.
Country
City
52 D Berlin X BERL
22 D Bremen BREM
19 D Bremerhaven X BREH
29 D Cottbus COTT
57 D Donaueschingen X DONE
14 D Dortmund DORT
29 D Dresden DSDN
14 D Duisburg X DUIS
14 D Düsseldorf DUES
30 D Eisenach EISN
30 D Erfurt X ERFU
52 D Frankfurt a.O. FR/O
12 D Frankfurt am Main X FR/M
45 D Freiburg FREI
26 D Friedrichshafen FRIE
37 D Fulda FULD
24 D Greifswald GREI
13 D Hagen HAGN
19 D Hamburg HAMB
22 D Hannover X HANO
59 D Heilbronn HEIL
30 D Hof HOF
57 D Horb HORB
25 D Ingolstadt X INGO
30 D Jena JENA
12 D Karlsruhe KARL
37 D Kassel X KASL
26 D Kempten KEMP
24 D Kiel KIEL
13 D Koblenz KOBL
14 D Köln KOLN
32 D Konstanz KONS
29 D Leipzig X LEIP
24 D Lübeck LUEB
22 D Magdeburg MAGD
12 D Mannheim MANN
26 D München X MUEN
52 D Neubrandenbg. NEUB
28 D Nürnberg X NUER
59 D Pforzheim PFOH
Centre of region
Code
45
45
Page 46

Meteotime Region No.
Country
City
52 D Potsdam POTS
25 D Regensburg REGN
24 D Rostock X ROST
59 D Stuttgart X STUG
13 D Trier X TRIR
59 D Tübingen TUEB
25 D Ulm ULM
28 D Würzburg WUER
20 DK Ålborg ALBO
21 DK Århus X ARHU
20 DK Herning X HERN
23 DK København X KOBN
21 DK Odense ODEN
17 F Amiens AMIE
11 F Annecy ANCY
8 F Avignon AVIG
5 F Béziers X BEZI
0 F Bordeaux X BORD
3 F Brest X BRST
17 F Caen CAEN
43 F Cannes CANS
10 F Chambéry CHAM
4 F Clermont-Ferrand X CLEF
7 F Dijon X DIJO
10 F Grenoble X GREN
1 F la Rochelle X LARO
17 F le Havre X LHAV
6 F Lille LILE
1 F Limoges LIMO
9 F Lyon X LYON
8 F Marseille X MARS
7 F Metz METZ
5 F Montpellier MONT
45 F Mulhouse MULH
7 F Nancy NACY
3 F Nantes NANT
43 F Nice NICE
8 F Nîmes NIMS
2 F Paris X PARS
0 F Pau PAU
5 F Perpignan PERP
2 F Reims REIM
46
46
Centre of region
Code
Meteotime Region No.
Country
City
3 F Rennes RENS
17 F Rouen ROUN
4 F Saint-Etienne STIE
45 F Strasbourg X STRB
8 F Toulon TOUN
0 F Toulouse TOUS
2 F Tours TOUR
9 F Valence VALC
48 FL Vaduz VADZ
16 GB Birmingham BIRM
18 GB Brighton BRGH
15 GB Bristol BRIS
18 GB Cambridge CAMB
16 GB Liverpool LIVP
18 GB London X LOND
16 GB Manchester X MACH
16 GB Newcastle-upon-Tyne NEWC
15 GB Plymouth PLYM
16 GB Sheffi eld SHEF
15 GB Swansea X SWAN
44 I Bologna BOLO
27 I Bolzano X BOLZ
41 I Firenze FIRE
43 I Génova X GENO
40 I Milano X MILA
40 I Parma PARM
41 I Pisa PISA
44 I Rímini RIMI
41 I Roma X ROMA
39 I Sestriere X SEST
41 I Siena SIEN
40 I Torino TORI
27 I Trento TREN
44 I Trieste TRIE
44 I Venézia X VENE
40 I Verona VERO
13 L Luxembourg LUXB
58 N Drammen DRAM
58 N Fredrikstad FRED
58 N Oslo X OSLO
42 NL Amsterdam X AMST
42 NL Den Haag DENH
Centre of region
Code
Page 47

Meteotime Region No.
Country
City
42 NL Eindhoven EIND
19 NL Groningen GRON
42 NL Rotterdam ROTT
56 S Boras BORA
53 S Göteborg X GOTE
53 S Halmstad HALM
56 S Jönköping X JOEN
55 S Kalmar X KALM
23 S Malmö MALM
54 S Stockholm X STOK
54 S Uppsala UPPS
55 S Visby VISB
49 SK Bratislava X BRAT
46 SLO Ljubljana LJUB
46 SLO Maribor MARI
44 SLO Nova Gorica NOGO
Centre of region
Code
47
47
Page 48

www.irox.com
IRMO3.06.S01
 Loading...