

Iron & Oak MBHH2013F, BHH3013GX, BHH2013GX, BHH3013GXF Owner's Manual

WARNING
READ and UNDERSTAND this manual completely before using log splitter.
All operators of this equipment must read and completely understand all safety information, operating instructions, maintenance
and storage instructions. Failure to properly operate and maintain the log splitter could result in serious injury to the operator and
bystanders from moving parts that can crush or cut, flying objects, burns, fire or explosion, escaping high pressure hydraulic fluid,
or carbon monoxide poisoning in particular, be aware of the following hazards.
Crush and Cut Hazards
Moving parts can crush and cut hands and fingers. Keep hands clear of ram, wedge, and logs while splitting.
High Pressure Hydraulic Fluid Hazards
High fluid pressures and temperatures are developed in hydraulic log splitters. Hydraulic fluid escaping through even a pinsize hole opening can puncture skin and cause severe blood poisoning. Inspect hydraulic system regularly for possible leaks.
Never check for leaks with your hand while the system is pressurized. Seek medical attention immediately if injured by
escaping fluid.
Fire Hazards
If your log splitter is intended for use near an ignitable forest, brush, or grassy covered land, the engine exhaust should be
equipped with a spark arrestor. See the "Specifications" section of this manual to determine if your splitter already has a spark
arrestor. If not equipped, call Iron & Oak Product Support for ordering information.
Keep a fire extinguisher with you that is rated for ordinary combustibles and flammable liquids.
STOP!
ADD OIL TO ENGINE BEFORE USING: Engine is shipped without oil. DO NOT start log splitter without first adding oil.
ADD HYDRAULIC OIL: Your log splitter was shipped without hydraulic oil. Refer to Periodic Maintenance section of this manual
for instructions on filling the hydraulic reservoir.
PRIME THE PUMP: The pump on your log splitter needs to be primed before use. Refer to Initial Setup section for instructions.
INSPECT COMPONENTS: Closely inspect to make sure no components are missing or damaged.
See Initial Unpacking and Set-up for instructions and for whom to contact to report missing or damaged parts.
ITEM NUMBER: _____________________
SERIAL NUMBER: ___________________
MBHH2013F
MODELS:
BHH2013GX
BHH3013GX
BHH3013GXF
Owner’s Manual
Instructions for Assembly, Testing, Operation,
Servicing and Storage
20 and 30 Ton Log Splitter: Outdoor hydraulic powered machine that
splits wood logs.
Any Questions, Comments, Problems or Parts Orders
Call Iron & Oak Product Support 1-800-817-1005
1

Hazard Signal Word Definitions
2

Table of Contents
Hazard Signal Word Definitions ................................................................................................................................................................ 2
Table of Contents ................................................................................................ ................................................................ ....................... 3
About Your Log Splitter ............................................................................................................................................................................ 4
Safety Label Locations .............................................................................................................................................................................. 5
Machine Component Identification ........................................................................................................................................................... 7
Initial Setup ................................................................................................................................................................................................ 8
Moving and Towing to the Job Site ......................................................................................................................................................... 10
Before Each Use – Inspection/Maintenance ............................................................................................................................................ 14
Before Each Use – Fueling ...................................................................................................................................................................... 17
Before Each Use – Work Site Selection and Set-Up ............................................................................................................................... 18
Splitting Operation ................................................................................................................................................................................... 19
Storage ..................................................................................................................................................................................................... 24
Periodic Maintenance............................................................................................................................................................................... 25
Troubleshooting ....................................................................................................................................................................................... 27
Specifications ........................................................................................................................................................................................... 28
Parts Breakdown – Exploded View – Rev E ........................................................................................................................................... 29
Summary of Important Safety information for Operation........................................................................................................................ 31
Assembly Instructions .............................................................................................................................................................................. 36
Limited Warranty ..................................................................................................................................................................................... 47
3

WARNING
This log splitter uses a high-pressure hydraulic system to generate a very strong splitting
force.
Read the manual completely before using the machine to understand how to safely operate
and maintain it.
About Your Log Splitter
Thank you for purchasing your Iron & Oak log splitter!
About Your Log Splitter:
This log splitter is a machine designed to split wood logs using a hydraulically powered moving ram.
The log splitter's gasoline engine is used to pressurize the hydraulic system.
This log splitter is designed to split logs lengthwise with the grain only.
This log splitter model is capable of splitting logs up to 24” long and 18” in diameter.
Your splitter can be used in the horizontal splitting position only:
When the splitter is set up to operate in the horizontal splitting position, a log is placed on the
horizontal beam and the ram moves horizontally into the end of the log to split it.
The technical specifications for your log splitter are provided in the Specifications section of this manual.
Follow all safety precautions presented throughout this manual. A summary of important safety
information can be found at the end of this manual.
Contact Iron & Oak Product Support at 1-800-817-1005 for any questions about the appropriate
use of this log splitter and/or optional accessories.
Warranty Registration:
Please fill out and submit the warranty registration card so that we have your contact information for any
future product literature or replacement parts you may need.
Attention: All Rental Companies and Private Owners who loan this
equipment to others!
All persons to whom you rent/loan the log splitter must have access to and read this manual. Keep this owner's
manual with the splitter at all times and advise all persons who will operate the machine to read it. You must
provide instruction on how to safely operate the splitter and remain available to answer any questions a
renter/borrower might have.
4
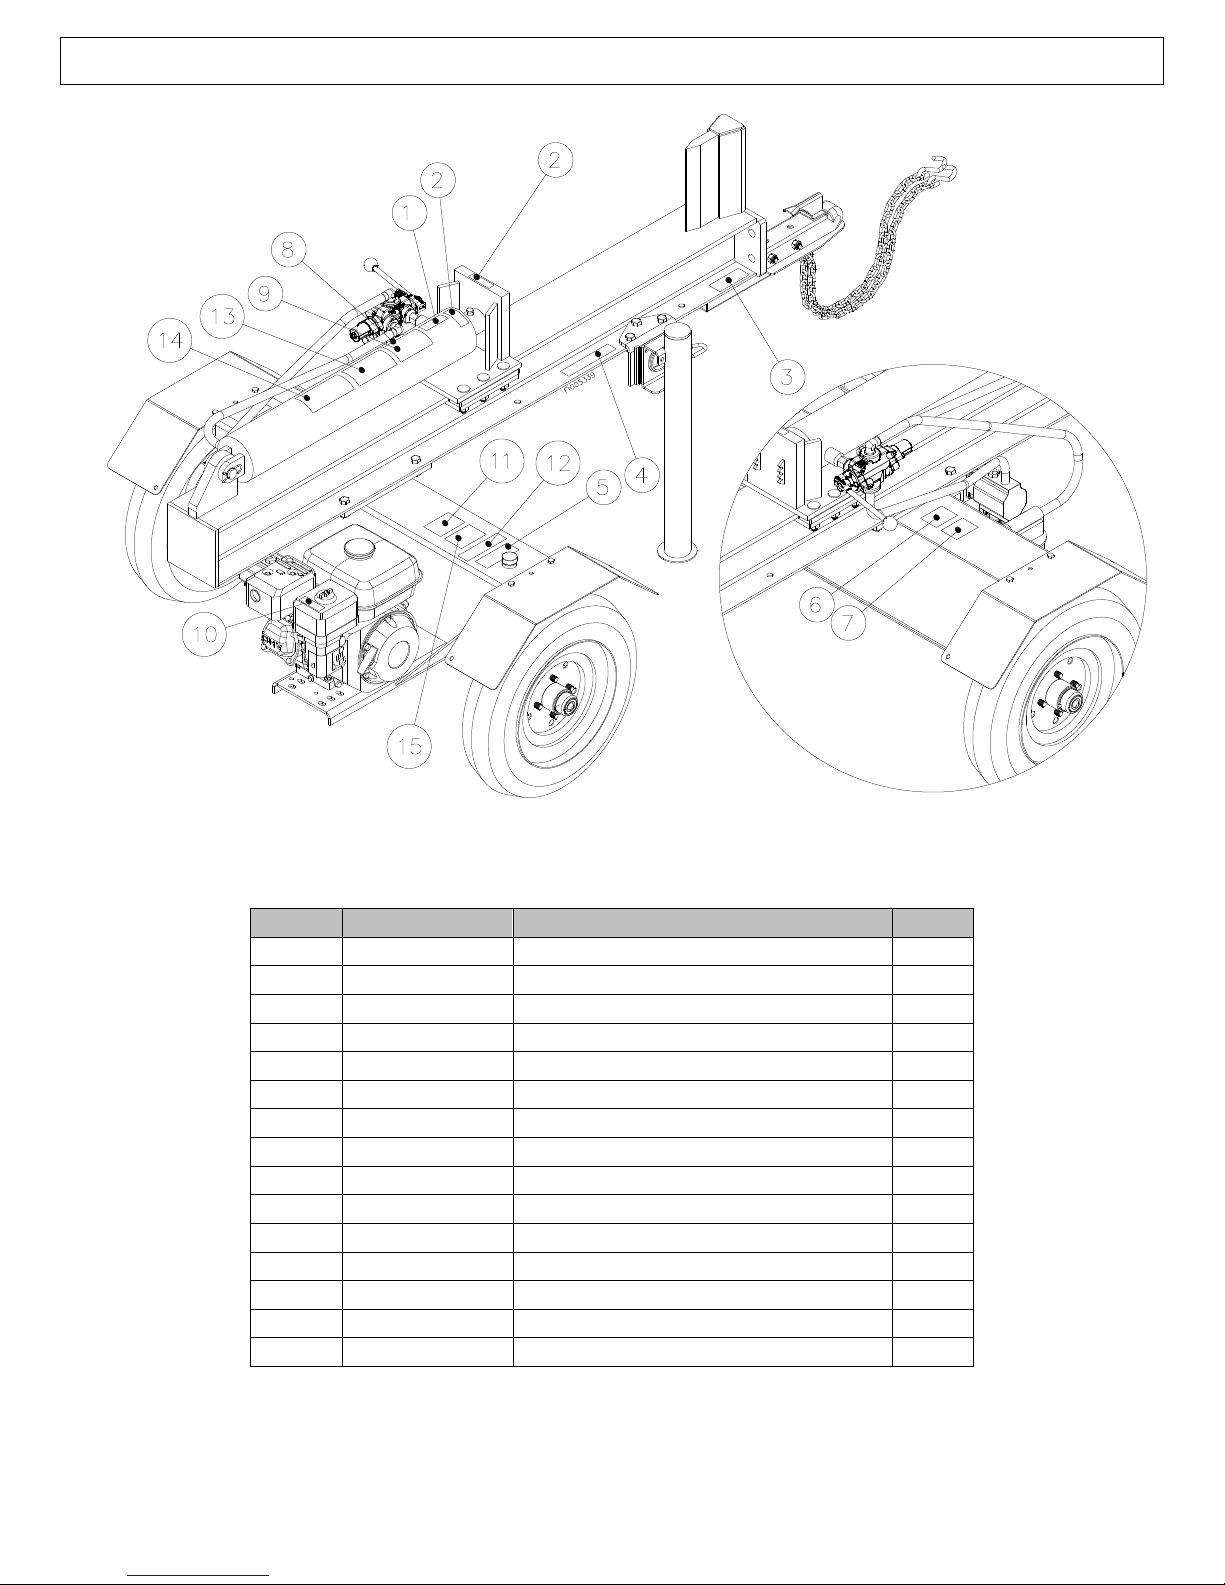
Ref#
Part #
Description
QTY
1
778609
Split Control Directions
1 2 787944
Small Pinch Point Warning
2 3 BR002653
Speed Limit
1 4 793025
Moving/Towing Instructions
1 5 BR002652
Hydraulic Fluid Notice
1 6 BR002621
Made in USA
1 7 N/A
Nameplate/Serial Number
1 8 777891
Escaping Fluid Warning
1 9 777896
Operation Instructions
1
10
786635
Burn Hazard Warning
1
11
39259
Carbon Monoxide Warning
1
12
777890
Fire Hazard Warning
1
13
778610
Log Splitter Warning
1
14
777888
Stuck Log Warning
1
15
788935
Fuel Fire Explosion Warning
1
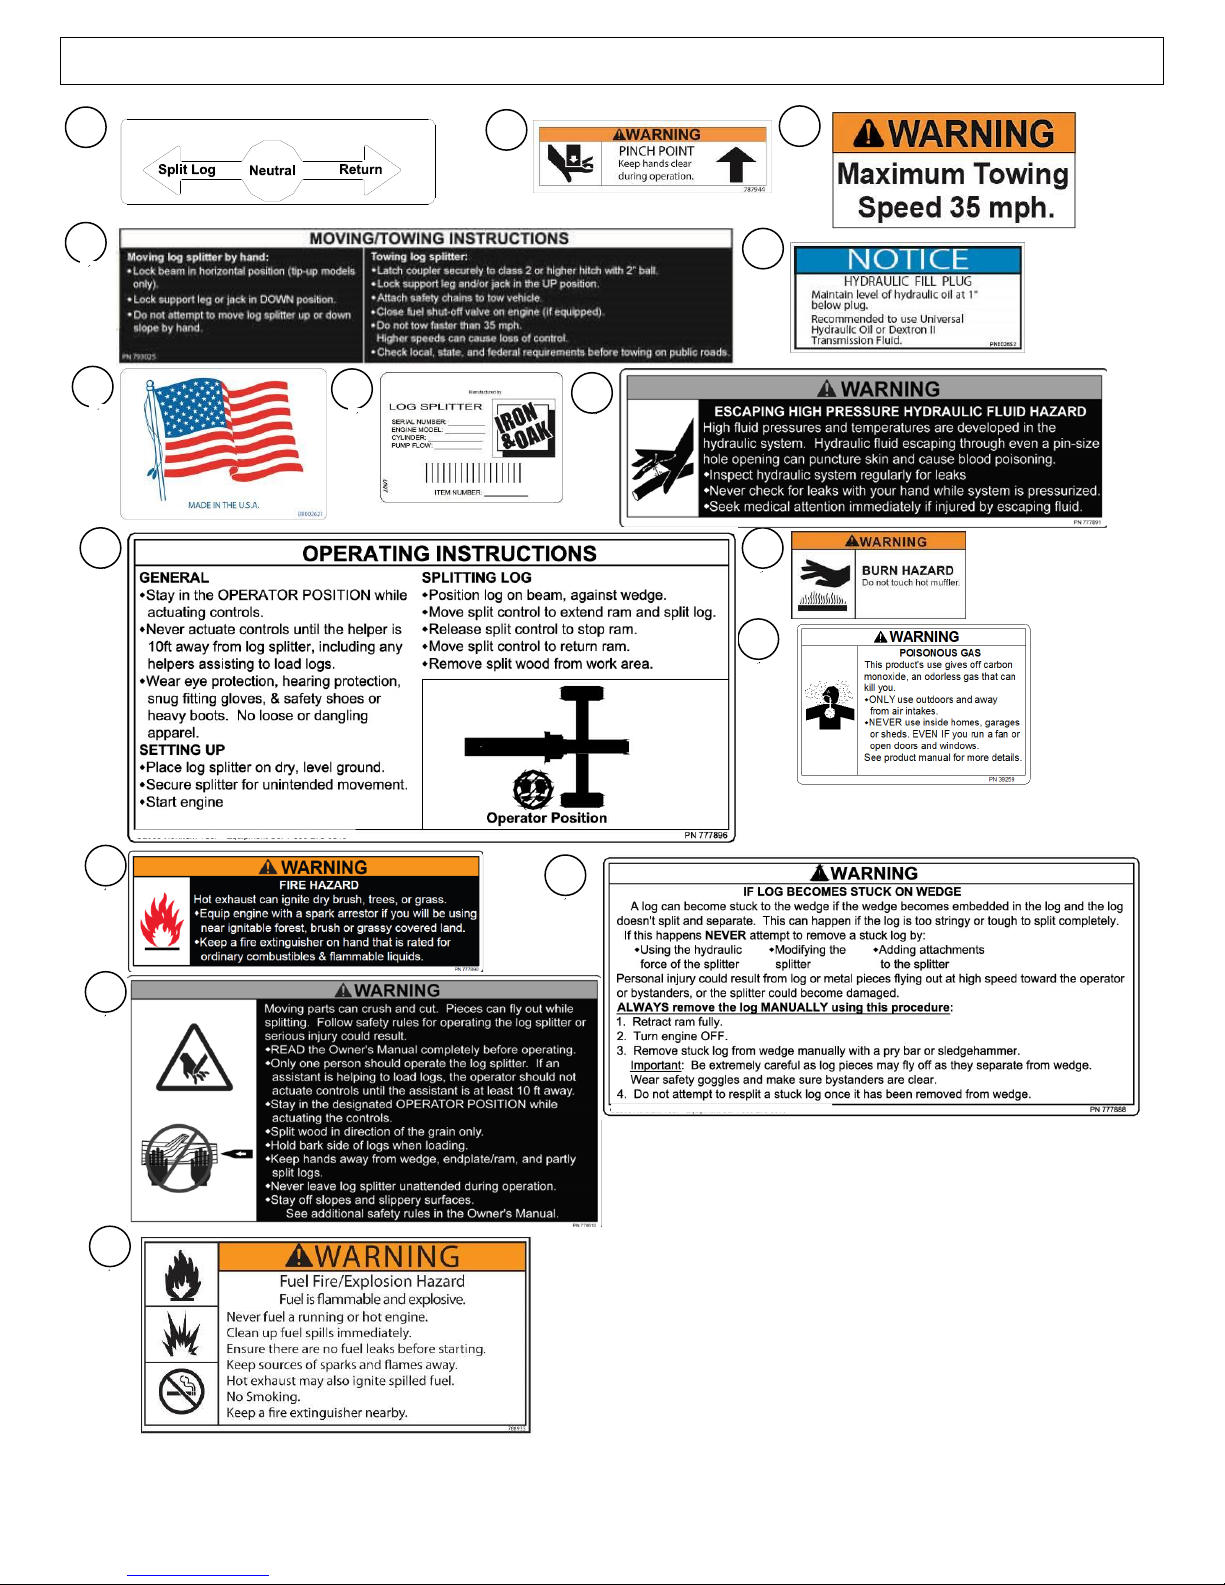
Safety Label Locations
Always make sure safety labels are in good condition. If a safety label is missing or not legible, order new
labels or unsafe operation could result. Contact Iron & Oak Product Support at 1-800-817-1005
5
1 2 3 5 4
6 7 981011121314
15
PN 777891
TO REMOVE
STUCK WOOD
PINCH POINT
wedge and
log stipper
SPLIT CONTROL LEVER OPERATION
Safety Label Locations
6
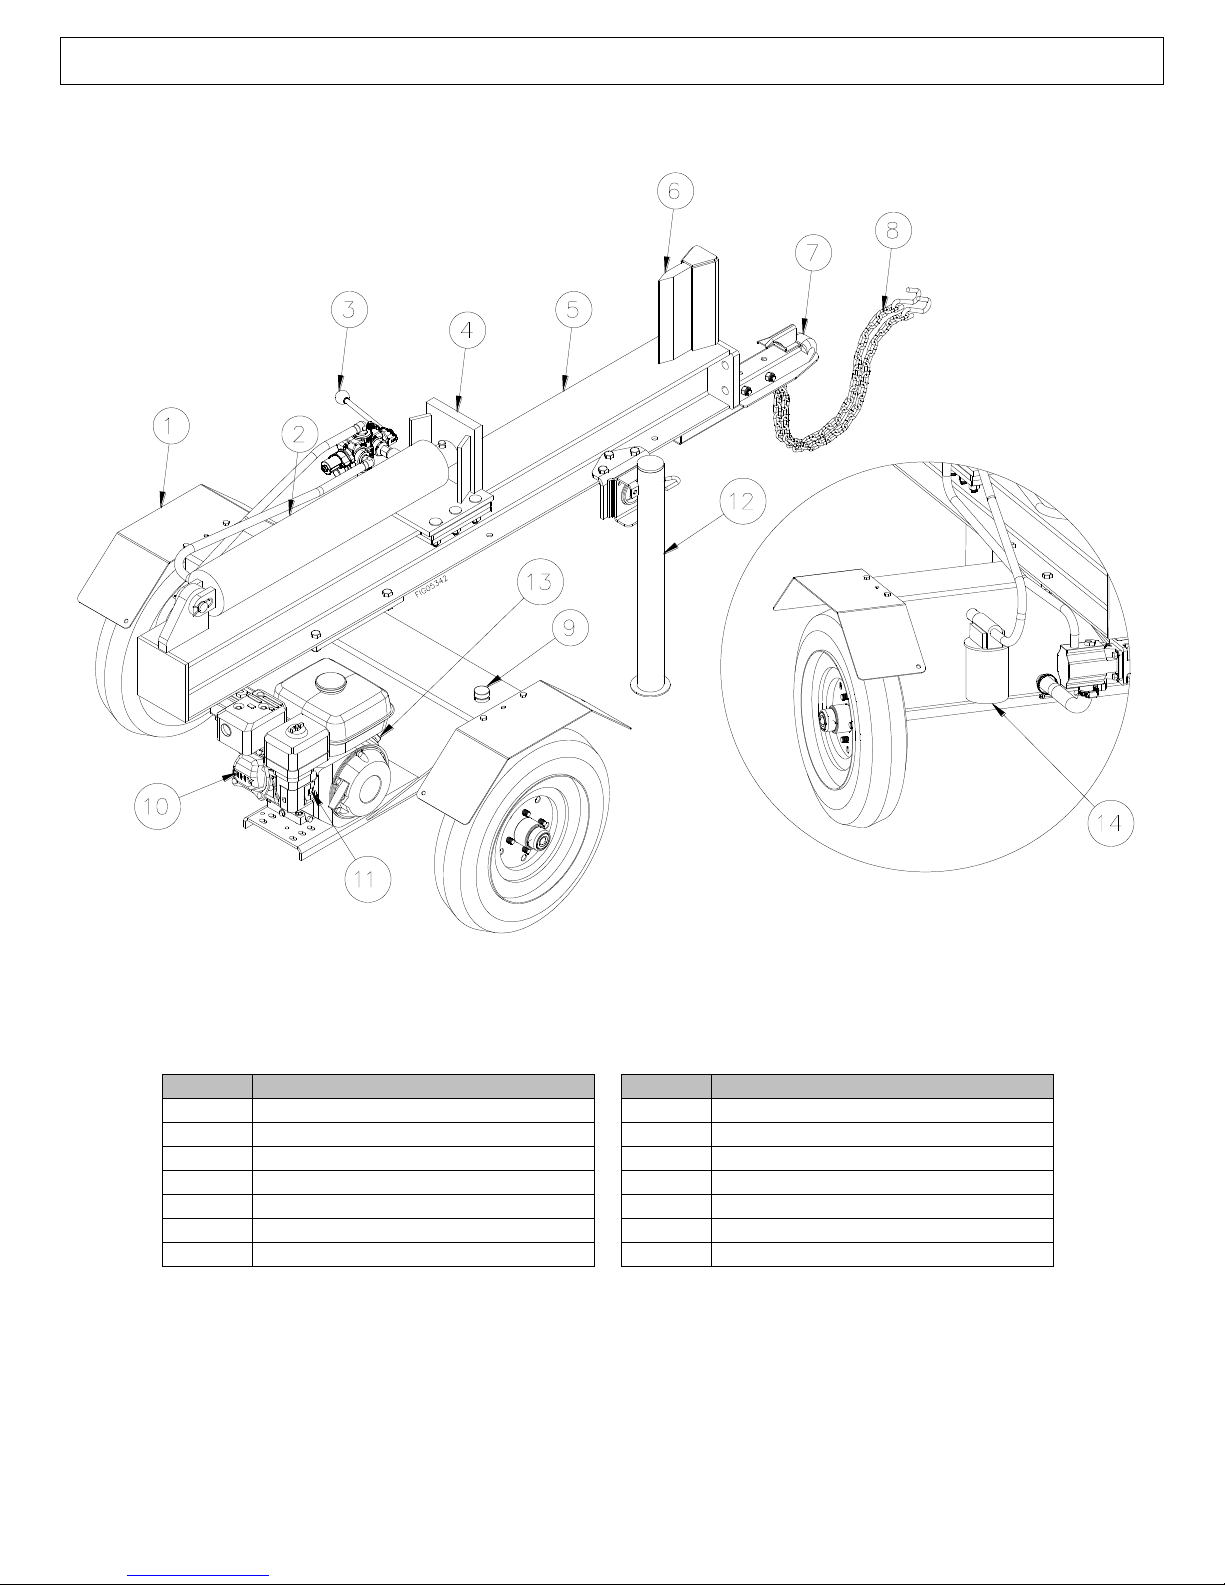
Ref #
Description
Ref #
Description
1
Fender
8
Safety Chains
2
Cylinder
9
Hydraulic Oil Cap
3
Split Control Lever
10
Engine
4
Ram
11
Fuel On/Off
5
Beam
12
Support Leg
6
Wedge
13
Engine On/Off
7
2” Coupler
14
Return Line Filter
Machine Component Identification
7
IMPORTANT!
Engine is shipped without oil. DO NOT start the engine before adding oil.
See Assembly Instructions section of this manual to assemble the log splitter before setup.
Step One:
Inspect Log Splitter
Components
Closely inspect all log splitter components.
(See Machine Components section of this manual for diagram of components.)
If you have missing or damaged components, please contact Product Support at
1-800-817-1005.
Step Two:
Add Oil to Engine
Add oil to the engine. Using a funnel, add SAE 10W-30 oil up to the FULL mark
on the dipstick. (See engine Owner's Manual for oil capacity and location of fill cap.)
Step Three:
Add Hydraulic Oil
to Reservoir
WARNING: High fluid pressures and temperatures are developed in hydraulic log
splitters. Hydraulic fluid escaping through a pin-hole sized opening can burn or puncture
skin, resulting in wounds that could cause blood poisoning, infection, disability, gangrene,
amputation, or death. Therefore, the following instructions should be heeded at all times
when inspecting or servicing the hydraulic components of the log splitter.
NEVER check for leaks with your hand. Leaks can be located by holding a piece of
cardboard or wood (at least two feet long) with your hand at one end and passing the
other end near the suspected area (wear eye protection). Look for discoloration of the
cardboard or wood.
NEVER adjust the pressure of the pump or valve.
If injured by escaping fluid, no matter how small the wound is, see a doctor at once. A
typical injection injury may be a small wound that does not look serious. However,
severe infection or reaction can result if proper medical treatment is not administered
immediately by a doctor who is familiar with injection injuries.
IMPORTANT
The hydraulic system oil filter for your log splitter is not factory installed. Make sure the
filter is installed before attempting to fill the hydraulic tank or start the engine.
(Installation instructions are provided in the “Assembly Instructions” section and are also
printed on the side of the filter).
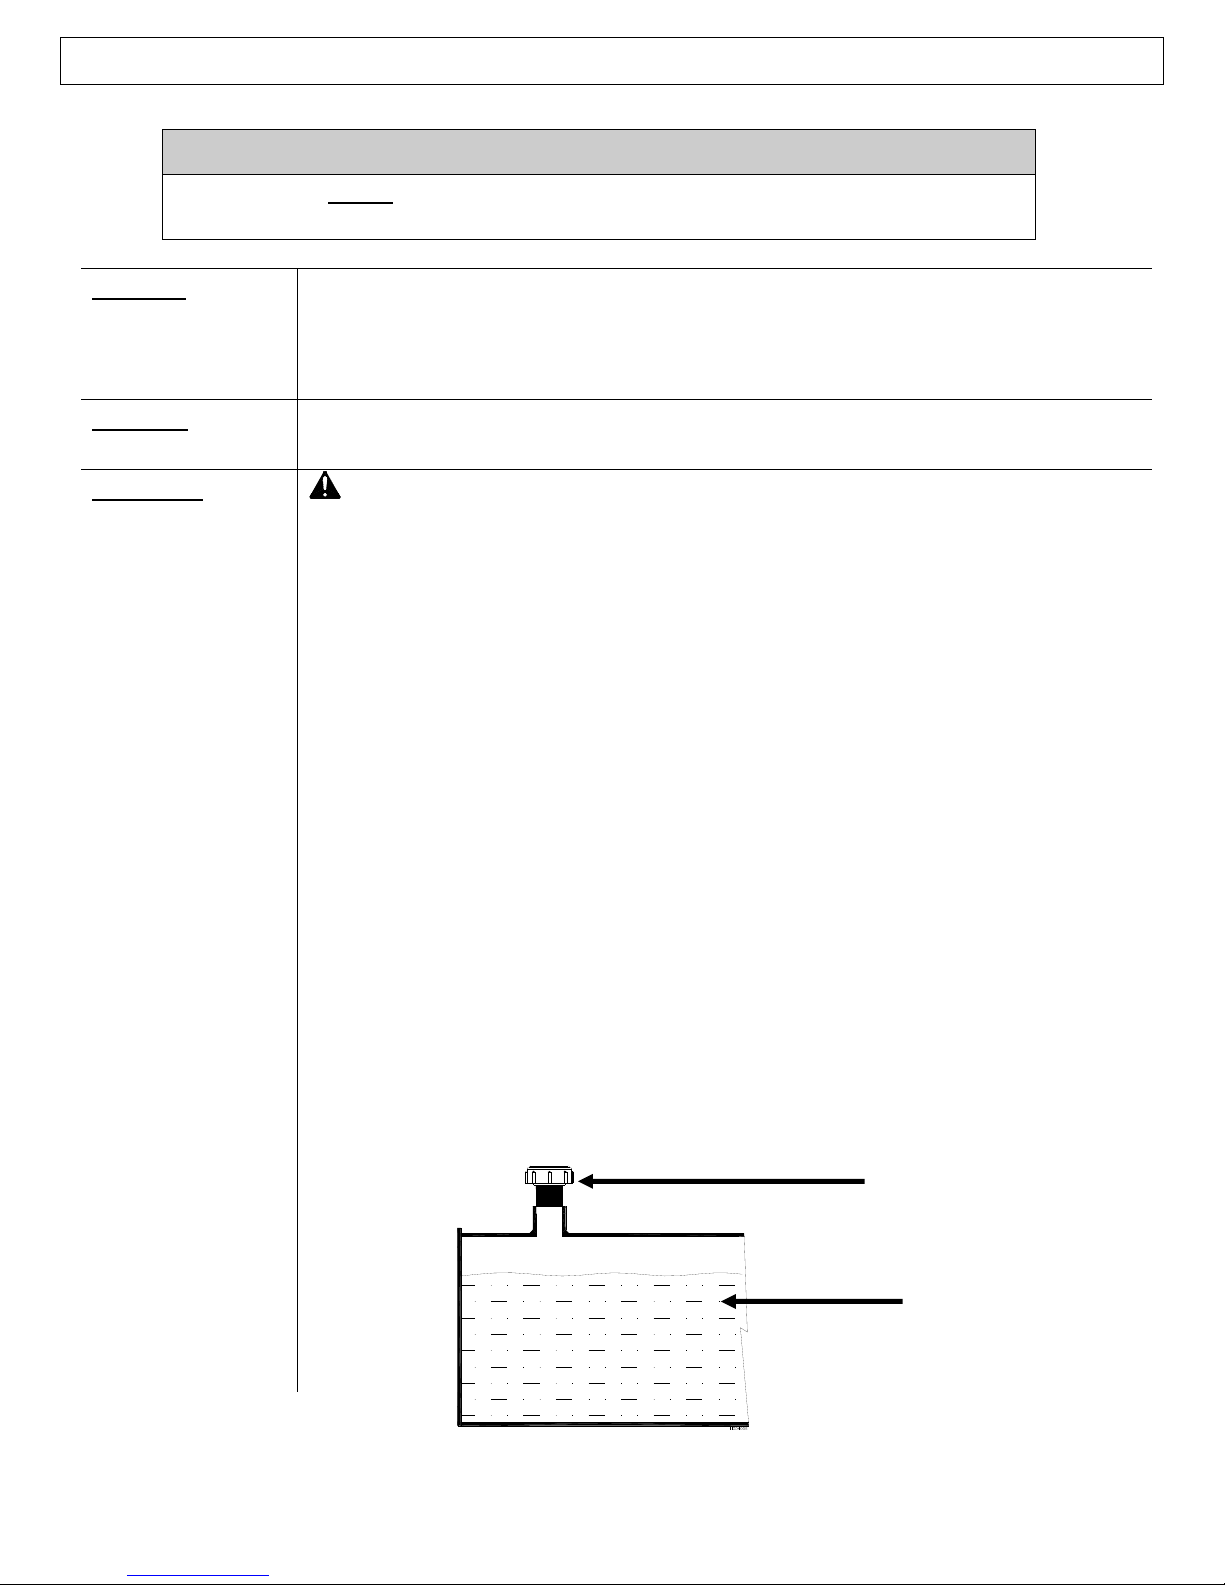
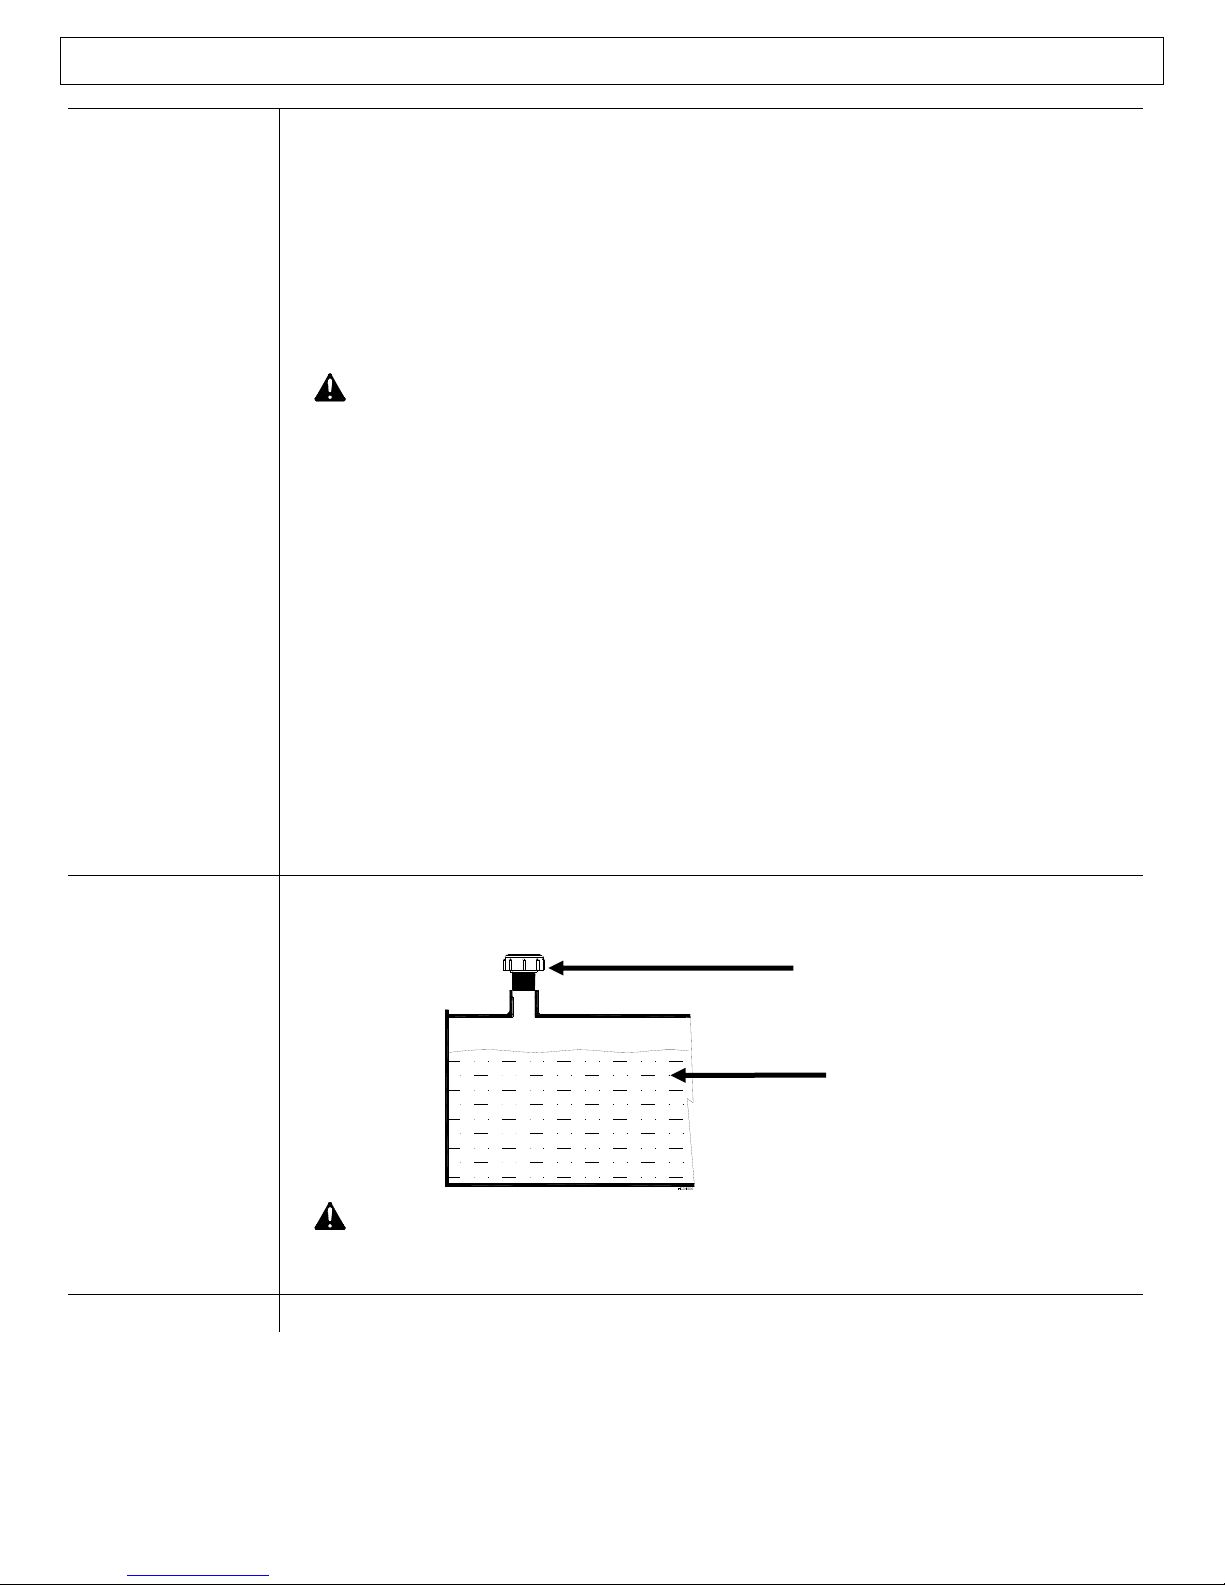
1. Remove hydraulic oil cap.
2. Refer to the Specifications section for approximate hydraulic oil capacity.
3. Fill reservoir with 10 wt AW32, ASLE H-150, or ISO 32 oil. Use a funnel
4. Check that oil level is full. Oil level should be approximately one inch from the top
of the tank. Replace oil fill cap once oil level is full.
Oil Fill Cap
Hydraulic oil
Initial Setup
8
Step Three:
Add Hydraulic Oil
to Reservoir
(continued)
5. Disconnect the spark plug wire from the spark plug. This prevents the engine from
starting until the hydraulic pump and cylinder are completely filled with oil. Make
sure the spark plug wire is held away from the spark plug with string or other
nonconductive material.
6. Push the valve control handle with one hand to the forward (extend) position
(towards the front of the cylinder). Pull on the starter grip recoil at least 20 times so
that hydraulic fluid has cycled through the pump.
7. Reconnect the spark plug wire to the spark plug.
8. Start engine and use control valve handle to extend and retract ram five (5) times to
remove air from the high pressure lines.
9. With ram retracted, check oil level again. Fill if necessary.
10. Replace hydraulic oil fill/vent cap.
WARNING: NEVER remove the hydraulic oil fill cap when the engine is
running or hot. Hot oil can escape causing severe burns. Allow log splitter to
cool completely before removing hydraulic oil fill cap.
Note: If the log splitter will be run for long periods of time in outdoor temperatures
above 70°F, we recommend changing the hydraulic oil to DEXRON III.
Step Four:
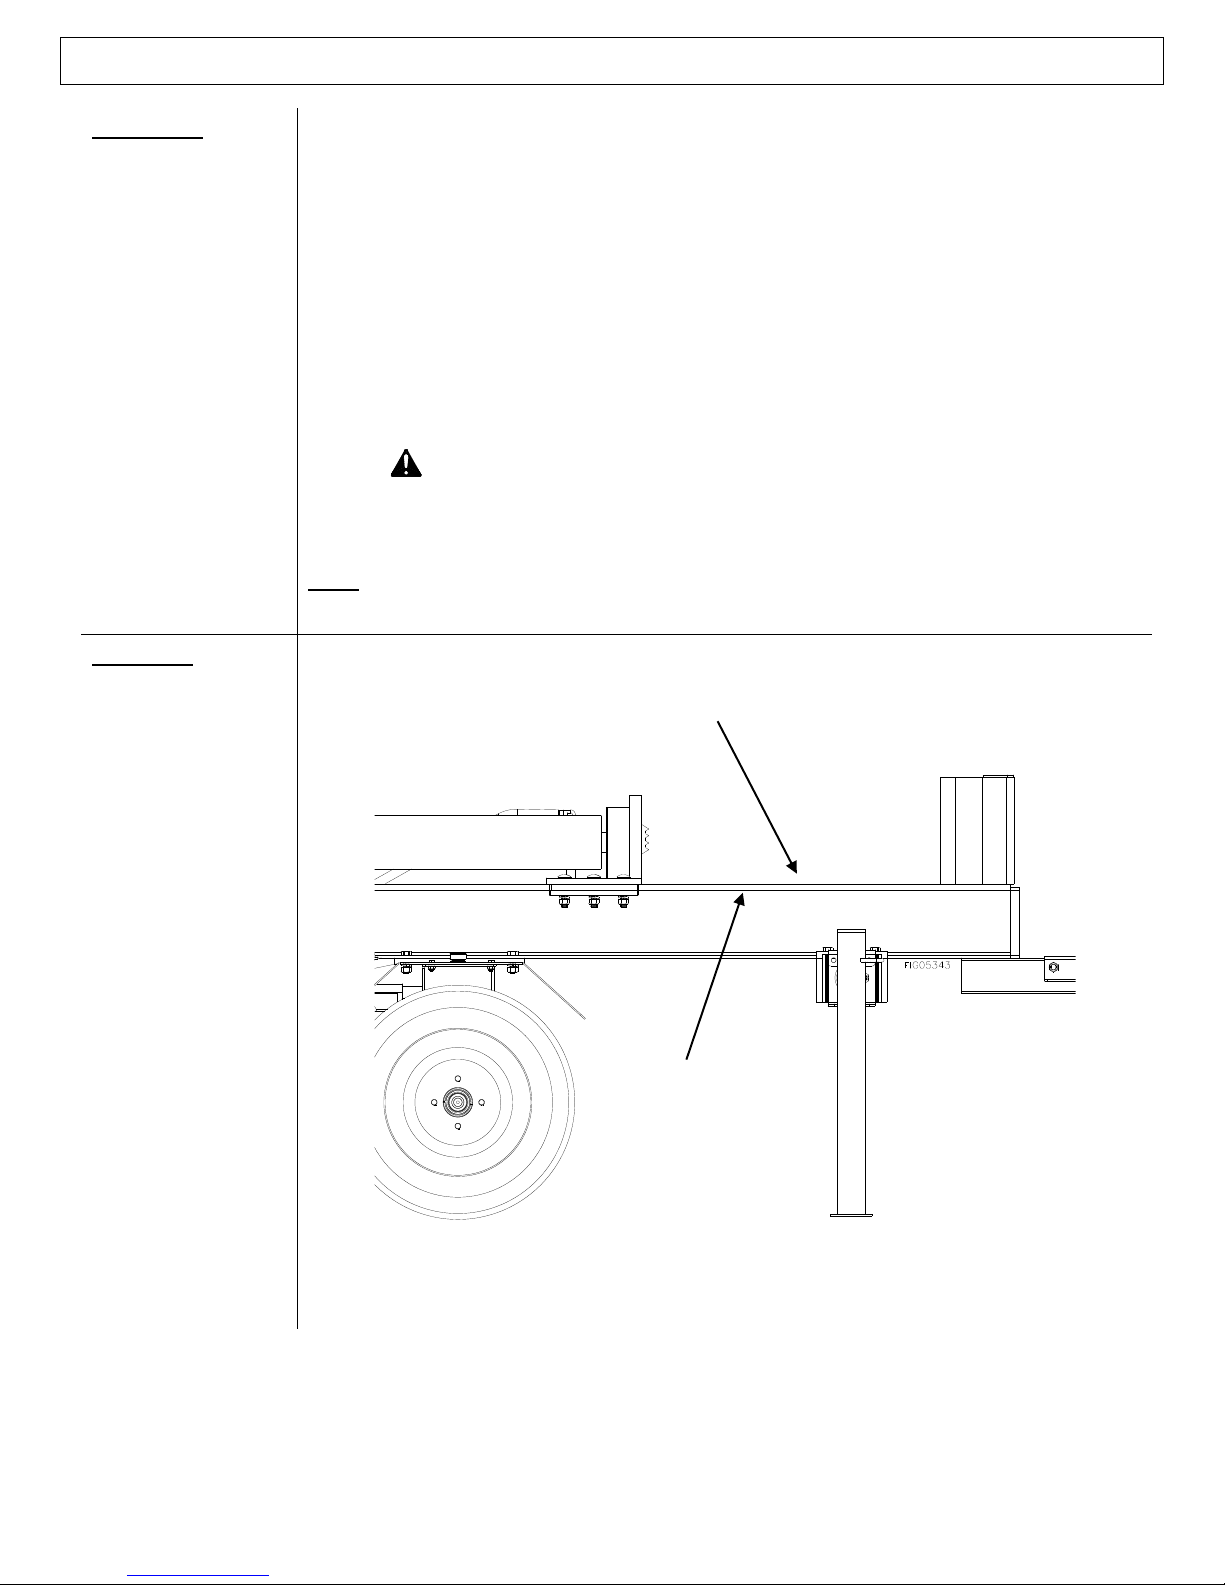
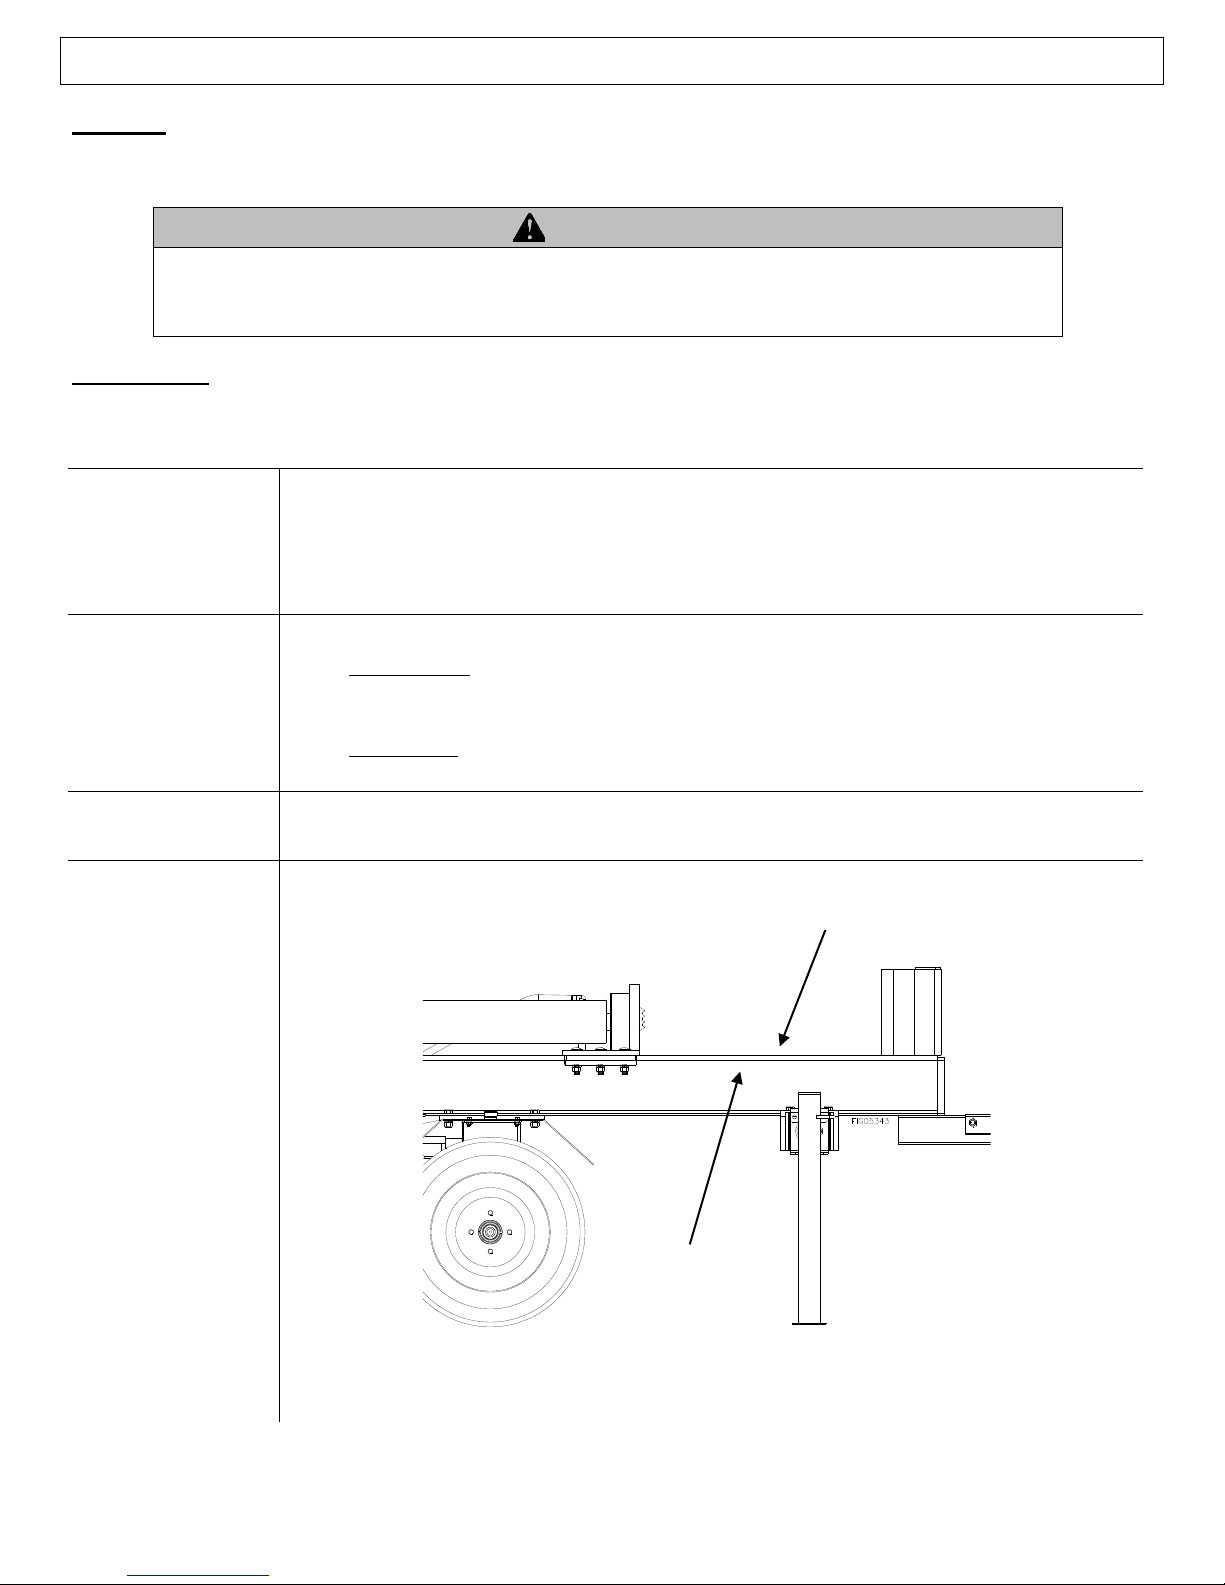
Lubricate Beam
Lubricate the surface of the beam with grease. This will help prevent wear between the ram
keepers and the beam.
Apply grease to the top of the beam and underneath the edge of the
beam, where the wear pads travel.
Initial Setup
9
WARNING
The log splitter is heavy. It can crush and cause serious injury if it rolls out of control or
tips over.
Follow the instructions below for safely moving and towing the log splitter.
1. Engine Off
IMPORTANT: Make sure log splitter engine is off.
Never move the log splitter with its engine running.
2. Fuel Valve Off
(if equipped)
Turn fuel valve off to prevent carburetor flooding and reduce the chance of fuel
leakage. Refer to Engine owner's manual for fuel valve location.
3. Lock Support
Leg DOWN
Lock support leg in DOWN position before you move the log splitter.
4. Move Log
Splitter to
Work Site
Move log splitter by hand either directly to chosen work site or to vehicle hitch
for towing.
(See Step Three: Before Each Use - Work Site Selection and Set-Up)
Important Safety Instructions:
Hills. Do not move the log splitter up or down hills by hand—use a towing
vehicle.
No riding. Never allow anyone to sit or ride on the log splitter.
No cargo. Never transport cargo or wood on the log splitter.
Moving the log splitter:
Moving and Towing to the Job Site
10

1. Read
Instructions
Review towing safety instructions in your vehicle manual.
2. Check
Tires
Make sure tires are fully inflated and in good repair.
WARNING:
Do not over-inflate tires. Serious injury can occur if tire explodes.
When seating a bead after repair, do not exceed 60 PSI. Pressures higher than
60 PSI can cause the tire and wheel to rupture and explode.
3. Engine Off
IMPORTANT: Make sure log splitter engine is off.
Never move the log splitter with its engine running.
4. Fuel Valve Off
(if equipped)
Turn fuel valve off to prevent carburetor flooding and reduce the chance of fuel
leakage. Refer to Engine owner's manual for fuel valve location.
Towing:
Moving and Towing to the Job Site
11
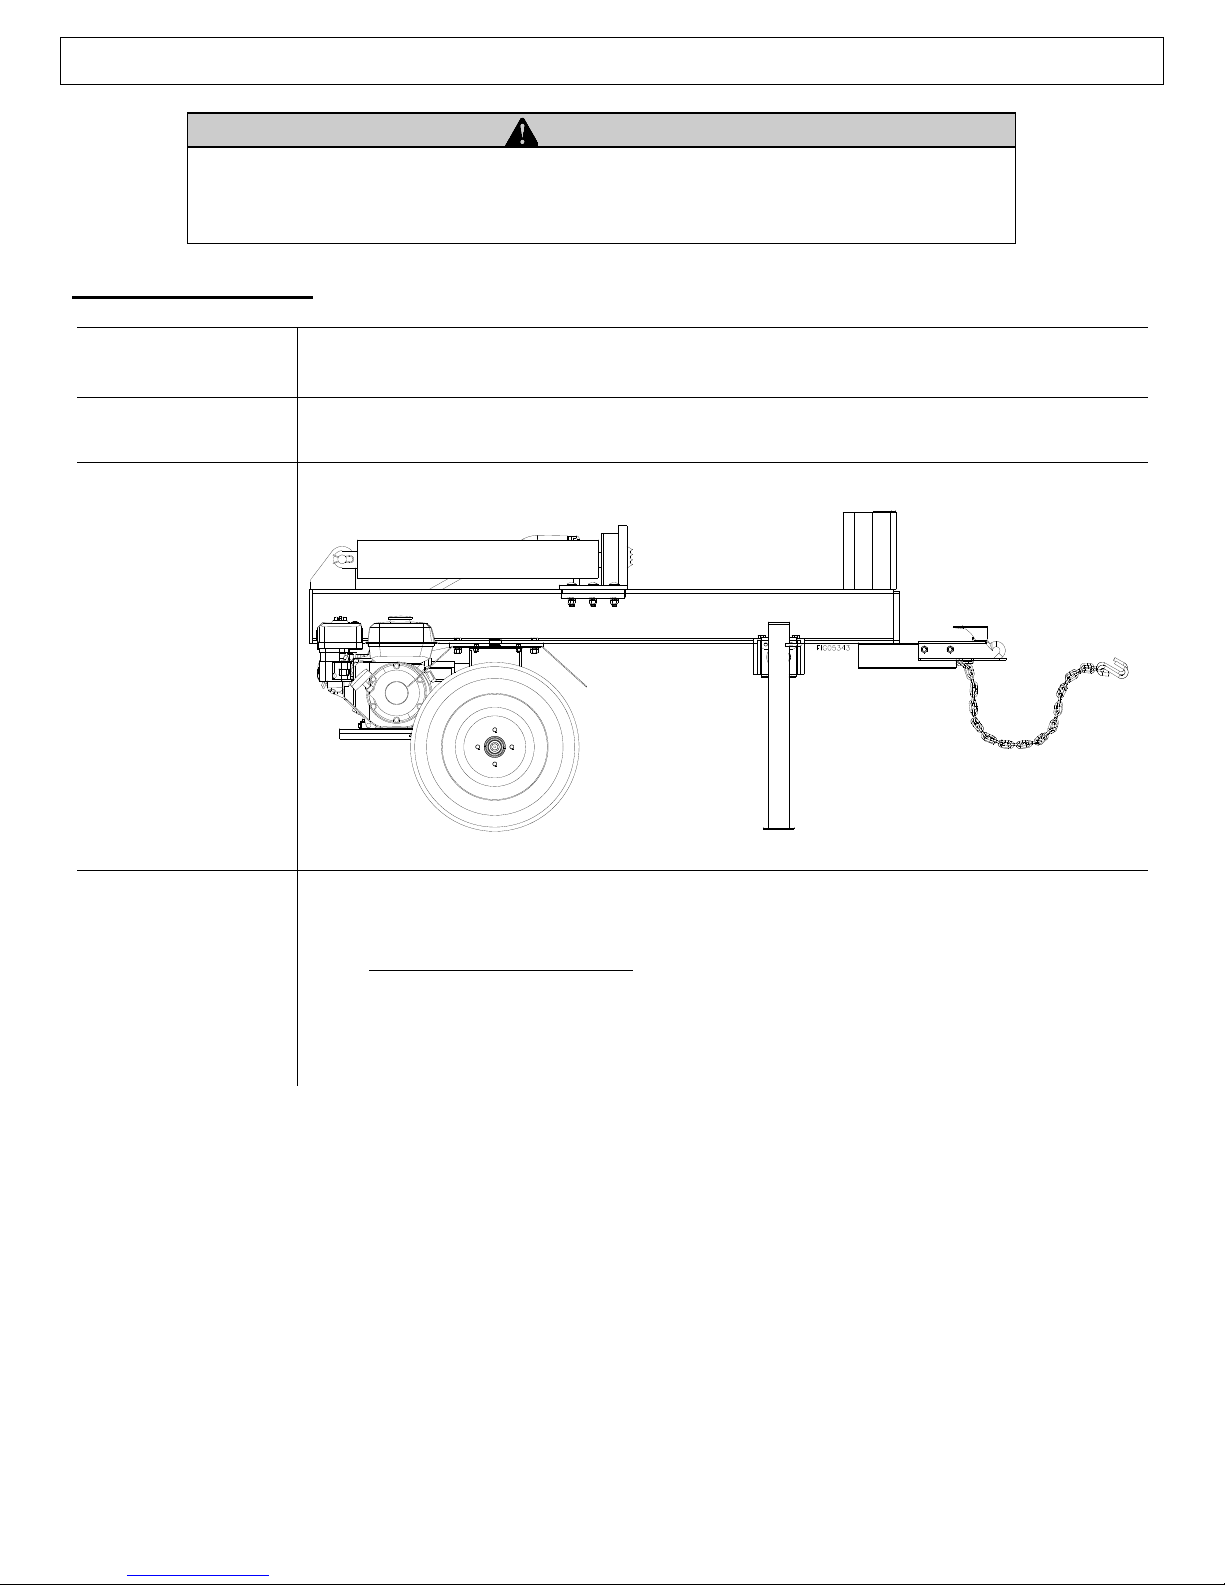
5. Attach to Hitch
(2" ball)
Attach log splitter to vehicle hitch.
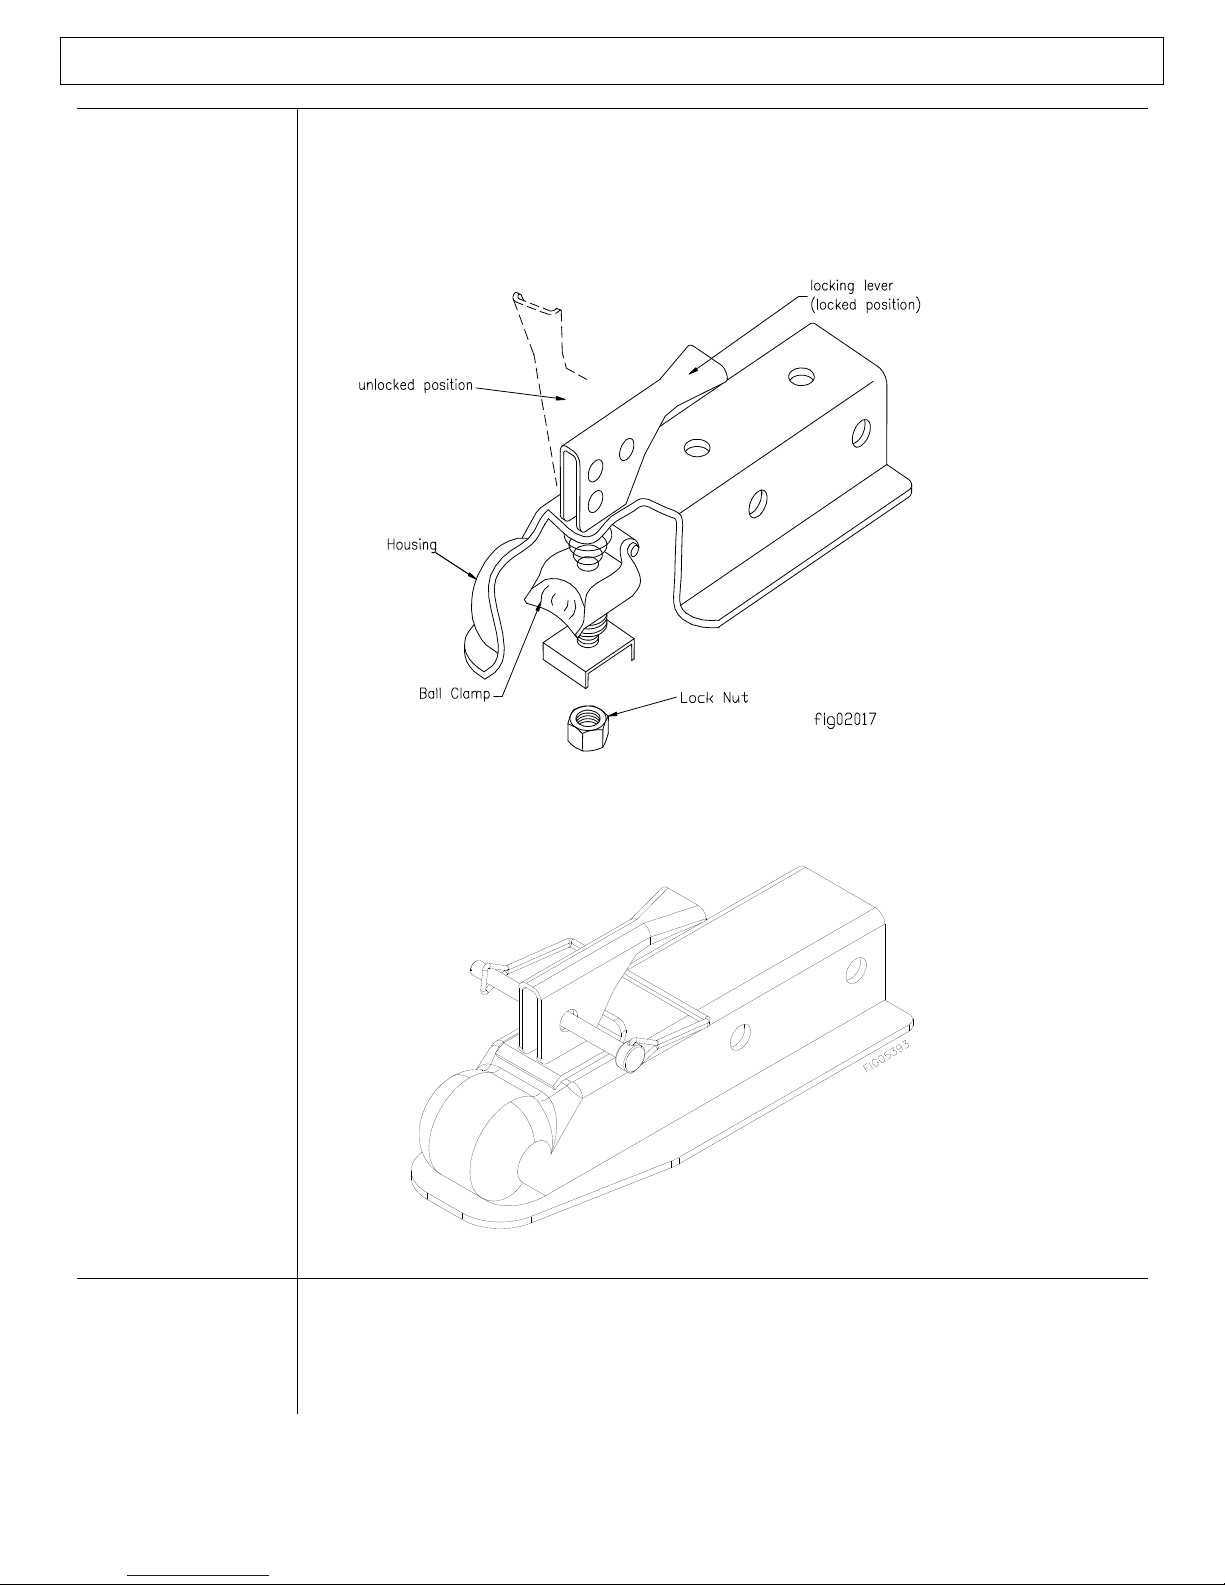
1. Attach log splitter's coupler to a class 2 or higher hitch with 2" ball (only).
2. Adjust coupler to ball by raising locking lever and turning lock nut with wrench.
3. Proper adjustment is obtained when coupler is as tight as possible on ball and
locking lever can still be opened and closed.
4. Lock lever closed to secure the attachment.
5. Insert pin into locking lever to ensure it does not unlock while towing.
6. Attach Safety
Chains
Attach safety chains.
1. Two safety chains must be used while towing.
2. Cross safety chains under the coupler allowing only enough slack for vehicle
turns.
Moving and Towing to the Job Site
12
7. Lock Support
Leg UP
To provide adequate ground clearance while towing, secure the support leg in the UP
position.
8. Tow to Desired
Location
Tow log splitter carefully to desired work site.
(See Step Three: Before Each Use – Work Site Selection and Set-Up)
Important safety instructions:
Added length. Be aware of the added length of the splitter.
Speed limit. Never tow this log splitter over 35 mph. Faster speeds may
result in loss of control.
Rough terrain. Drive slowly and take extra caution when traveling over
rough terrain.
On public roads. If towing on a public road, make sure to comply with all
local, state, and federal towing requirements. It is the sole responsibility of the
purchaser to obtain licensing, trailer lights, safety chains or signage, as needed
to comply.
Unattended. Turn off the towing vehicle before leaving the splitter
unattended.
Under the influence. Never tow or operate this splitter while under the
influence of alcohol, drugs, or medication.
9. Lock Support
Leg DOWN and
Unhitch
Lock support leg in the DOWN position and disconnect from vehicle.
NEVER operate log splitter while it is attached to the vehicle.
1. Lock the support leg down and open the coupler latch assembly.
2. Unhitch from vehicle.
Lock support leg
in UP position
Moving and Towing to the Job Site
13
WARNING
ALWAYS shut off the engine, disconnect the spark plug, and relieve system pressure before
inspecting, cleaning, adjusting, or repairing the splitter. Relieve system pressure by moving Split
Control Lever back and forth several times.
1. Engine Off /
Relieve Pressure
Perform all inspections/repairs with the engine off and hydraulic system pressure relieved.
1. Make sure engine is off and cool.
2. Disconnect the spark plug.
3. Relieve all hydraulic system pressure by moving the Split Control Lever back and forth
several times.
2. Remove Debris
Remove debris from engine, muffler, and moving parts.
1. Engine debris: Debris on a hot engine can be a fire hazard. Clean debris and chaff from
engine cylinder head, cylinder head fins, fan housing/recoil starter, and muffler areas.
Avoid contact with hot muffler.
2. Other debris: Debris on moving parts can cause excess wear. Clear debris from the
beam, wedge, and ram.
3. Fuel Tank / Lines
Check fuel tank and fuel lines for leaks.
Any fuel leak is a fire hazard. Fix any fuel leaks before starting engine.
4. Mechanical Parts
Check to be sure that all nuts and bolts are tight to ensure the log splitter is in safe working
condition.
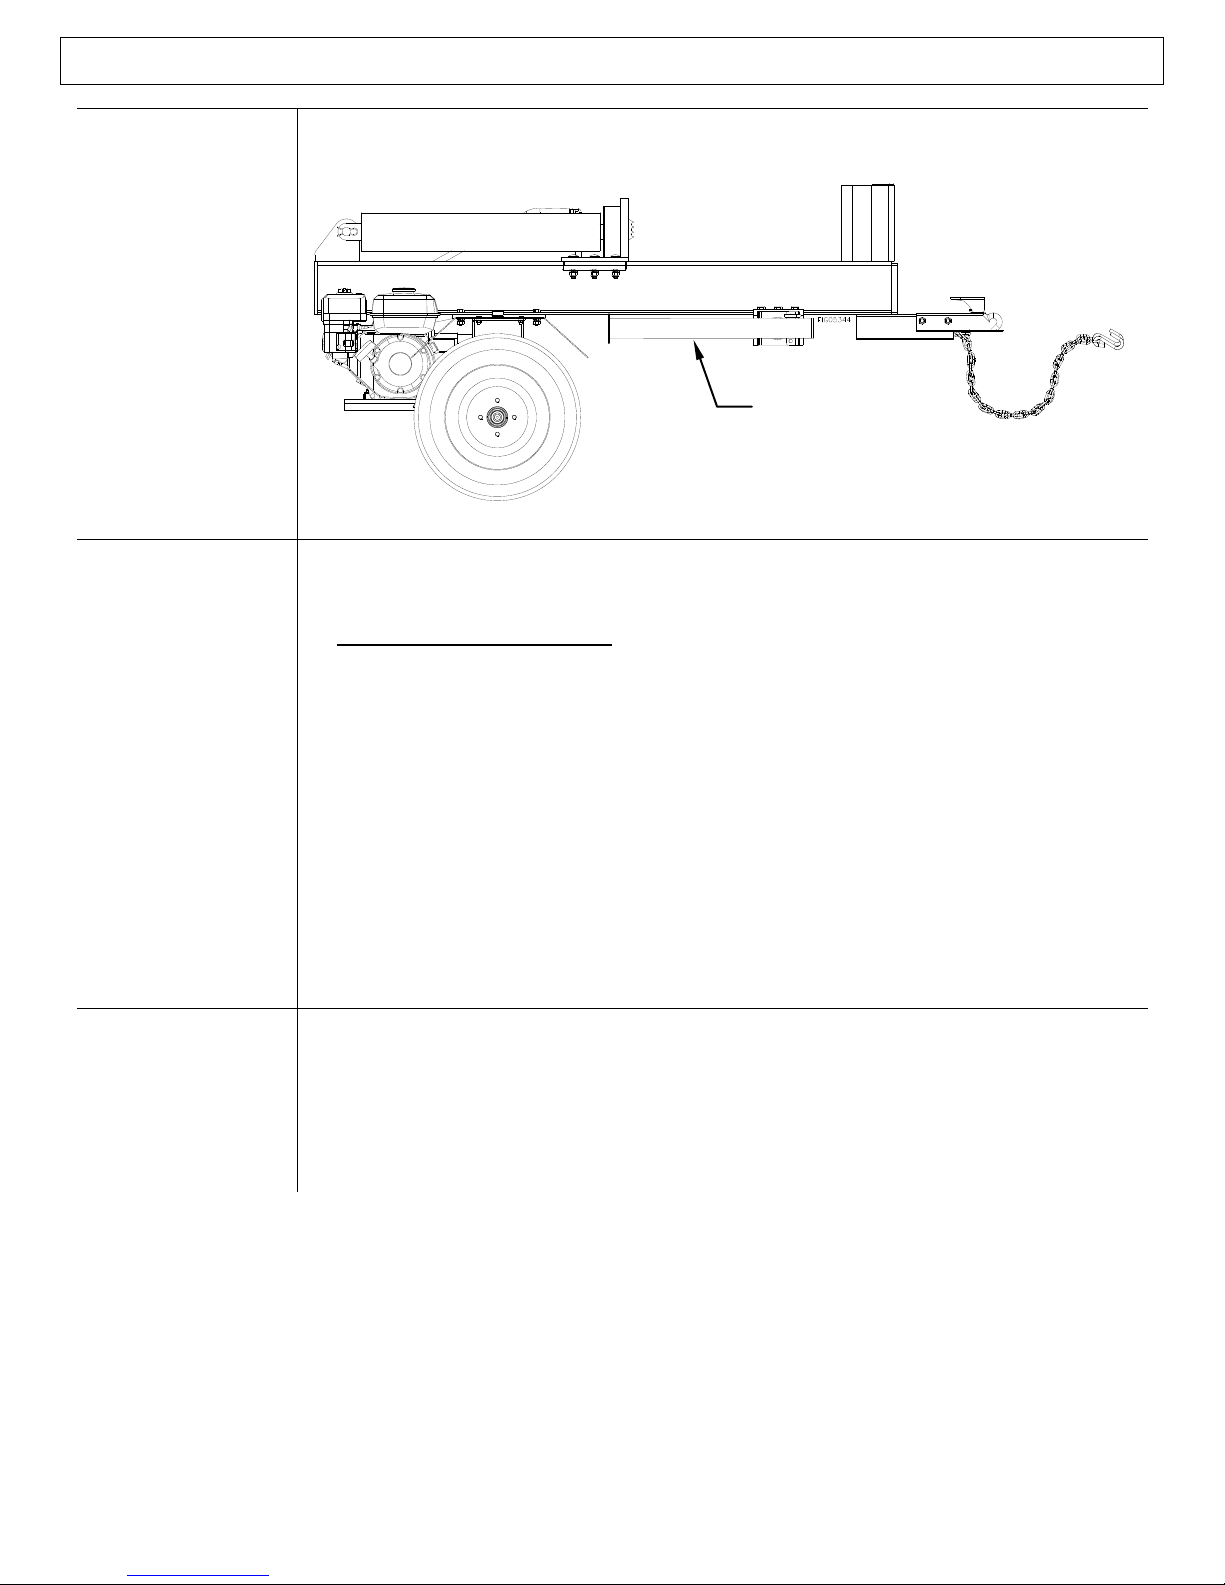
Apply grease to beam where the ram travels.
Apply grease to the top of the beam and underneath
the edge of the beam, where the wear pads travel.
Before Each Use – Inspection/Maintenance
Step One: Inspect and maintain log splitter before each use
If the log splitter has been used previously, it must be inspected and maintained BEFORE EACH SUBSEQUENT USE.
IMPORTANT:
If a part needs replacement, only use parts that meet the manufacturer's specifications. Replacement parts that do not meet
specifications may result in a safety hazard or poor operation of the log splitter.
14
5. Hydraulic System
Check the hydraulic system carefully:
1. Visually inspect all hoses, tubing, clamps/fittings, pump, and cylinder for cracks, fraying,
kinks, or other damage.
2. Check all components for oily residue, which may indicate a leak.
Do NOT operate the log splitter if there is any indication of damage or oily residue. Small leaks
in hydraulic lines can cause severe injuries and can also be an indication of catastrophic failure
in the near future. The life of hydraulic hoses may be from a few months to a few years,
depending on use and storage patterns.
WARNING: High fluid pressures and temperatures are developed in hydraulic log
splitters. Hydraulic fluid escaping through a pin-hole sized opening can burn or
puncture skin, resulting in wounds that could cause blood poisoning, infection,
disability, gangrene, amputation, or death. Therefore, the following instructions should
be heeded at all times when inspecting or servicing the hydraulic components of the log
splitter:
Stop the engine, disconnect the spark plug, and move all control valve handles back
and forth to relieve pressure before changing or adjusting hydraulic system
components such as hoses, tubing, fittings, or other components.
NEVER check for leaks with your hand. Leaks can be located by holding a piece of
cardboard or wood (at least two feet long) with your hand at one end and passing the
other end over the suspected area (wear eye protection). Look for discoloration of the
cardboard or wood.
NEVER adjust the pressure setting of the pump or valve.
If injured by escaping fluid, no matter how small the wound, see a doctor at once. A
typical injection injury may be a small puncture wound that does not look serious.
However, severe infection or reaction can result if proper medical treatment is not
administered immediately by a doctor familiar with injection injuries.
6. Hydraulic Oil
Level
Check the hydraulic oil level. Fill as needed – The hydraulic oil level should be 1” from the
top of the hydraulic tank with the cylinder retracted.
WARNING: NEVER remove the hydraulic oil fill cap when the engine is running or
hot. Hot oil can escape causing severe burns. Allow log splitter to cool completely
before removing hydraulic oil fill cap.
7. Engine
Inspect and perform engine maintenance as directed in the engine manual.
Oil Fill Cap
Hydraulic oil
Before Each Use – Inspection/Maintenance
15
 Loading...