

Page 1

IRONKEY™ WORKSPACE W700-SC
User Guide
Page 2

Copyright 2015 Imation Corp. All rights reserved.
Imation and Imation logo, IronKey and IronKey logo, and “PC on a Stick” are trademarks of
Imation Corp. All other trademarks are the property of their respective owners.
Imation Enterprises Corp.
1 Imation Way
Oakdale, MN 55128-3414 USA
www.imation.com
7/17/15
IK-W700SC-USR01-1.0
NOTE: Imation is not liable for technical or editorial errors and/or omissions contained herein;
nor for incidental or consequential damages resulting from the furnishing or use of this material.
The information provided herein is subject to change without notice.
The information contained in this document represents the current view of Imation on the issue
discussed as of the date of publication. Imation cannot guarantee the accuracy of any
information presented after the date of publication. This document is for information purposes
only. Imation makes no warranties, expressed or implied, in this document.
FCC Information
This device complies with part 15 of the FCC Rules. Operation is subject to the following two
conditions: (1) This device may not cause harmful interference, and (2) this device must accept
any interference received, including interference that may cause undesired operation.
This equipment has been tested and found to comply with the limits for a Class B digital device,
pursuant to part 15 of the FCC Rules. These limits are designed to provide reasonable protection
against harmful interference in a residential installation. This equipment generates, uses and can
radiate radio frequency energy and, if not installed and used in accordance with the
instructions, may cause harmful interference to radio communications. However, there is no
guarantee that interference will not occur in a particular installation. If this equipment does
cause harmful interference to radio or television reception, which can be determined by turning
the equipment off and on, the user is encouraged to try to correct the interference by one or
more of the following measures:
• Reorient or relocate the receiving antenna.
• Increase the separation between the equipment and receiver.
• Connect the equipment into an outlet on a circuit different from that to which the receiver is
connected.
• Consult the dealer or an experienced radio/ TV technician for help.
Note: Changes or modifications not expressly approved by the party responsible for compliance
could void the user's authority to operate the equipment.
Industry Canada
This Class B digital apparatus complies with Canadian ICES-003.
Cet appareil numerique de la classe B est conforme à la norme NMB-003 du Canada.
Page 3

CONTENTS
About my IronKey Workspace W700-SC device 4
Features and benefits 4
Host computer requirements 5
Device management 5
Device security 6
Device specifications 7
Recommended best practices 8
Other resources 9
About IronKey Control Panel 10
Starting IronKey Control Panel 11
Booting from a USB drive 14
Running the Startup Assistant 14
Manually configuring the host computer 16
Performing a one-time boot operation 17
Booting your device on a Macintosh 18
Using my W700-SC device 20
Activating a managed device on first-time use 20
Starting Windows from the device 23
Unplugging the device 24
Managing your Smart Card and PIN 24
Updating device software 26
Changing the Unlock message 27
Viewing device information 28
Troubleshooting 29
Resolving boot issues 30
Appendix 1: Imation support for Macintosh 34
IronKey Workspace applications 34
Level of support for Mac models 34
Moving between Mac models 36
Installing Boot Camp support drivers 37
Downloading Boot Camp Support Software 40
Appendix 2: Admin users 41
Activating a managed device on first-time use 41
Managing my online account (managed devices only) 43
IronKey Workspace W700-SC User Guide
3
Page 4
ABOUT MY IRONKEY WORKSPACE W700-SC
DEVICE
IronKey Workspace W700-SC is a trusted, FIPS 140-2 Level 3 certified, secure USB flash drive that features
XTS-AES 256-bit hardware encryption. Certified by Microsoft as a Windows To Go device, your W700-SC is a
secure, personal workspace. It is capable of using all host system resources on host computers that are
certified to run Microsoft Windows
supports device authentication using a smart card. When paired with your device, you can securely unlock
your workspace using your smart card and Personal Identification Number (PIN).
Figure 1: IronKey Workspace W700-SC device
Once you unlock your W700-SC device, you can safely boot a fully functional version of Microsoft Windows 8.1
Desktop. Use the Windows 8.1 workspace as you would any other Windows 8.1 computer. When your work is
finished, shut down the Windows 8.1 operating system and remove the device from the host computer. You’re
ready to bring your “PC on a Stick™” anywhere.
®
7.0 and higher, and qualified Mac computers. Additionally, the W700-SC
Use this guide to learn more about how to use your W700-SC device.
This chapter contains information about:
• Features and benefits
• Host computer requirements
• Device management
• Device security
• Device specifications
• Recommended best practices
• Other resources
FEATURES AND BENEFITS
FIPS 140-2 Level 3 certification—IronKey Workspace W700-SC is FIPS certified so you can feel confident that
you’re complying with regulatory requirements.
Section 508 compliant—W700-SC devices are fully compliant with section 508 accessibility requirements.
IronKey Workspace W700-SC User Guide
4
Page 5

ABOUT MY IRONKEY WORKSPACE W700-SC DEVICE
Hardware Encryption—The IronKey Cryptochip protects your critical data, applications and networks by
keeping encryption key management on the device, where it’s safe and protected.
Smart card/PIN-Protected—Only after logging in with an authorized smart card and PIN will the drive unlock
the workspace so you can boot into Windows To Go. If a smart card is lost or expired, you can bind a new card
to the device.
Wat e r p roof and Tam p er -Re s i s ta nt —Designed to survive the extremes, IronKey Workspace W700-SC has a
rugged metal encasing that is injected with an epoxy compound that makes it not only tamper-resistant, but
waterproof to military specifications (MIL-STD-810F).
Device Management—Your device has built-in software that lets you manage device settings. Your company
may also configure your device for centralized management with an IronKey Enterprise Management System,
such as IronKey Enterprise Server or IronKey Enterprise Service. For more information, see “Device
management” on page 5.
Host computer requirements
HOST COMPUTER REQUIREMENTS
The host computer must allow you to boot from a USB device. Computers that are certified for use with
Windows 7 or higher can be configured to boot automatically from a USB device. Check with the hardware
manufacturer if you are not sure whether your computer can boot from a USB device. For more information,
see “Booting from a USB drive” on page 14.
®
• Windows computer that is certified to run Microsoft Windows
• Macintosh computer that supports Windows 8 or higher. Note: Your W700-SC device must also
ha
ve Boot Camp Support Software installed in Windows To Go. Your administrator may have
included this software when your device was provisioned. For more information, see “Booting yo
device on a Macintosh” on page 18.
• To use your W700-SC with a smart card, you must have HID Global’s ActiveID® ActivClient® software (version 6.2.0.50, 6.2.0.195, or 7.0.2.403) installed on the host computer so that it is available
when you activate the device in non-boot mode.
• USB 3.0 (Super-Speed) port is recommended or USB 2.0 port for high-speed data transfer. USB 3.0
por
ts are typically marked blue or display the “SS” (Super Speed) symbol. A USB 1.1 port or powere
hub
will also work, but will be slower.
7 or higher.
ur
d
DEVICE MANAGEMENT
There are two levels of device management: the administrative level and the user level. At the administrative
level, your organization can implement a device management system to control the policy on your device and
provide device updates as well as control access to the device. Devices controlled by an IronKey Enterprise
Management System are called “managed devices”. Your administrator will tell you if you have a managed
device.
User management refers to the device management options available to you, the user, to control your device.
Each device includes the IronKey Control Panel. An application that lets you view device information, change
device preferences, and run the Startup Assistant to configure the host computer.
Administrative management
An IronKey Enterprise Management System allows IT administrators to remotely manage your IronKey
Workspace W700-SC device. If you have a managed device, you must first activate it before you start
Windows To Go. Activation binds the device to your user account in the IronKey Enterprise Management
System and applies a device policy. Once activated, your device can receive policy and software updates, and
administrators can reset a forgotten PIN.
IronKey Workspace W700-SC User Guide
5
Page 6
ABOUT MY IRONKEY WORKSPACE W700-SC DEVICE
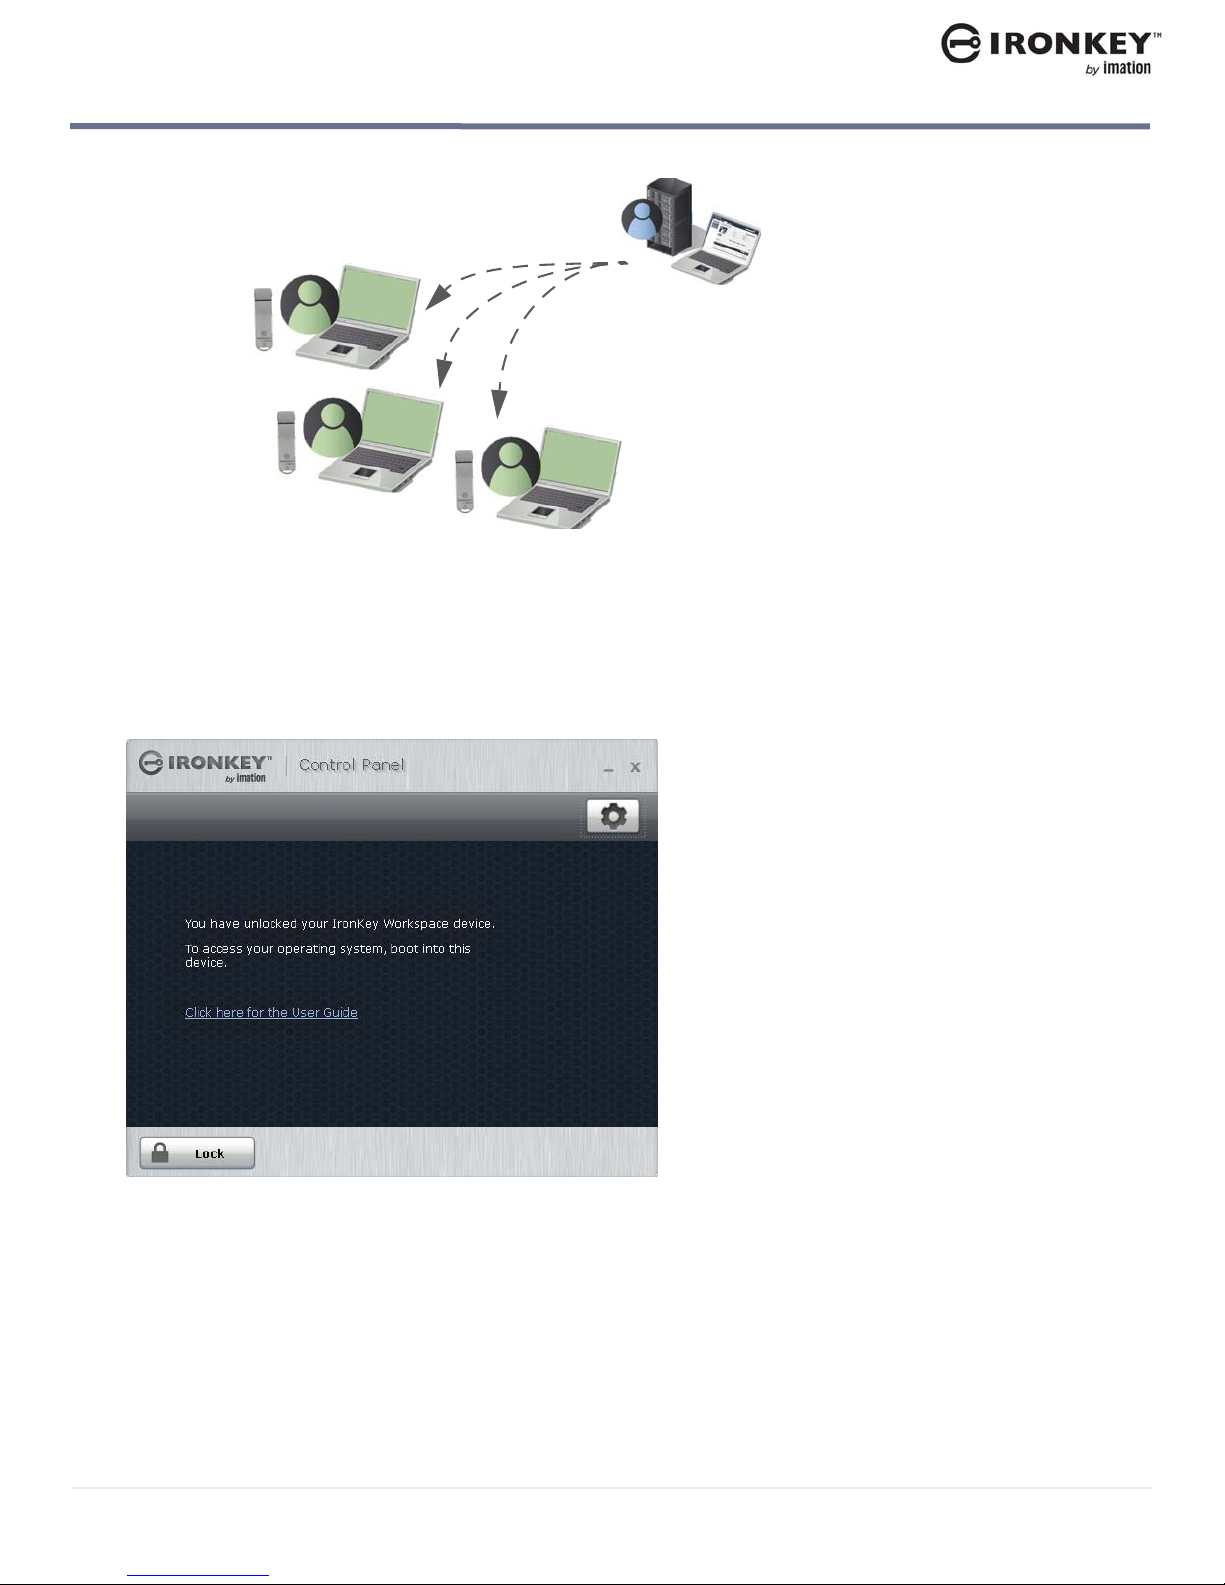
Users with
managed
devices
Administrators manage devices
using the Admin Console in the
IronKey Enterprise
Management System
Figure 2: Devices managed by an IronKey Enterprise Management System
Device security
User management
Use the IronKey Control Panel application to manage your device preferences. If your device is managed by an
IronKey Enterprise Management System, the IronKey Control Panel allows the device to connect to the
management system. Using the Control Panel, you can activate your device with the management system and
download device software updates. For more information, see “About IronKey Control Panel” on page 10.
Figure 3: IronKey Control Panel application
DEVICE SECURITY
IronKey Workspace W700-SC devices have been designed from the ground up with security in mind. The
device uses a combination of advanced security technologies to ensure that only you can access your data.
Additionally, it is a physically secure device, to prevent hardware-level attacks and tampering, and to ensure
the device is rugged and long-lasting.
IronKey Workspace W700-SC User Guide
6
Page 7

ABOUT MY IRONKEY WORKSPACE W700-SC DEVICE
The IronKey Workspace W700-SC adds an extra security factor when authenticating, a smart card. Instead of
a device password like other IronKey Workspace devices, you can use your smart card to unlock the device.
The encryption key from the smart card is paired with the device and bound to the device authentication
method.
The IronKey Cryptochip is hardened against physical attacks such as power attacks and bus sniffing. It is
physically impossible to tamper with its protected data or reset the password counter. If the Cryptochip
detects a physical attack, it destroys the Cryptochip, making the stored encrypted files inaccessible.
We strive to be very open about the security architecture and technology that we use in designing and
building this product. We use established cryptographic algorithms, we develop threat models, and we
perform security analyses (internal and third party) of our systems all the way through design, development
and deployment.
Note: The W700-SC “device password” referred to in this section is the smart card encryption certificate that
is protected by the smart card PIN.
Data Encryption Keys
• AES key generated by onboard Random Number Generator
• AES key is generated at initialization time and encrypted with a hash of the device password
• No back-doors: AES key cannot be decrypted without the device password
• AES key never leaves the hardware and is not stored in NAND flash
Device specifications
Data Protection
• Windows To Go partition is not accessible until the device password is verified in hardware
• Device password retry-counter implemented in tamper-resistant hardware
• If you exceed the smart card PIN retry-count, the smart card will lock and an administrator will have
to unlock the card.
• Sensitive data and settings are stored in hardware
Device Password Protection
• USB command channel encryption to protect device communications
• Password-in-memory protection to protect against cold-boot and other attacks
The device password is hashed using salted SHA-256 before being transmitted to the device firmware over a
secure USB channel. It is stored in an extremely inaccessible location in the protected Cryptochip hardware.
The hashed password is validated in hardware (there is no “getPassword” function that can retrieve the hashed
password), and only after the password is validated is the AES encryption key decrypted. The password trycounter is also implemented in hardware to prevent memory rewind attacks.
DEVICE SPECIFICATIONS
The following table provides details about your W700-SC device.
Tab l e 1 : Device specifications
Specification Details
Capacity* 32GB, 64GB, 128GB
Dimensions 82mm X 21.1mm X 9.1mm
IronKey Workspace W700-SC User Guide
7
Page 8

ABOUT MY IRONKEY WORKSPACE W700-SC DEVICE
Tab l e 1 : Device specifications
Specification Details
Wei ght 1.12 oz (32 g rams)
Recommended best practices
Operating
Te mp e ra t u re
Operating Shock 16G rms
Certification FIPS-140-2 Level 3
Hardware
Encryption
Hardware • USB 3.0 (Super speed)
Host computer
compatibility
Accessibility The IronKey Control Panel application is Section 508 compliant. Users with disabilities
Designed and Assembled in the U.S.A.
0C, 70C
Data: 256-bit AES (XTS mode)
Hardware: 256-bit AES
Hashing: 256-bit SHA
• Water-resistant MIL-STD-810F
•Dust-resistant
• Shock-resistant
• Ruggedized
PC certified to run Microsoft Windows 7 or higher operating systems
Mac computer that supports Windows 8.1
have keyboard navigation and screen reader support.
* Some space is required for Windows To Go software. Windows 8.1 Enterprise is not included or preloaded on
the device.
RECOMMENDED BEST PRACTICES
The following list provides tips on how to use your device to maximize safety and security.
• Never unplug the device when the LED is on or while booted in Windows To Go. This can result in
loss of data or possibly cause irreparable damage to the operating system on the device.
• Never share your device smart card PIN.
• If Windows To Go is in Hibernate mode, do not unplug the device and move it to another computer.
Windows To Go does not support roaming between computers using hibernate.
• Recovering data stored in Windows on a lost or damaged drive is difficult and often not possible. It
is recommended that you store files and data using an alternate storage method. If your company
has purchased IronKey secure storage devices, you can save your data to the IronKey storage device
while booted in Windows To Go. You can also use folder redirection or offline files, or back up your
data to a network drive or cloud-based storage space.
IronKey Workspace W700-SC User Guide
8
Page 9

ABOUT MY IRONKEY WORKSPACE W700-SC DEVICE
Other resources
OTHER RESOURCES
IronKey devices
http://support.ironkey.com Support information, knowledge base and video tutorials
securityfeedback@imation.com Product feedback and feature requests
http://www.ironkey.com General information
Windows To Go
http://www.ironkey.com/en-US/windows-to-go-drives/windows-to-go.html
Reference documentation from Apple
The following table provides links to documentation from Apple about Boot Camp 5.1 and Windows 8 and 8.1
support on Mac computers.
Tab l e 2 : Reference information from Apple
Top ic Reference
Main Boot Camp Support page http://www.apple.com/support/boot
Boot Camp 5.1: Frequently Asked Questions http://support.apple.com/kb/HT5639
Boot Camp: Frequently Asked Questions
about Ins
Boot Camp: System requirements for
M
icrosoft Windows operating systems
Boot Camp 5.1 download http://support.apple.com/downloads/#maco
About Startup Manager http://support.apple.com/kb/HT1310
talling Windows 8
http://support.apple.com/kb/HT5628
http://support.apple.com/kb/HT5634
Note: Mak
Mac model that will be used to boot the device.
e sure you download the version that supports the
camp/
Contact support
For support, please contact your Help desk or System Administrator.
scomponents
IronKey Workspace W700-SC User Guide
9
Page 10

ABOUT IRONKEY CONTROL PANEL
The IronKey Control Panel is software that lets you manage your device. You can run the Control Panel when
you are booted into the host operating system or when booted in Windows To Go. The Control Panel lets you
edit your device preferences and view device information, such as the software or firmware version. For
managed devices, IronKey Control Panel also lets you activate the device (on first-time use) and download and
install device software updates. Users with administrative privileges can also use the Control Panel to connect
to the management console in the IronKey Enterprise Management System. If you are an Administrative User,
see Appendix A for further information.
You can access the Control Panel when the host operating system is running (this is called non-boot mode) or
when you boot into Windows To Go (this is called Windows To Go mode). Some tasks can only be completed
when you run the Control Panel in non-boot mode, for example, installing device updates.
The following table outlines IronKey Control Panel operations available in non-boot and Windows To Go mode.
Tab l e 3 : IronKey Control Panel operations
IronKey Control Panel operation Non-boot mode Windows To Go mode
Pair device with new smart card Yes —
Unlock/Lock the device Yes
Change unlock message
Auto-lock preferences
Activate the device (managed devices
1
Yes
Yes
1
Yes
Yes —
—
only)
Check for device updates (managed
Yes Yes
devices only)
Download and install device updates
Yes —
(managed devices only)
View device information Yes Yes
Access online account (Admin users
Yes Yes
only)
1
For managed devices, this is only available if enabled in policy.
1
IronKey Workspace W700-SC User Guide
10
Page 11

ABOUT IRONKEY CONTROL PANEL
Starting IronKey Control Panel
STARTING IRONKEY CONTROL PANEL
For managed devices, you can start IronKey Control Panel from the application partition in non-boot mode or
from the taskbar when booted in Windows To Go.
Non-boot mode
Make sure that you have HID Global’s ActiveID® ActivClient® software installed on the host computer so that it
is available when you start the Control Panel in non-boot mode. In non-boot mode, when the host operating
system is running, IronKey Control Panel opens after you unlock the device. Entering the wrong PIN a
consecutive number of times will lock the smart card.
You should always lock the device before you unplug it or if the device is not in use while working in non-boot
mode. You can manually lock the device or set the device to automatically lock after a period of inactivity. For
managed devices, auto-lock settings are available in IronKey Control Panel if enabled in the device policy. The
device policy is applied to the device during activation.
For a list of operations that are available with IronKey Control Panel in non-boot mode, see “IronKey Control
Panel operations” on page 10.
Note: If y
be required to activate the device. See “Activating a managed device on first-time use” on page 20.
To start IronKey Control Panel in non-boot mode
1. Mak
2. Insert
3. Insert
4. In a file manager
ou have a managed device, the first time you start IronKey Control Panel in non-boot mode, you will
e sure that the host computer is turned on and the host operating system is running.
the W700-SC device into the USB port of the host computer.
your smart card into the card reader.
, double-click the IronKey.exe file from the IronKey Workspace drive.
IronKey Workspace W700-SC User Guide
11
Page 12
ABOUT IRONKEY CONTROL PANEL
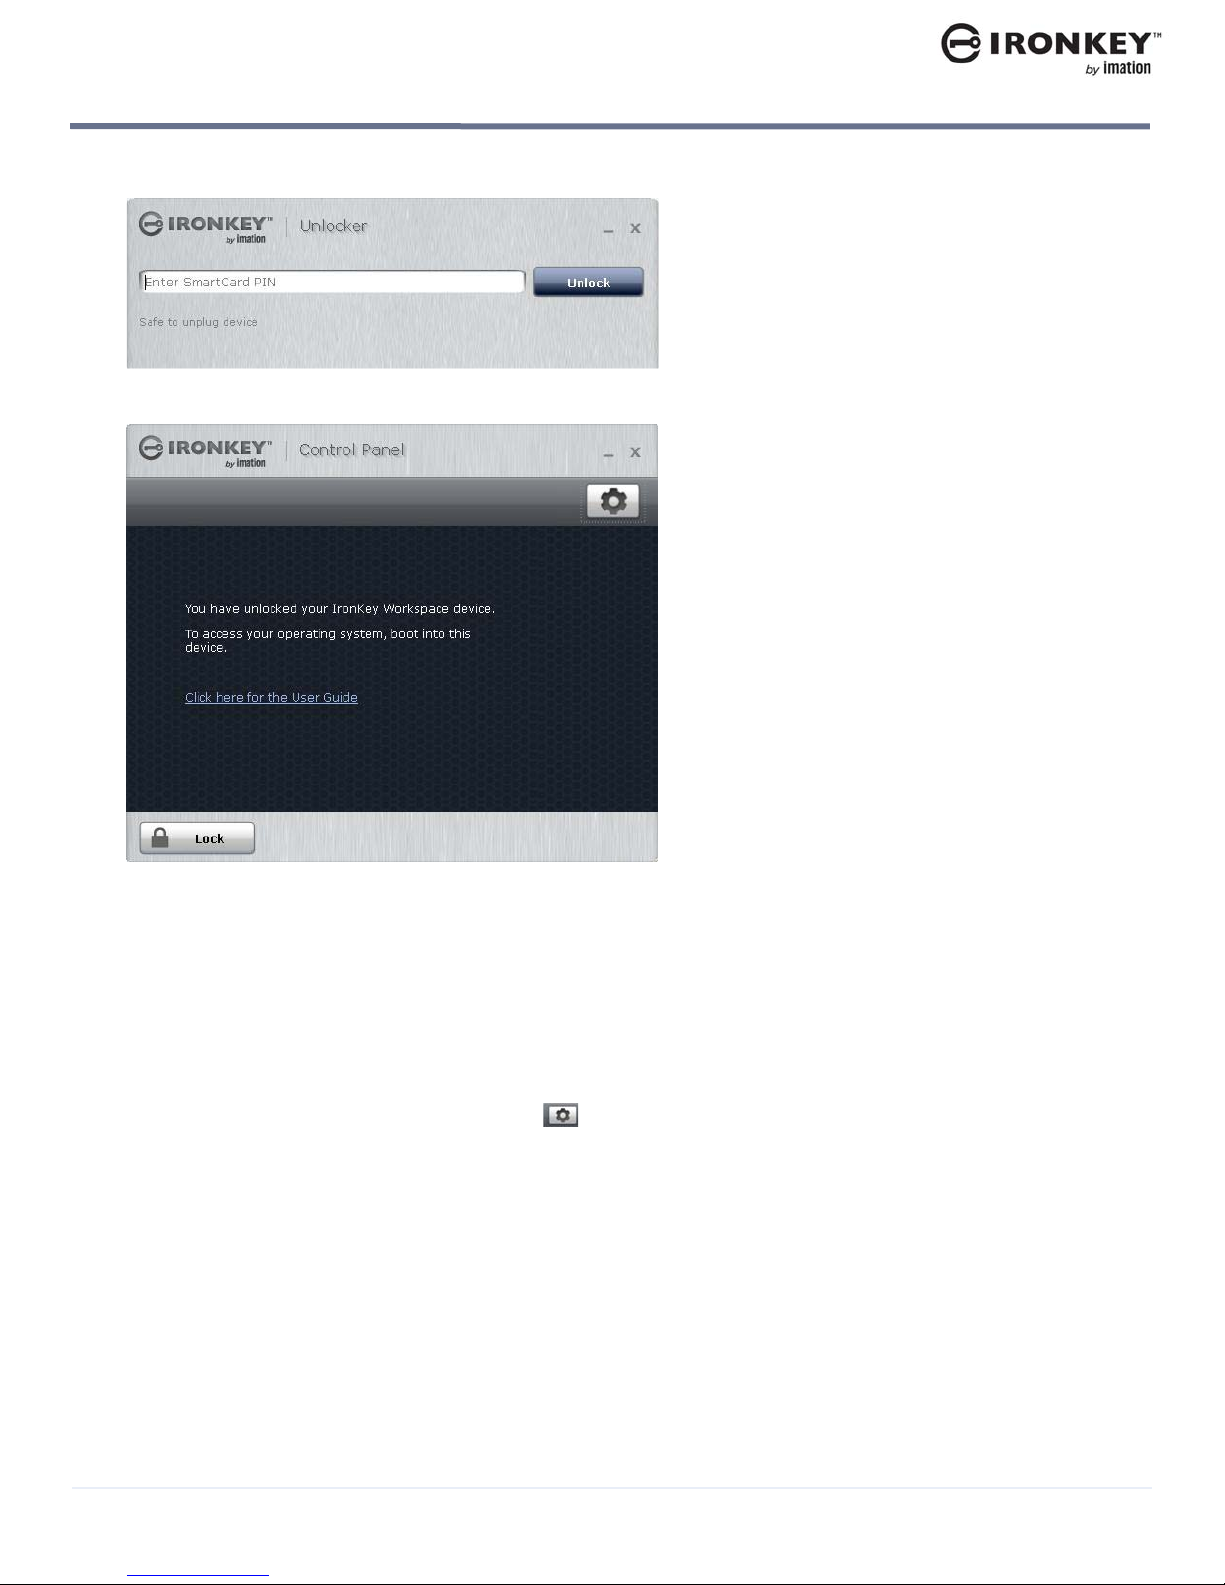
5. Type your SmartCard PIN and click Unlock.
The IronKey Control Panel will open automatically.
Starting IronKey Control Panel
Note: If the device loses power, for example if it is unplugged from a USB hub, it will lock.
To l o c k t h e d e v ice
• In Ir
onKey Control Panel, click Lock from the bottom left corner of the application. You can also use the
keyboard shortcut: CTRL + L.
Note: O
nce the device is locked, you can safely unplug it.
To set the device to automatically lock
1. In Ir
2. Click P
3. Cli
onKey Control Panel, click the Settings button in the menu bar.
references in the left sidebar.
ck the check box for auto-locking the device and set the time-out for either 5, 15, 30, 60, 120, or 180
minutes.
Note: F
or managed devices, if auto-lock preferences have been disabled by the administrator, you will not be
able to modify this setting.
IronKey Workspace W700-SC User Guide
12
Page 13

ABOUT IRONKEY CONTROL PANEL
Starting IronKey Control Panel
Windows To Go mode
In Windows To Go mode, IronKey Control Panel runs automatically when you boot Windows from the device.
You do not have to unlock the device to start the application. The device unlocks when you authenticate in the
IronKey Workspace Preboot environment. Locking the device does not apply in Windows To Go mode; instead,
you must shutdown the Windows operating system. For more information, see “Unplugging the device” on
page 24.
To start IronKey Control Panel in Windows To Go
• When boot
Control Panel.
ed in Windows, on the Windows taskbar, right-click the IronKey icon and choose IronKey
IronKey Workspace W700-SC User Guide
13
Page 14

BOOTING FROM A USB DRIVE
It is recommended that you configure the host computer (PC) to always boot from a USB drive (if present).
The IronKey Workspace Startup Assistant, available in the Control Panel on your device, will automatically
configure a qualified host computer to boot from your device on startup. The tool sets the boot order of the
host computer so that it will boot first from a USB drive if one is present.
If the host computer is not supported by the Startup Assistant, you will have to manually configure it to boot
from a USB drive. If you do not want to configure the host computer, you can do a one-time boot procedure to
start Windows To Go.
Important: Once configured, your computer will try to boot any USB device connected to it on startup,
including malicious devices. Do not insert a bootable USB device unless you are sure the device is safe for use.
You cannot configure Mac computers to always boot from a USB drive. See “Booting your device on a
Macintosh” on page 18.
This chapter contains information about:
• Running the Startup Assistant
• Manually configuring the host computer
• Performing a one-time boot operation
• Booting your device on a Macintosh
RUNNING THE STARTUP ASSISTANT
Run the IronKey Workspace Startup Assistant first before you try booting Windows To Go from the device.
The Startup Assistant runs on Windows computers only and will not configure Mac systems. The tool can
configure host computers with either a 32-bit or 64-bit processor architecture that also meet the following
configurations:
• UEFI firmware and Windows 8 or Windows 8.1 operating system
• BIOS firmware from DELL and Windows operating system
• BIOS firmware from HP and Windows operating system
• BIOS firmware from Lenovo and Windows operating system
Other configurations are not supported. If your system is not supported, see “Manually configuring the host
computer” on page 8. Once configured, you will have to manually edit the boot order in the BIOS settings if
you want to remove USB as the first boot priority.
Tip: For the most up-to-date list of DELL, HP, and Lenovo systems that will work with the Startup Assistant,
see the
Note: You cannot run the Startup Assistant if your system setup is protected with a password.
Startup Assistant page on the IronKey Support site.
IronKey Workspace W700-SC User Guide
14
Page 15

BOOTING FROM A USB DRIVE
Running the Startup Assistant
Note: Some Dell systems prevent booting from a USB device even when USB is first in the boot order. For
security reasons, if your computer is set to prevent booting from a USB device, you must go directly into the
BIOS system setup to enable boot support. In the BIOS Setup, the “Enable Boot Support” setting is located
under Settings > System Configuration > USB Configuration. For information about how to enter the BIOS
Setup, see “Manually configuring the host computer” on page 8.
To run the IronKey Workspace Startup Assistant
1. Mak
2. I
3. Click the Setting
e sure that the host computer is turned on and the host operating system is running.
nsert the IronKey Workspace W700-SC device into the USB port of the host computer.
s button, and from the left sidebar, click Too ls , and then click Launch Startup Assis-
tant.
4. When prompted to allow the Startup Assistant to make changes to your computer, click Yes .
5. R
ead the instructions on the first screen of the Startup Assistant and click Continue.
IronKey Workspace W700-SC User Guide
15
Page 16

BOOTING FROM A USB DRIVE
6. The Startup Assistant will check the host computer’s registry to verify that the system configuration is
supported. If the system is supported, click Configure to start the process.
If the system does not meet the requirements, the Configure button will appear dimmed and you will
receive a status message that indicates the system is not supported. Unsupported host computers must
be manually configured, see “Manually configuring the host computer” on page 8.
7. When the c
onfiguration process has completed, click Exit.
Manually configuring the host computer
The host computer is now ready to automatically boot Windows To Go from the device. To boot from the
device, make sure the device is plugged in and restart the host computer.
Note: If t
further instructions.
he configuration is incomplete, review the details in the System information section on-screen for
MANUALLY CONFIGURING THE HOST COMPUTER
If the host computer is not supported by the IronKey Workspace Startup Assistant, you can manually
configure it to boot from a USB device. The steps to configure your computer depend on the host operating
system you are using.
IronKey Workspace W700-SC User Guide
16
Page 17

BOOTING FROM A USB DRIVE
Performing a one-time boot operation
PCs running Windows 8 or Windows 8.1
If the host computer is running Windows 8, you set the option to boot from a USB device in the Windows To
Go Startup Options. Once set, the host computer will automatically boot from the device when you insert it
and turn on the host computer.
To change Windows To Go Startup Options (Windows 8 and Windows 8.1)
1. In the host operating system, press the Windows key + W.
2. In the Settings Search text box, type “Windows To Go startup options”. The topic will display in the list.
Press ENTER to select it.
3. In Windows To Go Startup Options dialog box, click Yes , and then click Save Changes.
PCs certified to run Windows 7 or higher
If the host computer is certified for Windows 7 or higher (and is not running Windows 8 or 8.1), you must
manually configure the BIOS settings so the computer will automatically boot from a USB device. The
following procedure describes the general steps required to change the BIOS settings. BIOS settings differ by
computer manufacturer. For more information about methods to configure BIOS settings by manufacturer, see
Tips for configuring your BIOS settings to work with Windows To Go.
To manually configure a computer to boot from a USB drive
1. Shut down the host computer if it is not already turned off.
2. Insert the device into the USB port.
3. Turn on the computer and enter the BIOS Utility.
This is a very fast step. You have only a few seconds to press the correct key to access the BIOS (typically
when the manufacturer’s logo appears). You can press the key multiple times to increase the chances of
successfully entering the firmware/BIOS. Many manufacturers use “F2” but an on-screen message will
indicate the key sequence for the computer you are configuring, for example, “Press the F2 key”, or “Press
F1 to enter setup”.
4. In the BIOS, navigate to the setting that controls the boot order. The name of the option may vary, for
example, “Boot”, “System Configuration”, or “Storage”.
5. In the Boot Priority, move the USB drive to the top of the list so that it is first in the boot order. The name
of the USB drive in the list may vary depending on the computer manufacturer.
6. Save the new BIOS settings and Exit.
Important: Use caution when modifying BIOS boot settings as incorrect changes can harm your computer. Do
not save BIOS changes if you think a setting has been incorrectly modified; exit the BIOS and restart the
procedure.
Tip: If you are having trouble changing your BIOS settings, see the documentation from the computer
manufacturer.
PERFORMING A ONE-TIME BOOT OPERATION
The Boot menu controls which device (for example, hard drive or USB drive) the operating system will load
from when the computer starts up. Each computer uses a specific “hotkey” that when pressed on startup, will
access the Boot menu. Hotkeys can vary by computer manufacturer. When you select the USB drive from the
Boot menu, the computer starts Windows To Go from the device for only this startup session. This is called a
one-time boot procedure and does not permanently change the boot order of the host computer.
IronKey Workspace W700-SC User Guide
17
Page 18

BOOTING FROM A USB DRIVE
To bo o t Windows To Go one-time only
1. Shut down the host computer if it is not already turned off.
2. Plug the IronKey Workspace device into USB port of the host computer.
3. Turn on the computer and press the hotkey to open the Boot menu.
This is a very fast step. You have only a few seconds to press the correct key. Typical hotkeys include Esc,
F10, or F12. An on-screen message will indicate the key sequence for the computer.
If the Boot menu does not appear and the operating system for the host computer starts, shut down the
computer and restart.
4. When the Boot menu appears, use the Arrow keys to select the USB drive (Imation IronKey) and press
ENTER.
If the menu has options for “USB drive” and “USB hard disk”, choose USB hard disk.
5. In the IronKey Workspace Preboot Environment, type the SmartCard PIN and click Unlock.
6. Click Reboot Now.
7. When the computer reboots, press the hotkey to open the Boot menu and select the USB drive (Imation
IronKey), and then press ENTER.
8. If prompted, type the Windows password to unlock the Windows To Go workspace.
Note 1: Some computers may force an automatic reboot process when you first start up Windows To Go.
Booting your device on a Macintosh
Note 2: Some computers do not support choosing the drive from the Boot menu and will require that you
configure the computer to boot from a USB device. See
“Running the Startup Assistant” on page 14.
BOOTING YOUR DEVICE ON A MACINTOSH
With the proper Boot Camp Support Software (from Apple Inc.), IronKey Workspace devices will boot
Windows To Go on many Mac computers that support Windows 8 or higher. Boot Camp software contains
drivers that must be installed in Windows To Go to make sure that components, such as Wifi access, will work
in Windows To Go when booted on a Mac.
There are two Boot Camp support packages that support Windows 8.1. Each package supports a different set
of Mac models. Your administrator may have installed these Boot Camp packages or included the setup files so
that you can install it in Windows To Go. For more information about installing Boot Camp “Installing Boot
Camp support drivers” on page 37. For a list of Mac models that have been tested with IronKey Workspace
devices running Windows To Go, see “Level of support for Mac models” on page 34.
Mac computers cannot be configured to automatically boot from a USB device. You must always use a onetime boot procedure.
Some Mac computers do not recognize the IronKey Workspace device when it reboots from the Preboot
environment and require the use of the Alternate Reboot method to ensure that the USB device displays in the
Startup Manager when you reboot the computer. The alternate re-boot method refers to how the computer
reboots from the IronKey Workspace Preboot Environment. The following Mac models are known to require
this method: MacBook Air 11-inch Mid 2012, and MacBook Air 13-inch Mid 2012.
To boot Windows To Go on a Mac
1 Make sure that the Mac computer is turned off and that no other USB devices are currently plugged in.
2. Plug the device into the USB port.
IronKey Workspace W700-SC User Guide
18
Page 19

BOOTING FROM A USB DRIVE
Booting your device on a Macintosh
3. Turn on the computer and immediately hold the Option key (Alt key on a non-Mac keyboard) to open the
Startup Manager.
4. In the Startup Manager, select the USB Windows device option.
If there are two USB options, choose the option that says “Windows”. Otherwise, if only one USB option
plays, such as “EFI Boot” choose that one.
dis
5. In the Workspace Preboot environment, if your Mac model requires you to use the alternate reboot
method (see “Imation support for specific Mac models” on page 34), click Op
Use default reboot behavior check bo
x. Click Use alternate reboot method, and then click Back.
tions and click to clear the
6. In the Workspace Preboot environment, type your SmartCard PIN in the text box of the Unlocker window
and click Unlock.
7. Click Re
8. W
boot Now and immediately hold the Option key again.
hen the Startup Manager opens, select the USB Windows device option again. The Windows To Go
operating system will now start up.
ype the Windows password (if applicable) and press ENTER.
9. T
Tip: If you do not press the Op
tion key in time and the Mac operating system starts, click Restart on the
Welcome screen (or click the Apple menu and choose Restart), and then immediately hold the Option key to
open the Startup Manager.
IronKey Workspace W700-SC User Guide
19
Page 20

USING MY W700-SC DEVICE
When you first receive a provisioned device, your administrator should provide the following information:
• Indicate whether your device is configured for management by an IronKey Enterprise Management
System—If your device will be managed, you will receive an activation code. You must activate the
device before you start Windows To Go for the first time. For more information, see
managed device on first-time use.
• Smart card PIN—This code is required to unlock the device in the IronKey Workspace Preboot environment when booting Windows To Go. You will set the PIN when you activate the device.
• Windows account information including Windows login credentials—Required to log into Windows.
• Indicate whether your device has been configured for use with qualified Mac computers. See “To
boot Windows To Go on a Mac” on page 18 for more details.
This chapter contains information about:
• Activating a managed device on first-time use
• Starting Windows from the device
• Unplugging the device
• Managing your Smart Card and PIN
• Updating device software
• Changing the Unlock message
• Viewing device information
Activating a
ACTIVATING A MANAGED DEVICE ON FIRST-TIME USE
Activating a device binds the device to your user account in the IronKey Enterprise Management System. With
the IronKey Workspace W700-SC, the smart card is also paired with your device during this process. You will
need the activation code provided by your administrator. During device activation, policies are applied to your
device.
You must activate your device on a host computer that is running Windows 7 (or higher) and has access to the
IronKey Enterprise Management System. You can activate your device on a qualified Mac or PC. Device
activation can only be done using the IronKey Control Panel in non-boot mode (not in Windows To Go). Once
activated, you can boot your device by following the procedure “Starting Windows from the device” on page
23.
Important: To activate your W700-SC with a smart card, you must have HID Global’s ActiveID® ActivClient®
software installed on the host computer.
To activate a managed device
1. Make sure that the host computer is turned on and the host operating system is running.
2. Insert the device into the USB port of the host computer. USB 3.0 port is preferred but USB 2.0 is also
supported.
IronKey Workspace W700-SC User Guide
20
Page 21

USING MY W700-SC DEVICE
Activating a managed device on first-time use
3. Insert the smart card into the card reader if it is not already inserted.
4. Do one of
• If you are running a Mac, open the IronKey Unlocker drive in Finder and then open the IronKey application. If you want the IronKey Unlocker application t
device, install the Auto-Launch Assistant. See “Installing the Auto-Launch Assistant (Mac only)” on
page 22.
• If you are running Windows, open a file manager
Wor kspace d rive.
the following:
o automatically open when you plug in the
, double-click the IronKey.exe file from the IronKey
5. Ty pe th e Activation Code (or copy and paste the characters if you received an email with the activation
code) and click the check box to agree to the End-User License Agreement. Your administrator will provide this code to you.
6. Click Activate. During activation, the device policy is applied and the device is bound to the user in the
IronKey Enterprise Management System.
IronKey Workspace W700-SC User Guide
21
Page 22

USING MY W700-SC DEVICE
7. Type the smart card PIN, and then click Continue.
8. Once the device is initialized and paired with the smart card, it is now ready to use. When device setup is
complete, the IronKey Control Panel will appear.
Activating a managed device on first-time use
9. Click the Lock button and shut down the host operating system. The device is now ready to boot into
Windows To Go. Follow the procedure “Starting Windows from the device” on page 23.
ou will need the smart card PIN when you start Windows from the device.
Tip: Y
Installing the Auto-Launch Assistant (Mac only)
Installing the Auto-Launch Assistant will automatically open the IronKey Unlocker window when you plug in
the device on that computer. This feature is only available on a Mac.
To install the Auto-Launch Assistant
1. Unlock y
2. Click To
o uninstall the Assistant, click Uninstall Auto-Launch Assistant.
Tip: T
IronKey Workspace W700-SC User Guide
our device and click the Settings button on the menu bar.
ol s from the left side bar, and then click Install Auto-Launch Assistant.
22
Page 23

USING MY W700-SC DEVICE
Starting Windows from the device
STARTING WINDOWS FROM THE DEVICE
If your device is managed, make sure you have activated the device with the IronKey Enterprise Management
System before you start Windows for the first time. For more information, see “Activating a managed device
on first-time use” on page 20.
During the startup procedure, you will need your smart card and PIN. The PIN unlocks the device in the IronKey
Workspace W700-SC Preboot environment. For security reasons, Windows To Go must start within 90
seconds after the device unlocks and reboots into Windows To Go (step 4). Otherwise, the device will lock and
you must restart the login process.
Make sure that the host computer meets the requirements described on page 6. It is recommended that the
host computer be configured to boot automatically from a USB device to ensure that the 90 second time limit
is not exceeded once you start booting the device. See “Running the Startup Assistant” on page 14. For Mac
computers or host PCs that are not configured to boot automatically from a USB device, see “Booting your
device on a Macintosh” on page 18, or “Performing a one-time boot operation” on page 17.
To start the Windows operating system on the device
urn off the host computer and insert the device into the USB 3.0 port (if there is one).
1. T
urn on the host computer and wait for the IronKey Workspace Preboot environment to start. If the host
2. T
computer is not configured to automatically boot from a USB device, quickly press the appropriate hotkey (typically F10 or F12) to perform a one-time boot operation (see “Performing a one-time boot operation” on page 17).
3. Insert
4. Ty
the smart card into the card reader if it is not already inserted.
pe t he Smart card PIN and click Unlock. Wait for the onscreen timer or click Reboot now.
If you want to set the default keyboard layout to the language and keyboard that you are currently using,
click Options and under Keyboard Layout, select the corresponding language and keyboard setting. Click
Back to return to the Unlocker dialog box. This setting will apply to all subsequent boot procedures.
IronKey Workspace W700-SC User Guide
23
Page 24

USING MY W700-SC DEVICE
5. The computer will reboot into the Windows operating system on the device.
6. If this is the first time starting Windows, you may have to configure some Windows settings. Follow the
on-screen instructions. This is only required the first time you start Windows To Go.
7. When Windows starts, type your Windows password (if applicable) to log into your Windows account.
Tip: If the host computer is already running when you plug in the device, you can restart it and boot into
Windows To Go.
Note: Each time you boot your device on different host computers, Windows To Go will adapt to the hardware
of the host computer to use its unique set of hardware components. The device stores a hardware profile for
each new host computer. This profile is used on subsequent startup procedures for a known host computer.
Unplugging the device
UNPLUGGING THE DEVICE
In Windows To Go mode, make sure that you properly shut down the Windows operating system before you
remove the device from the host computer.
If the device is being used in non-boot mode (that is, the device is not booted into Windows To Go and the
host operating system is running), you should lock the device (using IronKey Control Panel), and then safely
eject it from the host computer. For more information about locking a device, see “To lock the device” on page
12.
To shut down Windows
1. In Windows To Go, move the mouse to the bottom-left corner of the screen and right-click the Windows
logo.
2. Click Shut down or sign out and then click Shut down.
3. When the operating system has shut down, unplug the device from the host computer.
Important: Never remove the device while booted in Windows To Go. Doing so could corrupt Windows To Go.
If the device is accidentally unplugged while Windows To Go is running, the computer will freeze.
MANAGING YOUR SMART CARD AND PIN
If you lose your card or forget your PIN code, you will need to pair a new card with your device. Contact your
administrator to reset your smart card from the IronKey Enterprise Management System. The next time you
plug in your device, you will be prompted to insert the card and pair it with your device.
To pair a new card with your device
1. Make sure that the host computer is turned on and the host operating system is running. The host com-
puter must have network access to the IronKey Enterprise Management System.
2. Insert the device into the USB port of the host computer. USB 3.0 port is preferred but USB 2.0 is also
supported.
3. Insert the smart card into the card reader if it is not already inserted.
IronKey Workspace W700-SC User Guide
24
Page 25

USING MY W700-SC DEVICE
Managing your Smart Card and PIN
4. Open a file manager, double-click the IronKey.exe file from the IronKey Workspace drive.
5. Type a SmartCard PIN and confirm it, and then click Continue.
The new smart card will be paired with the device.
IronKey Workspace W700-SC User Guide
25
Page 26

USING MY W700-SC DEVICE
6. When the IronKey Control Panel appears, click Lock and shut down the host operating system. The device
is now ready to boot into Windows To Go using the new smart card. Follow the procedure “Starting Windows from the device” on page 23.
Updating device software
UPDATING DEVICE SOFTWARE
You can update software and firmware on your device using signed updates that are verified in hardware
before they are loaded. Updating your device allows you to take advantage of new upgrades as they become
available. You cannot update your device while booted in Windows To Go.
Important: Y
Windows. You cannot run the update file on a Mac.
For managed devices, updates are uploaded to the Ir
administrator. You can download and install the update using IronKey Control Panel. If set in the device policy
(by your administrator), you will automatically be notified about a new update when you unlock the device.
You can also manually check for updates.
To manually check for device updates (managed devices only)
1. In Ir
ou must download and install the device update in non-boot mode using a computer running
onKey Enterprise Management System by an
onKey Control Panel, click the Settings button.
IronKey Workspace W700-SC User Guide
26
Page 27

USING MY W700-SC DEVICE
2. Click Too ls in the sidebar, and then click Check for Updates.
Note: When booted in Windows To Go, you can receive update notifications and manually check for device
updates. However, you can only download and install the update in non-boot mode on a computer running
Windows.
Changing the Unlock message
To update a managed device
1. Mak
2. Insert
3. Unl
4. Click the Setting
5. Click To
6. If an updat
7. Fo
e sure that the host computer is turned on and the host operating system is running. If you are cur-
rently booted in Windows To Go, shut down the Windows To Go operating system, unplug the device, and
tart up the host computer.
s
the device into the USB port of the host computer.
ock the device and start the IronKey Control Panel application by double-clicking the “IronKey.exe” file
on the IronKey Workspace drive from a file manager.
s button on the menu bar.
ol s in the sidebar, click Check for Updates.
e is detected, a Download dialog box will appear. Click Download.
After the file is downloaded, the Updat
llow the instructions in the Update wizard to complete the update.
e wizard will start automatically.
CHANGING THE UNLOCK MESSAGE
The Unlock message is custom text that displays when you unlock the device. You can change the message
that displays, for example, you can add contact information so that if you lose your device, someone will know
how to return it to you.
Note: F
message. Administrators may set a corporate message that you cannot modify.
or managed devices, you can only change this message if your device policy allows you to modify the
To change the Unlock message
1. In Ir
2. Click P
IronKey Workspace W700-SC User Guide
onKey Control Panel, click the Settings button in the menu bar.
references in the left sidebar.
27
Page 28

USING MY W700-SC DEVICE
3. Type the message in the Unlock Message field. Your message text must fit in the space provided (approx-
imately 7 lines and 200 characters).
Viewing device information
VIEWING DEVICE INFORMATION
You can find specific information about your device, such as the model and serial number, software and
firmware version from IronKey Control Panel.
To view device details
1. In Ir
2. Click De
onKey Control Panel, click the Settings button on the menu bar.
vice Info in the left sidebar. Device information will display on the right.
Tip: Click Copy to copy the device information to the clipboard for pasting in an e-mail message, forum
posting, or support request.
IronKey Workspace W700-SC User Guide
28
Page 29

TROUBLESHOOTING
The following tips and frequently asked questions are available to help you use your device.
How secure are IronKey Workspace W700-SC devices?
W700-SC devices are protected with AES 256-bit hardware-encryption just as our Secure Portable Storage
devices. They also have FIPS-140-2 Level 3 certification.
How do I access my device if I forget my PIN or lose my card?
If you forget your PIN or lose your card, you must contact your administrator. The administrator can unpair
your device and smart card so that you can pair it with a new smart card.
I cannot get my computer to boot from a USB device
Make sure that the host computer you are using meets the “Host computer requirements” on page 5. You will
need to access the boot sequence in the BIOS of your computer and set the boot sequence to USB as first
option. See “Booting from a USB drive” on page 14. Contact your administrator if you require further assistance
or see the documentation from the computer manufacturer.
Why can’t I download and install a device update in Windows To Go?
In Windows To Go mode, you can check to see if new device updates are available but you cannot install them
while booted in Windows To Go. If your device is managed, you can download and install device updates only
in non-boot mode. To switch to non-boot mode, shut down the Windows To Go operating system and then
unplug the device. Restart the host computer and then plug the device back in. Start the IronKey Control Panel
on the application partition of the device. Follow all of the steps in the procedure “Updating device software”
on page 26.
Windows To Go will not go into Hibernate or Sleep mode
By default, Hibernate and Sleep mode are not enabled for Windows To Go devices. You should not enable
these modes because Windows To Go does not support roaming between computers.
Can I boot my device on a Mac?
You can boot your device on many Mac computers that support Windows 8. You must install the Boot Camp
Support Software in Windows To Go, so that Windows 8.1 has the drivers it requires to support Mac hardware.
For more information, see “Booting your device on a Macintosh” on page 18. If you require additional
information about using a Mac computer with your device, see “Appendix 1: Imation support for Macintosh” on
page 34.
I’m using a Mac but wireless access is not working in Windows To Go
If you do not have the correct Boot Camp software drivers (for your Mac model) installed in Windows To Go,
some components will not work properly. See “Installing Boot Camp support drivers” on page 37 or verify on
the Apple Web site that you have the Boot Camp software that is required for your Mac model.
How do I resolve the following error message with a managed device?
“Wrong Admin Code for this IronKey Workspace device. Contact your System Administrator to resend the
Activation Code.”
IronKey Workspace W700-SC User Guide
29
Page 30

TROUBLESHOOTING
The Admin Code that was set on the device when it was provisioned may not match the Admin Code set when
the device was added to your user account in IronKey Enterprise Management System. If these codes (set by
an administrator) do not match, the Activation Code will not activate your device. Contact your administrator
to verify that you have the correct Activation Code for your device.
Why does the IronKey Control Panel appear too large/small?
The IronKey Control Panel application will appear larger or smaller depending on
Microsoft Windows Control Panel that control the size of applications and text on the Desktop. If the
application is too large or too small, you can adjust these Windows settings until the application meets your
display preference.
the Display settings in the
Resolving boot issues
RESOLVING BOOT ISSUES
If you are having issues booting your IronKey Workspace W700-SC device, this section provides some known
issues and workarounds to resolve boot issues.
My device will not start Windows To Go after I reboot
When you reboot from the Preboot environment, some host computers may not recognize the drive. This is
own to happen with some Mac models (see “To boot Windows To Go on a Mac” on page 18). If you have
kn
problems booting into Windows To Go, follow these steps to use the alternate reboot method.
1 In the Ir
2. Click
3. Click Back and in the Workspace Preboot environment, type your smart card PIN in the text box of the
Unlocker window. Click Unlock, and then click Reboot now.
Disable Secure Boot
The Secure Boot One feature, available with PCs that use a UEFI architecture, may conflict with the process of
booting fr
To disable Secure Boot, you need to enter the UEFI or BIOS setup utility of the host PC. In the setup utility, look
for an option in System Configuration or Boot Options to turn Secure Boot off. Try booting your device again.
onKey Workspace Preboot Environment, click Options.
to clear the Use default reboot behavior check box, and then click Use alternate reboot method.
om a USB.
Turn o f f Windows Fast Startup
Fast Startup (also called hybrid boot or hybrid Shutdown)
up faster after shutting down. When turned on, Windows 8 uses a hybrid shutdown method (a partial
hibernate). This method saves only the kernel session and the device drivers (system information) to the
hibernate file (hiberfil.sys) on disk instead of closing it when you shut down your PC.
IronKey Workspace W700-SC User Guide
is a new feature in Windows 8 to help your PC start
30
Page 31

TROUBLESHOOTING
Resolving boot issues
The Fast Startup process can sometimes ignore inserted USB devices. Turning off this process may solve the
USB boot issue. Once set, when you shut down the PC, it will perform a full shut down operation.
1 Open the Control Panel and click Power Options.
2. Ta p o r c l i c k t h e Choose what the power buttons do.
IronKey Workspace W700-SC User Guide
31
Page 32

TROUBLESHOOTING
3. Tap or Click the Change settings that are currently unavailable.
Resolving boot issues
4. If prompted by UAC, then tap or click Yes .
5. Under Sh
utdown settings, click to clear the Turn on fast startup box, and tap or click Save changes.
IronKey Workspace W700-SC User Guide
32
Page 33

TROUBLESHOOTING
USB 3.0 ports often
have this symbol beside
the port. SS stands for
Super Speed.
Note: If the Turn o n fast star t u p setting is not listed, it means that hibernate has been disabled and therefore
Fast Startup has also been disabled.
Resolving boot issues
Resolving USB port issues
Occasionally, some users may still experience difficulty when booting Windows To Go, even after they have
correctly set the BIOS. For example, the Workspace authentication page may reappear during the boot
process. These issues are typically because PC vendors have different ways of manipulating hardware
interfaces, such as USB ports. Below are some known workarounds from Imation support.
Try a different USB port
Manufacturers may prioritize ports and how they are powered, or the sequence in which ports are recognized
(and powered) differently. Try different ports on your PC to see which one works.
Try a USB 3.0 port if available
Some PC manufacturers prioritize the performance of USB 3.0 ports before a USB 2.0 port. The USB 3.0 port
is visually different. See the image below for examples of USB 2.0 and 3.0 ports.
IronKey Workspace W700-SC User Guide
33
Page 34

APPENDIX 1: IMATION SUPPORT FOR
MACINTOSH
IRONKEY WORKSPACE APPLICATIONS
The IronKey Control Panel, installed on the application drive (accessible in non-boot mode), allows you to
activate a managed device and update firmware and software on the device. Device updates must be run in
Windows. You cannot update your device on a Mac.
The IronKey Control Panel application automatically runs as part of the Windows To Go operating system,
whether running on a Mac or a Windows-based computer.
LEVEL OF SUPPORT FOR MAC MODELS
The following table lists Mac models that have been tested with Windows To Go on an IronKey Workspace
device. The level of support for Mac hardware is indicated by model.
• Level 1—Works with Windows To Go using the recommended Boot Camp Support Software.
• Level 2—Works with Windows To Go using the recommended Boot Camp Support Software and
may require additional modifications, for example, manually installing some drivers.
• Level 3—Not recommended; limited ability to boot Windows To Go.
• Not supported by Imation
Tab l e 4 : Imation support for specific Mac models
Mac Model
MacBook Pro
MacBook Pro (Retina, 13inch, Late 2013) Software
OS X 10.9
MacBook Pro (Retina, Mid
2012) OS X 10.9
Support
level
Level 1 5.1.5640
Level 1 5.1.5621
Boot Camp
5.1 Support
Software
version
Additional notes
Use
Alternate
Reboot
Method*
IronKey Workspace W700-SC User Guide
34
Page 35

APPENDIX 1: IMATION SUPPORT FOR MACINTOSH
Tab l e 4 : Imation support for specific Mac models
Level of support for Mac models
Mac Model
MacBook Pro (Retina, Mid
2012) Software OS X 10.8.5
MacBook Pro (13-inch Early
2011), Software OSX 10.8.5
MacBook Pro (13-inch Early
2011), Software OS X 10.9
MacBook Pro (15-inch Early
2011), Software OS X 10.10.2
MacBook Pro (13-inch, Mid
2010) OS X 10.9
MacBook Pro (15-inch, Mid
2010) Mac OS X 10.6.8
Mac book Pro (15-inch, Mid
2009) Software 10.8
Boot Camp
Support
level
Level 2 5.1.5621 After you authenticate in the Preboot
Level 2 5.1.5621 You may need to manually install the
Level 1 5.1.5621
Level 1 5.1.5621
Level 3 5.1.5621 You must install Boot Camp in Windows
Level 3 5.1.5621 Roaming between host Mac computers
Level 1 5.1.5621
5.1 Support
Software
version
Additional notes
environment and unlock the device, the
Startup Manager may not recognize the
device when you reboot. If this occurs,
select the Mac hard drive, go to the
Welcome screen, and then choose
Restart (or click the Apple menu and
choose Restart, if there is no password
to login). Immediately hold the Option
key and the USB Windows device option
should appear.
driver for the HD audio device.
To Go from a different host Mac
computer that supports Boot Camp
5.1.5621. The MacBook Pro (13-inch, Mid
2010) only supports Boot Camp 4 so it
will not allow you to install Boot Camp
5.1. However, Boot Camp 5.1 drivers seem
to work on this computer if they are
already installed when you try to boot
the device.
is not recommended with this model.
The Windows operating system may fail
to start or stop responding on this
computer if you use the device on newer
2013 Mac computers and then return to
this computer.
Use
Alternate
Reboot
Method*
MacBook Air
MacBook Air (11-inch, Mid
2013) OS X 10.8.4
MacBook Air (13 inch Mid
2012), Software OS X 10.9.1
IronKey Workspace W700-SC User Guide
Level 2 5.1.5640 If the wireless device is not recognized
Level 1 5.1.5621
after installing Boot Camp, you may have
to install it manually from the Driver
folder in the Boot Camp directory.
•
35
Page 36

APPENDIX 1: IMATION SUPPORT FOR MACINTOSH
Tab l e 4 : Imation support for specific Mac models
Moving between Mac models
Boot Camp
Mac Model
Mac Book Air (11-inch Mid
2012), Software OS X 10.8.5
MacBook Air (13-inch, Mid
2011)
iMac
iMac (27-inch Late 2013) OS
X 10.9.5
iMac (27-inch Late 2012) OS
X 10.9.1
iMac (27-inch Mid 2011) OS
X 10.8.5
iMac (27-inch, Mid 2010) Level 1 5.1.5621
iMac (24-inch Early 2009) Not
iMac (21-inch, Late 2009) Not
iMac (17-inch, Late 2006) Not
Support
level
Level 1 5.1.5621
Level 1 5.1.5621
Level 1 5.1.5640
Level 1 5.1.5621
Not
supported
supported
supported
supported
5.1 Support
Software
version
Additional notes
Use
Alternate
Reboot
Method*
•
Mac mini
Mac mini (Late 2012)
Software OS X 10.8.5
Mac mini (Mid 2011)
Software OS X 10.8
Mac mini (Mid 2010) Not
* The alternate re-boot method refers to how the computer reboots from the IronKey Workspace Preboot
Environment. Some Mac models require that you use this method to ensure that the USB device displays in the
Startup Manager when you reboot the computer.
Level 1 5.1.5621
Level 1 5.1.5621
supported
MOVING BETWEEN MAC MODELS
Booting a device on a Mac with different Boot Camp 5.1 software requirements (than what is currently installed
in Windows To Go) is generally not recommended. Without the correct software drivers for the Mac model in
use, some components, such as wireless, may not work. You may have to manually install the correct version of
the Boot Camp 5.1 driver to use the component. For more information, see “Manually installing drivers” on
page 39.
IronKey Workspace W700-SC User Guide
36
Page 37

APPENDIX 1: IMATION SUPPORT FOR MACINTOSH
Installing Boot Camp support drivers
INSTALLING BOOT CAMP SUPPORT DRIVERS
Your administrator may have already downloaded and installed the Boot Camp drivers in Windows To Go or
you may have to do this manually. If the drivers have been downloaded but not installed, they should be in a
folder named BootCamp5.1.5640 or BootCamp5.1.5621. You can download the files if necessary, see
“Downloading Boot Camp Support Software” on page 40.
• Boot Camp 5.1.5640 supports 2013 (or newer) Mac models
• Boot Camp 5.1.5621 supports Mac models that are older than 2013 but still support Windows 8 or 8.1
For a list of Boot Camp version requirements by Mac mod
34, or http://support.apple.com/kb/HT5634.
Installing Boot Camp 5.1 Support Software is a two-step process.
1. Boot Windows To Go
2. Run the setup file to install Boot Camp Support Software
Make sure that you install the version required by the Mac c
properly, you can manually install it after. For more information, see “Manually installing drivers” on page 39.
If the device will be used on Mac computers with different Boot Camp 5.1 version requirements, you may have
to install specific drivers from the other Boot Camp version to ensure that components, such as Wifi, will work
correctly.
To bo o t Wi n dows To Go
1 Mak
2. Plug the de
3. T
e sure that the Mac computer is turned off and that no other USB devices are currently plugged in.
vice into the USB port.
urn on the computer and immediately hold the Option key (Alt key on a non-Mac keyboard) to open the
Startup Manager.
el, see “Level of support for Mac models” on page
omputer you are using. If a driver fails to install
For a list of all startup key combinations for Intel-based Mac computers, see
http://support.apple.com/kb/ht1533.
IronKey Workspace W700-SC User Guide
37
Page 38

APPENDIX 1: IMATION SUPPORT FOR MACINTOSH
Installing Boot Camp support drivers
4. In the Startup Manager, select the USB Windows device option.
If there are two USB options, choose the option that says “Windows”. Otherwise, if only one USB option
plays, such as “EFI Boot” choose that one.
dis
5. In the Workspace Preboot environment, if your Mac model requires you to use the alternate reboot
method (see Table 4 on page 34), click Opt
box. Click Us
e alternate reboot method, and then click Back.
ions and click to clear the Use default reboot behavior check
6. In the Workspace Preboot environment, type the SmartCard PIN in the text box of the Unlocker window
and click Unlock.
7. Click Re
8. W
boot Now and immediately hold the Option key again.
hen the Startup Manager opens, select the USB Windows device option again. The Windows To Go
operating system will now start up.
ype the Windows password (if applicable) and press ENTER.
9. T
When Windows To Go has successfully started, y
Tip: If you do not press the Op
tion key in time and the Mac operating system starts, click Restart on the
ou can install Boot Camp 5.1 Support Software.
Welcome screen (or click the Apple menu and choose Restart), and then immediately hold the Option key to
open the Startup Manager.
To install Boot Camp Support Software in Windows To Go
1 If Windows To Go already has a download of the Boot Camp Setup files, go t
o step 5. If you downloaded
the files to a USB device, go to step 2 to copy the files to Windows To Go.
2. In Windows To Go, plu
g the USB flash drive (with the version of Boot Camp 5.1 Support Software required
for this Mac) into a USB port.
3. In Fi
nder, locate the Boot Camp support files on the USB flash drive and copy them to the Windows Desk-
top. If you downloaded both versions of Boot Camp 5.
1 support software, you can copy both versions to
Windows To Go but you should only install the version that supports the Mac you are currently using.
IronKey Workspace W700-SC User Guide
38
Page 39

APPENDIX 1: IMATION SUPPORT FOR MACINTOSH
4. Important: After you copy the files, safely eject the USB flash drive that contains the Boot Camp 5.1 Sup-
port Software. If you do not eject the drive, the Star
puter in step 8.
tup Manager will not open when you reboot the com-
Installing Boot Camp support drivers
5. Double-click th
process.
6. When prompted to allow changes, click Yes and follow the on-screen instructions.
7. Important: Do not cli
minutes. Do not stop the installation process. When the installation is complete, click Finish.
8. A s
9. T
ystem restart dialog box will appear. Click Ye s to reboot the computer and complete the installation.
Make sure that you hold the Option key to open the Startup Manager, and then select the USB Windows
device option.
he Windows To Go operating system will start. Type the Windows password (if applicable) and press
ENTER. Follow the instructions on any other Install dialog boxes that may appear. The device is now ready
for use on qualified Macs.
e Boot Camp folder, and then double-click the setup.exe file to start the Boot Camp install
ck the Cancel button in any of the installer dialog boxes. Installation may take a few
Manually installing drivers
You may have to manually install Boot Camp software drivers in the following situations:
• A Windows To Go component does not work after installing Boot Camp 5.1 Support Software. For
xample, if wireless is not working, you can manually install the driver for the network adapter, for
e
example, BroadcomNetworkAdapter64.exe.
• A Windows To Go component stops working because t
ported on the Mac model you are using. For example, if you install Boot Camp 5.1.5640, wireless may
work if you use the device with a Mac model that requires Boot Camp 5.1.5621 drivers. You must
not
manually install the required network driver.
he version of the installed driver is not sup-
To manually install a driver
1. On a
2. Double-click the folder for the manufacturer of the component that is not working. For example, for a
3. Double-cl
IronKey Workspace W700-SC User Guide
qualified Mac computer, in Windows To Go, locate and double-click the Boot Camp folder. Doubleclick the Drivers folder. If you are installing a driver from a different version of Boot Camp 5.1 Support
Software, make sure you select the correct Drivers folder.
wireless driver, try Broadcom.
ick the driver executable file for the missing driver. For example, for wireless, try BroadcomNet-
AdapterWin8x64.exe.
39
Page 40

APPENDIX 1: IMATION SUPPORT FOR MACINTOSH
4. Follow the instructions in the Install wizard. You may have to reboot the computer following the install
process. Make sure to hold the Option key to open the Startup Manager and choose the USB device.
Downloading Boot Camp Support Software
DOWNLOADING BOOT CAMP SUPPORT SOFTWARE
There are two versions of Boot Camp 5.1 Support Software. You should download the version required by the
Mac model that you will use to boot the device. For a list of Boot Camp requirements by Mac model, see
http://support.apple.com/kb/HT5634. If you will use your device on several Mac models with different Boot
Camp 5.1 requirements, download both versions to support the largest number of qualified Mac models.
Although you can install only one version in Windows To Go, you can install individual drivers from the other
version to support Macs that require these drivers.
Apple recommends that you download the software files to a USB flash drive formatted with the FAT file
system. After downloading, you can install Boot Camp Support Software in Windows To Go.
To download Boot Camp 5.1 Support Software
1. Plug a USB fla
puter. You can use a Mac or a PC to download the file.
2. In a W
packages:
You can also search the Apple Web site for the latest Boot Camp 5.1 download file.
3. Click the Do
4. Double-cl
5. C
6. Safely eject the USB drive.
7. If the c
Software you downloaded. Follow the instructions in “Installing Boot Camp support drivers” on page 37.
eb browser, download one (or both if required) of the following Boot Camp 5.1 Support Software
• Boot Camp 5.1.5640—This download supports 2013 (or newer) Mac models.
• Boot Camp 5.1.5621—This download supports Mac models that
dows 8 and 8.1.
opy all files and folders in the extracted Boot Camp 5.1 folder to the root level of the USB flash drive.
omputer is running Windows, move to a Mac that supports the version of Boot Camp 5.1 Support
sh drive (that is formatted with the MS-DOS FAT file system) into the USB port of a com-
are older that 2013 and support Win-
wnload button to copy the compressed Boot Camp 5.1 file to your computer.
ick the Boot Camp 5.1 folder to extract the files.
IronKey Workspace W700-SC User Guide
40
Page 41

APPENDIX 2: ADMIN USERS
Users who have been assigned administrative privileges in the IronKey Enterprise Management System must
perform some additional steps when activating their device; they must enable their online account. This
section describes the steps to activate a managed device for users with an administrative role in the IronKey
Enterprise Management System. It also provides instructions on how to access the Admin Console and
manage their online account.
ACTIVATING A MANAGED DEVICE ON FIRST-TIME USE
Activating a device binds the device to your user account in the IronKey Enterprise Management System. You
will need the activation code provided by your administrator. During device activation, policies are applied to
your device.
You can activate your device on a qualified Mac or PC. Device activation can only be done using the IronKey
Control Panel in non-boot mode (not in Windows To Go). Once activated, you can boot your device by
following the procedure “Starting Windows from the device” on page 23.
Important: To activate your W700-SC with a smart card, you must have HID Global’s ActiveID® ActivClient®
software installed on the host computer.
To activate a managed device
1. Make sure that the host computer is turned on and the host operating system is running.
2. Insert the device into the USB port of the host computer. USB 3.0 port is preferred but USB 2.0 is also
supported.
3. Do one of the following:
• If you are running a Mac, open the IronKey Unlocker drive in Finder and then open the IronKey application. You can install the Auto-Launch Assistant, so that the Unlocker will automatically open when
you plug in a device.
4. Insert the smart card into the card reader if it is not already inserted.
IronKey Workspace W700-SC User Guide
41
Page 42

APPENDIX 2: ADMIN USERS
Activating a managed device on first-time use
• If you are running Windows, open a file manager, double-click the IronKey.exe file from the IronKey
Wor kspace d rive.
5. Ty pe th e Activation Code (or copy and paste the characters if you received an email with the activation
code) and click the check box to agree to the End-User License Agreement.
6. Click Activate. During activation, the device policy is applied and the device is bound to the user in the
IronKey Enterprise Management System.
ype the SmartCard PIN, and then click Continue.
7. T
IronKey Workspace W700-SC User Guide
42
Page 43

APPENDIX 2: ADMIN USERS
8. You will be prompted to provide an e-mail address for an online account. Type the address and click Con-
tinue. (
Online accounts are required for Admin users).
Managing my online account (managed devices only)
A message prompt will appear indicating that an e-m
the e-mail to set up your online account; this includes creating a “secret question”.
9. Onc
10. Onc
e you have set up your online account, click OK in the message prompt to proceed with the device
setup.
e the device is initialized and paired with the smart card, it is now ready to use. When device setup is
complete, the IronKey Control Panel will appear.
ail has been sent to you. Follow the instructions in
11. Click the Lock button and shut down the host operating system. The device is now ready to boot into
Windows To Go. Follow the procedure “Starting Windows from the device” on page 23.
ou will need the Smart Card PIN to start Windows from the device.
Tip: Y
MANAGING MY ONLINE ACCOUNT (MANAGED DEVICES ONLY)
Online accounts are only available to Administrator users (in IronKey Enterprise Server or IronKey Enterprise
Service) with managed devices. If you are an Admin user, you are required to create an online account when
you activate your device, see “Activating a managed device on first-time use” on page 41. You must be able to
connect to the IronKey Enterprise Management System to access your online account through the IronKey
Control Panel.
The online account lets you view the IronKey devices associated with your user account. If you own more than
one IronKey device, you can create nicknames for each device. Names help you tell the devices apart from
each other when viewed online. You can also view and/or edit online account settings, such as your account
activity log, Secret Question settings, and account profile.
As an Admin user, your online account also lets you access the Admin Console in the IronKey Enterprise
Management System. The Admin Console lets you manage user accounts, devices, and device policies. For
more information about using the Admin Console to manage users and devices, see the IronKey Enterprise
Server Admin Guide or the IronKey Enterprise Management Service Admin Guide.
To log on to your online account
1. In Ir
onKey Control Panel, click the Settings button on the menu bar.
IronKey Workspace W700-SC User Guide
43
Page 44

APPENDIX 2: ADMIN USERS
Managing my online account (managed devices only)
2. Click Account in the left sidebar, and then click Manage Account Settings.
3. The Admin Console in the IronKey Enterprise Management System will open in a Web browser.
To edit a device nickname
og on to your online account in IronKey Control Panel.
1. L
IronKey Workspace W700-SC User Guide
44
Page 45

APPENDIX 2: ADMIN USERS
Managing my online account (managed devices only)
2. Click the My IronKeys tab, and then click the Edit button beside the device whose nickname you want to
change.
ype a new nickname in the box and click the Save button.
3. T
To manage your online account settings
og on to your online account in IronKey Control Panel.
1. L
2. Click the My
Account tab.
3. The following table describes tasks that you can perform in your online account.
Tab l e 4 : List of tasks available for your online account
To... Do the following...
Review account
activity
Set up e-mail
alerts
Click A
attempts for your device.
Click A
alert notice will be sent to you when specific activities occur, such as an incorrect
ccount Dashboard to monitor recent events such as login and failed password
ccount Alerts, and then click the Edit button. Click to enable e-mail alerts. An
secret question attempt.
Edit Secret
estions and
Qu
Answers
Update Profile
ormation
inf
Click Account Settings, and then click the Edit button to modify your responses to the
Secret Question that you answered during the setup of your online account. You can
also edit time zone data.
Click Update Profile, and then click the Edit button to change your profile information.
IronKey Workspace W700-SC User Guide
45
 Loading...