

Page 1

IR
ONKEY™
User Guide
ENTERPRISE S250/D250
Last Updated: July15, 2016
Page 2

IRONKEY ENTERPRISE S250/D250 USER GUIDE
GE 2
CONTENTS
QUICK START ................................................................................................ 3
ABOUT MY DEVICE ........................................................................................ 7
How is it different than a regular flash drive? .......................................................................................................... 7
What systems can I use it on? ..................................................................................................................................... 9
How secure is it? .............................................................................................................................................................. 9
Product specifications .................................................................................................................................................. 11
Recommended best practices ................................................................................................................................... 11
USING MY DEVICE ........................................................................................ 12
Setting up the device ................................................................................................................................................... 12
Unlocking and locking the device ............................................................................................................................. 13
Accessing my device if I forget my password .......................................................................................................... 16
Changing my password ................................................................................................................................................ 16
Accessing my secure files ............................................................................................................................................ 17
Encrypting and decrypting files ................................................................................................................................ 17
Creating a secure backup of my files ...................................................................................................................... 17
Updating my device ...................................................................................................................................................... 18
Reformatting my device ............................................................................................................................................... 19
Using my device on Linux ........................................................................................................................................... 19
Finding information about my device ....................................................................................................................... 21
Using onboard applications ........................................................................................................................................ 21
Importing digital certificates ...................................................................................................................................... 23
Using Identity Manager .............................................................................................................................................. 24
Managing my online account settings ..................................................................................................................... 25
WHERE CAN I GET HELP? .......................................................................... 27
For more information ................................................................................................................................................... 27
To contact support ....................................................................................................................................................... 27
はじめに ........................................................................................................... 28
시작하기 ........................................................................................................... 39
入门 .................................................................................................................. 49
開始使用 ........................................................................................................... 59
PRIMEROS PASOS ......................................................................................... 69
MISE EN ROUTE ............................................................................................ 80
ERSTE SCHRITTE ......................................................................................... 90
Page 3

IRONKEY ENTERPRISE S250/D250 USER GUIDE
GE 3
Quick Start
Enterprise devices must be set up using a Windows or Mac operating system. Once set up, you
can use your device on Windows, Mac, or Linux systems. For more information about using your
device on Linux, see.
Windows & Mac Setup
Windows Vista (SP2), 7 (SP1), 8, 8 .1 or Mac OS X 10 .9.x - 10.11.x
1. Plug the device into your computer’s USB port.
2. When the Device Setup window appears, follow the on-screen instructions. If this window
does not appear, open it manually:
Windows: Start > My Computer > IronKey Unlocker > IronKey.exe
•
Mac: Finder > IronKey Unlocker > IronKey
•
3. When Device Setup is complete, you can move your important files to the IronKey Secure
Files drive (IronKey USB drive for Mac) and they will be automatically encrypted.
Some Windows systems prompt to restart after you first plug in your device.You can safely
close that prompt without restarting—no new drivers or software are installed.
Mise en route
Installation avec Windows et Mac
Windows Vista (SP2), 7 (SP1), 8, 8 .1 ou Mac OS X 10 .9.x - 10.11.x
1. Branchez le périphérique sur le port USB de votre ordinateur.
2. Lorsque la fenêtre d’Installation du périphérique s’affiche, suivez les instructions à l’écran. Si
cette fenêtre ne s’affiche pas, ouvrez-la manuellement :
Windows :Démarrer > Ordinateur > IronKey Unlocker > IronKey.exe
•
Mac : Finder > IronKey Unlocker > IronKey
•
3. Lorsque l’installation du périphérique est terminée, vous pouvez déplacer vos fichiers impor-
tants vers le lecteur Secure Files (Fichiers sécurisés). Ils seront automatiquement cryptés.
Certains systèmes Windows vous invitent à redémarrer la première fois que vous branchez
votre périphérique.Vous pouvez fermer cette invite en toute sécurité sans redémarrer, aucun
nouveau pilote ou logiciel n’est installé.
Page 4

IRONKEY ENTERPRISE S250/D250 USER GUIDE
GE 4
Kurzanleitung
Geräte-Setup bei Windows und Mac
Windows Vista (SP2), 7 (SP1), 8, 8 .1 oder Mac OS X 10 .9.x - 10.11.x
1. Stecken Sie das Gerät in den USB-Port Ihres Computers
2. Wenn sich das Fenster „Geräte-Setup― öffnet, folgen Sie den Anweisungen auf dem Bild-
schirm.Wenn sich dieses Fenster nicht öffnet, dann öffnen Sie es wie folgt manuell:
Windows: Start > My Computer > IronKey Unlocker > IronKey.exe
•
Mac: Finder > IronKey Unlocker > IronKey
•
3. Wenn das Geräte-Setup abgeschlossen ist, können Sie Ihre wichtigen Dateien auf das Lauf-
werk „Secure Files― verschieben und sie werden automatisch entschlüsselt.
Einige Windows-Systeme werden Sie zum Neustart auffordern, wenn Sie das Ihr Gerät zum
ersten Mal anschließen. Sie können diese Aufforderung sicher schließen ohne Neu zu starten
– keine neuen Laufwerke oder Software werden installiert.
Inicio rápido
Instalación en Windows y Mac
Windows Vista (SP2), 7 (SP1), 8, 8 .1 o Mac OS X 10 .9.x - 10.11.x
1. Conecte el dispositivo en el puerto USB de su equipo
2. Cuando aparezca la ventana Instalación del dispositivo, siga las instrucciones que se muestran
en pantalla. Si no aparece, ábrala manualmente:
Windows: Inicio > Equipo > IronKey Unlocker > IronKey.exe
•
Mac: Finder > IronKey Unlocker > IronKey
•
3. Tras finalizar la instalación del dispositivo, podrá mover sus archivos importantes a la unidad
―Secure Files‖ y estos se cifrarán de forma automática.
Algunos sistemas Windows le solicitarán que reinicie el sistema tras conectar el dispositivo
por primera vez. Puede cerrar este mensaje con seguridad sin reiniciar el equipo, no se
instalarán drivers ni software nuevo.
Page 5

IRONKEY ENTERPRISE S250/D250 USER GUIDE
GE 5
クイックスタート
W
indow
Windows Vista (SP2), 7 (SP1), 8, 8 .1
s
および
1. デバイスをコンピューターのUSBポートに挿入します。
2. [デバイスのセットアップ] 画面が表示されたら、画面上の指示に従ってください。
この画面が表示されない場合は、手動で開いてください。
M
ac
のセットアップ
または
Mac OS X 10 .9.x - 10.11.x
Windows の場合:[スタート] > [マイ コンピューター] > [IronKey Unlocker] >
•
[IronKey.exe]
Mac の場合: [セレクタ] > [IronKey Unlocker] > [IronKey]
•
3. デバイスのセットアップが完了したら、重要なファイルを「Secure Files」ドライブに移動
さ せることができ、そこで自動的に暗号化されます。
デバイスを初めて挿し込むと、Windows システムが再起動するようにプロンプトを表示
します。 新しいドライバーまたはソフトウェアがインストールされていない場合、再起動
することなくそのプロンプトを安全に閉じることができます。
빠른 시작
Windows 및 Mac 설정
Windows Vista (SP2), 7 (SP1), 8, 8 .1
1. 컴퓨터 USB 포트로 장치를 꽂습니다.
2. 장치 설정 창이 나타나면 화면의 지침을 따릅니다.
이 창이 나타나지 않으면 다음과 같이 수동으로 엽니다.
또는
Mac OS X 10 .9.x - 10.11.x
Windows: 시작 > 내 컴퓨터 > IronKey Unlocker > IronKey.exe
•
Mac: Finder > IronKey Unlocker > IronKey
•
3. 장치 설정이 완료되면 중요한 파일을 „Secure File‟ 드라이브로
이동할 수 있습니 다. 이동한 파일은 자동으로 암 호화됩니다.
일부 Windows 시스템에서는 장치를 처음으로 꽂으면 다시
시작하라는 메시지를 표시합니다. 다시 시작하지 않고 메시지를
닫아도 안전 합니다 . 새로운 드라이버나 소프트웨어가 설치되지
않습니다.
Page 6

IRONKEY ENTERPRISE S250/D250 USER GUIDE
GE 6
快速入门
Windows & Mac 安装
Windows Vista (SP2), 7 (SP1), 8, 8 .1 或 Mac OS X 10 .9.x - 10.11.x
1. 将设备插到电脑 USB 接口。
2. 显示设备安装窗口后,按屏幕上的说明进行操作。
如果窗口未显示,可手动将其打开:
Windows: 开始 > 我的电脑 > IronKey Unlocker > IronKey.exe
•
Mac:Finder > IronKey Unlocker > IronKey
•
3. 设备安装完成后,可以将重要文件移动到“安全文件”驱动器中,文件会自动加密
首次插入设备后,某 Windows 系统会提示重新启动 您可以放心关闭此提示,且无需 重新启动
,因为系统并未安装任何新的驱动程序或软件。
快速入門
Windows 與 Mac 設定
支援系統為:
Windows Vista (SP2), 7 (SP1), 8, 8 .1 或 Mac OS X 10 .9.x - 10.11.x
1. 將裝置連接到您的電腦 USB 連接埠。
2. 當裝置設定視窗出現時,請依照畫面上指示操作。
若此視窗並未出現,請手動開啟:
Windows: 開始 > 我的電腦 > IronKey Unlocker > IronKey.exe
•
Mac:Finder > IronKey Unlocker > IronKey
•
3. 當裝置設定完成時,即可將您的重要檔案移至「安全檔案」裝置,接著這些檔案就會
自動加密。
部分 Windows 系統會在您第一次連接裝置後,提示您重新啟動電腦。您可以放心關 閉此提示
且無需重新啟動,因為系統並無安裝任何新的驅動程式或軟體。
Page 7
IRONKEY ENTERPRISE S250/D250 USER GUIDE
GE 7
About my device
The IronKey Enterprise 250 Series (S250 and D250) is designed to be the world’s most secure
USB flash drives. Now you can safely carry your files and data with you wherever you go.
Your device (once set up) will be connected to the IronKey Enterprise Management System that
manages your organization’s IronKey devices. Device applications and features are configured by
the System Administrator. Some settings that are described in this guide may not be available to
you if the administrator has not enabled them for your device.
Device features with administrative control
» Password policies
» Password Reset
» Auto-locking device
» Onboard applications
» Force Read-Only mode
» Force Update
How is it different than a regular flash drive?
Hardware Encryption
Inside your device is the IronKey Cryptochip, which protects your data to the same level as
highly classified government information. This security technology is always on and cannot be
disabled.
Password-Protected To access your secure data, you unlock the device with a password using the Unlocker software
that is carried on the device. Do not share your password with anyone. That way, even if your
device is lost or stolen, no one else can access your data.
Page 8

IRONKEY ENTERPRISE S250/D250 USER GUIDE
GE 8
Self-Destruct Sequence
If the Cryptochip detects physical tampering by a hacker, or if a specified number of consecutive
incorrect password attempts have been entered, it can initiate a permanent self-destruct
sequence that securely erases all onboard data—so remember your password.
Anti-Malware Autorun Protection
Your device helps protect you from many of the latest malware threats targeting USB flash
drives by detecting and preventing autorun execution of unapproved programs. It can also be
unlocked in Read-Only Mode if you suspect the host computer is infected.
Simple Device Management
Your device includes the IronKey Control Panel, a central management area for accessing your
files, editing your preferences, changing your device password and safely locking your device.
Secure Local Backup and Data Recovery
Securely back up your secure files using the onboard Secure Backup software (Windows only).
The backup allows you to recover your data to a new IronKey Enterprise device in case this
one is ever lost or stolen.
Onboard Web Browsing
Surf the web through almost any network using the onboard Mozilla Firefox web browser.
Online account
Your online account allows you to use some applications and features, such as resetting a
password, updating your device software and creating data. Your online account includes the
Security Vault. If your device is ever lost or stolen, you can easily restore your online passwords
from this encrypted online backup.
Self-Learning Password Management
Securely store and back up all your online passwords with the IronKey Identity Manager. It
allows you to automatically log into your online account to avoid keylogging spyware and
phishing attacks.
Waterproof and Tamper-Resistant
Designed to survive the extremes, the rugged metal encasing is injected with an epoxy
compound that makes it not only tamper-resistant, but waterproof to military specifications
(MIL-STD-810F).
Page 9

IRONKEY ENTERPRISE S250/D250 USER GUIDE
GE 9
What systems can I use it on?
®
»
Windows
»
Windows
»
Windows
»
Windows
»
Mac
OS
» Linux (2.6+)
8.1
®
8
®
7 (SP1)
®
Vista (SP2)
®
X (10.9.x - 10.11.x)
The computer must have a USB 2.0 port for high-speed data transfer. A USB 1.1 port or
powered hub will also work, but will be slower.
Some applications are available only for specific systems:
»
Windows Only
•
•
•
•
•
•
Onboard Firefox
Secure Backup
Virtual Keyboard
IronKey Identity Manager
Device updates
CRYPTOCard
» Mac Only
Auto-Launch Assistant
•
How secure is it?
IronKey Enterprise 250 Series has been designed from the ground up with security in mind. A
combination of advanced security technologies are used to ensure that only you can access your
data. Additionally, it has been designed to be physically secure, to prevent hardware-level attacks
and tampering, as well as to make the device rugged and long-lasting.
The IronKey Cryptochip is hardened against physical attacks such as power attacks and bus
sniffing. It is physically impossible to tamper with its protected data or reset the password
counter. If the Cryptochip detects a physical attack from a hacker, it destroys the Cryptochip
making the stored encrypted files inaccessible.
We strive to be very open about the security architecture and technology that we use in
designing and building this product. We use established cryptographic algorithms, we develop
threat models, and we perform security analyses (internal and third party) of our systems all the
way through design, development and deployment.
Page 10

IRONKEY ENTERPRISE S250/D250 USER GUIDE
GE 10
DEVICE SECURITY
Data Encryption Keys
» AES key generated by onboard Random Number Generator
» AES key generated at initialization time and encrypted with hash of user password
» No backdoors: AES key cannot be decrypted without the user password
» AES key never leaves the hardware and is not stored in NAND flash
Data Protection
» Secure volume does not mount until password is verified in hardware
» Password try-counter implemented in tamper-resistant hardware
» Once the password try-count is exceeded, the device will initiate a permanent self-destruct
sequence
» Sensitive data and settings are stored in hardware
APPLICATION SECURITY
Device Password Protection
» USB command channel encryption to protect device communications
» Password-in-memory protection to protect against cold-boot and other attacks
» Virtual Keyboard to protect against keyloggers and screenloggers
The device password is hashed using salted SHA-256 before being transmitted to the device
firmware over a secure USB channel. It is stored in an extremely inaccessible location in the
protected Cryptochip hardware. The hashed password is validated in hardware (there is no
―getPassword‖ function that can retrieve the hashed password). Only after the password is
validated is the AES encryption key decrypted.The password try-counter is also implemented in
hardware to prevent memory rewind attacks.
IDENTITY MANAGER PROTECTION
The Identity Manager and your online account work together, allowing you to back up your
online passwords to your Online Security Vault. First, you must unlock your device using twofactor authentication.Your passwords are securely stored in a hidden, hardware-encrypted area
inside the device (not in the file system), being first locally encrypted with 256-bit AES, using
randomly generated keys encrypted with a SHA-256 hash of your device password.All of this
data is then doubly encrypted with 128-bit or 256-bit AES hardware encryption.
When you back up your passwords online, your device performs a complicated public key
cryptography handshake with IronKey’s services using RSA 2048-bit keys. After successful
authentication, your encrypted block of password data is securely transmitted over SSL to your
encrypted Online Security Vault.
Page 11

IRONKEY ENTERPRISE S250/D250 USER GUIDE
GE 11
Product specifications
Specification
Details
Capacity*
Up to 64GB, depending on the model
Dimensions
75mm X 19mm X 9mm
Weight
0.8 oz
Waterproof
MIL-STD-810F
Operating Temperature
0C, 70C
Operating Shock
16G rms
Hardware Encryption
• Data: 256-bit AES (CBC Mode)
• Hardware: 256-bit AES
• Hashing: 256-bit SHA
• PKI: 2048-bit RSA
FIPS Certifications
See www.ironkey.com/en-US/website/certification-and-compliance for details.
Hardware
USB 2.0 (High-Speed) port recommended, USB 1.1
OS Compatibility
• Windows Vista (SP2),Windows 7 (SP1), or Windows 8,
Windows 8.1
• Mac OS X 10.9.x - 10.11
• Unlocker for Linux (2.6+, x86)
Accessibility
IronKey Control Panel is designed to be Section 508 compliant. Users
with disabilities have keyboard navigation and screen reader support.
For details about your device, see ―Device Info‖ in the Control Panel settings.
Designed and Assembled in the U.S.A.
IronKey Enterprise devices do not require any software or drivers to be installed.
* Advertised capacity is approximate and not all of it will be available for storage. Some space is required for onboard software.
Recommended best practices
» Create an online account so that you can:
reset a forgotten device password
•
back up your Identity Manager passwords
•
» Lock the device
when not in use
•
before unplugging it
•
before the system enters sleep mode
•
» Never unplug the device when the LED is on
» Never share your device password
» Perform a computer anti-virus scan before setting up the device
Page 12

IRONKEY ENTERPRISE S250/D250 USER GUIDE
GE 12
Using my device
Setting up the device
Enterprise devices must be set up using a Windows or Mac operating system. Once set up, you
can use your device on Windows, Mac, or Linux systems. The setup process is the same for
systems running a Microsoft Windows or Mac operating system.
1. Plug the IronKey device into your computer’s USB port. The ―Device Setup‖ screen appears.
The setup software runs automatically from a virtual DVD. This screen may not appear if
your computer does not allow devices to autorun. You can start it manually by:
WINDOWS: Double-clicking the ―IronKey Unlocker‖ drive in ―My Computer‖ and
•
launching ―IronKey.exe‖.
MAC: Opening the IronKey Unlocker drive in Finder and opening the IronKey application
•
in the IronKey Unlocker folder. You can install the Auto-Launch Assistant, so that
the Unlocker will automatically open when you plug in a device. See ―Installing the
Auto- Launch Assistant (Mac only)‖ on page 14.
2. Type or paste the Activation Code. You should have received the code in an email
message sent from your Administrator.
3. Select a default language preference, agree to the end-user license agreement, and then click
the ―Activate‖ button.
By default, IronKey software will use the same language as your computer’s operating system.
4. Type a device password and confirm it, and then click the ―Continue‖ button.
Your password is case-sensitive and must comply with the password policy set by the
administrator.
5. If you are prompted to provide an email address for an online account, enter it now and
click the ―Continue‖ button.
A message prompt will appear indicating that an email has been sent to you. Follow the
instructions in the email to set up your online account; this includes creating a ―secret
question‖.
Your online account is required for some security features, such as resetting a password,
updating your device software, and creating online backups of Identity Manager data.
6. Once you have set up your online account, click OK in the message prompt to proceed with
the device setup.
7. Click ―Continue". The device initializes.
Page 13

IRONKEY ENTERPRISE S250/D250 USER GUIDE
GE 13
During this process, it generates the AES encryption key, creates the file system for the
secure volume, and copies secure applications and files to the secure volume.
When the initialization is complete, the IronKey Control Panel appears.Your device is now
ready to protect your data and can be used on a Windows, Mac or Linux computer. Some
policies set by the administrator may restrict use of the product to systems running only
Windows and Mac.
Installing the Auto-Launch Assistant (Mac only)
Installing the Auto-Launch Assistant will automatically open the IronKey Unlocker window when
you plug in your device on that computer. This feature is only available on a Mac.
1. Unlock your device and click the ―Settings‖ button in the menu bar.
2. On the ―Tools‖ side bar, click the ―Install Auto-Launch Assistant‖ button.
TIP: To uninstall it, click on the ―Uninstall Auto-Launch Assistant‖ button
Unlocking and locking the device
UNLOCKING THE DEVICE
The unlock process is the same for Windows and Mac systems. For Linux systems, see ―Using
my device on Linux‖ on page 20.
1. Plug in your device and wait for the Unlocker window to appear.
If the Unlocker window does not appear, you can start it manually by:
WINDOWS: Double-clicking the ―IronKey Unlocker‖ drive in ―My Computer‖ and
•
launching ―IronKey.exe‖.
MAC: Opening the IronKey Unlocker drive in Finder and opening the IronKey application
•
in the IronKey Unlocker folder.
NOTE: On a Mac you can install the Auto-Launch Assistant, which automatically opens
•
the Unlocker when you plug in an IronKey Enterprise device.
2. Type your device password and click ―Unlock". The IronKey Control Panel will appear.
Optionally, you can click the ―Read-Only Mode‖ check box to unlock the device in Read-
•
Only Mode.
Entering your password correctly (which is verified in hardware) will mount your secure
•
volume with all your secure applications and files.
Entering the wrong password a consecutive number of times—depends on the password
•
settings defined by the administrator—will permanently destroy the device and all your
onboard data.
As a security precaution, you must unplug and reinsert the device after every three failed
•
password attempts.
Page 14

IRONKEY ENTERPRISE S250/D250 USER GUIDE
GE 14
Unlocking in Read-Only mode
You can unlock your device in a read-only state so that files cannot be edited on your secure
drive. For example, say that you want to access a file on your device while using an untrusted
or unknown computer; unlocking your device in Read-Only Mode will prevent any malware on
that machine from infecting your device or modifying your files. Administrators can also set your
device to unlock in a read-only state.
1. Plug in your device and launch the Unlocker.
2. Click the ―Read-Only Mode‖ check box.
3. Click the ―Unlock‖ button.
» You will see a message in the Control Panel that indicates you are in Read-Only Mode.
» When you unlock your device in Read-Only Mode, you will remain in Read-Only Mode until
you lock your device.
» Some features are not available in Read-Only Mode because they require modifying files on
your device. Examples of unavailable features include reformatting, restoring applications,
editing files on the Secure Files drive, editing the Applications List, and running onboard
Firefox.
» To unlock your device in Read-Only Mode on Linux, enter: ironkey --readonly
Changing the Unlock message
This feature, if enabled by the System Admin, allows you to create a message that appears on the
IronKey Unlocker window. For example, you can provide contact information so that if you lose
your device someone will know how to return it to you.
1. Unlock your device and click the ―Settings‖ button in the menu bar.
2. Click the ―Preferences‖ button in the left sidebar.
3. Enter text in the ―Unlock Message‖ field.
Your message text must fit the space provided (approximately 7 lines and 200 characters).
LOCKING THE DEVICE
Click the ―Lock‖ button in the bottom left of the Control Panel to safely lock your
•
device.You can also use the keyboard shortcut: CTRL + L. If you want the device to
automatically lock when not in use, see ―Setting the device to automatically lock‖ on page
16.
NOTE: If you have applications or files open on the Secure Files drive, you might not be able to
lock your device (this prevents potential file corruption). Close any open onboard applications
and files and retry locking the device.
NOTE: An administrator can remotely disable your device if necessary. Disabling an unlocked
device will automatically lock the device.You cannot unlock the device unless the System Admin
re-enables the device.
CAUTION: Once the device is locked, you can safely unplug it. However, do not unplug the
device when it is unlocked.
Page 15

IRONKEY ENTERPRISE S250/D250 USER GUIDE
GE 15
Setting the device to automatically lock
If enabled by your System Admin, you can set a device time-out to automatically lock your
device after a specified period of inactivity. This will help prevent others from accessing your
secure files.
1. Unlock your device and click the ―Settings‖ button in the menu bar.
2. Click the ―Preferences‖ button in the left sidebar.
3. Click the checkbox for auto-locking the device and set the time-out for either 5, 15, 30, 60,
120, or 180 minutes.
If a secure file has been opened, it may not be safe to lock the device; otherwise, you may lose
the file changes or corrupt the file.The device will continue to try to lock in this situation, but
will not force the application to quit.You can configure the setting to force the device to lock;
however, you risk losing data in any opened and modified files.
IMPORTANT: Forcing a device to lock can result in data loss. If your files have become
corrupt from a forced lock procedure or from unplugging the device before locking, you might
be able to recover the files by running CHKDSK and using data recovery software.
To run CHKDSK (Windows only)
1. Unlock the device.
2. Use the following keyboard shortcut to bring up the ―Run‖ prompt:
WINDOWS LOGO BUTTON + R.
3. Type ―CMD‖ and press ENTER.
4. From the command prompt, type CHKDSK, the Secure files drive letter,
and then ―/F /R‖.
For example, if the Secure Files drive letter is G, you would enter:
•
CHKDSK G: /F /R
5. Use data recovery software if necessary in order to recover your files.
TYPING PASSWORDS WITH THE VIRTUAL KEYBOARD
If you are unlocking your device on an unfamiliar computer and are
concerned about keylogging and screenlogging spyware, use the IronKey
Virtual Keyboard. It helps protect your device password by letting you
click out letters and numbers. The underlying techniques in the Virtual
Keyboard will bypass many trojans, keyloggers, and screenloggers.
You can start the Virtual Keyboard in a couple of ways:
1. Click the Virtual Keyboard icon in a password field on the IronKey Unlocker or Control
Panel.The Virtual Keyboard appears.
Alternatively, when the keyboard focus is in a password field you can press CTRL+ALT+ V.
•
2. Click the keys to type your password. Click ―Enter‖ when you are finished.
Page 16

IRONKEY ENTERPRISE S250/D250 USER GUIDE
GE 16
You can use the Virtual Keyboard in conjunction with the actual keyboard, so that you
•
type some characters and click some characters.
You can also optionally click the ―Randomize‖ button to randomize where the keys are
•
located. This helps protect against screenloggers.
NOTE: This feature is available on Windows only and uses a standard QWERTY keyset. The
language preference for the device must be set to English.
NOTE: When you click a key in the Virtual Keyboard, all of the keys briefly go blank. This
feature prevents screenloggers from capturing what you clicked. If you do not want to use this
feature, you can disable it in the options menu beside the ―Close‖ button.
Accessing my device if I forget my password
If you forget your password, you can reset it if an administrator has granted you password reset
privileges. Otherwise, you must contact your administrator.
1. Plug in your device and launch the Unlocker.
2. Click the ―Password Help‖ button.
3. On the Password Help prompt, click the ―Reset Password‖ button.An email will be sent to
the email address provided during account setup with instructions on how to proceed.
4. After you complete the instructions in the email message, click the ―Continue‖ button.
5. Type your new password, or use the Virtual Keyboard, and confirm the password in the fields
provided, then click the ―Change Password‖ button.
Changing my password
Password settings are determined by an administrator. Sometimes you may be required to
change your password to comply with new corporate password policies. When a change is
required, the Password Change screen will appear the next time you unlock the device. If the
device is in use, it will lock and you will have to change the password before you can unlock it.
It is also good security practice to regularly change your password on your own. However, be
especially careful to remember your device password.
1. Unlock your device and click the ―Settings‖ button in the menu bar.
2. Click the ―Password‖ button in the left sidebar.
3. Enter your current password in the field provided.
4. Enter your new password and confirm it in the fields provided.
5. Click the ―Change Password‖ button.
NOTE: If you created a backup with the Secure Backup application, restoring the backup will
require you to enter the device password that was used at the time of the back up.
Page 17
IRONKEY ENTERPRISE S250/D250 USER GUIDE
GE 17
Accessing my secure files
After unlocking the device, you can access the files securely stored on the device by:
Clicking the ―Files‖ button (folder icon) in menu bar of the IronKey Control Panel.
•
WINDOWS: Opening Windows Explorer to the ―Secure Files‖ drive.
•
MAC: Opening Finder to the ―Secure Files‖ drive.
•
TIP: You can also access your files by right-clicking the IronKey icon on the Windows taskbar
and clicking ―Secure Files‖.
Encrypting and decrypting files
Everything you store on your IronKey Enterprise device is encrypted. Since the device has a
built-in Cryptochip, all of the encryption and decryption is done for you ―on-the-fly‖, giving you
the convenience of working as you normally would with a regular flash drive, while providing
strong and ―always-on‖ security.
Drag a file onto the Secure Files drive to automatically encrypt it.
•
Files opened from the Secure Files drive are automatically decrypted as you open them.
•
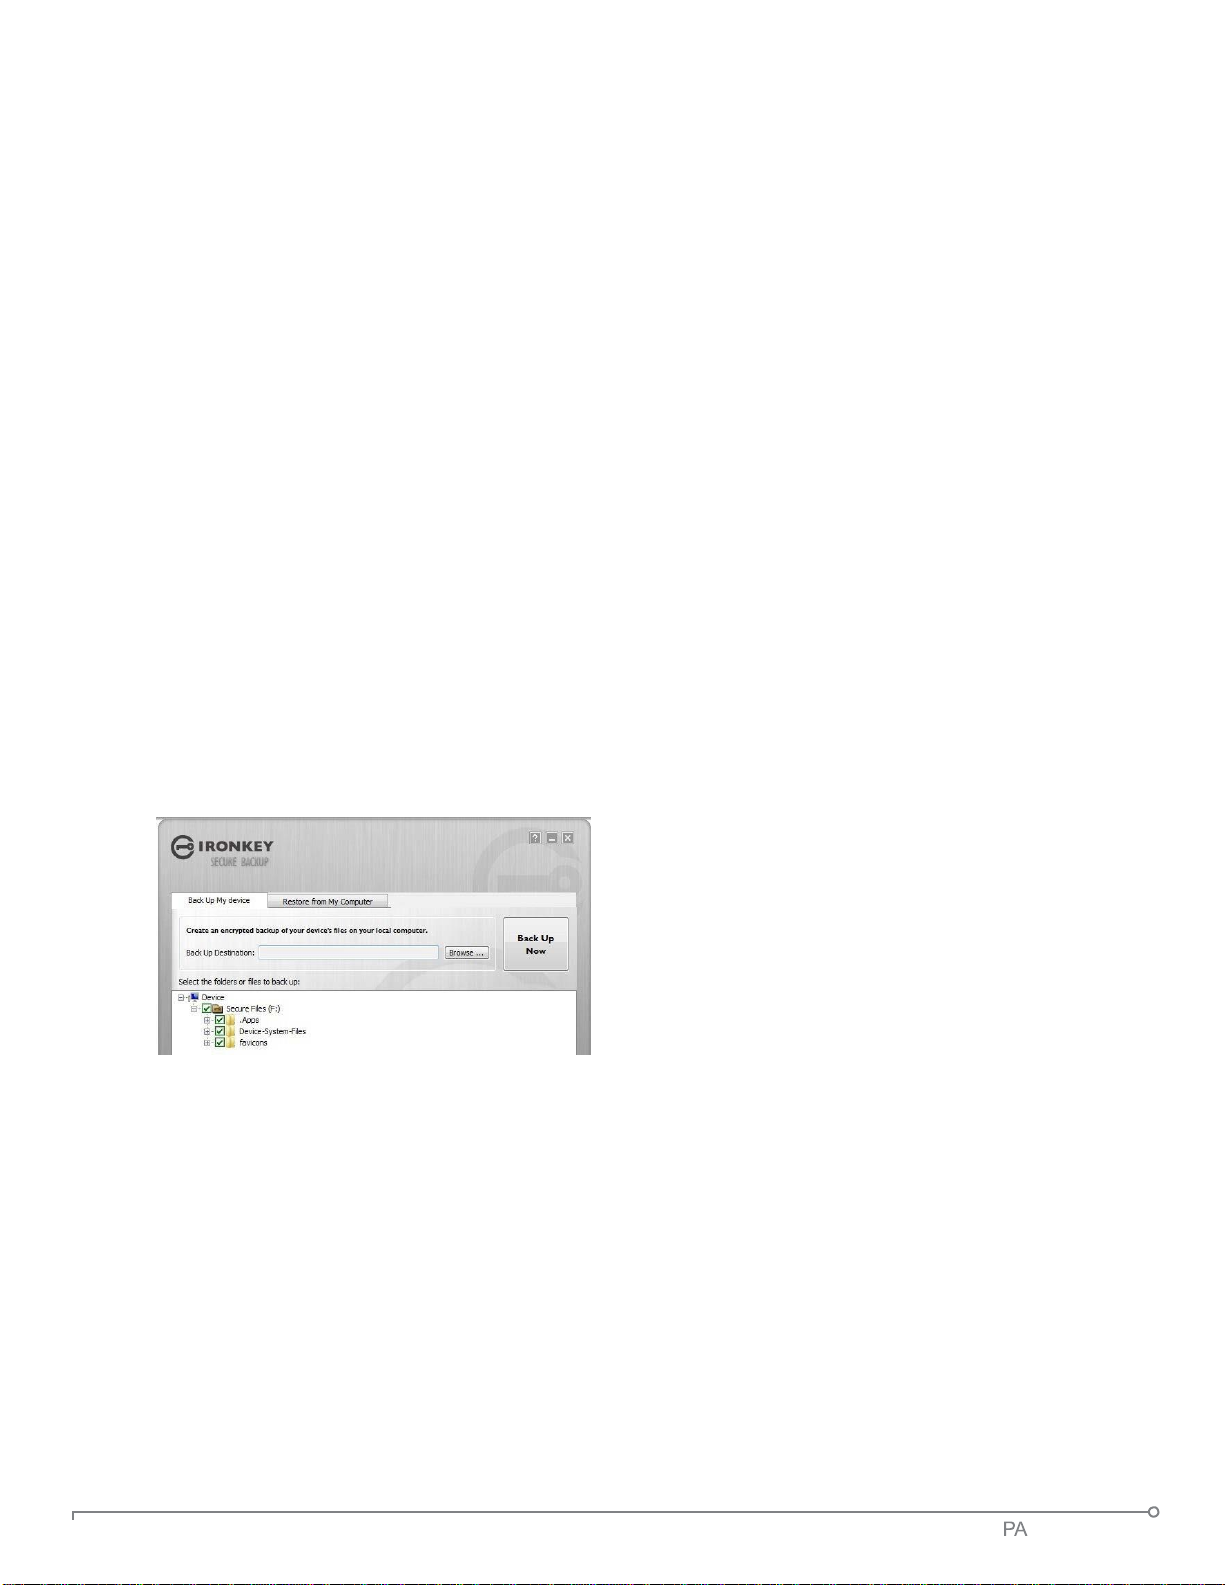
Creating a secure backup of my files
If your device has the Secure Backup application
onboard, you can restore an encrypted backup of
your data to a new or existing
IronKey Enterprise device (Windows only, English
only).
Secure Backup saves an encrypted backup of
some or all of your onboard files to your local
computer or network fileshare.You use the same
application to restore one or all of your files.
1. In the Applications list of the IronKey Control Panel, click the ―Secure Backup‖ button to
open the program (Windows only)
The Secure Backup window should appear, displaying the Secure Files drive.
•
2. Select the files you want to back up.
3. Click the check boxes next to the files you want to back up.
A green check mark means all files in this folder and all sub-folders will be backed up
•
A red minus sign means only some of the files in this folder or its subfolders will be
•
backed up
4. Type the path to the destination folder for the backed up files or use the Browse button to
locate it.
Page 18

IRONKEY ENTERPRISE S250/D250 USER GUIDE
GE 18
The destination folder can be an existing folder, a new folder, or a separate drive (for
•
example, a network fileshare)
5. Click ―Backup Now". The files will be encrypted and backed up.
NOTE: While the files are securely encrypted, the filenames are not. To hide the filenames, zip
the files you want to back up before you create the backup file.
IMPORTANT: Do not add, alter, or delete the backed up files or you may be prevented from
restoring them later.
RESTORING FILES TO THE DEVICE FROM A BACKUP FILE
1. In the Applications list of the IronKey Control Panel, click the ―Secure Backup‖ button to
open the program (Windows only).
The Secure Backup window should appear, displaying the Secure Files drive.
•
2. Select the ―Restore from My Computer‖ tab.
3. Select the destination folder you had chosen previously when backing up your data.
Make sure to select the folder that contains the backup file, not files or folders within
•
that folder.
4. Select which files/folders to restore and click ―Restore Now‖. Restored files will overwrite
existing files of the same name on the Secure Files drive.
NOTE: If the data was backed up from a different IronKey Enterprise device, you must use the
device password for that device in order to restore the files to another device.
Updating my device
You can securely update software and firmware on your device through signed updates that are
verified in hardware. Keeping your device up-to-date helps protect you from future malware
and online threats. If enabled for your device by an administrator, you will receive an update
notification when a new update becomes available. You must update your device within the
time period indicated in the message. If you do not update your device within the time allowed,
access to your files may be restricted to read-only until you update your device.
1. Unlock your device and click the ―Settings‖ button on the menu bar of the IronKey Control
Panel.
2. Click the ―Tools‖ sidebar and in the Updates section, click the ―Check for Updates‖ button.
3. If an update is available, click ―Download‖ to install it.
NOTE: You must use a computer running Windows to download and install software updates.
TIP: You can check for updates automatically each time you unlock your device by clicking the
―Automatically check for updates‖ check box. If your administrator has already set this option,
the check box will appear enabled and dimmed.
Page 19

IRONKEY ENTERPRISE S250/D250 USER GUIDE
GE 19
Reformatting my device
Reformatting the Secure Files drive will erase all your secure files and your Application List, but
it will not erase your device password and settings.
1. Unlock your device and click the ―Settings‖ button in the menu bar.
2. Click the ―Reformat Secure Volume‖ button.
TIP: Back up your data prior to reformatting; otherwise, it will be erased.
Using my device on Linux
You can use your IronKey Enterprise device on several distributions of Linux (x86 systems
only with kernel version 2.6+). However, you must set up the device using a Windows or Mac
operating system. Some policies set by the administrator may restrict use of the product to
systems running only Windows and Mac.
USING THE UNLOCKER
Use the Unlocker for Linux to access your files and change your device password on Linux,
allowing you to securely transfer files from and between Windows, Mac, and Linux computers.
Depending on your Linux distribution, you might need root privileges to use the program
―ironkey‖ found in the Linux folder of the mounted virtual DVD. If you have only one IronKey
Enterprise device attached to the system, run the program from a command shell with no
arguments (e.g. ironkey). If you have multiple IronKey Enterprise devices, you must specify
which one you want to unlock.
NOTE: ironkey only unlocks the secure volume; it must then be mounted. Many modern Linux
distributions do this automatically; if not, run the mount program from the command line, using
the device name printed by ironkey.
To unlock the device in Read-Only Mode, enter:
ironkey --readonly When prompted, type your password.
To unlock the device, enter:
ironkey --unlock When prompted, type your password.
To lock the device, you must either unmount and physically remove (unplug) it, or else run:
ironkey --lock
Simply unmounting the device does not automatically lock the secure volume.
To lock the device named “devicename,” enter:
ironkey --lock [devicename]
Page 20

IRONKEY ENTERPRISE S250/D250 USER GUIDE
GE 20
Please note the following important details for using your device on Linux:
1.
Kernel Version must be 2.6 or higher
If you compile your own kernel, you must include the following in it:
» DeviceDrivers->SCSIDeviceSupport-><*>SCSICDROMSupport
» DeviceDrivers-><*> Support for Host-side USB
» DeviceDrivers-><*> USB device filesystem
» DeviceDrivers-><*> EHCI HCD (USB 2.0) support
» DeviceDrivers-><*> UHCI HCD (most Intel and VIA) support
» DeviceDrivers-><*> USB Mass Storage Support
The kernels that are included by default in most major distributions already have these features,
so if you are using the default kernel that comes with a supported distribution you do not need
to take any other action.
Also, on 64-bit linux systems the 32-bit libraries must be installed in order to run the ironkey
program. Consult the distribution’s help resources for assistance and more information.
2.
Mounting problems
» Make sure you have permissions to mount external SCSI and USB devices
» Some distributions do not mount automatically and require the following command to be
run:
mount /dev/<name of the device> /media/<mounted device name>
» The name of the mounted device varies depending on the distribution. The names of the
IronKey Enterprise devices can be discovered by running:
ironkey --show
3.
Permissions
» You must have permissions to mount external/usb/flash devices
» You must have permissions to run executables off the device’s virtual DVD in order to
launch the Unlocker
» You might need root user permissions
See the Linux folder on the device’s virtual DVD for information about how to set up
permissions to allow non-root users to access their IronKey Enterprise devices.All of these
methods require that the system administrator take (one time) action to enable access; after
that, ordinary users can lock, unlock, and change passwords on any IronKey Enterprise devices
they plug in.
4.
Supported distributions
Not all distributions of Linux are supported. Please visit http://support.ironkey.com for the
latest list of supported distributions.
5.
The IronKey Unlocker for Linux only supports x86 systems at this time.
Page 21
IRONKEY ENTERPRISE S250/D250 USER GUIDE
GE 21
Finding information about my device
VIEWING DEVICE INFORMATION
1. Unlock your device and click the ―Settings‖ button in the menu bar.
2. Click the ―Device Info‖ button in the left sidebar.
On this screen you can view details about your device, including:
Model number
•
Serial number
•
Software and firmware versions
•
Secure files drive letter
•
Operating System and system administrative privileges
•
TIP: You can also click the ―Copy‖ button to copy the device information to the clipboard for
pasting in an email, forum posting or support request.
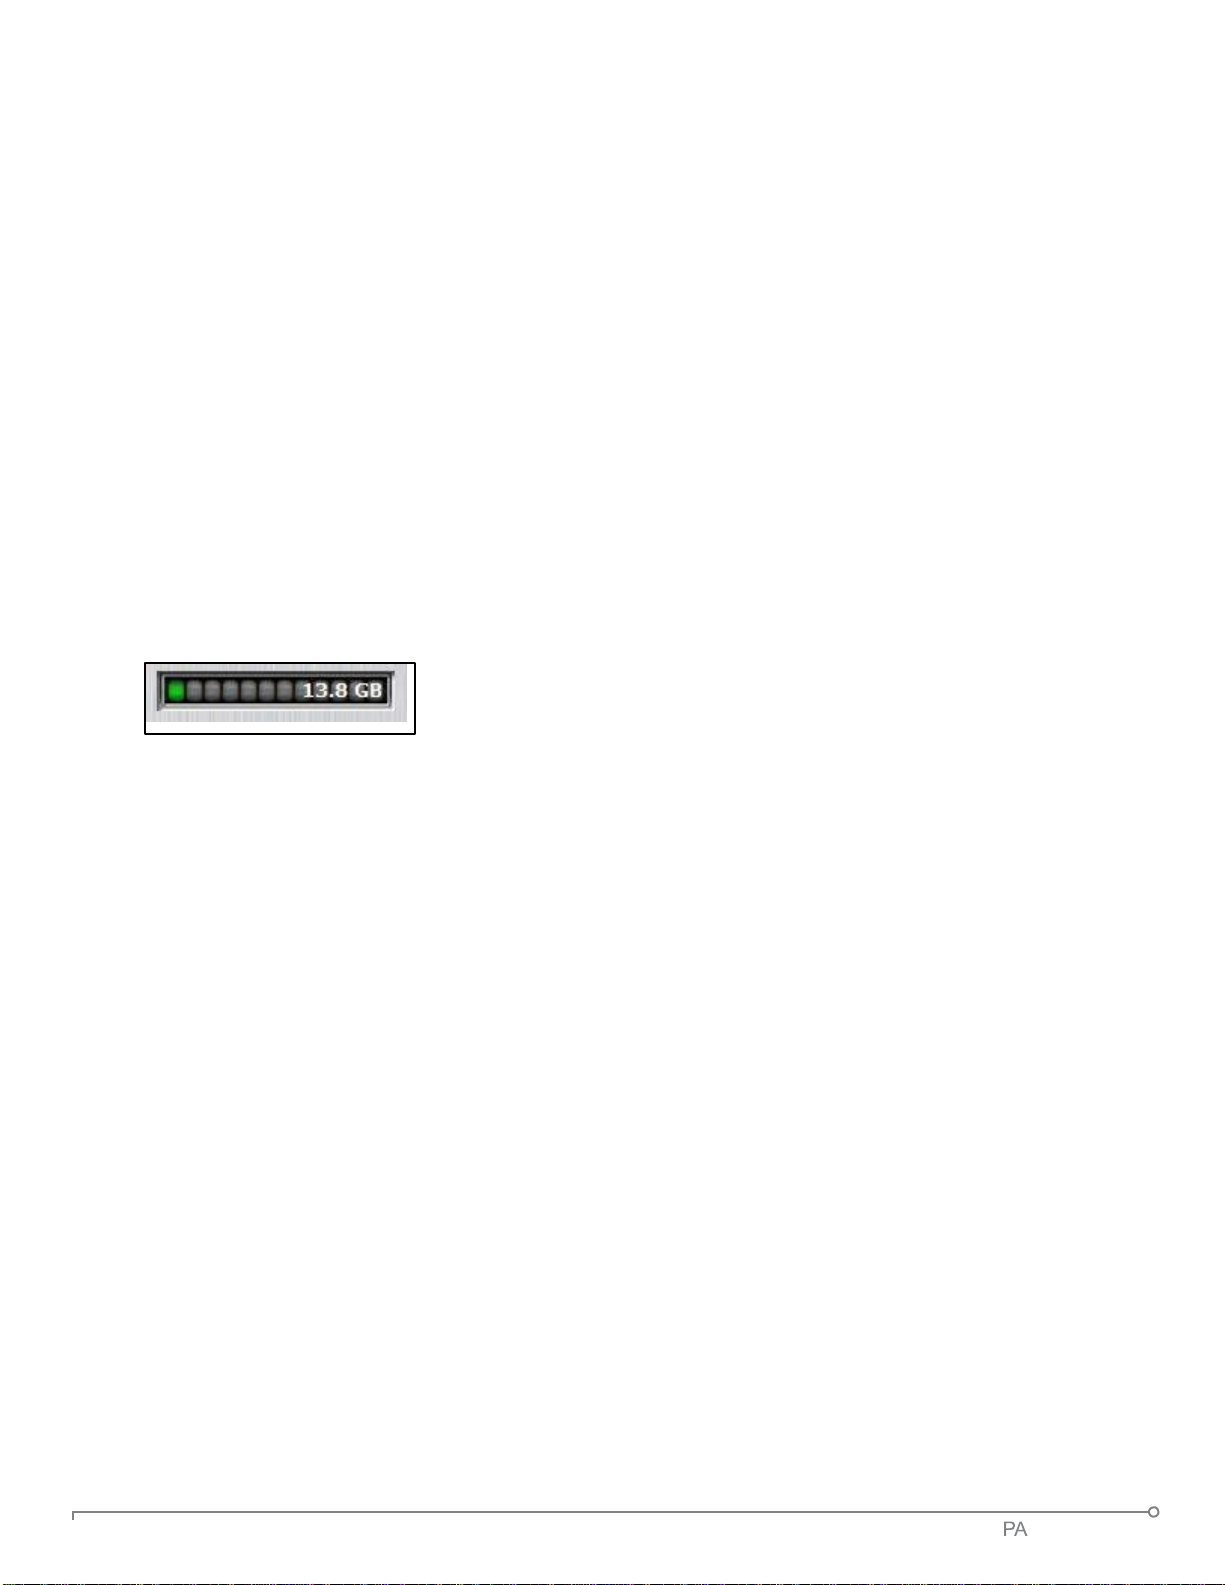
DETERMINING THE STORAGE SPACE AVAILABLE ON THE DEVICE
The Capacity Meter at the bottom right of the Control Panel
provides current information about how much data storage is
available on your device.The green bar graph represents how full
the device is (for example, the meter will be totally green when the device is full), while the
white text on the Capacity Meter displays how much free space remains.
Using onboard applications
Your administrator determines the applications that are installed on your device.
BROWSING THE WEB WITH ONBOARD FIREFOX
If enabled, a Firefox web browser is already onboard your device, so none of your cookies,
history files, bookmarks, add-ons or online passwords are stored on the local computer. Now
you can carry your personalized web experience with you to other computers without worry.
Click the ―Applications‖ button on the menu bar of the Control Panel, and then click the
•
Mozilla Firefox application.
NOTE: If you have a local version of Firefox running at the same time, you will be prompted to
close it.
TIP: You can also open onboard Firefox by right-clicking the IronKey icon in the Windows
taskbar and clicking ―Secure Browser.‖
Page 22

IRONKEY ENTERPRISE S250/D250 USER GUIDE
GE 22
SCANNING MY DEVICE FOR MALWARE
If enabled by your System Administrator, the IronKey Malware Scanner is a self-cleaning
technology that detects and removes malware that gets on your device from an infected file
or machine. Powered by the McAfee® Anti-Virus and Anti-Malware signature database, and
constantly updated to combat the latest malware threats, the scanner first checks for the latest
updates, then scans your device, and reports and cleans any malware that is found.
Some things to know about scanning your device:
» The scanner runs automatically when you unlock your device.
It scans any running system processes and all onboard files (compressed and
•
uncompressed) .
It reports and cleans any malware that it finds.
•
» The scanner will automatically update itself before each scan to protect you from the latest
malware threats.
An update requires an Internet connection.
•
Ensure a minimum of 135 MB of free space on the device to accommodate the
•
downloaded malware signature files.
Your first update may take a long time to download depending on your Internet
•
connection.
The date it was last updated is displayed onscreen.
•
If the scanner becomes too far out of date, it will need to download a large file to bring it
•
back up-to-date.
EDITING THE APPLICATIONS LIST
The Applications List is the area where you can quickly launch onboard applications and files.
Items in the list are shortcuts to actual files. Managing the items in the list does not alter the
actual file.
1. Unlock your device.The Control Panel will appear with the Applications List selected by
default.
2. If the Control Panel is already open, click the ―Applications‖ button in the menu bar to view
the Applications List. Do one of the following:
To add a file or application shortcut—Drag a file from the desktop to the
•
Applications List area to add it to the list.
To add, rename, sort or delete items in the list—right-click anywhere in the
•
Application List and choose the action from the options menu.
To change the way icons appear in the list—right-click anywhere in the Application list
•
and choose, "Large icons", "List‖, or ―Tile‖.
Some things to know about the Applications List:
» You can add any file to the list, including documents, images, and batch files.
» For items that are not applications, the operating system opens the item with the default
program associated with that filetype.
» Items that are Windows executables will be hidden from view on the Mac. Similarly, Mac
application files will be hidden from view on Windows computers.
Page 23

IRONKEY ENTERPRISE S250/D250 USER GUIDE
GE 23
RESTORING ONBOARD APPLICATIONS
You can restore your onboard applications if they are ever erased or corrupted (Windows
only).
1. Unlock your device, and click the ―Settings‖ button on the menu bar of the IronKey Control
Panel.
2. Click the ―Tools‖ button in the left sidebar and then, under Device Health, click the ―Restore
Onboard Apps‖ button.
Importing digital certificates
The Cryptochip includes a limited amount of extremely secure hardware storage space, which
you can use to store the private key associated with a digital certificate. This provides you
with additional strong authentication capabilities. For example, you could store a self-signed
certificate used for internal systems that will allow you to automatically log in when using the
onboard Firefox web browser.
The import process uses IronKey’s PKCS#11 interface and requires Mozilla Firefox. Note that
there is space for five additional private keys in the Cryptochip; these keys will receive the
security benefits of the Cryptochip’s tamperproof hardware and self-destruct mechanisms.
1. Start onboard Firefox.
2. Click the ―Firefox‖ menu, and then click ―Options‖.
3. In the ―Options‖ window, click the ―Advanced‖ icon, and then click the ―Encryption‖ tab.
4. Click the ―View Certificates‖ button to open the Firefox Certificate Manager.
5. IronKey’s certificate is available here. To add your own, click the ―Import‖ button.
6. Browse to the PKCS#12-format certificate file and open it.
You will be prompted for the location of the PKCS#12-format certificate file (the file
extension is .p12 in UNIX/Linux, .pfx in Windows).
7. A window appears asking you to confirm where to store the certificate. Choose ―IronKey
PKCS#11‖.
8. Enter the password that was used to protect the certificate. If no password was used, simply
leave the text field blank.
9. Your certificate is now stored securely in the IronKey Cryptochip and is available for use in
the onboard Mozilla Firefox.
NOTE: When deleting certificates, you must restart Firefox for the action to take effect.You
cannot delete the IronKey certificate that was pre-packaged with your device.
Page 24

IRONKEY ENTERPRISE S250/D250 USER GUIDE
GE 24
Using Identity Manager
If IronKey Identity Manager is enabled on your device, you can use it to securely store and use
important identity credentials, such as login information and one-time passwords to applications
and online accounts. With the click of a button, it automatically launches a specified application,
fills in your username and password, and then logs you in. It can even generate strong passwords
for you, so that you can lock down your important accounts.
Identity Manager also allows you to back up your encrypted Identity Manager data to your
Online Security Vault in your online account.The backup synchronizes password data between
IronKey Enterprise devices and allows you to securely restore all your passwords to a new
device if your device is ever lost or stolen. Only you can access and decrypt your passwords.
Identity Manager does not store your passwords in a file on the file system of the flash drive, so
malware cannot copy your password database. Also, since your passwords are not typed in this
provides added protection from keyloggers and other crimeware.
The Identity Manager works with VeriSign’s VIP service to lock down many important online
accounts, including eBay, PayPal,AOL, and Geico accounts. This new technology generates a onetime password for each login, locking down your online account so that it can only be used from
your device.
See the Help file for detailed information about the benefits of using Identity Manager. To view it,
click the Help icon in the top right of the main Identity Manager window.
To start Identity Manager
1. Unlock your device and click the ―Applications‖ button in the menu bar of the Control Panel.
2. Click ―Identity Manager‖.
To modify settings in Identity Manager
Start Identity Manager and click the ―Settings‖ button in the main Identity Manager window.
•
See the Help file for more information.
ADDING ACCOUNTS AND PASSWORDS
You can add accounts to Identity Manager in several ways:
» Restore them from your Online Security Vault.
» Import them from Firefox, KeePass, RoboForms or Internet Explorer.
» Add them manually using the ―Add‖ button in the main Identity Manager window.
» When on a particular website, select ―Add Account‖ from the Titlebar Menu.
» Use the Identity Manager’s built-in self-learning approach to capture your logins by logging
into a site as usual.The Identity Manager prompts you to store this password securely on
your device.
Generate strong and random passwords
You can create strong random passwords with Identity Manager when you add or edit an
account. Once you create the password, Identity Manager can remember them for you.
Page 25

IRONKEY ENTERPRISE S250/D250 USER GUIDE
GE 25
LOGGING INTO AN ACCOUNT AUTOMATICALLY
The next time you return to a website or application for which you have stored a password,
your login automatically fills in for you. If you have the auto-login option enabled for that
account, the Identity Manager also submits the login.
You can also automatically log in by:
» Using the IronKey Launcher (Ctrl + Alt + R).
» Using the Titlebar menu in the top right of the application window.
» Using the IronKey System Tray Menu.
» Clicking the ―AUTO‖ button in the main Identity Manager window.
EDIT AND DELETE ACCOUNTS AND LOGINS
You can manage your Identity Manager accounts from within the main Identity Manager window.
1. Unlock your device and Open Identity Manager.
2. Double-click the account, or select it and click the ―Edit‖ button.
Your data is automatically saved when you finish making your edits.
LOCKING DOWN ACCOUNTS WITH VERISIGN VIP
You can lock down some important online accounts with VeriSign’s VIP service so that they can
only be accessed using your device. Log into eBay or PayPal, and the Identity Manager will guide
you through the rest.
TIP: You can also manually use the VeriSign VIP service for an account by editing the account
and selecting VeriSign VIP from the ―Additional Authentication‖ list.
BACKING UP AND RESTORING MY IDENTITY MANAGER DATA
You can securely back up your encrypted Identity Manager data to your Online Security Vault.
You can synchronize devices (or set up Master-Slave relationships) by restoring backups to your
other IronKey Enterprise devices.
To create a backup—Open Identity Manager and click the ―Backup‖ button, then select
•
―Online Backup‖.
To restore a backup—Open the Identity Manager and click the ―Backup‖ button, then
•
select ―Online Restore‖
Managing my online account settings
NOTE: You may not have an online account if your System Administrator has not enabled this
feature. Online accounts are typically created during device setup.You must have an online
account to use features such as resetting a password, updating your device software, and
creating online backups of Identity Manager data.
Page 26

IRONKEY ENTERPRISE S250/D250 USER GUIDE
GE 26
Your device supports advanced cryptographic authentication using strong PKI key pairs
Task
Description
Review account activity
Click ―Account Dashboard‖ to monitor recent events such as logins, failed
password attempts and so on.
Set up email alerts
Click ―Account Alerts‖ to have email alert notices sent to you when
specific activities occur, such as an incorrect secret question attempt.
You can also sign up to be notified of new Ironkey product
Edit Secret Questions and
Answers
Click the ―Edit‖ button to modify your Secret Question responses that
you provided during the setup of your online account. You can also
edit time zone data.
generated in the Cryptochip. When you log into your online account from your device, it uses
these unique keys as your digital identity credentials. This locks down your account so that you
must have both your device and your password in order to gain access. In other words, only you
can access your online account, even if someone stole your device or password.
To log on to your online account
1. Unlock your device and click the ―Settings‖ button on the menu bar of the Control Panel.
2. Click the ―Account‖ button in the left sidebar.
3. Click the ―Manage Account Settings‖ button.
CHANGING DEVICE NICKNAME
If you own more than one IronKey Enterprise device, you can create nicknames for each device.
Names help you tell the devices apart from eachother.
1. Log on to your online account.
2. On the ―My IronKeys‖ tab, click the ―Edit‖ button beside the device whose nickname you
want to change.
3. Type a new nickname in the box and click the ―Save‖ button.
MANAGING ACCOUNT SETTINGS
The following table describes some tasks you can perform when you log on to your online
account.
Access your online account and then follow the steps in the table below.
•
NOTE: You cannot update email addresses in your online profile unless you are a System
Administrator.
Page 27

IRONKEY ENTERPRISE S250/D250 USER GUIDE
GE 27
Where can I get Help?
support.ironkey.com
Support information, knowledgebase and video tutorials
http://www.ironkey.com
General information
For more information
To contact support
http://support.ironkey.com
Page 28

S250/D250 USER GUIDE
ページ
はじめに
このセクションでは、いくつかの基本操作についての簡単な概略を説明し、IronKeyデ バイスの
使用に役立ちます。IronKey Enterprise デバイスを使用している場合、シス テム管理者によっ
て管理されている Enterprise ソリューションとリンクしています。 結果として、このセクショ
ンのいくつかの設定は、管理者が有効にしない場合は利用で きない可能性があります。
デバイスIronKeyの IronKey コントロールパネルソフトウェアは、いくつかの言語に 翻
訳されています。 しかし、IronKey マルウェア検索プログラム (Enterprise デバ イス専
用)、個人情報管理、オンボード Firefox, バーチャルキーボード、いくつかのオンボー
ドアプリケーションは英語のみ
です。オンラインアカウントの Web サイトやデフォルトの電子メールメッセージも
英語のみです。
このセクションでは、次についての情報を含んでいます。
»
システム要件
»
推奨されるベストプラクティス
»
デバイスのセットアップ
»
デバイスのロック解除
»
デバイスのロック
»
セキュアファイルへのアクセス
»
ファイルの暗号化および解読
»
パスワードを忘れた場合のデバイスへのアクセス
»
言語基本設定の変更
»
ファイルのセキュアバックアップの作成
»
Linux でのデバイスの使用
»
ヘルプの入手場所
システム要件
»
Windows 8.1
»
Windows 8
»
Windows 7 (SP1)
»
Windows Vista (SP2)
»
Mac OS X
»
Linux (2.6+)
コンピュータは高速データ転送のため USB 2.0 ポートが必要です。USB 1.1 ポートまた は電
源付きハブでも作動しますが、速度は遅くなります。
(10.9.x - 10.11)
Page 29

S250/D250 USER GUIDE
ページ
いくつかのアプリケーションは、特定のシステム専用です。
» Windows のみ
オンボード Firefox
•
• セキュアバックアップ
• バーチャルキーボード
IronKey 個人情報管理
•
» Mac 専用—Auto-Launch Assistant
推奨されるベストプラクティス
» オンラインアカウントを作成すると、次のことが可能になります。
デバイスのパスワードを忘れた場合にリセットする
•
個人情報管理パスワードをバック アップする
•
» デバイスをロックしてください
使用していない場合
•
取り外す前
•
システムがスリープモードになる前
•
» LED が点灯しているときは絶対にデバイスを取り外さないでください
» デバイスのパスワードを共有しないでください
» デバイスをセットアップする前に、コンピュータのウイルス対策スキャンを行います
デバイスのセットアップ
セットアップ プロセスは、Windows と Mac のシステムでは同じです。Linux システム に関し
ては、Linux でのデバイスの使用をご覧ください。
1. Ironkey デバイスをコンピュータの USB ポートに接続します。[デバイスセットア
ッ プ] 画面が表示されます。
セットアップソフトウェアが、仮想 DVD から自動的に実行されます。この画面は、 コンピ
ュータでデバイスを自動実行できない場合は、表示されない場合がありま す。次の手順で手
動で開始できます。
WINDOWS: [マイコンピュータ] の [IronKey Unlocker] ドライブをダブルクリッ
•
クして、[IronKey.exe] を起動します。
MAC: Finder の IronKey Unlocker ドライブを開き、IronKey Unlocker フォル
•
ダの Ironkey アプリケーションを開きます。
2. アクティベーションコードを入力しま す。管理者によって送信された、電子メールメッセー
ジに記載されているコードを
受け取る必要があります。
Page 30

S250/D250 USER GUIDE
ページ
3. デフォルトの言語基本設定を選択し、使用許諾契約に従うことに同意して、[アクテ
ィベート] ボタンをクリックします。
デフォルトでは、Ironkey ソフトウェアはコンピュータのオペレーティングシステ
ムと同じ言語を使用します。
4. デバイスパスワードを入力し、[続行] ボタンをクリックします。
パスワードは大文字と小文字が区別され、少なくとも 4 文字以上である必要があり
ます。
5.
オンラインアカウントに電子メールアドレスの入力が
すぐに入力して、[続行] ボタンをクリックします。
6. メッセージのプロンプトが表示され、電子メールが送信されたことを示します。電
子メールの指示に従い、オンラインアカウントをセットアップします。これには「
秘密の質問」の作成が含まれます。
パスワードリセット、デバイスソフトウェアの更新など、オンラインアカウ ト
•
にはいくつかのセキュリティ機能が必要です。
7. デバイスにオンラインアカウントをセットアップしたら、メッセージプロンプトの
[OK] をクリックし、デバイスのセットアップを進めます。
8. デバイスが初期化されます。このプロセス中、AES 暗号キーが生成され、ソース
ボ リュームのファイルシステムが作成され、セキュアアプリケーションとファイ
ルが セキュアボリュームにコピーされます。
指示されている場合、
9. 初期化が完了したら、IronKey コントロールパネルが表示されます。デバイスはデ ータを保
護する準備ができており、Windows、Mac または Linux で使用できます。
Unlocker 画面に表示されているメッセージを追加または変更する場合は、パス ワードを
•
忘れた場合のデバイスへのアクセスをご覧ください
デバイスのロック解除
ロック解除プロセスは、Windows と Mac システムでは同じです。Linux システムに関 しては
、Linux でのデバイスの使用をご覧ください。
1. デバイスを接続し、Unlocker ウィンドウが表示されるまでお待ちください。
Unlocker ウィンドウが表示されない場合、次の手順で手動で開始できます。
WINDOWS: [マイコンピュータ] の [Ironkey Unlocker] をダブルクリックし
•
て、[IronKey.exe] を起動します。
MAC: Finder の IronKey Unlocker ドライブを開き、IronKey Unlocker フォル
•
ダの Ironkey アプリケーションを開きます。
• 注: Mac では、デバイスに接続するとき、自動的に Unlocker を開く Auto-
Launch Assistant をインストール IronKey できます。
Page 31

S250/D250 USER GUIDE
ページ
2.
デバイスパスワードを入力し、[ロック解除] をクリックします。Ironkey コントロ ールパ
ネルが表示されます。
オプションとして、[読み取り専用モード] チェックボックスをクリックして、
•
読み取り専用モードでデバイスをロック解除できます。
パスワードを正しく入力すると (ハードウェアで検証されます)、すべてのセキ
•
ュアアプリケーションおよびファイルとともに、セキュアボリュームがマウント されます
。
10 回連続で間違ったパスワードを入力すると、デバイスとすべてのオンボード
•
データは恒久的に破壊されます。Ironkey Enterprise デバイスを使用している 場
合、この番号は管理者に定義されたパスワード設定によって変わる場合があり ま
す。
セキュリティ上の理由により、3 回パスワード入力に失敗するごとに、デバイス
•
を取り外して挿入し直す必要があります。
読み取り専用モードでのデバイスのロック解除 読み取り専用状態でデバイスをロック解除する
ことで、誰もセキュアファイルデバイス でファイルを編集できません。たとえば、信頼できな
いまたは不明なコンピュータを使 用している間、デバイスのファイルにアクセスしてみたいと
します。読み取り専用モー ドでデバイスをロック解除すると、デバイスに影響を与えたり、フ
ァイルを変更してし まうマシン上のすべてのマルウェアを防ぎます。
1. デバイスに接続し、Unlocker を起動します。
2. [読み取り専用モード] チェックボックスをクリックします。
3. [不明] ボタンをクリックします。
» コントロールパネルにメッセージが表示され、読み取り専用モードであることを示
します。
» 読み取り専用モードでデバイスをロック解除すると、デバイスをロックするまで読
み取り専用モードが継続します。
» デバイスのファイルを変更する必要があるため、いくつかの機能が読み取り専用モ
ードでは利用できません。利用できない機能の例には、再フォーマット、アプリケ
ーションの復元、セキュアファイルドライブのファイルの編集、[アプリケーショ ン] リス
トの編集が含まれます。
» Linux で読み取り専用モードのデバイスをロック解除するには、次を入力しま
す。ironkey --readonly
Page 32

S250/D250 USER GUIDE
ページ
Unlocker に表示されるメッセージの作成
この機能では、Ironkey Unlocker ウィンドウに表示されるメッセージを作成できま す。例えば
、連絡先情報を入力すると、デバイスを紛失しても、誰かが返す方法がわか ります。
1. デバイスをロック解除し、メニューバーの [設定] ボタンをクリックします。
2.
左サイドバーの [基本設定] ボタンをクリックします。
3. [ロック解除メッセージ] フィールドにテキストを入力します。
メッセージテキストは、フィールドのスペースに合わせる必要があります (約 7 行
200 文字)
注:
Ironkey Enterprise に関しては、管理者がこの機能を有効にしていない場合、コ ントロ
ールパネルにロック解除メッセージは表示されません。
バーチャルキーボードでパスワードを入力
詳しくないコンピュータでデバイスをロック解除し、キーログや
スクリーンログスパイウェアが心配な場合は、Ironkey バーチャ
ルキーボードを使用します。これは、文字と数字を外へクリック
させることによって、デバイスパスワードを保護するのに役立ち
ます。バーチャルキーボードの根底にある技術は、多くのトロ
イ、キーロガー、スクリーンロガーを回避します。
いくつかの方法でバーチャルキーボードを開始できます。
1. Ironkey Unlocker またはコントロールパネルのパスワードフィールドにあるバ
ーチャルキーボードアイコンをクリックします。バーチャルキーボードが表示され
ます。
もしくは、キーボードがパスワードフィールドにフォーカスすると
•
き
、CTRL+ALT+V を押します。
2. キーをクリックしてパスワードを入力します。終わったら [エンター] をクリック
ます。
•
•
注:
この機能は Windows 専用で、標準の QWERTY キーセットを使用します。
実際のキーボードとともにバーチャルキーボードを使用するため、いくつかの文
字を入力し、いくつかの文字をクリックします。
また、オプションとして [Randomize (ランダム化)] ボタンをクリックして、キ
ーの位置をランダムにもできます。これは、スクリーンロガーに対しての保護に 役立ちま
す。
し
注: バーチャルキーボードのキーをクリックすると、すべてのキーが短時間白くなりま す。こ
の機能は、何をクリックしたのかをスクリーンロガーがキャプチャできないよう にします。こ
の機能を使用しない場合は、[閉じる] ボタンの横にあるオプションメニ ューで無効に出来ます
。
Page 33

S250/D250 USER GUIDE
ページ
デバイスのロック
コントロールパネルの左下にある [ロック]ボタンをクリックし、
•
デバイスを安全にロックします。キーボードのショートカットも使用できます。
CTRL + L.
注: アプリケーションまたはファイルがセキュアファイルドライブで開いている場合、 デバイス
をロックできない場合があります (これはファイルが破損する可能性を防ぎま す)。開いている
すべてのオンボードアプリケーションおよびファイルを閉じ、デバイス のロックを再度試しま
す。
注: デバイスがロックされたら、安全に取り外せます。しかし、ロック解除されている
デバイスを取り外さないでください。
ときは
セキュアファイルへのアクセス
デバイスロックした後、次の手順でデバイスに安全に保管されたファイルにアクセスで きます
。
IronKey コントロールパネルのメニューバーにある [ファイル] ボタン (フォル ダ
•
アイコン) をクリックします。
WINDOWS: [セキュアファイル] ドライブに対して Windows Explorer を開きます。
•
MAC: [セキュアファイル] ドライブに対して Finder を開きます。
•
ヒント: Windows タスクバーの Ironkey アイコンを右クリックしたり、[セキュアファ
イル] をクリックして、ファイルにもアクセスできます。
ファイルの暗号化および解読
デバイスに保管されているすべてのものはIronKey暗号化されています。デバイスには
Cryptochip が内蔵されているため、すべての暗号化と解読は「オンザフライ」で行え ます。フ
ラッシュドライブで通常通りに作業する際にも、強力で「常にオン」なセキュ リティが得られ
ます。
ファイルをセキュアファイルドライブにドラッグすると、自動的に暗号化されます。
•
セキュアファイルドライブからファイルが開くと、開いたときに自動的に解読され
•
ます。
Page 34

S250/D250 USER GUIDE
ページ
パスワードを忘れた場合のデバイスへのア クセ ス
パスワードを忘れた場合、パスワードリセットオプションでデバイスをリカバリでき
ます。
管理者はパスワードリセットの権限を付与し、この機能を使用する必要があります。パ
スワードを忘れ、リセットできない場合、管理者に お問い合わせください。
パスワードを忘れた場合にリセットする方法
1. デバイスに接続し、Unlocker を起動します。
2.
[パスワードヘルプ] ボタンをクリックします。
3. パスワードヘルプのプロンプトで、[パスワードリセット] ボタンをクリックしま
法の指示が記載された電子メールが送信されます。
4. 電子メール メッセージ内の指示を完了した後、[続行] ボタンをクリックします。
5. 新しいパスワードを入力するか、バーチャルキーボード を使用して、用意された
フィールドのパスワードを確認してから [パスワードの変更] ボタンをクリックし ま
す。
す。続行方
言語基本設定の変更
デバイスをセットアップするときに言語基本設定を設定します。しかし、必要に応じて
Ironkey コントロールパネルから変更できます。
1. デバイスをロック解除し、メニュー バーの [設定] ボタンをクリックします。
2. 左サイドバーの [基本設定] ボタンをクリックします。
3. リストから [言語基本設定] を選択します。
Page 35

S250/D250 USER GUIDE
ページ
ファイルのセキュアバックアップの作成
デバイスにオンボードにセキュアバックアッ
プアプリケーションがある場合、新規または
既存のIronKeyデバイス (Windows 専用、英
語のみ) にデータの暗号化されたバックアッ
プを保管できます。
セキュアバックアップは、いくつかまたはす
べてのオンボードファイルの暗号化されたバ
ックアップを、ローカルコンピュータまたは
ネットワークファイルシェアに保存します。
同じアプリケーションを使用して、1 つまたはすべてのファイルを保管します。
1. IronKey コントロールパネルの [アプリケーション] リストで、[セキュアバックア ッ
プ] ボタンをクリックして、プログラムを開きます (Windows のみ)
セキュアバックアップウィンドウが表示され、セキュアファイルドライブが表示
•
されます。
2. バックアップするファイルを選択します。
3. バックアップするファイルの隣にあるチェックボックスをクリックします。
緑のチェックマークは、フォルダとすべてのサブフォルダ内のすべてのファイル がバッ
•
クアップされることを意味します。
赤いマイナスサインは、このフォルダとサブフォルダのいくつかのみがバックア
•
ップされることを意味します。
4. バックアップファイルの保存先フォルダのパスを入力するか、参照ボタンを使用し て検索し
ます。
保存先フォルダは既存のフォルダ、新規フォルダ、別のドライブ (ネットワーク
•
ファイルシェアなど) を指定できます。
5. [今すぐバックアップ] をクリックします。ファイルが暗号化されバックアップされ
ます。
注: ファイルは安全に暗号化されますが、ファイル名はされません。ファイル名を隠 す
には、バックアップファイルを作成する前に、バックアップするファイルを zip し
す。
注: バック アップファイルを追加、変更、削除しないでください。後で復元できない
ります。
ま
場合があ
バックアップファイルからデバイスにファイルを復元する
1. IronKey コントロールパネルの [アプリケーション] リストで、[セキュアバックア ッ
プ] ボタンをクリックして、プログラムを開きます (Windows のみ)。
セキュアバックアップウィンドウが表示され、セキュアファイルドライブが表示
•
されます。
2.
[マイコンピュータから復元] を選択します。
Page 36

S250/D250 USER GUIDE
ページ
3. データをバックアップするとき以前選択した保存先フォルダを選択します。
バックアップファイルを含み、フォルダ内にファイルやフォルダがないフォルダを 選択
•
していることを確認します。
4. どのファイル/フォルダを復元するか選択し、[今すぐ復元] をクリックします。復元
されたファイルはセキュアファイルドライブにある同じ名前の既存のファイルが上書
きされます。
注: データが別のIronKeyデバイスからバックアップされた場合、別のデバイスにファイ ルを復
元するため、デバイスにデバイスのパスワードを使用する必要があります。
Linux でのデバイスの使用
Linux のいくつかの配信でデバイスをIronKey使用できます (カーネルバージョン 2.6+
の x86 システムのみ)。
UNLOCKER の使用
Linux の Unlocker を使用してファイルにアクセスし、Linux のデバイスパスワードを変 更する
ことで、Windows、Mac, および Linux コンピュータ間でファイルを安全に転送で きます。
Linux 配信によって、マウントされた仮想 DVD の Linux フォルダで見つかったプログラ
ム [ironkey] を使用する権限をルートする必要がある場合があります。システムに 1 つの
IronKeyデバイスしか接続されていない場合、引数なしでコマンドシェルからプログ ラム
を実行します (ironkeyなど)複数のIronKeyデバイスがある場合、ロック解除する デバイ
スを指定する必要があります。
注: ironkey はセキュアボリュームのみロック解除します。それをマウントする必
要があります。現在の多くの Linux 配信はこれを自動的に行います。行わない場合
は、ironkey によって印刷されたデバイス名を使用して、コマンドラインからマウ
ント プログラムを実行します。
読み取り専用モードでデバイスをロック解除するには、次を入力します。
ironkey --readonly
「devicename」がパスワードのデバイスをロック解除するには、次を入力します。
ironkey --unlock
デバイスをロックするには、マウントを解除して物理的に取り外すか、次を実行する必要 があ
ります。
ironkey --lock
「devicename」と名づけられたデバイスをロックするには、次を入力します。
ironkey --lock [devicename]
単にデバイスのマウントを解除しても、セキュアボリュームを自動的にロックしません。
Page 37

S250/D250 USER GUIDE
ページ
Linux でデバイスを使用するには、次の重要な詳細に注意してください。
1. Kernel バージョンが 2.6 またはそれ以降である必要があります
自分のカーネルをコンパイルする場合、次を含む必要があります。
» DeviceDrivers->SCSIDeviceSupport-><*>SCSICDROMSupport
» DeviceDrivers-><*> Support for Host-side USB
» DeviceDrivers-><*> USB device filesystem
» DeviceDrivers-><*> EHCI HCD (USB 2.0) support
» DeviceDrivers-><*> UHCI HCD (most Intel and VIA) support
» DeviceDrivers-><*> USB Mass Storage Support
ほとんどの主要な配信でデフォルトで含まれているカーネルは、すでにこれらの機能を備
えているため、サポートされている配信とともにデフォルトのカーネルを使用する場合、
別のアクションを起こす必要はありません。
また、64 ビットの Linux システムでは、ironkey プログラムを実行するために、32 ビットの
ライブラリがインストールされている必要があります。サポートや詳細情報につ いては、配信
のヘルプリソースに連絡してください。
2.
マウントに関する問題
» 外部の SCSI や USB デバイスをマウントする権限があることを確認します
» 配信の中には自動的にマウントされず、実行するのに次のコマンドが必要なものもあ
ります。
mount /dev/<name of the device> /media/<mounted device name>
» マウントされるデバイスの名前は配信によって変わります。デバイスのIronKey名前は 実行
してからわかります。
ironkey --show
3.
権限
» 外部の USB/フラッシュデバイスをマウントする権限が必要です
» Unlocker を起動するため、デバイスの仮想 DVD を実行ファイルを実行する権限が必
要です
» ルートユーザーの権限が必要な場合があります
権限をセットアップし、非ルートユーザーがIronKeyデバイスにアクセスできる方法につ いての
情報は、デバイスの仮想 DVD の Linux フォルダをご覧ください。これらの方法の すべては、
システム管理者がアクセスを有効にするアクションを起こす必要があります
(1 回)。その後、通常のユーザーはIronKey接続するすべてのデバイスでパスワードをロ ック、
ロック解除、変更できます。
4. サポートされている配信
Linux のすべての配信がサポートされているわけではありません。サポートされている配 信の
最新リストは、http://support.ironkey.com にアクセスしてください。
5. 現時点では、Linux 用の IronKey Unlocker は x86 システムのみサポートしていま す
。
Page 38

S250/D250 USER GUIDE
ページ
ヘルプの入手場所
詳細情報
support.ironkey.com
www.ironkey.com
サポートの連絡先
http://support.ironkey.com
サポート情報、ナレッジベース、ビデオチュートリ
アル
全般情報
Page 39

IRONKEY ENTERPRISE S250/D250 사용자 가이드
페이지
시작하기
이 단원에서는 IronKey 장치를 사용하는 데 도움이 되는 몇 가지 기본 작업에 대한
간단한 개요를 제공합니다. IronKey Enterprise 장치를 사용하고 있다면, 해당 장치는
시스템 관리자가 관리하는 엔터프라이즈 솔루션에 연결되어 있습니다. 즉, 이 단원의
일부 설정은 관리자가 허가하지 않았다면 사용하지 못할 수도 있습니다.
IronKey 장치의 IronKey 제어판 소프트웨어는 여러 언어로 번역되었습니다. 그러나
Ironkey 맬웨어 스캐너(Enterprise 장치 전용), ID 관리자, 내장 Firefox, 가상 키보드와
같은 일부 내장및 응용 프로그램은 영어로만 되어 있습니다. 온라인 계정 웹 사이트 및
기본 이메일 메시지도 영어로만 되어 있습니다.
이 단원에는 다음에 관한 정보가 포함됩니다.
»
시스템 요구사항
»
권장 모범 사례
»
장치 설정
»
장치 잠금 해제
»
장치 잠금
»
보안 파일 액세스
»
파일 암호화 및 해독
»
암호를 잊어버린 경우 장치 액세스
»
언어 환경 설정 변경
»
파일의 보안 백업 만들기
»
Linux에서 내 장치 사용
»
도움을 받을 수 있는 곳
시스템 요구사항
» Windows 8.1
» Windows 8
» Windows 7 (SP1)
» Windows Vista (SP2)
» Mac OS X(10.9.x - 10.11.x)
» Linux(2.6+)
컴퓨터에는 고속 데이터 전송용 USB 2.0 포트가 있어야 합니다. USB 1.1 포트 또는
허브로도 작동되지만 속도가 느립니다.
Page 40

IRONKEY ENTERPRISE S250/D250 사용자 가이드
페이지
일부 응용 프로그램은 다음과 같은 특정 시스템에서만 사용 가능합니다.
» Windows 전용
내장 Firefox
•
보안 백업
•
가상 키보드
•
IronKey ID 관리자
•
» Mac 전용—Auto-Launch Assistant
권장 모범 사례
» 다음과 같이 할 수 있도록 온라인 계정을 만듭니다.
잊어버린 장치 암호 재설정
•
ID 관리자 암호 백업
•
» 다음과 같은 경우 장치를 잠급니다.
사용하지 않을 때
•
플러그를 빼기 전
•
시스템이 절전 모드가 되기 전
•
» LED가 켜져 있을 때 절대 장치를 분리하지 않습니다.
» 장치 암호를 절대 공유하지 않습니다.
» 장치를 설정하기 전에 컴퓨터 안티바이러스 검사를 수행하십시오.
장치 설정
설정 프로세스는 Windows와 Mac 시스템에서 동일합니다. Linux 시스템의 경우 Linux
에서 내 장치 사용을 참조하십시오.
1. 컴퓨터의 USB 포트에 Ironkey 장치를 꽂습니다. "장치 설정" 화면이 나타납니다.
설정 소프트웨어가 가상 DVD에서 자동으로 실행됩니다. 이 화면은 컴퓨터에서 장치의 자동
실행을 허용하지 않으면 나타나지 않습니다. 다음과 같이 수동으로 시작할 수 있습니다.
WINDOWS: "내 컴퓨터"의 “IronKey Unlocker” 드라이브를 두 번 클릭하고
•
“IronKey.exe”를 실행하십시오.
MAC: 파인더에서 IronKey Unlocker 드라이브를 열고 IronKey Unlocker 폴더에서
•
IronKey 응용 프로그램을 여십시오.
2. 장치 활성화 코드를 입력하십시오. 관리자가 보낸 이메일 메시지에서 코드를 받았을
것입니다.
3. 기본 언어를 선택하고 최종 사용자 사용권 계약에 동의한 다음 "활성화" 버튼을 클릭하
십시오
기본적으로 IronKey 소프트웨어는 컴퓨터 운영 체제와 동일한 언어를 사용합니다.
Page 41

IRONKEY ENTERPRISE S250/D250 사용자 가이드
페이지
4. 장치 암호를 입력하고 확인한 다음 "계속" 버튼을 클릭하십시오.
암호는 4문자 이상이어야 하며 대소문자를 구분합니다.
5. 온라인 계정에 사용할 이메일 주소를 제공하라는 메시지가 표 시되면 바로 입력한 다음
"계속" 버튼을 클릭하십시오.
6. 이메일이 전송되었음을 표시하는 메시지가 나타납니다. 이메일의 지침에 따라 온라인
계정을 설정하십시오. 여기에는 "비밀 질문" 만들기가 포함됩니다.
온라인 계정은 암호 재설정, 웹 검색, 장치 소프트웨어업데이트 등과 같은 몇 가지
•
보안 기능에 필요합니다.
7. 장치에 대해 온라인 계정을 설정하면 표시된 메시지에서 "확인"을 클릭하여 장치 설정
을 계속하십시오.
8. 장치가 초기화됩니다. 이 프로세스 동안 AES 암호화 키 및 Secure Volume용 파일 시
스템이 생성되고 보안 응용 프로그램 및 파일이 Secure Volume에 복사됩니다.
9. 초기화가 완료되면 IronKey 제어판이 나타납니다. 이제 장치가 데이터를 보호할 수 있
고 Windows, Mac 또는 Linux 컴퓨터에서 장치를 사용할 수 있습니다.
Unlocker 화면을 표시하는 메시지를 추가하거나 수정하려면 암호를 잊어버린 경우
•
장치 액세스를 참조하십시오.
장치 잠금 해제
잠금 해제 프로세스는 Windows와 Mac 시스템에서 동일합니다. Linux 시스템의 경우
Linux에서 내 장치 사용을 참조하십시오.
1. 장치를 꽂고 Unlocker 창이 나타나기를 기다립니다.
Unlocker 창이 나타나지 않으면 다음과 같이 수동으로 시작할 수 있습니다.
WINDOWS: "내 컴퓨터"의 “IronKey Unlocker” 드라이브를 두 번 클릭하고
•
“IronKey.exe”를 실행하십시오.
MAC: 파인더에서 IronKey Unlocker 드라이브를 열고 IronKey Unlocker 폴더에서
•
IronKey 응용 프로그램을 여십시오.
참고: Mac에서는 IronKey 장치를 연결할 경우 Unlocker를 자동으로 여는 Auto-
•
Launch Assistant를 설치할 수 있습니다.
2. 장치 암호를 입력하고 "잠금 해제"를 클릭하십시오. IronKey 제어판이 나타납니다.
또는 "읽기 전용 모드" 확인란을 클릭하여 읽기 전용 모드에서 장치를 잠금 해제할
•
수 있습니다.
암호를 올바르게 입력하면(하드웨어에서 확인됨) 모든 보안 응용 프로그램 및
•
파일과 함께 Secure Volume이 마운트됩니다.
10번 연속으로 잘못된 암호를 입력하면 장치와 모든 내장 데이터가 영구적으로
•
파괴됩니다. IronKey Enterprise 장치를 사용할 경우 이 횟수는 관리자가 정의하는 암호
설정에 따라 다를 수 있습니다.
보안 예방 조치로 암호 입력 시도를 3번 실패할 때마다 장치를 분리하고 다시
•
삽입해야 합니다.
Page 42

IRONKEY ENTERPRISE S250/D250 사용자 가이드
페이지
읽기 전용 모드에서 장치 잠금 해제
보안 파일 드라브의 파일을 아무도 편집할 수 없도록 장치를 읽기 전용 상태에서 잠금
해제할 수 있습니다. 예를 들어, 신뢰할 수 없거나 알 수 없는 컴퓨터를 사용하면서
장치의 파일에 액세스하려 한다고 가정합니다. 읽기 전용 모드에서 장치를 잠금
해제하면 해당 시스템에 있는 맬웨어가 장치를 감염시키거나 파일을 수정하지 못하도록
막을 수 있습니다.
1. 장치를 꽂고 Unlocker를 실행하십시오.
2. "읽기 전용 모드" 확인란을 클릭하십시오.
3. "잠금 해제" 버튼을 클릭하십시오.
» 제어판에 읽기 전용 모드임을 나타내는 메시지가 표시됩니다.
» 읽기 전용 모드에서 장치를 잠금 해제하면 장치를 잠글 때까지 읽기 전용 모드가 계속
유지됩니다.
» 일부 기능은 장치의 파일을 수정해야 하므로 읽기 전용 모드에서 사용할 수 없습니다.
사용할 수 없는 기능의 예로는 재포맷, 응용 프로그램 복원, 보안 파일 드라이브의
파일 편집, 응용 프로그램 목록 편집이 있습니다.
» Linux의 읽기 전용 모드에서 장치를 잠금 해제하려면 다음을 입력하십시오.
ironkey --readonly
Unlocker에 표시되는 메시지 만들기
이 기능을 사용하여 IronKey Unlocker 창에 나타나는 메시지를 만들 수 있습니다. 예를
들어, 장치를 분실할 경우 누군가 반환할 방법을 알 수 있도록 연락처 정보를 제공할 수
있습니다.
1. 장치를 잠금 해제하고 메뉴 표시줄의 "설정" 버튼을 클릭하십시오.
2. 왼쪽 사이드바의 "환경 설정" 버튼을 클릭하십시오.
3. "잠금 해제 메시지" 필드에 텍스트를 입력하십시오.
메시지 텍스트는 제공된 공간에 맞아야 합니다(약 7줄과 200문자).
참고: IronKey Enterprise 장치의 경우 관리자가 이 기능을 사용 설정하지 않았으면
제어판에 잠금 해제 메시지가 표시되지 않습니다.
가상 키보드로 암호 입력
익숙하지 않은 컴퓨터에서 장치를 잠금 해제할 때 키로거 및
스크린로거 스파이웨어가 있을지 염려된다면 Ironkey 가상
키보드를 사용하십시오. 가상 키보드를 사용하면 문자와 숫자를
마우스로 클릭할 수 있어 장치 암호를 보호하는 데 도움이 됩니다.
가상 키보드의 기반 기술은 수많은 트로이 목마, 키로거 및
스크린로거를 우회합니다.
Page 43

IRONKEY ENTERPRISE S250/D250 사용자 가이드
페이지
다음과 같은 두 가지 방법으로 가상 키보드를 시작할 수 있습니다.
1. 가상 키보드 아이콘을 클릭하십시오. IronKey Unlocker 또는 제어판의 암호 필드
에 있습니다. 가상 키보드가 나타납니다.
또는 키보드 초점이 암호 필드에 있을 때 CTRL+ALT+ V를 누릅니다.
•
2. 키를 클릭하여 암호를 입력하십시오. 완료하면 "Enter"를 클릭하십시오.
일부 문자는 입력하고 일부 문자는 클릭하도록 가상 키보드를 실제 키보드와 함께
•
사용할 수 있습니다.
또는 "무작위" 버튼을 클릭하여 키의 위치를 무작위로 배열할 수도 있습니다.
•
그러면 스크린로거에 대해 보호를 받을 수 있습니다.
참고: 이 기능은 Windows에서만 사용할 수 있고 표준 QWERTY 키세트를 사용합니다.
참고: 가상 키보드로 키를 클릭할 경우 모든 키가 잠시 공백이 됩니다. 그러면
스크린로거가 클릭한 키를 캡처하지 못합니다. 이 기능을 사용하지 않으려면 "닫기" 버튼
옆의 옵션 메뉴에서 기능을 사용 중지할 수 있습니다.
장치 잠금
장치를 안전하게 잠그려면 제어판 왼쪽 하단의 “잠금” 버튼을 클릭하십시오.
•
키보드 바로 가기,CTRL + L을 사용할 수도 있습니다.
참고: 보안 파일 드라이브의 응용 프로그램 또는 파일이 열려 있으면 장치를 잠그지 못할
수 있습니다(잠재적인 파일 손상 방지). 열려 있는 내장 응용 프로그램 및 파일을 닫고
장치 잠금을 재시도하십시오.
주의: 장치가 잠기면 안전하게 분리할 수 있습니다. 그러나 잠금 해제된 경우 장치를
분리하지 마십시오.
보안 파일 액세스
장치 잠금 해제 후에 다음과 같이 장치에 저장된 파일에 안전하게 액세스할 수 있습니다.
IronKey 제어판 메뉴 표시줄의 "파일" 버튼(폴더 아이콘)을 클릭하십시오.
•
WINDOWS: Windows 탐색기를 열고 "보안 파일" 드라이브로 이동하십시오.
•
MAC: 파인더를 열고 "보안 파일" 드라이브로 이동하십시오.
•
팁: Windows 작업 표시줄의 Ironkey 아이콘을 마우스 오른쪽 클릭하고 "보안 파일"을
클릭하여 파일에 액세스할 수도 있습니다.
Page 44

IRONKEY ENTERPRISE S250/D250 사용자 가이드
페이지
파일 암호화 및 해독
IronKey 장치에 저장하는 모든 것은 암호화됩니다. 장치에는 내장 암호화 칩(Cryptochip)
이 있으므로 모든 암호화 및 해독이 "바로" 수행되어 일반 플래시 드라이브를 사용하는
것과 같은 작업 편의성을 제공하는 동시에 강력한 "상시" 보안을 제공합니다.
자동으로 암호화하려면 보안 파일 드라이브로 파일을 끕니다.
•
보안 파일 드라이브에서 연 파일은 열리면서 자동으로 해독됩니다.
•
암호를 잊어버린 경우 장치 액세스
암호 재설정 옵션을 사용하면 암호를 잊어버렸을 때 장치를 복구할 수 있습니다.
장치 관리자가 이 기능을 사용하도록 암호 재설정 권한을 부여해야 합니다. 암호를
잊어버리고 재설정할 수 없으면 관리자에게 문의해야 합니다.
암호를 잊어버린 경우 암호를 재설정하려면
1. 장치를 꽂고 Unlocker를 실행하십시오.
2. "암호 도움말" 버튼을 클릭하십시오.
3. 암호 도움말 메시지에서 "암호 재설정" 버튼을 클릭하십시오. 재설정 방법의 지침이
포함된 이메일이 전송됩니다.
4. 이메일 메시지의 지침을 완료한 후 "계속" 버튼을 클릭하십시오.
5 . 새 암호를 입력하거나 가상 키보드를 사용하고 제공된 필드에서 암호를 확인한 다음 "
암호 변경" 버튼을 클릭하십시오.
언어 환경 설정 변경
장치를 설정할 때 언어 환경 설정을 설정합니다. 그러나 필요할 경우 IronKey 제어판에서
변경할 수 있습니다.
1. 장치를 잠금 해제하고 메뉴 표시줄의 "설정" 버튼을 클릭하십시오.
2. 왼쪽 사이드바의 "환경 설정" 버튼을 클릭하십시오.
3. 목록에서 언어 환경 설정을 선택하십시오.
Page 45

IRONKEY ENTERPRISE S250/D250 사용자 가이드
페이지
파일의 보안 백업 만들기
장치에 Secure Backup 응용 프로그램이
내장되어 있으면 새로운 또는 기존 IronKey
장치에 데이터의 암호화 백업을 복원할 수
있습니다(Windows 전용, 영어 전용).
Secure Backup은 내장 파일의 일부 또는
모든 암호화 백업을 로컬 컴퓨터 또는
네트워크 파일 공유에 저장합니다. 동일한
응용 프로그램을 사용하여 파일 하나 또는
전부를 복원할 수 있습니다.
1. Ironkey 제어판의 응용 프로그램 목록에서 "Secure Backup" 버튼을 클릭하여 프로그
램을 여십시오(Windows 전용).
Secure Backup 창이 나타나 보안 파일 드라이브를 표시해야 합니다.
•
2. 백업할 파일을 선택하십시오.
3. 백업할 파일 옆의 확인란을 클릭하십시오.
초록색 확인 표시는 이 폴더와 모든 하위 폴더의 파일이 모두 백업된다는
•
의미입니다.
빨간색 마이너스 기호는 이 폴더 또는 하위 폴더의 일부 파일만 백업된다는
•
의미입니다.
4. 백업된 파일의 대상 폴더의 경로를 입력하거나 찾기 버튼을 사용하여 파일을 찾으십
시오.
대상 폴더는 기존 폴더, 새 폴더 또는 별도의 드라이브(예: 네트워크 파일 공유)일
•
수 있습니다.
5
.
"지금 백업"을 클릭하십시오. 파일이 암호화되고 백업됩니다.
참고: 파일은 안전하게 암호화되지만 파일 이름은 암호화되지 않습니다. 파일 이름을
숨기려면 백업 파일을 만들기 전에 백업할 파일을 압축하십시오.
참고: 백업된 파일을 추가, 변경 또는 삭제하지 마십시오. 나중에 복원하지 못하게 될 수
있습니다.
백업 파일에서 장치로 파일 복원
1. IronKey 제어판의 응용 프로그램 목록에서 "Secure Backup" 버튼을 클릭하여 프로그
램을 여십시오(Windows 전용).
Secure Backup 창이 나타나 보안 파일 드라이브를 표시해야 합니다.
•
2. "내 컴퓨터에서 복원" 탭을 선택하십시오.
3. 데이터를 백업할 때 이전에 선택한 대상 폴더를 선택하십시오.
반드시 백업 파일이 있는 폴더 안의 파일이나 폴더가 아니라 백업 파일이 있는
•
폴더를 선택하십시오.
Page 46

IRONKEY ENTERPRISE S250/D250 사용자 가이드
페이지
4. 복원할 파일/폴더를 선택하고 "지금 복원"을 클릭하십시오. 복원된 파일은 보안 파일
드라이브의 이름이 같은 기존 파일을 덮어씁니다.
참고: 데이터가 다른 IronKey 장치에서 백업된 경우 다른 장치로 파일을 복원하기 위해
해당 장치의 장치 암호를 사용해야 합니다.
Linux에서 내 장치 사용
Linux의 여러 배포판(커널 버전 2.6+를 포함하는 x86 시스템만 해당)에서 IronKey 장치를
사용할 수 있습니다.
UNLOCKER 사용
Linux용 Unlocker를 사용하고 Linux에서 장치 암호를 변경하여 Windows, Mac, Linux
컴퓨터 사이에서 파일을 안전하게 전송하십시오.
Linux 배포판에 따라 마운트된 가상 DVD의 Linux 폴더에 있는 “ironkey” 프로그램을
사용하기 위해 루트 권한이 필요할 수 있습니다. 시스템에 연결된 IronKey 장치가
하나뿐이라면 인수 없이 명령 셸에서 프로그램을 실행하십시오(예: ironkey). 여러
IronKey 장치가 있으면 잠금 해제할 장치를 지정해야 합니다.
참고: ironkey는 Secure Volume만 잠금 해제합니다. 그다음 마운트되어야 합니다.
현재 많은 Linux 배포판이 이 작업을 자동으로 수행합니다. 자동으로 수행되지
않으면 ironkey라고 표시되는 장치 이름을 사용하여 명령행에서 마운트 프로그램을
실행하십시오.
읽기 전용 모드에서 장치를 잠금 해제하려면 다음을 입력하십시오.
ironkey --readonly
암호가 “devicepassword”인 장치를 잠금 해제하려면 다음을 입력하십시오.
ironkey --unlock
장치를 잠그려면 장치를 마운트 해제하거나 물리적으로 제거(분리)하거나 다음을
실행해야 합니다.
ironkey --lock
이름이 "devicename"인 장치를 잠그려면 다음을 입력하십시오.
ironkey --lock [devicename]
장치를 마운트 해제한다고 해서 자동으로 Secure Volume이 잠기는 것은 아닙니다.
Page 47

IRONKEY ENTERPRISE S250/D250 사용자 가이드
페이지
Linux에서 장치를 사용하기 위해 다음 중요 세부 정보를 유의하십시오.
1 . 커널 버전이 2.6 이상이어야 합니다.
자체 커널을 컴파일한 경우 다음을 포함해야 합니다.
» DeviceDrivers->SCSIDeviceSupport-><*>SCSICDROMSupport
» DeviceDrivers-><*> Support for Host-side USB
» DeviceDrivers-><*> USB device filesystem
» DeviceDrivers-><*> EHCI HCD (USB 2.0) support
» DeviceDrivers-><*> UHCI HCD (most Intel and VIA) support
» DeviceDrivers-><*> USB Mass Storage Support
대부분의 주요 배포판에 기본적으로 포함되는 커널에는 이미 이러한 기능이 있으므로
지원되는 배포판과 함께 포함되는 기본 커널을 사용하는 경우 다른 조치를 취할 필요가
없습니다.
또한 64비트 Linux 시스템에서는 ironkey 프로그램을 실행하기 위해 32비트
라이브러리를 설치해야 합니다지원 및 추가 정보는 배포판의 지원 리소스를
참조하십시오.
2. 마운트 문제
» 외부 SCSI 및 USB 장치를 마운트할 권한이 있는지 확인하십시오.
» 일부 배포판에서는 자동으로 마운트하지 않고 다음 명령을 실행해야 합니다.
mount /dev/<name of the device> /media/<mounted device name>
» 마운트된 장치의 이름은 배포판에 따라 다릅니다. IronKey 장치의 이름은 다음을
실행하여 검색할 수 있습니다.
ironkey --show
3. 권한
» 외부/USB/플래시 장치를 마운트할 권한이 있어야 합니다.
» Unlocker를 실행하기 위해 장치의 가상 DVD 외부에서 실행 파일을 실행할 권한이
있어야 합니다.
» 루트 사용자 권한이 필요할 수 있습니다.
루트 이외 사용자가 IronKey 장치에 액세스할 수 있는 권한을 설정하는 방법에 대한
자세한 내용은 장치의 가상 DVD의 Linux 폴더를 참조하십시오. 위의 모든 방법은 시스템
관리자가 액세스를 사용 설정하는 작업을 수행해야 합니다(한 번). 그 후에 일반 사용자가
연결한 IronKey 장치에서 암호를 잠금, 잠금 해제 및 변경할 수 있습니다.
4. 지원하는 배포판
Linux의 모든 배포판을 지원하지 않습니다. 지원하는 배포판의 최신 목록은
http://support.ironkey.com을참조하십시오.
5. Linux용 IronKey Unlocker는 현재 x86 시스템만 지원합니다.
Page 48

IRONKEY ENTERPRISE S250/D250 사용자 가이드
페이지
도움을 받을 수 있는 곳
support.ironkey.com
지원 정보, 지식 기반 및 비디오 지침서
www.ironkey.com
일반 정보
자세한 정보
지원 문의
http://support.ironkey.com
Page 49

IRONKEY ENTERPRISE S250/D250 用户指南
页面 49
入门
本文提供了一些基本操作的简明概述,可帮助您开始使用 IronKey 设备。如果您正在使用
IronKey 企业设备,它会将您连接至由您的系统管理员管理的企业解决方案。 因此,本文
内容中系统管理员尚未启用的部分设置将无法使用。
您 IronKey 设备上的 IronKey 控制面板软件已被翻译成多种不同的语言。然而,部分 板
载应用程序只有英文版,例如 IronKey 恶意软件扫描器(仅限企业设备),身份管理 器
,板载 Firefox,及虚拟键盘。 在线帐户 的网页和预设邮件信息都只有英文版。
本文包含以下相关信息:
»
系统要求
»
推荐最佳范例
»
设置设备
»
解锁设备
»
锁定设备
»
访问我的安全文件
»
加密和解密文件
»
在忘记密码时访问我的设备
»
更改语言首选项
»
为我的文件创建安全备份
»
在 Linux 系统上使用我的设备
»
我在哪里可获得帮助?
系统要求
» Windows 8.1
» Windows 8
» Windows 7 (SP1)
» Windows Vista (SP2)
» Mac OS X (10.9.x - 10.11.x)
» Linux (2.6+)
计算机须有一个能进行高速数据传输的 USB 2.0 端口。USB 1.1 或有动力装置的集线器 也可用,
但传输速度会较慢。
Page 50

IRONKEY ENTERPRISE S250/D250 用户指南
页面 50
部分应用程序仅适用于以下指定系统:
» 仅限 Windows
板载 Firefox
•
安全备份
•
虚拟键盘
•
IronKey 身份管理器
•
» 仅适用于 Mac — 自动启动助手
推荐最佳范例
» 创建一个在线帐户然后您就可以:
重置遗忘的设备密码
•
备份您的身份管理器密码
•
» 锁定设备
当不使用时
•
在拔出设备之前
•
在系统进入休眠模式之前
•
» 当 LED 灯亮着时绝不拔出设备
» 绝不分享您的设备密码
» 设置设备之前执行计算机病毒防护扫描
设置设备
Windows 和 Mac 系统的设置步骤相同。对于 Linux 系统,请参阅在 Linux 系统上使用我的
设备。
1. 将 IronKey 设备插入您的计算机 USB 端口。出现“设置设备”屏幕。
虚拟 DVD 驱动自动运行设置软件。如果您的计算机不允许设备自动运行,该屏幕可能不 会出
现。您可以通过以下方式手动启动它:
WINDOWS: 在“我的电脑”中双击“IronKey 解锁”驱动器并启动“IronKey.exe”。
•
MAC: 在 Finder 中打开 IronKey 解锁驱动器并在 IronKey 解锁器 文件夹中打开
•
IronKey 应用程序。
2. 如果您有 IronKey 企业设备,输入激活代码。您应该可以在系统管理员发送的电子邮件 信息中
找到该代码。
3. 选择默认语言首选项,同意最终用户许可协议,然后单击“激活”按钮。
IronKey 软件默认设置将使用与您的计算机操作系统相同的语言。
4. 输入设备密码并确认,然后单击“继续”按钮。
您的密码须区分大小写并且至长度至少为四个字符。
Page 51

IRONKEY ENTERPRISE S250/D250 用户指南
页面 51
5. 如果有提示信息要求提供一个在线帐户的电子邮件地址,立即输入,
然后单击“继续”按钮。
6. 将会出现一条提示信息表明已发送邮件至您的邮箱。按照邮件中的说明来设置您的在 线帐户;
包括创建一个“安全问题”。
您的在线帐户要求一些安全功能,例如重置密码,更新设备软件以及更多功能。
•
7. 一旦为您的设备建立了在线账户,单击信息提示中的“确定”可继续设置设备。
8. 设备初始化。在此进程期间,将会生成 AES 加密密钥,为安全卷创建文件系统,并 将安全应
用程序和文件复制到安全卷。
9. 当初始化完成后,会出现 IronKey 控制面板。您的设备现在可以保护您的数据并能够
用于 Windows,Mac 或 Linux 计算机。
如果您想要添加或修改显示在解锁屏幕上的信息,请参阅在忘记密码时访问我的
•
设备。
解锁设备
Windows 和 Mac 的解锁程序相同。对于 Linux 系统,请参阅在 Linux 系统上使用我的 设
备。
1. 插入您的设备并等待解锁窗口出现。 如果解锁窗口并未出现,您可以通过以下方式手
动开启:
WINDOWS: 在“我的电脑”中双击“IronKey 解锁器”驱动并启动“IronKey.exe”。
•
MAC: 在 Finder 中打开 IronKey 解锁器驱动并在 IronKey 解锁器 文件夹中打开
•
IronKey 应用程序。
注意:在 Mac 计算机上您可以安装自动启动助手,当您插入一个 IronKey 设备时
•
它会自动打开解锁器。
2. 输入您的设备密码并单击“解锁”。将会出现 IronKey 控制面板。
或者,您可以单击“只读模式”复选框,在只读模式下解锁设备。
•
正确输入您的密码(已在硬件中验证的密码)将安装携有您的全部安全应用程序
•
和文件的安全卷。
连续 10 次输入错误密码将永久毁坏设备和您的全部板载数据。如果您正在使用
•
IronKey 企业设备,错误密码的输入次数可能由系统管理员管理定义的密码设置来 决定。
作为安全防范措施,输入三次错误密码后,您必须拔出并重新插入设备。
•
Page 52

IRONKEY ENTERPRISE S250/D250 用户指南
页面 52
只读模式下解锁设备 您可以在只读模式下解锁您的设备,以便其他人无法编辑您存放在
安全文件驱动中的文 件。举例来说,当在使用一台非信任或未知计算机时,您想要访问
您的设备里的一个文 件;以只读模式解锁您的设备将会防止该计算机上的恶意软件感染
您的设备或修改您的 文件。
1. 插入您的设备并启动解锁程序。
2. 单击“只读模式”复选框。
3. 单击“解锁”按钮。
» 您将会看到控制面板中有一条信息,表明设备处于只读模式。
» 当您在只读模式下解锁设备时,设备将保持只读模式直到您锁住设备。
» 只读模式下部分功能无法使用,因为这些功能需在设备上修改文件方可使用。在此列
举不可用功能包括重新格式化,恢复应用程序,编辑安全文件驱动器上的文件,以及 编辑应
用程序列表。
» 要在 Linux 系统上以只读模式解锁您的设备,请输入:ironkey --readonly
创建一条显示在解锁程序上的信息
此项功能允许您创建显示在 IronKey 解锁程序窗口中的信息。例如,您可以提供联系信 息,如果
您遗失了设备,拾获者知道如何将设备退还给您。
1. 解锁您的设备 并单击菜单栏上的“设置”按钮。
2. 单击左侧边栏的“首选项”按钮。
3. 在“解锁信息”字段中输入文本。
您的信息文本须符合提供的空间(大约是 7 行和 200 个字符)。
注意:对于 IRONKEY 企业设备,如果您的系统管理员尚未启用该项功能,您将不会在控 制面板
中看到解锁信息。
使用虚拟键盘输入密码
如果您在一台不熟悉的计算机上解锁设备,担忧键盘记录和屏幕记 录间谍
软件,请使用 IronKey 虚拟键盘。它让您单击字母和数字, 帮助您保护设
备密码。虚拟键盘优先的技术将能绕开许多木马程 式,键盘记录器和屏幕
记录器。
您可以通过几种方式开启虚拟键盘:
Page 53

IRONKEY ENTERPRISE S250/D250 用户指南
页面 53
1. 在 IronKey 解锁程序或控制面板上的口令字段中单击虚拟键盘图标。便会出现虚拟
键盘。
或者,当键盘焦点在口令字段中,您可以同时按下 CTRL+ALT+V。
•
2. 单击键可输入您的密码。完成后单击“输入”。
您可以结合使用虚拟键盘和真实键盘,以便可以打出部分字符或单击部分字符。
•
您还可以视需要单击“随机化”按钮,即可使按键随机分布。这可以防御屏幕记录器。
•
注意:该项功能仅对 WINDOWS 系统并使用标准传统键盘时可用。
注意:当您单击虚拟键盘上的一个键时,全部按键会暂时变成空白。这项功能可防止屏幕
记录器捕捉您单击的字符。如果您不希望使用这项功能,您可以在“关闭”按钮旁边的选项
菜单中禁用这项功能。
锁定设备
单击控制面板左下方的 “锁定”按钮,即可安全锁定您的设备。您还可以使用键
•
盘快捷键:CTRL + L。
注意:如果您的安全文件驱动器上有开启的应用程序或文件,您可能无法锁定设备(这样
可以保护潜在的档案破坏)。关闭任何开启的机载应用程序和文件并重试锁定设备。
警告:一旦设备锁定后,您可以安全拔出设备。然而,设备未锁定时请勿拔出。
访问我的安全文件
解锁设备后,您可以访问安全存储在设备的文件:
单击 IronKey 控制面板中菜单栏的“文件”按钮(文件夹图标)。
•
WINDOWS: 打开 Windows 资源管理器找到“安全文件”驱动器。
•
MAC: 打开 Finder 找到“安全文件”驱动器。
•
提示:您还可以通过右键单击 WINDOWS 任务栏上的 IRONKEY 图标并单击“安全文 件”来访问您
的文件。
加密和解密文件
您存储在你的 IronKey 设备中的全部数据都是加密的。因为设备有内建的密码芯片, 所有加密和
解密都是“即时”的,您只要带着普通的闪存驱动器,就能提供强大,“永远开 启”的安全保护,为您
带来工作便利性。
• 将文件拖动到安全文件驱动器即可自动为其加密。
• 当您打开安全文件驱动器中的文件时,即可自动解密。
Page 54

IRONKEY ENTERPRISE S250/D250 用户指南
页面 54
在忘记密码时访问我的设备
密码重置选项允许您在忘记密码后恢复您的设备。
对于私人设备,您只要通过设置设备启用密码重置功能。然而,只要您可以解锁您的设 备,就可
以在设置后启用它。
对于企业设备,须有系统管理员授权密码重置特权,方可使用该项功能。如果您忘记您 的密码而
且不能重置,您必须联系您的系统管理员。
设置后启用密码重置(仅限私人设备)
1. 插入您的设备并启动解锁程序。
2. 单击控制面板菜单栏上的“设置”按钮。
3. 单击左侧边栏上的“密码”按钮并单击“启用密码重置……”复选框。 进行之前您必须创建一个在线
帐户(如果您尚未创建)。
4. 如果您尚未创建在线帐户,单击“确定”即可创建一个。在帐户边栏,输入用于帐户 的电子邮件
地址并单击“创建在线帐户”按钮。
5. 将会出现一条提示信息表明已发送邮件至您的邮箱。按照邮件中的说明来设置您的 在线帐户;
包括创建一个“安全问题”。
6. 一旦成功设置您的在线帐户后,您将看到一个提问询问您是否要启用密码重置选 项。单击“是的
”。
在忘记密码时如何重置密码(私人和企业设备)
1. 插入您的设备并启动解锁程序。
2. 单击“密码帮助”按钮。
3. 在密码帮助提示框中,单击“重置密码”按钮。将会发送一封说明如何重置密码的邮件
给您。
4. 在您完成阅读邮件信息中的说明后,单击“继续”按钮。
5. 输入您的新密码,或使用虚拟键盘,并且确认字段中提供的密码,然后单击“更改密 码
”按钮。
Page 55

IRONKEY ENTERPRISE S250/D250 用户指南
页面 55
更改语言首选项
当您 设置您的设备 时,您可以设置语言首选项。当然,若有必要,您也可以在 IronKey 控制面板
中更改它。
1. 解锁设备并单击菜单栏上的“设置”按钮。
2. 单击左侧边栏的“首选项”按钮。
3. 从列表中选择语言首选项。
为我的文件创建安全备份
如果您的设备有板载应用程序安全备份,您可
以将加密备份数据恢复至新的或现有的
IronKey 设备(仅限于 Windows 系统,仅限
于英文版本)。
安全备份能将部分或全部板载文件的加密备份
保存至您的本地计算机或网络文件共享。您使
用相同的应用程序来恢复一个或全部文件。
1. 在 IronKey 控制面板的应用程序列表中,单击“安全备份”按钮即可打开程序(仅限于
Windows 系统)
将会出现安全备份窗口,显示安全文件驱动器。
•
2. 选择您想要备份的文件。
3. 单击要备份的文件旁边的复选框。
绿色的检查标志表明将备份该文件夹和全部子文件夹中的全部文件。
•
红色的负号表明将备份该文件夹或其子文件夹中的部分文件。
•
4. 输入路径到达目标文件夹找到已备份文件,或使用浏览器按钮找到它。
目标文件夹可以是现有的文件夹,新文件夹,或单独的驱动器(例如,网络文
•
件共 享)
5. 单击“立即备份”。文件将被加密并备份。
注意:当文件安全加密时,文件名称并未加密。要隐藏文件名称,创建备份文件之前压缩
您想要备份的文件。
注意:请勿添加,更改,或删除备份文件,或者稍后您可能会阻碍恢复文件。
Page 56

IRONKEY ENTERPRISE S250/D250 用户指南
页面 56
1. 在 IronKey 控制面板的应用程序列表中,单击“安全备份”按钮即可打开程序(仅限于
Windows 系统)。
将会出现安全备份窗口,显示安全文件驱动。
•
2. 选择“由我的计算机恢复”标签。
3. 选择之前备份数据时您已选定的目标文件夹。
确保选择只含有备份文件的文件夹,不含其它文件或文件夹。
•
4. 选择要恢复至哪一个文件/文件夹并单击“立即恢复”。已恢复文件将会覆盖安全文件驱 动上有相
同名称的现有文件。
注意:如果数据由不同的 IronKey 设备备份而来,您必须使用该设备的设备密码,以便将 文件恢
复至不同的设备。
在 Linux 系统上使用我的设备
您可以在 Linux 系统的多个分派系统上使用您的 IronKey 设备(x86 系统只有核心 2.6+
版本)。
由备份文件将文件恢复至设备
使用解锁程序
使用适用于 Linux 的解锁程序以便在 Linux 系统上访问您的文件并更改您的设备密码, 允许您安
全地在 Windows,Mac,以及 Linux 计算机之间传输文件。
根据您的 Linux 分派,您可能需要根特权方可使用“ironkey”程序,该程序位于已安装的
虚拟 DVD 驱动器中的 Linux 文件夹中。如果您只有一个 IronKey 设备附属于该系统,由
无参数的命令窗口(例如,ironkey)运行该程序。如果您有多种 IronKey 设备,您必
须指定需要关闭哪一个。
注意:ironkey 只会开启安全卷;然后必须安装它。当下许多 Linux 系统会阻止自动安 装;如果
没有自动安装,由命令行运行安装程序,使用由 ironkey 已命名的设备名称。
要以只读模式开启设备,输入:
ironkey --readonly
要使用“设备密码”解锁设备,输入:
ironkey --unlock
要锁定设备,您必须卸装并移除(拔出)设备,或额外运行:
ironkey --lock
要关闭名为“设备名称”的设备,输入:
ironkey --lock [devicename] 仅卸装
Page 57

IRONKEY ENTERPRISE S250/D250 用户指南
页面 57
设备并不能自动锁定安全卷。
在Linux 系统上使用您的设备请注意以下重要细节:
1. Kernel 版本须为 2.6 或以上
如果您编制您自己的 Kernel,必须含有以下:
» DeviceDrivers->SCSIDeviceSupport-><*>SCSICDROMSupport
» DeviceDrivers-><*> Support for Host-side USB
» DeviceDrivers-><*> USB device filesystem
» DeviceDrivers-><*> EHCI HCD (USB 2.0) support
» DeviceDrivers-><*> UHCI HCD (most Intel and VIA) support
» DeviceDrivers-><*> USB Mass Storage Support
大多数主要的分配默认包含的 Kernel 都已具备这些功能,所以如果您正在使用默认的
Kernel 有支持的分配,您无需做其它动作。
另外,64 位 linux 系统上,必须安装 32 位函数库,以便运行 ironkey 程序。咨询分配 帮助信息
,以获得协助和更多信息。
2. 安装问题
» 确保您有权限安装外部 SCSI 和 USB 设备
» 有些分配不会自动安装,并且要求运行以下命令:
mount /dev/<name of the device> /media/<mounted device name>
» 安装的设备其名称视分配不同而不同。可通过运行以下命令找到 IronKey 设备的名 称
:
ironkey --show
3. 权限
» 您必须有权限安装外部 /U 盘/闪存设备
» 您必须有权限脱离设备的虚拟 DVD 驱动器来运行可执行文件,以便开启解锁程序
» 您可能需要根用户权限
关于如何设置权限允许非根用户访问其 IronKey 设备,请查看设备的虚拟 DVD 驱动
器中的 Linux 文件夹,获得更多信息。所有这些方法要求系统管理员采取行动(一次
性)来授权访问。此后,普通用户可对其插入的任何 IronKey 设备进行锁定,解锁以
及更改密码操作。
4. 支持的分派
并非支持全部 Linux 系统分派。请访问 http://support.ironkey.com可获得最新支持的 分配
列表。
5. 适用于 Linux 系统的 IronKey 解锁程序目前仅支持 x86 系统。
Page 58

IRONKEY ENTERPRISE S250/D250 用户指南
页面 58
我在哪里可获得帮助?
欲知更多信息
support.ironkey.com
www.ironkey.com
支持信息,知识库和视频教程
基本信息
联系支持
http://support.ironkey.com
Page 59

IRONKEY ENTERPRISE S250/D250 使用者指南
頁面 59
開始使用
本章節提供一些基本操作的簡要概述,以協助您開始使用 IronKey 裝置。如果您正在使用
的是 IronKey 企業版裝置,該裝置已連結至由「系統管理員」所管理的企業解決方案。因
此,如果系統管理員尚未啟用本章節中的某些設定,您可能無法使用這些設定。
在 IronKey 裝置上的「IronKey 控制面板」 軟體已經翻譯為數種不同語言。然而,仍有某 些內建
的應用程式目前僅供英文版本,例如 IronKey 惡意程式掃描器 (僅限企業版裝置), 身分識別管理
員,內建 Firefox,虛擬鍵盤,以及安全 工作階段。線上帳號網站以及預設電子郵件訊息也僅供英
文版本。
本章節包含與下列主題相關之資訊:
»
系統需求
»
建議最佳做法
»
安裝裝置
»
解除鎖定裝置
»
鎖定裝置
»
存取我的安全檔案
»
加密與解密檔案
»
忘記密碼時如何存取裝置
»
變更語言偏好
»
建立檔案安全備份
»
在 Linux 上使用我的裝置
»
我可以從何處取得幫助?
系統需求
» Windows 8.1
» Windows 8
» Windows 7 (SP1)
» Windows Vista (SP2)
» Mac OS X (10.9.x - 1 0.11 .x)
» Linux (2.6 版本或更新)
電腦必須配備 USB 2.0 連接埠以進行高速數據傳輸。亦可使用 USB 1.1 連接埠或外接電 源集線
器,但是速度較慢。
Page 60

IRONKEY ENTERPRISE S250/D250 使用者指南
頁面 60
某些應用程式僅提供特定系統使用:
» 僅限 Windows
內建 Firefox
•
安全備份
•
虛擬鍵盤
•
IronKey 身分識別管理員
•
» 僅限 Mac —Auto-Launch Assistant
建議最佳做法
» 請建立一個線上帳號,以方便您:
重設忘記的裝置密碼
•
備份身分識別管理員密碼
•
» 鎖定裝置
未使用時
•
拔除裝置前
•
系統進入睡眠模式前
•
» LED 指示燈未熄滅時請勿拔除裝置
» 請勿共用裝置密碼
» 安裝本裝置前先執行電腦防毒掃描
安裝裝置
Windows 和 Mac 系統的設定程序相同。若使用 Linux 系統,請參閱<在 Linux 上使用我 的裝置
>一節。
1. 請將 IronKey 裝置插入您電腦的 USB 連接埠。「裝置設定」畫面隨即出現。
設定軟體也會從虛擬 DVD 自動執行。如果您的電腦不允許自動執行,則此畫面可能 不會出現
。您也可使用下列方式手動啟動:
WINDOWS:在「我的電腦」中按兩下「IronKey 解除鎖定程式」磁碟機來啟動
•
IronKey.exe。
MAC:在 Finder 中開啟「IronKey 解除鎖定程式」磁碟機,然後開啟 IronKey 解
•
除鎖定程式 資料夾中的 IronKey 應用程式 。
2. 請輸入啟用代碼。您應該已收到由管理員所寄發內 含此代碼的電子郵件訊息。
3. 選取預設的語言偏好,並同意使用者授權合約,然後按一下「啟用」按鈕。
依預設,IronKey 軟體將使用與您電腦作業系統相同的語言。
4. 輸入裝置密碼並確認後,再按一下「繼續」按鈕。
您的密碼區分大小寫,且長度至少為 4 個字元。
Page 61

IRONKEY ENTERPRISE S250/D250 使用者指南
頁面 61
5. 如果系統提示您提供線上帳號的電子郵件地址,請立刻輸入,然後按一 下「繼續」按鈕。
6. 畫面中將出現訊息提示表示已經傳送一封電子郵件給您。請遵循電子郵件中的指示來 設定線上
帳號;其中也包括建立「秘密問題」。
某些安全性功能要求線上帳號,例如重設密碼,更新裝置軟體等更多功能。
•
7. 當您設定好裝置的線上帳號後,請按一下訊息提示中的「確認」以繼續進行裝置設
定。
8. 裝置隨即進行初始化。初始化期間,系統會產生 AES 加密金鑰,建立安全磁區的檔案 系統,
並將安全應用程式和檔案複製到安全磁區。
9. 初始化完成時,「IronKey 控制台」隨即出現。您的裝置現在已經準備好保護您的資 料,並適
用於 Windows,Mac 或 Linux 電腦。
如果您想要新增或修改「解除鎖定程式」畫面上所顯示的訊息,請參閱<忘記密碼
•
時如何存取裝置>一節。
解除鎖定裝置
Windows 和 Mac 系統的解除鎖定程序相同。若使用 Linux 系統,請參閱<在 Linux 上使 用裝置
>一節。
1. 插入裝置並等候「解除鎖定程式」視窗出現。 如果「解除鎖定程式」視窗未出現,您可以使用
下列方式手動啟動:
WINDOWS:在「我的電腦」中按兩下「IronKey 解除鎖定程式」磁碟機來啟動
•
「IronKey.exe」。
MAC:在 Finder 中開啟「IronKey 解除鎖定程式」磁碟機,然後開啟 Mac 資料夾
•
中的 IronKey 應用程式 。
注意:您可以在 IronKey 解除鎖定程式 電腦上安裝 Auto-Launch Assistant,往後
•
當您插入 IronKey 裝置時,就會自動開啟解除鎖定程式。
2. 輸入您的裝置密碼並按一下「解除鎖定」。「IronKey 控制台」隨即出現。
此外,您也可以按一下「唯讀模式」核取方塊以解除鎖定在唯讀模式下的裝置。
•
正確地輸入您的密碼 (在硬體中驗證) 即可掛接包含您所有安全應用程式和檔案的安
•
全磁區。
如果連續 10 次輸入錯誤的密碼,將導致此裝置連同您所有的內建資料永久性地銷
•
毀。如果您使用 IronKey 企業版裝置,輸入錯誤密碼的容許次數則會根據管理員定 義的密碼
設定而有所不同。
基於安全性考量,每輸入三次錯誤密碼,您必須拔下裝置再重新插入。
在唯讀模式下解除鎖定裝置 您可以在唯讀狀態下解除鎖定裝置,以防止任何人編輯您「安全檔案
」磁碟機中的檔案。 例如,當您使用不受信任或未知的電腦,但要存取您裝置上的檔案時;在唯
讀模式下解除
•
Page 62

IRONKEY ENTERPRISE S250/D250 使用者指南
頁面 62
鎖定您的裝置,將避免主機上的任何惡意程式感染您的裝置或修改您的檔案。
1. 插入裝置並啟動解除鎖定程式。
2. 按一下「唯讀模式」核取方塊。
3. 按一下「解除鎖定」按鈕。
» 您將會在「控制台」中看到表示您正在唯讀模式下的訊息。
» 當您在唯讀模式下解除鎖定裝置時,您會在鎖定裝置前維持唯讀模式狀態。
» 在唯讀模式下無法使用某些功能,因為這些功能需要修改裝置上的檔案。無法使用的
功能包括如重新格式化,還原應用程式,在安全檔案磁碟機中編輯檔案,以及編輯應 用程式
清單。
» 若要在 Linux 中在唯讀模式下解除鎖定您的裝置,請輸入:ironkey --readonly
建立在解除鎖定程式中顯示的訊息
您可以透過此功能建立「IronKey 解除鎖定程式」視窗所顯示的訊息。例如,您可以提供 聯絡資
訊,萬一不慎遺失裝置時,拾獲者可與您聯絡。
1. 解除鎖定您裝置並按一下功能表列中的「設定」按鈕。
2. 按一下左側邊列的「偏好」按鈕。
3. 在「解除鎖定訊息」欄位中輸入文字。
您的訊息文字不可超過所提供的空間 (大約 7 行,共 200 個字元)。
注意:若使用 IRONKEY 企業版裝置,如果管理員尚未啟用此功能,您將無法在控制台 中看見「
解除鎖定訊息」。
使用虛擬鍵盤輸入密碼
如果您正在陌生的電腦上解除鎖定裝置,並且擔心是否存在鍵盤記
錄或畫面記錄間諜程式,請使用「IronKey 虛擬鍵盤」。此功能可
讓您點選字母和數字以協助您保護裝置密碼。虛擬鍵盤的基礎技術
將能避開許多木馬程式,鍵盤記錄程式和畫面記錄程式。
您可以使用多種方式啟動虛擬鍵盤:
1. 按一下 IronKey 解除鎖定程式或控制台密碼欄位中的「虛擬鍵盤」圖示。虛擬鍵 盤隨即出
現。
或者,當鍵盤輸入點位於密碼欄位時,您可以按下 CTRL+ALT+V。
•
2. 按一下按鍵以輸入密碼。輸入完成後,按一下「輸入」。
您也可以交錯使用虛擬鍵盤和實體鍵盤,透過實體鍵盤輸入某些字元並透過虛擬鍵 盤點選某
•
些字元。
您也可以按一下「隨機」按鈕來隨機安排每個按鍵在虛擬鍵盤上的位置。此功能可
•
協助您避免畫面記錄程式帶來的危害。
Page 63

IRONKEY ENTERPRISE S250/D250 使用者指南
頁面 63
注意:此功能僅提供使用標準 QWERTY 鍵盤配置的 WINDOWS 系統使用。
注意:點選虛擬鍵盤上的按鍵時,所有按鍵會短暫變成空白。此功能可避免畫面記錄程式
擷取您點選時的影像。若您不想使用此功能,您也可以在「關閉」按鈕旁的選項功能表中
停用。
鎖定裝置
按一下控制台左下方的 「鎖定」按鈕來安全地鎖定裝置。您也可以使用鍵盤
•
快速鍵:CTRL + L。
注意:如果「安全檔案」磁碟機中有開啟的應用程式或檔案,您可能無法鎖定裝置 (這是
為了避免檔案損毀的潛在風險)。請關閉任何開啟的內建應用程式或檔案,並重新嘗試鎖
定裝置。
警告:一旦鎖定裝置,您便可以安全地將其拔除。然而,請勿在裝置未鎖定的狀態下將其
拔除。
存取我的安全檔案
解除鎖定裝置後,您可使用下列方式存取安全地儲存在裝置中的檔案:
在 IronKey 控制台的功能表列中按一下「檔案」按鈕 (資料夾圖示) 。
•
WINDOWS:開啟 Windows Explorer 瀏覽至「安全檔案」磁碟機。
•
MAC:開啟 Finder 瀏覽至「安全檔案」磁碟機。
•
提示:您也可以在 WINDOWS 工作列上以右鍵按一下 IRONKEY 圖示,然後再按一下「 安全檔
案」來存取檔案。
加密與解密檔案
儲存在 IronKey 裝置中的一切資料都會加密。由於裝置內建加密晶片,所有加密和解密都
可快速完成,帶給您如同使用一般快閃磁碟機的便利性,同時也提供了強大的常駐安全 性
。
將檔案拖曳至「安全檔案」磁碟機即可自動加密。
•
從「安全檔案」磁碟機開啟的檔案,也會在開啟時自動解密。
•
Page 64

IRONKEY ENTERPRISE S250/D250 使用者指南
頁面 64
忘記密碼時如何存取裝置
如果您不慎忘記密碼,可以透過「密碼重設」選項還原裝置。
管理員必須授與密碼重設權限才能使用此功能。如果您不慎忘記密碼 且無法重設,您必須連絡管
理員。
若要在不慎遺忘密碼時重設密碼
1. 插入裝置並啟動解除鎖定程式。
2. 按一下「密碼說明」按鈕。
3. 在「密碼說明」提示中,按一下「密碼重設」按鈕。您將會收到一封電子郵件,內容 包含如何
繼續進行此程序的指示。
4. 當您遵循電子郵件訊息的指示完成所有步驟後,按一下「繼續」按鈕。
5 . 直接輸入您的新密碼,或是使用虛擬鍵盤,並在提供的欄位中確認密碼,再按一下「 變更密碼
」按鈕。
變更語言偏好
您在設定裝置時已設定語言偏好。但是,如有必要您還是可以在 IronKey 控制台中變更此
設定。
1. 解除鎖定裝置,然後按一下功能表列上的「設定」按鈕。
2. 按一下左側列的「偏好」按鈕。
3. 從清單中選取「語言偏好」。
建立檔案安全備份
如果裝置內建的「安全備份」應用程式,則您
可以將資料的加密備份還原至新的或現有的
IronKey 裝置 (僅限 Windows 英文版)。
安全備份能將您部分或全部的內建檔案加密成
備份檔案,並儲存至您的本地電腦或共享網路
上。您可使用相同的應用程式還原部分或全部
的檔案。
Page 65

IRONKEY ENTERPRISE S250/D250 使用者指南
頁面 65
1. 在 IronKey 控制台的「應用程式」清單中,按一下「安全備份」按鈕來開啟程式 (
僅限 Windows)
此時應該會出現「安全備份」視窗,並顯示「安全檔案」磁碟機。
•
2. 選取您想備份的檔案。
3. 按一下您想備份之檔案旁的核取方塊。
綠色的核取記號表示將備份此資料夾和子資料夾中的所有檔案。
•
紅色減號表示將僅備份此資料夾和子資料夾中的部分檔案。
•
4. 輸入備份檔案目的地資料夾的路徑,或使用「瀏覽」按鈕指定其位置。
• 目的地資料夾可為現有資料夾,新資料夾,或不同的磁碟機 (例如網路上的檔案共
用空間)。
5. 按一下「立即備份」。程式將加密並備份檔案。
注意:程式會安全地加密檔案,但不會加密檔案名稱。若要隱藏檔案名稱,請您建立備份 檔案之
前先壓縮您要備份的檔案。
注意:請勿新增,改變或刪除備份檔案,否則您稍後將無法進行還原。
1. 在 IronKey 控制台的「應用程式」清單中,按一下「安全備份」按鈕來開啟程式 (僅
限 Windows)。
• 此時應該會出現「安全備份」視窗,並顯示「安全檔案」磁碟機。
將備份檔案還原至裝置
2. 選取「從我的電腦還原」索引標籤。
3. 選取您先前備份資料時所選擇的目的地資料夾。
• 請確定選取包含備份檔案的資料夾,而非該資料夾中的檔案或資料夾。
4. 選取要還原的檔案/資料夾,並按一下「立即還原」。還原的檔案將覆寫「安全檔案」 磁碟機名
稱相同的檔案。
注意:如果該資料是從不同的 IRONKEY 裝置備份,您必須使用該裝置的裝置密碼,才 能將檔案
還原至不同的裝置中。
在 Linux 上使用我的裝置
您可在數個 Linux 發行版本中使用您的 IronKey 裝置 (x86 系統僅可使用 2.6 以上的核心
版本)。
使用解除鎖定程式
使用適用於 Linux 的解除鎖定程式存取 Linux 上的檔案和變更裝置密碼,可讓您在 Windows,
Mac 和 Linux 電腦之間安全地傳送檔案。
根據您的 Linux 發行版本,您可能會需要根權限才能使用掛接虛擬 DVD 中 Linux 資料夾
下的「ironkey」程式。如果您僅將一個 IronKey
Page 66

IRONKEY ENTERPRISE S250/D250 使用者指南
頁面 66
裝置連結至系統,可在命令殼層不使用 引數 (例如 ironkey) 執行此程式。如果您有多
個 IronKey 裝置,您必須指定您想解除鎖定 的裝置。
注意:ironkey 僅會解除鎖定安全磁區;因此您必須掛接該磁區。許多較新的 LINUX
發 行版本都會自動執行此項操作;如果沒有,請從命令行中使用 ironkey 所列印的裝
置名 稱執行掛載程式。
如要以唯讀模式解除鎖定「devicename」裝置,請輸入:
ironkey --readonly
如要解除鎖定密碼為「devicepassword」的裝置,請輸入:
ironkey --unlock
如要鎖定裝置,您必須卸載並且將裝置拔除,或者執行:
ironkey --lock
如要鎖定「devicename」裝置,請輸入:
ironkey --lock [devicename] 直接卸
載裝置並不會自動鎖定安全磁區。
若您在 Linux 上使用裝置,請注意下列重要細節
:
1. 核心版本必須為 2.6 或更新版本
若您編譯自己的核心版本,則必須包括下列內容;
» DeviceDrivers->SCSIDeviceSupport-><*>SCSICDROMSupport
» DeviceDrivers-><*> Support for Host-side USB
» DeviceDrivers-><*> USB device filesystem
» DeviceDrivers-><*> EHCI HCD (USB 2.0) support
» DeviceDrivers-><*> UHCI HCD (most Intel and VIA) support
» DeviceDrivers-><*> USB Mass Storage Support
最主要的發行版本中所包含的核心版本已經預設擁有這些功能,因此,若您使用預設支援 這些功
能的核心版本,便不需要為此採取任何行動。
同時,在 64 位元 Linux 系統中 必須要安裝 32 位元的程式庫,才能執行 ironkey 程 式。如需進
一步協助與資訊,請洽詢各發行版本的說明資源。
Page 67

IRONKEY ENTERPRISE S250/D250 使用者指南
頁面 67
2. 掛載問題
» 請確保您有安裝外部 SCSI 和 USB 設備的權限。
» 某些發行版本不會自動掛載且須執行下列指令:
mount /dev/<name of the device> /media/<mounted device name>
» 掛載裝置的名稱會根據各發行版本而有所不同。可藉由執行下列指令來搜尋 IronKey 裝置名稱
:
ironkey --show
3. 權限
» 您必須具有安裝外部/ USB /快閃磁碟裝置的權限。
» 您必須具有在裝置的虛擬 DVD 上執行可執行文件的權限,才能執行「解除鎖定程式」。
» 您可能還需要根使用者權限。
請參閱裝置虛擬 DVD 上的 Linux 文件夾,獲得更多關於如何設置權限以允許非根使用者存取
IronKey 裝置的資訊。這些方法全需要系統管理員 (單次) 啟用存取;之後,一般使用者也可 以在
任何他們所插入的 IronKey 裝置上鎖定,解除鎖定,以及變更密碼。
4. 支援版本
並非支援所有的 Linux 版本。請造訪 http://support.ironkey.com參閱最新支援發行版本清
單。
5. 「IronKey 解除鎖定程式」目前只支援 Linux x86 系統。
Page 68

IRONKEY ENTERPRISE S250/D250 使用者指南
頁面 68
我可以從何處取得幫助?
如需更多資訊
support.ironkey.com
www.ironkey.com
技術支援資訊,知識庫和影片教學
一般資訊
如需聯繫技術支援部門
http://support.ironkey.com
Page 69

IRONKEY ENTERPRISE S250/D250 GUÍA DEL USUARIO
PRIMEROS PASOS
Esta sección ofrece una breve descripción de algunos funcionamientos básicos que le ayudarán a
iniciarse en el uso de su dispositivo IronKey. Si va a utilizar un dispositivo de IronKey Enterprise,
verá que está vinculado a una solución empresarial gestionada por su administrador de sistemas.
Por lo tanto, puede que algunos parámetros de configuración indicados en esta sección no estén
disponibles si el administrador no los ha habilitado.
El software Panel de control IronKey de su dispositivo IronKey se ha traducido a varios
idiomas. Sin embargo, algunas aplicaciones incorporadas solo están disponibles en inglés como,
por ejemplo,Analizador de malware IronKey (solo para dispositivos de Enterprise), Gestor
de identidades, Firefox (incorporado al dispositivo),Teclado virtual. El sitio web de cuentas en
línea y los mensajes de correo electrónico predeterminados también están en inglés
únicamente.
Esta sección contiene información sobre:
»
Requisitos del sistema
»
Prácticas recomendadas
»
Configuración del dispositivo
»
Desbloqueo del dispositivo
»
Bloqueo del dispositivo
»
Acceso a mis archivos seguros
»
Cifrado y descifrado de archivos
»
Acceso a mi dispositivo si olvido la contraseña
»
Cambio de idioma
»
Creación de una copia de seguridad segura
de mis archivos
»
Uso de mi dispositivo en Linux
»
Dónde obtener ayuda
Requisitos del sistema
» Windows 8.1
» Windows 8
» Windows 7 (SP1)
» Windows Vista (SP2)
» Mac OS X (10.9.x - 10.11.x)
» Linux (2.6+)
El equipo debe disponer de un puerto USB 2.0 para obtener una transferencia de datos de alta
velocidad. Un concentrador o puerto USB 1.1 también funcionará, aunque más lento.
Page 70

IRONKEY ENTERPRISE S250/D250 GUÍA DEL USUARIO
Algunas aplicaciones están disponibles únicamente para sistemas específicos:
»
Solo en Windows
Firefox incorporado
•
Copia de seguridad segura
•
Teclado virtual
•
Gestor de identidades IronKey
•
» Solo para Mac
Asistente AutoLaunch
•
Prácticas recomendadas
» Cree una cuenta en línea para poder:
restablecer la contraseña olvidada de un dispositivo
•
hacer una copia de seguridad de las contraseñas del Gestor de identidades
•
» Bloquee el dispositivo
cuando no esté en uso
•
antes de desconectarlo
•
antes de que el sistema pase al modo de suspensión
•
» Nunca desconecte el dispositivo cuando el LED esté encendido
» Nunca comparta la contraseña del dispositivo
» Realice un análisis antivirus en el equipo antes de configurar el dispositivo
Configuración del dispositivo
El proceso de configuración es el mismo para los sistemas Windows y Mac. Para los sistemas
Linux, consulte Uso de mi dispositivo en Linux.
1. Conecte el dispositivo IronKey en el puerto USB de su equipo.Aparece la pantalla ―Configuración de dispositivo‖.
El software de configuración se ejecuta automáticamente desde un DVD virtual. Puede que
esta pantalla no aparezca si su equipo no admite la ejecución automática de dispositivos.
Puede iniciar la configuración manualmente de la siguiente manera:
WINDOWS: Haga doble clic en la unidad ―IronKey Unlocker‖ en ―Mi PC‖
•
y ejecute ―IronKey.exe‖.
MAC: Abra la unidad IronKey Unlocker en Buscador y la aplicación IronKey
•
en la carpeta IronKey Unlocker.
2. Escriba el Código de activación. Debería haber recibido el código en un mensaje de correo
electrónico enviado por el administrador.
3. Seleccione un idioma predeterminado, acepte el acuerdo de licencia de usuario final y, a
continuación, haga clic en el botón ―Activar‖.
De manera predeterminada, el software de IronKey utilizará el mismo idioma que el definido
en el sistema operativo de su equipo.
Page 71

IRONKEY ENTERPRISE S250/D250 GUÍA DEL USUARIO
4. Escriba una contraseña para el dispositivo y confírmela.A continuación, haga clic
en el botón ―Continuar‖.
La contraseña distingue entre mayúsculas y minúsculas, y debe contener un mínimo
de 4 caracteres.
5. Si se le solicita una dirección de correo electrónico para
a continuación, haga clic en el botón ―Continuar‖.
6. Aparece un mensaje de confirmación indicando que se le ha enviado un correo electrónico.
Siga las instrucciones detalladas en el correo electrónico para configurar su cuenta en línea;
esto incluye la creación de una ―pregunta secreta‖.
Su cuenta en línea será necesaria para algunas funciones de seguridad como, por ejemplo,
•
el restablecimiento de una contraseña, o la actualización del software del dispositivo,
entre otras.
7. Una vez configurada su cuenta en línea para el dispositivo, haga clic en ―Aceptar‖ en el men-
saje de confirmación para continuar con la configuración del dispositivo.
8. El dispositivo se inicia. Durante este proceso, genera una clave de cifrado AES, crea un
sistema de archivos para el volumen seguro, y copia ahí las aplicaciones y archivos seguros.
una cuenta en línea, introdúzcala y,
9. Una vez completa la inicialización, aparece el Panel de control IronKey. El dispositivo está
ahora listo para proteger sus datos. Puede utilizarlo en un equipo con sistema operativo
Windows, Mac o Linux.
Si desea añadir o modificar el mensaje que aparece en la pantalla Desbloqueador, consulte
•
Acceso a mi dispositivo si olvido la contraseña.
Desbloqueo del dispositivo
El proceso de desbloqueo es el mismo para los sistemas Windows y Mac. Para los sistemas
Linux, consulte Uso de mi dispositivo en Linux.
1. Conecte el dispositivo y espere a que aparezca la ventana Desbloqueador.
Si no aparece, puede iniciarla manualmente de la siguiente manera:
WINDOWS: Haga doble clic en la unidad ―IronKey Unlocker‖ en ―Mi PC‖
•
y ejecute ―IronKey.exe‖.
MAC: Abra la unidad IronKey Unlocker en Buscador y la aplicación IronKey
•
en la carpeta IronKey Unlocker.
NOTA: En un equipo Mac puede instalar el Asistente AutoLaunch, que abre
•
automáticamente el Desbloqueador al conectarlo a un dispositivo IronKey.
2. Escriba la contraseña del dispositivo y haga clic en ―Desbloquear‖. Aparecerá el Panel de
control IronKey.
De manera opcional, puede hacer clic en la casilla ―Modo de solo lectura‖ para
•
desbloquear el dispositivo en Modo de solo lectura.
Si introduce la contraseña correcta (que se verifica en el hardware), se montará el
•
volumen seguro con todas las aplicaciones y todos los archivos seguros.
Page 72

IRONKEY ENTERPRISE S250/D250 GUÍA DEL USUARIO
Si introduce la contraseña equivocada 10 veces seguidas, el dispositivo se destruirá de
•
forma definitiva junto con todos los datos incorporados. Si utiliza un dispositivo IronKey
Enterprise, este número puede variar en función de la configuración de contraseña
definida por el administrador.
Como medida preventiva de seguridad, debe conectar y reiniciar el dispositivo después
•
de tres intentos fallidos de introducción de contraseña.
Desbloquear el dispositivo en Modo de solo lectura
Puede desbloquear el dispositivo en un estado de solo lectura para que nadie pueda editar los
archivos de su unidad de archivos seguros. Por ejemplo, supongamos que desea acceder a un
archivo del dispositivo mientras utiliza un equipo desconocido o que no es de confianza;
si desbloquea su dispositivo en Modo de solo lectura, evitará que cualquier malware de la
máquina infecte su dispositivo o modifique sus archivos.
1. Conecte el dispositivo y ejecute el Desbloqueador.
2. Haga clic en la casilla ―Modo de solo lectura‖.
3. Haga clic en el botón ―Desbloquear‖.
» Verá un mensaje en el Panel de control que indica que se encuentra en Modo
de solo lectura.
» Cuando desbloquee su dispositivo en Modo de solo lectura, este permanecerá
en este modo hasta que lo bloquee.
» Algunas funciones no están disponibles en Modo de solo lectura porque requieren
la modificación de archivos en el dispositivo.Algunos ejemplos de funciones no disponibles
son: formateo, restauración de aplicaciones, edición de archivos en la unidad de archivos
seguros y edición de la lista de aplicaciones.
» Para desbloquear su dispositivo en Modo de solo lectura en Linux, introduzca:
ironkey –readonly
Crear un mensaje que se muestre en el Desbloqueador
Esta función permite crear un mensaje que aparezca en la ventana Desbloqueador de IronKey.
Por ejemplo, puede proporcionar información de contacto para que, en caso de perder el
dispositivo, la persona que lo encuentre sepa cómo devolvérselo.
1. Desbloquee el dispositivo y haga clic en el botón ―Configuración‖ de la barra de menús.
2. Haga clic en el botón ―Preferencias‖ en la barra lateral izquierda.
3. Introduzca el texto en el campo ―Mensaje de desbloqueo‖.
El texto del mensaje debe ajustarse al espacio suministrado (aproximadamente 7 líneas
y 200 caracteres).
NOTA: Para los dispositivos IronKey Enterprise, si el administrador no ha habilitado esta
función, no verá el Mensaje de desbloqueo del Panel de control.
Page 73

IRONKEY ENTERPRISE S250/D250 GUÍA DEL USUARIO
Escribir las contraseñas con el Teclado virtual
Si va a desbloquear el dispositivo en un equipo no conocido
y le preocupan los spyware registradores de pulsaciones de tecla
y de pulsaciones de pantalla, utilice el Teclado virtual de IronKey.
Este le ayuda a proteger la contraseña de su dispositivo, permitiéndole
teclear letras y números. Las técnicas subyacentes del Teclado virtual
omitirán múltiples troyanos, registradores de pulsaciones de teclas y registradores de
pulsaciones de pantalla.
Puede iniciar el Teclado virtual de varias formas:
1. Haga clic en el icono de Teclado virtual en un campo de contraseña del Desbloqueador
de IronKey o del Panel de control.Aparece el Teclado virtual.
De forma alternativa, cuando el foco del teclado se encuentra en un campo de
•
contraseña puede pulsar CTRL+ALT+V.
2. Haga clic en las teclas para escribir la contraseña. Haga clic en ―Enter‖ cuando haya acabado.
Puede utilizar el Teclado virtual junto con el teclado real, para teclear algunos caracteres y
•
hacer clic sobre otros.
Además, si lo desea, puede hacer clic en el botón ―Randomize‖ (Aleatorizar) para cambiar
•
el orden de las teclas. Esta opción le ayudará a protegerse frente a los registradores de
pulsaciones de pantalla.
NOTA: Esta función solo está disponible en Windows y utiliza un conjunto de teclas
QWERTY estándar.
NOTA: Cuando hace clic en una tecla en el Teclado virtual, todas las teclas se quedan vacías
unos segundos. Esta función evita que los registradores de pulsaciones de pantalla capten
aquello sobre lo que ha hecho clic. Si no desea utilizar esta función, puede deshabilitarla en el
menú de opciones junto al botón ―Cerrar‖.
Bloqueo del dispositivo
Haga clic en el botón ―Bloquear‖ de la parte izquierda del Panel de control para
•
bloquear de forma segura su dispositivo.También puede utilizar el método abreviado de
teclado: CTRL + L.
NOTA: Si tiene aplicaciones o archivos abiertos en la unidad de archivos seguros,
es posible que no pueda bloquear su dispositivo (para evitar posibles daños en los archivos).
Cierre las aplicaciones y archivos incorporados que estén abiertos e intente de nuevo bloquear
el dispositivo.
PRECAUCIÓN: Una vez esté bloqueado el dispositivo, puede desbloquearlo de forma segura.
Sin embargo, no desconecte el dispositivo cuando esté desbloqueado.
Page 74

IRONKEY ENTERPRISE S250/D250 GUÍA DEL USUARIO
Acceso a mis archivos seguros
Después de desbloquear el dispositivo, puede acceder a los archivos almacenados de forma
segura en el dispositivo de la siguiente manera:
Al hacer clic en el botón ―Archivos‖ (icono de carpeta) en la barra de menús del Panel de
•
control IronKey.
WINDOWS: Al abrir el explorador de Windows para acceder a la unidad
•
―Archivos seguros‖.
MAC: Al abrir el Buscador para acceder a la unidad ―Archivos seguros‖.
•
SUGERENCIA: También puede acceder a sus archivos al hacer clic con el botón derecho en
el icono de Ironkey de la barra de tareas de Windows y en ―Archivos seguros‖.
Cifrado y descifrado de archivos
Toda la información que almacena en su dispositivo IronKey está cifrada. Puesto que el
dispositivo cuenta con un chip de cifrado integrado, todo el proceso de cifrado y descifrado se
realiza sobre la marcha, ofreciéndole la comodidad de trabajar, como normalmente haría, con
una unidad flash corriente, al tiempo que le otorga una seguridad sólida y siempre activa.
Arrastre un archivo a la unidad de archivos seguros para cifrarlos automáticamente.
•
Los archivos que se abren desde la unidad de archivos seguros se descifran automáticamente
•
en cuanto los abre.
Acceso a mi dispositivo si olvido la contraseña
La opción Restablecer la contraseña le permite recuperar su dispositivo en caso de que olvide
la contraseña.
El administrador debe conceder privilegios para restablecer la contraseña para poder utilizar
esta función. Si olvida su contraseña y no puede restablecerla, debe ponerse en contacto con su
administrador.
Para restablecer la contraseña si la olvida
1. Conecte el dispositivo y ejecute el Desbloqueador.
2. Haga clic en el botón ―Ayuda para la contraseña‖.
3. En el aviso de Ayuda para la contraseña, haga clic en el botón ―Restablecer la contraseña‖.
Se le enviará un correo electrónico con instrucciones sobre cómo continuar.
4. Después de completar las instrucciones del mensaje de correo electrónico, haga clic en el
botón ―Continuar‖.
5. Escriba la nueva contraseña o utilice el Teclado virtual, y confirme la contraseña en los
campos indicados.A continuación, haga clic en el botón ―Cambiar la contraseña‖.
Page 75

IRONKEY ENTERPRISE S250/D250 GUÍA DEL USUARIO
Cambio de idioma
Define el idioma al configurar su dispositivo. No obstante, si fuese necesario, puede cambiarlo
desde el Panel de control IronKey.
1. Desbloquee el dispositivo y haga clic en el botón ―Configuración‖ de la barra de menús.
2. Haga clic en el botón ―Preferencias‖ en la barra lateral izquierda.
3. Seleccione el idioma que desee de la lista.
Creación de una copia de seguridad segura de mis archivos
Si su dispositivo dispone de la aplicación Copia
de seguridad segura incorporada, puede
restaurar una copia de seguridad cifrada de los
datos en un dispositivo IronKey nuevo o
existente (solo en Windows y en inglés).
La opción Copia de seguridad segura almacena
una copia de seguridad cifrada de parte o todos
los archivos incorporados en su equipo local o
red de archivos compartidos. Utilizará la misma
aplicación para restaurar uno o todos sus archivos.
1. En la lista de aplicaciones del Panel de control IronKey, haga clic en el botón―Copia de se-
guridad segura‖ para abrir el programa (solo en Windows).
Debería aparecer la ventana Copia de seguridad segura, con la unidad
•
de archivos seguros.
2. Seleccione los archivos a los que desea hacer una copia de seguridad.
3. Haga clic en las casillas junto a los archivos a los que desea hacer una copia de seguridad.
Una marca de comprobación de color verde quiere decir que se realizará una copia de
•
seguridad de todos los archivos en esta carpeta y sus subcarpetas.
Un signo menos de color rojo quiere decir que solo se realizará la copia de seguridad de
•
algunos archivos de esta carpeta o sus subcarpetas.
4. Escriba la ruta de la carpeta de destino en la que desea almacenar los archivos con copia de
seguridad o utilice el botón Examinar para encontrarla.
La carpeta de destino puede ser una carpeta existente, una nueva o una unidad
•
independiente (por ejemplo, una red de archivos compartidos).
5. Haga clic en ―Back Up Now‖ (Hacer copia de seguridad ahora). Los archivos se cifrarán y se
les hará una copia de seguridad.
NOTA: Aunque los archivos están cifrados de forma segura, los nombres de archivos no. Para
ocultar los nombres de archivos, comprima los archivos a los que desea hacer una copia de
seguridad antes de crear el archivo de copia de seguridad.
Page 76

IRONKEY ENTERPRISE S250/D250 GUÍA DEL USUARIO
NOTA: No añada, altere ni elimine los archivos con copia de seguridad o, de lo contrario, no
podrá restaurarlos más tarde.
RESTAURAR ARCHIVOS EN EL DISPOSITIVO A PARTIR DEL ARCHIVO DE COPIA DE
SEGURIDAD
1. En la lista de aplicaciones del Panel de control IronKey, haga clic en el botón ―Copia de se-
guridad segura‖ para abrir el programa (solo en Windows).
Debería aparecer la ventana Copia de seguridad segura, con la unidad
•
de archivos seguros.
2. Seleccione la pestaña ―Restore from My Computer‖ (Restaurar desde Mi PC).
3. Seleccione la carpeta de destino que escogió anteriormente cuando vaya a hacer la copia de
seguridad de los datos.
Asegúrese de seleccionar la carpeta que contiene el archivo de copia de seguridad, no los
•
archivos o carpetas que se encuentran en esa carpeta.
4. Seleccione los archivos/carpetas que desee restaurar y haga clic en ―Restore Now‖
(Restaurar ahora). Los archivos restaurados sobrescribirán los archivos existentes con el
mismo nombre en la unidad de archivos seguros.
NOTA: Si la copia de seguridad de los datos se realizó desde un dispositivo IronKey diferente,
debe utilizar la contraseña de dicho dispositivo para poder restaurar los archivos en un
dispositivo diferente.
Uso de mi dispositivo en Linux
Puede utilizar su dispositivo IronKey en distintas distribuciones Linux (solo sistemas x86 con la
versión 2.6 o superior de kernel).
UTILIZAR EL DESBLOQUEADOR
Utilice el Desbloqueador para acceder a los archivos y cambiar la contraseña del dispositivo
en Linux, lo cual le permite transferir de forma segura archivos entre equipos con sistema
operativo Windows, Mac y Linux.
En función de su distribución de Linux, puede que necesite privilegios de usuario avanzado
para utilizar el programa ―ironkey‖ que se encuentra en la carpeta de Linux del DVD virtual
montado. Si solo tiene un dispositivo IronKey conectado al sistema, ejecute el programa desde
un shell de comandos sin argumentos (por ejemplo, ironkey). Si tiene varios dispositivos
IronKey, debe especificar aquel que desee bloquear.
NOTA: ironkey solo bloquea el volumen seguro;así que debe montarlo. Muchas distribuciones
Linux modernas lo hacen automáticamente;de lo contrario, ejecute el programa montado desde
la línea de comandos, con el nombre del dispositivo impreso por ironkey.
Page 77

IRONKEY ENTERPRISE S250/D250 GUÍA DEL USUARIO
Para desbloquear el dispositivo en Modo de solo lectura, introduzca:
ironkey --readonly
Para desbloquear el dispositivo con la contraseña ―devicepassword‖, introduzca:
ironkey --unlock
Para desbloquear el dispositivo, debe desmontarlo y extraerlo físicamente (desconectarlo), o bien ejecutar:
ironkey --lock
Para bloquear el dispositivo llamado ―devicename‖, introduzca:
ironkey --lock [devicename]
Con solo desmontar el dispositivo no se bloquea automáticamente el volumen seguro.
Tenga en cuenta los siguientes detalles importantes sobre el uso del dispositivo en Linux:
1. La versión de Kernel debe ser 2.6 o superior
Si compila su propio kernel, debe incluir en él lo siguiente:
» DeviceDrivers->SCSIDeviceSupport-><*>SCSICDROMSupport
» DeviceDrivers-><*> Support for Host-side USB
» DeviceDrivers-><*> USB device filesystem
» DeviceDrivers-><*> EHCI HCD (USB 2.0) support
» DeviceDrivers-><*> UHCI HCD (most Intel and VIA) support
» DeviceDrivers-><*> USB Mass Storage Support
Los kernels que se incluyen de manera predeterminada en la mayoría de las distribuciones ya
cuentan con estas funciones por lo que, si utiliza el kernel predeterminado que viene con una
distribución compatible, no necesita llevar a cabo ninguna otra acción.
Además, en sistemas Linux de 64 bits, deben instalarse bibliotecas de 32 bits para poder ejecutar
el programa ironkey. Consulte los recursos de ayuda de la distribución para obtener ayuda y
más información.
2. Problemas de montaje
» Asegúrese de que tiene permisos para montar dispositivos SCSI y USB externos.
» Algunas distribuciones no montan automáticamente y requieren la ejecución
del siguiente comando:
mount /dev/<nombre del dispositivo> /media/<nombre del
dispositivo montado>
» El nombre del dispositivo montado varía en función de la distribución. Los nombres del
dispositivo IronKey pueden conocerse mediante la ejecución del comando:
ironkey –show
Page 78

IRONKEY ENTERPRISE S250/D250 GUÍA DEL USUARIO
3. Permisos
» Debe tener los permisos para montar dispositivos flash USB externos.
» Debe tener los permisos para ejecutar archivos ejecutables del DVD virtual del dispositivo,
para lanzar el Desbloqueador.
» Puede que necesite permisos de usuario avanzado.
Consulte la carpeta de Linux del DVD virtual del dispositivo para ver información sobre cómo
configurar permisos que permitan a usuarios con menores privilegios acceder a sus dispositivos
IronKey.Todos estos métodos requieren que el administrador del sistema realice una acción
para permitir el acceso;después, los usuarios normales podrán bloquear, desbloquear y cambiar
contraseñas en cualquier dispositivo IronKey que conecten.
4. Distribuciones compatibles
No todas las distribuciones Linux son compatibles.Visite http://support.ironkey.com para obtener
la lista más reciente de distribuciones compatibles.
5. En este momento, el Desbloqueador IronKey para Linux solo admite sistemas x86.
Page 79

IRONKEY ENTERPRISE S250/D250 GUÍA DEL USUARIO
Dónde obtener ayuda
support.ironkey.com
Información de soporte, base de conocimientos y
tutoriales de vídeo
www.ironkey.com
Información general
PARA OBTENER MÁS INFORMACIÓN
PARA CONTACTAR CON EL SERVICIO DE SOPORTE
http://support.ironkey.com
Page 80

IRONKEY ENTERPRISE S250/D250 GUIDE D’UTILIS
GE 80
MISE EN ROUTE
Cette section présente brièvement certaines opérations de base que vous pourrez réaliser avec
votre périphérique IronKey. Si vous utilisez un périphérique IronKey Enterprise, il est relié à une
solution entreprise gérée par votre administrateur système. Par conséquent, vous n'aurez peutêtre pas accès à certains paramètres mentionnés dans cette section si l'administrateur ne vous
en a pas autorisé l'accès.
Le logiciel du panneau de commande de votre périphérique IronKey est traduit en plusieurs
langues. Cependant, certaines applications embarquées sont en anglais uniquement, telles que le
Détecteur de programmes malveillants (périphériques Enterprise uniquement), le Gestionnaire
d'identités, Firefox, et le Clavier virtuel. Le site Web des comptes en ligne et les e-mails par
défaut sont également en anglais uniquement.
Cette section aborde les sujets suivants :
»
Configuration système requise
»
Meilleures pratiques recommandées
»
Configuration du périphérique
»
Déverrouillage du périphérique
»
Verrouillage du périphérique
»
Accès aux fichiers sécurisés
»
Cryptage et décryptage de fichiers
»
Accès au périphérique en cas d'oubli du mot
de passe
»
Changement de langue
»
Création d'une sauvegarde sécurisée
des fichiers
»
Utilisation du périphérique sous Linux
»
Où puis-je obtenir de l'aide ?
Configuration système requise
» Windows 8.1
» Windows 8
» Windows 7 (SP1)
» Windows Vista (SP2)
» Mac OS X (10.9.x - 10.11.x)
» Linux (2.6+)
L'ordinateur doit être doté d'un port USB 2.0 pour le transfert de données haut débit.
Le transfert fonctionne également avec un port USB 1.1 ou un concentrateur auto-alimenté,
mais plus lentement.
Page 81

IRONKEY ENTERPRISE S250/D250 GUIDE D’UTILIS
GE 81
Certaines applications sont disponibles uniquement pour certains systèmes :
»
Windows uniquement
Firefox (application embarquée)
•
Sauvegarde sécurisée
•
Clavier virtuel
•
Gestionnaire d'identités IronKey
•
» Mac uniquement :
assistant AutoLaunch
•
Meilleures pratiques recommandées
» Créez un compte en ligne de façon à pouvoir :
réinitialiser un mot de passe de périphérique oublié ;
•
sauvegarder vos mots de passe du Gestionnaire d'identités.
•
» Verrouillez le périphérique :
lorsque vous ne l'utilisez pas ;
•
avant de le débrancher ;
•
avant que le système ne passe en mode veille.
•
» Ne débranchez jamais le périphérique lorsque le voyant est allumé.
» Ne communiquez jamais le mot de passe de votre périphérique.
» Effectuez une analyse antivirus sur l'ordinateur avant de configurer le périphérique.
Configuration du périphérique
Le processus de configuration est le même pour les systèmes Windows et Mac. Pour les
systèmes Linux, reportez-vous au paragraphe Utilisation du périphérique sous Linux.
1. Branchez le périphérique IronKey sur le port USB de votre ordinateur. L'écran Configuration
du périphérique apparaît.
Le logiciel de configuration s'exécute automatiquement à partir d'un DVD virtuel. Il se peut
que cet écran ne s'affiche pas si votre ordinateur ne permet pas aux périphériques
de s'exécuter automatiquement.Vous pouvez le lancer manuellement au moyen de l'une des
méthodes suivantes :
WINDOWS : Double-cliquez sur le disque du Déverrouilleur IronKey dans Poste
•
de Travail et exécutez IronKey.exe.
MAC : Accédez au disque du Déverrouilleur IronKey dans le Finder et ouvrez
•
l'application IronKey située dans le dossier Déverrouilleur IronKey.
2. Saisissez le code d'activation. Vous devez avoir reçu le code dans un e-mail envoyé
par votre administrateur.
3. Sélectionnez une langue par défaut, acceptez le contrat de licence d'utilisateur final,
puis cliquez sur le bouton Activer.
Par défaut, le logiciel IronKey utilise la même langue que celle de votre système
d'exploitation.
Page 82

IRONKEY ENTERPRISE S250/D250 GUIDE D’UTILIS
GE 82
4. Saisissez le mot de passe du périphérique et confirmez-le, puis cliquez sur
le bouton Continuer.
Votre mot de passe est sensible à la casse et doit comprendre au moins 4 caractères.
5. Si vous êtes invité à entrer une adresse e-mail pour un compte en ligne, saisissez-la
maintenant et cliquez sur le bouton Continuer.
6. Un message s'affiche indiquant qu'un e-mail vous a été envoyé. Suivez les instructions
fournies dans cet e-mail pour configurer votre compte en ligne.Vous aurez notamment
à créer une question secrète.
Votre compte en ligne est nécessaire pour certaines fonctions de sécurité, telles que
•
la réinitialisation du mot de passe, la mise à jour de votre
périphérique, etc.
7. Une fois que vous avez configuré votre compte en ligne pour votre périphérique, cliquez
sur OK dans le message pour configurer le périphérique.
8. Le périphérique s'initialise. Ce processus génère une clé de cryptage AES, crée le système de
fichiers pour le volume sécurisé et copie les applications et les fichiers sécurisés sur
le volume sécurisé.
9. Une fois l'initialisation terminée, le panneau de commande IronKey apparaît.Votre
périphérique est maintenant prêt pour protéger vos données et peut être utilisé sur
un ordinateur Windows, Mac ou Linux.
Si vous souhaitez ajouter ou modifier le message qui s'affiche sur l'écran Déverrouilleur,
•
reportez-vous au paragraphe Accès au périphérique en cas d’oubli du mot
de passe.
Déverrouillage du périphérique
Le processus de déverrouillage est le même pour les systèmes Windows et Mac.
Pour les systèmes Linux, reportez-vous au paragraphe Utilisation du périphérique sous Linux.
1. Branchez votre périphérique et attendez que la fenêtre Déverrouilleur apparaisse.
Si elle ne s'affiche pas, vous pouvez l'ouvrir manuellement.
WINDOWS : Double-cliquez sur le disque du Déverrouilleur IronKey dans Poste
•
de Travail et exécutez IronKey.exe.
MAC : Accédez au disque du Déverrouilleur IronKey dans le Finder et ouvrez
•
l'application IronKey située dans le dossier Déverrouilleur IronKey.
REMARQUE : Sur un Mac, vous pouvez installer l'assistant Auto-Launch, qui ouvre
•
automatiquement le Déverrouilleur lorsque vous débranchez un périphérique IronKey.
2. Saisissez le mot de passe de votre périphérique et cliquez sur Déverrouiller. Le panneau
de commande IronKey s'affiche.
Vous pouvez également cocher la case Mode Lecture seule pour déverrouiller
•
le périphérique en lecture seule.
La saisie de votre mot de passe (vérifiée par le matériel) déclenche le montage
•
de votre volume sécurisé avec tous vos fichiers et applications sécurisés.
Si vous entrez un mot de passe incorrect 10 fois de suite, le périphérique est
•
irrémédiablement corrompu ainsi que toutes les données qui s'y trouvent. Si vous utilisez
périphérique IronKey Enterprise, ce nombre peut varier selon les paramètres de mot
de passe définis par l'administrateur.
Par mesure de sécurité, débranchez le périphérique et rebranchez-le après trois essais
•
infructueux de saisie du mot de passe.
Page 83

IRONKEY ENTERPRISE S250/D250 GUIDE D’UTILIS
GE 83
Déverrouiller le périphérique en mode Lecture seule
Vous pouvez déverrouiller votre périphérique en mode Lecture seule de sorte que personne
ne puisse modifier les fichiers sur votre disque Fichiers sécurisés. Par exemple, supposons que
vous souhaitez accéder à un fichier de votre périphérique depuis un ordinateur non sécurisé
ou inconnu. Le déverrouillage de votre périphérique en mode Lecture seule empêchera tout
programme malveillant qui se trouve sur la machine d'infecter votre périphérique ou de
modifier vos fichiers.
1. Branchez votre périphérique et lancez le Déverrouilleur.
2. Cochez la case Mode Lecture seule.
3. Cliquez sur le bouton Déverrouiller.
» Un message s'affiche dans le panneau de commande indiquant que vous êtes
en lecture seule.
» Lorsque vous déverrouillez votre périphérique en mode Lecture seule, vous restez dans
ce mode jusqu'à ce que vous verrouilliez votre périphérique.
» Certaines fonctions ne sont pas disponibles en mode Lecture seule, car elles nécessitent de
modifier des fichiers sur votre périphérique. Le reformatage, la restauration d'applications,
l'édition de fichiers sur le disque Fichiers sécurisés et la modification de la liste d'applications
sont des exemples de fonctions non disponibles.
» Pour déverrouiller votre périphérique en mode Lecture seule sous Linux, saisissez :
ironkey --readonly
Créer un message s'affichant dans le Déverrouilleur
Cette fonction vous permet de créer un message qui apparaît dans la fenêtre Déverrouilleur
IronKey. Par exemple, vous pouvez indiquer vos coordonnées de sorte que si vous perdez votre
périphérique, la personne qui le trouvera pourra vous joindre.
1. Déverrouillez votre périphérique et cliquez sur le bouton Paramètres dans la barre de menu.
2. Cliquez sur le bouton Préférences dans la barre latérale gauche.
3. Saisissez le texte dans le champ Msg déverrouillage.
Le texte de votre message ne doit pas dépasser l'espace prévu (soit environ 7 lignes
et 200 caractères).
REMARQUE : Pour les périphériques IronKey Enterprise, si votre administrateur n'a pas
activé cette fonction, vous ne verrez pas le Msg déverrouillage dans le panneau de commande.
Saisir les mots de passe à l'aide du Clavier virtuel
Si vous déverrouillez votre périphérique sur un ordinateur inconnu et
que vous souhaitez vous protéger des logiciels espions enregistreurs de
frappe et d'écran, utilisez le Clavier virtuel IronKey. Vous protégez ainsi
le mot de passe de votre périphérique en vous permettant d'entrer les
lettres et les chiffres en cliquant dessus. Les techniques sous-jacentes du
Clavier virtuel permettent de se prémunir contre de nombreux chevaux de Troie, et enregistreurs
de frappe et d'écrans.
Page 84

IRONKEY ENTERPRISE S250/D250 GUIDE D’UTILIS
GE 84
Vous pouvez faire apparaître le Clavier virtuel de plusieurs façons :
1. Cliquez sur l'icône Clavier virtuel dans un champ de mot de passe du Déverrouilleur
IronKey ou panneau de commande. Le Clavier virtuel s'affiche.
Lorsque vous vous trouvez dans un champ de mot de passe, vous pouvez également
•
appuyer sur CTRL+ALT+V.
2. Cliquez sur les touches pour saisir votre mot de passe. Cliquez sur Enter (Entrée) lorsque
vous avez terminé.
Il est possible d'utiliser le Clavier virtuel en combinaison avec le clavier de l'ordinateur.
•
Vous pouvez entrer certains caractères en les saisissant et d'autres en cliquant dessus.
Vous pouvez également cliquer sur le bouton Randomize (Aléatoire) afin de réorganiser
•
de manière aléatoire l'emplacement des touches. Ce système permet de vous protéger des
enregistreurs d'écran.
REMARQUE : Cette fonction est disponible sous Windows uniquement et utilise un clavier
QWERTY standard.
REMARQUE : Lorsque vous cliquez sur une touche du Clavier virtuel, toutes les touches
s'effacent brièvement. Cette fonction empêche les enregistreurs d'écran de faire une capture
d'écran des touches sur lesquelles vous venez de cliquer. Si vous ne souhaitez pas utiliser cette
fonction, désactivez-la dans le menu Options à côté du bouton Fermer.
Verrouillage du périphérique
Cliquez sur le bouton Verrouiller en bas à gauche du panneau de commande pour
•
verrouiller votre périphérique.Vous pouvez aussi utiliser le raccourci clavier CTRL + L.
REMARQUE : Si des applications ou des fichiers sont ouverts sur votre disque Fichiers
sécurisés, vous ne pourrez peut-être pas verrouiller votre périphérique (ceci a pour but d'éviter
de corrompre les fichiers). Fermez toute application embarquée ou fichier ouvert sur le
périphérique et réessayez de verrouiller le périphérique.
ATTENTION : Une fois le périphérique verrouillé, vous pouvez le débrancher en toute
sécurité. Cependant, ne débranchez pas le périphérique lorsqu'il n'est pas verrouillé.
Accès aux fichiers sécurisés
Une fois le périphérique déverrouillé, vous pouvez accéder en toute sécurité aux fichiers
stockés sur le périphérique selon l'une des méthodes suivantes :
Cliquez sur le bouton Fichiers (icône de dossier) de la barre de menu du panneau
•
de commande IronKey.
WINDOWS : Ouvrez l'Explorateur Windows et accédez au disque Fichiers sécurisés.
•
MAC : Ouvrez le Finder et accédez au disque Fichiers sécurisés.
•
CONSEIL : Vous pouvez également accéder à vos fichiers en cliquant avec le bouton
droit de la souris sur l'icône Ironkey de la barre des tâches Windows, puis en sélectionnant
Fichiers sécurisés.
Page 85

IRONKEY ENTERPRISE S250/D250 GUIDE D’UTILIS
GE 85
Cryptage et décryptage de fichiers
Tout ce que vous stockez sur votre périphérique IronKey est crypté. Étant donné que le
périphérique intègre une Cryptochip intégrée, toutes les opérations de cryptage et de
décryptage sont exécutées automatiquement à la volée, vous permettant ainsi de travailler
comme vous le feriez avec une clé USB ordinaire, tout en bénéficiant d'une sécurité
renforcée et continue.
Faites glisser un fichier vers le disque Fichiers sécurisés pour le crypter automatiquement.
•
Les fichiers ouverts depuis le disque Fichiers sécurisés sont automatiquement décryptés
•
lors de leur ouverture.
Accès au périphérique en cas d'oubli du mot de passe
L'option Réinitialiser le mot de passe vous permet d'accéder à votre périphérique si vous
oubliez votre mot de passe.
Un administrateur doit vous accorder des droits de réinitialisation de mot de passe pour utiliser
cette fonction. Si vous oubliez votre mot de passe et que vous ne pouvez pas le réinitialiser,
vous devez contacter votre administrateur.
Pour réinitialiser votre mot de passe en cas d'oubli
1. Branchez votre périphérique et lancez le Déverrouilleur.
2. Cliquez sur le bouton Aide sur le mot de passe.
3. Dans l'invite, cliquez sur le bouton Réinitialiser le mot de passe. Un e-mail d'instructions
vous est envoyé.
4. Après avoir suivi les instructions de l'e-mail, cliquez sur le bouton Continuer.
5. Saisissez le nouveau mot de passe ou utilisez le Clavier virtuel, et confirmez le mot de passe
dans les champs prévus à cet effet, puis cliquez sur le bouton Modifier le mot de passe.
Changement de langue
Vous définissez la langue lorsque vous configurez votre périphérique. Cependant, vous pouvez
en changer dans le panneau de commande IronKey si nécessaire.
1. Déverrouillez votre périphérique et cliquez sur le bouton Paramètres dans la barre de menu.
2. Cliquez sur le bouton Préférences dans la barre latérale gauche.
3. Sélectionnez la langue de votre choix dans la liste.
Page 86

IRONKEY ENTERPRISE S250/D250 GUIDE D’UTILIS
GE 86
Création d'une sauvegarde sécurisée des fichiers
Si votre périphérique intègre l'application
embarquée Sauvegarde sécurisée, vous pouvez
restaurer une sauvegarde cryptée de vos
données vers un nouveau périphérique ou un
périphérique IronKey existant (Windows
uniquement, en anglais uniquement).
L'application Sauvegarde sécurisée enregistre une
sauvegarde cryptée d'une partie ou de tous vos
fichiers stockés sur le périphérique sur votre
ordinateur local ou sur le partage de fichiers réseau.Vous utilisez la même application pour
restaurer un seul ou tous vos fichiers.
1. Dans la liste des applications du panneau de commande IronKey, cliquez sur le bouton
Sauvegarde sécurisée pour ouvrir le programme (Windows uniquement).
•
La fenêtre Sauvegarde sécurisée s'ouvre affichant le disque Fichiers sécurisés.
2. Sélectionnez les fichiers à sauvegarder.
3. Cochez les cases en regard des fichiers à sauvegarder.
•
Une coche verte indique que tous les fichiers de ce dossier et de ces sous-dossiers
seront sauvegardés.
•
Un signe moins rouge signifie que seuls certains fichiers de ce dossier ou de ces sousdossiers seront sauvegardés.
4. Saisissez le chemin vers le dossier de destination pour les fichiers sauvegardés ou utilisez le
bouton Browse (Parcourir) pour le localiser.
•
Le dossier de destination peut être un dossier existant, un nouveau dossier ou un disque
distinct (par exemple, un partage de fichier réseau).
5. Cliquez sur Backup Now (Sauvegarder maintenant). Les fichiers seront cryptés et
sauvegardés.
REMARQUE : Bien que les fichiers soient cryptés, les noms de fichiers ne le sont pas. Pour
masquer les noms de fichiers, zippez les fichiers à sauvegarder avant de créer le fichier de
sauvegarde.
REMARQUE : N'ajoutez pas, ne modifiez pas et ne supprimez pas les fichiers sauvegardés
ou vous ne pourriez pas les restaurer ultérieurement.
RESTAURER LES FICHIERS VERS LE PÉRIPHÉRIQUE DEPUIS
LE FICHIER DE SAUVEGARDE
1. Dans la liste des applications du panneau de commande IronKey, cliquez sur le bouton
Sauvegarde sécurisée pour ouvrir le programme (Windows uniquement).
La fenêtre Sauvegarde sécurisée s'ouvre affichant le disque Fichiers sécurisés.
•
2. Sélectionnez l'onglet Restore from My Computer (Restaurer depuis mon ordinateur).
Page 87

IRONKEY ENTERPRISE S250/D250 GUIDE D’UTILIS
GE 87
3. Sélectionnez le dossier de destination choisi précédemment lors de la sauvegarde
de vos données.
Assurez-vous de sélectionner le dossier qui contient le fichier de sauvegarde, et non
•
les fichiers ou dossiers stockés dans ce dossier.
4. Sélectionnez les fichiers/dossiers à restaurer et cliquez sur Restore Now (Restaurer
maintenant). Les fichiers restaurés remplaceront les fichiers existants portant le même
nom qui sont enregistrés sur le disque Fichiers sécurisés.
REMARQUE : Si les données ont été sauvegardées à partir d'un autre périphérique IronKey,
vous devez utiliser le mot de passe du périphérique afin de restaurer les fichiers vers un
périphérique différent.
Utilisation du périphérique sous Linux
Vous pouvez utiliser votre périphérique IronKey sur plusieurs distributions Linux (systèmes x86
uniquement avec noyau version 2.6+).
UTILISER LE DÉVERROUILLEUR
Utilisez le Déverrouilleur pour Linux afin d'accéder à vos fichiers et de modifier votre mot de
passe de périphérique sous Linux.Vous pouvez ainsi transférer les fichiers en toute sécurité
entre des ordinateurs Windows, Mac et Linux.
Selon votre distribution Linux, vous pouvez avoir besoin du droit d'utilisateur root pour
accéder au programme ironkey situé dans le dossier Linux du DVD virtuel monté. Si un seul
périphérique IronKey est connecté au système, exécutez le programme à partir de l'interpréteur
de commande sans arguments (par exemple, ironkey). Si plusieurs périphériques IronKey sont
connectés, vous devez spécifier celui qui doit être déverrouillé.
REMARQUE : ironkey ne fait que déverrouiller le volume sécurisé. Ce volume doit ensuite
être monté. De nombreuses distributions Linux récentes le font automatiquement. Dans le cas
contraire, exécutez le programme de montage à partir de la ligne de commande en utilisant le
nom de périphérique indiqué par ironkey.
Pour déverrouiller le périphérique en mode Lecture seule, saisissez :
ironkey --readonly
Pour déverrouiller le périphérique avec le mot de passe
ironkey --unlock
Pour verrouiller le périphérique, vous devez le démonter ou le retirer physiquement (débrancher), ou encore, exécuter :
ironkey --lock
Pour verrouiller le périphérique nommé « nompériphérique », saisissez :
ironkey --lock [nompériphérique]
« motdepassepériphérique », saisissez :
Démonter simplement le périphérique ne verrouille pas automatiquement le volume sécurisé.
Page 88

IRONKEY ENTERPRISE S250/D250 GUIDE D’UTILIS
GE 88
Veuillez noter les points essentiels suivants concernant l'utilisation de votre périphérique sous Linux :
1. Le noyau doit être de version 2.6 ou supérieure.
Si vous compilez votre propre noyau, vous devez y inclure ce qui suit :
» DeviceDrivers->SCSIDeviceSupport-><*>SCSICDROMSupport
» DeviceDrivers-><*> Prise en charge USB côté hôte
» DeviceDrivers-><*> Système de fichiers du périphérique USB
» DeviceDrivers-><*> Prise en charge EHCI HCD (USB 2.0)
» DeviceDrivers-><*> Prise en charge UHCI HCD (Intel et VIA pour
la plupart)
» DeviceDrivers-><*> Système de stockage de masse USB
Les noyaux inclus par défaut dans la plupart des principales distributions sont déjà dotés de ces
fonctions. Par conséquent, si vous utilisez le noyau par défaut d'une distribution prise en charge,
vous n'avez pas besoin d'effectuer d'actions supplémentaires.
Par ailleurs, sur les systèmes Linux 64 bits, il est nécessaire d'installer des bibliothèques
32 bits pour pouvoir exécuter le programme ironkey. Consultez les ressources d'aide de la
distribution pour en savoir plus.
2. Problèmes de montage
» Assurez-vous que vous possédez les droits requis pour monter les périphériques externes
SCSI et USB.
» Certaines distributions ne se montent pas automatiquement et nécessitent l'exécution de la
commande suivante :
mount /dev/<nom du périphérique> /media/<nom du périphérique
monté>
» Le nom du périphérique monté varie selon la distribution. Pour connaître les noms des
périphériques IronKey, exécutez :
ironkey --show
3. Droits d'accès
» Vous devez posséder les droits d'accès pour monter les périphériques externes/usb/flash.
» Vous devez également détenir les droits d'accès pour exécuter les fichiers exécutables du
DVD virtuel du périphérique pour lancer le Déverrouilleur.
» Il se peut que vous ayez besoin de droits d'utilisateur root.
Reportez-vous au dossier Linux du DVD virtuel du périphérique pour plus d'informations sur la
configuration des droits d'accès des utilisateurs non-root à leurs périphériques IronKey.Toutes
ces méthodes nécessitent que l'administrateur système exécute l'action requise (ponctuelle)
pour autoriser les accès. Les utilisateurs ordinaires pourront ensuite verrouiller, déverrouiller et
modifier les mots de passe sur tout périphérique IronKey branché.
4. Distributions prises en charge
Toutes les distributions Linux ne sont pas prises en charge. Consultez le site à l'adresse
http://support.ironkey.com pour obtenir la liste des dernières distributions prises en charge.
5.
À l'heure actuelle, le Déverrouilleur IronKey pour Linux ne prend en charge que les systèmes
x86.
Page 89

IRONKEY ENTERPRISE S250/D250 GUIDE D’UTILIS
GE 89
Où puis-je obtenir de l'aide ?
support.ironkey.com
Support, base de connaissances et didacticiels
www.ironkey.com
Informations générales
POUR EN SAVOIR PLUS
POUR CONTACTER LE SUPPORT
http://support.ironkey.com
Page 90

IRONKEY ENTERPRISE S250/D250 BENUTZERHANDBUCH
SEITE 90
ERSTE SCHRITTE
Dieser Abschnitt bietet einen kurzen Überblick über einige grundlegende Vorgänge,
die Sie bei der Verwendung des IronKey-Geräts unterstützen. Falls Sie ein IronKey EnterpriseGerät verwenden, ist dieses mit einer Unternehmenslösung verbunden, die von Ihrem
Systemadministrator verwaltet wird. Das kann zur Folge haben, dass einige in diesem Abschnitt
genannte Einstellungen nicht für Sie verfügbar sind, da ihr Administrator diese nicht aktiviert hat.
Die IronKey Kontrollfeld-Software auf Ihrem IronKey-Gerät liegt in verschiedenen Sprachen
vor. Einige der mitgelieferten Anwendungen sind allerdings nur in Englisch verfügbar, wie etwa
IronKey Malware Scanner (Nur Enterprise-Geräte), Identity Manager, der mitgelieferte
Firefox, und Virtual Keyboard (Virtuelle Tastatur). Die Website für das Online-Konto und die
Standard-E-Mail-Adressen sind ebenfalls nur in Englisch verfügbar.
Dieser Abschnitt enthält Informationen über:
»
Systemanforderungen
»
Empfohlene bewährte Methoden
»
Einrichten des Geräts
»
Entsperren des Geräts
»
Sperren des Geräts
»
Zugriff auf meine sicheren Dateien
»
Verschlüsseln und Entschlüsseln von Dateien
»
Auf mein Gerät zugreifen, wenn ich mein Kennwort vergessen habe
»
Ändern der Spracheinstellungen
»
Ein sicheres Backup meiner Dateien anlegen
»
Das Gerät unter Linux verwenden
»
Wo finde ich Hilfe?
Systemanforderungen
» Windows 8.1
» Windows 8
» Windows 7 (SP1)
» Windows Vista (SP2)
» Mac OS X (10.9.x - 10.11.x)
» Linux (2.6 oder neuer)
Der Computer muss über eine USB 2.0-Schnittstelle für HochgeschwindigkeitsDatenübertragung verfügen. Eine USB 1.1-Schnittstelle oder ein Hub mit Stromversorgung
funktioniert ebenfalls, ist aber langsamer.
Page 91

IRONKEY ENTERPRISE S250/D250 BENUTZERHANDBUCH
SEITE 91
Einige Anwendungen sind nur für bestimmte Betriebssysteme verfügbar:
»
Nur Windows
•
•
•
•
Mitgelieferter Firefox
Sicheres Backup
Virtuelle Tastatur
IronKey Identity Manager
» Nur Mac—Auto-Launch-Assistent
Empfohlene bewährte Methoden
» Legen Sie ein Online-Konto an, denn es ermöglicht Folgendes:
•
Zurücksetzen eines vergessenen Gerätekennworts
•
Backup Ihres Identity Manager-Kennworts
» Sperren des Geräts
•
wenn nicht in Verwendung
•
vor dem Ausstecken
•
ehe das Betriebssystem in den Ruhezustand geht
» Stecken Sie das Gerät nie aus, wenn die LED leuchtet
» Geben Sie niemals Ihr Gerätekennwort weiter
» Führen Sie auf dem Computer einen Virenscan durch, ehe Sie das Gerät einrichten
Einrichten des Geräts
Der Einrichtungsprozess für Windows- und Mac-Betriebssysteme ist identisch.
Für Linux-Betriebssysteme lesen Sie bitte Das Gerät unter Linux verwenden.
1. Stecken Sie das IronKey-Gerät in die USB-Schnittstelle des Rechners. Das Fenster
„Geräte-Setup‖ wird angezeigt.
Die Setup-Software wird automatisch von einer virtuellen DVD ausgeführt. Dieses Fenster
wird möglicherweise nicht angezeigt, wenn der Computer das automatische Ausführen
(autorun) von Peripheriegeräten nicht erlaubt. Sie können es manuell starten, indem Sie
Folgendes tun:
WINDOWS: Doppelklicken Sie in „Mein Computer‖ das Laufwerk „IronKey-Entsperrer‖
•
und starten Sie „IronKey.exe‖.
MAC: Öffnen Sie das Laufwerk IronKey-Entsperrer im Finder und starten Sie dann die
•
Anwendung IronKey im Ordner IronKey-Entsperrer.
2. Geben Sie den Aktivierungscode ein. Diesen sollten Sie per E-Mail von Ihrem
Administrator erhalten haben.
3. Wählen Sie die gewünschte Spracheinstellung, stimmen Sie der Endanwenderlizenz zu und
klicken Sie dann die Taste „Aktivieren‖.
Page 92

IRONKEY ENTERPRISE S250/D250 BENUTZERHANDBUCH
SEITE 92
Standardmäßig verwendet die IronKey-Software die für Ihr Betriebssystem
eingestellte Sprache.
4. Geben Sie ein Gerätekennwort ein und bestätigen Sie dieses. Klicken Sie dann
die Taste „Weiter‖.
Beim Kennwort wird die Groß- und Kleinschreibung beachtet. Es muss mindestens vier
Zeichen lang sein.
5. Wenn Sie aufgefordert werden, eine E-Mail-Adresse für ein Online-Konto anzugeben,
dann tun Sie das jetzt und klicken Sie dann die Taste „Weiter‖.
6. Es wird eine Mitteilung angezeigt, die Sie darüber unterrichtet, dass eine E-Mail an Sie
versandt wurde. Folgen Sie der Anleitung in dieser E-Mail, um Ihr Online-Konto einzurichten;
dazu gehört auch das Erstellen einer „Geheimfrage‖.
Ihr Online-Konto wird für einige Sicherheitsfunktionen benötigt, wie etwa
•
das Zurücksetzen des Kennworts, Aktualisieren der Gerätesoftware und mehr.
7. Wenn Sie das Online-Konto für das Gerät eingerichtet haben, klicken Sie „OK‖ in der
Eingabeaufforderung der Mitteilung, um mit der Einrichtung fortzufahren.
8. Das Gerät wird initialisiert.Während dieses Prozess werden ein AES-Verschlüsselungscode
und das Dateisystem für das sichere Volume erstellt sowie die sicheren Anwendungen und
Dateien auf das sichere Volume kopiert.
9. Wenn die Initialisierung abgeschlossen ist, wird das IronKey-Kontrollfeld angezeigt. Das
Gerät ist nun für den Schutz Ihrer Daten bereit und kann auf Windows-, Mac- und LinuxComputern verwendet werden.
Wenn Sie die Mitteilung, die im Fenster zum Entsperren angezeigt wird, ergänzen oder
•
ändern möchten, lesen Sie bitte Auf mein Gerät zugreifen, wenn ich mein Kennwort
vergessen habe.
Entsperren des Geräts
Der Entsperrvorgang für Windows- und Mac-Betriebssysteme ist identisch. Für LinuxBetriebssysteme lesen Sie bitte Das Gerät unter Linux verwenden.
1. Stecken Sie das Gerät an und warten Sie, bis das Fenster Entsperrer angezeigt wird.
Wird dieses nicht angezeigt, können Sie es wie folgt manuell starten:
WINDOWS: Doppelklicken Sie in „Mein Computer‖ das Laufwerk „IronKey-Entsperrer‖
•
und starten Sie „IronKey.exe‖.
MAC: Öffnen Sie das Laufwerk IronKey-Entsperrer im Finder und starten Sie dann die
•
Anwendung IronKey im Ordner IronKey-Entsperrer.
HINWEIS: Auf einem Mac können Sie den AutoLaunch-Assistenten installieren, der
•
beim Einstecken eines IronKey-Geräts automatisch den Entsperrer startet.
Page 93

IRONKEY ENTERPRISE S250/D250 BENUTZERHANDBUCH
SEITE 93
2. Geben Sie das Gerätekennwort ein und klicken Sie „Entsperren‖. Das IronKey-Kontrollfeld
wird angezeigt.
Optional können Sie auch das Ankreuzfeld „Schreibgeschützter Modus‖ ankreuzen, um
•
das Gerät in diesem Modus zu entsperren.
Nach der korrekten Eingabe des Kennworts (das über die Hardware verifiziert wird)
•
wird das sichere Volume mit allen sicheren Anwendungen und Dateien gemountet.
Falls zehnmal hintereinander das falsche Kennwort eingegeben wird, führt dies zur
•
dauerhaften Zerstörung des Geräts und aller sich darauf befindlichen Daten.Wenn Sie ein IronKey
Enterprise-Gerät verwenden, kann diese Anzahl je nach den vom Administrator
festgelegten Kennworteinstellungen abweichen.
Als Sicherheitsvorkehrung müssen Sie das Gerät nach drei fehlgeschlagenen Kennwort-
•
Eingabeversuchen aus- und wieder einstecken.
Entsperren des Geräts im schreibgeschützten Modus
Sie können das Gerät im schreibgeschützten Modus entsperren, sodass niemand die
Dateien auf dem Laufwerk Sichere Dateien ändern kann.Wenn Sie beispielsweise an einem
nicht vertrauenswürdigen Computer arbeiten und auf eine Datei auf dem Gerät zugreifen
möchten,dann verhindert das Entsperren im schreibgeschützten Modus, dass Schadsoftware auf
dem Rechner das Gerät infizieren oder Ihre Dateien ändern kann.
1. Stecken Sie das Gerät an und starten Sie den Entsperrer.
2. Klicken Sie das Ankreuzfeld „Schreibgeschützter Modus‖.
3. Klicken Sie die Taste „Entsperren‖.
» Im Kontrollfeld wird eine Mitteilung angezeigt, die darauf hinweist, dass Sie sich im
schreibgeschützten Modus befinden.
» Wenn Sie das Gerät in diesem Modus entsperren, bleiben Sie bis zum Sperren darin.
» Einige Funktionen sind dabei nicht verfügbar, denn sie machen das Ändern von Dateien auf
dem Gerät erforderlich. Das sind zum Beispiel die Neuformatierung, das Wiederherstellen
von Anwendungen, das Bearbeiten von Dateien auf dem Laufwerk Sichere Dateien und die
Bearbeitung der Anwendungsliste.
» Geben Sie zum Entsperren des Geräts im Schreibgeschützten Modus unter Linux folgendes
ein: ironkey --readonly
Erstellen Sie die Nachricht, die der Entsperrer anzeigt
Diese Funktion ermöglicht es, eine Nachricht anzulegen, die im Fenster IronKey Entsperrer
angezeigt wird. Sie können beispielsweise Kontaktdaten angeben, sodass ein Finder erfährt, wie
er Ihnen das Gerät zurückgeben kann.
1. Entsperren Sie das Gerätund klicken Sie die Taste „Einstellungen‖ in der Menüleiste.
2. Klicken Sie die Taste „Einstellungen‖ in der linken Seitenleiste.
3. Geben Sie den Text im Feld „Nachricht beim Entsperren‖ ein.
Die Nachricht muss in den vorgegebenen Platz passen (ca. sieben Zeilen und 200 Zeichen).
HINWEIS: Sollte Ihr Administrator bei einem Enterprise-Gerät diese Funktion nicht aktiviert
haben, sehen Sie die Nachricht beim Entsperren nicht im Kontrollfeld.
Page 94

IRONKEY ENTERPRISE S250/D250 BENUTZERHANDBUCH
SEITE 94
Kennwort mit der Virtuellen Tastatur eingeben
Wenn Sie das Gerät auf einem Computer entsperren, mit dem
Sie nicht vertraut sind und befürchten, es könnte dort Keyloggingund Screenlogging-Spyware (zum Ausspähen Ihrer Eingaben) installiert
sein, verwenden Sie die IronKey Virtuelle Tastatur. Sie schützt das
Gerätekennwort, da sie hier auf Buchstaben und Zahlen klicken.
Die zugrundeliegenden Techniken der Virtuellen Tastatur umgehen viele Trojaner, Keylogger
und Screenlogger.
Sie haben eine Reihe von Möglichkeiten, die Virtuelle Tastatur zu starten:
1. Klicken Sie das Symbol Virtuelle Tastatur im Kennwortfeld des IronKey Entsperrers
oder des Kontrollfelds. Die Virtuelle Tastatur wird angezeigt.
Alternativ können Sie, wenn der Tastaturfokus auf dem Kennwortfeld ist,
•
STRG+ALT+V drücken.
2. Klicken Sie die Tasten zur Eingabe Ihres Kennworts. Nachdem Sie fertig sind, klicken
Sie „Eingabe‖.
Sie können die Virtuelle Tastatur in Kombination mit der wirklichen Tastatur verwenden,
•
sodass Sie einige Zeichen eingeben und andere anklicken.
Sie können optional auch die Taste „Zufällig festlegen‖ drücken, um eine zufällige
•
Anordnung der Tasten zu schaffen. Das hilft gegen Screenlogger.
HINWEIS: Diese Funktion ist nur unter Windows verfügbar und nutzt eine Standard-
QWERTY-Tastatur.
HINWEIS: Wenn Sie eine Taste auf der virtuellen Tastatur drücken, werden alle Tasten für
einen Moment gelöscht. Mit dieser Funktion werden Screenlogger daran gehindert, das geklickte
Zeichen zu erfassen. Sollten Sie diese Funktion nicht verwenden wollen, können Sie sie im Menü
Optionen neben der Taste „Schließen‖ deaktivieren.
Sperren des Geräts
Klicken Sie die Taste „Sperren‖ unten links im Kontrollfeld, um das Gerät sicher zu
•
sperren. Sie können auch das Tastaturkürzel verwenden: STRG + L.
HINWEIS: Wenn Anwendungen oder Dateien auf dem Laufwerk Sichere Dateien geöffnet sind,
ist es nicht möglich, das Gerät zu sperren (damit wird eine mögliche Beschädigung der Dateien
verhindert). Schließen Sie alle auf dem Gerät befindlichen Anwendungen und Dateien und
versuchen Sie das Sperren erneut.
ACHTUNG: Sobald das Gerät gesperrt ist, ist das sichere Ausstecken möglich. Stecken Sie es
aber nicht aus, solange es entsperrt ist.
Page 95

IRONKEY ENTERPRISE S250/D250 BENUTZERHANDBUCH
SEITE 95
Zugriff auf meine sicheren Dateien
Nach dem Entsperren des Geräts haben Sie Zugriff auf die sicher gespeicherten Dateien, wenn
Sie Folgendes tun:
Klicken Sie die Taste „Dateien‖ (Ordnersymbol) in der Menüleiste des IronKey-
•
Kontrollfelds.
WINDOWS: Öffnen Sie im Windows Explorer das Laufwerk „Sichere Dateien‖.
•
MAC: Öffnen Sie im Finder das Laufwerk „Sichere Dateien‖.
•
TIPP: Sie können auf Dateien auch durch Rechtsklick auf das IronKey-Symbol auf der Taskleiste
von Windows zugreifen, dann auf „Sichere Dateien‖ klicken.
Verschlüsseln und Entschlüsseln von Dateien
Alles, was Sie auf dem IronKey-Gerät speichern, ist verschlüsselt. Da das Gerät über einen
eingebauten Verschlüsselungschip verfügt, wird die Ver- und Entschlüsselung „im Handumdrehen‖
erledigt. So können Sie bequem wie gewohnt mit einem regulären Flash-Laufwerk arbeiten und
nutzen gleichzeitig eine starke, stets aktive Sicherheitsfunktion.
Das Ziehen einer Datei auf das Laufwerk Sichere Dateien verschlüsselt diese automatisch.
•
Die auf dem Laufwerk Sichere Dateien geöffneten Dateien werden beim Öffnen
•
automatisch entschlüsselt.
Auf mein Gerät zugreifen, wenn ich mein Kennwort vergessen habe
Die Option Kennwort-Reset ermöglicht das Wiederherstellen des Geräts, falls Sie das
Kennwort vergessen haben.
Muss Ihnen Ihr Administrator die Rechte zur Kennwort- Wiederherstellung zuordnen, damit Sie
diese Funktion nutzen können.Wenn Sie das Kennwort vergessen und es nicht zurücksetzen
können, wenden Sie sich bitte an Ihren Administrator.
So setzen Sie das Kennwort zurück, falls Sie es vergessen haben
1. Stecken Sie das Gerät an und starten Sie den Entsperrer.
2. Klicken Sie die Taste „Kennwort-Hilfe‖.
3. Klicken Sie im Fenster Kennwort-Hilfe die Taste „Kennwort-Reset‖. Es wird eine E-Mail mit
einer Anleitung für das weitere Vorgehen an Sie geschickt.
4. Nachdem Sie diesen Anweisungen gefolgt sind, klicken Sie die Taste „Weiter‖.
5. Geben Sie das neue Kennwort ein oder verwenden Sie die Virtuelle Tastatur und
bestätigen Sie das Kennwort in den dafür vorgesehenen Feldern. Klicken Sie dann die Taste
„Kennwort ändern‖.
Page 96

IRONKEY ENTERPRISE S250/D250 BENUTZERHANDBUCH
SEITE 96
Ändern der Spracheinstellungen
Sie haben die Sprache beim Einrichten des Geräts eingestellt. Sie können sie bei Bedarf mit dem
IronKey-Kontrollfeld ändern.
1. Entsperren Sie das Gerät und klicken Sie die Taste „Einstellungen‖ in der Menüleiste.
2. Klicken Sie die Taste „Einstellungen‖ in der linken Seitenleiste.
3. Wählen Sie die Sprache aus der Liste.
Ein sicheres Backup meiner Dateien anlegen
Wenn das Gerät mit der Anwendung Sicheres
Backup ausgestattet ist, können Sie ein
verschlüsseltes Backup Ihrer Daten auf einem
neuen oder vorhandenen IronKey-Gerät
wiederherstellen (nur Windows, nur Englisch).
Sicheres Backup speichert ein verschlüsseltes
Backup einiger oder aller Ihrer auf dem
Stick befindlichen Dateien auf Ihrem lokalen
Rechner oder einem freigegebenen Ordner im Netzwerk. Sie stellen mit derselben Anwendung
ausgewählte Dateien oder alle wieder her.
1. Klicken Sie in der Liste Anwendungen des IronKey-Kontrollfelds die Taste „Sicheres Backup‖,
um das Programm zu öffnen (nur Windows)
Das Fenster Sicheres Backup wird angezeigt, und dort ist das Laufwerk Sichere
•
Dateien sichtbar.
2. Wählen Sie die Dateien, von denen Sie ein Backup erstellen wollen.
3. Klicken Sie die Ankreuzfelder neben den entsprechenden Dateien.
Ein grüner Haken bedeutet, das alle Dateien in diesem Ordner und in Unterordnern in
•
das Backup miteinbezogen werden
Ein rotes Minuszeichen bedeutet, dass nur einige der Dateien in diesem Ordner oder
•
seinen Unterordnern in das Backup miteinbezogen wird
4. Geben Sie den Pfad zum Zielordner ein, in dem die Backup-Dateien gespeichert werden
sollen, oder verwenden Sie die Taste Durchsuchen, um diesen zu finden.
Der Zielordner kann ein bereits existierender Ordner, ein neuer oder ein separates
•
Laufwerk sein (z. B. ein freigegebener Ordner im Netzwerk)
5. Klicken Sie „Backup jetzt erstellen‖. Die Dateien werden verschlüsselt und das
Backup erstellt.
HINWEIS: Zwar sind die Dateien sicher verschlüsselt, die Dateinamen allerdings nicht.Wenn
Sie die Dateinamen unlesbar machen möchten, erstellen Sie eine ZIP-Datei mit den Dateien für
das Backup, ehe sie dieses erstellen.
HINWEIS: Dem Backup der Dateien dürfen Sie nichts hinzufügen, die gesicherten Dateien
nicht ändern oder löschen, da sonst die Wiederherstellung nicht mehr möglich ist.
Page 97

IRONKEY ENTERPRISE S250/D250 BENUTZERHANDBUCH
SEITE 97
WIEDERHERSTELLEN VON DATEIEN AUF DAS GERÄT AUS EINER
1. Klicken Sie in der Liste Anwendungen des IronKey-Kontrollfelds die Taste „Sicheres Backup‖,
um das Programm zu öffnen (nur Windows).
Das Fenster Sicheres Backup wird angezeigt, und dort ist das Laufwerk Sichere
•
Dateien sichtbar.
2. Wählen Sie die Registerkarte „Von meinem Computer wiederherstellen‖.
3. Wählen Sie den Zielordner, den Sie beim Backup der Daten ausgewählt hatten.
Stellen Sie sicher, dass der Ordner die Backup-Datei enthält, die Dateien oder Ordner
•
innerhalb dieses Ordners.
4. Wählen Sie die Dateien/Ordner, die wiederhergestellt werden sollen und klicken Sie „Jetzt
wiederherstellen‖.Wiederhergestellte Dateien überschreiben bestehende Dateien gleichen
Namens auf dem Laufwerk Sichere Dateien.
BACKUP-DATEI
HINWEIS: Wurde das Backup der Daten von einem anderen IronKey-Gerät erstellt, müssen
Sie das Kennwort dieses Geräts verwenden, um die Dateien wiederherzustellen.
Das Gerät unter Linux verwenden
Sie können das IronKey-Gerät auf verschiedenen Linux-Distributionen verwenden
(nur x86-Systeme mit Kernelversion 2.6 oder höher).
DEN ENTSPERRER VERWENDEN
Verwenden Sie den Entsperrer für Linux, um auf Ihre Dateien zuzugreifen und das
Gerätepasswort unter Linux zu ändern. So ist es möglich, Dateien sicher zwischen Computern
mit Windows, Mac und Linux auszutauschen.
Je nach Linux-Distribution benötigen Sie Root-Rechte, um das Programm „ironkey‖ zu
verwenden, das sich im Linux-Ordner auf der gemounteten virtuellen DVD befindet.Wenn Sie
nur ein IronKey-Gerät am System angeschlossen haben, führen Sie das Programm von einer
Kommandozeilen-Shell ohne Argument aus, (z. B. ironkey).Wenn Sie mehrere IronKey-Geräte
haben, müssen Sie angeben, welches Sie entsperren möchten.
HINWEIS: ironkey entsperrt nur das Sichere Volume;dieses muss dann gemountet
werden.Viele moderne Linux-Distributionen tun das automatisch;wenn nicht, führen Sie das
Programm in der Kommandozeile aus und verwenden Sie den Gerätenamen, der von ironkey
ausgegeben wird.
Page 98

IRONKEY ENTERPRISE S250/D250 BENUTZERHANDBUCH
SEITE 98
Zum Entsperren des Geräts im schreibgeschützten Modus geben Sie Folgendes ein:
ironkey --readonly
Um das Gerät mit dem Kennwort „gerätekennwort” zu entsperren, geben Sie
ironkey --unlock
Um das Gerät zu entsperren, müssen Sie es entweder auswerfen und abstecken oder Folgendes ausführen:
ironkey --lock
Um das Gerät namens „gerätename” zu sperren, geben Sie Folgendes ein:
ironkey --lock [gerätename]
Das Gerät einfach auszuwerfen sperrt nicht automatisch das Sichere Volume.
Folgendes ein:
Beachten Sie bitte die folgenden wichtigen Details für das Verwenden des Geräts unter Linux:
1. Die Kernelversion muss 2.6 oder höher sein
Wenn Sie den Kernel selbst kompilieren, muss Folgendes darin enthalten sein:
» DeviceDrivers->SCSIDeviceSupport-><*>SCSICDROMSupport
» DeviceDrivers-><*> Unterstützung für Host-side-USB
» DeviceDrivers-><*> USB-Dateisystem für Geräte
» DeviceDrivers-><*> EHCI HCD (USB 2.0-Unterstützung)
» DeviceDrivers-><*> UHCI HCD (Unterstützung für die meisten
Intel und VIA)
» DeviceDrivers-><*> USB-Massenspeicher-Unterstützung
Die Kernel, die standardmäßig in den meisten Distributionen enthalten sind, verfügen über
diese Funktionen.Wenn Sie also den Standardkernel verwenden, der mit einer unterstützten
Distribution geliefert wird, müssen Sie nichts weiter tun.
Außerdem müssen auf 64-Bit-Linux-Systemen die 32-Bit-Bibliotheken installiert sein, damit das
Programm ironkey ausgeführt werden kann. Ziehen Sie die Hilfe-Ressourcen der Distribution
wegen weiterer Informationen heran.
2. Probleme beim Mounten
» Stellen Sie sicher, dass Sie die Rechte haben, um externe SCSI- und USB-Geräte zu mounten
» Manche Distributionen mounten nicht automatisch und verlangen, dass folgender Befehl
ausgeführt wird:
mount /dev/<name des geräts> /media/<gemounteter gerätename>
» Der Name des gemounteten Geräts variiert je nach Distribution. Der Name des
IronKey-Geräts lässt sich herausfinden, wenn Sie Folgendes ausführen:
ironkey --show
Page 99

IRONKEY ENTERPRISE S250/D250 BENUTZERHANDBUCH
SEITE 99
3.
Rechte
» Sie müssen die nötigen Rechte haben, um externe/USB-/Flash-Geräte mounten zu können
» Sie müssen die nötigen Rechte haben, um ausführbare Programm von der virtuellen DVD
des Geräts ausführen zu können; nur so lässt sich der Entsperrer starten
» Sie benötigen möglicherweise Root-Rechte
Siehe den Linux-Ordner auf der virtuellen DVD des Geräts für Informationen über das
Einrichten von Rechten, die Nicht-Root-Benutzern den Zugriff auf das IronKey-Gerät erlauben.
Alle diese Methoden machen es erforderlich, dass der Systemadministrator (einmalig) den
Zugang erlaubt;danach können auch normale Benutzer jedes IronKey-Gerät sperren, entsperren
und das Kennwort ändern, das sie einstecken.
4.
Unterstützte Distributionen
Nicht alle Linux-Distributionen werden unterstützt. Bitte besuchen Sie
http://support.ironkey.com zu Informationen über die aktuelle Liste unterstützter Distributionen.
5.
Der IronKey-Entsperrer für Linux unterstützt derzeit nur x86-Systeme.
Page 100

IRONKEY ENTERPRISE S250/D250 BENUTZERHANDBUCH
SEITE 100
Wo finde ich Hilfe?
support.ironkey.com
Supportinformationen,Wissensdatenbank und VideoAnleitungen
www.ironkey.com
Allgemeine Informationen
WEITERE INFORMATIONEN
DEN SUPPORT KONTAKTIEREN
http://support.ironkey.com
 Loading...