

Iron Baltic V-PLOW 1500 Gen 2, V-SAHK 1500 Gen 2, 34.4200, 34.4300, 34.4100 User Manual
V-PLOW 1500 Gen 2
V-SAHK 1500 Gen 2
MODEL / MUDEL
34.4100 / 34.4200 / 34.4300
ATTENTION!
READ AND FOLLOW ALL SAFETY AND OPERATING INSTRUCTIONS!
TÄHELEPANU !
LOE JA JÄLGI KÕIKI OHUTUS- JA KASUTUSJUHISEID !
INTRODUCTION
This manual contains instructions for fully assembling the ATV V-Plough, along with ensuring it's safe operation and
maintenance.
NOTE: Photos and drawings in this manual may not necessarily depict the actual models of plough or their accessories.
They are merely given as a frame of reference and are based on the latest available information at the time of
publication.
This symbol is used throughout the manual and on warning signs in order to warn users of the
potential for serious injury. Before using the vehicle and plough, carefully read the safety
instructions and make sure that you have understood them. Follow all instructions and ensure
that everyone who uses the equipment follows them!
Add the serial number and purchase date for your ATV Plough to the fields below. The distributor needs this information in
order to be able to service your equipment quickly and efficiently when ordering spare parts. If parts need to be replaced, use
only original spare parts.
In case repairs are required under the terms of the guarantee, submit this registration brochure together with the initial sales
invoice to the distributor to order any servicing under the terms of the guarantee.
Your plough and hardware were designed with safety in mind. In order to protect you and
your ATV, certain parts of the blade and/or hardware are designed to fail when equipment is
over-stressed. For this reason, push tubes, blade hinges, mounting brackets, and clevis pins are
not covered by warranty.
Keep this manual for future reference.
Based on the specifications for your model, please check that you have received all of the parts for your particular set.
SERIAL NUMBER: ___________________________
MODEL NUMBER: ___________________________
DATE OF PURCHASE: ___________________________

SAFETY INSTRUCTIONS
Most accidents occur due to negligence or carelessness. Avoid unnecessary accidents and
follow the safety instructions given below.
TRAINING
1. Read the safety instructions, terms and conditions of use carefully.
Make sure that you have the potential to safely use both the vehicle and
plough.
2. Never allow children to use the vehicle or plough. Never allow adults
to use the vehicle or plough unless they have received appropriate
instruction.
3. The vehicle or plough should not be used when intoxicated or under
the influence of drugs which may affect perception or reactions.
4. Make sure that there are no persons, especially infants, or animals in
the equipment’s operating area.
PROHIBITIONS
• Never operate the plough on slopes greater than 10 with the plough installed.
• Never use the plough unless all of the parts are correctly installed.
• Never use the plough before you have carefully read the entire user manual.
• Never exceed a speed of 10kph when transporting the plough.
• Never exceed a speed of 5kph when ploughing.
• Never use the plow in the dark, unless you are using artificial lighting.
• Never stand or ride on the plough.
COMPULSORY TASKS
• Follow every instruction given by the ATV’s manufacturer.
• Always use proper protective equipment (helmet etc.) when using the vehicle.
• Always inspect the plough mechanism, fasteners, cable, winch rope and adjustments before operating. Replace
all worn or damaged parts before operating.
• The safe road-steadiness of the vehicle must always be ensured by using the correct accessories for the task in
hand (chains, counterbalances, etc).
• Make sure that all of the safety stickers are in good condition. Replace damaged stickers as required.
• Before starting work, check that the plough and winch are working properly.
• Make sure that bystanders are moved to a safe distance when operating the plough.
• Be aware of objects that could be hidden under snow.
• Slow down the speed when working on a slope or on an uneven surface.
• Keep away from blade and moving parts during operation.
• Before adjusting blade angle, stop the ATV and engage the handbrake.
• When ploughing snow or soil into piles, start backing up before raising the blade.
• Do not ram the blade into piles of soil or snow. Ensure that you slow down before hitting the pile.
• Always wear thick leather gloves when handling the winch rope.
• Always remain clear of moving parts and joints. Keep others away when operating or adjusting the plough.
• Always lower the plough to the down position before leaving the ATV unattended.
7
8
9
3
13
15
16
12
14
4
11
5
4
11
2
1
2
1
4
11
6
10
10
16
15
3
13
12
14
9
8
7
5
4
11
1
2
4
11
6
10
2
1
10
4
11
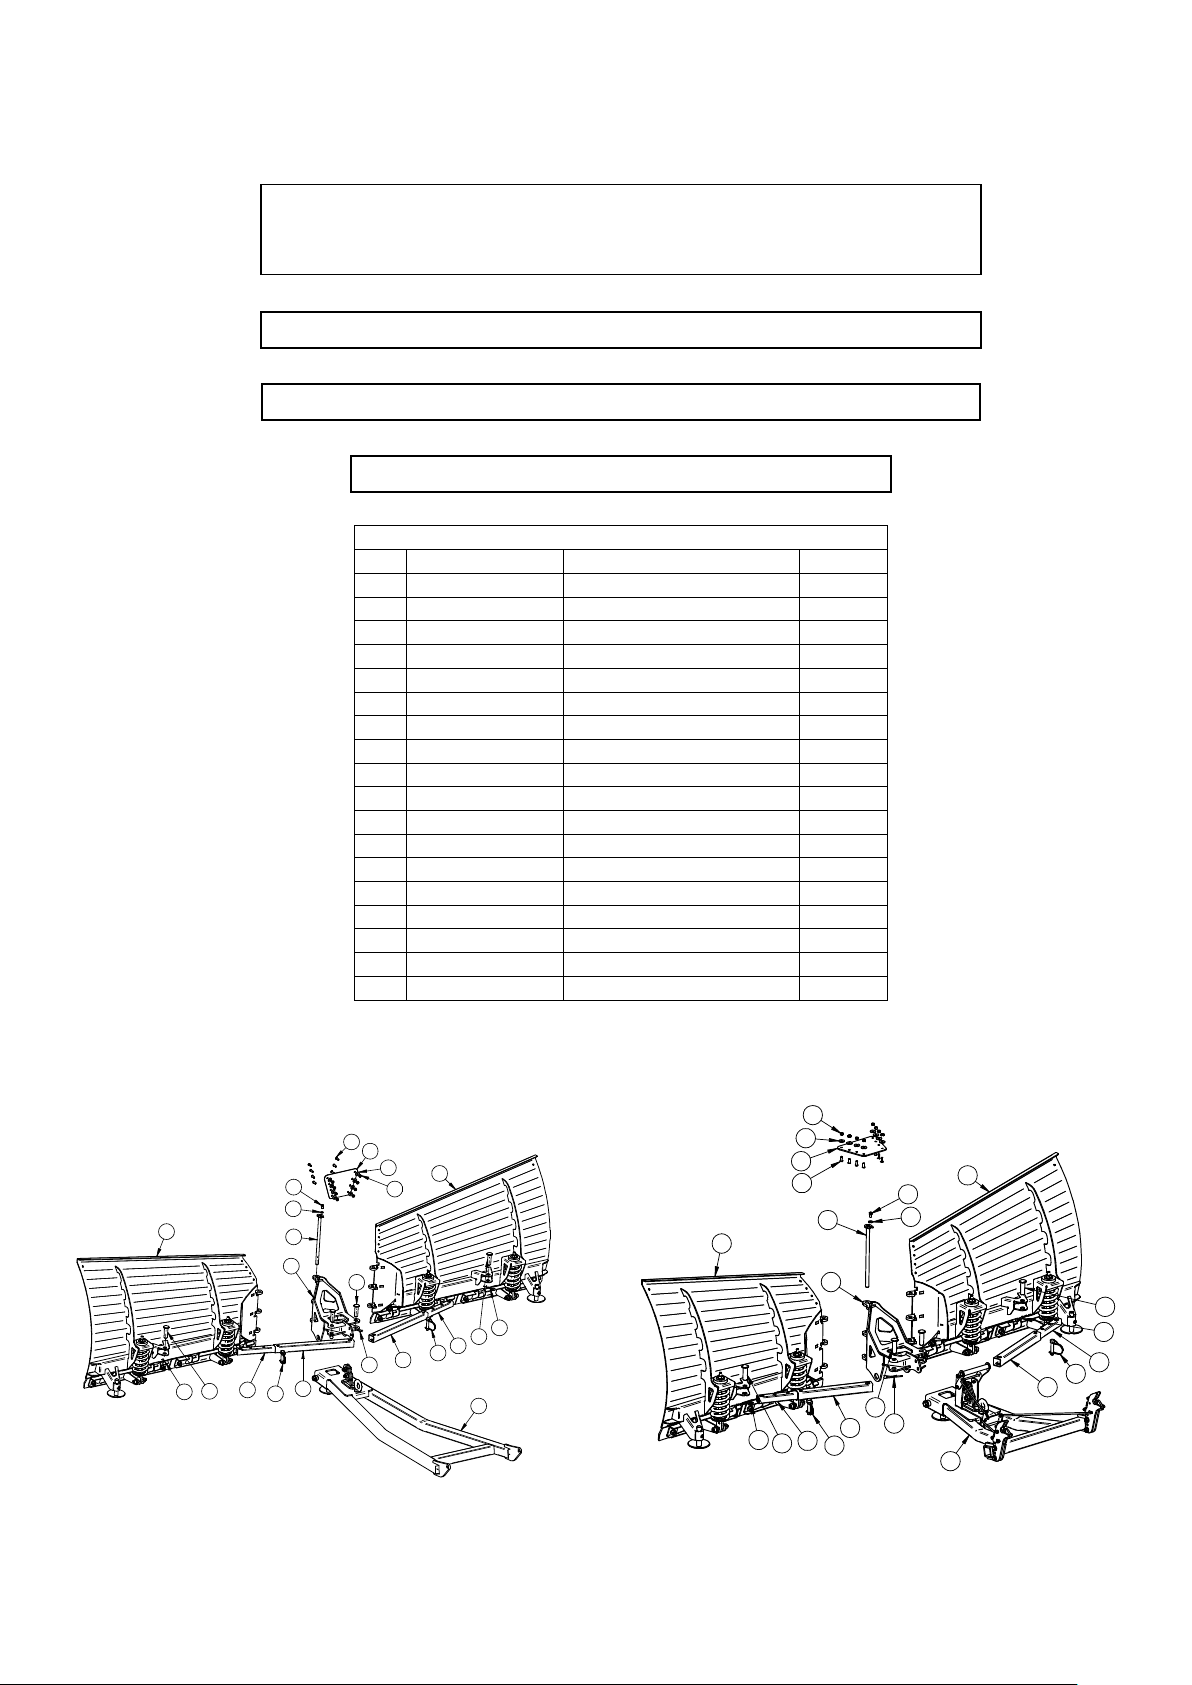
COMPLETING ASSEMBLY
Mid-mount system Front mount system
SPECIFICATION
Pos.
Code
Description
Amount
1
34.3507
Plow adjusting inner tube
2
2
34.3508
Plow adjusting outer tube
2 3 34.2007
Rubber cover
1 4 34.2008
Pin
4
5
34.2100
V-plow sides connector
1
6
34.2200
V-plow push tube assembly
1 6 34.3400
V-plow front mount
1 6 34.3600
V-plow front mount (narrow)
1
7
34.3510
Plow right side assembly
1
8
34.3520
Plow left side assembly
1 9 34.2700
Plow assembly pin
1
10
OT.10.11.011
Lynch pin
2
11
DIN 11024
Cotter pin
4
12
DIN 933
Bolt M6x12
1
13
DIN 7380
Bolt M6x16
8
14
SFS 3738
Washer M6
1
15
DIN 9021
Washer M6
8
16
DIN 985
Nylock nut M6
8
Attention! An ATV winch is required for the installation of the plow!
For assembly use 10mm and 17mm socket wrenches.
Installation time 20-30 min
Based on the specification, check whether you have received all the parts for the set.
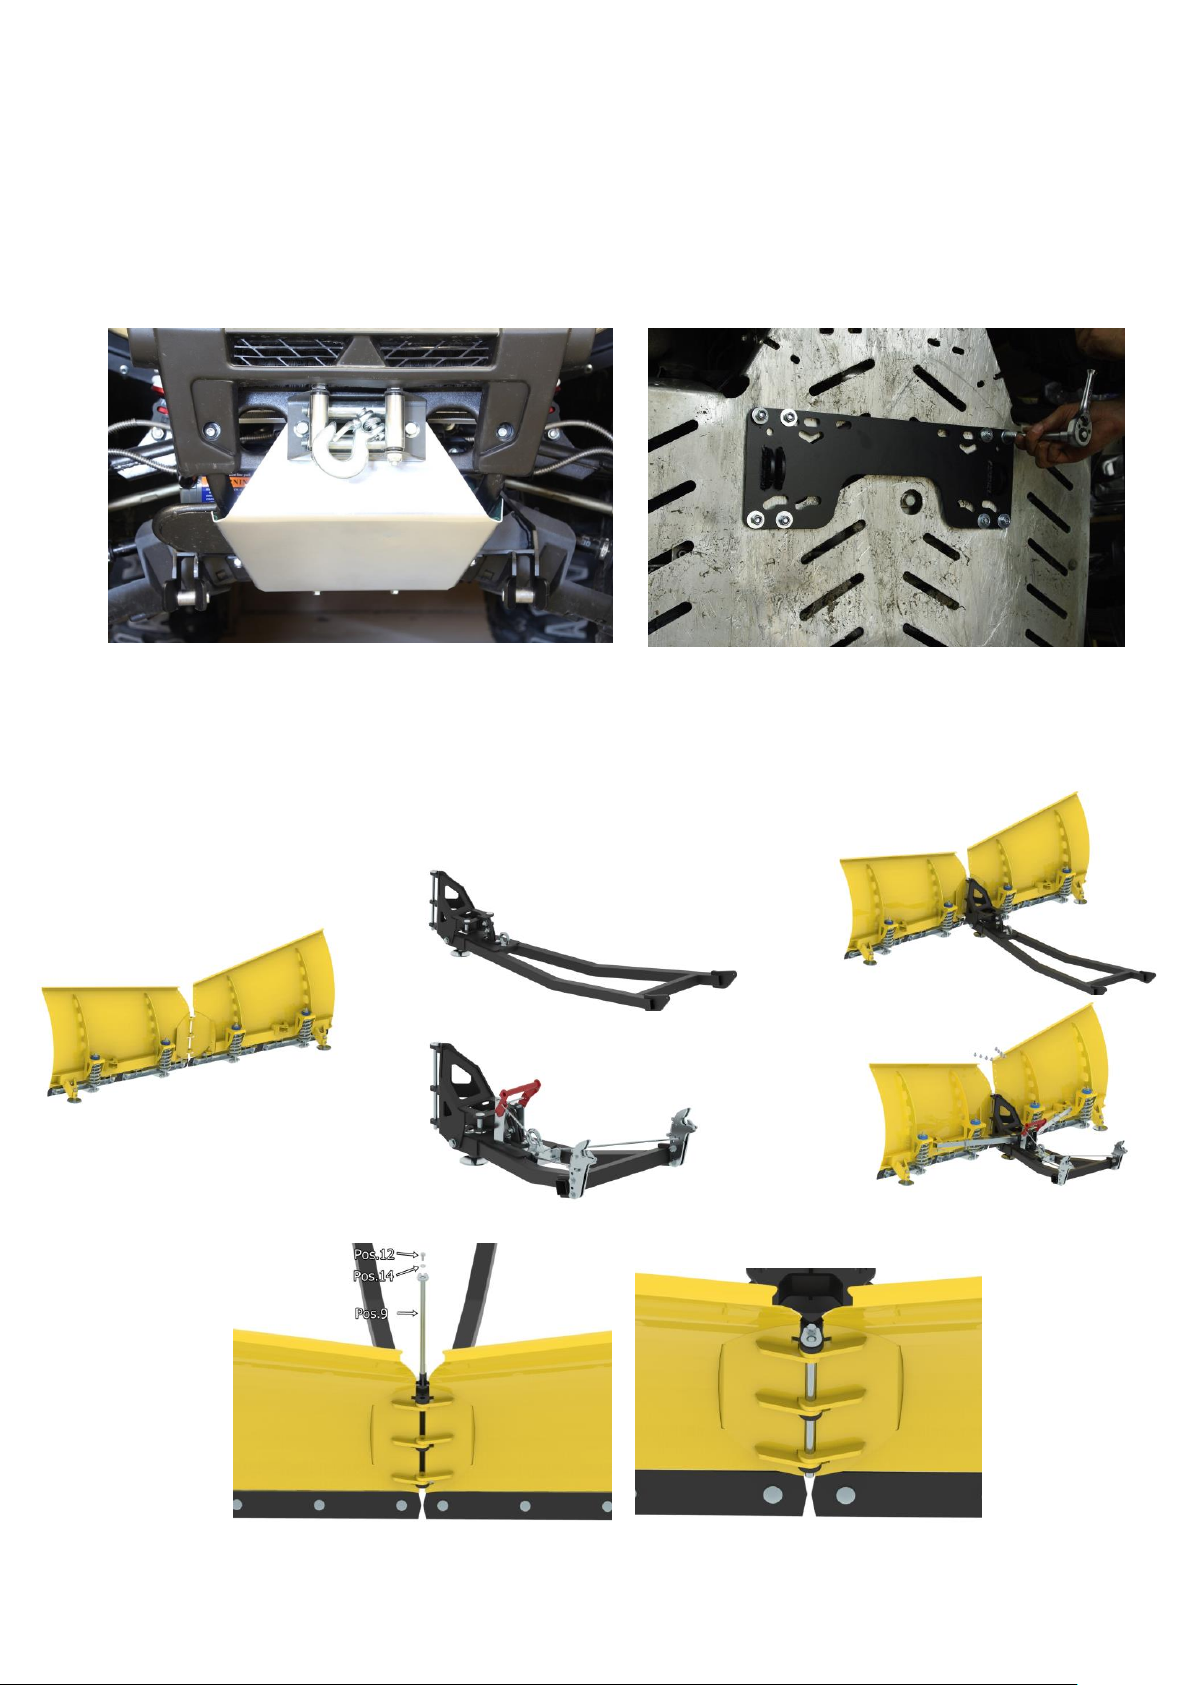
Installation Guide
1. Install the model-specific mounting kit under or in front of the ATV. Instructions are
available in the mounting kit packaging.
2. Connect blades 34.3510 and 34.3520 to push tube assembly 34.2200 or 34.3400 or 34.3600.
Use plow assembly pin 34.2700, M6 x 12 bolt and 6mm washer.
+ =
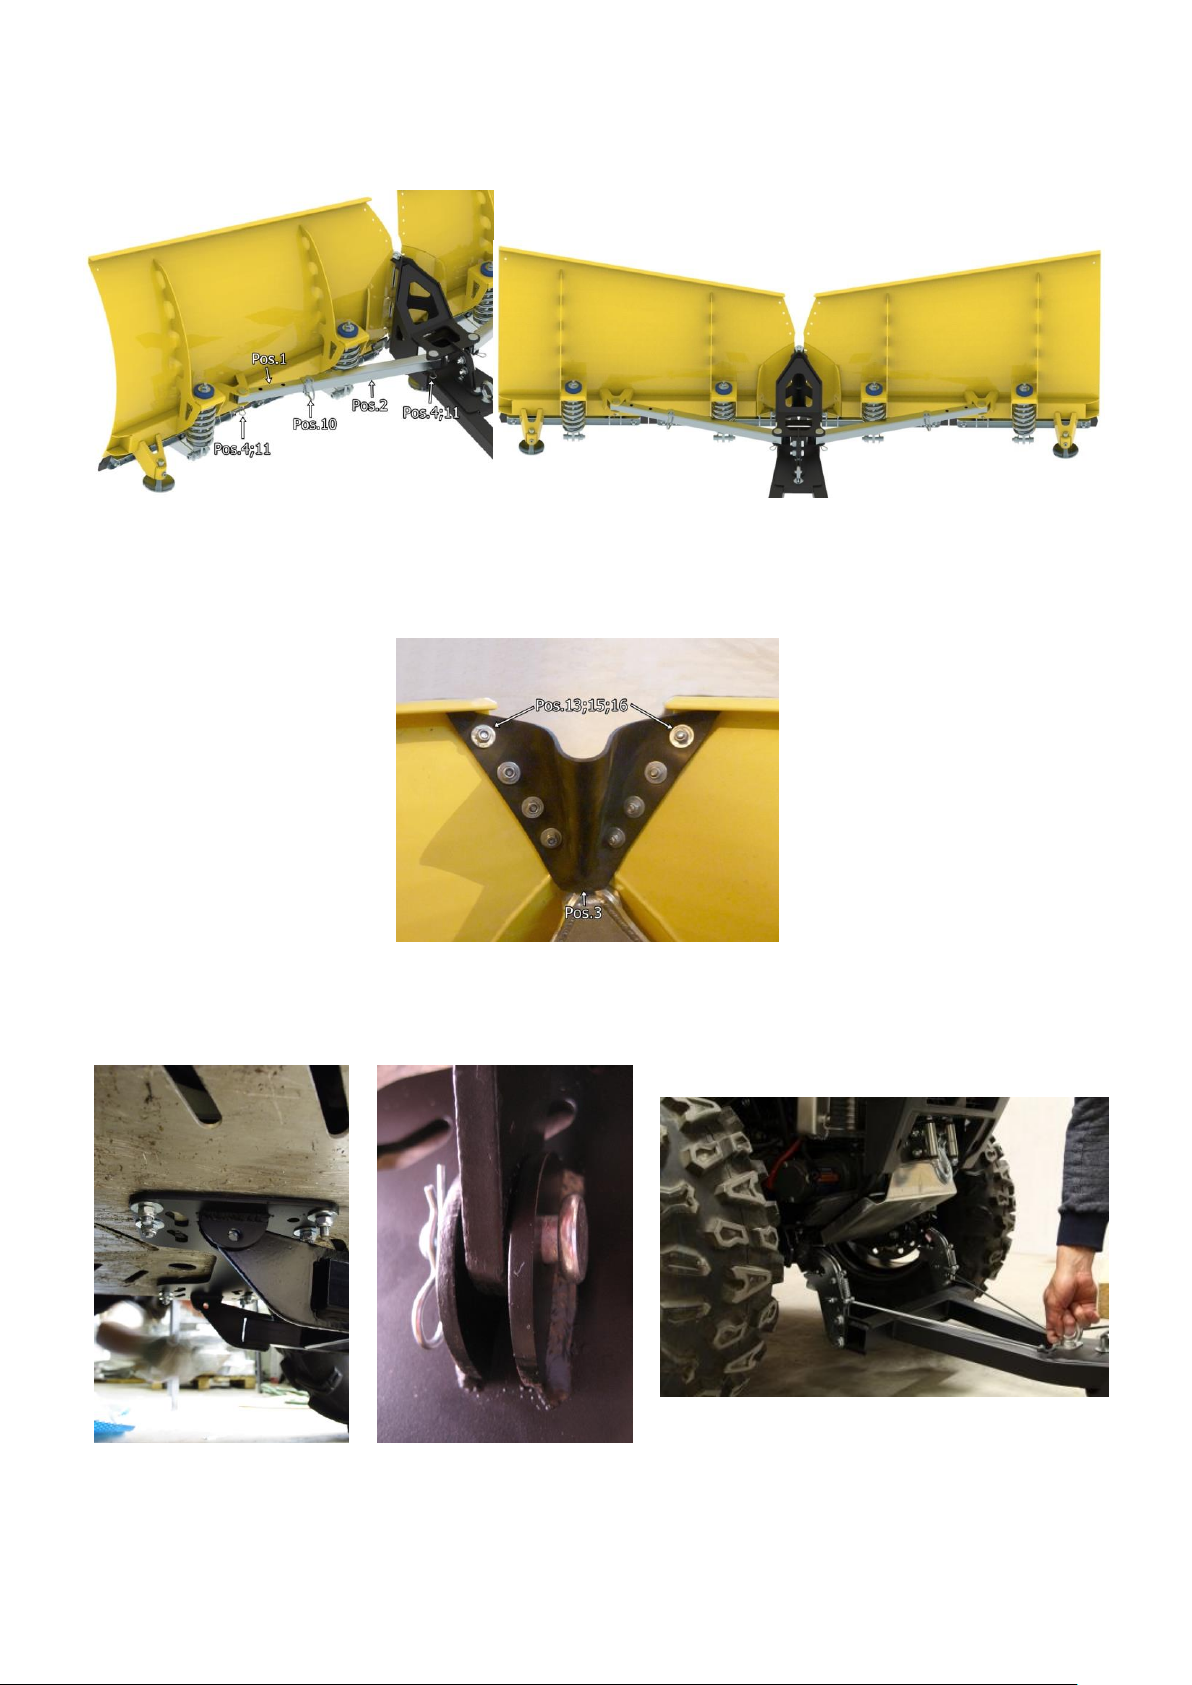
3. Install plow adjusting tubes 34.3507 and 34.3508 using pin 34.2008 and 3mm cotter pin. For
adjusting the angle of the blades, use lynch pin Pos.10.
4. Install rubber cover 34.2007 between two sides of the plow. Use M6x16 bolts, 6 washers and
M6 nylock nuts.
5. Install mid mount plough under the ATV using 10 x 35 pins and cotter pins from the
mounting kit packaging. Or front mounted plow infront of the ATV.
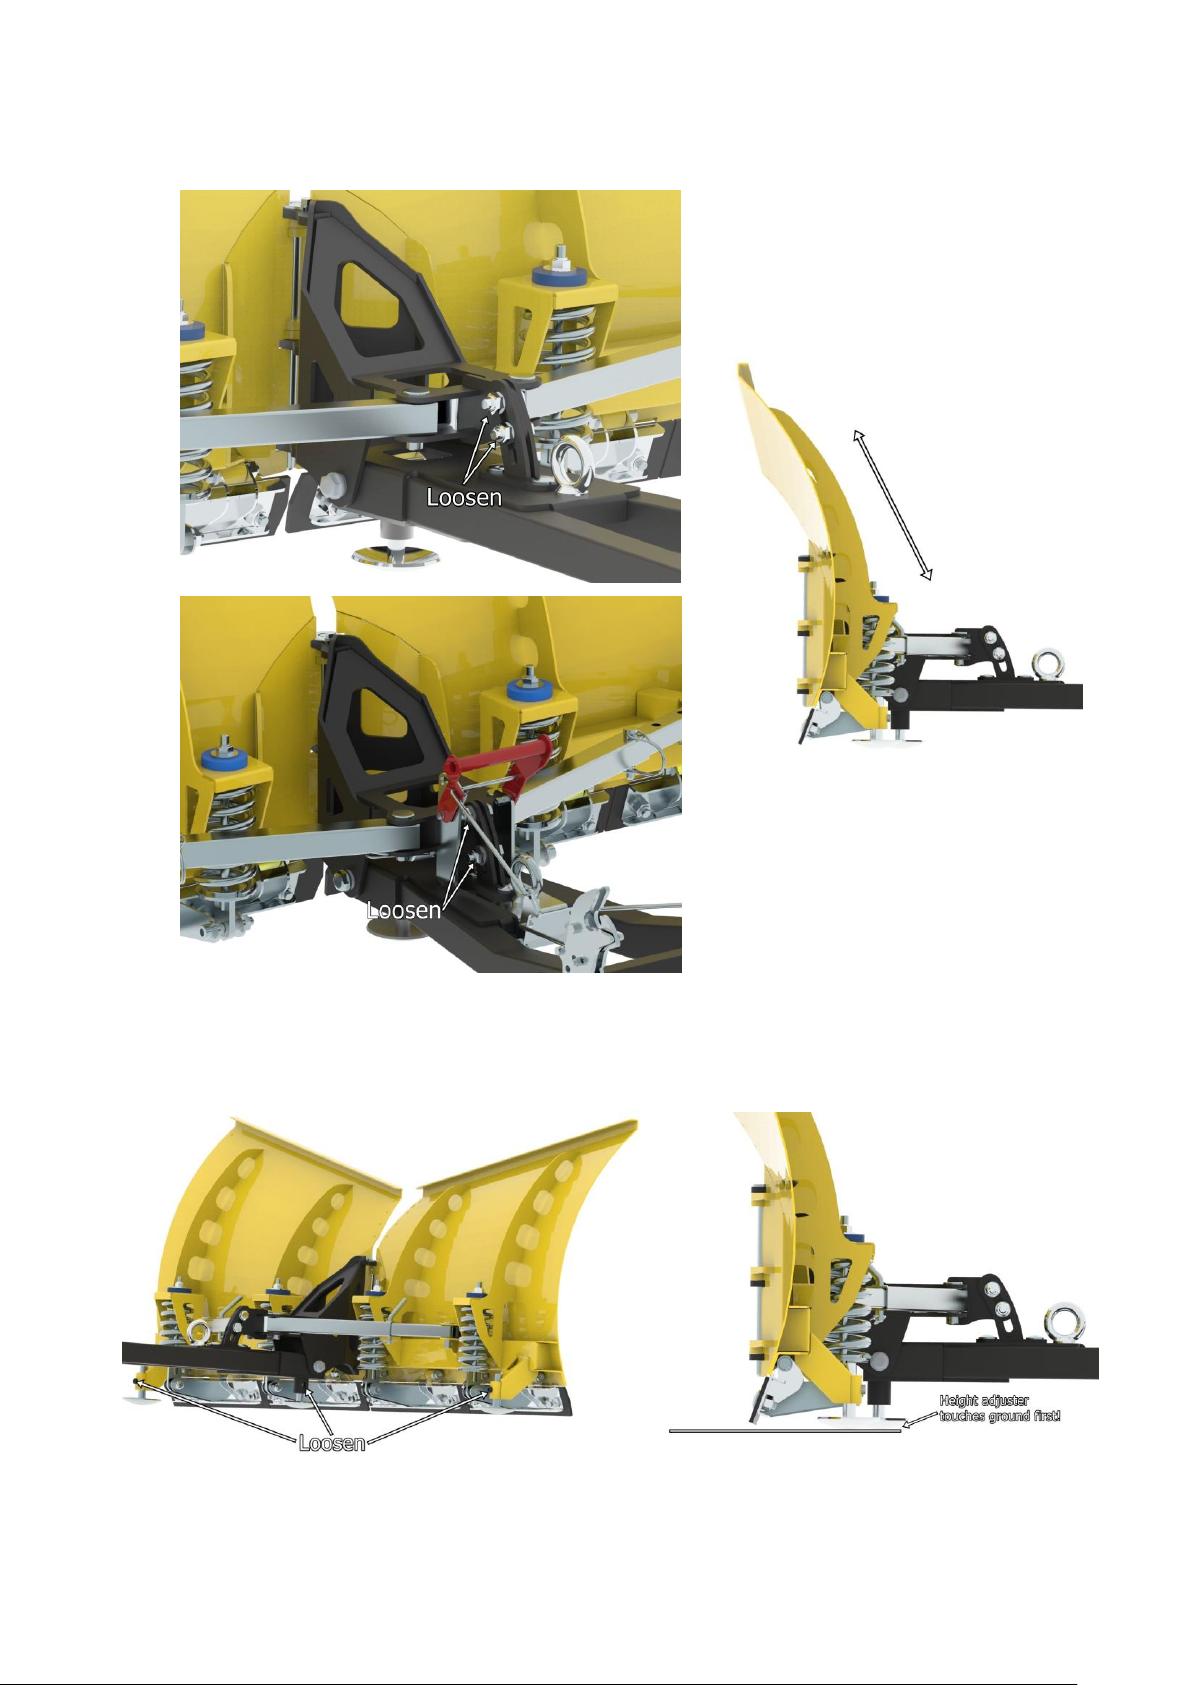
6. To adjust the angle of the blade, loosen the M10 x 35 bolts and turn the sides connector to a
suitable position so that the height adjusters would be parallel to the ground.
7. To adjust the working height of the blade, loosen the screw and set the skid at a suitable
height. Push tube assembly should be parallel to the ground. Make sure that height adjuster
is little bit lower than the blade. Plow should slide on height adjusters NOT on the blade!
 Loading...