


Adjust Ring Volume
Ring or Vibrate
Set Ringer Tone
Phone Lock
Require SIM Card PIN
Change SIM PIN2 Code
New Security Code
Extended Menus
Show Time and Date
Set Time and Date
Set Time Format
Language Selection
Lights
Select Keypad Tones
Phone Status
Options Menu Quick Reference
Show Battery Meter
Show Signal Strength
Pending Call Drop
Call Forwarding
Call Waiting
Call Barring
Call Related Features
Show Call Timers
Set Audible Call Timers
Set In-Call Display
Lifetime Timer
Call Meters
Register Now
Network Selection
Call Voicemail
Received Messages
Outgoing Messages
Message Editor
Message Settings
Messages
Phone Setup
Personal Numbers
Show Services
Last T en Calls
My Phone Number(s)
Fixed Dialing
One-Touch Dial Setting
Phone Book
M

Satellite
Antenna Lock
Release Button
Display
Microphone
Headset Jack
Real-Time
Clock
Battery Charge
Indicator
Earpiece
Signal Strength
Indicator
Status
Indicator
Satellite
Antenna
Volume
Control
Keys
Display and
Status Indicators
Alphanumeric
Keypad
Accessory and
Power Connector
Battery Compartment
Connector
Message Key
Quick Access
Key
Represents functions not on front of phone.
HELPFUL HINTS
• Need clear view of sky, outdoors, away from buildings and tall structures.
Rotate and fully extend antenna into a vertical position.
• Wait until registration is complete (you will see
A
Registered and the
+
and n indicators). If no registration (n missing), press
E 8
.
• To dial, press: [
0 0
]or [0 and hold for two seconds], [country code],
[phone number],
O
.
• Talk with antenna above your head and vertical to the ground.

3. Insert the SIM card.
1. Rotate and extend
the antenna.
2. Remove battery door.
4. Push down and slide the
SIM card tray to the right.
6. Install the battery by
matching arrows on phone
and battery.
5. Remove battery’s
protective cover.
7. Attach battery door
cover.
8. Attach charging device.
Getting Started
Display your phone number:
Press
Q#.
Also refer to the “View Your SIM Card Phone Number(s)” section of the
User’s Guide.
Special Features Continued
9505 PORTABLE QUICK REFERENCE
Find Name
1
E
Mute
Call Voicemail
Lock Now
Battery Meter
Recall a number from the phone book:
1. Press
Q.
2. Enter the one-, two-, or three-digit location number of the entry,
and then press
O.
3. Press
O to call the displayed entry.
Recall last ten numbers dialed:
1. Press
M until you see Phone Book, and then press O.
2. Press Mto scroll toLast Ten Calls, and then press O to select.
3. Press
M to scroll to Last Calls Made and then press O to select.
4. Press M to scroll to the number you are looking for.
5. Press
O to place a call to that number.
Quick Access Menu
Phone Book
234
5
Vibrate On/Off
Read Messages
Register Now
Forward On/Off
678
9
Keypad disable:
Press
* and # keys simultaneously to prevent accidental usage
of the phone. All keys with the exception of the
S key will be disabled. You
can still answer an incoming call by pressing
O when the keypad is locked.
To remove the keypad disable, press
* and # simultaneously.
Factory default for satellite mode.
Turn the phone's power on/off: Press and hold
S.
Place a call: You need a clear view of the sky, away from tall structures
Rotate and extend the antenna in a vertical position. To dial,
press: [
0 0
]
or
[
0
and hold for two seconds], [country code],
[phone number],
O
.
End a call: Press
C.
Adjust earpiece volume:
Press upper and lower volume keys on the side of the phone.
Adjust ringer volume:
Press E and then the upper and lower volume keys on the side of
the phone.
Answer a call (with antenna rotated and extended):
Phone rings and/or vibrates
After
Call followed by Answer? is in display, press O.
Answer a call (with antenna stowed):
Phone chirps
Rotate and extend antenna
Phone will ring and/or vibrate
After
Call followed by Answer? is in display, press O.
Clear the last digit in the display or exit a submenu:
Press
C.
Clear the entire display or exit the menu system:
Press and hold
C.
Select prompt language:
Press and hold
C to return to idle display.
Press
M 2 6 O to go to the language selection submenu.
Press
M until you see the preferred language.
Press
O to select.
Basic Operation
Special Features
(Top)
(Top)
(Top)
✁

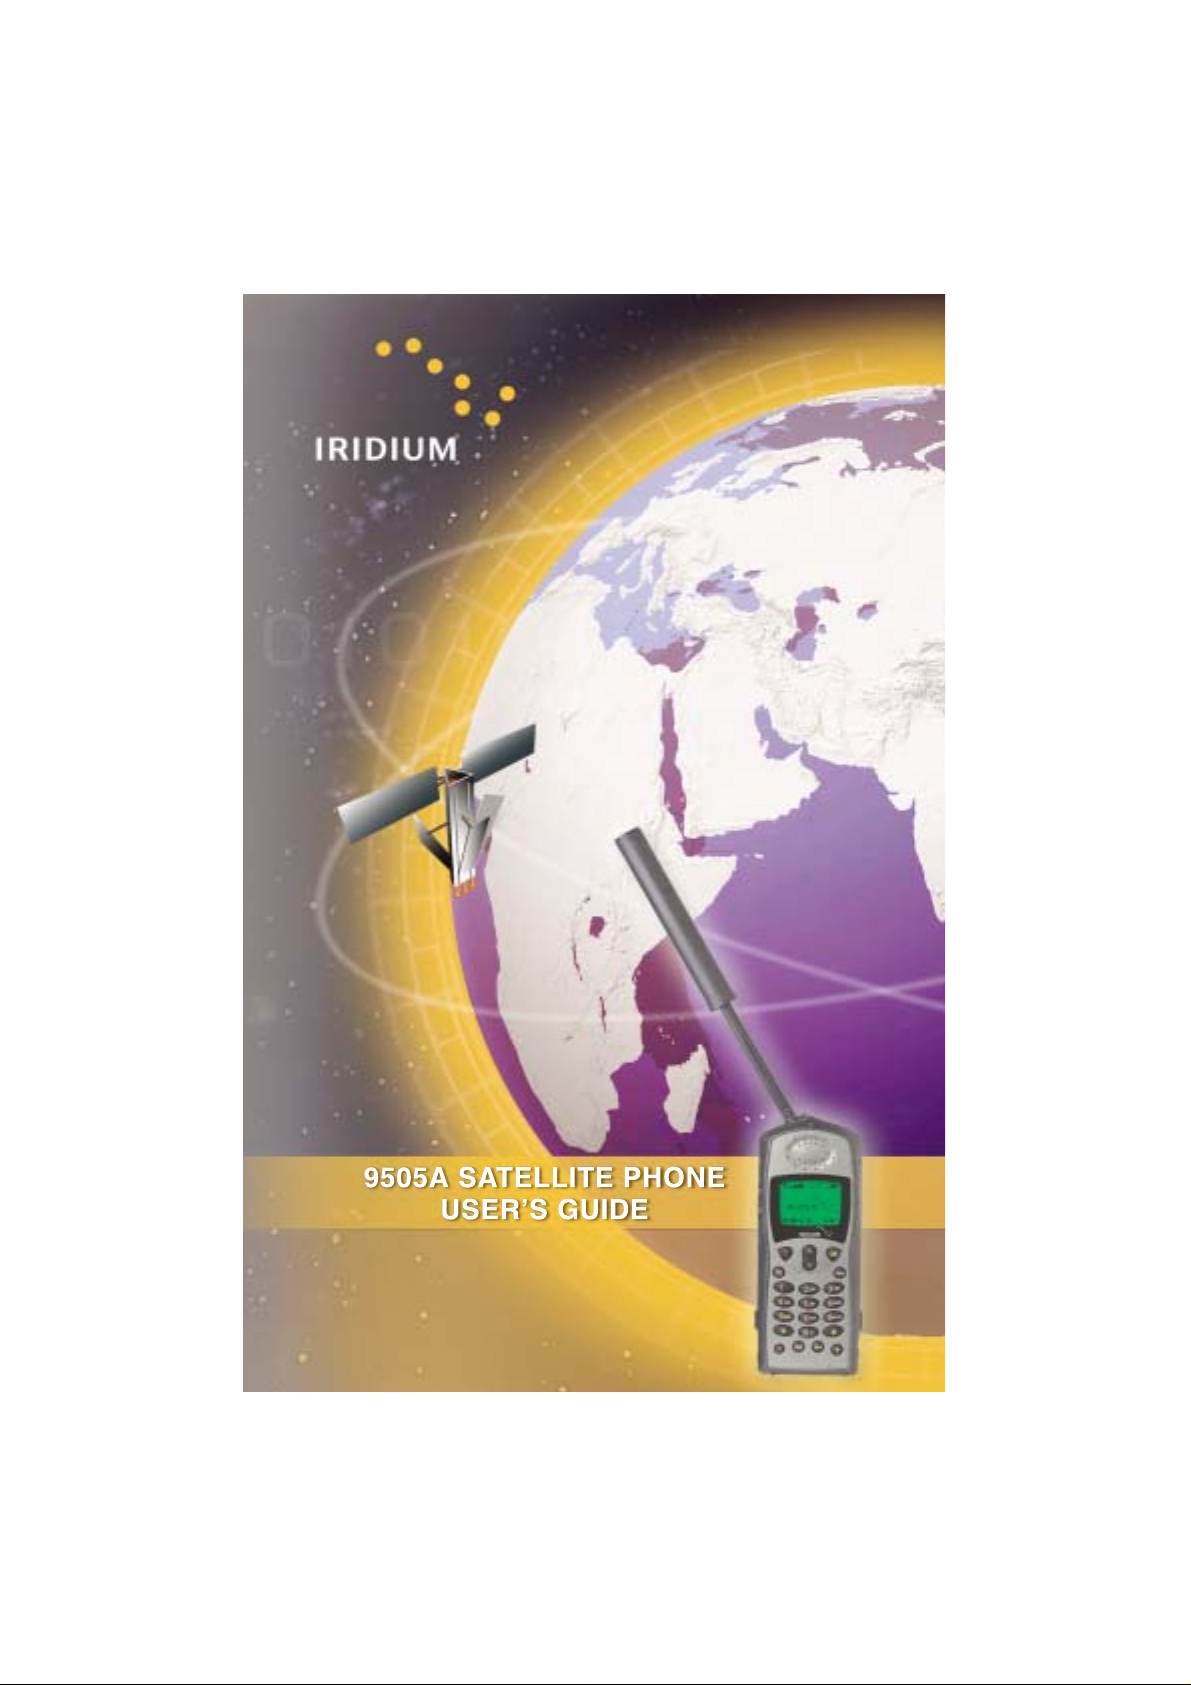
The 9505A Satellite Telephone, working
exclusively within the Iridium Satellite
Communications System, outperforms other
current communications equipment. Designed and
manufactured to exacting standards, it is small,
light and resistant to water, dust, shock and
environmental variables and is ideal for
remote areas and rugged conditions.
Only Iridium offers complete coverage of the most
remote points on earth—oceans, land masses, airways,
and even polar regions—and a comprehensive range of
mobile and fixed wireless products. No matter where on
the globe, your telephone remains in contact at all times
and provides a clear signal.
Combined with World Satellite Service and World Data
Service, the Iridium 9505A Satellite Telephone provides the
ultimate solution to your communications needs.
Customize your own package of satellite
services, designed for flexible, global coverage,
and enjoy your state-of-the-art
9505A Satellite Telephone!
Anytime.
Anywhere.
You have Iridium.

ii

Contents
Safety Information. . . . . . . . . . . . . . . . . . . . . . . . .7
Overview . . . . . . . . . . . . . . . . . . . . . . . . . . . . . . .11
Guide Overview. . . . . . . . . . . . . . . . . . . . . . . . .12
Phone Overview . . . . . . . . . . . . . . . . . . . . . . . .13
Indicators. . . . . . . . . . . . . . . . . . . . . . . . . . . . . .16
Accessories . . . . . . . . . . . . . . . . . . . . . . . . . . . .19
Getting Started . . . . . . . . . . . . . . . . . . . . . . . . . .23
Attaching the Satellite Antenna . . . . . . . . . . . . .24
What Is a SIM Card? . . . . . . . . . . . . . . . . . . . . .25
Installing/Removing the SIM Card . . . . . . . . . .26
Removing the Battery Cover . . . . . . . . . . . . . . .28
Installing the Battery . . . . . . . . . . . . . . . . . . . . .29
Removing the Battery . . . . . . . . . . . . . . . . . . . .31
Charging the Battery . . . . . . . . . . . . . . . . . . . . .33
Checking Battery Charge Level. . . . . . . . . . . . . 35
Battery Information . . . . . . . . . . . . . . . . . . . . . .36
Using Your Phone . . . . . . . . . . . . . . . . . . . . . . . .37
Startup Procedures . . . . . . . . . . . . . . . . . . . . . .38
Placing a Call. . . . . . . . . . . . . . . . . . . . . . . . . . .42
Receiving a Call. . . . . . . . . . . . . . . . . . . . . . . . .46
Additional Phone Features . . . . . . . . . . . . . . . .49
Using In-Call Features . . . . . . . . . . . . . . . . . . . .51
Muting a Call . . . . . . . . . . . . . . . . . . . . . . . . . . .52
Using the Menus . . . . . . . . . . . . . . . . . . . . . . . . .53
Using the Options Menu . . . . . . . . . . . . . . . . . .54
Using the Quick Access Menu. . . . . . . . . . . . . .56
Managing the Phone Book. . . . . . . . . . . . . . . . .59
Phone Book Menu. . . . . . . . . . . . . . . . . . . . . . .60
Organizing Your Phone Book . . . . . . . . . . . . . .61
Storing Names and Numbers . . . . . . . . . . . . . .63
Entering Names. . . . . . . . . . . . . . . . . . . . . . . . . 65
Using Pauses in Numbers. . . . . . . . . . . . . . . . .67
Using Phone Number Prefixes . . . . . . . . . . . . .69
Locating Entries. . . . . . . . . . . . . . . . . . . . . . . . . 70
Calling, Modifying, or Erasing an Entry . . . . . . .72
iii

Checking Phone Book Capacity . . . . . . . . . . . . 73
Preventing Access to the Phone Book . . . . . . . 74
Restricting Phone Use . . . . . . . . . . . . . . . . . . . 75
Viewing the Last Ten Calls Made or Received . 80
Viewing and Modifying Your Phone Numbers. . 81
Using One-Touch Dialing . . . . . . . . . . . . . . . . . 83
Viewing Service Phone Numbers . . . . . . . . . . . 85
Using Calling Features . . . . . . . . . . . . . . . . . . . 87
Call Related Features Menu. . . . . . . . . . . . . . . 88
Forwarding Calls When Unavailable. . . . . . . . . 89
Forwarding All Your Calls . . . . . . . . . . . . . . . . . 90
Using Detailed Call Forwarding . . . . . . . . . . . . 92
Canceling All Forwarding . . . . . . . . . . . . . . . . . 94
Restricting Calls with Call Barring . . . . . . . . . . 96
Viewing the Battery Meter . . . . . . . . . . . . . . . 101
Viewing Signal Strength . . . . . . . . . . . . . . . . . 102
Deactivating Pending Call Drop Signal . . . . . . 103
Using Message Services . . . . . . . . . . . . . . . . . 105
Messages Menu . . . . . . . . . . . . . . . . . . . . . . . 106
Checking Your Voicemail . . . . . . . . . . . . . . . . 107
Managing Your Received Messages . . . . . . . 108
Accessing Received Messages . . . . . . . . . . . 110
Managing Outgoing Messages. . . . . . . . . . . . 115
Managing Other Message Settings . . . . . . . . 124
Customizing Phone Features . . . . . . . . . . . . . 129
Phone Setup Menu. . . . . . . . . . . . . . . . . . . . . 130
Managing Phone Ringer Settings. . . . . . . . . . 131
Locking and Unlocking Your Phone . . . . . . . . 133
Protecting the SIM Card . . . . . . . . . . . . . . . . . 135
Managing Other Security Settings . . . . . . . . . 137
Activating Extended Menus . . . . . . . . . . . . . . 139
Managing Time and Date Settings . . . . . . . . . 140
Selecting the Display Language . . . . . . . . . . . 143
Turning Lights On and Off. . . . . . . . . . . . . . . . 144
Setting Keypad Tones . . . . . . . . . . . . . . . . . . . 144
Managing Phone Settings . . . . . . . . . . . . . . . 145
Accessing the Network . . . . . . . . . . . . . . . . . . 149
iv

Network Selection Menu . . . . . . . . . . . . . . . . .150
Registering With the Satellite Network . . . . . .151
Timing Your Calls . . . . . . . . . . . . . . . . . . . . . . .153
Call Meters Menu . . . . . . . . . . . . . . . . . . . . . .154
Showing Call Timers . . . . . . . . . . . . . . . . . . . .155
Setting Audible Call Timers . . . . . . . . . . . . . . .157
Showing the In-Call Timer . . . . . . . . . . . . . . . .159
Showing the Lifetime Timer. . . . . . . . . . . . . . .160
Customizing the Menu System . . . . . . . . . . . .161
Personalizing the Options Menu . . . . . . . . . . .162
Personalizing the Quick Access Menu . . . . . .164
Troubleshooting . . . . . . . . . . . . . . . . . . . . . . . .165
Index. . . . . . . . . . . . . . . . . . . . . . . . . . . . . . . . . 169
Patent Information . . . . . . . . . . . . . . . . . . . . . .181
Warranty Information . . . . . . . . . . . . . . . . . . . . 183
v

vi

Safety Information
Important: Read this information before using your wireless mobile
phone.
Exposure to Radio Frequency Signals
Your wireless mobile telephone is a low power radio transmitter and
receiver. When it is ON, it receives and also sends out radio frequency
(RF) signals.
International agencies have set standards and recommendations for the
protection of public exposure to RF electromagnetic energy.
• International Commission on Non-Ionizing Radiation Protection
(ICNIRP)1996
• Verband Deutscher Elektrotechniker (VDE) DIN-0848
• United States Federal Commission, Radio Frequency Exposure
Guidelines (1996)
• National Radiological Protection Board of the United Kingdom, GS
11,1988
• American National Standards Institute (ANSI) IEEE. C95. 1-1992
• National Council on Radiation Protection and Measurements
(NCRP). Report 86
• Department of Health and Welfare Canada. Safety Code 6
These standards are based on extensive scientific review. For example,
over 120 scientists, engineers, and physicians from universities,
government health agencies, and industry reviewed the available body of
research to develop the updated ANSI standard.
The design of your phone complies with these standards when used as
described under “Phone Operation” on page 8.
Antenna Care
Use only the supplied or an approved replacement antenna.
Unauthorized antennas, modifications, or attachments could damage the
phone and may violate local agency regulations.
7

Phone Operation
Normal Operation: Hold the phone as you would any other telephone.
Rotate the antenna to either the left or right detent, and make sure the
antenna is fully extended. The antenna should be vertical to the ground
and have a clear unobstructed view of the sky.
Tips on Efficient Operation: For your phone to operate most efficiently:
• Rotate and extend your antenna fully.
• Make sure the antenna has a clear unobstructed view of the sky.
• Do not touch the antenna unnecessarily when the phone is in use.
Contact with the antenna affects call quality and may cause the
phone to operate at a higher power level than otherwise needed.
• Do not wear the phone on your body while making calls with the
headset accessory. Wearing the phone on the body can interfere
with proper phone operation, since the antenna requires a clear
unobstructed view of the sky to access the Iridium
network.
®
satellite
Batteries
Caution: All batteries can cause property damage, injury or burns if a
conductive material, such as jewelry, keys or beaded chains, touches
exposed terminals. The material may complete an electrical circuit and
become quite hot. To protect against such unwanted current drain,
exercise care in handling any charged battery, particularly when placing
it inside your pocket, purse or other container with metal objects. When
the battery is detached from the phone, your batteries are packed with a
protective battery cover; please use this cover for storing your batteries
when not in use.
Driving
Check the laws and regulations on the use of wireless telephones in the
areas where you drive. Always obey them. Observe the following
guidelines when using your phone while driving.
• Give full attention to driving—driving safely is your first
responsibility.
• Use hands-free phone operation, if available.
• Pull off the road and park before making or answering a call if
driving conditions so require.
8 Safety Information

Electronic Devices
Most modern electronic equipment is shielded from RF signals.
However, certain equipment may not be shielded against the RF signals
from your wireless phone.
Pacemakers
The Health Industry Manufacturers Association recommends that a
minimum separation of six inches (6") be maintained between a
handheld wireless phone and a pacemaker to avoid potential
interference with the pacemaker. These recommendations are consistent
with the independent research by and recommendations of Wireless
Technology Research.
Persons with pacemakers:
• should ALWAYS keep the phone more than six inches from their
pacemaker when the phone is turned ON
• should not carry the phone in a breast pocket
• should use the ear opposite the pacemaker to minimize the
potential for interference
• should turn the phone OFF immediately if you have any reason to
suspect that interference is taking place
Hearing Aids
Some digital wireless phones may interfere with some hearing aids. In
the event of such interference, you may want to consult your hearing aid
manufacturer to discuss alternatives.
Other Medical Devices
If you use any other personal medical device, consult the manufacturer
of your device to determine if it is adequately shielded from external RF
energy. Your physician may be able to assist you in obtaining this
information.
Turn your phone OFF in health care facilities when any regulations
posted in these areas instruct you to do so. Hospitals or health care
facilities may be using equipment that could be sensitive to external RF
energy.
Vehicles
RF signals may affect improperly installed or inadequately shielded
electronic systems in motor vehicles. Check with the manufacturer or its
representative regarding your vehicle. You should also consult the
manufacturer of any equipment that has been added to your vehicle.
Safety Information 9

Posted Facilities
Turn your phone OFF in any facility where posted notices so require.
Aircraft
Airline regulations prohibit using your phone while in the air. Check and
comply with the policy of your airline regarding the use of your phone
while the aircraft is on the ground.
Switch OFF your phone before boarding an aircraft.
Blasting Areas
To avoid interfering with blasting operations, turn your phone OFF when
in a “blasting area” or in areas posted: “Turn off two-way radio.” Obey all
signs and instructions.
Potentially Explosive Atmospheres
Turn your phone OFF and do not remove your battery when you are in
any area with a potentially explosive atmosphere. Obey all signs and
instructions. Sparks from your battery in such areas could cause an
explosion or fire resulting in bodily injury or even death.
Areas with a potentially explosive atmosphere are often but not always
clearly marked. They include, but are not limited to: fueling areas such as
gasoline stations; below deck on boats; fuel or chemical transfer or
storage facilities; areas where fuel odors are present (for example, if a
gas/propane leak occurs in a car or home); areas where the air contains
chemicals or particles, such as grain, dust, or metal powders; and any
other area where you normally would be advised to turn off your vehicle
engine.
For Vehicles Equipped with an Air Bag
An air bag inflates with great force. Do NOT place objects, including both
installed or portable wireless equipment, in the area over the air bag or in
the air bag deployment area. If in-vehicle wireless equipment is
improperly installed and the air bag inflates, serious injury could result.
AC Travel Charger with International Plug Kit
TUV Product Services Approval only applies when the Europlug
adapters are used with this product.
10 Safety Information

Overview
This chapter provides an overview of this user’s guide, your new satellite
phone, and available Satellite Series™ accessories.
11

Guide Overview
Key Presses
Key presses are represented in this guide using
symbols. A sequence of key presses may be shown
as follows:
This means you should press M followed by O
and then C, in sequence, not simultaneously.
Prompts and Messages
Your phone responds to key presses by displaying
either a prompt that guides you to the next action or
a message confirming that your action is complete.
Prompts and messages are represented in this
guide in LCD style, for example:
Completed.
Tips
In the margins of this guide are useful hints and
ways to improve your phone’s performance.
MOC
Enter PIN or
12 Overview

Phone Overview
Antenna
Lock Release
Button
Signal
Strength
Indicator
Volume
Control
Keys
Display Status
Indicators
Message
Key
Alphanumeric
Keypad
Status
Indicator
Satellite
Antenna
Earpiece
Real-Time
Clock
Battery
Charge
Indicator
Display
Battery
Compartment
Power
Connector
Accessory
Connector
Note: Phone shown with antenna in stowed position.
Headset Jack
Quick Access
Key
Microphone
Overview 13

Special Keys
Key Function
Turns the phone’s power on and off
S
Selects menu settings or options, or initiates
O
and answers calls
Takes you directly to the Messages menu,
where you can call your voicemail number or
?
read messages you have received
Stores numbers in the phone book
I
Recalls numbers from the phone book
Q
Enters the Quick Access menu
E
Enters the Options menu and scrolls forward
M
through menu features
Clears characters from the screen or exits the
C
Options menu
Scrolls backward or forward through menu
<
features
Volume Control Keys
The volume control keys are located on the left side
of the phone. They adjust earpiece and ringer
volume. See “Adjust Earpiece Volume” on page 49
and “Adjust Ringer Volume” on page 50 for more
information.
14 Overview
Satellite Antenna
You must rotate and fully extend the satellite
antenna to answer calls, make calls, and access
satellite services.* See “Holding the Phone” on
page 40 for more information.
* Satellite products require a clear line of sight to satellite.

Satellite Antenna
Lock
Release
Button
This button releases the satellite antenna so you
can attach the auxiliary antenna.
Display
Your phone’s Liquid Crystal Display (LCD) displays
as many as four rows of 16 characters.
The LCD on your phone may respond slowly to key
presses in extremely cold temperatures. This is
normal and does not affect the phone operation in
any way.
Headset Jack
The headset jack located on the right side of the
phone provides a connection for an optional
headset.
Power Connector
This connector, located at the bottom left of the
phone, provides the connection for an external
power supply.
Accessory Connector
This connector, located on the bottom of the phone,
provides the connection for a data cable.
Overview 15

Indicators
Status Indicator
The status indicator is located at the top of your
phone. This LED indicator provides information on
your phone’s current state of service.
If the LED is... Then...
Alternating
red and green
Flashing green
Flashing yellow
Flashing yellow
and red
Flashing red Service is not available.
A call is incoming.
You are receiving a signal from the
Iridium satellite network. You can
make and receive calls.
You are temporarily unable to make
or receive calls. Try again in a few
minutes.
Your SIM card may be inserted
incorrectly, may not be inserted, or
you may be in a restricted area. You
can make emergency calls only.
16 Overview

Display Status Indicators and Icons
Indicator Description
Signal Strength Indicator
indicates the strength of the signal
from the network. The signal
strength indicator appears
rx
q
12:00
o
+
continuously in the top left hand
corner of the display. The more
segments displayed in the bar
graph, the stronger the signal. Five
bars indicate full signal strength.
No bars indicate a weak signal.
Battery Charge Indicator
indicates the strength of the battery
charge. The more segments
displayed, the greater the battery
charge.
You can also check the strength of
the charge at any time through the
menu. See “Viewing the Battery
Meter” on page 101 for more
information.
Real Time Clock Indicator
displays the time in either 12-hour
or 24-hour format. See “Change
the Time Displayed” on page 141
for more information.
Message Indicator appears when
you receive a new message. It
flashes when the SIM card is full.
See “Getting to Received
Messages...” on page 111 for
additional information.
Satellite Mode Indicator appears
when your phone is in satellite
mode.
Overview 17

Indicator Description
Home System Indicator appears
when the phone has successfully
registered with the Iridium satellite
system.
No Service Indicator appears
when your phone is not capable of
placing or receiving calls.
In Use Indicator appears when a
call is in progress.
Scroll Bar appears on the right of
the display when you are in a
menu. The button on the scroll bar
indicates where you are in the list.
Check Mark indicates a menu item
is currently selected.
Hourglass Icon appears in the
display when your phone has to
request settings from the network.
Quick Access Menu Icons allow
you to easily identify Quick Access
features as you scroll through the
Quick Access menu.
w
B
n
m
k
s
z
...
P
18 Overview

Accessories
Product appearance and specifications are subject
to change without notice.
Batteries
Lithium Ion Battery
• Provides up to 2.6 hours of
talk time or 24** hours of
standby time*
• Weighs 2.2 ounces/62 grams
*
All talk and standby times are approximate and
depend on network configuration, signal strength,
and the features selected.
**
These numbers are provisional, they need to
remeasured when the power saving software is
available.
If replacing the battery, the phone should be
switched off before removing the battery.
If you want to store the battery for a long period
store it in the fully charged state. Batteries that
have been stored in a discharged state for longer
than 6 months may not be rechargable.
Overview 19

AC Travel Charger with International
Plug Kit
The AC travel
charger with
international plug kit
provides rapid
charge for optimal
performance and
can be used to
power the phone
when the battery is
depleted.
• Includes three international plug adapters for
use in Europe, United States of America and
Canada and the United Kingdom
• Allows you to use the 9505A portable phone
while recharging the battery *
* The battery should not be allowed to discharge
fully.
20 Overview

Auto Accessory Adapter
Restores full battery power
for portable phone
operation from any
operating vehicle (using
standard 12-volt accessory
connector port).
• Make and receive
phone calls using the
auto accessory adapter for direct power when
batteries are depleted
• Recharge battery while attached to portable
phone
Headset
The convenient headset
provides both an earphone and
microphone in one small piece
for simple hands-free and private
telephone conversations. The
headset plugs directly into the
jack on the right side of your
phone.
Lanyard Wrist Strap
The lanyard wrist strap is
made of nylon. It provides a
convenient way to carry your
phone.
Overview 21

Portable Auxiliary Antenna
From one car to
another, this compact
pocket-sized antenna
with convenient
magnetic mount goes
in every vehicle you do,
to provide improved
reception.
• For use with the portable phone
• Reliable magnetic mount, ceramic patch
antenna
• Attached 1.5-meter cable
Note: The use of wireless devices and their
accessories may be prohibited or restricted in
certain areas. Always obey the laws and regulations
on the use of these devices.
Antenna Adapter
This adapter provides the required
external antenna connection to use
your 9505A portable phone with the
portable auxiliary antenna.
22 Overview
Carry Case
This high-quality leather case helps
protect your phone. It includes a
belt clip and a lanyard wrist strap.

Getting Started
Getting started with your new satellite phone is easy. Just insert your
phone’s SIM (Subscriber Identity Module) card and charge the battery.
This chapter shows you how.
23

Attaching the Satellite Antenna
Attach the Antenna
1. Attach the antenna in the down position.
2. Press and hold the
lock release button at
the top of the phone.
3. Push the antenna
until it clicks into place
and release the lock
release button.
Remove the Antenna
You may want to remove the satellite antenna to
attach an auxiliary antenna.
1. Place the antenna in the down position.
3
2
24 Getting Started
2. Press and hold the
lock release button at
the top of the phone.
3. Remove the antenna
by pulling straight out.
3
2

What Is a SIM Card?
Your SIM (Subscriber Identity Module) card is a
small smart card that contains your phone number,
service details, and memory for storing Phone Book
entries and messages.
Note: Your phone has limited functionality without
the SIM card.
SIM Card Protection
You may want to keep your SIM card in your wallet
or purse when you are not using your satellite
phone. This helps keep your personal information
secure and gives you access to your service even if
your phone is not available. If you forget your phone,
insert your SIM card into a friend’s phone to access
your personal service.
Caution: Do not bend or scratch your SIM card, and
avoid exposing your card to static electricity, water,
or dirt.
Getting Started 25

Installing/Removing the SIM Card
The SIM card is stored in a recess in the battery
compartment. It is normally covered by the battery
when you use your phone.
Caution: Make sure your phone is powered off
before inserting or removing the SIM card. If you
don’t, you may damage the memory on your SIM
card.
1. Turn your phone off by pressing and holding
S
key.
the
2. Remove the battery cover and battery.
(See “Removing the Battery” on page 31.)
3. Slide the SIM card tray to the left and lift up
the right side of the tray.
3
26 Getting Started

4. Insert the SIM card into the tray with the
notch up and the gold plate facing out.
or
Remove the SIM card from the tray.
4
5. Push down the SIM card tray and slide the
tray to the right to lock it in place.
5
6. Replace the battery and battery cover.
(See “Insert the Battery” on page 29.)
Getting Started 27

Removing the Battery Cover
Your new batteries are shipped uncharged and fitted
with protective covers.
Save the covers for storing and carrying unused
batteries. The covers prevent metal objects from
contacting both battery terminals, which can reduce
the risk of injury, or damage from a battery short
circuit.
Remove the Battery Safety Cover
1. Press in the release latch.
2. Continue pushing in and upwards until the
battery slips free from its cover.
28 Getting Started
Attach the Battery Safety Cover
1. Lower the side opposite the latch into the
cover.
2. Slip the side with the release latch down until
it clicks.

Organizing Your Phone Book
Each name and phone number in your Phone Book
is stored in a numbered memory location. The
satellite phone has two types of memory—phone
memory and SIM card memory.
Phone Memory SIM Card Memory
Personal
Numbers
Fixed Dial
Numbers
Phone
Number Digits
Name
Characters
Location
Numbers
1 SIM card capacity varies depending upon the card issued by
your service provider.
100 entries 155 entries
No entries 40 entries
32 20
16 16
1-100 101-255
1
Your phone’s memory can seem overwhelming if
you do not have a strategy for organizing your
Phone Book. Begin setting up your Phone Book by
asking yourself three questions:
Which numbers do I call most?
Make a list of the numbers you call most frequently.
You will probably want to store these numbers in the
first nine memory locations of your Phone Book. You
can then dial them with a single keystroke by using
one-touch dialing.
Managing the Phone Book 61

Tip:
If you have
many entries,
group them in
blocks of ten to
make them
easier to find.
When do I use these numbers?
Group the numbers on the list according to when
you use them. Most people call a different set of
numbers during the day than they do in the evening
and on weekends. You can switch one-touch dialing
to your phone’s memory (locations 1–9), your SIM
card’s memory (locations 101–109), or to your fixed
dial list (locations 1–9). Store your evening and
weekend numbers on one type of memory and your
daytime numbers on another.
Which numbers do I need to keep
secure?
Use your SIM card to store the numbers you need to
keep secure, like the numbers of friends and family
members. You can remove your SIM card and keep
it securely in your wallet or purse when you are not
using your phone. If you wish, you can even require
a PIN code every time your SIM card is inserted into
any
phone. (To deactivate your PIN code, see
“Activate and Deactivate the SIM Card PIN Code”
on page 135.) Store more public numbers, like
business associates and travel agents in your
phone’s memory.
62 Managing the Phone Book

Getting to Personal Numbers...
1. Press M until you see Phone Book, and then press O.
2. Press M
to scroll to Personal Numbers, and then pressO.
3. Press M to scroll to one of the features described below.
Storing Names and Numbers
Add an Entry
Use the Options Menu
1. Follow the steps in “Getting to Personal
Numbers...” to get to
press
O.
Add Entry, and then
2. Press
3. Press
4. Enter a number, and then press
5. Enter a name (as described in “Entering
6. Enter a one-, two-, or three-digit location
7. Press and hold
* SIM memory is dependent on your SIM card.
M to scroll to Add To Phone Memory or Add
To SIM Card Memory
O
see
Enter Name.
Names” on page 65), and then press
You will see
number (1-100 for phone memory or 101-255
for SIM memory*), and then press
will see
or
Press
location. You will see
Stored XXX.
O
.
to select. You will see Enter Number.
O
. You will
Enter Location.
O. You
to select the next available
Stored XXX.
C
to exit the menu.
Managing the Phone Book 63
O
Numbers
Tip:
.
should be
entered in
international
format.

Tip:
If you have
more than one
number for the
same person,
try attaching a
descriptive tag
to the name,
Home
like
Office
Mobile
,
, or
.
Use the Dedicated Keys
1. Enter the phone number you want to store.
2. Press
3. Press
4. Press
I
to begin storing.
M to scroll to Add To Phone Memory or Add
To SIM Card Memory
will see
you entered.
Enter Number, followed by the number
O
, and then press O. You
to accept the number. You will see
Enter Name.
5. Enter a name (as described in “Entering
O
Names” on page 65), and then press
You will see
6. Enter a one-, two-, or three-digit location
number, and then press
Enter Location.
O. You will see
.
Stored XXX.
or
O
Press
memory location. You will see
to store the entry in the next empty
Stored XXX.
Adding Entry Messages
When you enter the location number for your entry,
you may see one of these messages:
Message Description
Stored XXX You have stored the entry.
Range XXX-XX
Overwrite?
64 Managing the Phone Book
You have chosen a memory location
outside the appropriate range. Enter
a new number within the range
listed on the display.
You have chosen an occupied
O
location. Press
location or press any other key to try
another location.
to overwrite the

Entering Names
You can use the keypad to produce any letter in the
alphabet. For example, press
letters A, B, or C, as shown:
Enter Characters
2
to enter the
press 1 time to insert an A
press 2 times to insert a B
press 3 times to insert a C
press 4 times to insert a 2
1. Enter a letter by pressing a key as many
times as necessary.
2. Press
3. Repeat steps 1 and 2 as many times as
M
to advance the cursor.
necessary, and then press
O
.
Correct an Entry
To delete a character:
1. Press
2. Press
To add a character:
1. Press
2. Enter a letter by pressing a key as many
M
to scroll the cursor to the right of
the character you want to delete.
C
to delete one character at a time.
or
Press and hold
C
to clear the display.
M to scroll the cursor to the location
where you want to add a character.
times as necessary.
Tip:
Press and
hold any
numeric key to
toggle between
uppercase and
lowercase
characters.
Managing the Phone Book 65

Available Characters
Use this chart as a guide for producing characters:
1
2
3
4
5
6
7
8
9
0
Space . 1 ? ! , @ _ & : “ ( ) ‘ ¿ ¡ % £ $
Space . 1 ? ! , @ _ & : “ ( ) ‘ ¿ ¡ % £ $
A B C 2 Ä Å à Æ β Ç
a b c 2 ä å à æ
D E F 3 ∆ É è Φ
d e f 3 ∆ é è
G H I 4 Γ ì
g h i 4
J K L 5 Λ
j k l 5 Λ
M N O 6 Ñ Ö Ø Ò Ω
m n o 6 ñ ö ø ò
P Q R S 7 Π ß Σ
p q r s 7 Π ß Σ
T U V 8 Θ Ü ù
t u v 8
W X Y Z 9 Ξ Ψ
w x y z 9 Ξ Ψ
+ - 0 x * / = > < #
+ - 0 x * / = > < #
Γ ì
Θ ü ù
β Ç
Φ
Ω
The upper line for each key shows the uppercase
characters. The lower line for each key shows the
lowercase characters.
66 Managing the Phone Book

Using Pauses in Numbers
When you call automated systems, a recorded
message prompts you for numbers such as PIN
numbers and account numbers. You can store these
numbers in the same memory location as the
automated system’s access number. Separate the
numbers with “pauses”—special characters that tell
your phone to wait a few seconds before sending
additional numbers—and store the string in the
same way you would other numbers.
Enter Pauses in Numbers
1. Enter the phone number you use to access
the automated system.
2. Press and hold
character inserted into the number entry.
3. Enter the next group of numbers. For
example, enter your PIN number. If the
automated system requires a * or #, enter
those symbols, too.
4. Repeat steps 2 to 3 as many times as
necessary.
5. To store the entry follow the procedures in
“Add an Entry” on page 63.
*. You will see a ® (pause)
You can
Tip:
store 32
characters in a
phone memory
location, or 20
characters in a
SIM card
memory
location. A
pause is equal
to one
character.
Managing the Phone Book 67

Dial Numbers With Pauses
To dial a number with pauses:
1. Recall the entry. (See “Locating Entries” on
page 70.)
Tip:
Yo u r
phone displays
up to 32 digits
(two rows of 16
digits) when
you enter a
number with
pauses.
2. Press O
The first pause in the number waits until the
call is answered. When the automated
system answers, your phone waits a few
seconds and then automatically sends the
next set of numbers, then the next, until all
numbers are sent.
to place the call.
68 Managing the Phone Book

Using Phone Number Prefixes
You can save time when you dial by storing the
prefixes that you often use. This is sometimes called
“postscripting.” Your satellite phone allows you to
change or add to Phone Book entries without
overwriting them.
Store a prefix in your Phone Book just as you would
any other number. See “Storing Names and
Numbers” on page 63.
Use a Stored Prefix
To use a stored prefix:
1. Recall the prefix from your Phone Book.
(See “Locating Entries” on page 70.)
2. Add the remaining numbers.
3. Press
Change Entry to a Similar Number
To change an entry to a similar number:
1. Recall the number from your Phone Book.
O
to place the call.
(See “Locating Entries” on page 70.)
Tip:
Try naming
the prefix by
area, like
Downtown
Suburbs
Germany
,
, or
.
2. Press
3. Enter the replacement digits.
4. Press
C to delete the unwanted digits.
O
to place the call.
Managing the Phone Book 69

Getting to Personal Numbers...
1. Press M until you see Phone Book, and then press O.
2. Press M
to scroll to Personal Numbers, and then pressO.
3. Press M to scroll to one of the features described below.
Locating Entries
Find an Entry by Name
Search your Phone Book by the first few letters of
the entry.
Tip:
Yo u r
phone sorts
SIM card
memory and
phone memory
together
alphabetically.
Tip:
Use the
M
,<, or
volume control
keys on the
side of the
phone to scroll
through Phone
Book entries.
Note: If you have restricted access to either SIM
card or phone memory, those entries will not be
available. For more information, see “Preventing
Access to the Phone Book” on page 74.
1. Follow the steps in “Getting to Personal
Numbers...” to get to
then press
.
Name
2. Enter one or more characters of the entry,
and then press
entry you are looking for.
3. Press
and then proceed to “Calling, Modifying, or
Erasing an Entry” on page 72.
O
O to access options for that entry,
Find Entry By Name, and
to select. You will see Enter
O
. If necessary, scroll to the
70 Managing the Phone Book

Getting to Personal Numbers...
1. Press M until you see Phone Book, and then press O.
2. Press M
3. Press M to scroll to one of the features described below.
Find an Entry by Location
Find an entry by its location number.
Use the Options Menu
1. Follow the steps in “Getting to Personal
Numbers...” to get to
and then press
Enter Location.
2. Enter the one-, two-, or three-digit location
number, and then press
entry displayed.
If you enter an empty location number, you
will see
then selects the next available location. If no
numbers are stored, you will see
Stored
to scroll to Personal Numbers, and then pressO.
Find Entry By Location,
O to select. You will see
O
. You will see the
Location XXX is Empty. Your phone
No Numbers
.
3. Press
O to access options for that entry,
and then proceed to “Calling, Modifying, or
Erasing an Entry” on page 72.
Use the Dedicated Keys
1. Press Q. You will see Enter Location.
2. Enter the one-, two-, or three-digit location
number of the entry, and then press
will see the entry displayed.
If you enter an empty location number, you
will see
then selects the next available location.
3. Press
see the number followed by
Location XXX is Empty. Your phone
O to call the displayed entry. You will
Calling.
O. You
Managing the Phone Book 71

Calling, Modifying, or Erasing an Entry
Once you have selected a Phone Book entry, you
can call, change, or erase that entry.
Call a Selected Entry
1. Find an entry, and then press O. (See
“Locating Entries” on page 70.)
Tip:
For help
entering letters
or changing
entries, see
“Entering
Names” on
page 65.
2. Press
M until you see Call Number, and then
press
O
. You will see Calling followed by
the number you dialed.
Modify a Name or Number
1. Find an entry, and then press O. (See
“Locating Entries” on page 70.)
2. Press
3. Enter changes to the number, and then
4. Enter changes to the name, and then press
M until you see Modify Name Or Number,
O
and then press
followed by the phone number stored in that
entry.
press
O. You will see the name stored in
that entry.
. You will see
Edit Number
O. You will see Modified XXX.
Erase a Name and Number
1. Find an entry, and then press O
“Locating Entries” on page 70.)
2. Press
M
until you see Erase Name And Number,
and then press
O
. You will see Erased xxx.
. (See
,
72 Managing the Phone Book

Getting to Personal Numbers...
1. Press M until you see Phone Book, and then press O.
2. Press M
to scroll to Personal Numbers, and then pressO.
3. Press M to scroll to one of the features described below.
Checking Phone Book Capacity
Use this feature to see how many available memory
locations you have in either SIM card memory or
phone memory.
1. Follow the steps in “Getting to Personal
Numbers...” to get to
O to select.
press
Check Capacity, and then
2. Press
3. Press and hold
M until you see Check Phone Capacity or
Check SIM Capacity, and then press O. You
will see
XXX Unused Locations.
C to exit the menu.
Managing the Phone Book 73

Preventing Access to the Phone Book
You may want to restrict memory access when
loaning your phone to others. You can choose to
prevent access to the phone memory, SIM memory,
or both.
1. Follow the steps in “Getting to Personal
Numbers...” to get to
O
press
to select.
Prevent Access, and then
Tip:
The
factory default
security code
is: 000000.
2. Press
3. Press
4. Enter security code. Enter your six-digit
5. Press and hold
Note: If you restrict access to either phone memory
or SIM memory and try to access an entry stored in
that type of memory, you will see a list of the entries
that are not restricted. If you prevent access to both
your phone memory and SIM memory and then try
to access an entry, you will see
M until you see the restriction type
you desire:
Memory
Memory
will see
security code. You will see
No Memory Restrictions, To Phone
, To SIM Card Memory, or To Phone & SIM
.
O
to select the displayed option. You
Enter Security Code.
Completed.
C to exit the menu.
Restricted.
74 Managing the Phone Book

Getting to Fixed Dialing...
1. Press M until you see Phone Book, and then press O.
2. Press M
to scroll to Fixed Dialing, and then pressO.
3. Press M to scroll to one of the features described below.
Restricting Phone Use
You can restrict calling on your phone to a list of
numbers that you create. When the fixed dialing
feature is active, you can only call numbers or use
prefixes (for example, country codes or area codes)
that exactly match those stored in your fixed dial list.
You can store up to 40 entries on your list. These
entries are stored on your SIM card.
Activate Fixed Dialing
Use this feature to activate fixed dialing. For
instructions on how to store entries in the fixed dial
list, see “Add an Entry” on page 76.
Note: The fixed dialing feature restricts access to
your SIM memory.
1. Follow the steps in “Getting to Fixed
Dialing...” to get to
then press
.
PIN2
2. Enter code. Enter your SIM card PIN2 code,
and then press
press
M
until you see On or Off, and then
O
. You will see Completed.
3. Press
4. Press and hold
Setup Fixed Dialing, and
O
to select. You will see Enter
O.
C
to exit the menu.
Managing the Phone Book 75
Tip:
You should
have received
your SIM card
PIN2 code from
your service
provider.

Add an Entry
To add an entry to the fixed dial list:
1. Follow the steps in “Getting to Fixed
Dialing...” to get to
then press
.
PIN2
Setup Fixed Dialing, and
O
to select. You will see Enter
Tip:
Phone
numbers must
be in
international
format.
See
Tip:
“Entering
Names” on
page 65 for
help entering
letters.
2. Enter code. Enter your SIM card PIN2 code,
O
and then press
3. Press
4. Enter the number, and then press
5. Enter the name, and then press O. You will
6. Enter a location number, and then press
7. Press and hold
M until you see Add Entry, and then
press
O
. You will see Enter Number.
will see
see
O
Enter Name.
Enter Location.
. You will see Stored.
.
O. You
C to exit the menu.
76 Managing the Phone Book

Getting to Fixed Dialing...
1. Press M until you see Phone Book, and then press O.
2. Press M
3. Press M to scroll to one of the features described below.
Erase an Entry
To erase an entry in the fixed dial list:
1. Follow the steps in “Getting to Fixed
Dialing...” to get to
then press
PIN2
to scroll to Fixed Dialing, and then pressO.
Setup Fixed Dialing, and
O to select. You will see Enter
.
2. Enter code. Enter your SIM card PIN2 code,
O
and then press
3. Press
4. Press
5. Press
6. Press and hold
M
until you see Erase Entry, and then
press
O
to select. You will see the first entry
in your fixed dial list.
M
to scroll to the number you wish to
erase. You will see
O to confirm. You will see Erased.
.
Erased?.
C
to exit the menu.
Tip:
You should
have received
your SIM card
PIN2 code from
your service
provider.
Managing the Phone Book 77

Edit an Entry
To edit an entry in the fixed dial list:
1. Follow the steps in “Getting to Fixed
Dialing...” to get to
then press
.
PIN2
2. Enter code. Enter your SIM card PIN2 code,
and then press
Setup Fixed Dialing, and
O
to select. You will see Enter
O
.
3. Press
4. Press
5. Enter changes to the number, and then
6. Enter changes to the name, and then press
7. Enter a new location, and then press
8. Press and hold
M until you see Edit Entry, and then
press
O
to select. You will see the first entry
in your fixed dial list.
M
to scroll to the entry you want to
change, and then press
current number for that location.
press
O. You will see the current name for
that location.
O
. You will see the current location.
You will see
Modified.
O
. You will see the
C to exit the menu.
O
.
78 Managing the Phone Book

Getting to Fixed Dialing...
1. Press M until you see Phone Book, and then press O.
2. Press M
3. Press M to scroll to one of the features described below.
View Your Fixed Dialing List
This feature enables you to review, but not change,
your fixed dial list.
1. Follow the steps in “Getting to Fixed
Dialing...” to get to
then press
number on your fixed dial list.
to scroll to Fixed Dialing, and then pressO.
View Fixed Dial List, and
O
to select. You will see the first
2. Press
3. Press and hold
M
to scroll through the numbers on
your fixed dial list.
C
to exit the menu.
Managing the Phone Book 79

Getting to Phone Book Features...
1. Press M until you see Phone Book, and then press O.
2. Press M
will see the feature name, followed by
to scroll to one of the features described below. You
Select?.
Viewing the Last Ten Calls Made or
Received
Your phone saves the last ten phone numbers you dialed.
To view the phone numbers of the last ten calls you
have made:
1. Follow the steps in “Getting to Phone Book
Features...” to get to
press
O to select.
Last Ten Calls, and then
Tip:
If you want
to add a
number from
Last Ten Calls
to your Phone
Book, press
when the
number is
displayed, then
follow the steps
in “Storing
Names and
Numbers” on
page 63.
80 Managing the Phone Book
I
2. Press M
All Numbers
3. If you select
scroll to the number you are looking for, and
then press
or
If you select
Completed.
4. Press and hold
to scroll to Last Calls Made or Erase
, and then press O to select.
Last Calls Made, press
O
to place a call to that number.
Erase All Numbers, you will see
C
to exit the menu.
M
to

Viewing and Modifying Your Phone
Numbers
View Your SIM Card Phone
Number(s)
You can program up to three phone numbers (such
as your voice and data phone numbers) onto your
SIM card. Use this feature to view your phone
number(s).
1. Follow the steps in “Getting to Phone Book
Features...” to get to
2. Press
3. Press
4. Press and hold
Note: If you do not see your phone number(s), they
have not been programmed onto your SIM card. You
can program your voice phone number and other
phone numbers onto your SIM card by following the
steps described in “Modify Your Phone Number(s)”
on page 82.
O
to select. You will see your phone’s
voice phone number followed by
M to scroll through your numbers.
My Phone Number(s).
C
to exit the menu.
Modify?.
Tip:
Pressing
Q#
brings up your
phone number.
also
Managing the Phone Book 81

Getting to Phone Book Features...
1. Press M until you see Phone Book, and then press O.
2. Press M
will see the feature name, followed by
to scroll to one of the features described below. You
Select?.
Modify Your Phone Number(s)
Use this feature to modify or program your voice
phone number onto your SIM card. You can also
program other phone numbers (for example, a data
phone number) onto your SIM card. You can have
up to three phone numbers.
1. Follow the steps in “Getting to Phone Book
Features...” to get to
2. Press
O
to select. You will see your phone’s
voice phone number followed by
My Phone Number(s).
Modify?.
3. Press
modify.
4. Press
Edit Number followed by the number for the
selected entry.
5. Enter changes to the number, and then
press
the name for the entry selected.
6. Enter changes to the name (as described in
“Entering Names” on page 65) and then
press
7. Press and hold
82 Managing the Phone Book
M to scroll to the number you want to
O
to modify the number. You will see
O. You will see Edit Name followed by
O
. You will see Stored.
C
to exit the menu.

Using One-Touch Dialing
One-touch dialing enables you to place calls
instantly. You can choose to dial the phone numbers
in the first nine memory locations in either your SIM
memory, phone memory, or your fixed dial list. You
choose which type of memory you want to be active
with this feature.
Set Up One-Touch Dialing
To set the active memory for one-touch dialing:
1. Follow the steps in “Getting to Phone Book
Features...” to get to
and then press
One-Touch Dial Setting,
O
to select.
2. Press
3. Press and hold
M to scroll through To Phone Memory, To
SIM Card Memory
then press
You will see
O
Completed.
, or To Fixed Dial List, and
to select the displayed option.
C
to exit the menu.
Managing the Phone Book 83

Getting to Phone Book Features...
1. Press M until you see Phone Book, and then press O.
2. Press M
will see the feature name, followed by
Tip:
You do not
need to press
O
to call the
number when
you use
one-touch
dialing.
to scroll to one of the features described below. You
Select?.
Use One-Touch Dialing
To use one-touch dialing:
Press and hold the appropriate digit key.
For example, press and hold 2 to dial the number
stored in location 2 of your phone memory, location
2 of your fixed dial list, or 102 of your SIM memory,
depending on your setting.
84 Managing the Phone Book

Viewing Service Phone Numbers
The show services feature provides a read-only list
of service phone numbers that are pre-programmed
by your service provider. This list resides on the SIM
card and allows for call placement only.
1. Follow the steps in “Getting to Phone Book
Features...” to get to
Show Services.
2. Press
3. Press
4. Press
Note: If you do not see any service dialing
number(s), they have not been programmed onto
your SIM card. Contact your service provider for
more information.
O
to select. You will see a list of
service phone numbers.
M
to scroll to the number you are
looking for.
O
to place a call to that number.
or
Press and hold
C
to exit the menu.
Managing the Phone Book 85

86 Managing the Phone Book

Using Calling Features
This chapter describes call-related features. Many of these features are
network features that you must subscribe to in order to access.
87

Call Related Features Menu
Call Related Features
Show Battery Meter
Show Signal Strength
Pending Call Drop
On/Off
Call Forwarding
Forward When Unavailable
Forward All Calls
Detailed Forwarding
Cancel All Forwarding
Call Waiting
On/Off
Call Barring
Bar Outgoing Calls
Bar Incoming Calls
Cancel All Barring
Change Bar Password
1 This feature is network and subscription dependent.
2 This feature is network and subscription dependent. It is
available only when the extended menus are activated.
1
On/Off
On/Off
Forward Voice Calls
Forward Data Calls
1
2
Intl Calls
Intl Calls Except Home
All Calls
On/Off
When Roaming
All Calls
On/Off
2
Forward All Voice Calls
On/Off
If Busy
On/Off
If No Answer
On/Off
If Not Reachable
On/Off
88 Using Calling Features

Getting to Call Forwarding...
1. Press M until you see Call Related Features, and then
press
O
.
2. Press M to scroll to Call Forwarding, and then press O.
3. Press M to scroll to one of the features described below.
Forwarding Calls When Unavailable
Use this feature when you are unable to answer
your phone calls.
Note: You must subscribe to this network feature
through your service provider. Contact your service
provider for additional information.
To activate this feature:
1. Follow the steps in “Getting to Call
Forwarding...” to get to
Unavailable
Your phone takes a moment to request the
current setting from the network.
, and then press O to select.
Forward When
2. Press
3. Press
4. Enter the number you want calls forwarded
5. Press and hold
M
to scroll to On or Off, and then press
O
to select.
• If you select
• If you select
M
and then press
• If you select
step 5
• If you select
Enter Number. Continue with step 4
to, and then press
On, continue with step 3
Off, continue with step 5
to scroll to Voicemail or Other Number,
O
to select.
Voicemail
Other Number, then you will see
, continue with
O
.
C to exit the menu.
Using Calling Features 89
If you have
Tip:
not yet stored a
voicemail
number, go to
page 124 to
learn how.

Getting to Call Forwarding...
1. Press M until you see Call Related Features, and then
press
O
.
2. Press M to scroll to Call Forwarding, and then press O.
3. Press M to scroll to one of the features described below.
Forwarding All Your Calls
This feature forwards all of your calls to the number
you choose. Your phone does not ring.
Note: You must subscribe to this network feature
through your service provider. Contact your service
provider for additional information.
To activate this feature:
1. Follow the steps in “Getting to Call
Forwarding...” to get to
then press
moment to request the current setting from
the network.
O to select. Your phone takes a
Forward All Calls, and
2. Press
3. Press
Tip:
If you have
not yet stored a
voicemail
number, go to
page 124 to
learn how.
90 Using Calling Features
M
to scroll to either On or Off, and then
press
O
to select.
• If you select
moment to contact the network and
update the setting. You will see
Forward On
• If you select
M
and then press
• If you select
step 5
• If you select
Enter Number. Continue with step 4
On, your phone takes a
. Continue with step 3
Off, continue with step 5
to scroll to Voicemail or Other Number,
O
to select.
Voicemail, continue with
Other Number, then you will see
Call

4. Enter the number you want calls forwarded
to, and then press
O
.
5. Press and hold
C to exit the menu.
Using Calling Features 91

Getting to Call Forwarding...
1. Press M until you see Call Related Features, and then
press
O
.
2. Press M to scroll to Call Forwarding, and then press O.
3. Press M to scroll to one of the features described below.
Using Detailed Call Forwarding
This feature lets you select the specific situations
when you want your calls forwarded. The
When Unavailable
override the settings you select here.
Notes: You must subscribe to this network feature
through your service provider. Contact your service
provider for additional information
This feature is available only when the extended
menus are activated. See “Activating Extended
Menus” on page 139
Voice Calls
To forward voice calls:
and Forward All Calls features
Forward
1. Follow the steps in “Getting to Call
2. Press
3. Press
92 Using Calling Features
Forwarding...” to get to
and then press
takes a moment to request the current setting
from the network.
Detailed Forwarding,
O to select. Your phone
M to scroll to Forward Voice Calls, and
O
then press
to select.
M to scroll to the option you desire:
Forward All Voice Calls, If Busy, If No Answer,
or
If Not Reachable.

Installing the Battery
Insert the Battery
1. Remove or rotate the satellite antenna
before installing the battery. (See “Attaching
the Satellite Antenna” on page 24.)
2. Press and
hold the
release latch
at the top of
the battery
compartment
cover.
3. Pull the cover
upward, and
then remove it
from the phone.
4. Align the
arrows on the
battery with
the arrows in
the battery
compartment.
Insert the
battery,
bottom end first, into the compartment, and
then press the battery downward until it clicks
into place.
3
2
4
Tip:
The
battery
compartment is
located on the
back of the
phone.
Getting Started 29

5. Insert the
5
6
bottom end of
the battery
compartment
cover into the
slots at the end
of the
compartment.
6. Snap the
cover down
into place.
30 Getting Started

Removing the Battery
1. Ensure the phone is switched off.
2. Remove or rotate the satellite antenna
before removing the battery. (See “Attaching
the Satellite Antenna” on page 24.)
3. Press and
hold the
release latch
at the top of
the battery
compartment
cover.
4. Pull the cover
upward, and
then remove it
from the
phone.
5. Press and
hold the
release latch
at the base of
the battery.
6. Pull the
battery
upward and
out of the
phone.
The
Tip:
2
3
battery
compartment is
located on the
back of the
phone
4
5
Getting Started 31

7. Insert the
7
6
bottom end of
the battery
compartment
cover into the
slots at the end
of the
compartment.
8. Snap the
cover down
into place.
9. Replace the battery safety cover. See “Attach
the Battery Safety Cover” on page 28 for
more information.
32 Getting Started

Charging the Battery
Any battery that hasn’t been used for a month or
more—including new batteries—should be charged
for about 3–4 hours before use.
Using the Internal Charger
A battery charger is built right into your phone. Using
either the travel charger or auto accessory adapter,
you can plug the handset directly into a power
source to charge the installed battery.
Note: The battery should only be charged in
environments between 0-45
1. Connect the travel charger or auto
accessory adapter to the phone.
2. Plug the travel charger or auto accessory
adapter into the appropriate power source.
The phone beeps, flashes the q (battery
charge) indicator, and displays
0
C.
Charging
Battery
3. If the phone is powered on, press
the phone in charge-only mode.
S
to place
If the phone is powered off, it automatically
enters charge-only mode.
Getting Started 33

Note: You can still place and answer calls while
using the internal charger. If you wish to place or
answer a call:
S
Press
to normal operation.
Remember that talking on the phone uses
power, so charging takes more time.
to exit charge-only mode and return
34 Getting Started

Checking Battery Charge Level
Low Battery Warning
When the battery level is low and only a few minutes
of talk-time remains, your phone signals you in two
ways:
•
Low Battery appears on the display
• A warning tone (two double beeps) sounds
Note: To help maintain the best battery and phone
performance, recharge your battery as soon as
possible after you receive the low battery warning.
View Battery Meter
The q (battery charge) indicator appears
continuously in the upper right corner of the display.
You can also display a more detailed battery meter
at any time to check the charge level on your battery.
See “Viewing the Battery Meter” on page 101 for
more information.
Getting Started 35

Battery Information
Maximizing Battery Life
Caution: To prevent injuries or burns, do not allow
metal objects to contact or short circuit the battery
terminals.
Caution: At extreme temperatures (eg., -10°C)
battery life capacity is significantly reduced.
To ensure maximum battery life and use your
battery to its fullest capacity, observe the following
guidelines.
• Always use Iridium approved battery chargers
• Always use Iridium approved batteries
• Maintain the battery at or near room
temperature when charging
• When you don’t plan on using a particular
battery for a while, store the battery
uncharged in a cool, dark, and dry place
• To prolong the life of your batteries, avoid
exposing them to temperatures below -10°C
(14°F) or above 45°C (113°F)
• Always take your phone with you when you
leave your car
36 Getting Started
Disposing of Batteries
To dispose of batteries, check with your local
recycling center for a battery recycler near you.
Never dispose of batteries in fire.

Using Your Phone
Read this chapter to learn how to get up and running with your new
satellite phone.
37

Startup Procedures
Turn the Power On and Off
1. Insert your SIM card if necessary. (See
“Installing/Removing the SIM Card” on
page 26.)
2. Press and hold
off.
When you turn your phone’s power on, you
will hear the wakeup tone (or feel a vibration if
the VibraCall
see the wakeup screen. The wakeup screen
displays a short animated sequence that
reminds you to rotate and extend the
antenna, and shows how to hold the phone
for best reception (see illustration). You may
see a number of other power-on messages
(described on pages 39-40).
When the
disappears and the
indicator appears, you are ready to make a
call.
S
to turn the phone on and
®
alert function is activated) and
m (no service) indicator
n (home system)
38 Using Your Phone

Power-On Messages
Once your phone is powered on, you may see:
Message Description
The phone is attempting to establish
Searching...
Rotate and
Extend Antenna
Rotate Antenna
Registering...
or
Registering...
Check Signal
Invalid Account Contact your service provider.
Enter Phone
Unlock Code
Enter PIN
Insert Card
Check Card
communications with the satellite
network. See “Accessing the
Network” on page 149.
You also hear a tone when you see
this message. Make sure the
antenna is rotated upward and fully
extended and has a clear
unobstructed view of the sky.
Your phone is registering with the
network. When the process is
complete, you will see
See “Accessing the Network” on
page 149.
Your phone is unable to establish
registration with the satellite
network. Move to a location with a
clear unobstructed view of the sky.
Your phone was locked after the last
use. Enter your four-digit unlock
code and press
“Locking and Unlocking Your Phone”
on page 133.
Enter the four- to eight-digit SIM
card PIN code provided by your
service provider and press
proceed. See “Protecting the SIM
Card” on page 135.
Power off your phone, make sure
your SIM card is inserted
completely, and then power your
phone on again.
The SIM card is damaged or
inserted the wrong way.
Registered.
O
to proceed. See
O to
Using Your Phone 39

Message Description
If the SIM card PIN code is
incorrectly entered three times in a
Blocked
! Blocked
Bad Card
See Supplier
row, your phone becomes blocked.
See “Unblock the PIN Code” on
page 136 for instructions on how to
unblock it.
If the SIM card PIN2 code is
incorrectly entered three times in a
row, some features (e.g., Fixed
Dialing) become blocked. See
“Unblock the PIN2 Code” on
page 138 for instructions on how to
unblock PIN2.
Your SIM card has been damaged or
incorrectly issued. Contact your
service provider for information.
Holding the Phone
1. Rotate the antenna to either the left or right
detent. The antenna will stop here.
40 Using Your Phone
Right DetentLeft Detent

2. Extend the antenna by pulling out on the end
of it.
2
1
The antenna should be vertical to the ground
when you talk on the phone (as shown in the
following illustration from the wakeup screen
animated sequence).
H
3. Make sure the antenna has a clear
unobstructed view of the sky.
Standby Mode
To conserve energy, your phone may turn off its
display backlight when you have not pressed a key
for several seconds. The light reappears the next
time you press a key.
Using Your Phone 41

Placing a Call
To place a call, your phone must be powered on,
have a SIM card inserted, be unlocked, and be in
contact with the satellite network. See “Accessing
the Network” on page 149 for network information.
You can enter a phone number up to a maximum of
20 digits. The digits are displayed in two rows, 16
digits in the top line and four digits in the next line.
Dial a Number
1. Rotate and fully extend the satellite
antenna. “See Holding the Phone” on
page 40.
If you
Tip:
make a
mistake, press
C
once to
delete the last
digit, or press
C
and hold
clear all digits.
to
2. Enter the number using the digit keys. As
you begin entering digits, you will see
You must enter the phone number in
international format:
international access code
[
[
country code
[
phone number
Note: If you are calling another Iridium
satellite subscriber, use the Iridium country
code, then phone number.
3. Press
the number you dialed.
You will see either the flashing message
or
Iridium country code
]
O. You will see Calling followed by
, 00, or +]
Call?.
]
Calling or the flashing messages Calling,
Registering..., and the phone will play a
series of setup tones.
If the call connects and is answered,
appears on the display for a few seconds, followed
End Call?.
by
Connected
42 Using Your Phone

If the call does not connect, you may see one of the
following messages:
Message Description
Busy Try Later
or
Please Try Later
Restricted Area
Redial?
The phone is unable to access the
network. Try again in a few minutes.
The phone is unable to access the
network. Move to an area where
calls are allowed.
Press O to redial the number
automatically. See “Automatic
Redial” on page 44 for more
information.
International Dialing
To make an international phone call:
0
1. Press and hold
After a few seconds the international dialing
+ appears in the display. This allows
prefix
you to call from any country without knowing
the local international access code.
2. Enter the country code followed by the
phone number. The country code follows the
conventional format.
.
Using Your Phone 43

Automatic Redial
If the number or your network is busy, you will see
Redial? for five seconds.
O to redial the number automatically.
Press
Note: Your phone makes a maximum of ten redial
attempts. If the call cannot be connected within this
maximum, you will see the message
Redial Failed.
Redial Last Number Called
Whenever your phone is on standby, you can redial
the last number called:
O
1. Press
to display the last number dialed.
2. Press
O again to place the call.
Dial Special Characters
You can insert special characters in your numbers:
To enter... Then...
0 Press
*
+ (for international calls) Press and hold
® (for pause dialing) Press and hold *.
supplementary service
numbers, PINs, and
unblocking
0
.
Press *.
#
Press
or more times as
necessary.
or * one
0
Dial a Number With Pauses
See “Using Pauses in Numbers” on page 67 for
information on dialing numbers with pauses.
.
44 Using Your Phone

Dial a Number from the Phone Book
Your phone contains a phone book that you can use
to store names and telephone numbers. Once you
have stored information in your phone book, you
can save dialing steps by:
• using one-touch dialing (page 83)
• recalling and dialing an entry by location
(page 71)
• recalling and dialing an entry by name
(page 70)
• recalling and dialing one of the last ten
numbers called (page 80)
See “Managing the Phone Book” on page 59 for
information on how to store and retrieve names and
numbers from the phone book.
Call a Number in a Message
For details on how to call a phone number
embedded in a message, see “Return a Call” on
page 114 in the “Using Message Services” chapter.
End a Call
Use one of the following procedures to end a call:
• Press
• Press C
O
Using Your Phone 45

Receiving a Call
Receive a Phone Call
To receive a call, your phone must be powered on,
have a SIM card inserted, be unlocked, and be in
contact with the satellite network. See “Accessing
the Network” on page 149 for network information.
There are two scenarios for receiving calls in
satellite mode, depending on the antenna position:
(1) antenna raised and fully extended, or
(2) antenna stowed or in the down position.
Antenna Raised and Fully Extended
When you receive a call:
See
Tip:
page 132 to set
your phone’s
alert.
• Your phone rings and/or vibrates
• The status indicator alternates red and green
• The phone displays
on the next line
To answer the call:
O
Press
or #).
You will see
If the call does not connect properly, you may see
one of the following messages:
Message Description
Orient Antenna
Call Attempt
Call Failed
or any digit key (1 - 9,
Connected.
You need to fully extend the
antenna upwards with a clear
unobstructed view of the sky.
The antenna is not properly
adjusted or the network signal is not
strong enough.
Call, followed by Answer?
*
46 Using Your Phone

Antenna Stowed or in the Down Position
When you receive a call:
• The phone chirps up to three times to alert
you of an incoming call
• The phone displays
by
Call Attempt on the next line
You must rotate and extend the antenna as quickly
as possible to receive the call.
Rotate and fully extend the antenna as
described in “Holding the Phone” on page 40
You will see
attempt to answer until the phone rings or
vibrates.
After several seconds, your phone will ring or
vibrate and display
the next line.
To answer the call:
Press
or #).
You will see
If the call does not connect properly, you may see
one of the following messages:
Message Description
Iridium Call Attempt. Do not
O or any digit key (1 - 9, *
Connected.
Rotate Antenna, followed
Call followed by Answer? on
Orient Antenna
Call Attempt
or
Rotate Antenna
You need to fully extend the
antenna upwards with a clear
unobstructed view of the sky.
Call Attempt
The antenna is not properly
Call Failed
adjusted or the network signal is not
strong enough.
Using Your Phone 47

End a Call
Use one of the following procedures to end a call:
•Press
•Press C
O
Unanswered Calls
If you are away from your phone or choose not to
answer a call, your phone displays the message
Unanswered Call.
Personal Mailbox
Callers who are unable to reach you can leave
numeric, text, and voice messages. The next time
you register with the satellite network you will
receive these messages. Then you will have the
option of returning the call or saving the message
for later viewing.
For information on retrieving messages, see
“Accessing Received Messages” on page 110.
48 Using Your Phone

Additional Phone Features
Lock and Unlock the Keypad
To prevent accidental usage of the phone, press the
#
and * keys simultaneously to lock the
keypad. All keys with the exception of the
disabled. You can still answer an incoming call by
pressing
O
when the keypad is locked.
S key are
To remove the keypad lock, press
simultaneously.
# and *
Adjust Earpiece Volume
To adjust earpiece volume:
• Increase the volume by pressing the upper
volume control key
• Decrease the volume by pressing the lower
volume control key
As you press the keys, the phone’s speaker
demonstrates the new volume level. The bar graph
in the display represents the volume level. The
higher the graph, the louder the volume.
Volume
Quit?
Note: You can also use the volume control keys to
scroll through Phone Book entries.
Tip:
The
volume control
keys are
located on the
side of the
phone.
Using Your Phone 49

Tip:
The
volume control
keys are
located on the
left side of the
phone.
Adjust Ringer Volume
To adjust the ringer volume:
PressE and then the up or down volume
control key
The phone sounds the new volume level as you
adjust it.
Note: You can also use the Phone Setup menu to
adjust ringer volume. See “Adjust the Ringer
Volume” on page 131 for more information.
View Your SIM Card Phone Number
To retrieve and view your phone number from your
SIM card:
Q#
Press
Notes: If you do not see your phone number, the
number has not been programmed onto your SIM
card. You can program your phone number onto
your SIM card by following the steps described in
“Modify Your Phone Number(s)” on page 82.
You can also use the Phone Book menu to view
your phone number. See “View Your SIM Card
Phone Number(s)” on page 81 for more information.
50 Using Your Phone

Using In-Call Features
Read this chapter to learn how to use In-Call menu features. The In-Call
M
menu is displayed when you press
during a call.
51

Muting a Call
For privacy during a call, try muting the phone. You
hear the party on the other end, but the other party
does not hear you.
While in a call:
Yo u c a n
Tip:
also mute the
phone from the
Quick Access
menu. See
“Using the
Quick Access
Menu” on
page 56.
1. Press M until you see Turn Mute on or off.
O
2. Press
To unmute a call:
Press
or
1. Press
2. Press
to select. You will see Mute.
O again to resume your conversation.
M until you see Turn Mute on or off.
O
to select.
52 Using In-Call Features

Using the Menus
Many of your phone’s features are organized into lists of options called
menus
. There are three menus:
• The main Options menu lets you select and/or adjust phone
features
• The Quick Access menu gives you instant access to the menu
features you use most frequently
• The In-Call menu gives you access to call-related features when
you are in a call
Some options give you access to additional lists of options called
submenus
.
53

Using the Options Menu
The Options menu gives you access to your phone’s
features and options. You can
during a call.
Navigate the Options Menu
Learning how to use just a few keys enables you to
move freely through the entire menu system.
If you want to... Then...
enter the Options
menu
scroll through the
Options menu
select options and
submenus
exit features and
menus
not
access this menu
M. You will see the first
Press
available submenu.
• Press
• Press
Press
option or submenu when that
option or submenu name is
displayed.
• Press
• Press and hold
M to scroll forward.
<
to scroll
backward or forward.
O to select a menu
C to exit the feature
or submenu.
C to exit
the Options menu.
54 Using the Menus

How the Phone Responds
As you scroll through the Options menu, you will see
one of three questions on the bottom line of the
display.
If your phone
asks...
View Options?
Select?
Quit? Press O to exit the feature.
Then...
Press O
submenu.
Press
displayed feature.
to enter the
O
to select the
Display Messages and Indicators
If you see... Then...
y
Completed
! Failed
Enter PIN
or
Enter Name
u
Busy
Try Later
s
This indicates a feature has been
activated.
The display returns to the menu in a few
seconds.
Enter requested information,
then press
You may have requested information
while your phone was completing
another task.
The scroll bar indicates where you are
in a menu.
O.
w
Your phone may take a few seconds to
request settings from the network.
Customize the Options Menu
To personalize the Options menu—to hide and move
features—see “Move Menu Features” on page 162.
Using the Menus 55

Using the Quick Access Menu
The Quick Access menu is a way to keep your
favorite menu options readily accessible. Each digit
1 to 9, is matched to a Quick Access
key,
feature. See the table on page 57 for the default
setup.
If you know the number of the feature, activating that
option takes only two button presses! If you do not
know the number or want to review your options, just
scroll through the icon menu and read the tag
attached to each option.
Activate the Feature Directly
To access the feature directly:
E
Press
feature.
Scroll to the Feature
To scroll to the feature:
, and then press the digit key of the
56 Using the Menus
1. Press
2. Press
features.
3. Press
E.
M
to scroll through the available
O
to select a feature.

Default Quick Access Settings
The following features (and associated icons) are
the default settings for the Quick Access menu.
Key Icon Quick Access Feature
1
2
3
4
5
6
7
B
J
R
G
b
L
K
8
9
1 You must subscribe to this network feature through your
P
service provider. Contact your service provider for additional
information.
Find Name searches your Phone
Book by the full name.
Mute mutes and unmutes a call in
progress.
1
Call Voicemail
number to check your voicemail.
Battery Meter displays a fuel gauge
indicating charge. The more bars, the
greater the charge.
Lock Now locks your phone
immediately.
Vibrate On/off activates or
deactivates the VibraCall
function.
Read Messages displays the newest
message received.
Register Now initiates a search for
the Iridium satellite network. You
f
must wait three minutes between
registration attempts.
Forward On/Off1 activates or
deactivates unconditional call
forwarding depending on the current
setting.
calls your voicemail
®
alert
Customize the Quick Access Menu
See “Personalizing the Quick Access Menu” on
page 164 for instructions on how to modify the
feature selection on the Quick Access menu.
Using the Menus 57

58 Using the Menus

Managing the Phone Book
Your satellite phone can store up to 100 names and numbers, and your
SIM card expands memory capacity even more.
You can use the dedicated keys or the Phone Book menu to add and
retrieve numbers from the phone book. With the Phone Book menu you
can also access phone book maintenance and security features.
59

Phone Book Menu
Phone Book
Personal Numbers
Show Services
Last Ten Calls
My Phone Number(s)
Fixed Dialing
One-Touch Dial Setting
Find Entry By Name
Enter Name:
Call Number
Modify Name Or Number
Erase Name And Number
Find Entry By Location
Enter Location:
Call Number
Modify Name Or Number
Erase Name And Number
Add Entry
Add To Phone Memory
Add To SIM Card Memory
Check Capacity
Check Phone Capacity
Check SIM Capacity
Prevent Access
No Memory Restrictions
To Phone Memory
To SIM Card Memory
To Phone & SIM Memory
Last Calls Made
Erase All Numbers
View Fixed Dial List
Setup Fixed Dialing
On/Off
Edit Entry
Add Entry
Erase Entry
To Phone Memory
To SIM Card Memory
To Fixed Dial List
60 Managing the Phone Book

4. Press O to select the displayed option. Your
phone takes a moment to contact the network
and update the setting. You will see Call
Forward On
.
5. Press
M to scroll to either Voicemail or Other
, and then press O.
Number
• If you select Voicemail, continue with
step 7
• If you select
Other Number, then you will see
Enter Number. Continue with step 6
6. Enter the number you want calls forwarded
O
to, and then press
7. Press and hold
.
C
to exit the menu.
If you have
Tip:
not yet stored a
voicemail
number, go to
page 124 to
learn how.
Using Calling Features 93

Getting to Call Forwarding...
1. Press M until you see Call Related Features, and then
press
O
.
2. Press M to scroll to Call Forwarding, and then press O.
3. Press M to scroll to one of the features described below.
Canceling All Forwarding
This feature cancels all call forwarding settings.
Note: You must subscribe to this network feature
through your service provider. Contact your service
provider for additional information.
1. Follow the steps in “Getting to Call
Forwarding...” to get to
and then press
Your phone takes a moment to contact the
network and update the setting. You will see
Call Forward Off. All call forwarding settings
are now set to
Off.
Cancel All Forwarding,
O to select.
2. Press and hold
94 Using Calling Features
C
to exit the menu.

Getting to Call Related Features...
1. Press M until you see Call Related Features, and then
press
O
.
2. Press M to scroll to one of the features described below. You
will see the feature name, followed by
Select?.
Using Calling Features 95

Restricting Calls with Call Barring
You can use call barring to restrict both incoming
and outgoing calls. Call barring is useful if you are
loaning your phone to others or when you wish to
control incoming calls. When you change one of
your call barring settings, your phone takes a few
seconds to request the setting from the network.
Notes: You must subscribe to this network feature
through your service provider. Contact your service
provider for additional information
This feature is available only when the extended
menus are activated. See “Activating Extended
Menus” on page 139
96 Using Calling Features
 Loading...