

iQSol HSA User Manual
HSA User Manual
HSA V050, 14. September 2018

Page 2 of 50
Index
1 HSA Quick Start Guide ........................................................................................................................ 6
LEDs and buttons. .................................................................................................................... 6
How to power on. .................................................................................................................... 7
How to access the HSA ............................................................................................................. 7
How to completely power off (for storage or shipping). ......................................................... 7
Recommended PuTTY settings ................................................................................................. 8
Manual Download .................................................................................................................... 8
2 Setup Wizard .................................................................................................................................... 10
Starting the Wizard ................................................................................................................ 10
Changing IP ............................................................................................................................. 10
2.2.1 Select Interface.......................................................................................................... 11
2.2.2 Enter IP ...................................................................................................................... 11
2.2.3 Gateway .................................................................................................................... 12
2.2.4 Confirm settings and reconnect ................................................................................ 12
Changing DNS ......................................................................................................................... 12
Setting the correct time ......................................................................................................... 13
2.4.1 Setting timezone ....................................................................................................... 13
2.4.2 Enter date .................................................................................................................. 14
2.4.3 Enter time .................................................................................................................. 14
Changing NTP ......................................................................................................................... 15
Chaning password .................................................................................................................. 15
Setup of a new YubiHSM ........................................................................................................ 15
2.7.1 Creating a wrapping key ............................................................................................ 15
2.7.2 Creating the admin authentication key..................................................................... 16
Creating a PKI authentication key .......................................................................................... 18
2.8.1 Authentication key ID ................................................................................................ 19
2.8.2 Authentication key label ........................................................................................... 20
2.8.3 Authentication key domain ....................................................................................... 20
2.8.4 Choose a password.................................................................................................... 21

Page 3 of 50
2.8.5 PKI authentication key stored on the YubiHSM ........................................................ 21
Creating a new connector certificate ..................................................................................... 21
Wizard completed .................................................................................................................. 23
3 The main menu ................................................................................................................................. 24
4 The network menu ........................................................................................................................... 25
hostname ............................................................................................................................... 25
interface ................................................................................................................................. 25
4.2.1 Edit interface ............................................................................................................. 26
DNS ......................................................................................................................................... 26
addRoute ................................................................................................................................ 26
listRoute ................................................................................................................................. 26
NTP ......................................................................................................................................... 26
5 The yubiHSM menu .......................................................................................................................... 27
info ......................................................................................................................................... 27
setup ...................................................................................................................................... 27
authkey................................................................................................................................... 27
backup .................................................................................................................................... 27
readBackup ............................................................................................................................ 27
shell ........................................................................................................................................ 28
deviceinfo ............................................................................................................................... 28
connector ............................................................................................................................... 28
5.8.1 restartCon.................................................................................................................. 28
5.8.2 rmSN .......................................................................................................................... 28
5.8.3 writeSN ...................................................................................................................... 28
5.8.4 manSN ....................................................................................................................... 29
5.8.5 restartNginx ............................................................................................................... 29
5.8.6 cert ............................................................................................................................ 29
5.8.7 allowIP ....................................................................................................................... 29
5.8.8 listIP ........................................................................................................................... 29
6 The HSA menu .................................................................................................................................. 29

Page 4 of 50
users ....................................................................................................................................... 30
time ........................................................................................................................................ 30
update .................................................................................................................................... 30
backup .................................................................................................................................... 30
restore .................................................................................................................................... 30
wizard ..................................................................................................................................... 31
LinuxCLI .................................................................................................................................. 31
reboot ..................................................................................................................................... 31
shutdown ............................................................................................................................... 31
7 The logging menu ............................................................................................................................. 31
Syslog ..................................................................................................................................... 31
7.1.1 local ........................................................................................................................... 32
7.1.2 remote ....................................................................................................................... 32
7.1.3 server ......................................................................................................................... 32
7.1.4 TLS ............................................................................................................................. 32
7.1.5 filter ........................................................................................................................... 32
SNMP ...................................................................................................................................... 34
7.2.1 enable/disable ........................................................................................................... 34
7.2.2 OID ............................................................................................................................. 34
7.2.3 port ............................................................................................................................ 34
7.2.4 sysLocation ................................................................................................................ 34
7.2.5 sysContact ................................................................................................................. 34
7.2.6 user ............................................................................................................................ 34
7.2.7 listUser....................................................................................................................... 35
8 YubiHSM setup on a PKI Server ........................................................................................................ 36
Installing the connector certificate ........................................................................................ 36
Installing the YubiHSM Key Storage Privider. ........................................................................ 37
Add the CA Role ..................................................................................................................... 39
Configure Active Directory Certificate Services ..................................................................... 41
9 Troubleshooting ............................................................................................................................... 46

Page 5 of 50
Active Directory Certificate Services ...................................................................................... 46
Page 6 of 50
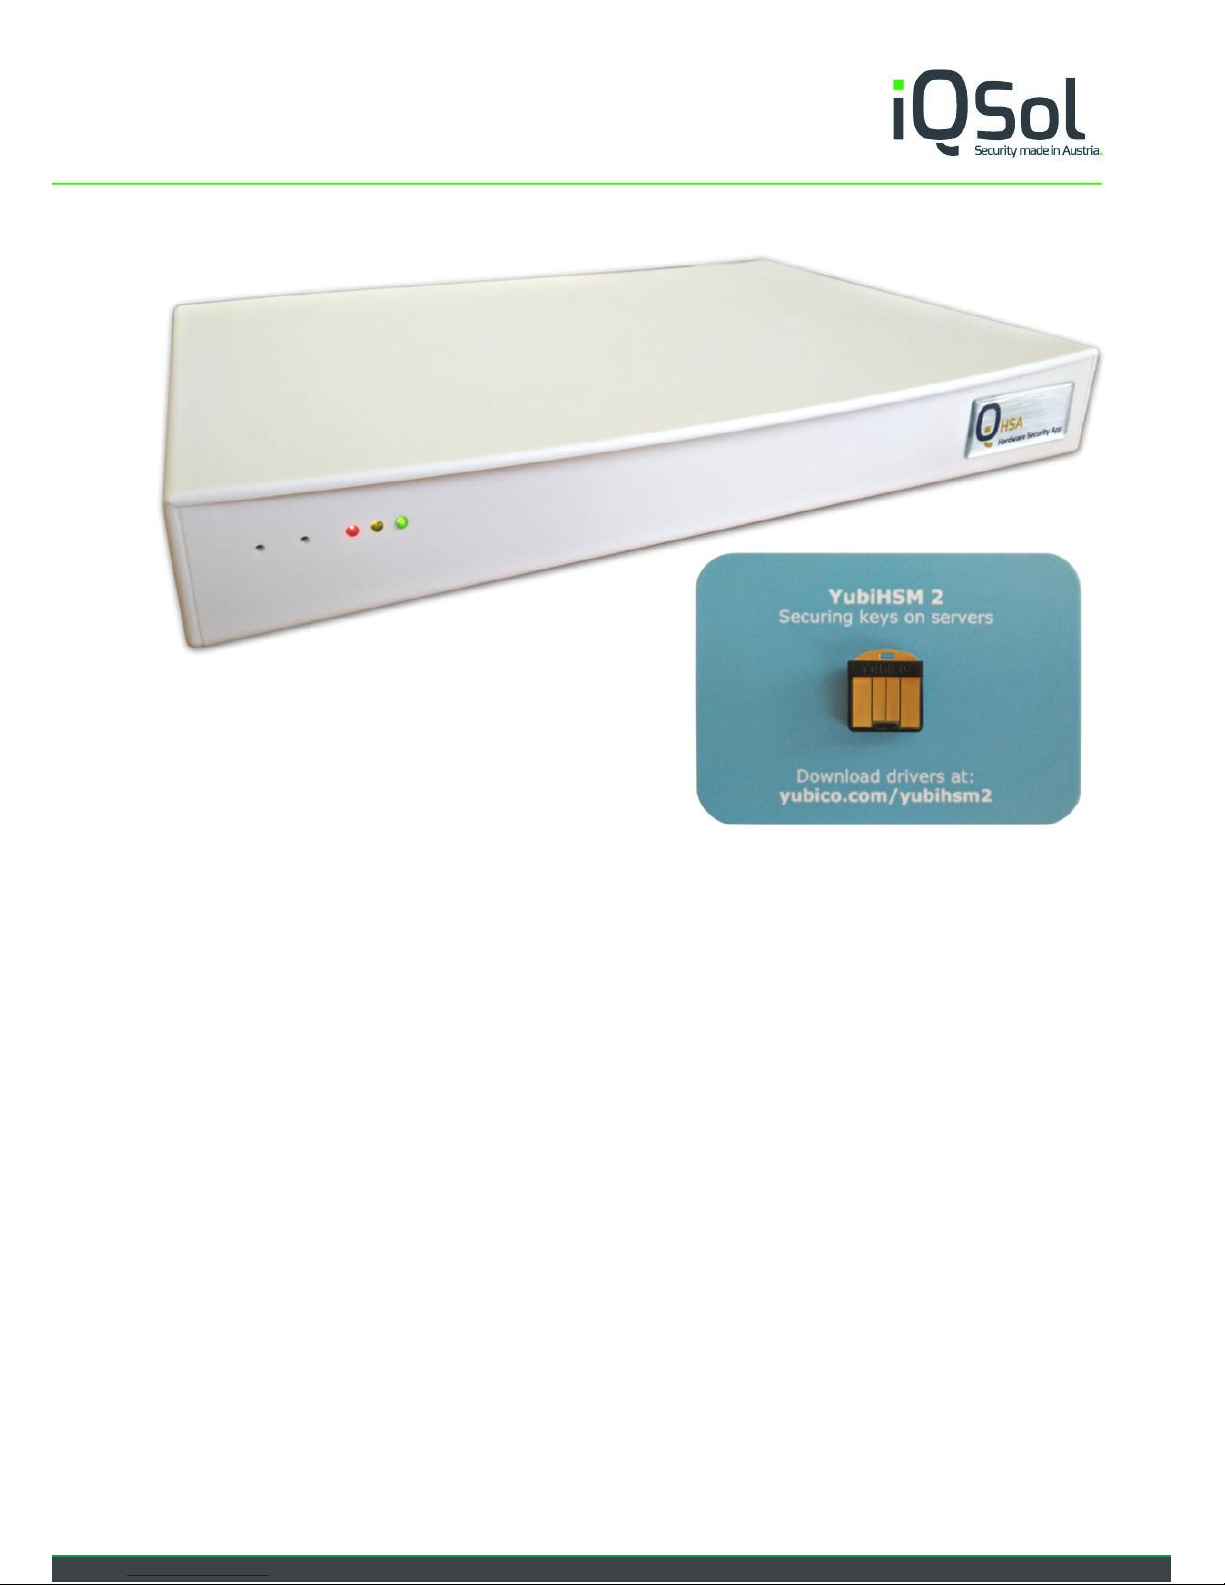
1 HSA Quick Start Guide
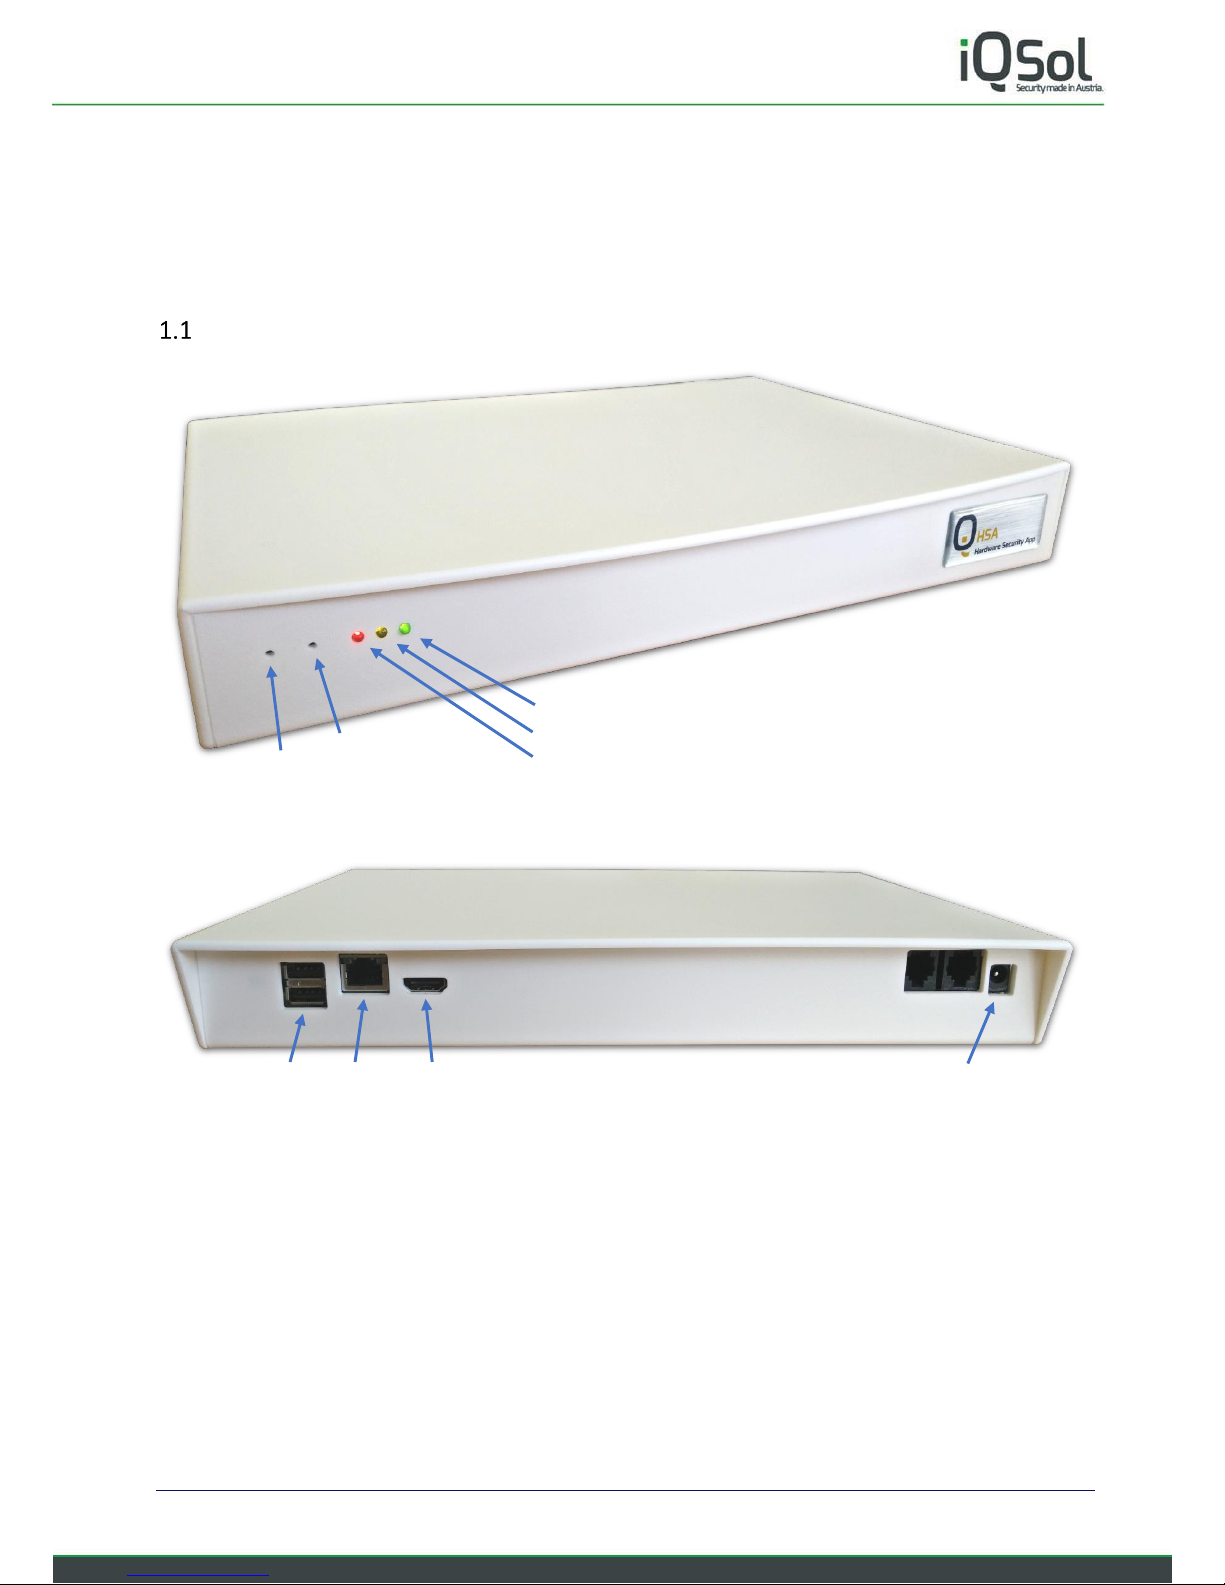
LEDs and buttons.
PWR
Reset
Harddrive active (green)
Power on (yellow)
Power supply connected (red)
USB LAN HDMI DC in 24 V 1120 mA

Page 7 of 50
How to power on.
Plug in the power supply and the HSA will start automatically (indicated by power on LED).
If the red LED is on but the yellow LED not, you can press the PWR button to power on.
Please do not connect the HSA to your network before changing the IP address.
How to access the HSA
You can connect to the HSA box via SSH using PuTTY or another SSH client.
Or with an HDMI monitor and a USB keyboard.
Default IP/Netmask: 192.168.0.1/24
Default Gateway: 192.168.0.254
Default DNS: 192.168.0.254
Default user and password:
deviceadmin
When you log in for the first time, the Setup Wizard starts, and you can specify the most important settings.
More detailed setup information can be found in the “HSA Setup Manual”, which you can download directly
from the HSA as described in Manual Download on the next page.
How to completely power off (for storage or shipping).
The HSA is equipped with a battery.
If you want to ship the device or store it for a longer period of time, please follow these steps to completely
power off.
In the menu
Go to The HSA menu > shutdown
On the CLI
Enter: sudo shutdown now
Or press the PWR button.
After the yellow LED turns off, unplug the power supply and press the Reset button for 5 seconds.
If everything is completely powered off, the PWR button doesn't work and you should only be able to power
on the HSA by plugging in the power supply.

Page 8 of 50
Recommended PuTTY settings
By default, the numeric keypad does not enter numbers in the HSA menu, but is used as the directional keys
when using PuTTY.
To change that, do the following:
Open PuTTY and click on “Terminal” > “Functions”.
Enable “Disable application key mode”.
It is also recommended to change the window and
text size for readability.
“Window” - “Columns” and “Rows”
“Window” > “Appearance” - “Font Settings”
The font “Consolas” works very well for terminals.
To save this as the default settings klick on
“Session”, in the “Saved Sessions” textfield enter
“Default Settings” and klick “Save”.
Manual Download
The Quick Start Guide is included in printed form in the HSA package.
The more detailed manual is only available as PDF.
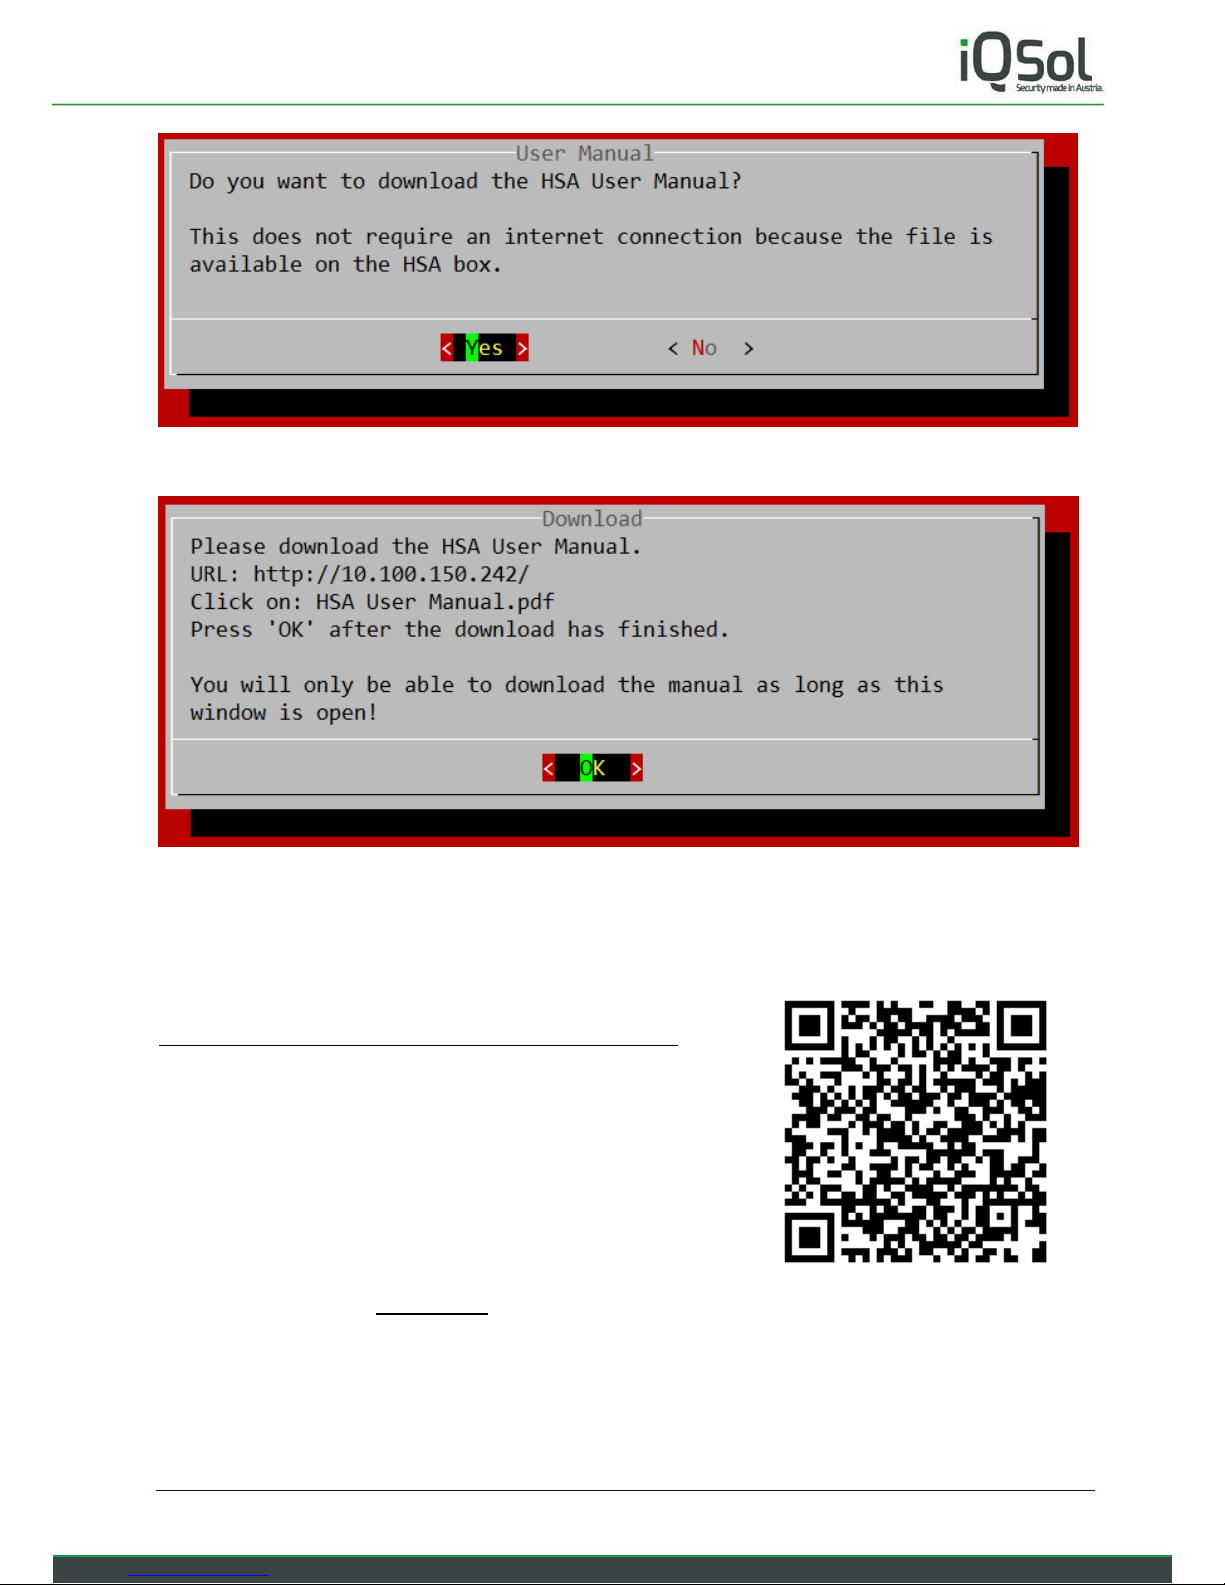
You can download it directly from the HSA as follows. After the first login the wizard starts, select “Yes”.
Page 9 of 50
The wizard asks if you want to download the HSA User Manual. Select “Yes”.
Open a web browser and enter the IP of your HSA (displayed in the “Download” window) in the address bar.
Right klick on “HSA User Manual.pdf” and select “Save target as ...”.
After downloading, make sure that you can open and read the HSA User Manual and click “OK”.
Alternatively, you can download the HSA User Manual online via FTP:
ftp://customer:FZig9k@ftp2.iqsol.biz/6-IQSol-Customer/HSA/
The HSA Quick Start Guide ends here.
Follow the instructions in Setup Wizard in the HSA User Manual PDF
you just downloaded to continue setting up the HSA.
Page 10 of 50
2 Setup Wizard
Please read the “HSA Quick Start Guide” before starting with the Setup Wizard.
Starting the Wizard
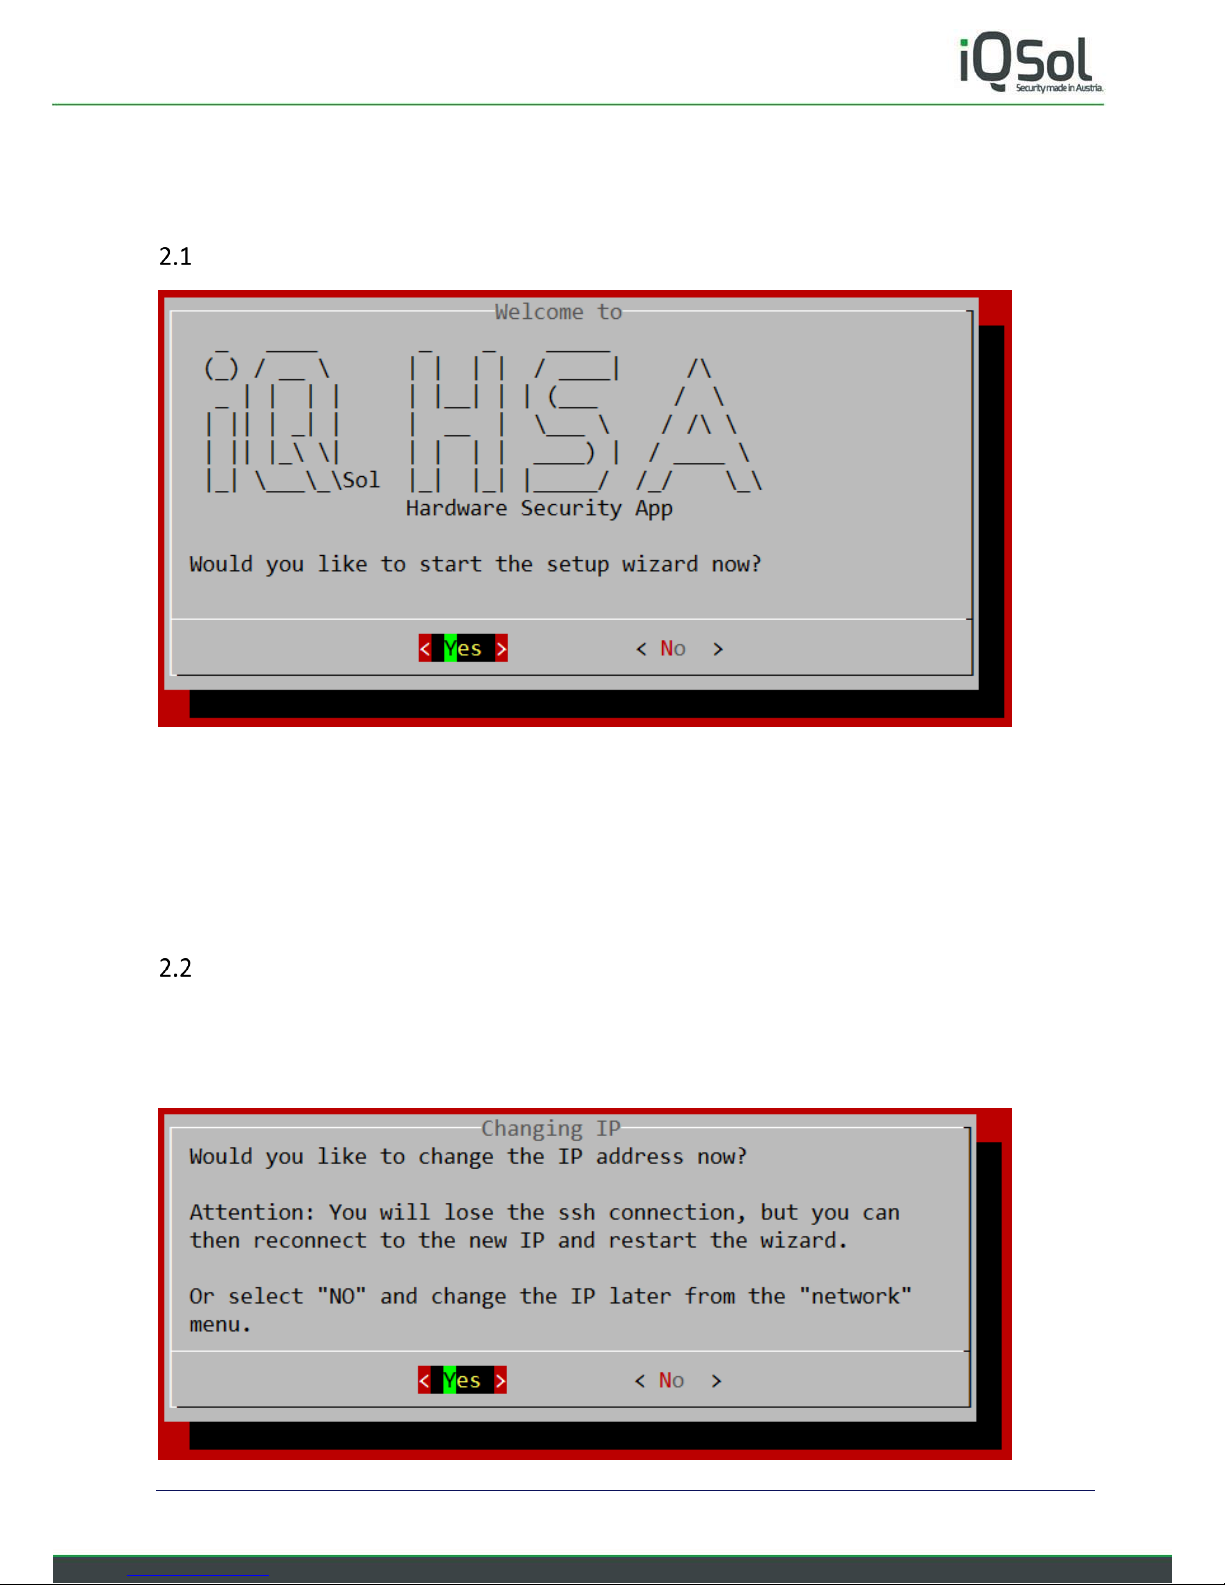
When you log on to the HSA for the first time, the setup wizard will start and guide you through the most
important settings.
Select “Yes” to start the wizard or “No” if you already know all the important steps and want to select them
manually in the menu.
This guide assumes that you are using the wizard.
Changing IP
First you will be asked if you want to change the IP.
You can do this now and then log in to the new IP address to proceed with the wizard, or select “No” to
change the IP address at the end in the menu, after everything else has been configured.
Page 11 of 50
This guide assumes that you have selected “Yes”.
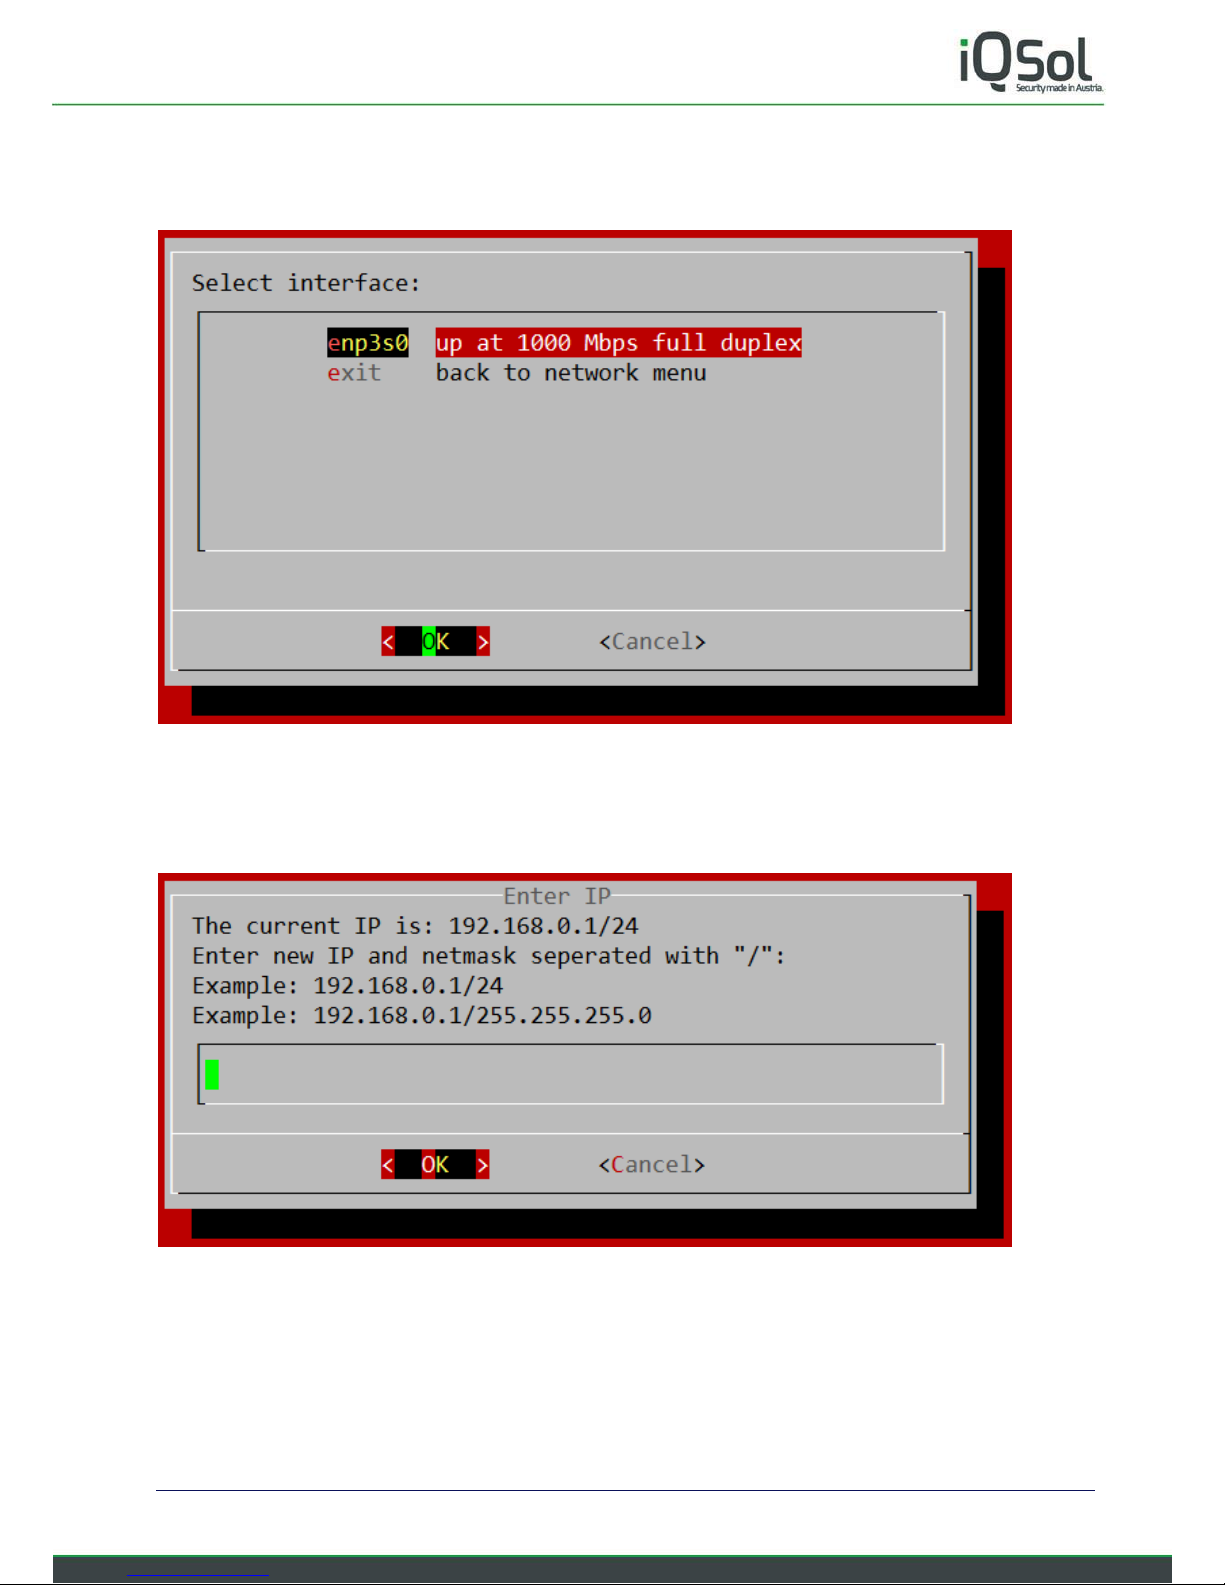
2.2.1 Select Interface
Now select the network interface on which you want to make changes.
On a standard HSA, only one should be present, just press “OK”.
2.2.2 Enter IP
Enter the new IP followed by the subnet mask like shown above.
You can enter the subnet mask as Classless Inter-Domain Routing (CIDR) suffix (example: 24) or dotted decimal
notation (example: 255.255.255.0).
Page 12 of 50
More info about this:
https://en.wikipedia.org/wiki/Classless_Inter-Domain_Routing
https://en.wikipedia.org/wiki/Dot-decimal_notation
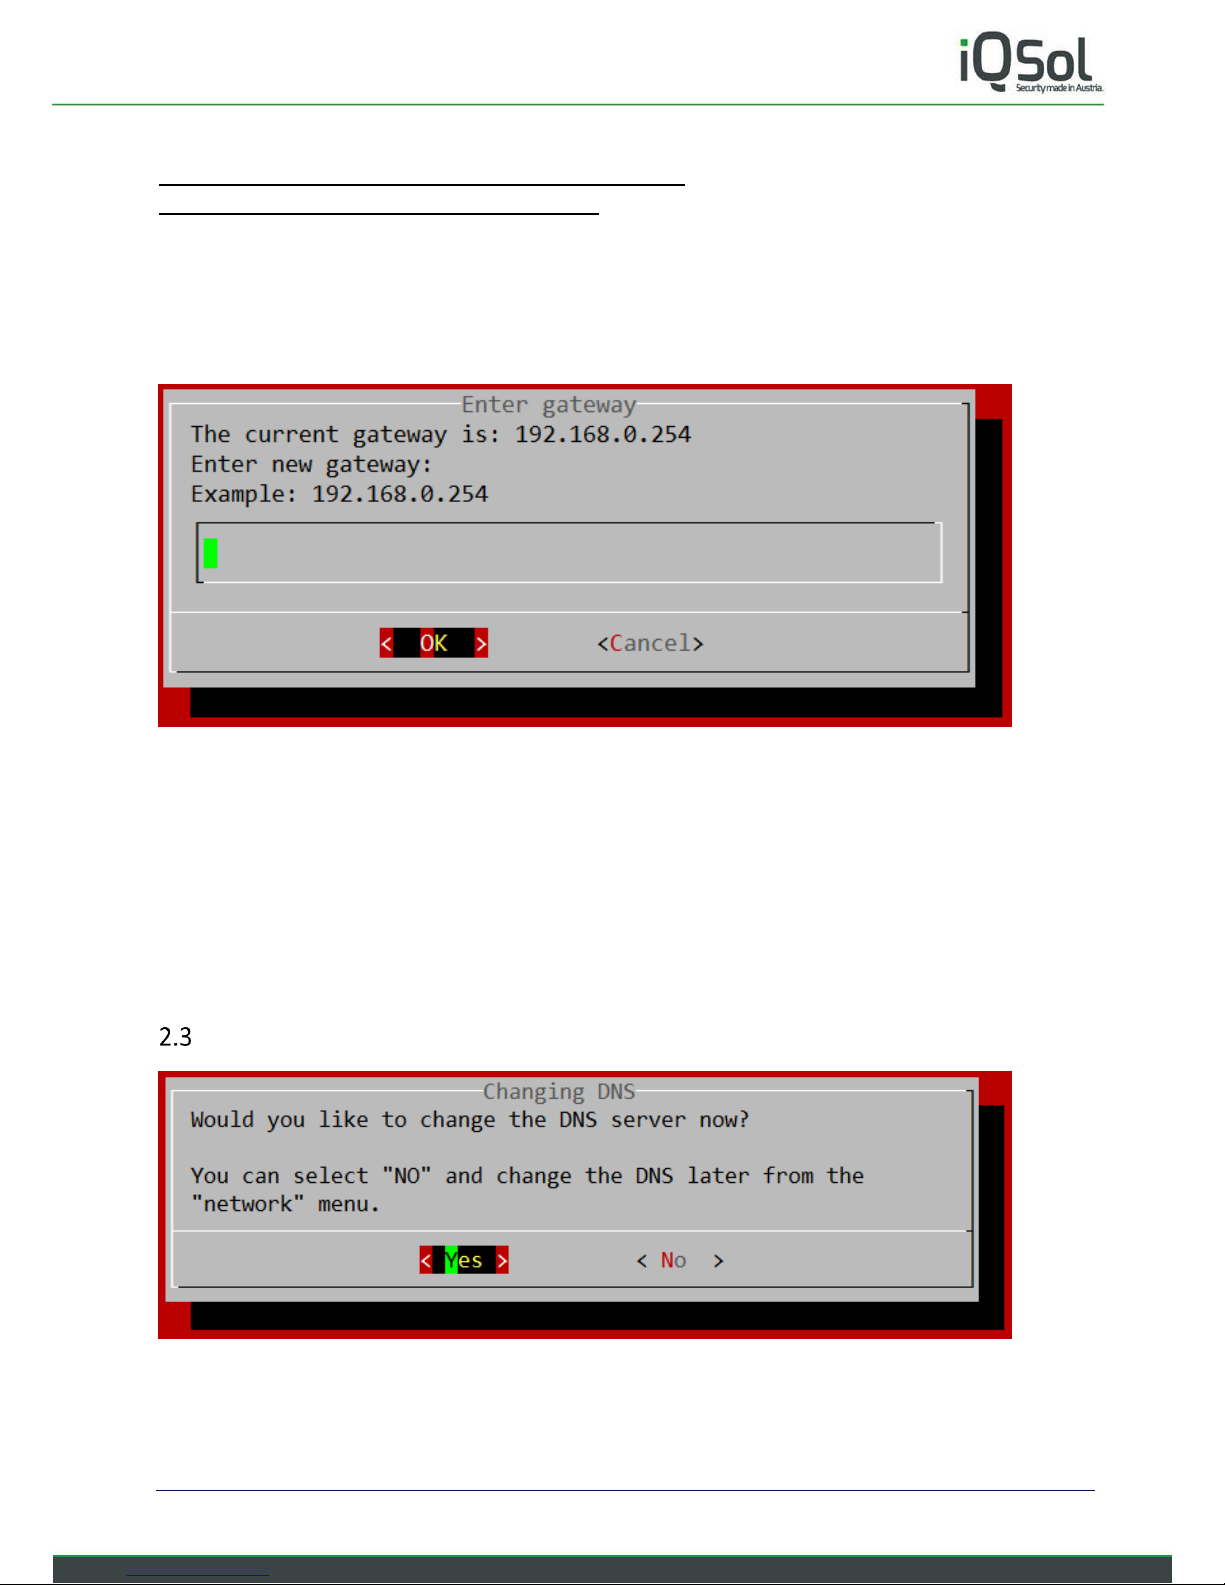
2.2.3 Gateway
In the next step you will be asked to enter your gateway IP.
Click “OK”. The settings will now be displayed again for confirmation.
2.2.4 Confirm settings and reconnect
If everything looks fine select “Yes”. If you are connected using SSH you will per design lose your connection.
Now you can open a new SSH session to the new IP and proceed the wizard.
After logging in again and getting " Would you like to start the setup wizard now?" displayed, select “Yes”.
The wizard won't ask again if you want to change the IP, but will continue to the next step.
Changing DNS
Select “Yes” if you want to use a specific DNS Server and proceed with the wizard.
Page 13 of 50
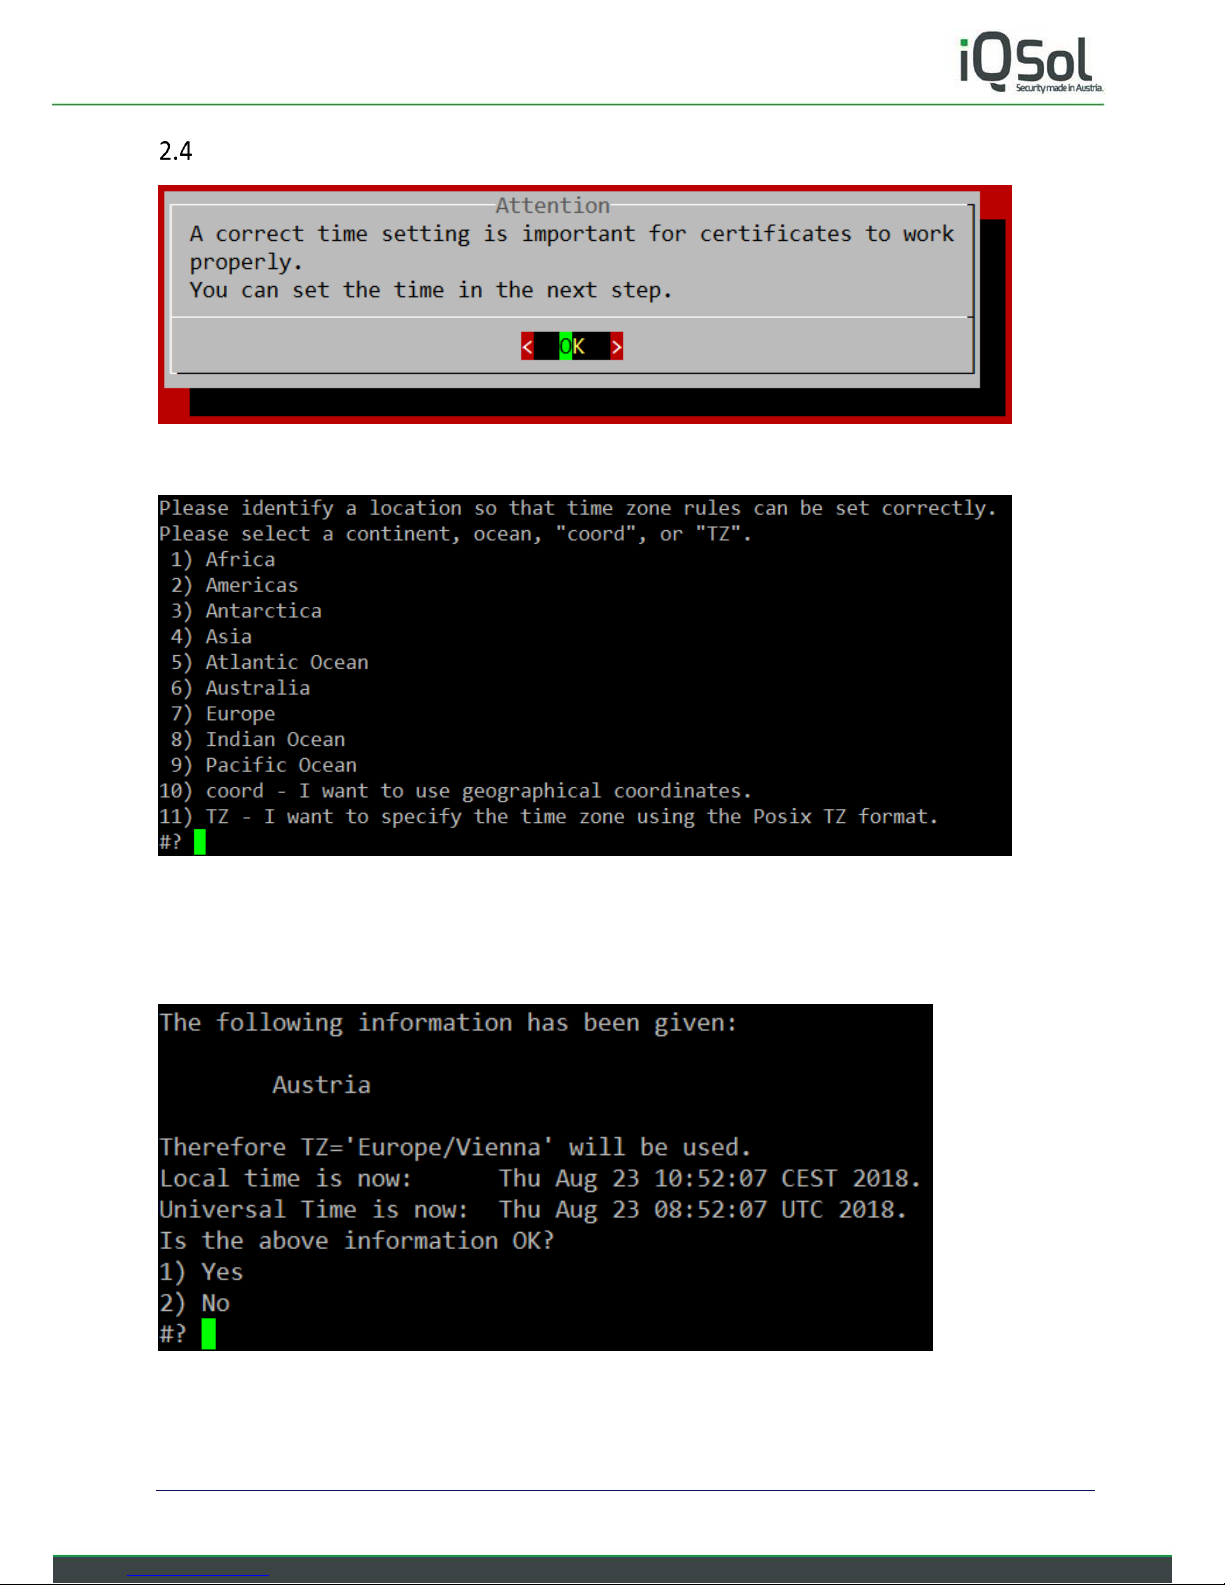
Setting the correct time
2.4.1 Setting timezone
Enter the number of your location and hit Enter.
For example, if you want to set “Europe/Vienna” as your time zone, input 7 and 4 in country selectin which is
appearing after selecting a continent.
Confirm the settings by entering 1.
Page 14 of 50
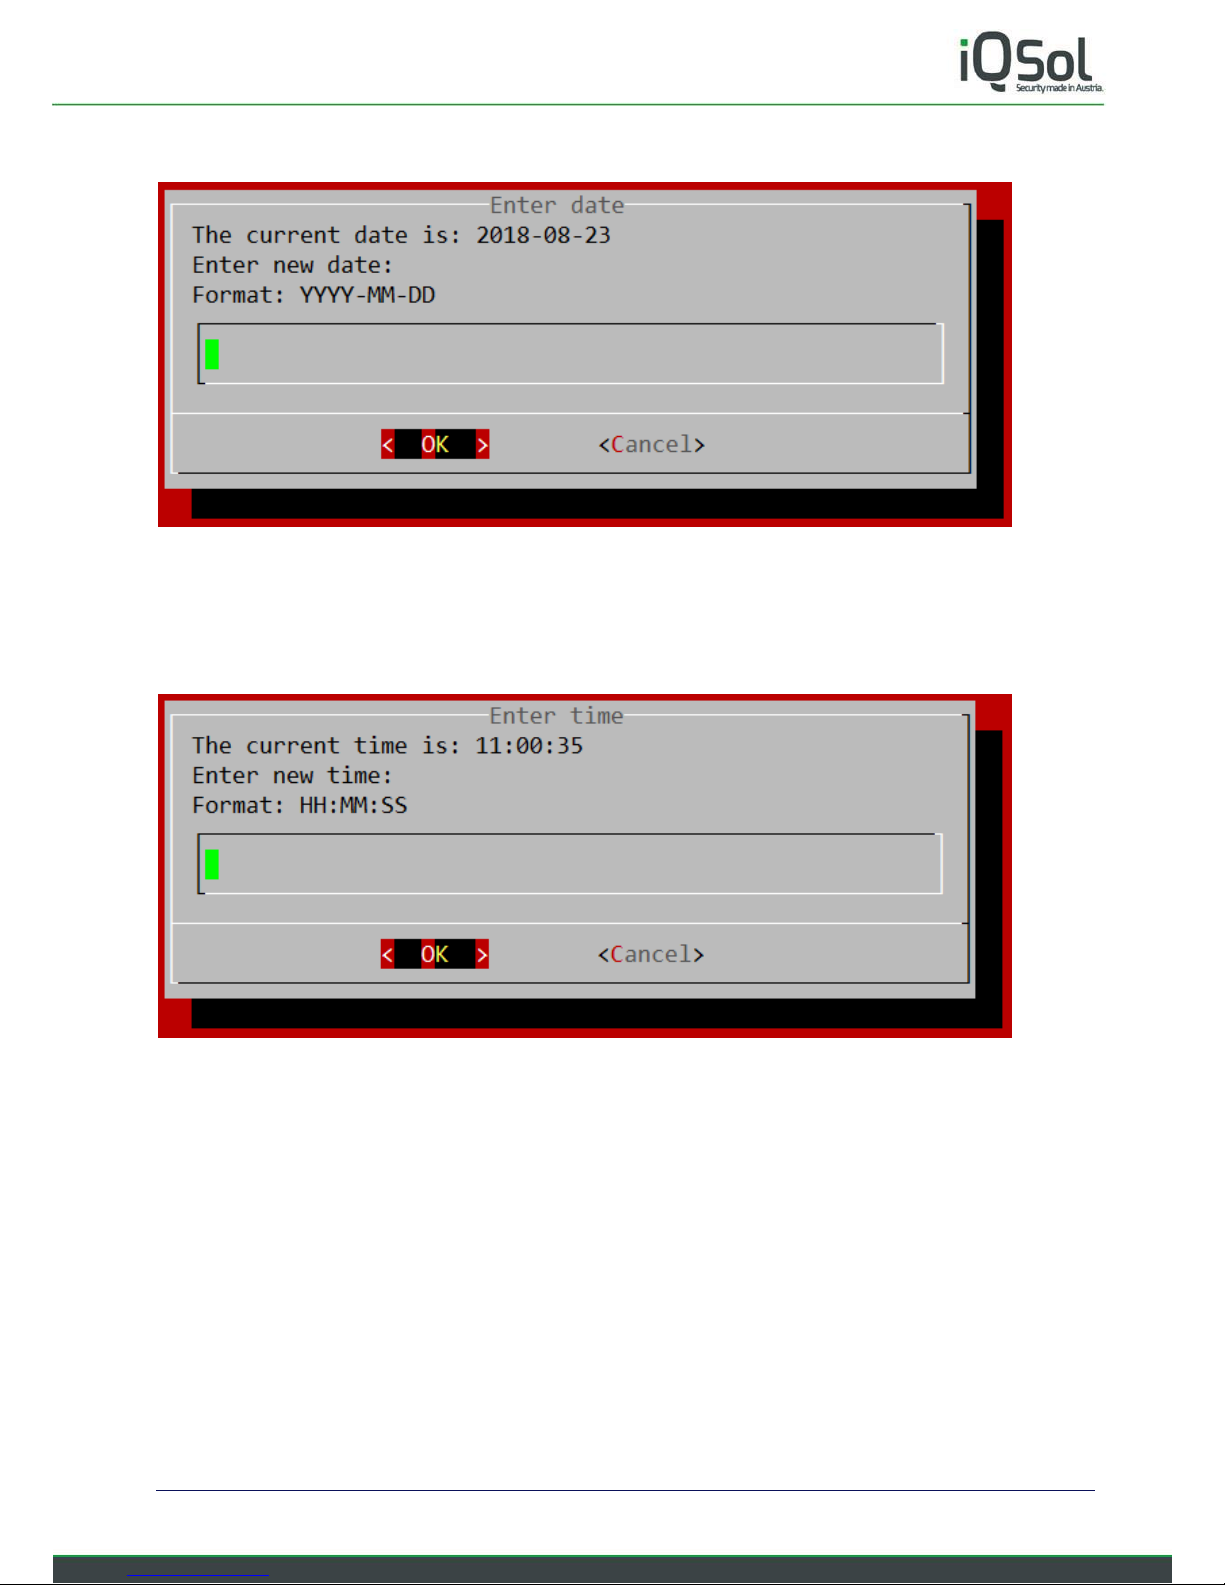
2.4.2 Enter date
Now enter the current date or just select “Cancel” if it is already correct.
If you selected “Cancel” you will be asked “No valid date was entered. Retry?” Select “No”.
2.4.3 Enter time
Same as with date. You can select “Cancel” if the time is already correct.
Note: The time in this screen is not updated live, but stays as it was when the screen first appeared. Time is
still running in the background and will continue to do so if you choose Cancel.

Page 15 of 50
Changing NTP
If you want to use a specific NTP server, select “Yes” and continue with the wizard.
Chaning password
This is important for the HSA to be secure. Choose a secure password!
First for the default user “deviceadmin”, this user will mainly be used to configure the HSA.
The default password is: deviceadmin
Next you will be asked to change the root password. The root user will rarely be used and is only needed for
some updates. This user should have a very strong password as it is allowed to do anything on the HSA.
The default password is: deviceadmin
Note: The YubiHSM module has its own passwords and is not affected by these settings.
Setup of a new YubiHSM
2.7.1 Creating a wrapping key
Now you will be asked to create a wrap key.
A Wrapkey is a secret key used to wrap and unwrap Objects during the export and import process.
 Loading...