

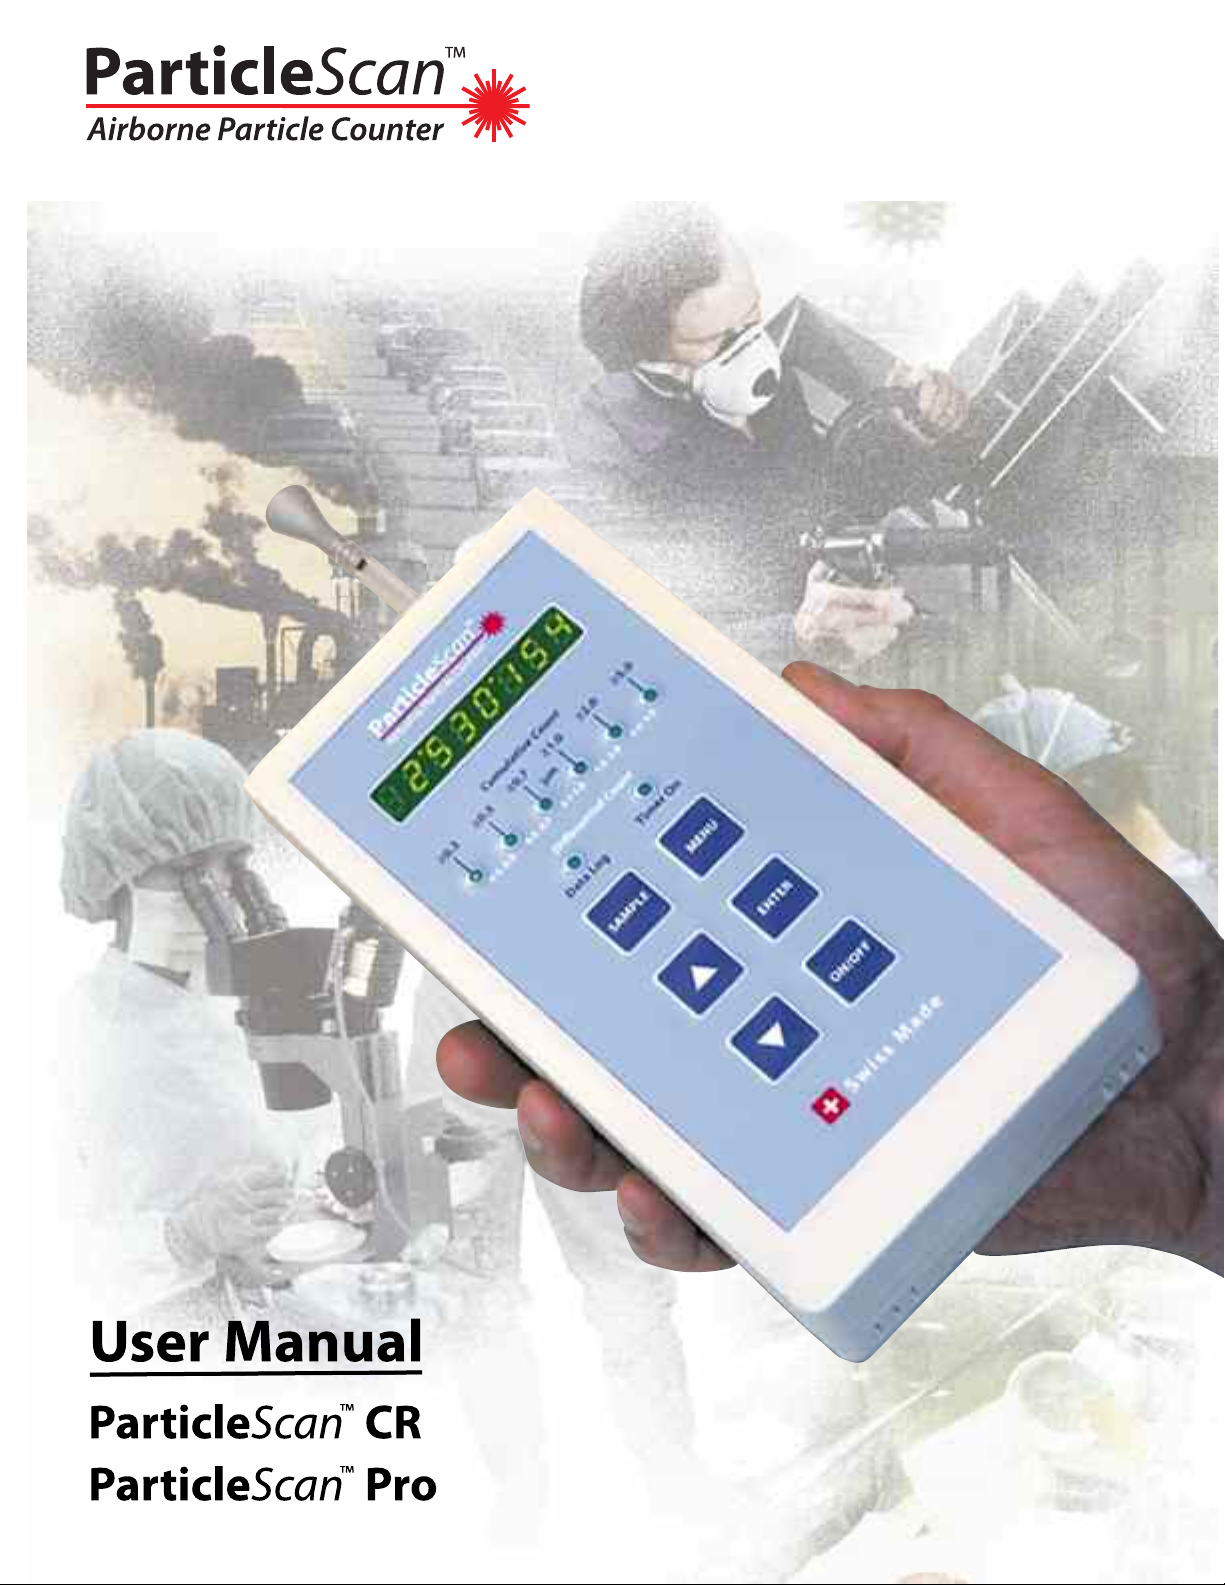
IQAir ParticleScan CR, ParticleScan Pro User Manual
To Buy: Visit www.sylvane.com or call (800) 934-9194
For Product Support: Contact IQAir at 1 (877) 715-4247
User Manual
ParticleScan™CR
™
ParticleScan
Pro

The IQAir Group reserves the right to change specifications contained in this document
© Copyright The IQAir Group 2000-2008 - All rights reserved.
at any time and without prior notice.
IQAir is a registered trademark of The IQAir Group.
ParticleScan is a trademark of The IQAir Group.

Important Safety Information
Important Safety Information
Class 1 Laser Product
his product incorporates a Class 1 laser diode based sensor as defined in 21 CFR, Subchapter J, of the Health and
T
Safety Act of 1998 and applies when the instrument is used under normal operating conditions and during
maintenance procedures.
Service procedures performed on the sensor can result in exposure to invisible radiation. Service
The laser diode based sensor inside this instrument carries a warning label as shown below:
-WARNING-
INVISIBLE LASER RADIATIONWHEN OPEN
AVOID EXPOSURE TO BEAM
Warning
• Do not attempt to sample reactive gases (such as hydrogen or oxygen) with the particle counter.
Reactive gases create an explosion hazard within the counter.
• Water, solvents,or other liquids of any type should never be allowed to enter the instrument.

Table of Contents
Table of Contents page
Important Safety Instructions
Chapter 1 – About Particle Counting 6
.1 How do Particle Counters Work? 6
1
1.2 The Two ParticleScan Models 6
1.3 Data Logging Options 6
Chapter 2 – The ParticleScan Kit 7
2.1 Unpacking and Initial Inspection 7
2.2 Packing List 7
Chapter 3 – Getting to Know the ParticleScan 8
3.1 The ParticleScan Unit 8
3.2 ParticleScan Features 9
Chapter 4 – Taking Measurements with the ParticleScan 10
4.1 Preparing the ParticleScan for Use 10
4.2 Switching the ParticleScan On and Off 10
4.3 Sampling Particles 10
4.4 Taking Samples at Different Size Channels 10
Chapter 5 – Adjusting Settings in the Menu 11
5.1 Location Menu [Loc] 11
5.2 Data Logging Menu [Log] 11
5.3 Delete Data Menu [data] 11
5.4 Full Memory Menu [FULL] 11
5.5 Concentration Units Menu [Con] 11
5.6 Sample Time Menu [SAti] 12
5.7 Sample Repeat Menu [SAr] 12
5.8 “Geiger Counter” Menu [GEIG] 12
5.9 Alarm Menu [A] 12
5.10 Time Menu [t] 13
5.11 Date Menu [MM:DD:YYYY ] 13
5.12 Auto Timer Menu [auto] 13
5.13 IP Menu [IP] 13
5.14 Remote Monitoring Menu [InEt] 13
Chapter 6 – Maintenance of the ParticleScan 14
6.1 The Battery 14
6.1.1 Low Battery Indicator 14
6.1.2 Recharging the Battery 14
6.1.3 Replacement of the Battery Pack 14
6.2 Sensor Testing & Cleaning 14
6.2.1 “Zero Count”Test 14
6.2.2 Sensor Cleaning 14

Table of Contents
Table of Contents page
Chapter 7 – Computer Connectivity 15
.1 Features 15
7
7.2 Computer Connectivity Options 15
7.2.1 Via a Network 15
7.2.2 Via a Crossover Connection 15
7.2.3 Via USB 16
7.2.4 USB Driver Installation 16
7.2.5 ParticleScan USB Software for PC Installation 17
7.2.6 Starting the ParticleScan USB Software for PC 18
7.3 Accessing the ParticleScan via the Web Browser 19
7.4 The ParticleScan Control Window 20
7.4.1 Start/Stop Measurements 20
7.4.2 Sample Time 20
7.4.3 Sample Repeat 20
7.4.4 Measurement Units 20
7.4.5 Count Type 20
7.4.6 ParticleScan Display On/Off 20
7.5 Setting the Time & Date 21
7.6 Using the Auto Timer 21
7.7 Scheduling Regular Measurements 22
7.8 Data Logging 23
7.8.1 Checklist Before Data Logging 23
7.8.2 Data Logging to Computer 23
7.8.3 Data Logging to ParticleScan Memory 24
7.8.4 Full Memory Options 24
7.8.5 Viewing Logged Data 24
7.8.6 Printing Logged Data 25
7.8.7 Saving Logged Data to a CSV File 25
7.8.8 Importing a ParticleScan Data File into Excel 26
Chapter 8 – Troubleshooting 28
8.1 Symptom,Cause and Corrective Action 28
Chapter 9 – Technical Specifications for ParticleScan Pro and CR 29
9.1 Technical Specifications 29

hapter 1 – About Particle Counting
C
Chapter 1 – About Particle Counting
1.1 How Do Particle Counters Work?
Laser particle counters use a laser diode light source and collection optics for particle detection. Particles scatter the light
from the laser diode beam in the direction of the collection optics. The collection optics focus the light onto a photo
diode that converts the bursts of light into electrical impulses. The pulse height is proportional to the particle size.
Impulses are counted and their intensity is measured for particle sizing. The results are then displayed digitally for the
specific size channel(s) and set measurement unit.
1.2 The Two ParticleScan Models
The six-channel ParticleScan handheld particle counters are available in two configurations:
ParticleScan Pro
This model is designed for indoor air quality use, featuring a 0.025 cfm sampling rate.
The flow rate of 0.025 cfm of the ParticleScan Pro is more suitable for environments with normal to high particle
counts since the lower flow rate and smaller sampling diameter allow more accurate counting of elevated
particle concentrations.
ParticleScan CR
This model is designed for cleanroom use, featuring a 0.1 cfm sampling rate and a HEPA filter for the exhaust air.
The higher flow rate of the ParticleScan CR permits statistically significant results even if the particle
concentration is low and the measurement time is short.
1.3 Data Logging Options
ParticleScan Pro and ParticleScan CR handheld counters allow the logging (recording) of measurement data onto the
ParticleScan’s internal memory from where it can be downloaded at a later time to a computer via the ParticleScan Utility
Software or a web browser.
When the ParticleScan is connected to a computer or network, measurement data can also be logged in real time to the
computer via the ParticleScan USB Utility Software.
In both cases, the data can be viewed and saved to a text file that can be easily opened and formatted in any common
spreadsheet program. Logged data can also be printed directly from the logging window to a printer.
A printout of particle counting results can be used as a record whenever documentation of room cleanliness is required,
as in Fed-Std-209E cleanroom certification. A permanent record is also useful when tracking the particle concentration
trend at a workstation or other remote location.
6
hapter 2 – The ParticleScan Kit
C
Chapter 2 – The ParticleScan Kit
2.1 Unpacking and Initial Inspection
Each ParticleScan device has been thoroughly inspected and tested by the manufacturer and is ready for use. Prior to use,
please read this instruction manual.
Upon receipt, inspect the shipping carton for damage. If the carton is damaged, notify the carrier and dealer and save the
carton for carrier inspection.
Note: You may wish to keep the outer carton for safe shipment when you send the ParticleScan for calibration. Always
store and ship the ParticleScan in the carrying case.
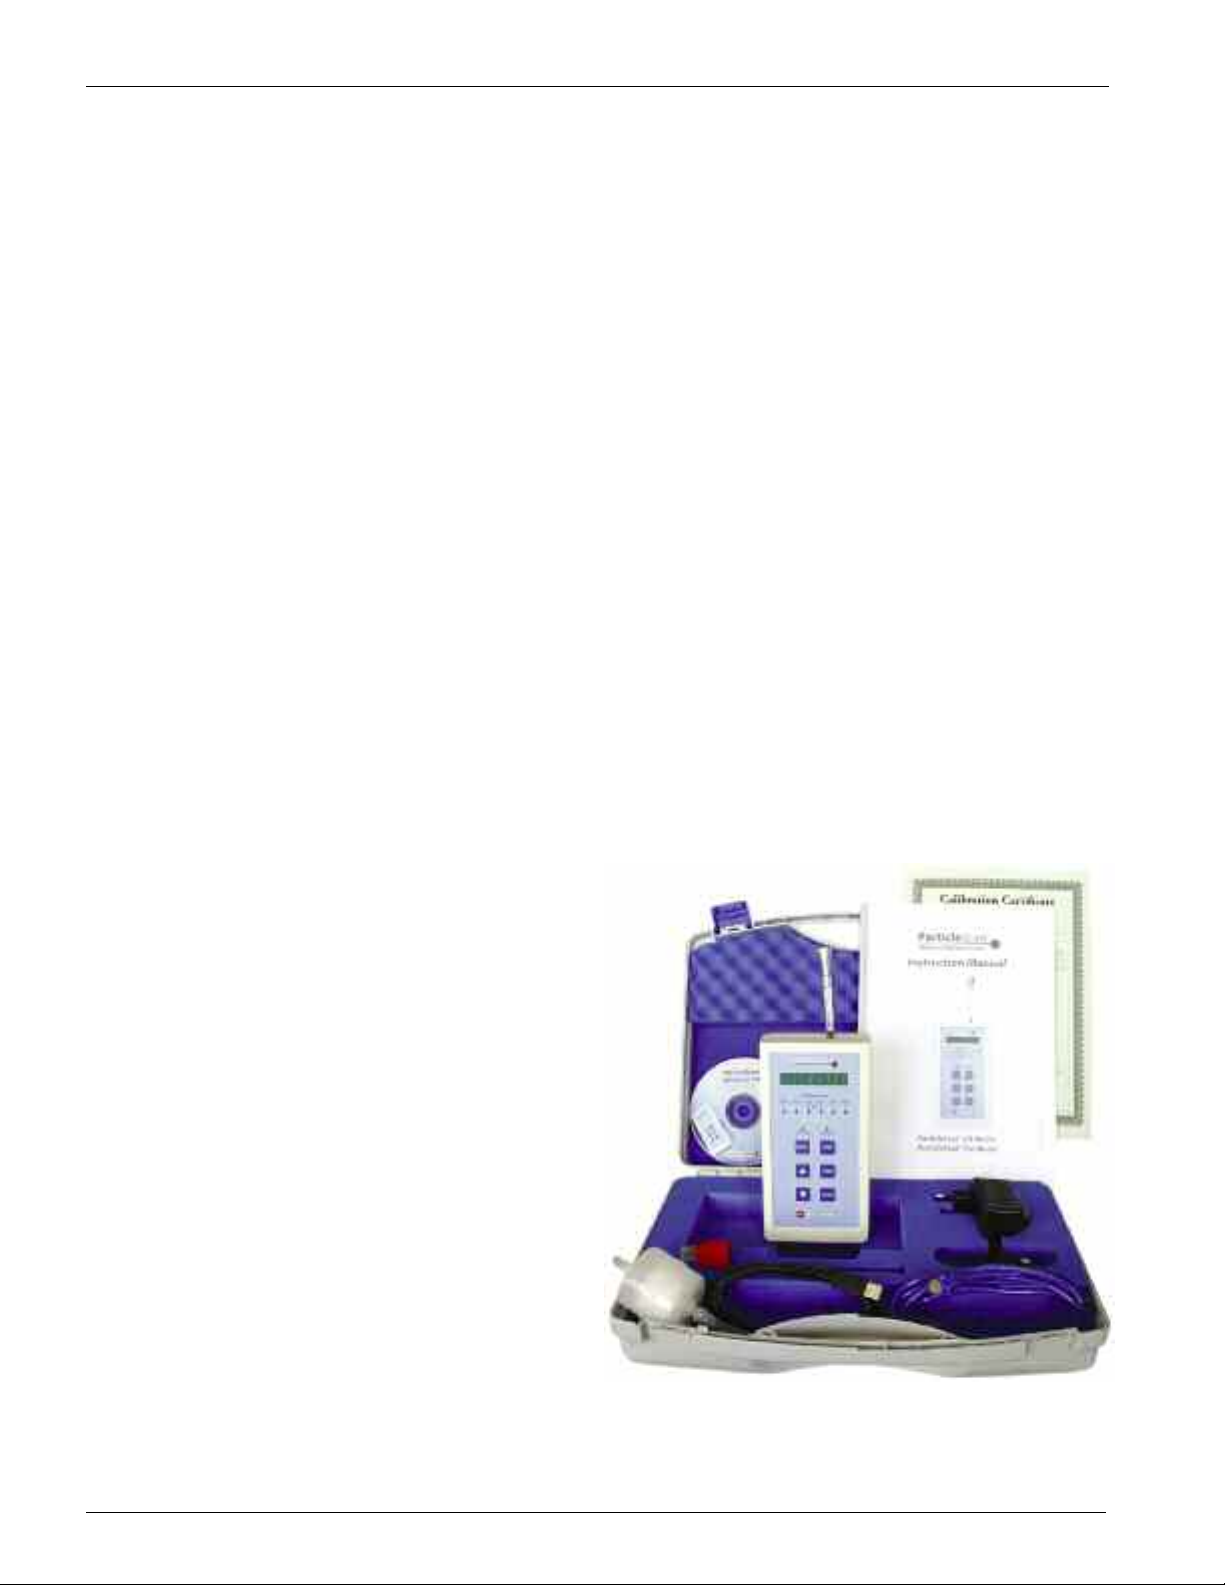
2.2 Packing List
Open the two latches of the carrying case and inspect the kit for completeness. Also check visually for broken parts,
scratches, dents or other damage.
Your ParticleScan kit should consist of the following items:
• ParticleScan device (with
red protection cap on intake nozzle)
• Protective carrying case
• Isokinetic probe with tubing
• Power adaptor
• Purge filter with tubing
• Network cable (Ethernet, Cat. 5)
• Crossover adapter (Ethernet, Cat 5)
• USB cable
• ParticleScan CD with ParticleScan USB Utility Software, USB drivers
Java Runtime, Excel data import sheet, ParticleScan pdf-manual
• User manual
• Calibration certificate
• Warranty registration card
7
Chapter 3 – Getting to Know the ParticleScan
Chapter 3 – Getting to Know the ParticleScan
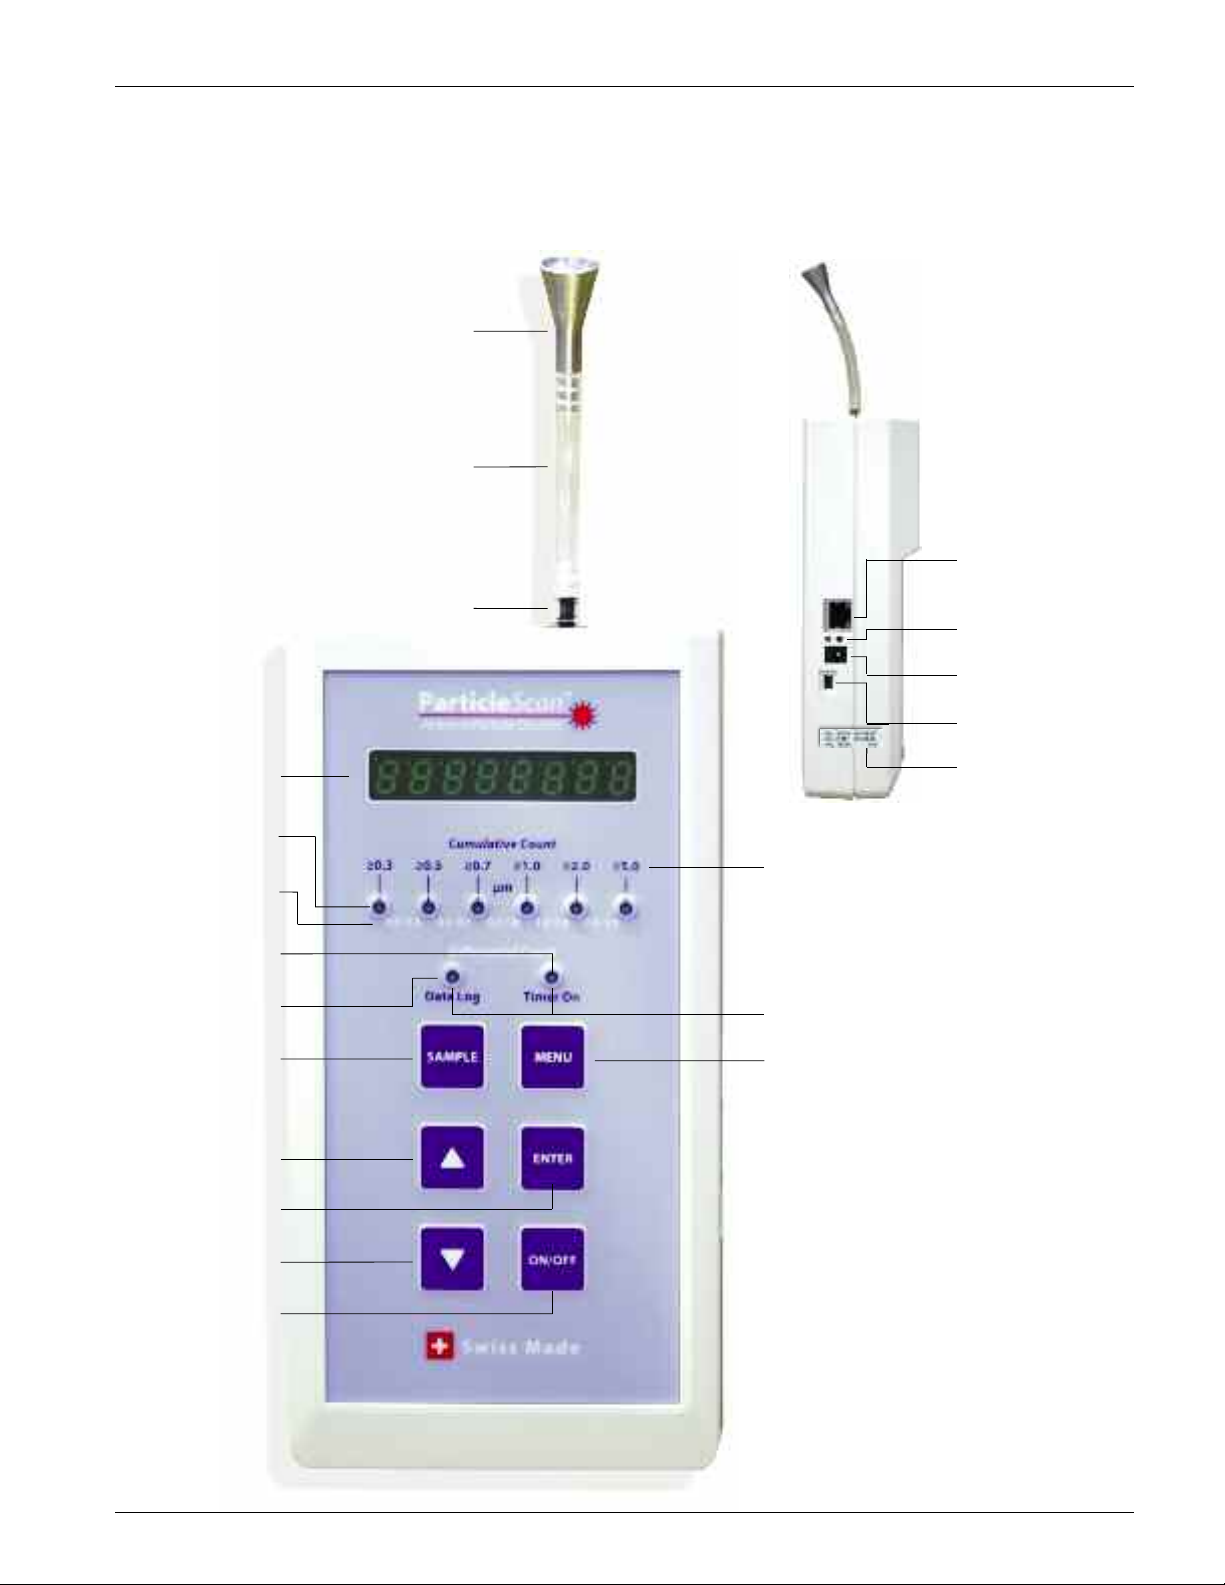
3.1 The ParticleScan Unit
sokinetic probe
I
Tygon tube
Intake nozzle
Ethernet port
(RJ-45)
Charging LEDs
Display
Particle Size
Indicators
Differential Count
Ranges
Auto Timer
Indicator
Data Log Indicator
SAMPLE Key
UP Key
ENTER Key
DOWN Key
ON/OFF Key
Press and hold
2 sec.
Power socket
USB port (Mini-B)
Calibration date sticker
Cumulative Count Ranges
Low Battery Indicator
When both Data Log and
Auto Timer flash
MENU Button
Press to display one of 13 menus:
1. Location Menu [Loc]
2. Data Logging Menu [Log]
3. Delete Data Menu [data]
4. Full Memory Menu [FULL]
5. Concentration Units Menu [Con]
6. Sample Time Menu [SAti]
7. Sample Repeat Menu [SAr]
8. “Geiger Counter” Menu [Geig]
9. Alarm Menu [A]
10. Timer Menu [t]
11. Date Menu [MM.DD.YYYY]
12. Auto Timer Menu [auto]
13. IP Menu [IP]
14. Remote Monitoring Menu [InEt]
8

Chapter 3 – Getting to Know the ParticleScan
3.2 ParticleScan Features
sokinetic probe The isokinetic probe with the Tygon tube piece allows uniform low turbulence sampling of ambient air.
I
It is also necessary for proportional sampling of particles of all sizes.
Intake nozzle The intake nozzle is covered during shipping with a protective red plastic cap, which is designed to keep
mall objects from entering into the sampling chamber. The cap must be removed prior to taking a sample to prevent
s
possible damage to the internal pump.
Display When the device is off and not connected to the charger, the display will also be off. If the device is off and
connected to the charger, it will show [charging] or [charged]. When the unit is sampling, the particle concentration
measured will be displayed. The displayed concentration can be shown for one particle size range at a time (see Particle
Size Indicators). When the Menu key is pressed, the display will show the user settings.
Particle Size Indicators The particle size indicators show which particle size range is currently displayed. When the Alarm
is set and the set particle concentration threshold is exceeded, the appropriate particle size indicator will flash and a beep
will sound.
Cumulative Count Ranges There are six cumulative size channels to select from: ≥0.3 / ≥0.5 / ≥0.7 / ≥1.0 / ≥2.0 / ≥5.0
microns. When a cumulative size channel is selected, the ParticleScan will count particles which are equal to and larger
than the selected size channel.
Differential Count Ranges There are five differential size channels to select from: 0.3–0.5 / 0.5–0.7 / 0.7–1.0 / 1.0–2.0 /
2.0–5.0 microns. When a differential size channel is selected, the ParticleScan will count the particles whose size lies
between the selected two size channels.
Data Log Indicator This indicator lights up when data logging has been turned on. Whenever a measurement is taken, it
will be logged to the ParticleScan’s internal memory.
Timer On Indicator This indicator lights up when the auto timer is actively set. The Auto Timer is a feature that allows the
ParticleScan to take automatic measurements based on a timer schedule. The Auto Timer schedule is set via the
ParticleScan USB Utility Software or the web browser interface.
Low Battery Indicator When the battery is running low, both the Data Log Indicator and the Timer On Indicator will
flash. The unit can operate for another 5–10 minutes from the time the Low Battery Indicator comes on.
ON/OFF Key Press and hold for 2 seconds to turn the device on or off.
SAMPLE Key Press once when the device is on to start a measurement. Press again to stop a measurement.
UP/DOWN Keys Use during a measurement to select size channel displayed. It is also used to change a menu setting.
MENU Key Press 1 to 14 times to display one of 14 user menus.
ENTER Key Press and hold for 2 seconds when in a menu to make a menu item changeable. Press once in certain menus
to progress. Press and hold for 2 seconds to save changes in a menu.
9

Chapter 4 – Taking Measurements with the ParticleScan
Chapter 4 – Taking Measurements with the ParticleScan
4.1 Preparing the ParticleScan for Use
To prepare your ParticleScan for use, simply follow these steps:
1. Remove the red protective cap from the intake nozzle.
2. Take the isokinetic probe and attach it with the tubing end to the intake nozzle.
4.2 Switching the ParticleScan On and Off
1. To switch the ParticleScan on, press and hold down the ON/OFF key for 2 seconds. When the device is turned on, it
will sound a short beep and show [STANDBY] on the display.
2. To turn off the device, press and hold down the ON/OFF key for 2 seconds. When the ParticleScan turns off, it will
sound a short beep and the display will extinguish or show [Charging] when it is connected to the power adapter.
4.3 Sampling Particles
1. To take a measurement, turn the ParticleScan on and press the SAMPLE key. The display will count down while the
pump gathers the first air sample and then displays the first measurement. There will be a delay of a few seconds
until the countdown starts, during which the ParticleScan performs a routine check. The number in the display
represents the number of particles calculated to be present per cubic foot, liter or cubic meter (1000 liters) of air,
depending on the concentration unit selected (see Chapter 5.5).
2. The display of the ParticleScan will update in regular intervals, as selected in the Sample Time Menu. The default
setting is 6 seconds (see Chapter 5.6).
3. To stop taking measurements, press the SAMPLE key once. The last measurement result is now frozen on the display.
4.4 Taking Samples at Different Size Channels
The ParticleScan features six size channels which allows the user to take cumulative counts for six different particle size
ranges and differential counts for five different size ranges.
1. When the ParticleScan is first switched on, it will display the particle concentration per cubic foot (cu. ft.) of air for
the default Cumulative Count Range (i.e. ≥0.3µm).
2. To change the size channel to the next particle size range, simply press the UP key once. The Size Range Indicator
LED will shift from “≥0.3” to “≥0.5”.
3. Repeated pressing of the UP key will scroll through all the different size ranges, first the Cumulative Count Ranges,
then the Differential Count Ranges. To reach the required count range, simply scroll through all the count ranges
until the desired Particle Size Indicator is lit.
10
 Loading...