

ipTime NAS 2 Installation Manual
According to this document,
check the contents in the box. (This Guide)
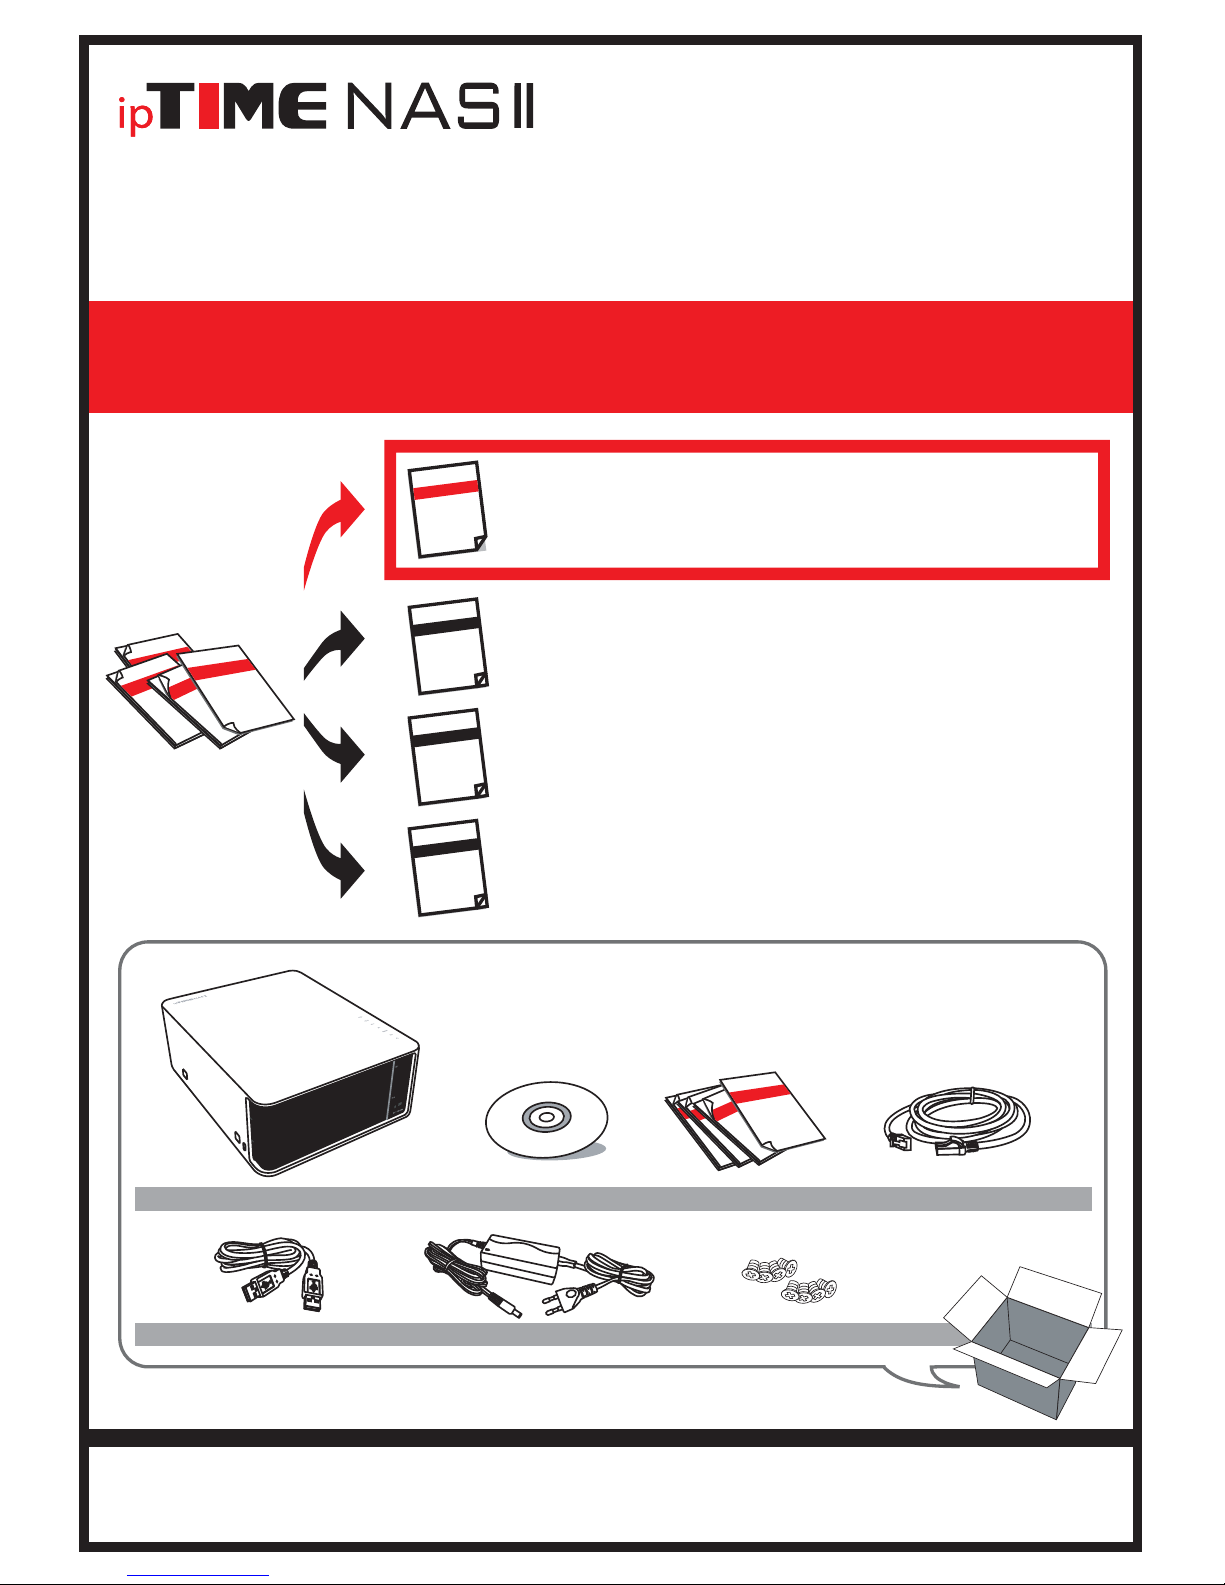
Box Contents
Access shared folders of NAS using PCs or smart-phones
through internet or local network.
Using NAS
Login the web console management system and using it.
User’
Install the utility software package
and setup the NAS system using the system setup wizard.
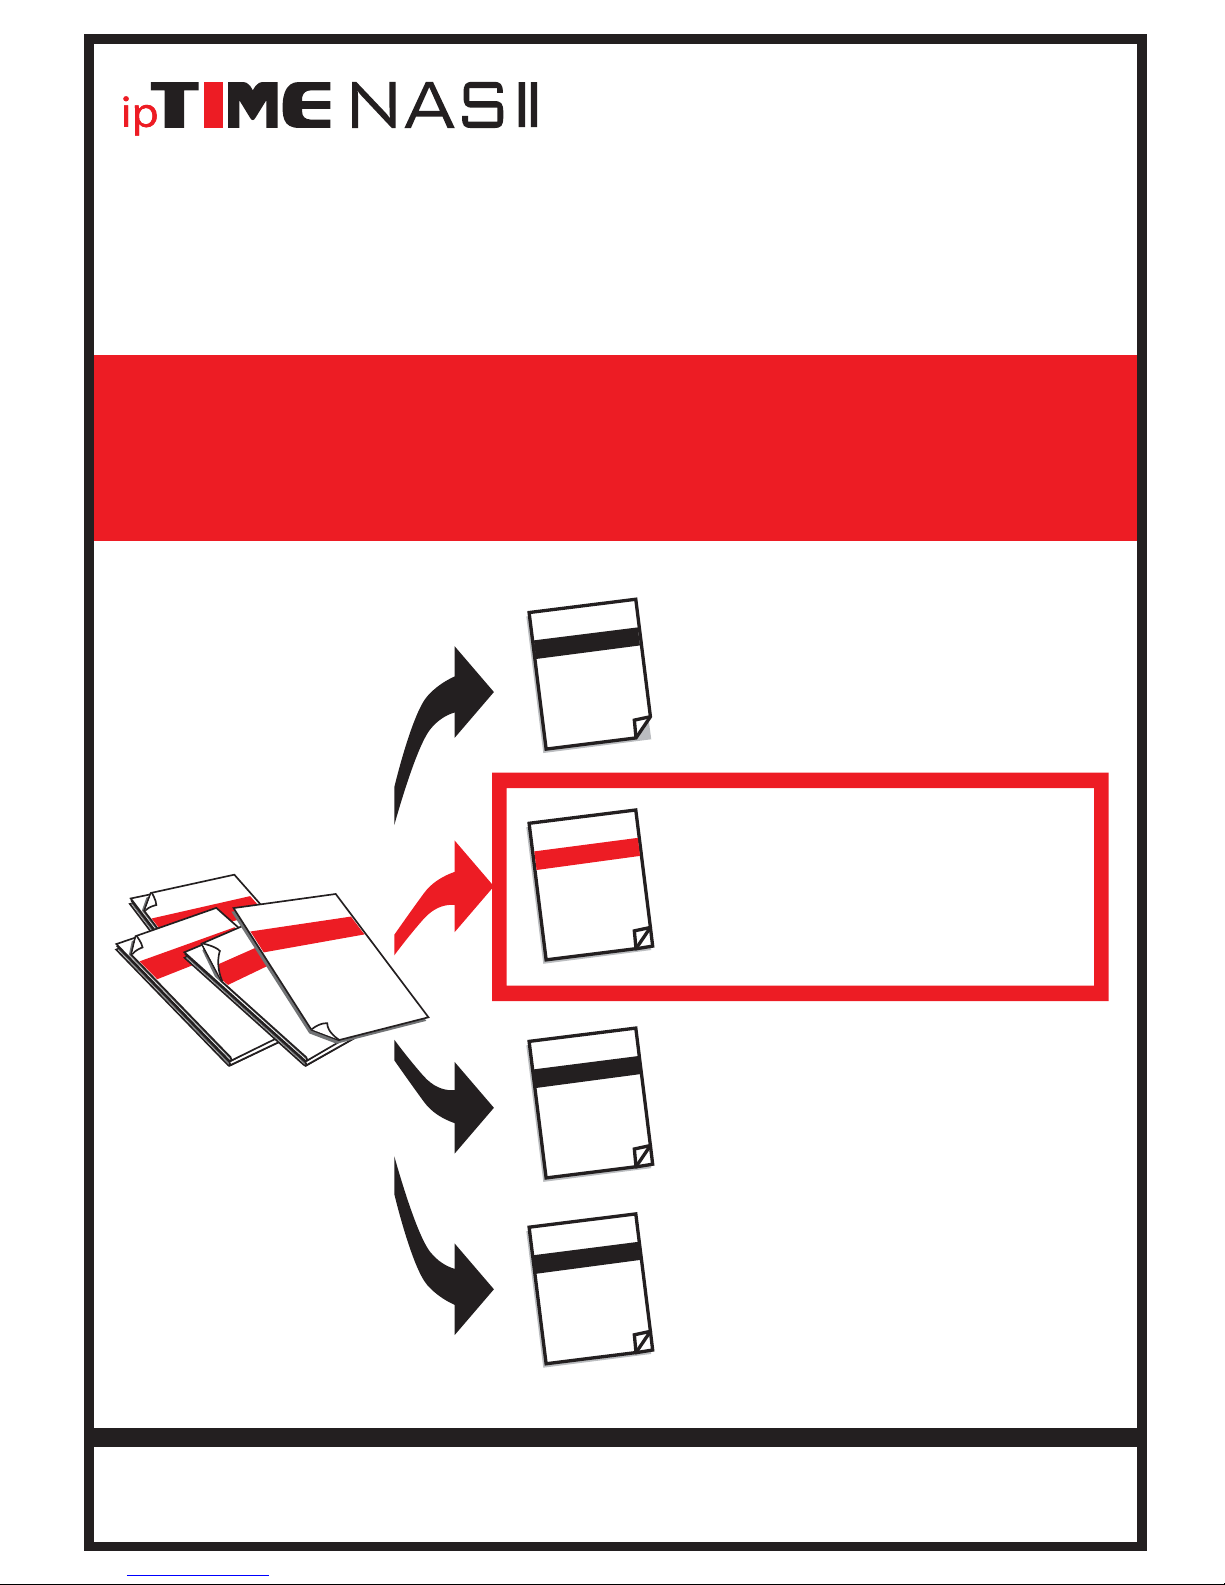
Installation Guide
Box Contents
Thank you for buying ipTIME
Thank you for buying ipTIME
NAS
NASⅡ
!!!
!!!
All specifications and figures are subject to change without notice.
s Guide for Web console
< LAN cable, 2m >< NAS system >
※ The box contents below are only for reference.
< Software CD > < Manuals >
< USB cable >
< Screw x 8 >
< DC Adapter >
Thank you for buying ipTIME NAS
Thank you for buying ipTIME NASⅡ
!!!
!!!
The utility software for NAS
The utility software for NASⅡ
can be run on
can be run on
Windows 2000, XP, Vista and Windows 7 OS environment.
Windows 2000, XP, Vista and Windows 7 OS environment.
In other OS like Mac OS or Linux, installation can be done using web browser manually.
In other OS like Mac OS or Linux, installation can be done using web browser manually.
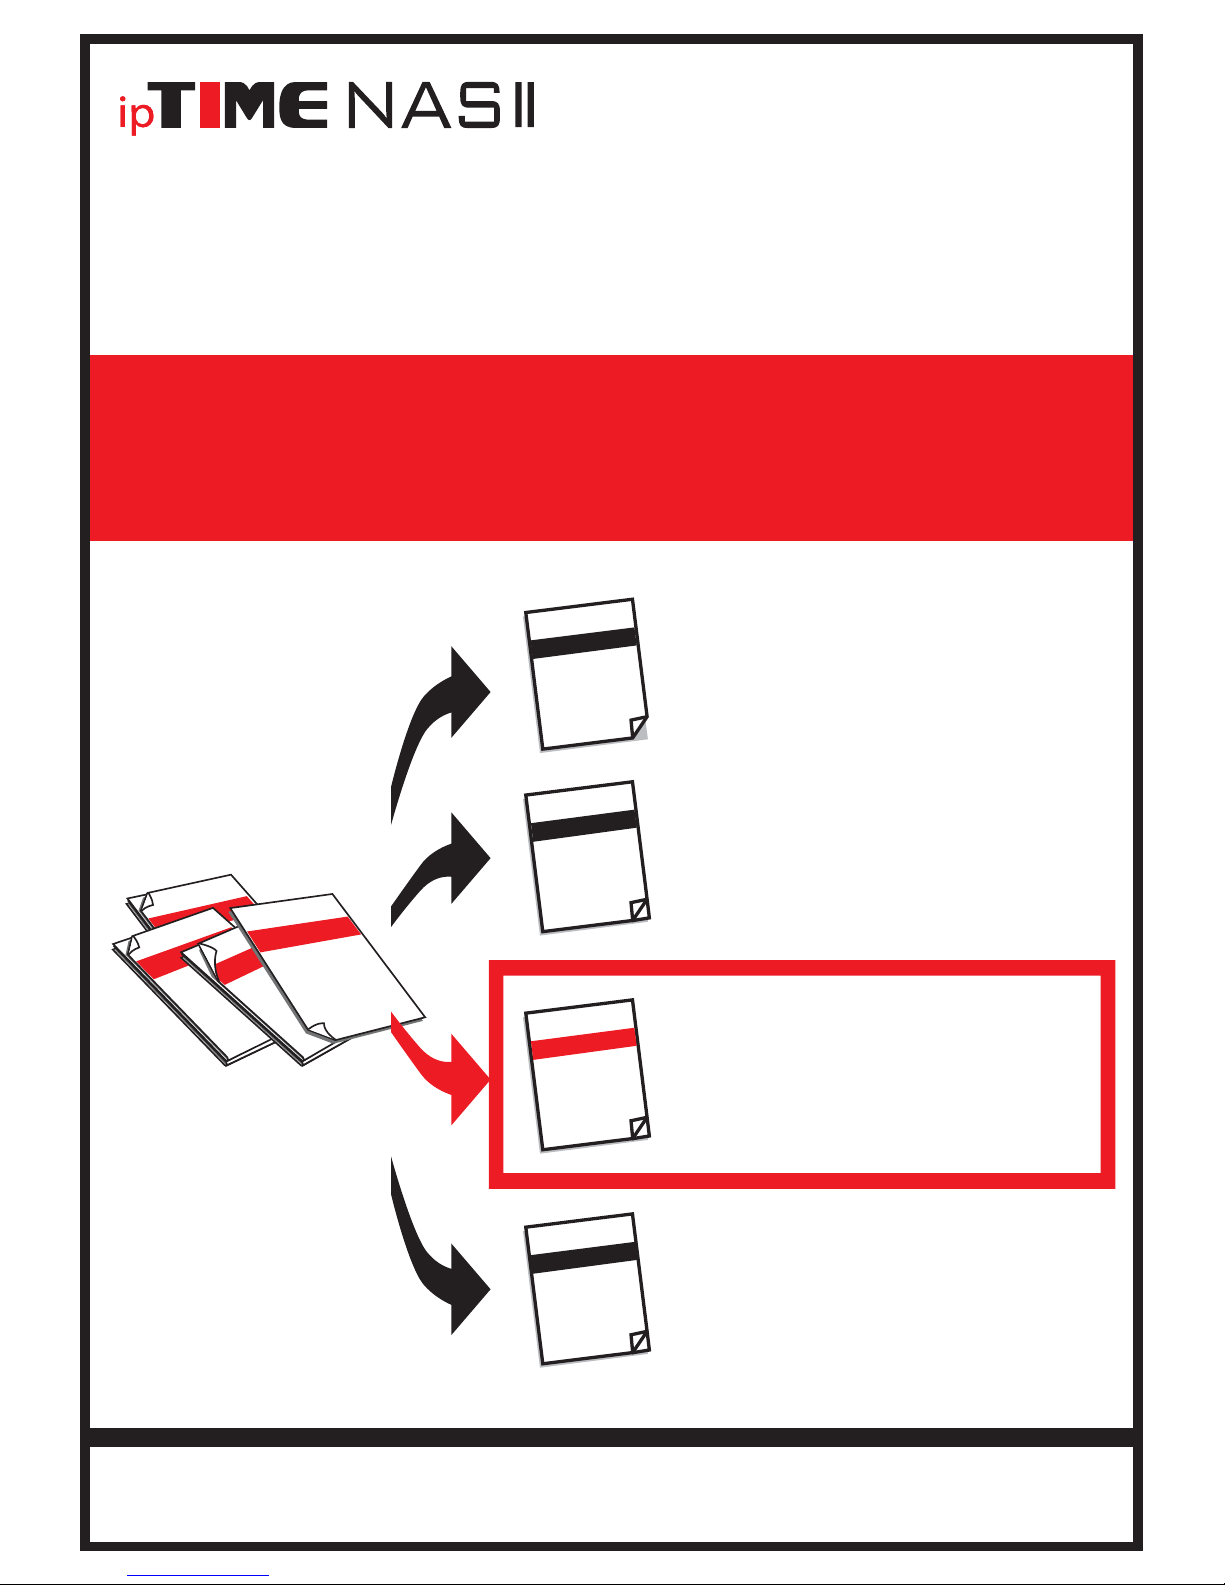
According to this document,
check the contents in the box.
Box Contents
Access shared folders of NAS
using PCs or smart-phones
through internet or local network.
Using NAS
User’
Install the utility software package
and setup the NAS system
using the system setup wizard. (This Guide)
Installation Guide
Installation Guide
s Guide for Web console
Login the web console management system
and using it.
All specifications and figures are subject to change without notice.
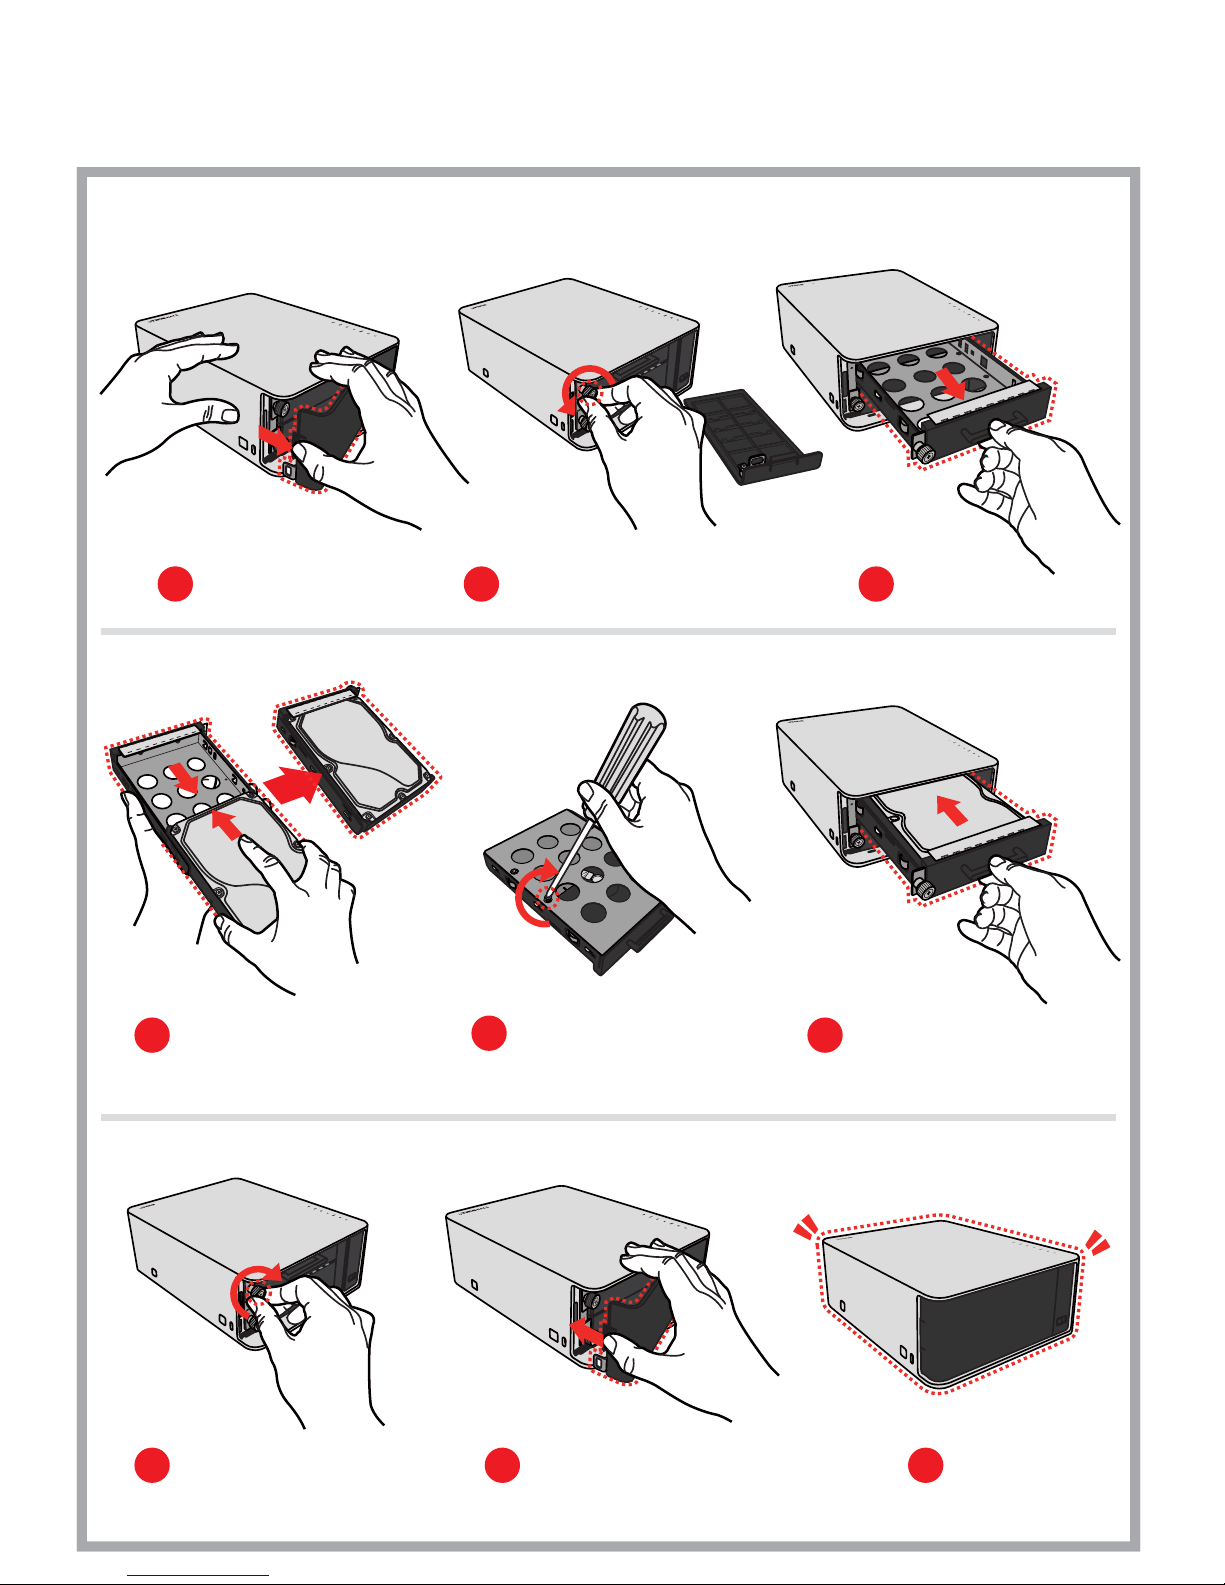
Installing the HDD
One.
Install HDD as the pictures below.
- The other HDD can be installed as the same way.
1
Open the front panel.
4
Insert the HDD into the tray. Lock the HDD with screws.
2
Unlock the screws from the tray.
3
6
5
Pull out the tray.
NAS
I
I
NAS
I
I
Plug the tray to the system.
Lock the screw to the tray.
7
Close the front panel.
8 9
Done.
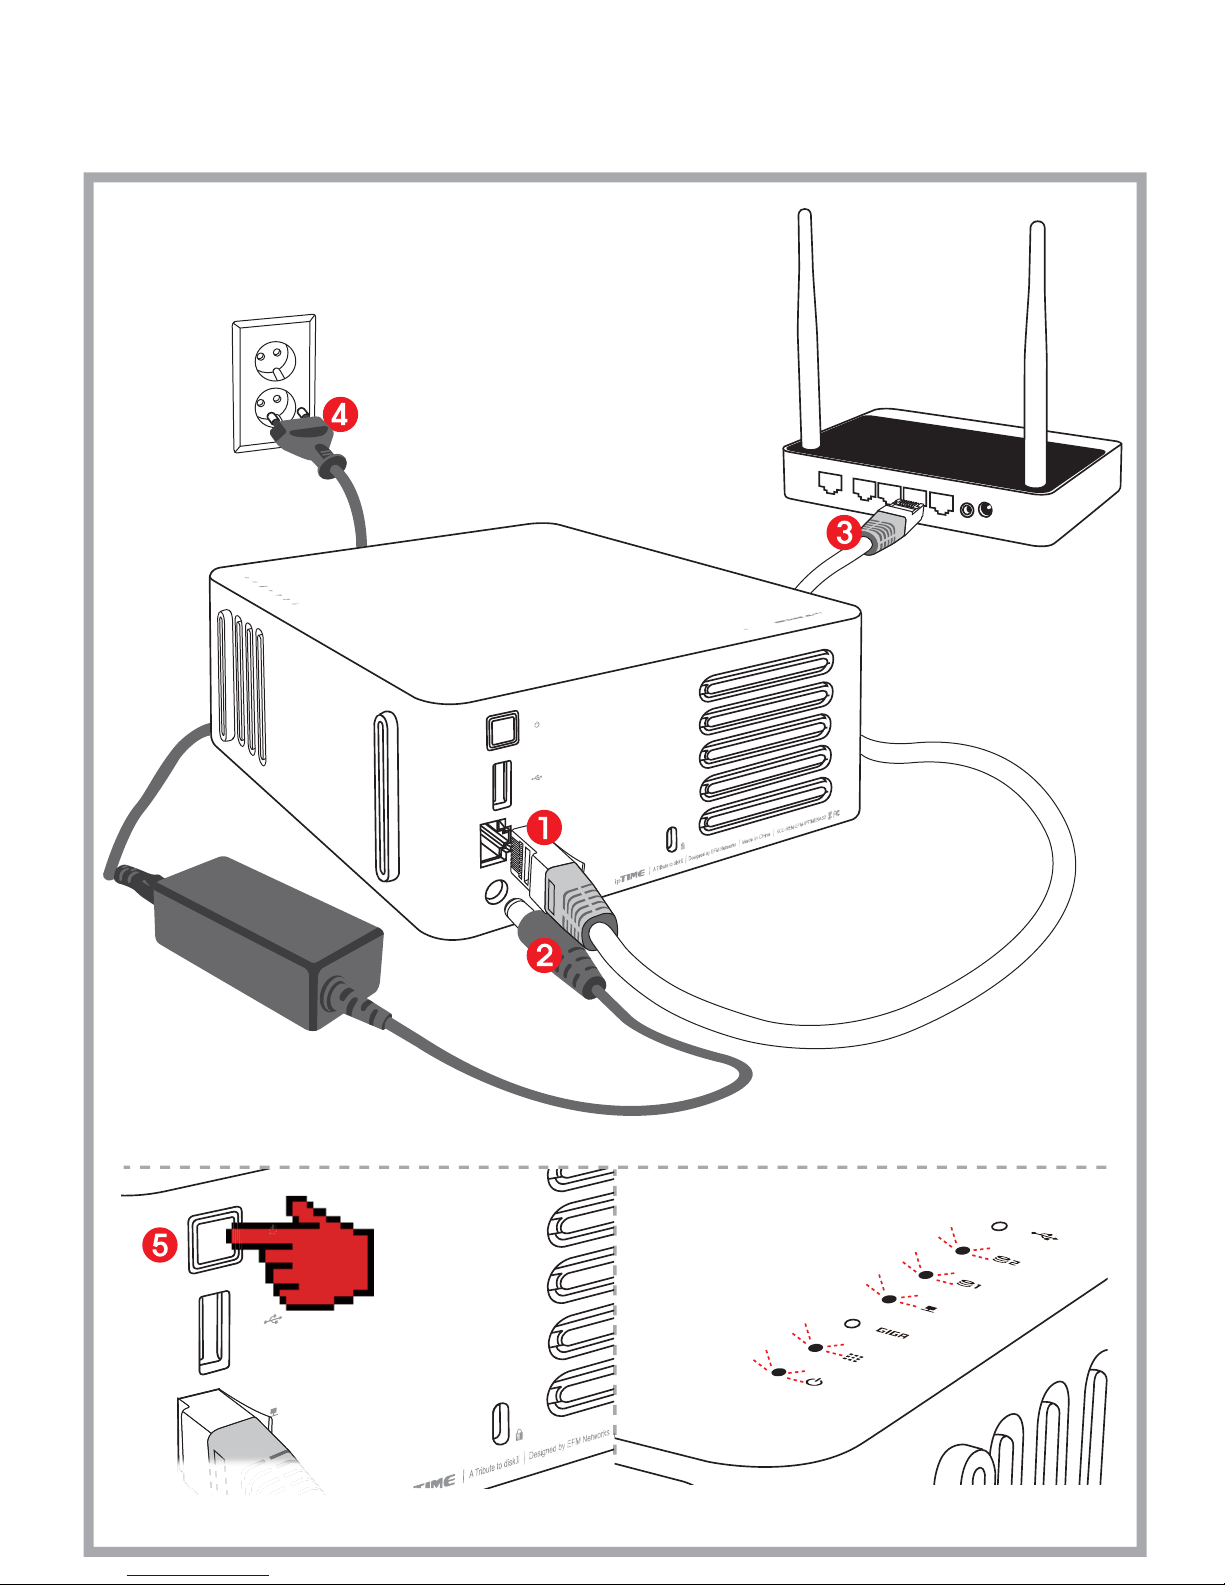
Connect cables as numbered as pictures below.
Use ipTIME IP router with firmware higher than 7.40 when connect NAS to network.
<ipTIME NASⅡ>
<ipTIME IP router>
NAS
I
I
I
I
Click Power button on the rear panel of NAS and check the LEDs as above.
Connecting cables
Two.
Installing Utility Software
Three.
3
Some Stages are omitted.
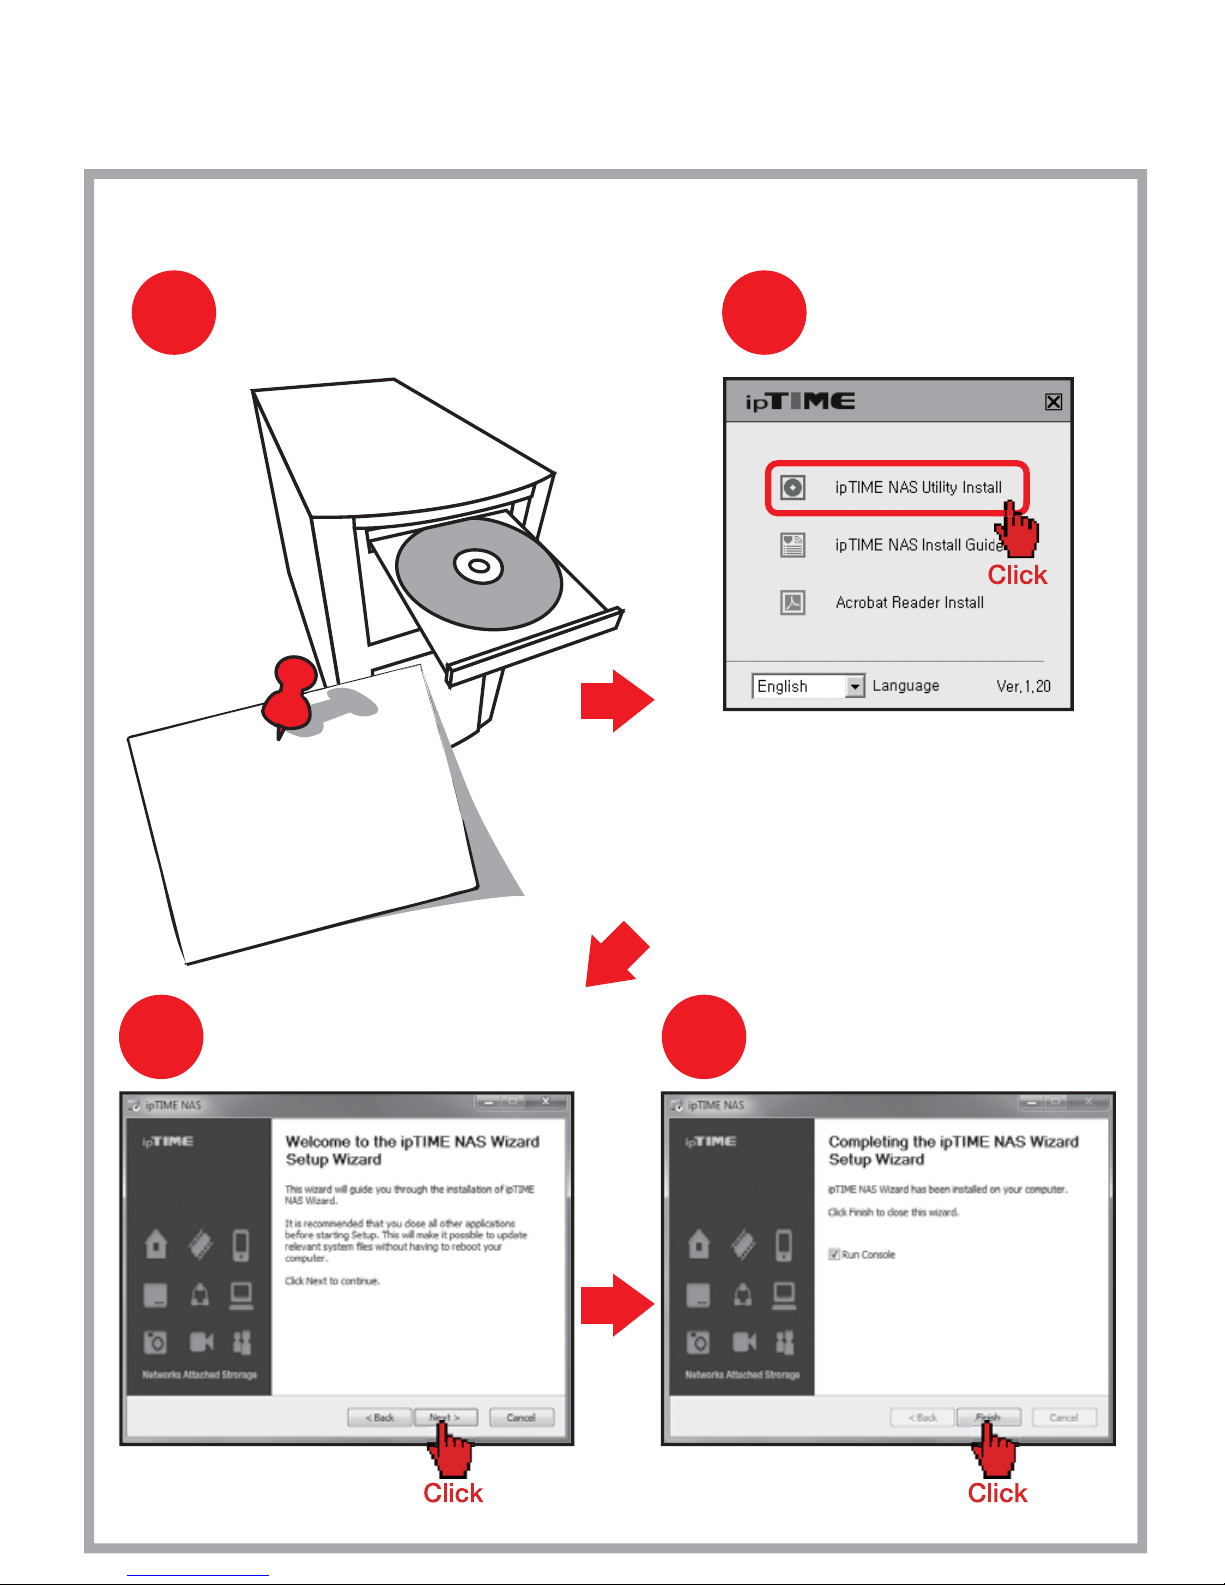
Start Installation
Click [Next]
to start the installation.
Click [Finish]
when the installation is finished.
1
2
Insert CD
Install the Utility
4
Finish Installation
Click [ipTIME NAS Utility Install] when
the CD launcher program is started.
The utility software for NASⅡ can
be run on Windows 2000, XP, Vista
and Windows 7 OS environment.
In other OS like Mac OS or Linux,
installation can be done using
web browser manually.
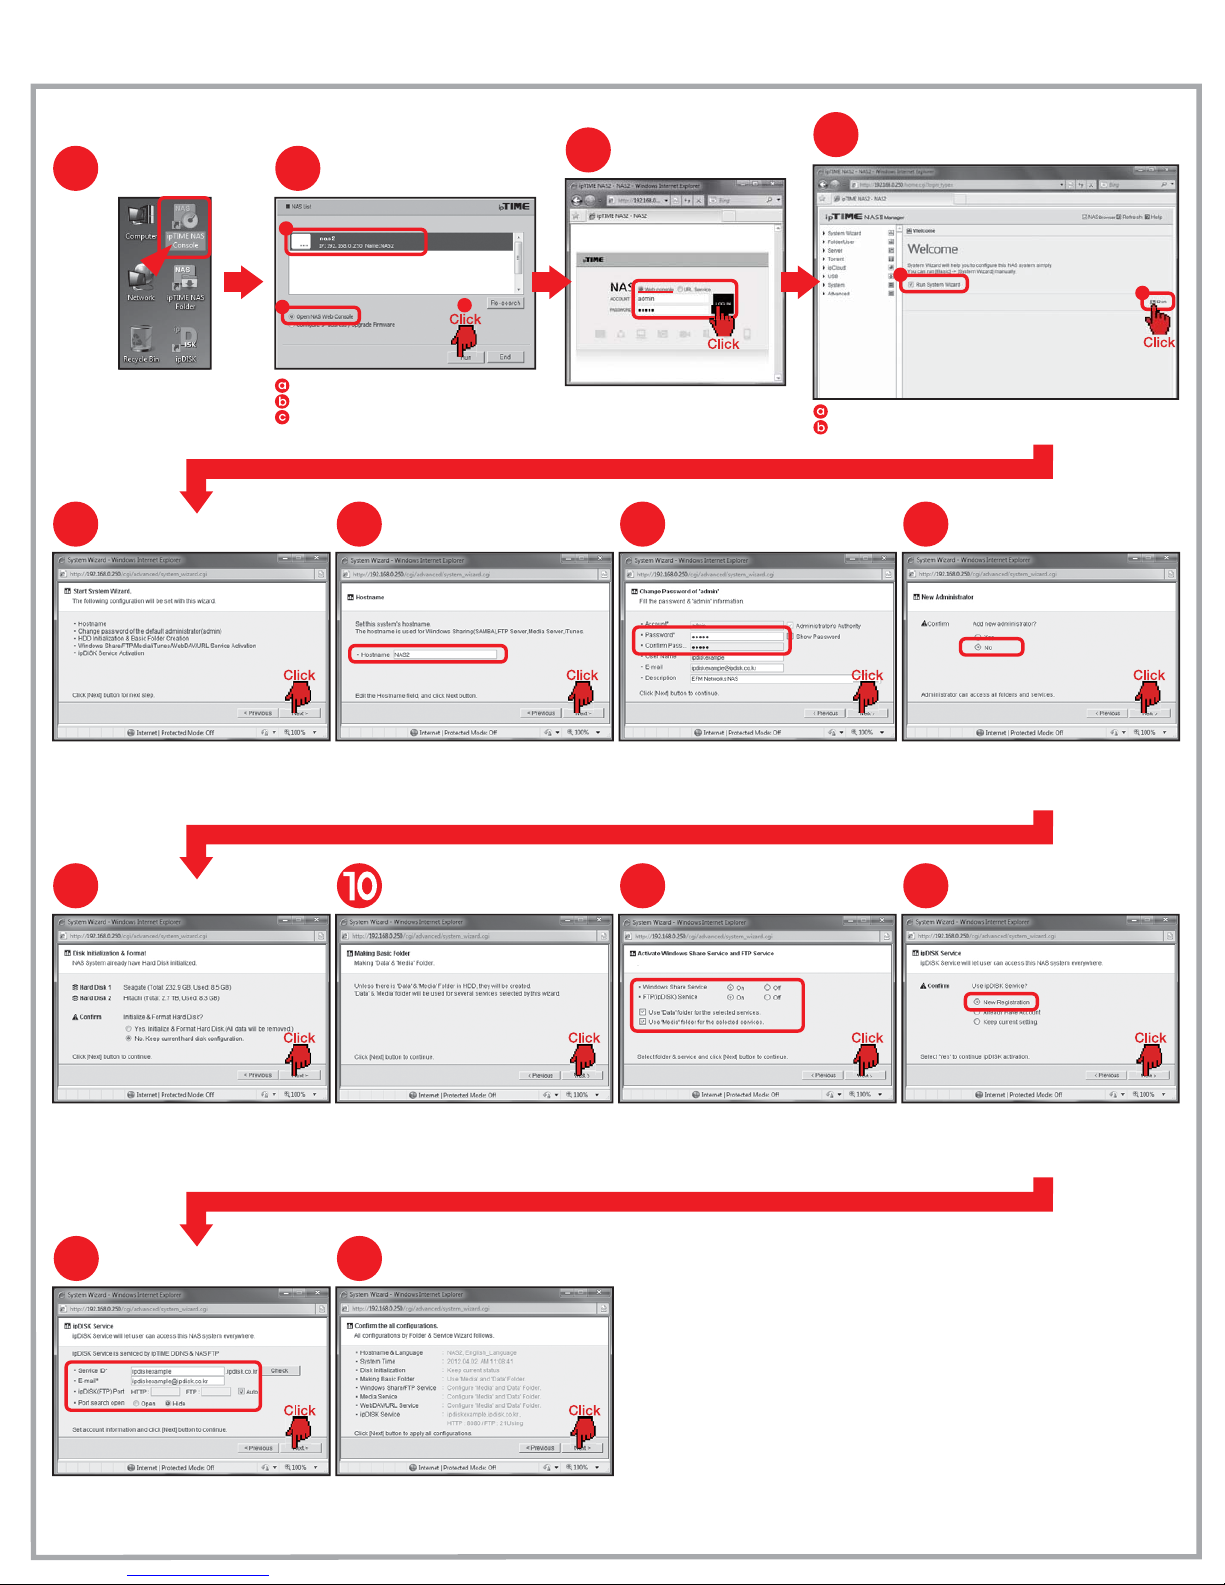
Configuring the NAS
Four.
Some of the configuration stages are omitted.
1
Run ipTIME NAS console
Double Click [ipTIME NAS console]
in the Desktop screen.
2
Select NAS
Choose NAS from searching list.
Choose [Open NAS Web Console].
Click [Run] button.
4
Run System Wizard
Check [Run System Wizard].
Click [Run] to start the wizard.
3
Login
a
b
c
a
b
Login to the selected NAS
as a
※ The default password for admin is
“admin” account.
‘admin’.
5
Start System Wizard
Click [Next] button to begin the wizard.
6
Enter the hostname
Enter the hostname wanted
and click [Next] button.
7
Change the
default password for admin
Change the password for admin
and click [Next] button.
8
Add a new administrator
9
Initialize and Format Disk
Choose Yes or No for initialize & Format Hard Disk
and click [Next] button.
※ Formatting is not needed
if the disk is already formatted.
Creating default folders for service
Activate the shared folders
for Windows and FTP
Turn on the FTP and Window service
and click [Next] button.
11
Register ipDISK service
Select [New Registration] for ipDISK service
and click [Next] button.
12
13
Configure ipDISK service
Fill Service ID and E-mail.
Select ipDISK(FTP) port as an Auto.
※ To select ipDISK port as an Auto,
use ipTIME IP router with firmware higher than 7.40.
14
Finish the configuration
Review the configurations
and click [Next] button to finish.
Choose Yes or No for adding a new administrator account
and click [Next] button.
※ Adding a new administrator account can be done later,
Choose
“No”
and continue the wizard.
Be sure the default folders
for service will be created.
“Data”
and
“Media”
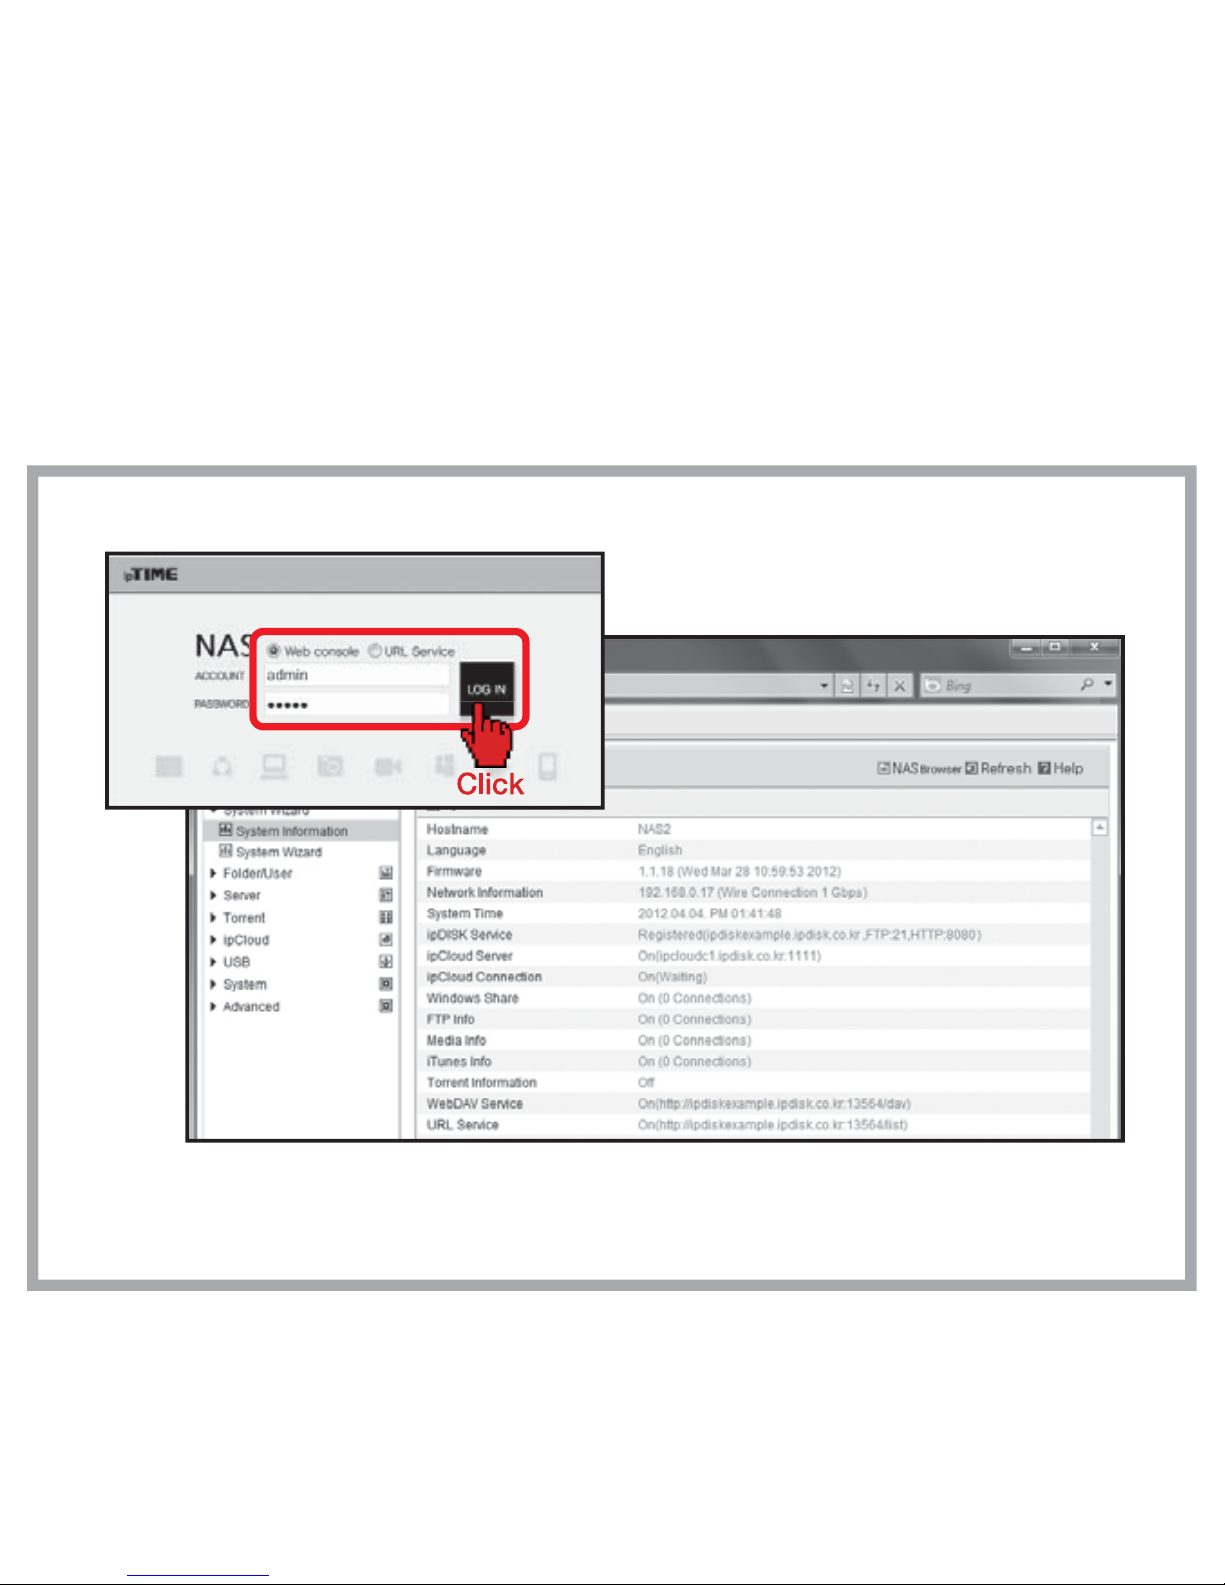
Management
with Web Console
Appendix.
The configuration done by system wizard can be reviewed by the web console.
※
Click [ipTIME NAS Console] icon to login to the web console.
※
Adding a user, creating a folder and other jobs can be done in the web console.
※
Refer
“User’
s Guide for Web Console Management”
for more detail information.
Thank you for buying ipTIME NAS
Thank you for buying ipTIME NASⅡ
!!!
!!!
The utility software for NAS
The utility software for NASⅡ
can be run on Windows 2000, XP, Vista
can be run on Windows 2000, XP, Vista
and windows 7 OS environment. In the smart-phone environment
and windows 7 OS environment. In the smart-phone environment
ipTIME NAS
ipTIME NASⅡ
can be easily accessed using smart-phone apps also available.
can be easily accessed using smart-phone apps also available.
According to this document,
check the contents in the box.
Box Contents
Access shared folders of NAS
using PCs or smart-phones
through internet or local network. (This Guide)
Using NAS
User’
Install the utility software package
and setup the NAS system
using the system setup wizard.
Installation Guide
Using NAS
s Guide for Web console
Login the web console management system
and using it.
All specifications and figures are subject to change without notice.
 Loading...