

Page 1
Doc No: PH232Ux2-UM-001
30 November 2013
USER’S MANUAL
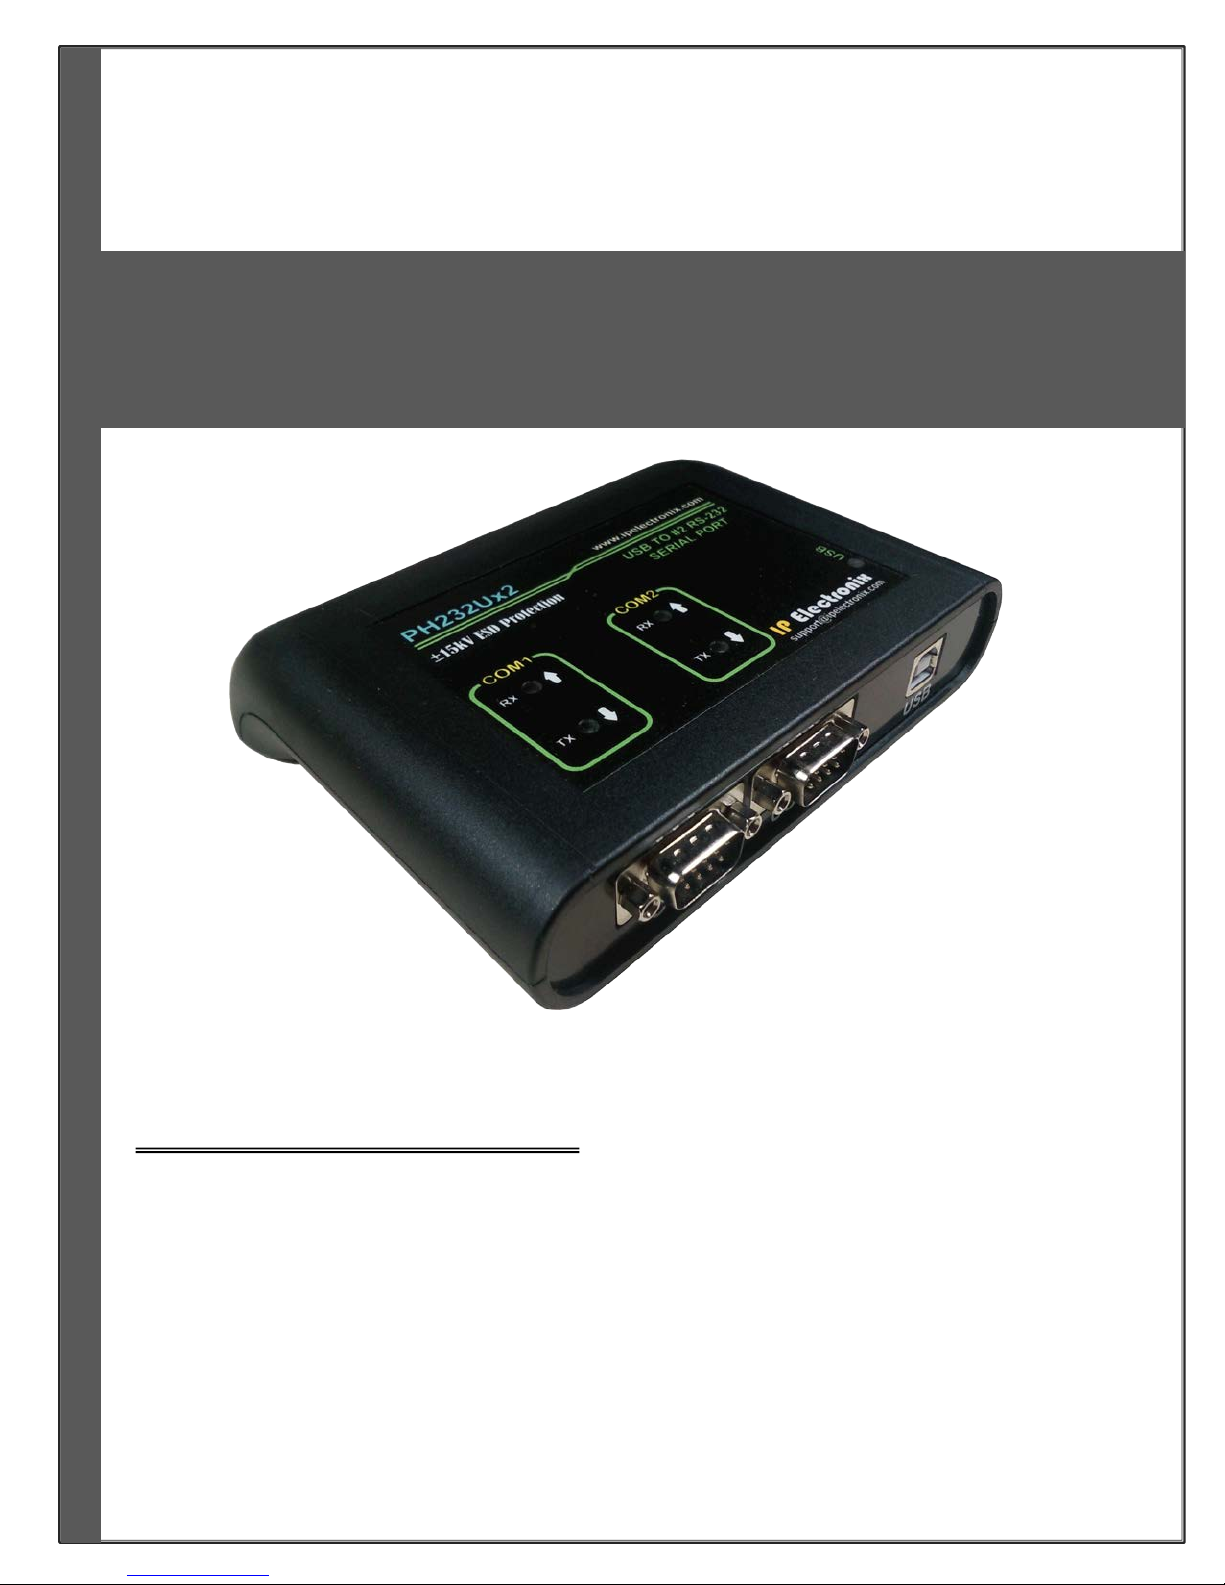
PH232Ux2
USB to #2 RS-232 Bi-Directional Converter
IPEX
(IP Electronix)
Page 2
www.ipelectronix.com
IPEX (IP Electronix) PH232Ux2
: User’s Manual
Page 2 of 27 Doc No. : PH232Ux2-UM-001
30 November 2013
Page 3

www.ipelectronix.com
IPEX (IP Electronix) PH232Ux2
: User’s Manual
Contents
1. INTRODUCTION ....................................................................................................................................... 4
2. SPECIFICATIONS ...................................................................................................................................... 4
3. PACKAGE CHECKLIST ............................................................................................................................... 5
4. TOP PANEL .............................................................................................................................................. 5
5. FRONT PANEL .......................................................................................................................................... 5
6. INSTALLATION ON WINDOWS XP ............................................................................................................ 6
7. INSTALLATION IN WINDOWS 7 .............................................................................................................. 13
8. CHANGING COM PORT NUMBER ........................................................................................................... 19
9. DISTINGUISH DEVICE PORTS COM NUMBER .......................................................................................... 22
10. RS-232 SERIAL PORTS PIN CONFIGURATION (PORT #1, PORT #2) ...................................................... 23
11. RS-232 CONNECTING METHODS ........................................................................................................ 24
12. GUARANTEE ...................................................................................................................................... 27
13. TECHNICAL SUPPORT ........................................................................................................................ 27
Page 3 of 27 Doc No. : PH232Ux2-UM-001
30 November 2013
Page 4

www.ipelectronix.com
IPEX (IP Electronix) PH232Ux2
: User’s Manual
1. Introduction
IPEX PH232Ux2™ is a USB to RS-232 Converter that adds two serial COM Port via its USB connection and is
compatible with RS-232 standard devices RXD, TXD, RTS, CTS, DTR, DSR, DCD, RI and GND signals and enables
your laptop or workstation with the ability to communicate between a USB port and up to #2 RS-232 serial
peripherals with baud rate from 300bps to 230400bps simultaneously. PH232Ux2™ is fully Plug & Play and no
external power supply is required as PH232Ux2™ takes its power from the USB Bus. It is designed for industrial
usage and is useful for Industrial Automation, Telecommunications, SCADA Systems, and DCS Systems …,
Protection against Surge, ESD and EMI also is considered in its design. PH232Ux2™ is Full-Duplex converter and
supports Point-to-Point connection.
PH232Ux2™ comes complete with drivers for Microsoft Windows XP/CE/2003/2008/7/8. Drivers are also
available for Linux, Mac OS and Android.
2. Specifications
USB to RS-232 Bi-Directional Converter
Number of Ports: #2 RS-232 Serial Port, #1 USB Port
Serial Standard: Meets or Exceeds the Requirements of TIA/EIA-232-F and ITU v.28 Standards
RS-232 Signal (Full Handshake Support): TxD, RxD, DTR, RTS, DSR, DCD, CTS, RI, GND
RS-232 Parity: Even, Odd, None, Mark and Space; Selectable
Hi-speed USB 2.0 supported (up to 480 Mbps)
Fully Plug & Play
Bus Powered (No External Power Supply Required)
Serial Transmission Speed up to 230.4 kbps
Driver Supported: Microsoft Windows XP/CE/2003/2008/7/8, Linux, Mac OS and Android (32 & 64 Bits)
Operating Systems
Power (Green) LED Indicator
Transmit (Blue) and Receive (Yellow) LED Indicator for All Ports
ESD Protection: RS-232 Bus-Pin ESD Protection Exceeds ±15 kV Using Human-Body Model (HBM)
Dimensions: 36.41mm x 121.82mm x 140 mm (1.43inch x 4.79inch x 5.51inch)
Operating Temperature: -10°C to +70°C (+14°F to +158°F)
1 Year Guarantee and 5 Years Support
Page 4 of 27 Doc No. : PH232Ux2-UM-001
30 November 2013
Page 5
www.ipelectronix.com
IPEX (IP Electronix) PH232Ux2
: User’s Manual
3. Package Checklist
Before installing the PH232Ux2, verify that the package contains the following items:
1) PH232Ux2
2) USB Cable
3) Installation CD-ROM
NOTE: Notify your sales representative if any of the above items is missing or damaged.
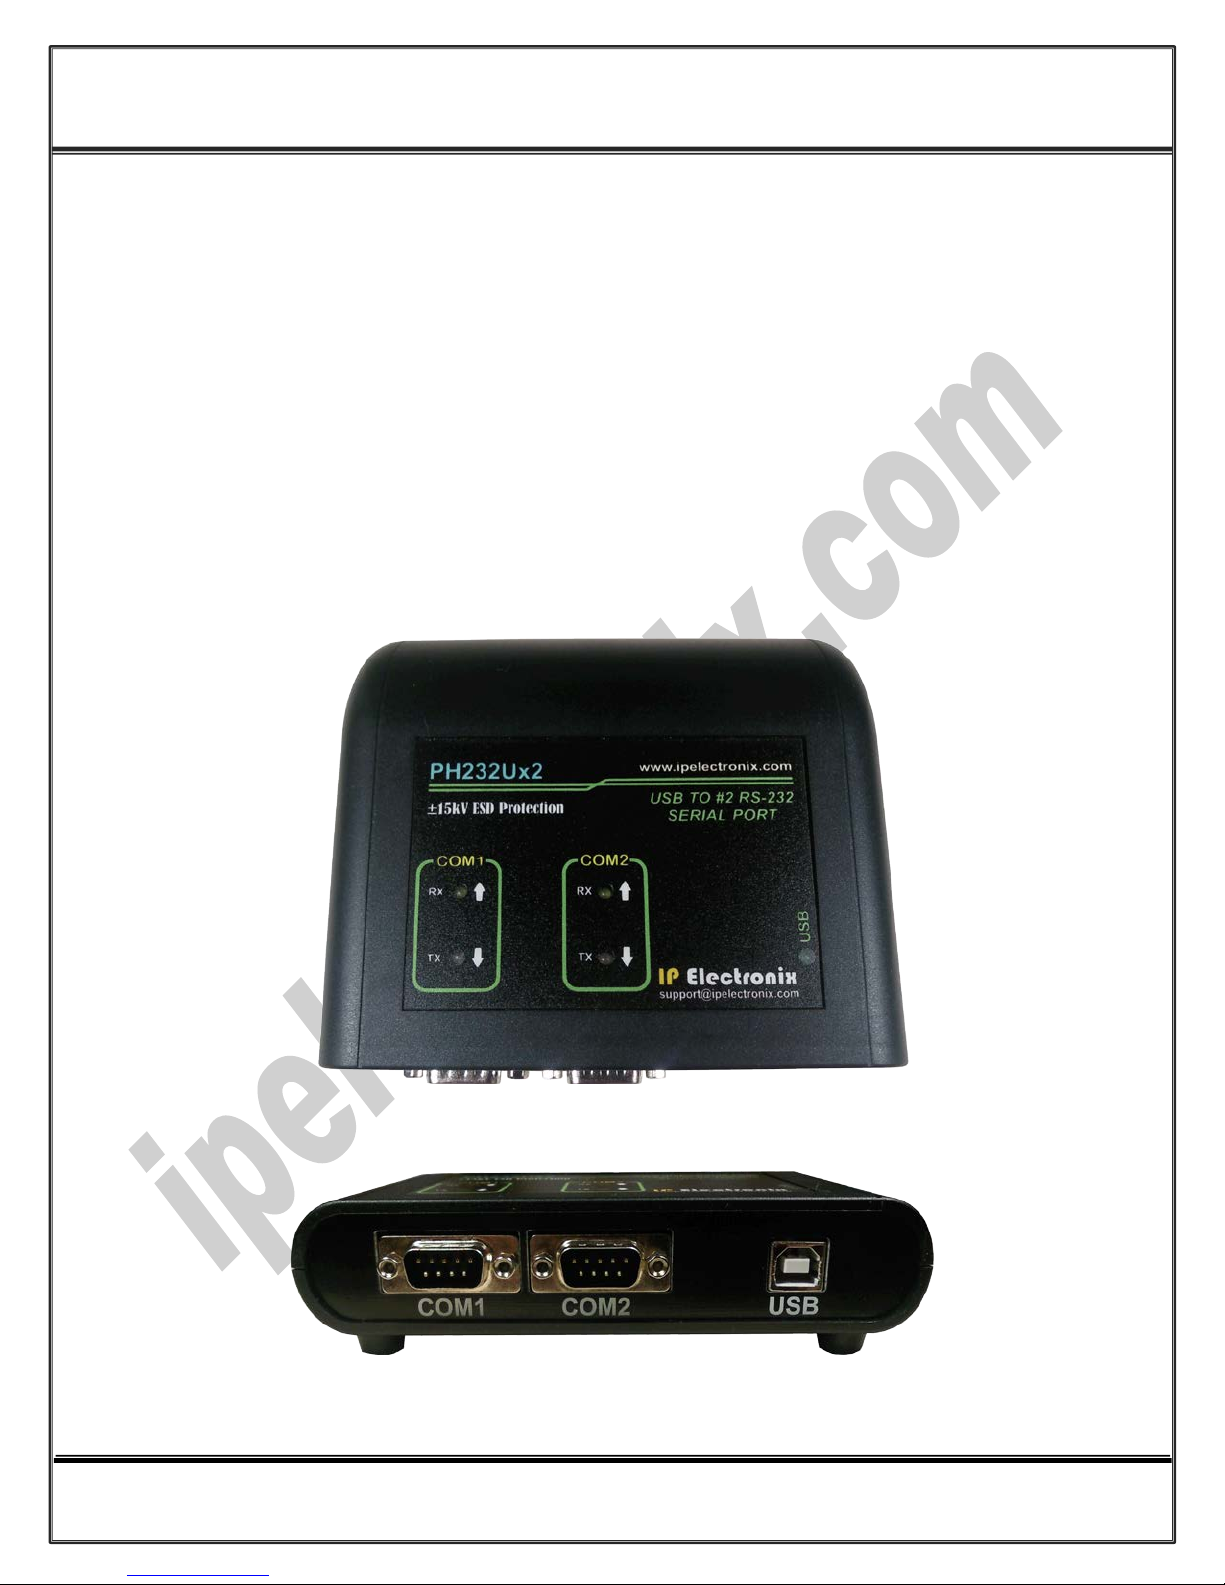
4. Top Panel
5. Front Panel
Page 5 of 27 Doc No. : PH232Ux2-UM-001
30 November 2013
Page 6
www.ipelectronix.com
IPEX (IP Electronix) PH232Ux2
: User’s Manual
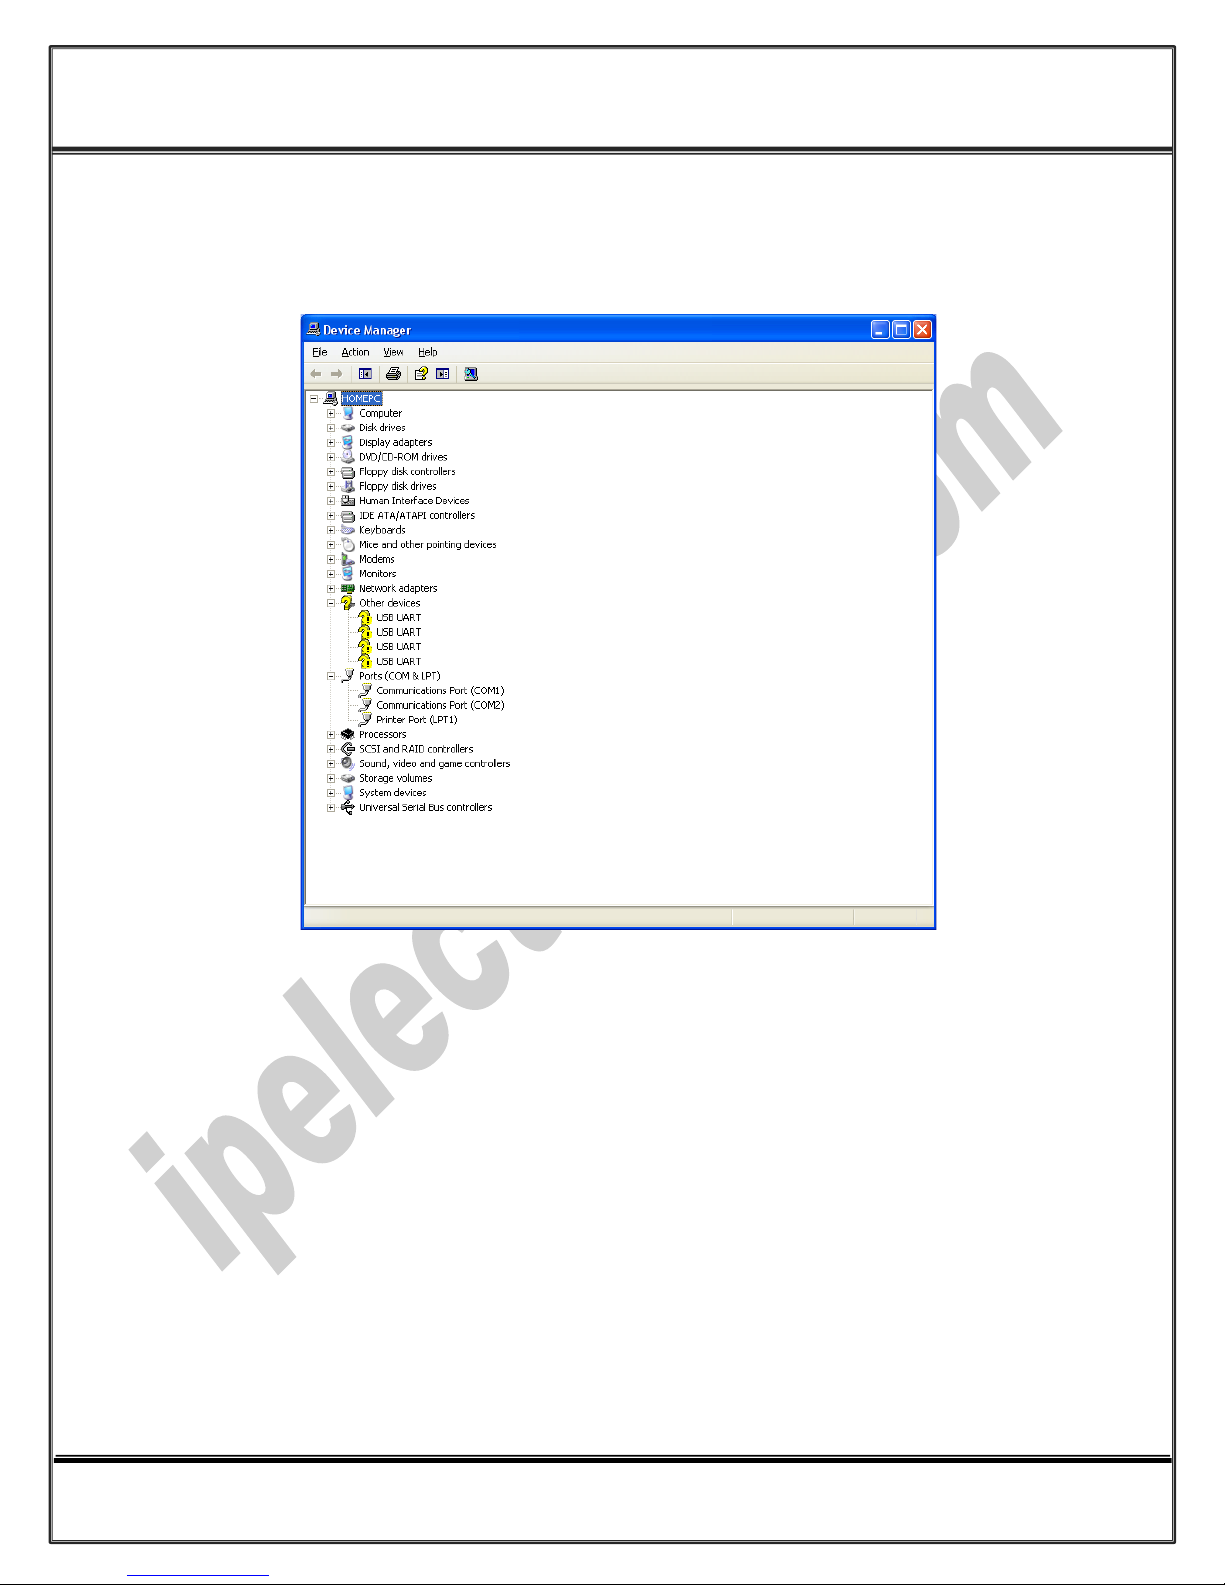
6. Installation on Windows XP
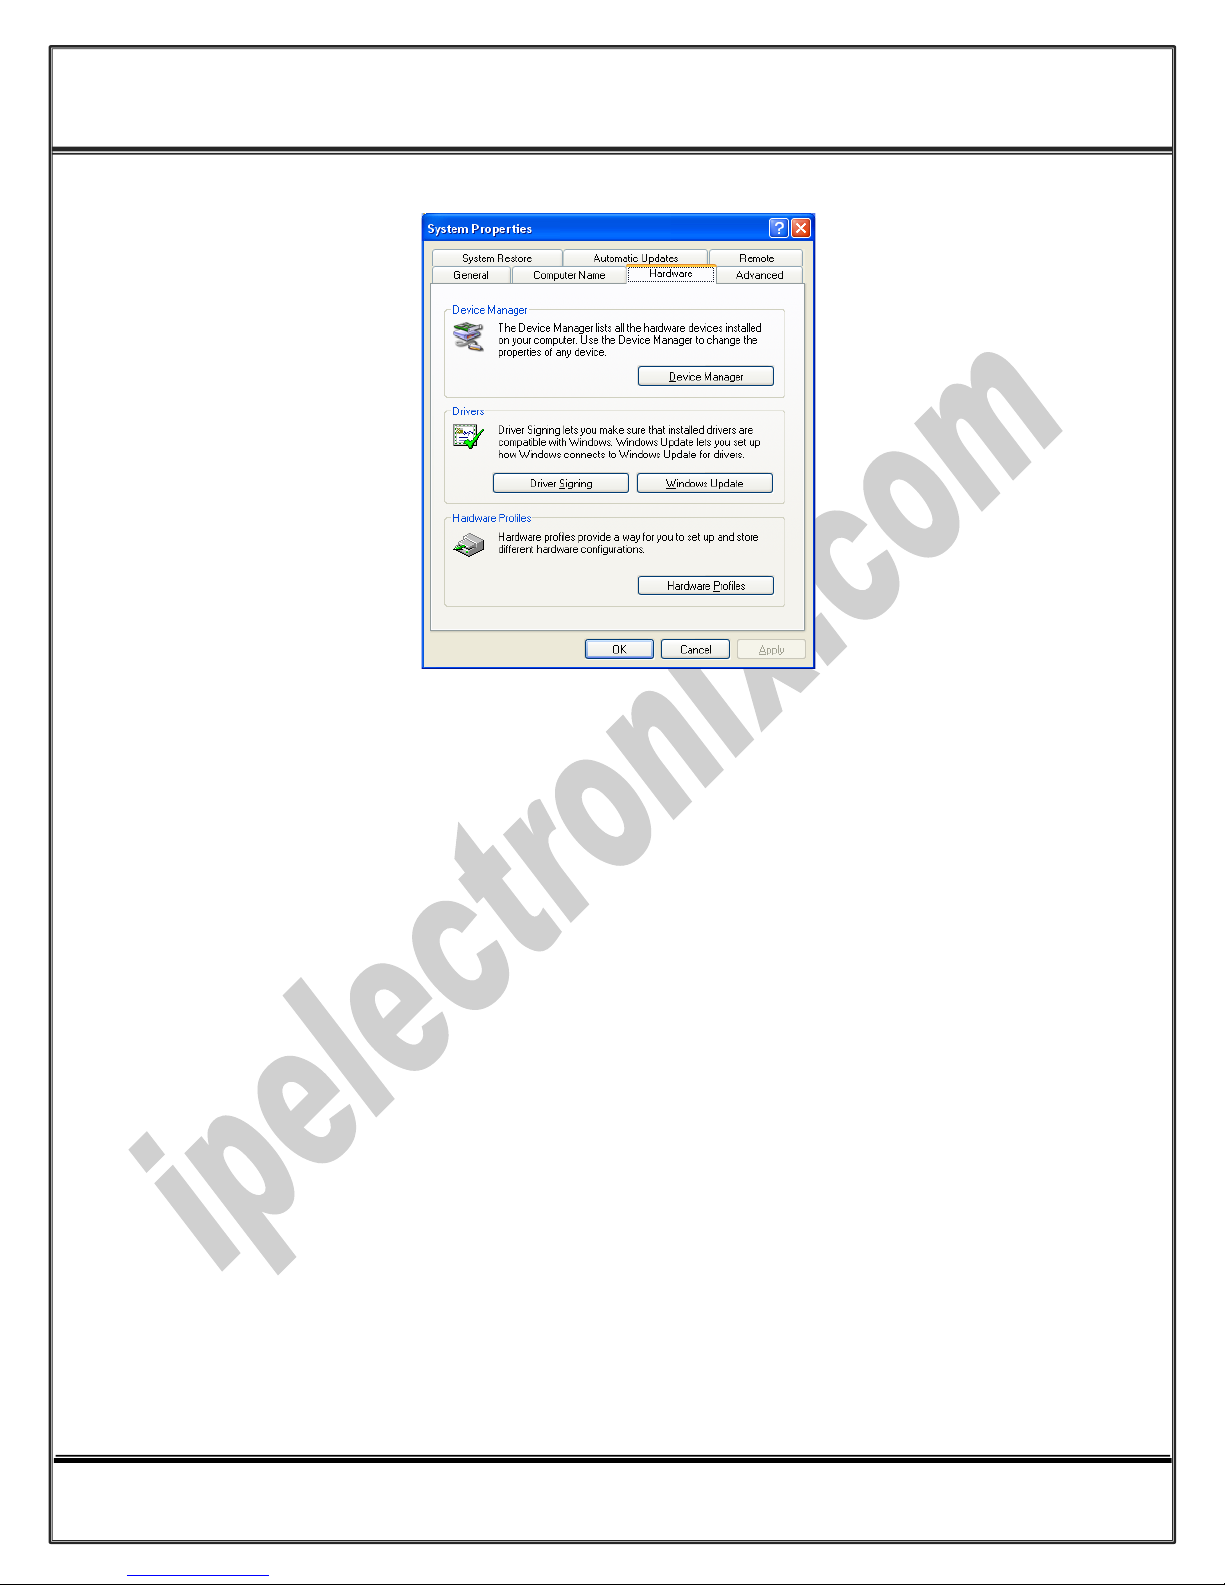
After you plug PH232Ux2 to USB port, you can see a new device in the Device Manager window as below:
(To run Device Manager, right click on My Computer, select Properties and then select Hardware tab, finally
click on Device Manager button like following picture or simply use "WIN-KEY + R" and then type DEVMGMT and
press Enter)
Page 6 of 27 Doc No. : PH232Ux2-UM-001
30 November 2013
Page 7
www.ipelectronix.com
IPEX (IP Electronix) PH232Ux2
: User’s Manual
Page 7 of 27 Doc No. : PH232Ux2-UM-001
30 November 2013
Page 8
www.ipelectronix.com
IPEX (IP Electronix) PH232Ux2
: User’s Manual
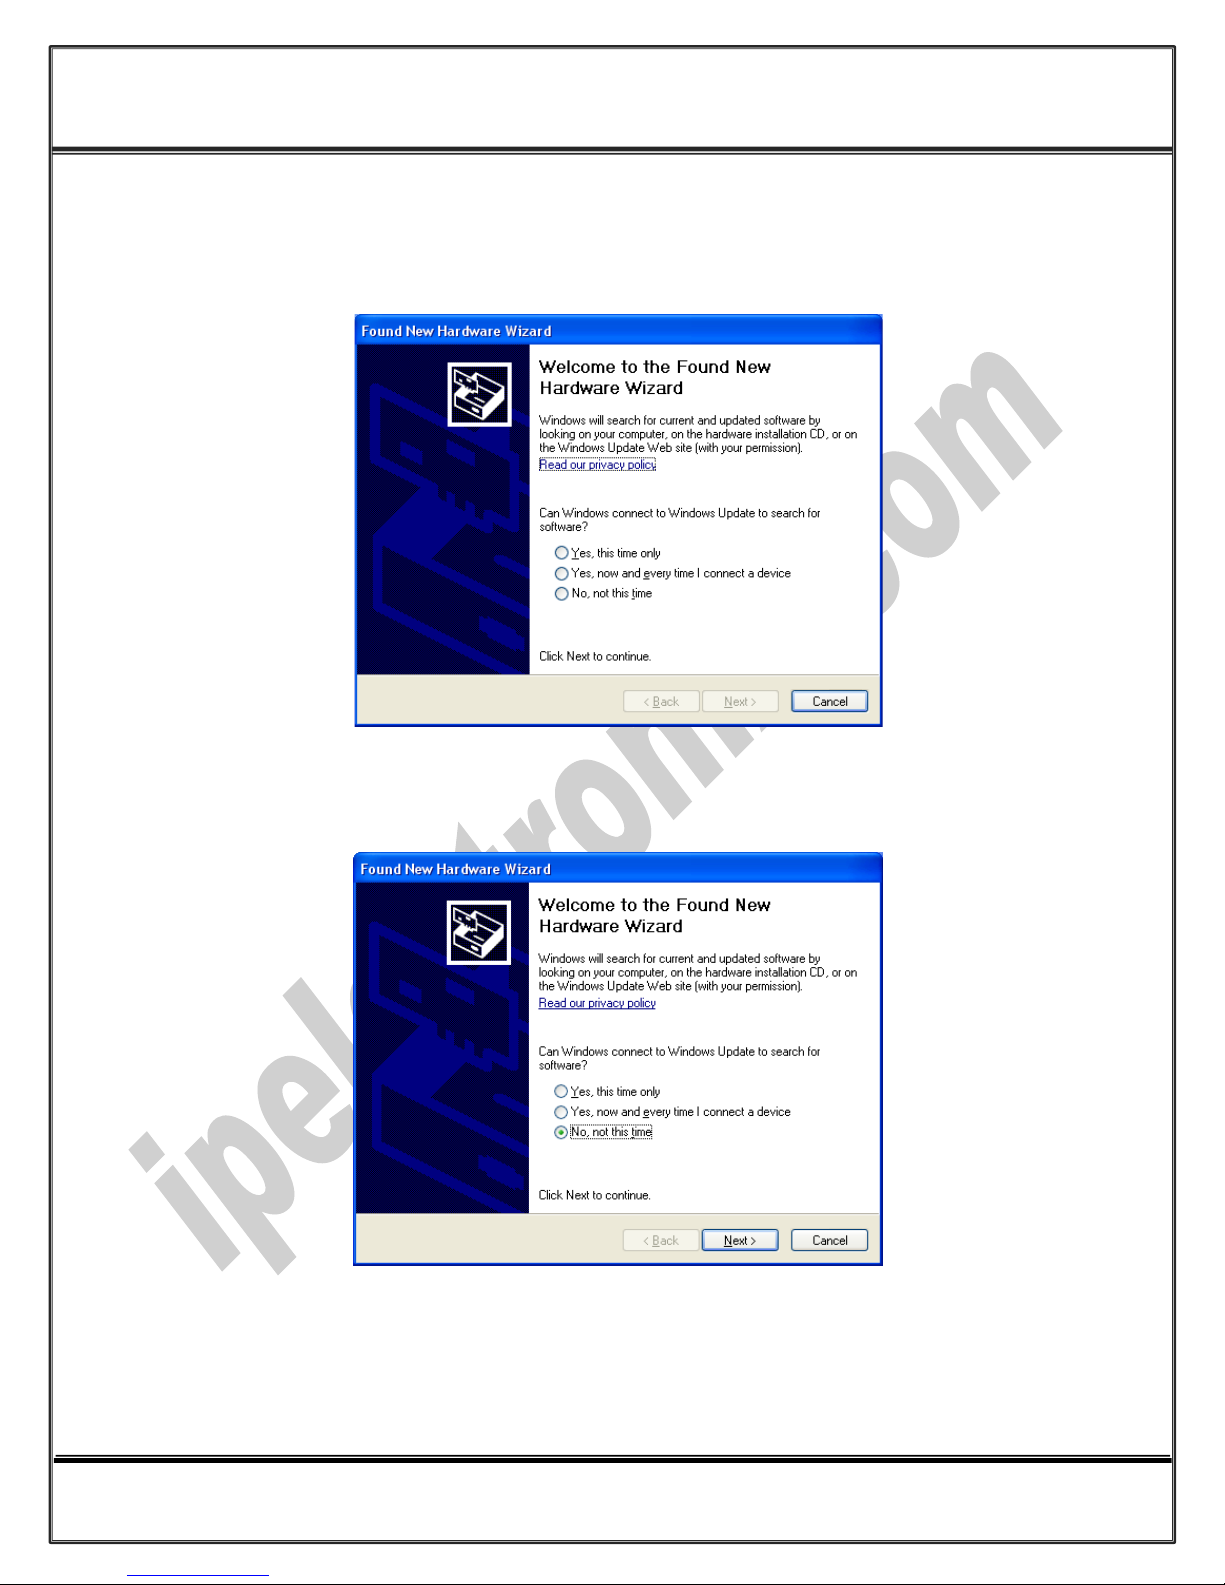
However, installation progress will be start automatically, and following window will be seen,
Select option "No, not this time" and then click "Next",
Page 8 of 27 Doc No. : PH232Ux2-UM-001
30 November 2013
Page 9
www.ipelectronix.com
IPEX (IP Electronix) PH232Ux2
: User’s Manual
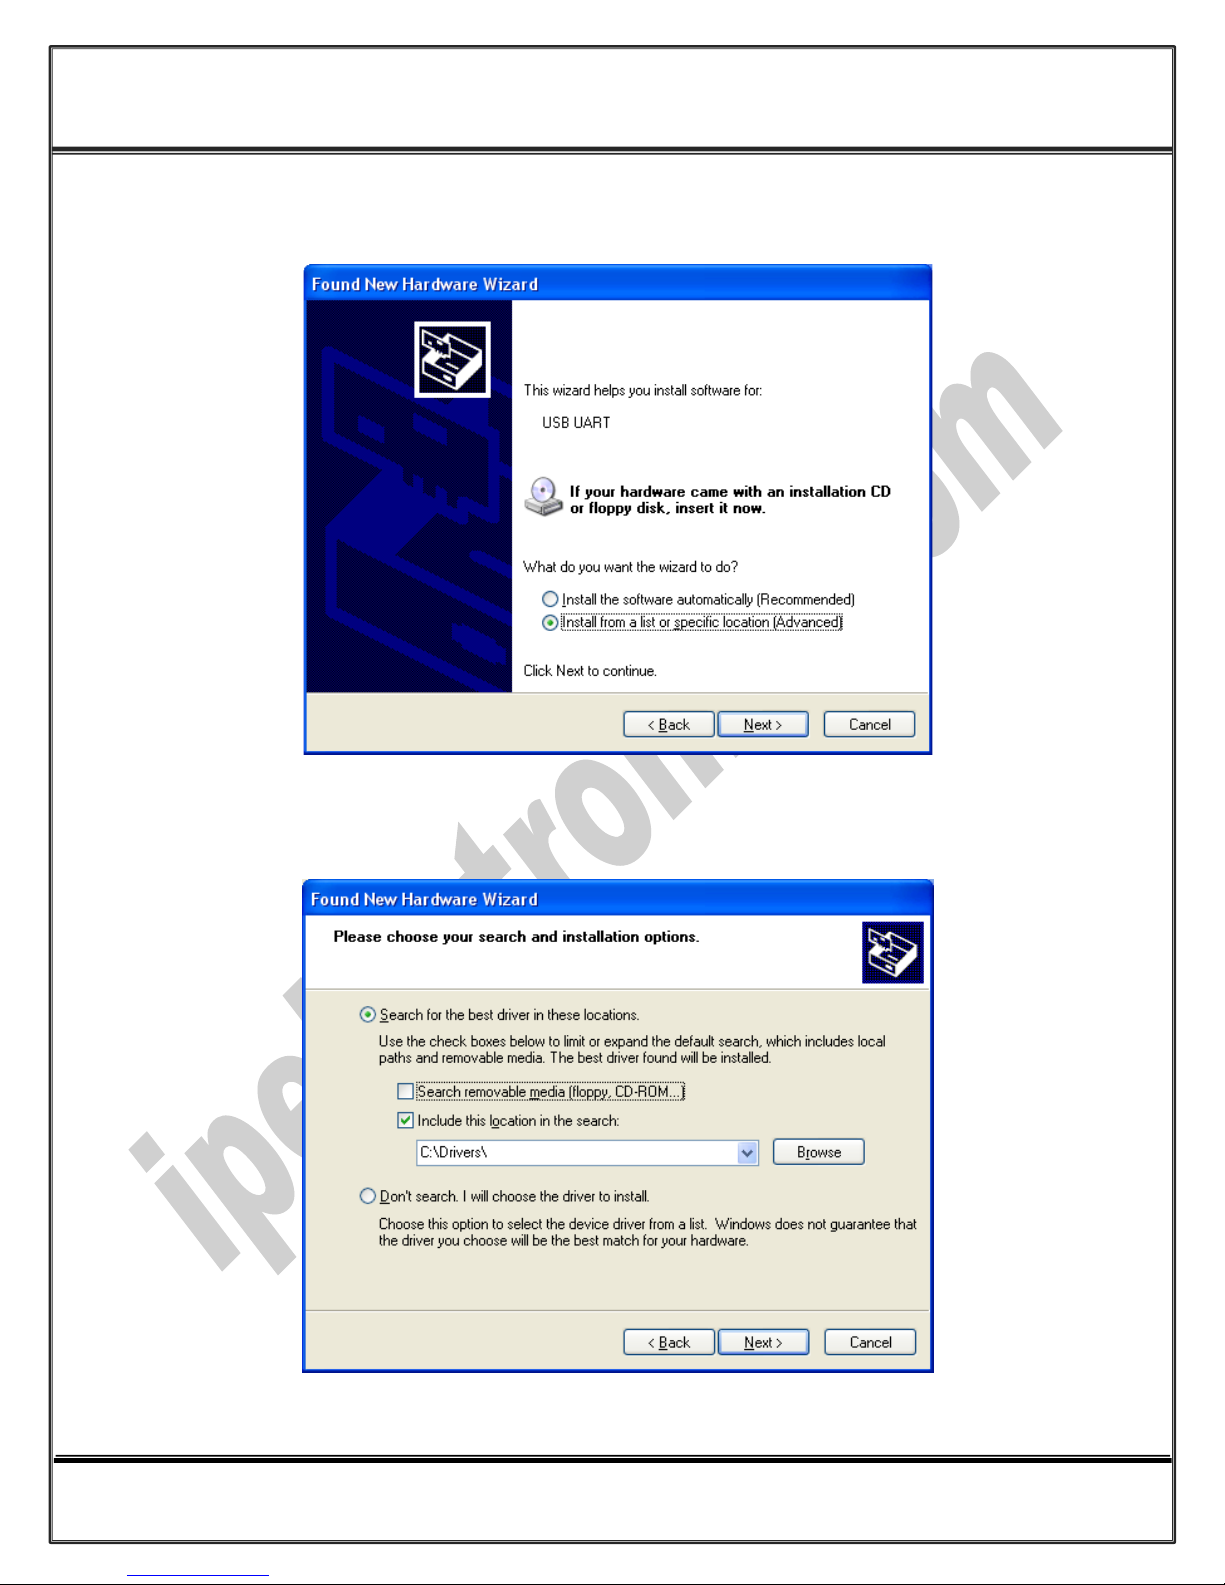
Select "Install from a list or specific location (Advanced)" and click "Next",
Select "Include this location in the search:" and click on "Browse",
Page 9 of 27 Doc No. : PH232Ux2-UM-001
30 November 2013
Page 10

www.ipelectronix.com
IPEX (IP Electronix) PH232Ux2
: User’s Manual
Select "Driver Folder" on the Installation CD and click OK.
Now, click on "Next",
Page 10 of 27 Doc No. : PH232Ux2-UM-001
30 November 2013
Page 11

www.ipelectronix.com
IPEX (IP Electronix) PH232Ux2
: User’s Manual
The driver will be installed,
Now, click "Finish",
Page 11 of 27 Doc No. : PH232Ux2-UM-001
30 November 2013
Page 12

www.ipelectronix.com
IPEX (IP Electronix) PH232Ux2
: User’s Manual
After finishing installation, you should be able to see a new "USB Serial Port" in "Ports (COM&LPT)" section of
Device Manager.
Page 12 of 27 Doc No. : PH232Ux2-UM-001
30 November 2013
Page 13

www.ipelectronix.com
IPEX (IP Electronix) PH232Ux2
: User’s Manual
7. Installation in Windows 7
Installation in Windows 7, is same as Windows XP, in case that installation progress do not be start
automatically, you can install driver manually as follow:
Page 13 of 27 Doc No. : PH232Ux2-UM-001
30 November 2013
Page 14

www.ipelectronix.com
IPEX (IP Electronix) PH232Ux2
: User’s Manual
Page 14 of 27 Doc No. : PH232Ux2-UM-001
30 November 2013
Page 15

www.ipelectronix.com
IPEX (IP Electronix) PH232Ux2
: User’s Manual
Page 15 of 27 Doc No. : PH232Ux2-UM-001
30 November 2013
Page 16

www.ipelectronix.com
IPEX (IP Electronix) PH232Ux2
: User’s Manual
Page 16 of 27 Doc No. : PH232Ux2-UM-001
30 November 2013
Page 17

www.ipelectronix.com
IPEX (IP Electronix) PH232Ux2
: User’s Manual
Page 17 of 27 Doc No. : PH232Ux2-UM-001
30 November 2013
Page 18

www.ipelectronix.com
IPEX (IP Electronix) PH232Ux2
: User’s Manual
Page 18 of 27 Doc No. : PH232Ux2-UM-001
30 November 2013
Page 19

www.ipelectronix.com
IPEX (IP Electronix) PH232Ux2
: User’s Manual
8. Changing COM Port Number
To change COM Port Number, right click on the USB COM Port on Device Manager and select properties,
Page 19 of 27 Doc No. : PH232Ux2-UM-001
30 November 2013
Page 20

www.ipelectronix.com
IPEX (IP Electronix) PH232Ux2
: User’s Manual
Select port setting:
Page 20 of 27 Doc No. : PH232Ux2-UM-001
30 November 2013
Page 21

www.ipelectronix.com
IPEX (IP Electronix) PH232Ux2
: User’s Manual
And then click on "advanced…",
Page 21 of 27 Doc No. : PH232Ux2-UM-001
30 November 2013
Page 22

www.ipelectronix.com
IPEX (IP Electronix) PH232Ux2
: User’s Manual
Now, you can choose a number from COM Port Number section and finally click ok.
9. Distinguish Device Ports COM Number
To distinguish which COM Port belongs to which PH232Ux2 Port, you can use a terminal utility like "HYPER
TERMINAL" which exists in Utility Folder on Installation CD. Select a COM port and transmit some characters,
now you can find port by watching TX LED (Blue LED) on front panel of device.
Page 22 of 27 Doc No. : PH232Ux2-UM-001
30 November 2013
Page 23

www.ipelectronix.com
IPEX (IP Electronix) PH232Ux2
: User’s Manual
10. RS-232 Serial Ports Pin Configuration (PORT #1, PORT #2)
Page 23 of 27 Doc No. : PH232Ux2-UM-001
30 November 2013
Page 24

www.ipelectronix.com
IPEX (IP Electronix) PH232Ux2
: User’s Manual
Modem or other DCE devices
DB9-Female Pin Number
PH232Ex1 Port #1 as DTE
DB9-Male Pin Number
Pin 1: DCD (Output)
Pin 1: DCD (Input)
Pin 2: RxD (Output)
Pin 2: RxD (Input)
Pin 3: TxD (Input)
Pin 3: TxD (Output)
Pin 4: DTR (Input)
Pin 4: DTR (Output)
Pin 5: GND (Ground)
Pin 5: GND (Ground)
Pin 6: DSR (Output)
Pin 6: DSR (Input)
Pin 7: RTS (Input)
Pin 7: RTS (Output)
Pin 8: CTS (Output)
Pin 8: CTS (Input)
Pin 9: RI (Output)
Pin 9: RI (Input)
11. RS-232 Connecting methods
11.1) Modem Connection (to a Modem, PH485i, or any other DCE devices)
(Modem Cable)
Page 24 of 27 Doc No. : PH232Ux2-UM-001
30 November 2013
Page 25

www.ipelectronix.com
IPEX (IP Electronix) PH232Ux2
: User’s Manual
PC,PLC or other DTE devices
DB9-Male Pin Number
PH232Ex1 Port #1 as DTE
DB9-Male Pin Number
Pin 7: RTS (Output)
Pin 1: DCD (Input)
Pin 3: TxD (Output)
Pin 2: RxD (Input)
Pin 2: RxD (Input)
Pin 3: TxD (Output)
Pin 6: DSR (Input)
Pin 4: DTR (Output)
Pin 5: GND (Ground)
Pin 5: GND (Ground)
Pin 4: DTR (Output)
Pin 6: DSR (Input)
Pin 8: CTS (Input)
Pin 7: RTS (Output)
Pin 7: RTS (Output)
Pin 8: CTS (Input)
Pin 1: DCD (Input)
Pin 7: RTS (Output)
11.2) Null Modem Connection (to PC, PLC, RTU, A-380, PH232Ex1, PH232Ex2 or any
other DTE devices)
(Null Modem Cable)
Page 25 of 27 Doc No. : PH232Ux2-UM-001
30 November 2013
Page 26

www.ipelectronix.com
IPEX (IP Electronix) PH232Ux2
: User’s Manual
PC,PLC or other DTE devices
DB9-Male Pin Number
PH232Ex1 Port #1 as DTE
DB9-Male Pin Number
Pin 3: TxD (Output)
Pin 2: RxD (Input)
Pin 2: RxD (Input)
Pin 3: TxD (Output)
Pin 5: GND (Ground)
Pin 5: GND (Ground)
11.3) Simple Null Modem Connection (to PC, PLC, A-380, PH232Ex1, PH232Ex2 …
Without Hardware Handshaking)
(Simple Null Modem Cable (Without Hardware Handshaking))
Page 26 of 27 Doc No. : PH232Ux2-UM-001
30 November 2013
Page 27

www.ipelectronix.com
IPEX (IP Electronix) PH232Ux2
: User’s Manual
12. Guarantee
All products manufactured by IPEX are under warranty regarding defective materials for a period of one year
from the date of delivery to the original purchaser.
13. Technical Support
If you have any technical question or need any technical support, please contact us using this Email address:
support@ipelectronix.com
.
Page 27 of 27 Doc No. : PH232Ux2-UM-001
30 November 2013
 Loading...