

iPet Companion Installation Manual
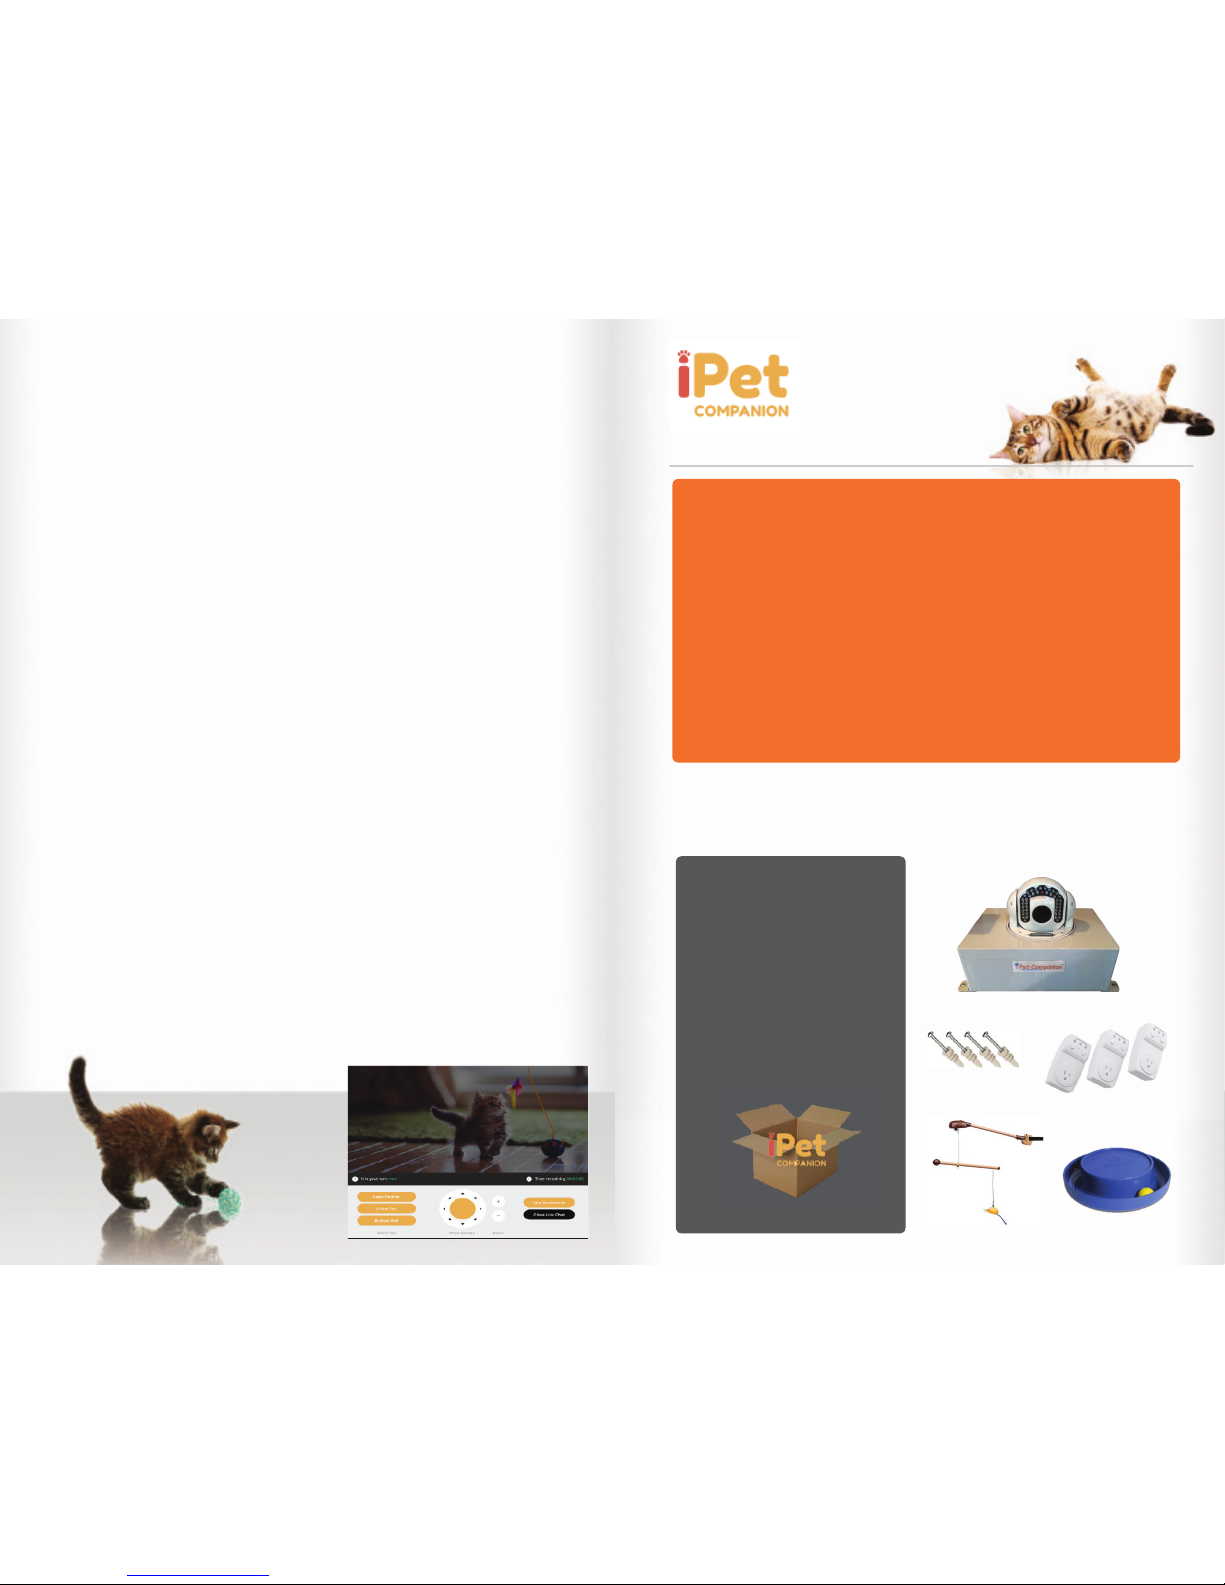
In the box, you will find:
• (1) control box (10”x7”x7”)
with built in camera and
power cord.
• (3) wireless wall adapters
• (2) motorized toy assemblies,
each with built in power cord.
• (4) mounting screws for use
to secure the control box.
Time to Install!
Step 1: Unpack the box
Make sure you have all the items, as well as those you need to supply.
© Copyright 2015 Apriori LLC. For more information on iPet Companion, please visit www.ipetcompanion.com.
Get Ready to Play!
IMPORTANT: You will need to supply the following:
• (1) electrical 110v outlet available for the control box unit
• (3) seperate electrical 110V outlets for the wireless wall
adapters.
• (1) DHCP enabled 2MB upload minimum internet connection
• (1) ethernet cable to attach to back of contol box. (length will
depend on control box distance to facilities router).
• Mounting surfaces for each of the toys.
Control Box Unit
Wireless Wall Adpaters
If all prerequisites are met, please continue on to Step 1 of the installation
guide. If not, or if there arise any questions please contact iPetCompanion
support via email at: support@ipetcompanion.com.
Troubleshooting.
Unit and or Wall Adapters LEDs do not light and fail to power on:
1) Try testing your wall outlets to make sure they have power.
2) Plug the wall adapters or Control Box Unit into another power source and
test the connection(s) again.
The Units green power LED lights up, but the yellow connection light does not:
1) The facilities router may not have DHCP enabled and has failed to assign
an IP Address to our unit. Have your IT staff ensure DHCP is enabled on your
router
2) The facilities router may need to have some rules added to it to allow the
iPet Companion system to talk to our servers. Have your IT staff add the
following three rules to the router and then unplug and replug in the unit:
ws://*.reach-in.net:80,
ws://*.reach-in.net:4502
wss://*.reach-in.net:443
The Cat Toys fail to spin:
1) Remove the wall adapter and interface the Cat Toy directly into the wall
outlet. If the Cat Toy does not turn on after plugging it into the wall outlet,
the toy may need replacement.
The Cat Toys do not operate thru the website:
1) You may have an obstruction blocking the wireless signal from the
control box unit to the wall adapters. Please try moving the wall
adpater closer to the unit or remove any obstructions between the wall
adapter and the control box unit.
Additional Information
All parts are NOT water proof. Please use caution when cleaning your cat room.
Keep your packing material in the event that part(s) needs to be returned to us.
If you have any questions, please email: support@ipetcompanion.com
Note: If any steps fail to produce correct results, please see the Troubleshooting section on
the last page of this guide.
Mounting Screws
Swinging Toy
Note: Parts shown in this installation guide may vary
slightly from actual parts included in the box
Wobbler Toy
The wall adapter without a cat toy can be used to engage
other devices and toys. Shelters in the past have used
bubble machines, watering dishes, disco balls, lasers, and
other unique powered toys. Please note that the plug is
rated to accept up to 10A maximum.
Test that the cat toy(s) are properly interfaced with the
wall adapter by pushing the On and Off button on each
associated wall adapter. The toy should rotate when the
On button is pressed and cease when the Off button is
pressed.
Step 5: Install the ethernet cable.
The ethernet (RJ45) cable may be either cat5 or cat6 in quality. One end of the ethernet
cable must be attached to a router/switch with DHCP assignment capabilities. Plug the
other end of the ethernet cable into the control box units ethernet port located on its back
side. (Note: We will verify ethernet connection in Step 6).
Step 6: Plug in the Control Box Units power.
The units power plug should plug into a relatively easy to access wall outlet. There may be
times when a manual reboot of the system is necessary. The control box is rebootable by
pulling the plug out of the outlet, waiting 10 seconds and plugging the unit back in.
Plug the units power in now. The first LED at the front
of the control box unit should light up and turn solid
red. The second LED will start to blink as it establishes a
connection with the iPet Companion servers.
After power has been established it may take up to 30
seconds for the control box to establish its connection to
iPet Companion. If the ethernet connection was installed
correctly and an internet connection is established with
the iPet Companion servers, the second red LED on the
front of the box will stop blinking and light up solid. This
means that your system is functioning properly.
Step 7: Prepare for launch!
Your iPet Companion system will automatically notify us the first time it is online. Once we
are notified, we will finalize the settings on your system and program your unique website
page. Once we have tested the system, we will notify the Main and Technical contacts that
were entered into the iPet Companion signup form that the system is functional and ready
for your launch date.
Step 8: Tell your community!
Your interactive iPet Companion web site, if used creatively, can be a powerful marketing
tool. Tell your community, news organizations, donors, sponsors, supporters and send out
newsletters. After all the community and the world as a whole will be the ones interacting
at your shelter.
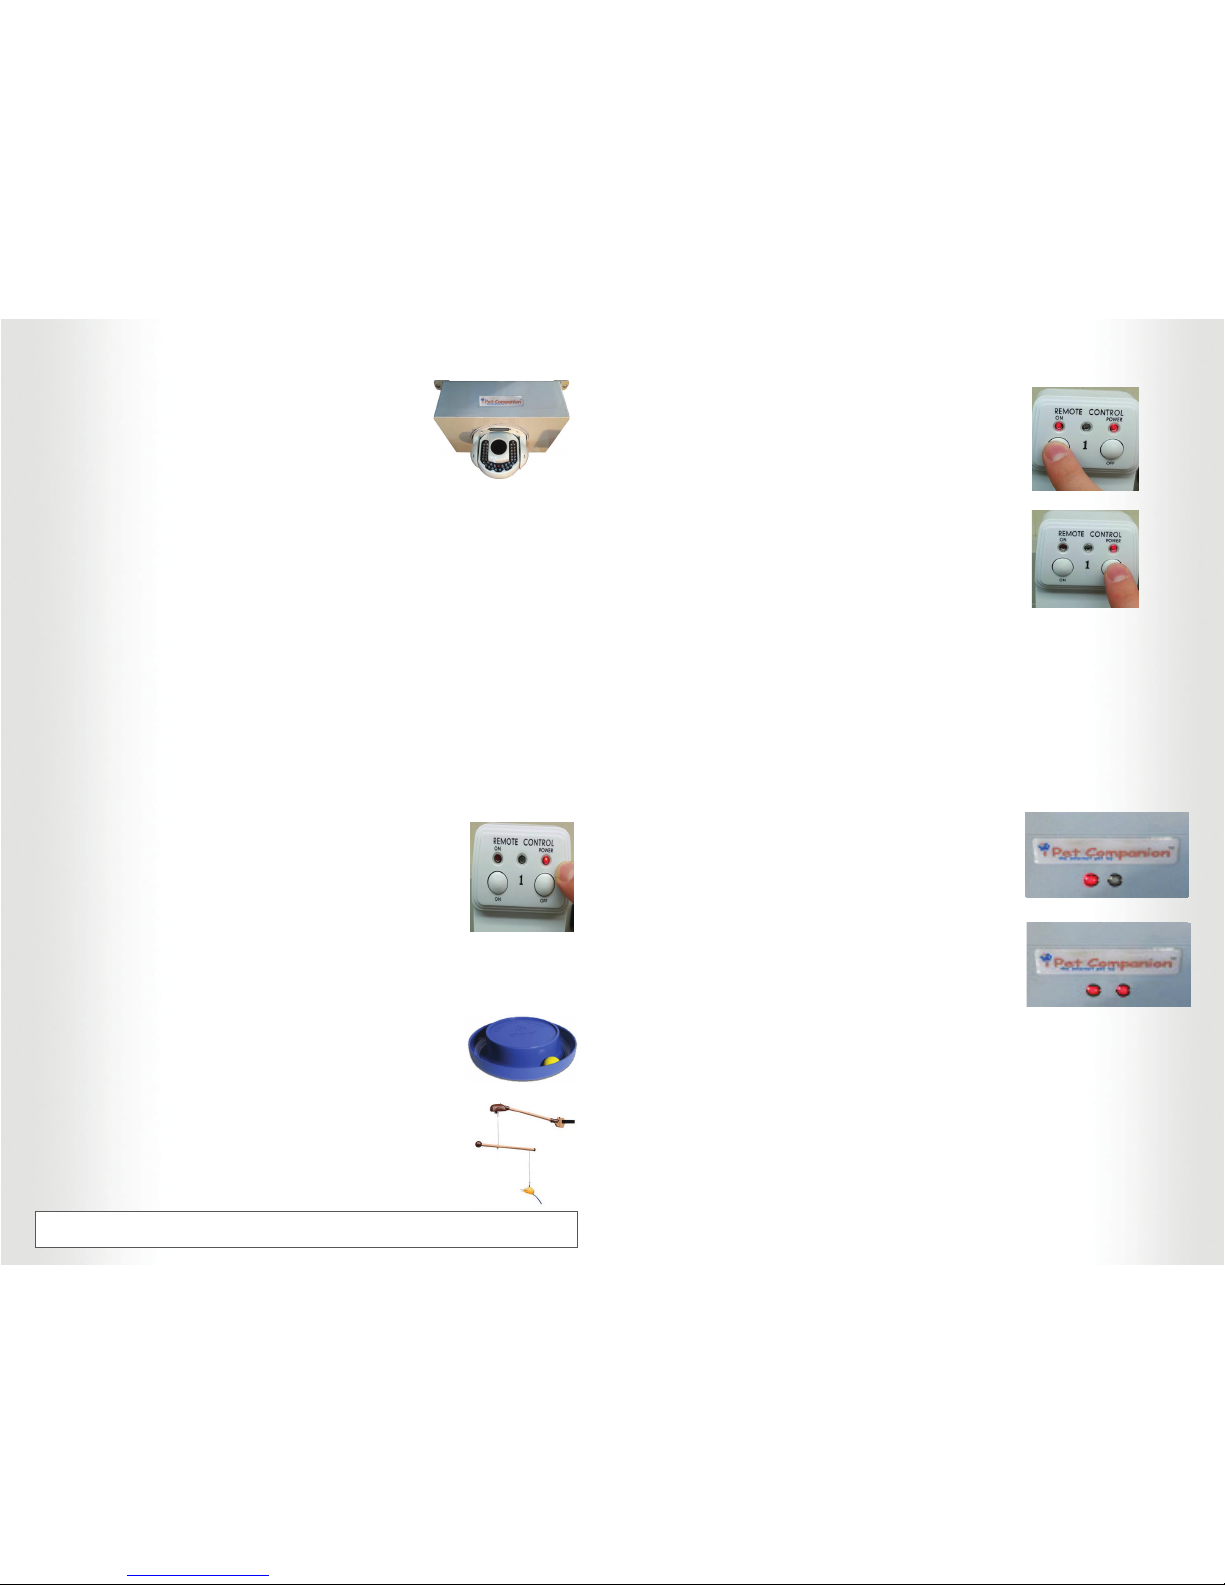
Step 2: Mount the Control Box Unit.
The control box must be mounted upside down. For best
user experience it is preferred to mount the control box
on the ceiling in the center of your room. This will give the
users a complete 360 degree view from the built in camera,
as well as the best possible zoom to all locations.
If the ceiling is not possible then choose a wall that will be facing the 3 toys. Install
a shelf and mount the control box to the underside of the shelf, up-side down. The
ceiling or shelf should be able to hold 8 lbs. Ensure that the unit is secured by all 4 base
screw holes.
Please ensure that pet sleeping locations as well as toys can be viewed. Do not install
the unit so that the camera is facing a window as this makes the on-screen image dark.
Ideally windows should be behind or to the side of the cameras front view position.
(NOTE: Do NOT plug the Control Box Unit in at this time)
Step 3: Install the 3 Wireless Wall Adapters.
The 3 wireless wall adapters need to be installed on their own separate wall outlets and
must be situated no more than 30 feet from the control box unit. Install the 3 wireless
wall adapters by placing each into its own receptacle. Each wall adapter is labeled with
a value of 1,2, or 3.
Make sure that the wall adapters are positioned in the view of
the camera from left to right in order 1,2,3. This represents the
number key on the keyboard that the online user will press to
engage the wall adapter.
Verify that each plug is properly powered by looking for the power
light to be lit. (Note: the On light does not toggle until the toys are
turned on).
Step 4: Install the Toys.
Each cat toy comes with a power supply that must be plugged into one of the 3 wall
adapters. The power cable(s) provide roughly 6 feet of length from the wall adapter to
the toy. You may install an extension cable for extra length as needed.
Locate the blue wobbler toy in an area where it can freely tilt from
side to side without obstruction. It needs to be placed on a flat
surface. Plug the toy into one of the 3 wall adapters.
Mount the swinging toy to a cat post, shelf, or other nearby object
by employing the velcro wraps provided. The toy must be allowed
to rotate freely without obstruction. It is best to position the toy at
least 4 1/2 feet off of the ground for best cat interaction. Plug the
toy into one of the wall plugs.
** For a good example of how to orient and set up your toys, visit iPetCompanion.com
and click the “Welland Humane Society” shelter to view their iPet Companion site.
Adapter On
Adapter Off
Adapter Powered
Control Box Powered
Connection Established
Unit Up-Side Down
Swinging Toy
Wobbler Toy
 Loading...