

IP-Cam JW0004, JW0005, JW0008, JW0011, JW0012 User Manual
...
0
Wireless Network IP Camera
(For PC View)
Night Vision & Remote Operation
User Manual
(Applicable models: JW0004,JW0005,JW0006,JW0008,JW0011,JW0012)
1
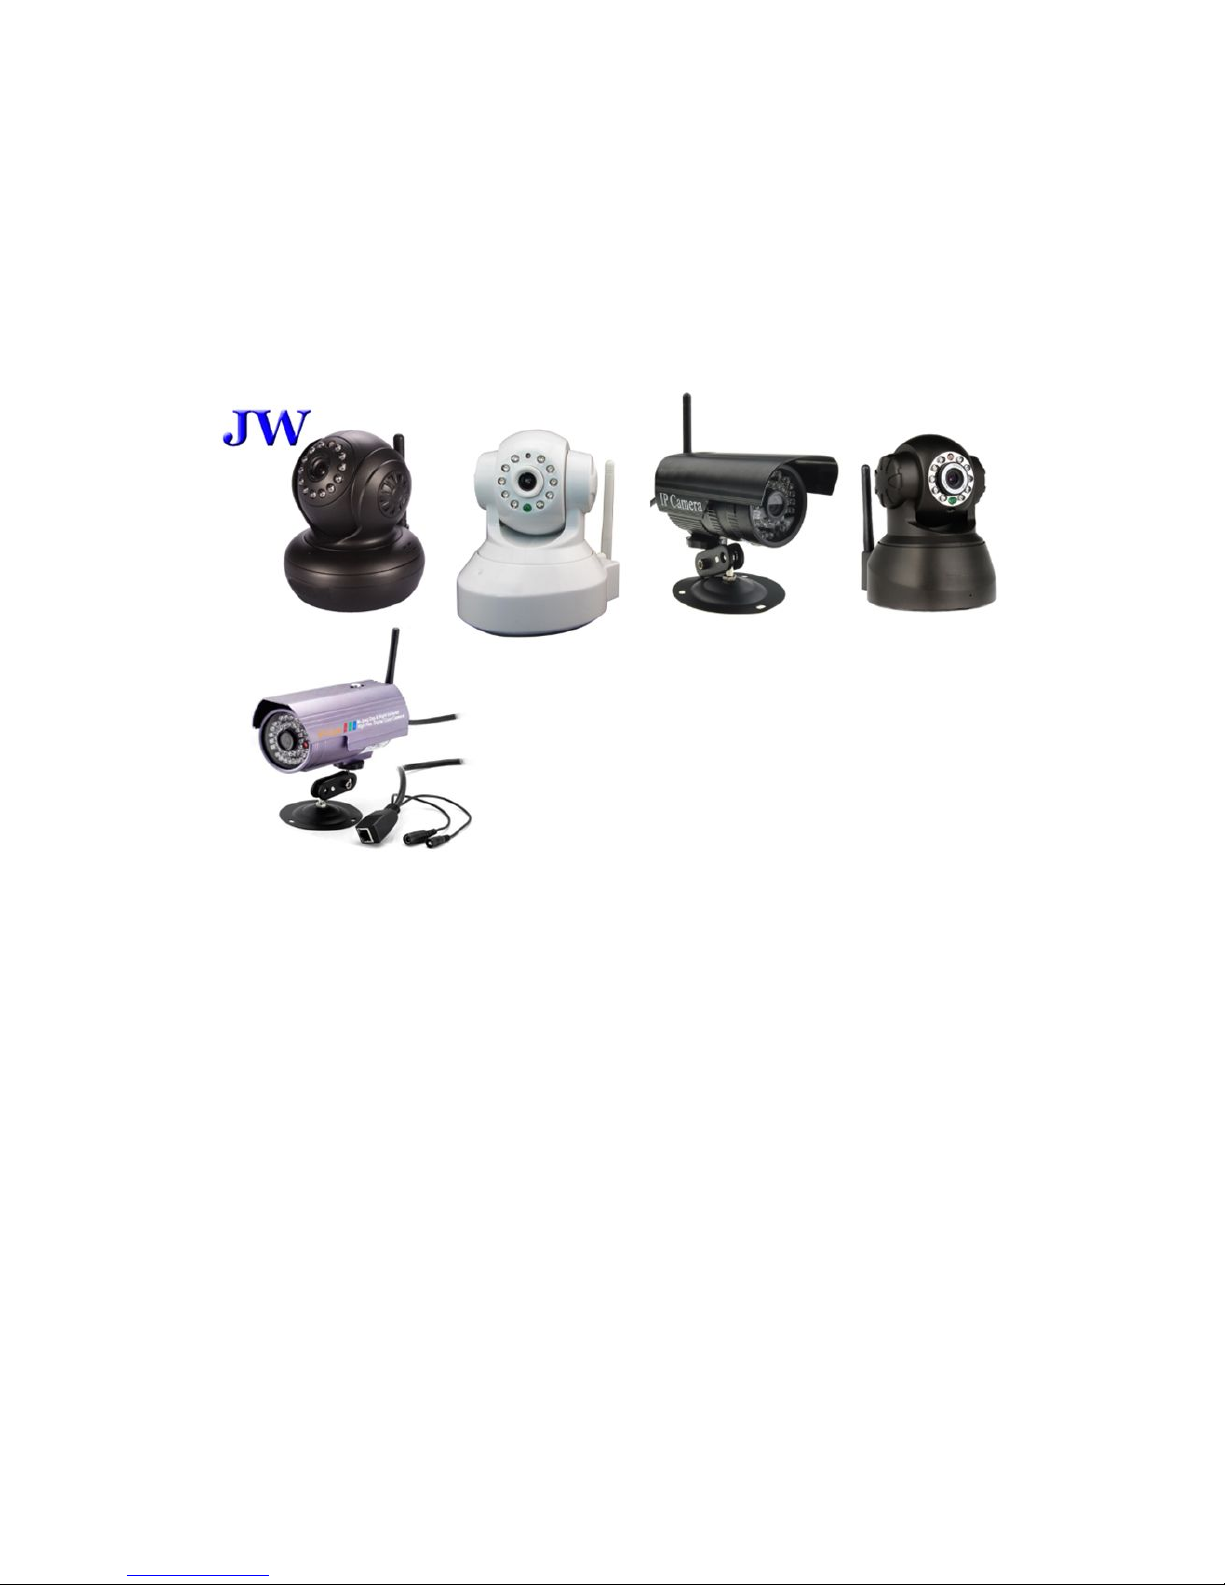
These are the models:
Packing List
Untie the pack and check the items contained against the following list:
●IP Camera X1
●Warranty Card X1
●DC Power Supply X1
●CD X1
●Certificate of Quality X1
●Mounting bracket X1
NOTE: Please contact us immediately if anything damaged or short of contents.

2
CONTENTS
1. Product Introduction ...........................................................................................3
1.1. Safety Introduction .........................................................................................3
1.2. Product Specifications................................................................................. ....3
1.3. System Requirements........................................................................................3
1.4. Product Views……………..............................................………….................4
1.4.1 Front View................ ......................................................................................4
1.4.2 Interface View.................................................................................................5
1.5. Hardware Installation........................................................................................5
1.6. Software Installation..................................... ....................................................6
2. Software Operation...............................................................................................6
2.1. Search Tool Software................................................. ......................................6
2.1.1. Search The IP address of the Camera.............................................................6
2.1.2. Configuration of the Network............................ ............................................7
3. Real-Time Video Demonstration................................... ......................................9
3.1. Camera Login.............................................................. .................. ...................9
3.2. View via IE Browser.........................................................................................10
3.3. View via Safari, Firefox, Google Browser. .................. ...................................13
3.4. Main Menu interface Introduction....... ............................................................14
3.5. Administer Setting Instruction......................... ................................................15
3.5.1. Multi-Device Settings....................................................................................16
3.5.2. Basic Network Settings.............. ...................................................................17
3.5.3. Wireless Settings.......................................................... .................................17
3.5.4. Dynamic DNS Settings...................................................................................18
3.5.4.1. DDNS Setting .............................................................................................18
3.5.4.2. Port Forwarding Settings......... ...................................................................20
3.5.4.3. DDNS Register........ .................. ................................................................23
3.5.5. Email and FTP Service Settings....................... .............................................28
3.5.6. Alarm Service Settings............................. .....................................................29
3.5.7. Reset/Firmware Upgrade Settings............... ..................................................29
3.5.8. Record&Capture Path.......................... ..........................................................29
3.5.9. Reset/Firm Ware Upgrade...............................................................................30
3.5.9.1.Restore Factory Settings................................................................................30
3.5.9.2. Reboot Equipment........................................................................................30
4. Warranty................................................................................................................31

3
1. Product Introduction
1.1 Safety Instructions
(1). Use the proper power source.
Do not use this product with a power source that supplies more than the specified Voltage
(100-240V AC).
(2). Never insert anything metallic into the camera.
Inserting metal object into the camera can be a source of dangerous electric shock.
(3). Do not operate in wet or dusty environment.
Avoid places like a damp basement or dusty hallway.
(4). Do not attempt to disassemble the camera.
You may be subjected to severe electrical shock if you attempt to take apart the camera
while the camera is connected to its power source. If there are any unusual sounds or smells
coming form the camera, unplug it immediately and contact Customer Service.
(5). Handle the camera carefully
Dropping the camera on any hard surface may cause a malfunction. If the camera does not
work properly due to physical damage, please contact Customer Service for repair or
exchange.
(6). Apply to FCC and CE Rule
This device complies with part 15 of the FCC and CE Rules. Operation is subject to the
following two conditions:
1: This device may not cause harmful interference.
2: This device must accept any interference received, including interference that may cause
undesired operation.
Any changes or modifications not expressly approved by the party responsible for
compliance could void the user’s authority to operate the equipment. This equipment
complies with FCC and CE radiation exposure limits set forth for uncontrolled environment.
This equipment should be installed and operated with minimum distance 20 cm between the
radiator & your body.
This transmitter must not be co-located or operating in conjunction with any other antenna or
transmitter.
1.2. Product Specifications
*- Adopt high Performance, strong function media processor 32Bit RSIC
*- High sensor CMOS
*-Adopt optimized MJPEG video compression algorithm, realize high-definition images
transmission in narrow bandwidth;
*-Maximum support 4 users viewing at the same time, no limit for users if using forwarder
Server function;
*- Built in Web Server, convenient for users to use standard browse to realize the
real time monitoring and setting administration;
*-Support WIFI:802.11 b/g/n wireless networking;

4
*-Support remote system update;
*-Support DDNS analysis, support LAN & Internet (ADSL,Cable Modem)
*-Support variety of network protocol: TCP/IP, UDP, SMTP, PPPoE, Dynamic DNS,
DNS Client, SNTP, BOOTP, DHCP, FTP, SNMP, WIFI/802. 11b/g
*-Parts of modes products support one/ two way audio, talkback;
*-Support motion detection alarm function (area & sensitivity Configurable);
*-Support image snapshot
*-Abnormal automatic recovery function, auto reconnection available when network
Interruption occurred.
*-Dynamic alarm function, alarm time-schedule configurable.
1.3. System Requirements
5
1.4. Product Views
1.4.1 Front View 1.4.2 Interface View
Figure 1.1 Figure 1.2
1: Audio Out , 2: Audio In
3: Ethernet interface: RJ-45 interface. Power Supply Light: constant on after power up
Network light: constant sparkle after power up data transmission.
4: Antenna:
5: Power input interface: connect direct current 5V Power
6: TF Socket : Useless for JW0004.
1.5 Hardware Installation
Follow the steps below to set up your camera hardware. Make sure to follow each step
carefully to ensure that the camera operates properly
1. Install the Wi-Fi antenna (For wireless model) .
2. Plug the power adaptor into camera
3. Plug the network cable into camera, the other side to the router/switch
4. It takes approx 30 seconds to boot up the camera, then you will find the IP address from
“Search Tool” (Figure: 1.8)
5. When the power on and network cable connected, the green led of the real panel will keep
on, The yellow led will keep flash.
Figure 1.3
6
1.6 Software Installation
Figure 1.4
Open the CD Install the follow software:
1. ActiveX: Click “OCX setup”—“Next”—“Install”—“Finish”.
2. Search Tool: Open the CD, click ,The Search Tool will run
automatically.( No need to install. You can copy this software to your desktop.)
Figure 1.5
2. Software operation
2.1 Search Tool Software
2.1.1 Search the IP address of the camera.
When the device has been mounted properly, you can double click the Icon “ ”
run this IP address search tool.
7
Figure 2.1
Note: The software searches IP Servers automatically over LAN.
There are 2 cases:
1. No IP Cameras found within LAN. After about 1 minute search, the Equipments List Field
not show the IP address.
2. IP Cameras have been installed within LAN. All the IP Cameras will be listed and the total
number is displayed in the Equipments list field as shown in Figure 2.1
Note:
1. Current Computer indicates the Computer’s IP Address information.
2. Equipment information indicates the IP camera’s IP Address information.
3. If you find that the camera’s “Subnet Mask”, “Gateway”, “DNS Server” is not as some
as your current computer’s. You need try to change the camra’s IP address.
Make sure the “Subnet Mask”, “Gateway”, “DNS Server” is the same as your router’s or your
current computer’s.
4. If you don’t know how to configure your camera’s IP address. You can click “ Update”
button. The Search Tool software can help you configure a usable IP camera automatically.
2.1.2 Configuration of the Network
Once your camera’s IP address’ Subnet Mask, Gateway, DNS Server is the same as your
PC or router, you need configure the camera’s Network parameter manually.
8
IP address: Fill in the IP address assigned and make sure it is in the same subnet as the
Gateway, and the subnet should be the same as your computer or router. (i.e. the first three
sections are the same)
Subnet Mask: The default subnet mask of the equipment is: 255.255.255.0. You can find
the subnet mask from your PC or router.
Gateway: Make sure it is in the same subnet with PC’s IP address .Here gateway is the LAN
IP of your router.
Primary DNS: IP address of IPS network provider. You can also set it as the same as the
Gateway.
NOTE: You can find out the Subnet Mask, Gateway, Primary DNS of your PC from the
“Search Tool” software.
Http Port: LAN port assigned for the equipment, default is 99. You can change the port
number to any one you want such as : 98,211,9999 etc.
3: Real-time Video Demonstration.
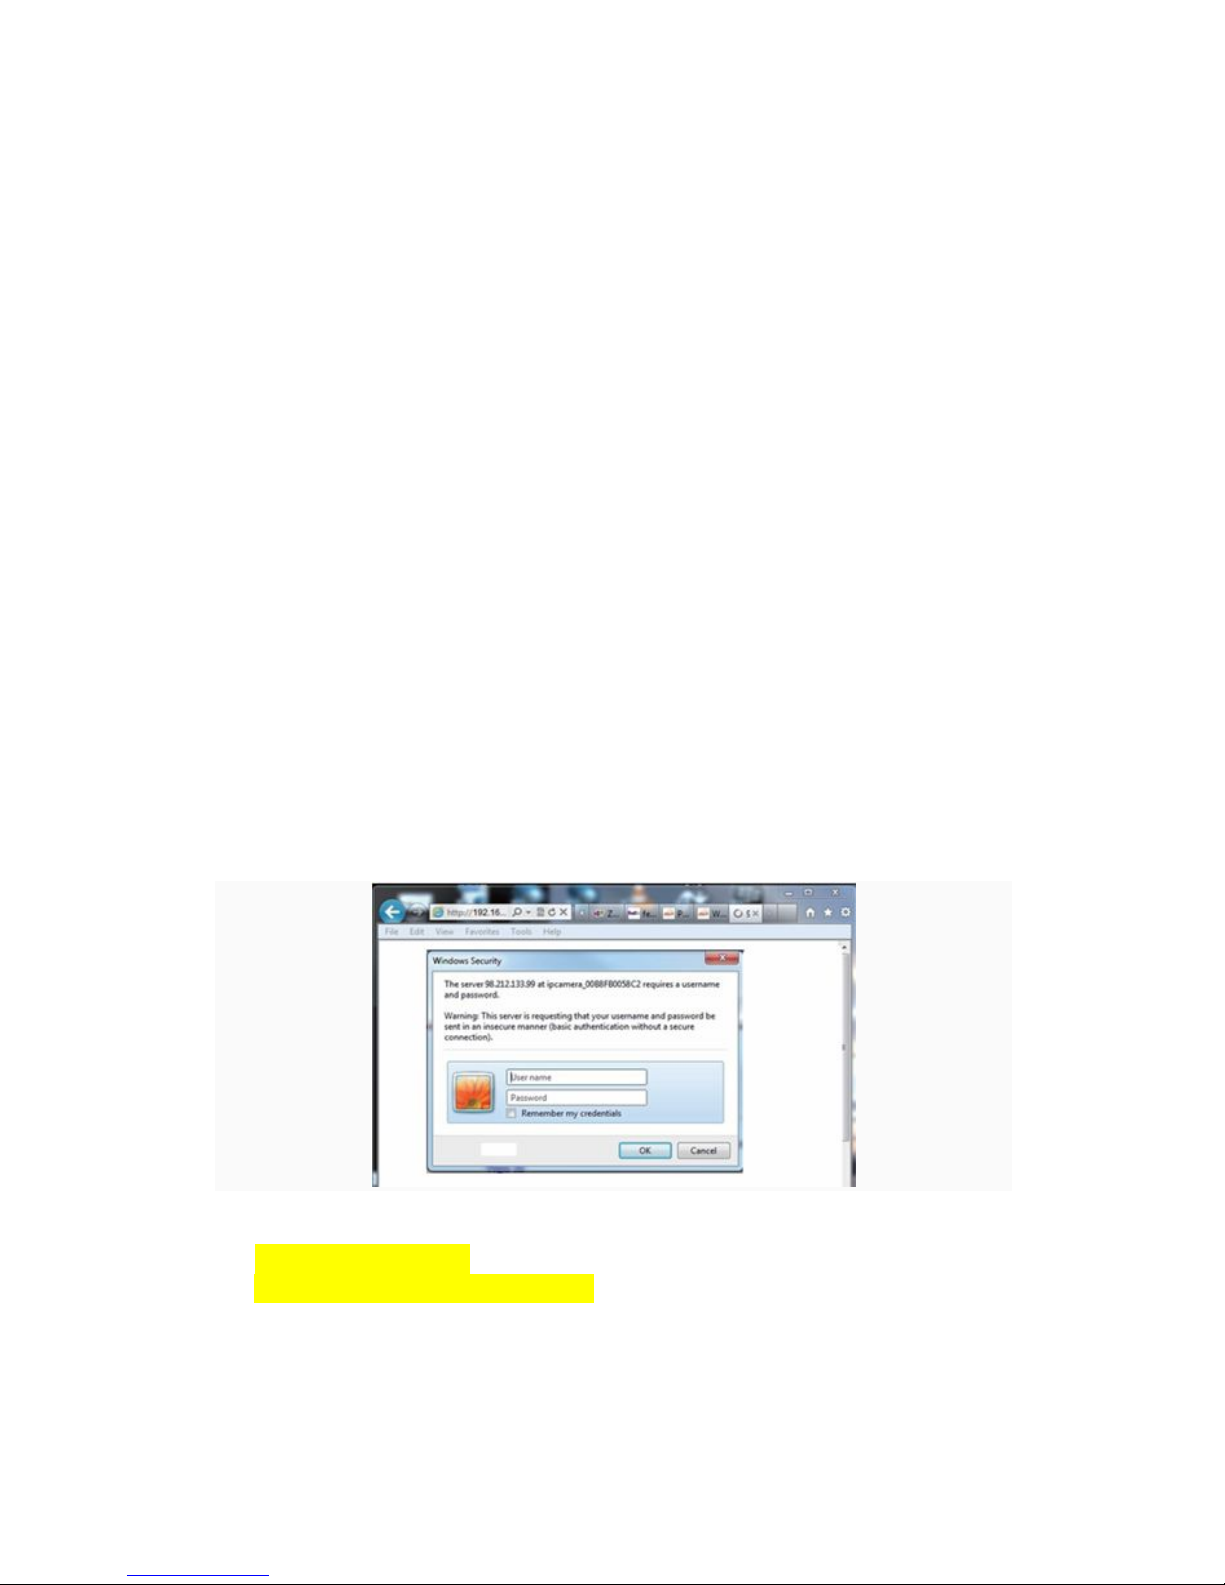
3.1. Camera Login:
You can access the camera through IP Camera Tool or IE, Firefox, Safari, Google
Chrome or other standard browser directly.
1. Double click the IP address of the IP Camera listed (Figure 2.1). The default browser
you use will run automatically and come to the camera login interface. (Figure 3.1)
2. To access the camera by IE Browser directly, just type the camera’s IP address, for
example, if the camera’s IP address is 192.168.1.99:99:
Figure 3.1
Username: admin
Password: NO PASSWORD.
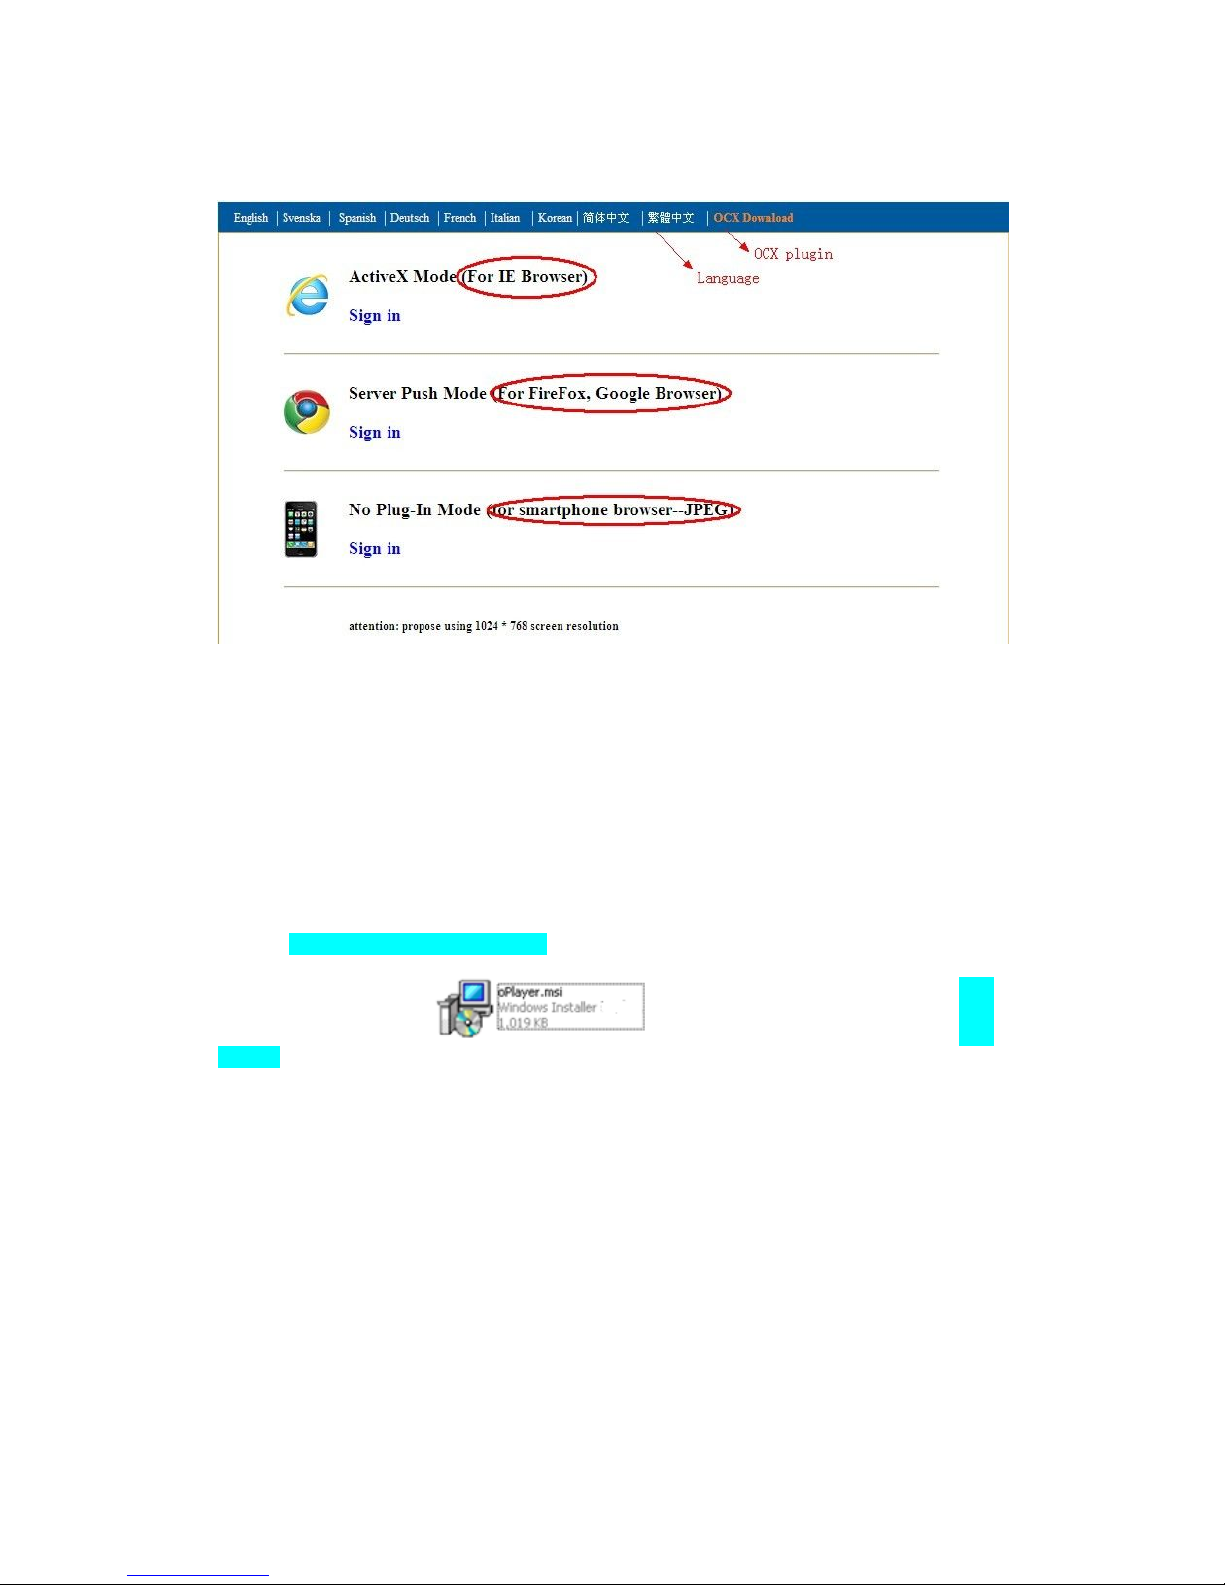
Input the correct user name and password, the Sign In interface will pop-up.
There are three models to login (figure 3.2).
9
Figure 3.2
(1) ActiveX Mode (For IE Browser): available in IE6.0 or above explorer
(2) “RTSP Stream Mode”: available in Firefox, Safari, and Google browser.
(3) “No Plug-In Mode”: available in smart phone browser.
(4) SD card video playback online
3.2. View via IE Browser.
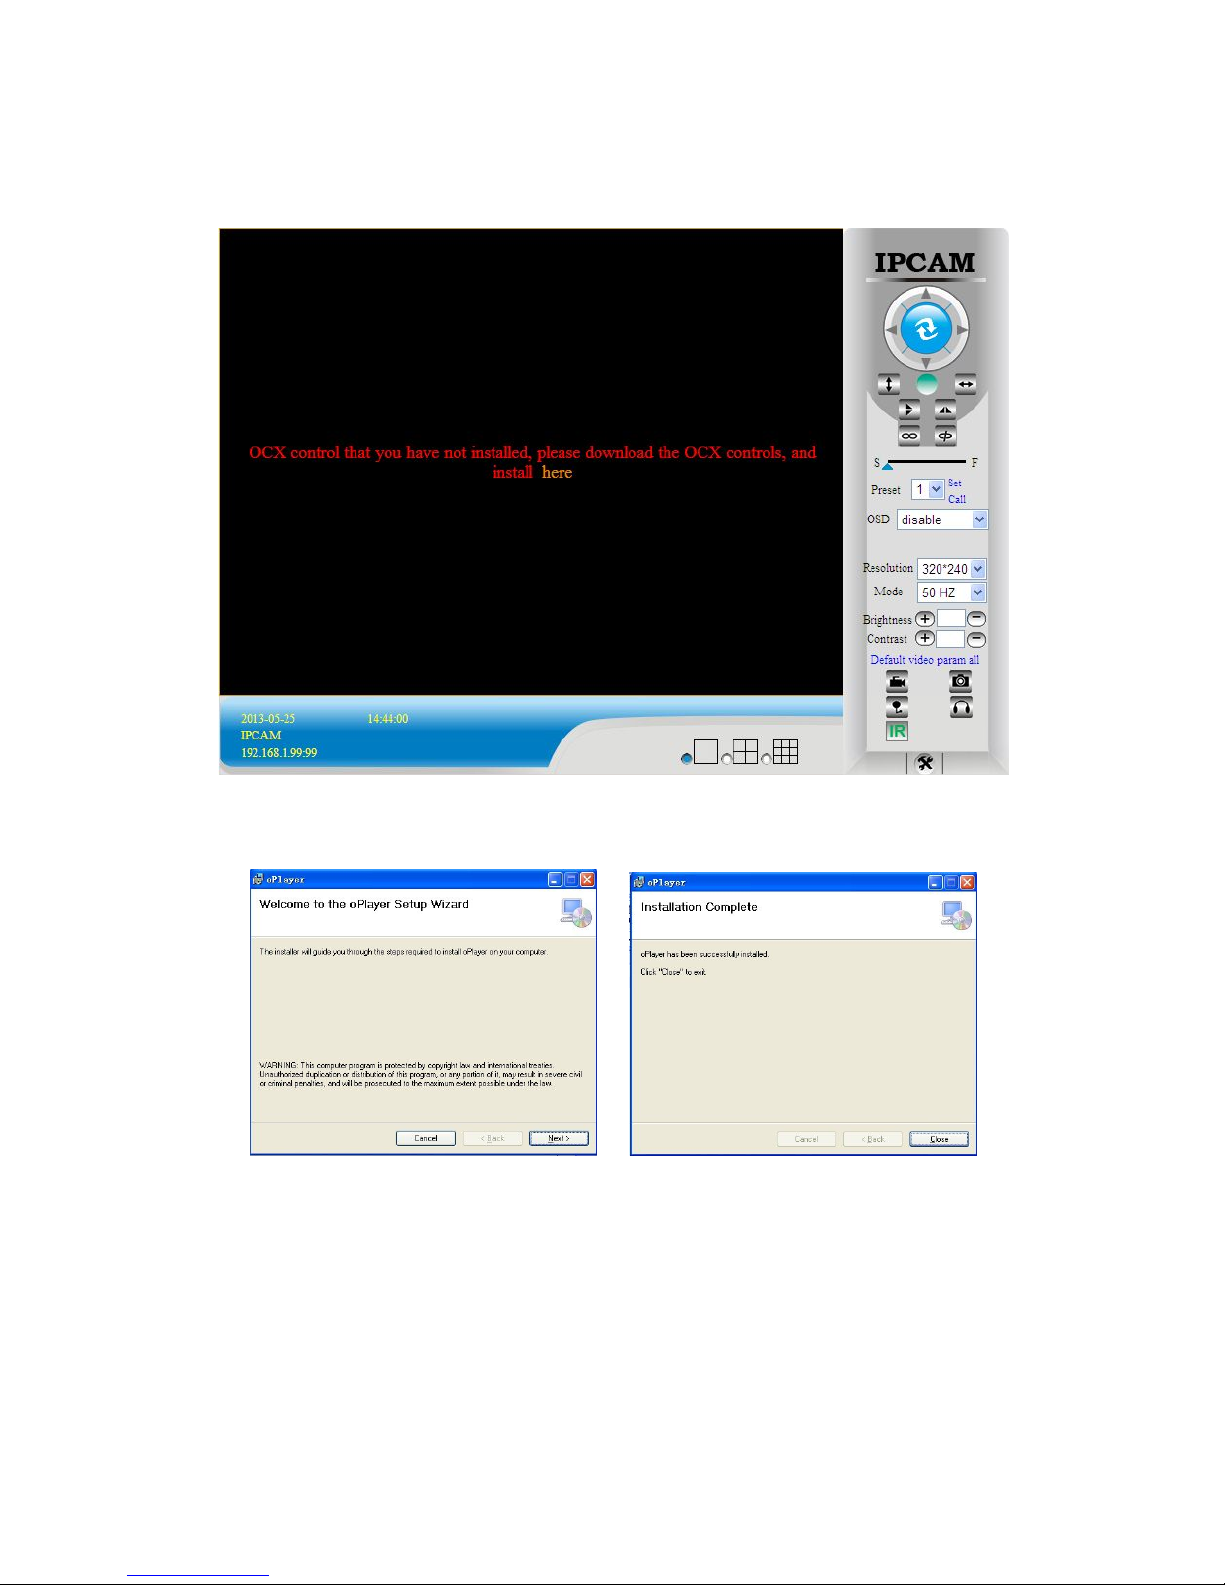
Choose Active Mode (For IE Browser), and sign in.
The first time login the camera, maybe get ActiveX prompt as the picture below, please
download the Ocx(or run in CD) and install first then choose Run
Add-on, refresh and login the camera again, then will see live video, details as below:
10
Figure 3.3
After Download Ocx-Setup (oPlayer Software), Click and install it, untill finished.
Figure 3.4
 Loading...