

Page 1

Bluetooth Handheld Keyboard
(with option of Laser Pointer)
User Manual
Model: KP-810-10BTT
Rev. 1.0
- Multi-language supporting
- Multi-touch&Scrolling bar
- Google TV Keybaord
www.unisengroup.com
Page 2

Introduction:
this Bluetooth Handheld keyboard consists of keyboard, mouse touchpad, and laser
pointer(optional) which is designed small and portable size. It provides people a unique &
capable tool to operate their personal computer wirelessly. it is widely used for:
■ the people who need to be apart from their personal computer yet must control it for their
presentation, teaching, and lecturing with large screen or projector, up to 33 feet wireless
operation distance provides you big free space to communicate with your audience.
■ the people who want to sit at their easy and comfortable chair to view the internet content,
network television, such as IPTV, or internet movies instead of physically change its channel,
it is a really computer remote controller, of course not a TV remote controller.
What's in your Packa ge?
In the package with Bluetooth Handheld Keyboard you will find a USB cable for charging the
Bluetooth Handheld Keyboard and this manual.
Features an d speci fications:
Bluetooth connection,
built-in re-chargeable Lithium-ion battery
backlit for operation in darken room
Portable size: 57 x 150 x 12.5mm
Charge voltage/current: 5V/300mA
Standby time: 600 hours
QWERTY keyboard
Built-in laser pointer
Google TV keyboard
Multi-language support
Multi-touch
Page 3
1
17
2
16
18
3
15
2
1
F
1
F 1
0
1
F
F9
8F
7
F
6
F
5
F
4
F
14
13
12
19
2 0
4
5
3
F
F2
11
2 1
6
1
F
7
9
8
ON
OFF
1 0
Page 4

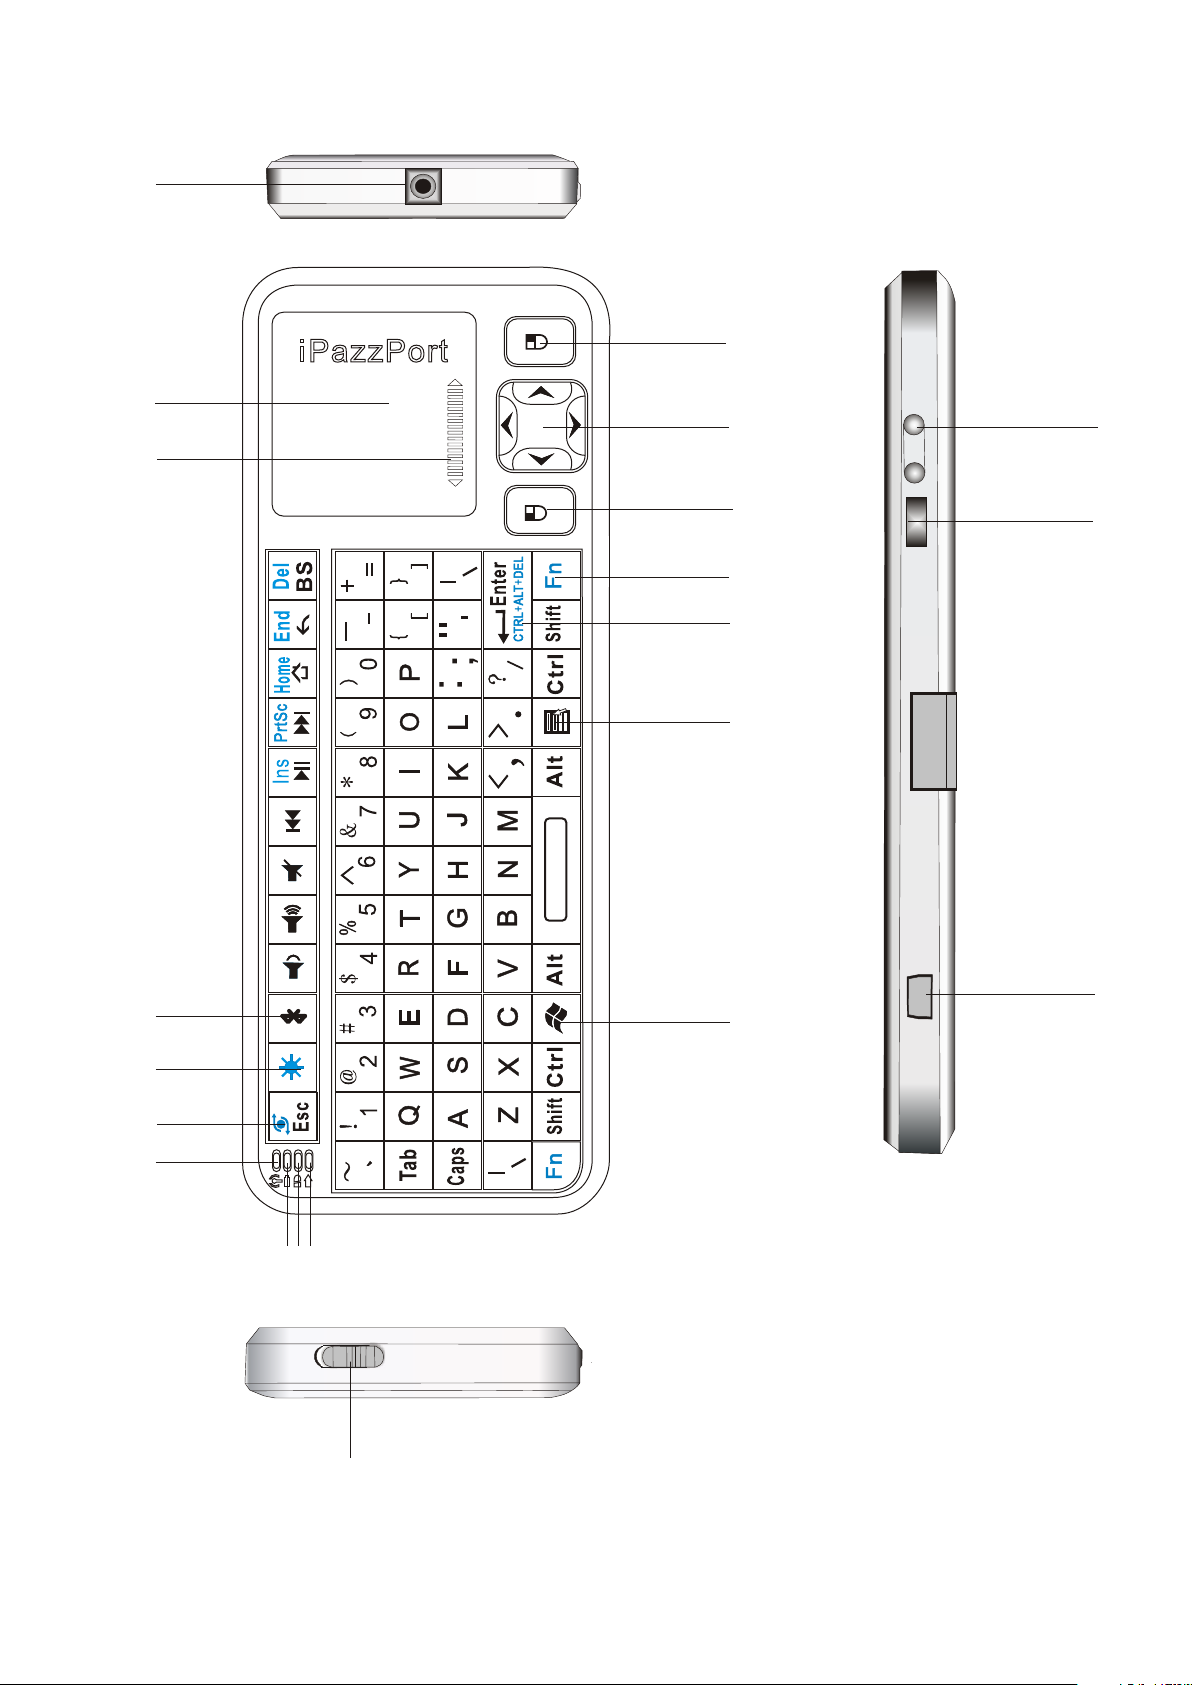
NUMBERE D
FEATURE
FUNCTIO N
OPERATION
ARROW 1
ARROW 2
ARROW 3
ARRAW 4
ARRAW 5
ARROW 6
ARROW 7
ARROW 8
ARROW 9
LASER EMITTER
TOUCH PAD
SCROLL BAR
BLUETOOTH RESET
BACKLIT BUTTON
LED1
LED2
LED3
LED4
PRESS LASER BUTTON(SEE ARROW 19)
TO ACTIVE IT
SLIDE YOUR FINGER TO MOVER MOUSE
SLIDE YOUR FINGER ON THIS AREA TO
SCROLL PAGE YOU VIEWING
PRESS THIS KEY TO RE-BUILD
BLUETOOTH CONNECTION
PRESS TO POWER ON /OFF BACKLIT
LIGHT ON WHEN CHARGING AND OFF
WHEN FULLY RECHAGED
LIGHT ON WHEN CONNECTED TO
EXTERNAL POWER SOURCE
FLASHES WHEN SIGNAL TRANSMIT
LIGHT ON WHEN TURN TO CAPS LOCK
INPUT
ARROW 10
ARROW 11
ARROW 12
ARROW 13
ARROW 14
ARROW 15
ARROW 16
ARROW 17
ARROW 18
POWER SWITCH
SHORTCUTFOR
START MENU
SHORTCUT MENU
COMBO KEY OF “Ctrl,
Alt, Del”
KEY Fn
MOUSE LEFT
NAVIGATE KEY
MOUSE RIGHT
PAGE DOWN/UP
BUTTON
TURN ON /OFF THE UNIT
PRESS TO GO TO START MENU ON
WINDOWS
PRESS TO GO TO SHORTCUT MENU
PRESS THIS KEY TOGETHER WITH
KEY “Fn”LIKE PRESS THESE THREE
KEYS SIMULTANEOUSLY
WORK TOGETHER WITH OHTERS
OPERATE LIKE MOUSE LEFT KEY
PRESS TO MOVE CURSOR UP , DOWN
LEFT AND RIGHT
OPERATE LIKE MOUSE RIGHT KEY
TURN PAGE UP OR DOWN
ARROW 19
ARROW 20
ARROW 21
LASER POINTER
BUTTON
MINI USB PORT
TOUCHPAD ROTATION
PRESS TO EMIT LASER AND RELEASE
TO STOP
FOR RECHARGE
TOUCHPAD INPUT DIRECTION ROTATE
Page 5
1. Pairing and establishing connection with computor.
Windows XP/2000
Let's take Microsoft Bluetooth Software as an example to describe Bluetooth Search,Pairing and
Connection, other Bluetooth software please refer to its own user manual.
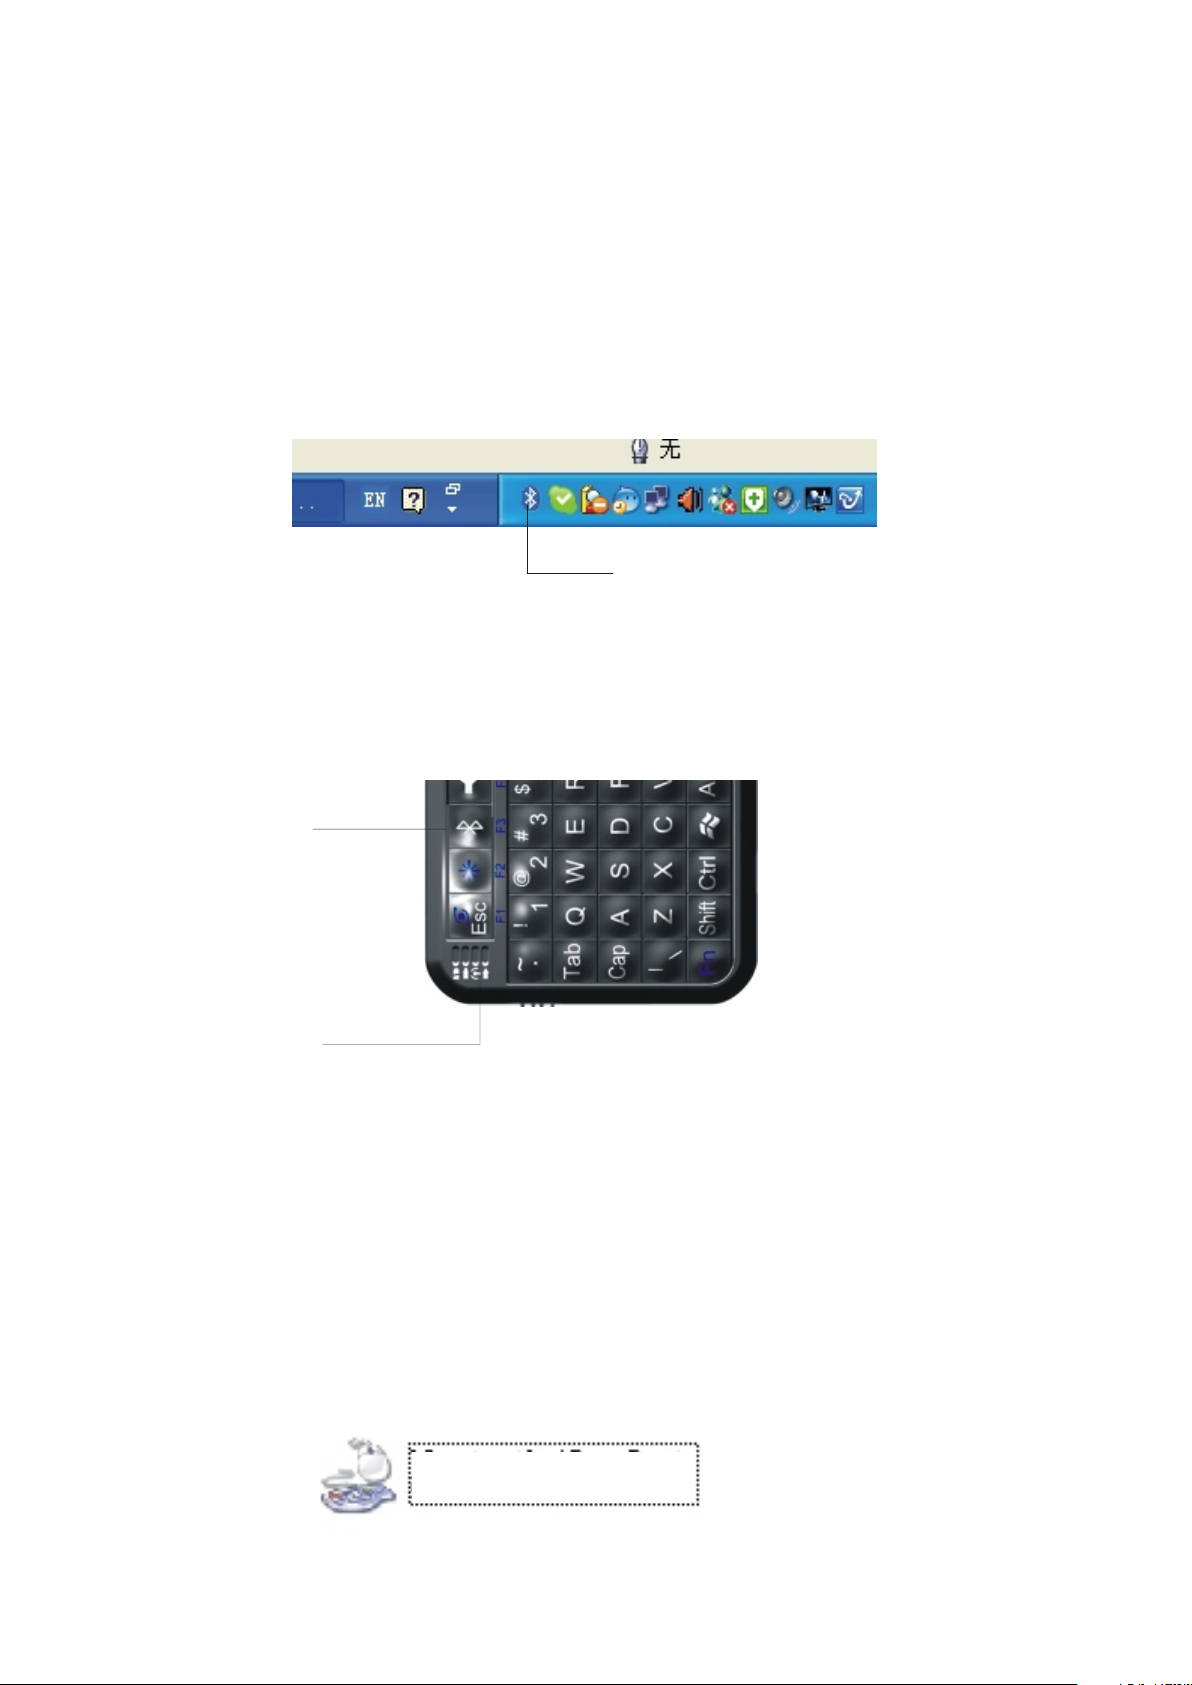
1.1 Insert Bluetooth adaptor into any vacant USB port on your computor, please be patient to wait
system search and install new hard driver. Then bluetooth icon will appear on the taskbar.
If your computing device has integrated bluetooth receiver refer to the user manual to enable
that receiver
Bluetooth icon
1.2 Turn on unit by moving the power switch to ON, (see arrow 10), press key BLUETOOTH RESET
indicated by arrow 4 till LED3 blink then release it(about 2-5 seconds) , that means your unit is
ready and searching other Bluetooth device for pairing.
Bluetooth Reset
LED3
Note: during operation, do not press this key, or your bluetooth keyboard will
be disconnected from your computor
1, 3 Click “Start”, “Control Panel” (make sure you're in Classic View), and then double-click
Bluetooth Devices. Select “Add”.
1.4, In the Add Bluetooth Device Wizard, select the “My device is set up and ready to be found
check box”, and then click “Next”.
1.5, After icon of “Bluetooth iPazzPort” appear, click “Bluetooth iPazzPort”, and then click “Next”.
Bluetooth iPazzPort
New Device
Page 6

1.6, When the wizard asks you which passkey you want to use, click “Choose a passkey for me”.
Then click “Next”.
1.7 After you are prompted to enter your passkey, please type the passkey on Bluetooth Handheld
Keyboard, and then press Enter. You also can choose no passkey to go next step.
PLEASE DO REMEMBER TO USE THE KEY OF BLUETOOTH HANDHELD KEYBOARD
WHEN INPUT PASSKEY
1.8, In the final page of the wizard, click Finish, it maybe take a few seconds for new hardware driver
installation before click finish. So please be patient.
Your Bluetooth Handheld Keyboard should now be successfully paired with your PC and
ready to use.
1.9 LED3 will goes out when connection is established successfully
NOTE: keyboard functions WILL NOT work until a bluetooth connection with the computing device
is completed.
Page 7

Win dows 7
Plug bluetooth receiver into any vacan USB port on your computor, please be patient to wait
the system recognize your device, it maybe take several minutes. When new hardware has
finished driver installation, an icon will appear in the task bar.
Right click icon of bluetooth, select “Add a Device”
An window like below will popup indicating that system is search a devie to add...
Page 8

Turn iPazzPort on by sliding the power switch to ON, LED3 will flash one time, then press
key “bluetooth reset” till LED3 flash. Bluetooth iPazzPort and Bluetooth Keyboard will appear
in the window. Select it and click “Next”
Bluetooth Reset
LED3
Then you will be promoted to input a pass code for your device, please do type the code with
iPazzPort, then press Enter
NOTE:1.
2. keyboard functions WILL NOT work until a bluetooth connection with the computing
device is completed.
Do not tap key “Bluetooth Reset” or you will disconnect its connection during
operation.
Page 9

Starting Bluetooth Handheld Keyboard
1. The Bluetooth Handheld Keyboard has a battery saving feature.
This feature puts the device into sleep mode if you do not use it for a long time.
You can wake up the unit by pressing any key for one second.
2 Arrow 14 points to the Fn key.
In order to bring users more convenience, the Bluetooth Handheld Keyboard also provides F1,
F2,F3...F12 which operate like those keys on the standard keyboard. Please press Key Fn
together with the key you want to operate them, but if you only press FX on the Bluetooth
Handheld Keybaord , that will make no sense. The following keys need to be used with key
Fn: F1,F2...F12, combo key of CTRL+ALT+DEL, Ins, Prt Scr, Home, End, Del, and Touchpad
rotation key( see arrow 21)
3. Arrow 13 points to Ctrl+Alt+Del key
As we know, in many occasions we need to use keys: Ctrl+Alt+Del on standard keyboard when
operate computer, such as restart system, lock users, terminate applications.... But now with
Bluetooth Handheld Keyboard you only press key Fn together with key “Enter” to complete
your mission.
4. Arrow 21 points to key of touchpad rotation.
As we know, some times, we want to operate the Bluetooth keyboard vertically, and some times
horizontally, when operation direction is rotated from vertical to horizontal, but touchpad will not
for example, if the operate direction is rotated, when you slide your finger on the touchpad
vertically, and the mouse cursor on the screen of computor will move horizontally, so please
press key Fn together with key of touchpad rotation to rotate the touchpad, this way, mouse
curosr will move in corresponding direction.
Page 10

5. When the backlit light up without any operation , this indicates your battery voltage has a low
charge and needs to be recharged. The Bluetooth Handheld Keyboard is equipped with a
re-chargeable battery. We have supplied you with a USB cable, which is plugged into a vacant
USB slot on your computer and the bottom of the Bluetooth Handheld Keyboard, as indicated
by arrow 20 . During charging LED1 will light up with steady on. When fully charged, LED 1
will go out and LED2 will on, unplug the Bluetooth Handheld Keyboard from the USB cable
and LED2 will go out too..
6. If you wish to operate this Bluetooth Handheld Keyboard in a darkened room then you
will want to use the Backlight Keyboard feature. In order to activate the Backlight feature
please press backlit button indicated by arrow 5 to turn on/off the backlight.
9. The Touch Mouse Pad (TMP) is quite versatile. To create input with the TMP place your
finger on the pad. Just move your finger on the TMP as though you were using your mouse
pad. Watch the mouse move to where you want it, and then use the keyboard for whatever
action you desire. You can draw patters using the TMP if you have installed MS Paint ,
ScreenPen or other Paint software.
7. Bluetooth Handheld Keyboard has an option of built-in Laser Pointer, which provide
an enhanced tool for your presentation, training, conference. press the Laser Pointer button
indicated by arrow19 to operate it, you can use this feature whenever the unit is on or off.
Page 11

Multi-touch application:
the touchpad supports various gesture, the related gesture and function is described below:
Touchpad
Function
Moving
Middle
botton
click
Vertical
two finger
scroll
Mouse
Function
Move
Cursor
Middle
botton
click
Scroll
middle
key
Finger
Gesture
Finger
Action
Slide one finger
on the touchpad
Tap the touchpad
with two finger
simultaneously
Slide two finger
vertically
Remark
Scroll
upward
Scroll
downward
Scroll pages quicky
when browse
website
Zoom in or out
the picture when
view pictures
Right click
Right
button
click
Tap the touchpad
with three fingers
simultaneously
Page 12
Hand writing
Bluetooth Handheld keyboard is equipped with large PAD for hand writing when used with the
handwriting input software, SCREEN PEN is the right program for the people who want to
have a speech, presentation, and training and want to emphasize his content on the screen,
with the Bluetooth Handheld keyboard and software of SCREEN PEN, he can emphasize
the words on the screen with circle, under line,×, √ as wish. This program is programed and
fully owned by Unisengroup,
1. Install the SCREEN PEN:
->load setup.exe from and disc and double click it then select “Next”.
-> Accept “License Agreement”
-> then click “Next” till install prgram completed.
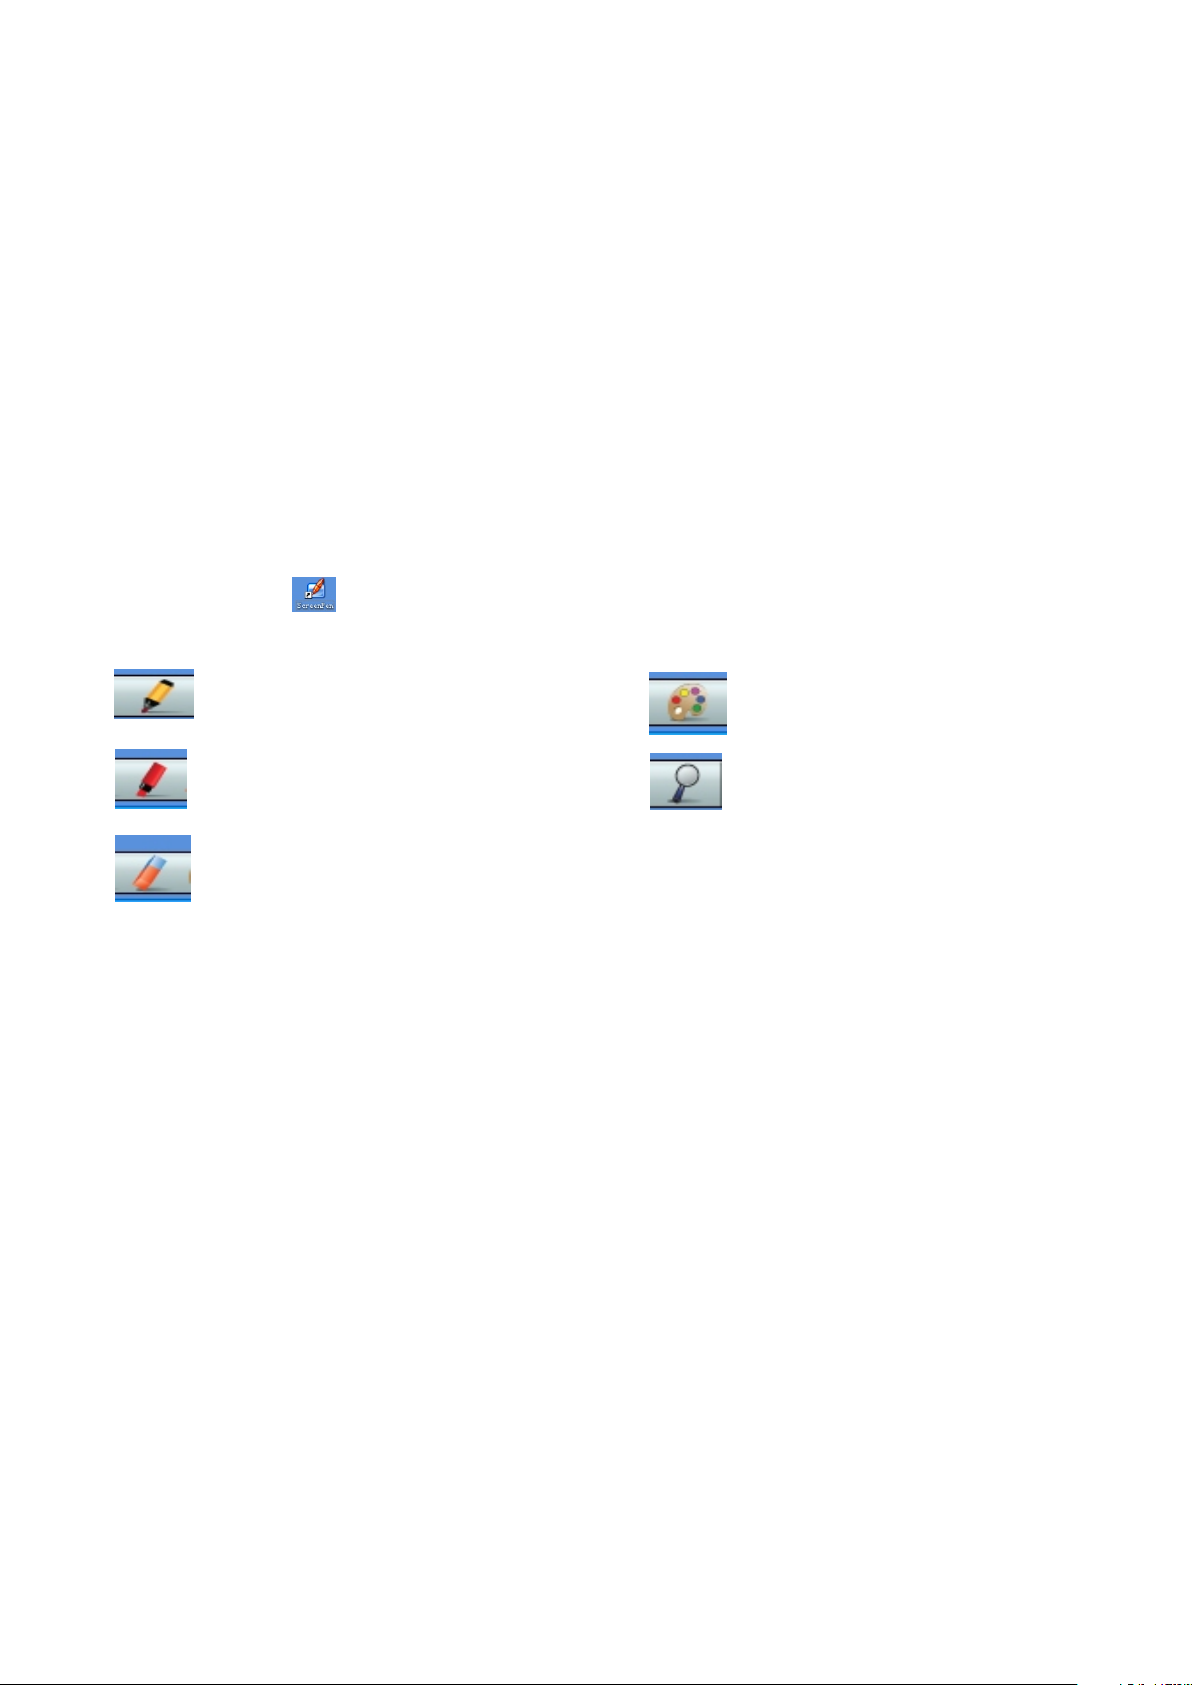
2.how to use SCREEN PEN
Double click icon on the desktop, then click icon on the task bar, menu bar like below will
appear to the left-down cornner of the screen.
Pen for drawing on the screen
Pen of Hi-liter
Eraser
this software is an optional addtional purchase!
Colour pallet
Amplifier
Page 13
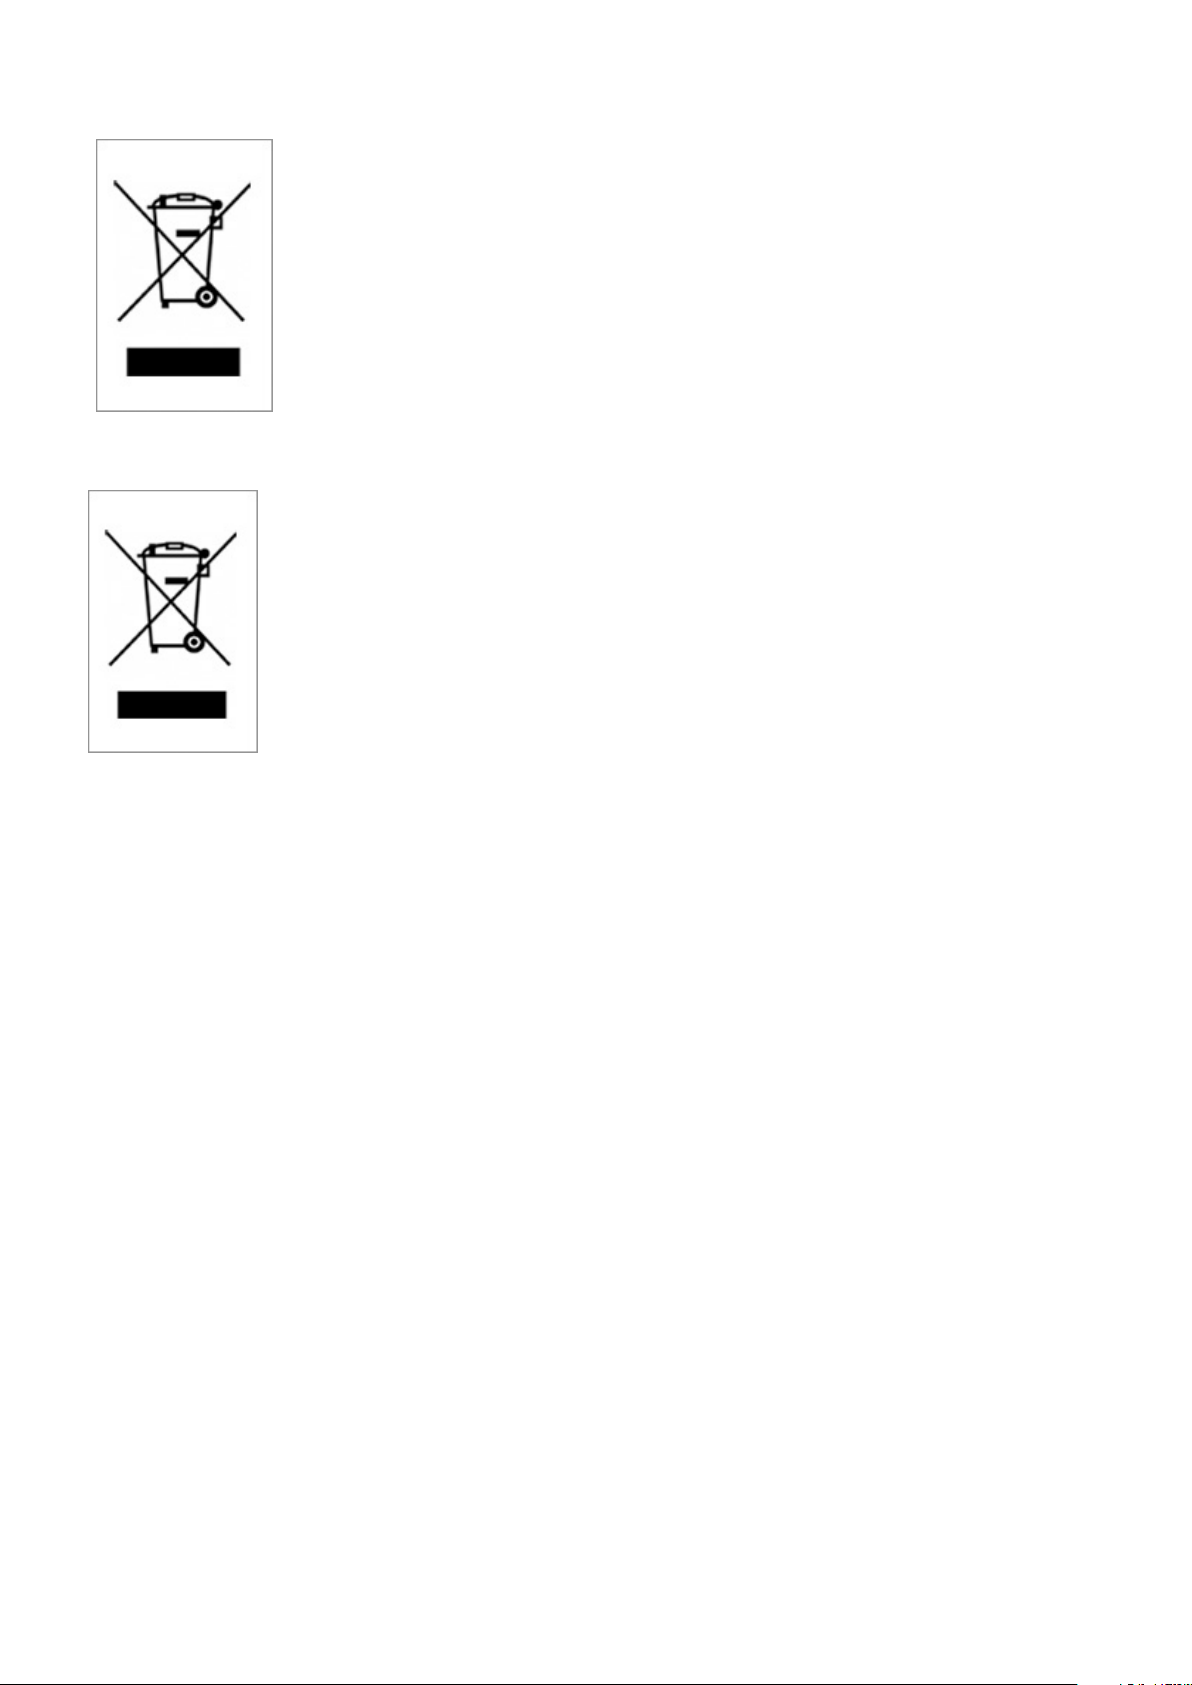
WEEE Directive & Prod uct Disposal
At the end of its serviceable life, this product should not be treated
as household or general waste. It should be handed over to the
applicable collection point for the recycling of electrical and electronic
equipment, or returned to the supplier for disposal
Notic e t o c u s t omers :
This symbol on the battery indicates that the battery is to be
collected separately.
The following apply only to users in European countries.
This battery is designed for separate collection at an appropriate
collection point.
Do not dispose of as household waste
For more information, contact the retailer or local authorities in
charge of waste management.
Caution :
Changes or modifications not expressly approved by the party responsible for compliance
could void the user's authority to operate the equipment.
Compliance statement:
1: This device is verified to comply with Part 15 of the FCC Rules. Operation subject to the
following two conditions:
(1) this device may not cause harmful interference, and
(2) this device must accept any interference received, including interference that may cause
undesired operation.
2: This equipment has been tested and found to comply with the limits for a Class B digital
device, pursuant to Part 15 of the FCC Rules. These limits are designed to provide
reasonable protection against harmful interference in a residential installation. This
equipment generates, uses and can radiate radio frequency energy and, if not installed
Page 14

And used in accordance with the instructions, may cause harmful interference to radio
communications. However,there is no guarantee that interference will not occur in a
particular installation.If this equipment does cause harmful interference to radio or
television reception, which can be determined by turning the equipment off and on,
the user is encouraged to try to correct the interference by one or more of the following
measures:
-- Reorient or relocate the receiving antenna.
-- Increase the separation between the equipment and receiver.
-- Connect the equipment into an outlet on a circuit different from that to which the receiver
is connected.
-- Consult the dealer or an experienced radio/TV technician for help
Page 15

该款手持蓝牙键 盘 是 本公司在前面无线 键 盘 触摸板系列上增加 的 又 一款新产品,继承 了 前
一系列产品结构 简 单 ,小巧,携带方便 等 特 点,并在此基础上 增 加 了激光笔,F1,F2,...F10
等功能键,集鼠 标,键 盘,以 及激光笔等功能于 一 体,是 当今世界上体积最 小 , 功能最为齐全的一
款键盘,无论是 会 议 主持演讲,教育培 训 , 还是家庭电脑娱乐 , 拥 有一款蓝牙键盘激 光 笔 ,会
让你轻松自如地 远 距 离控制你的电脑。 是 一 款真正的电脑遥控 器.
作为一款新型的 蓝 牙 键盘,采用蓝牙无 线 连 接技术,遥控达10米 半径范围.
该蓝牙手持键盘 采 用QWERTY式键 盘 布 局, 包含了标准键盘所 有 常 用功能键和字符键, 方 便 实 用
该产品的触摸板 采 用 电容感应式触摸板,为 你 的 提供准确的鼠标指 针 定 位. 与分体式鼠标
一样的方便使用,亦 可 进 行多媒体会议或演 讲 手 写标注.
一, 特点与规格:
1. 蓝牙无线连接:Bl u e tooth v2.0、B l u etooth HID v 1 . 0.
2. 支持背光灯显示。
3.QWERTY 键 盘布局
4.
充电:DC5V/300mA
5. 内置锂电池,超长 时 间 待机(约600小时).
6. 内置激光笔。
7. 造型小巧, 57*150*12.5 毫米/重量: 103克
8. Google TV 键 盘
9. 多点触摸
二.应用领域
该款蓝牙键盘激 光 笔 是目前世界上外形 尺 寸 最小的键盘鼠标一 体 化 电脑无线输入设备,有 效 地 解
决了无线操作电 脑 以 及当市场上的键盘 和 鼠 标体积过大的问题 。 在 电脑以及电脑娱乐 日 益 发达
的今天,该蓝牙 键 盘 触摸板有着广泛的 应 用 。
■ 家庭娱乐:通过 该 蓝 牙键盘,用户可以 远 离 电脑,坐在沙发上 , 轻 轻移动你的手指就 可
以进行网页浏览 , 网 络电影播放,中英 文 输 入以及网上聊天, 游 戏 。
■ 多媒体教育培训 以 及 演讲:该产品外形 小 巧 ,携带方便,对于 配 合 大屏幕和大投影仪 使 用 的
多媒体教学, 该款手 持 式 无线键盘触摸板可 以 让 教学培训讲师,演 讲 人 员远离你的电脑, 走下
讲台和你的听众 亲 切 交流,互动,创造一个良好 的 氛 围.使你的演讲和培训 生 动 有趣。
■本产品作为一款 电 脑 遥控器,还可以应 用 在 车载电脑,电脑控 制 的 大型设备维修,KTV点
歌系统等
Page 16

三,主要功 能 键 布 局 以 及说明
1
2
3
17
16
18
15
2
1
F
1
F 1
0
1
F
F9
8F
7
F
6
F
5
F
4
F
14
13
12
19
2 0
4
5
3
F
F2
11
2 1
6
1
F
7
9
8
ON
OFF
1 0
Page 17

功能描述
操作描述
1
2
3
4
5
6
7
8
9
10
激光头
触摸板
滚动条
蓝牙重启键
背光灯开关按键
LED1
LED2
LED3
LED4
电源开关
发射激光
用手指触摸以移 动 鼠 标
用手指在此区上 下 移 动以快速移动页面
单击以重新使键 盘 处 于可连接状态
单击以打开和关 闭 背 光灯
充电指示灯,充 满 电 时熄灭
外接电源指示灯
信号传输指示灯 , 数 据传输过程中灯闪
转换到大写输入 时 灯 亮,
打开或关闭电源
11
12
13
14
15
16
17
18
19
开始菜单快捷键
快捷菜单按键
组合键 “Ctrl,
Alt, Del”
Fn 按 键
鼠标左键
导航键
鼠标右键
上,下翻页按键
激光开关按键
单击以进入到开 始 菜 单
单击打开快捷菜 单
同时按住Fn和Enter键 等于同时
按住普通键盘上CTRL, ALT,DEL三 个键
配合其它的键同 时 操 作
鼠标左键
上,下,左,右 移 动 鼠标
鼠标右键
上,下翻页按键
打开或关闭激光
20
21
MINI USB 充电 接 口
触摸换向按键
充电
当键盘使用方向 改 变 时,与Fn一 起 使 用转
换触摸方向,使 之 与 使用方向一致
Page 18

四.使用说明
1 连接建立: 首 先 要 确 定 你要连接的 电 脑 是 否 具 有蓝牙功能 , 如 果 没 有 的话,你必
须要有一个 蓝 牙 适 配 器 使之与电脑 相 连 接 。
1.1打开电 脑 中 蓝 牙 通 信软件,使之处 于 可 搜 寻 其 它蓝牙设备 的 状 态.具 体 操 作请参
考其蓝牙设 备 说 明 书.这 里 所描述的只 是 作 为 参 考 。打开“控 制 面 板 ” , 找到
蓝牙设备图 标 , 右 击 该 图标,选择 “ 打 开 ” , 在弹出来的 对 话 框 里 单 击“贴
加”,在接 下 来 弹 出 的 对话框中选 择 “ 我 设 备 已连接并设 置 好 , 可 以 查找”
然后单击“ 下 一 步 ” 。 电脑会自动 搜 索 已 打 开 的其它蓝牙 设 备 。
1.2 拔动蓝 牙 键 盘 的 开 关至ON处,打开电 源.单 击 一 下 蓝 牙重启按键直到L E D 3闪
烁然后松开 该 键 ,L E D 3闪几秒钟后 熄 灭 。 这 说 明蓝牙键盘 与 电 脑 已 建 立连接
注:在操作 过 程 中 , 不 要再按蓝牙 重 启 键 , 否 则连接会断 开 的 ,
1.3 连接成 功 后 会 出 现 如下对话框,单 击 该 图 标,选 择"下 一步"
1.4 在接下 来 弹 出 的 对 话框里,软 件 会 要 求 你 输入连接密 码 , 此 时 你 可以按要求
输入你软件 给 你 的 随 机 密码,同时 你 也 可 以 选 择不要输入 密 码 。 然 后 软件会
自动安装, 至 此 连 接 配 对成功,你 可 以 使 用 蓝 牙键盘。
Page 19

2 键 Fn的使用.
Fn是配合以下键 使 用 的:F1,F2.. . F 12, ENTER, In s , P rtScr, Hom e , E nd, Del,
以及触摸板换向 键 ( 箭头22),使用时, 同 时 按住 Fn键,以及你想 要 操 作的那个按键,比 如 :
在标准键盘上, 同 时 按住CTRL+AL T + DEL三个键就可以 进 行 重启,任务管理, 等 操 作,在该无
线键盘上,你只 需 要 同时按住Fn以及Ent e r就 可以。
3 充电: 该无线键盘激 光 笔 配有内置锂电池, 如 果 在开机状态下,没 有 进 行任何的操作,背 光 灯
自动闪亮,那说明该 无 线 键盘激光笔已处于 低 电 压,需要充电,将 USB 线的一 头 插 入到电脑主机的
上USB接口,另一 头 插 到无线键盘激光笔 上 的M ini USB 插孔,1号指 示 灯 会亮。充电满时1号指 示
灯自动熄灭,LE D 2会 亮,这时拔掉USB充 电 线 ,LED2会熄灭.
4 背光灯:该无线键盘 配 有 背光灯,如果你在 黑 暗 或光线较暗的环境 下 操 作,你可以单击背 光 灯 按
按钮(箭头5)打开 背 光 灯,同样再按一次 该 键 即可关闭背光灯。
5. 激光笔:该无 线 键 盘配有激光笔以供 多 媒 体教学,培训,演 讲 , 演示。用手指按住 激 光 笔按钮
(如图箭头19所示 ) , 激光头就会发射红 色 激 光,释放该按钮即 可 关 闭激光。
6.触摸屏输入:
移动鼠标: 将手指放 在 触 摸屏上,然后滑动手指,就 会 快 速移动鼠标.移动鼠标 到 目 的位置,然后轻
击触摸屏,这样光标 就 会 停在目的位置. 你也可 以 移 动 光标到下拉条,然后按 住 左 键, 向下或向上
移动手指就能快 速 浏 览文件或网页。
绘画或手写输入 : 如 果你的电脑安装了 小 画 家,ScreenP e n或 其它手写输入功能 的 软 件。你可
以利用触摸屏进 行 绘 画,输入或标注。
Page 20

五,多点触摸应 用:
多点触摸应用说 明 如 下图:
触摸功能
移动
中键单击
两手指垂直
方向移动
等效鼠
标功能
移动鼠标
光标
中键单击
滚动鼠标
中键
图示
图示描述
在触摸板上滑动
手指
同时用两个手指
在触摸板上单击
两手指垂直
方向移动
备注
向上
向下
在浏览 网页 时双指
单击会 出现 滚动条
如上图 所示 ,将光 标
移至该 图上 方则向 上快 速
移动页 面, 反之则 向下
在浏览图 片 时,两
个手指向 上 、下移
动可以放 大 或缩小
画面
右击
鼠标右击
三个手指同时单
击
 Loading...