

Page 1
ASSEMBLY INSTRUCTIONS
(For LD18785CL-29.5*79.5)
AATTENTIONTTENTION::
Please read these instructions carefully before assembly.
1.
2. Aluminum is a soft metal; over tightening may strip threads or break the part.
3. DO NOT use power tools.
4. Check parts against the parts list to make sure you have all parts needed for proper
assembly.
5.Familiarize yourself with the inventory of parts and the accompanying illustrations to ensure
safe and proper assembly.
Assembly steps:
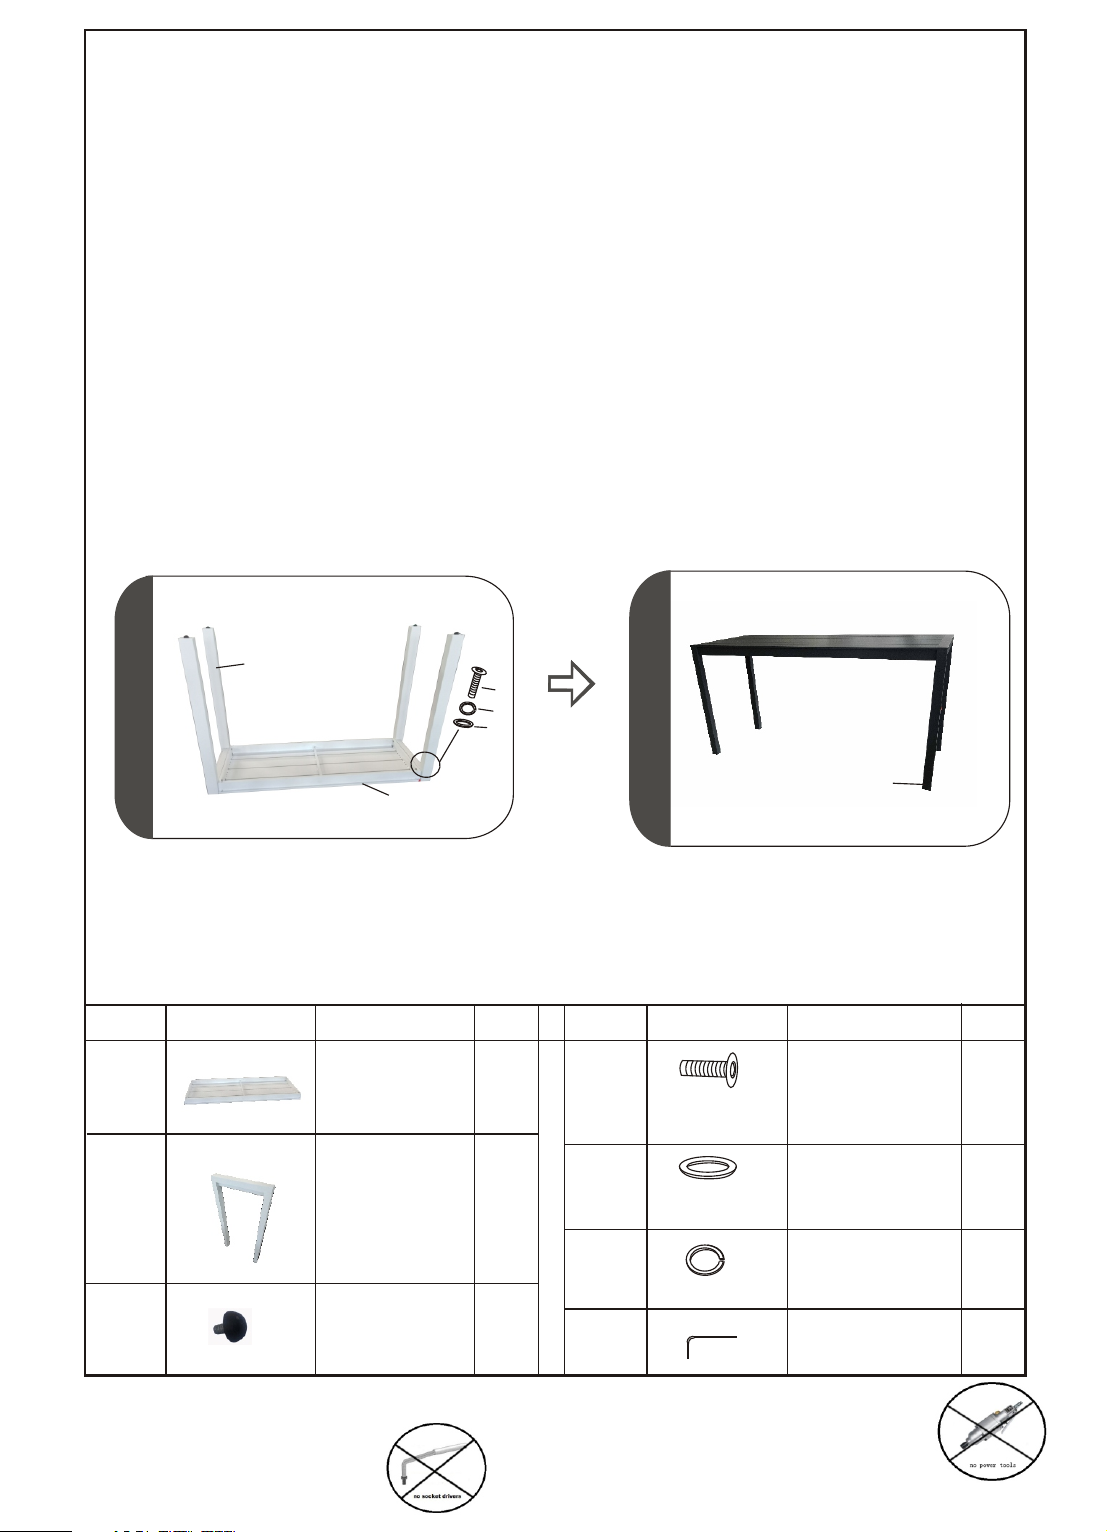
1. Please turn the table top (A) upside down and put it on a clean and soft place.
2 . Loosely at
Do not over tighten.
3.Tighten all the bolts and nuts completely. Do not over tighten.
4.Tur
n the table onto its legs and use the adjuster feet to level the table.
Warning : DO NOT use acid or alkaline washing liquid to clean the product.
tach the 2 legs to the table top(A) with bolts(D), flat washers(E), lock washers(F).
11
B
A
Parts list Parts picture Description
A
B
Table top
Table leg
D
F
E
Q'ty
1
2
22
C
These parts have been assemble by factory already!
Parts list Parts picture Description
D
(M8*30)
E
(M8)
Bolt
Flat washer
Q'ty
8
8
C
DO NOT OVER TIGHTEN
*
NO SOCKET DRIVERS
*
Foot Leveler
F
4
Made in China
G
(M8)
NO POWER TOOLS
*
ASSEMBLY REQUIRED
*
Lock washer
Wrench
8
1
Page 2
PRODUCT INSTRUCTIONS
(
WARNING!WARNING!
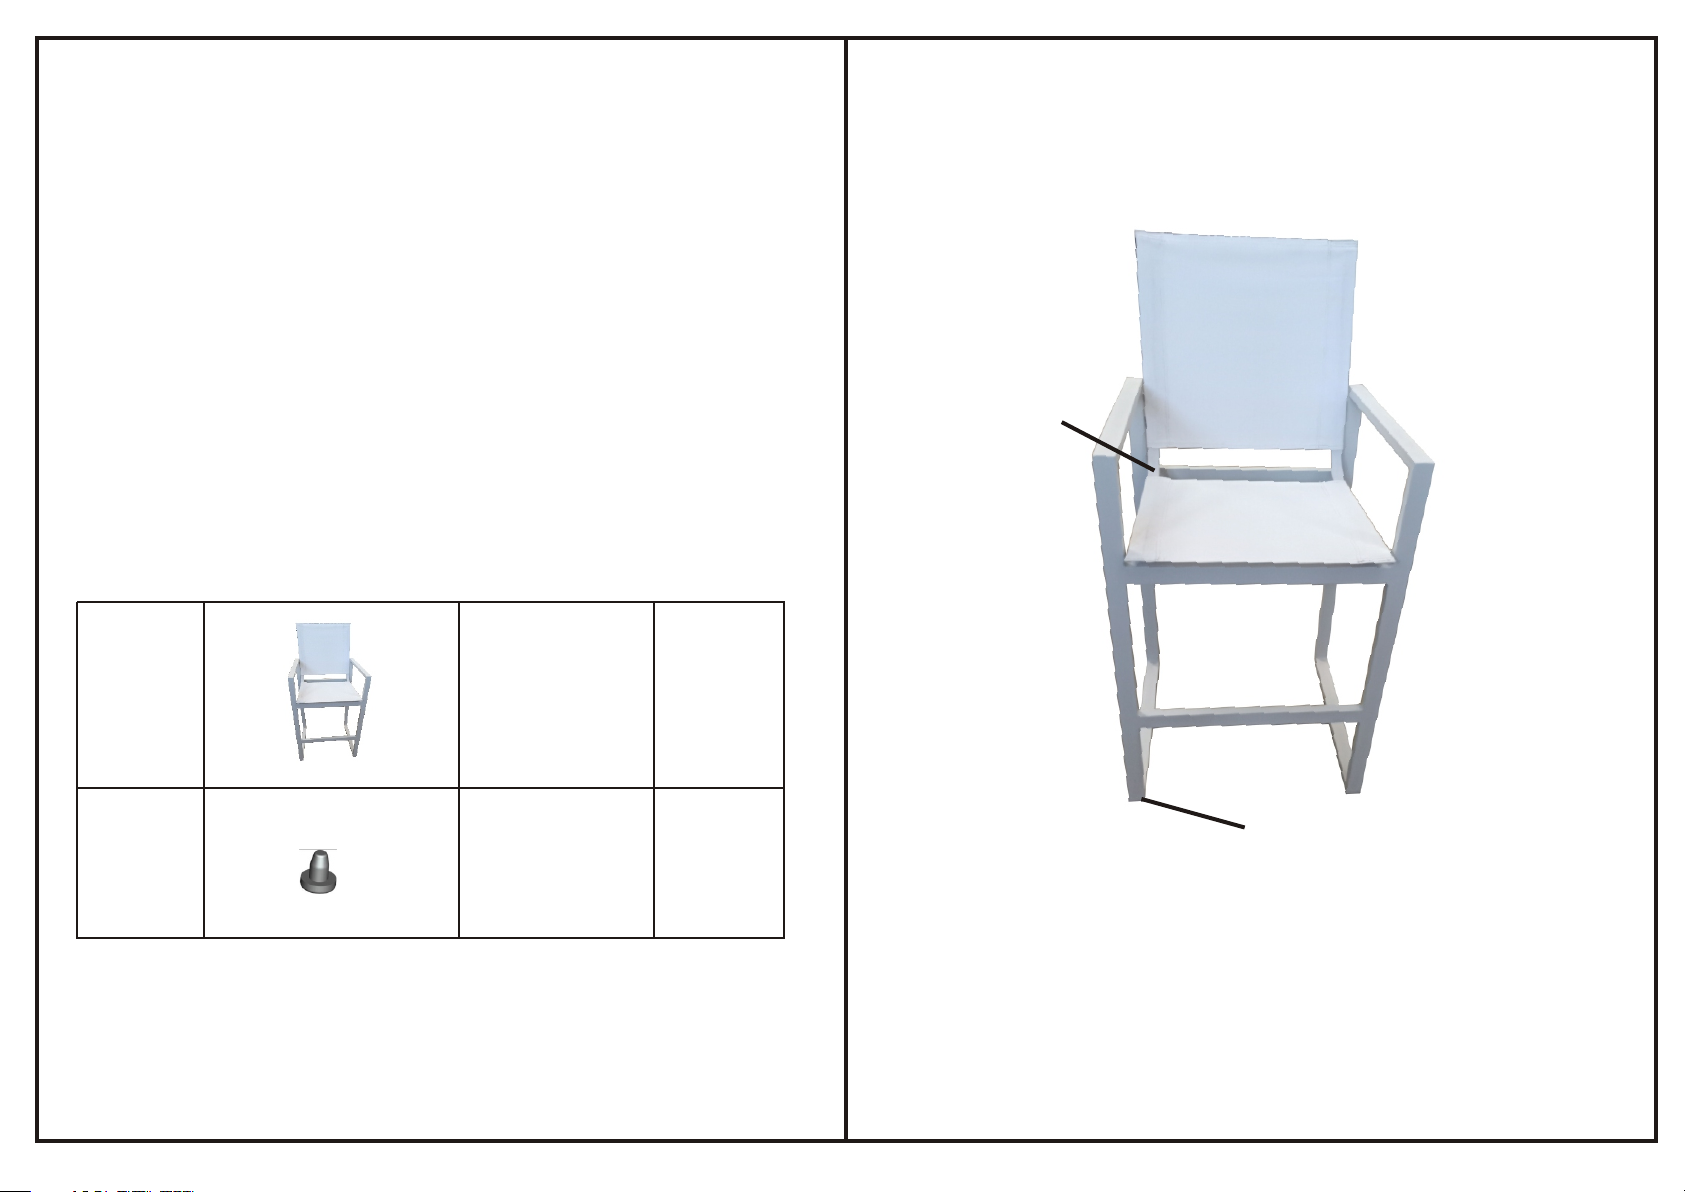
emove all protective packing material and
R
position base on floor. Adjust all the foot
levelers to level the chair. Now the chair is
eady for use!
r
Warning:
DO NOT use acid or alkaline washing liquid to
clean the product.
A
For LD18785-17)
CHAIR
1
A
B
Warning: Do not force component and
over tighten the nuts during assembly.
FOOT LEVELER
B
4
All parts have been pre-assembled.
Made in China
Page 3
ASSEMBLY I NSTRUCTIONS
(For LD18785-3)
AATTENTIONTTENTION::
1. Please read these instructions carefully before assembly.
2. Aluminum is a soft metal : over tightening may strip threads or break the
3. DO NOT use power tools.
4. Check parts against the parts list to make sure you have all parts needed for proper
assembly.
5.Familiarize yourself with the inventory of parts and the accompanying illustrations to ensure
safe and proper assembly.
Assembly step:
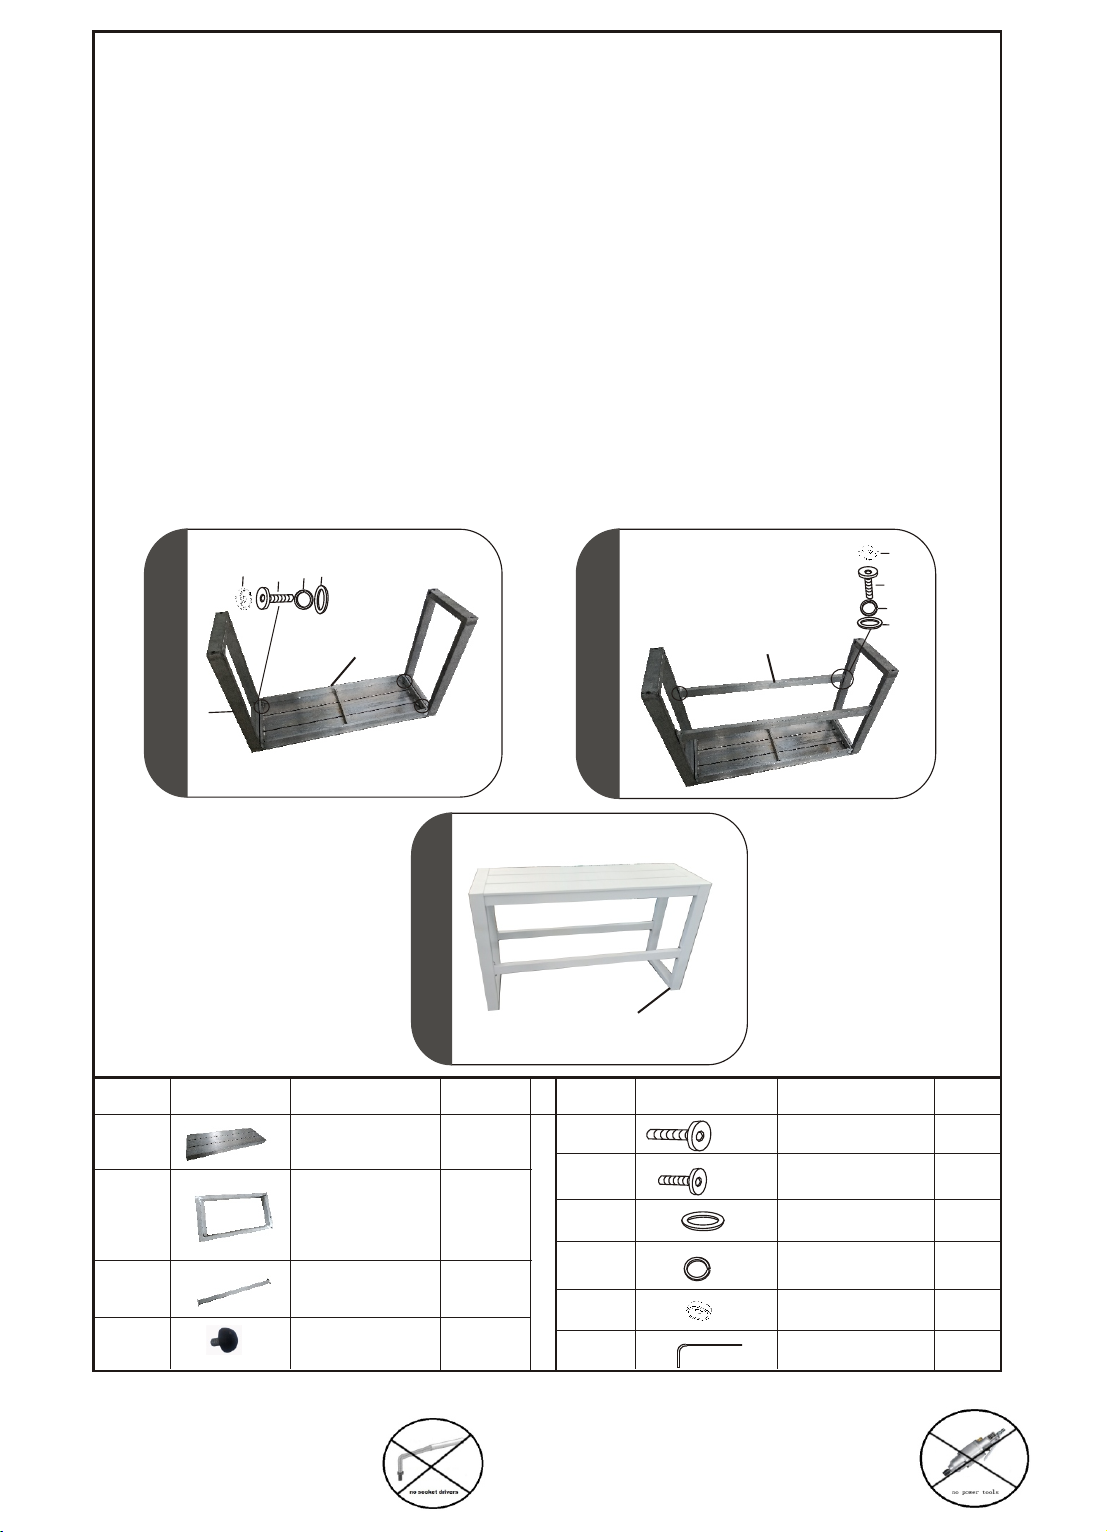
ut the seat(A) on a soft surface and then loosely attach the leg(B)to the seat with the
1. P
flat washer(F), lock washer(G),bolt(D) and PVC cover(H).Do not over tighten.
2. Now loosely attach the braces(C)to the legs with the flat washer(F), lock washer(G),bolt(E)
and PVC cover(H).
3. Tighten al
Warning : DO NOT use acid or alkaline washing liquid to clean the product.
l the bolts firmly but do not over tighten.
part.
H
F
G
D
11
A
B
Parts l ist Parts p ict ure Descr ipt ion
A
Seat
22
33
D
These parts have been assemble by factory already!
Q'ty
1
Parts l ist P arts pictu re D escripti on
D
(M6*30)
C
Screw
H
E
G
F
Q'ty
8
B
Leg
C
J
DO NOT OVER TIGHTEN
*
NO SOCKET DRIVERS
*
Brace
Foot leveler
E
2
F
G
2
H
4
Made in China
I
(M6*20)
NO POWER TOOLS
*
ASSEMBLY REQUIRED
*
Screw
Flat washer
Lock washer
PVC cover
Wrench
8
16
16
16
1
 Loading...