

Page 1
GREASE JOINT REJUVENATOR
®
#7862, #7863 or #7864
INSTRUCTIONS
The Grease Joint Rejuvenator® allows a clogged grease
tting or joint to take on fresh grease by injecting light
penetrating oil into the grease joint via the grease tting,
thus breaking up and removing any dirt, rust or debris. The
purpose of this tool is to free up the joint and tting, enabling
them to be greased.
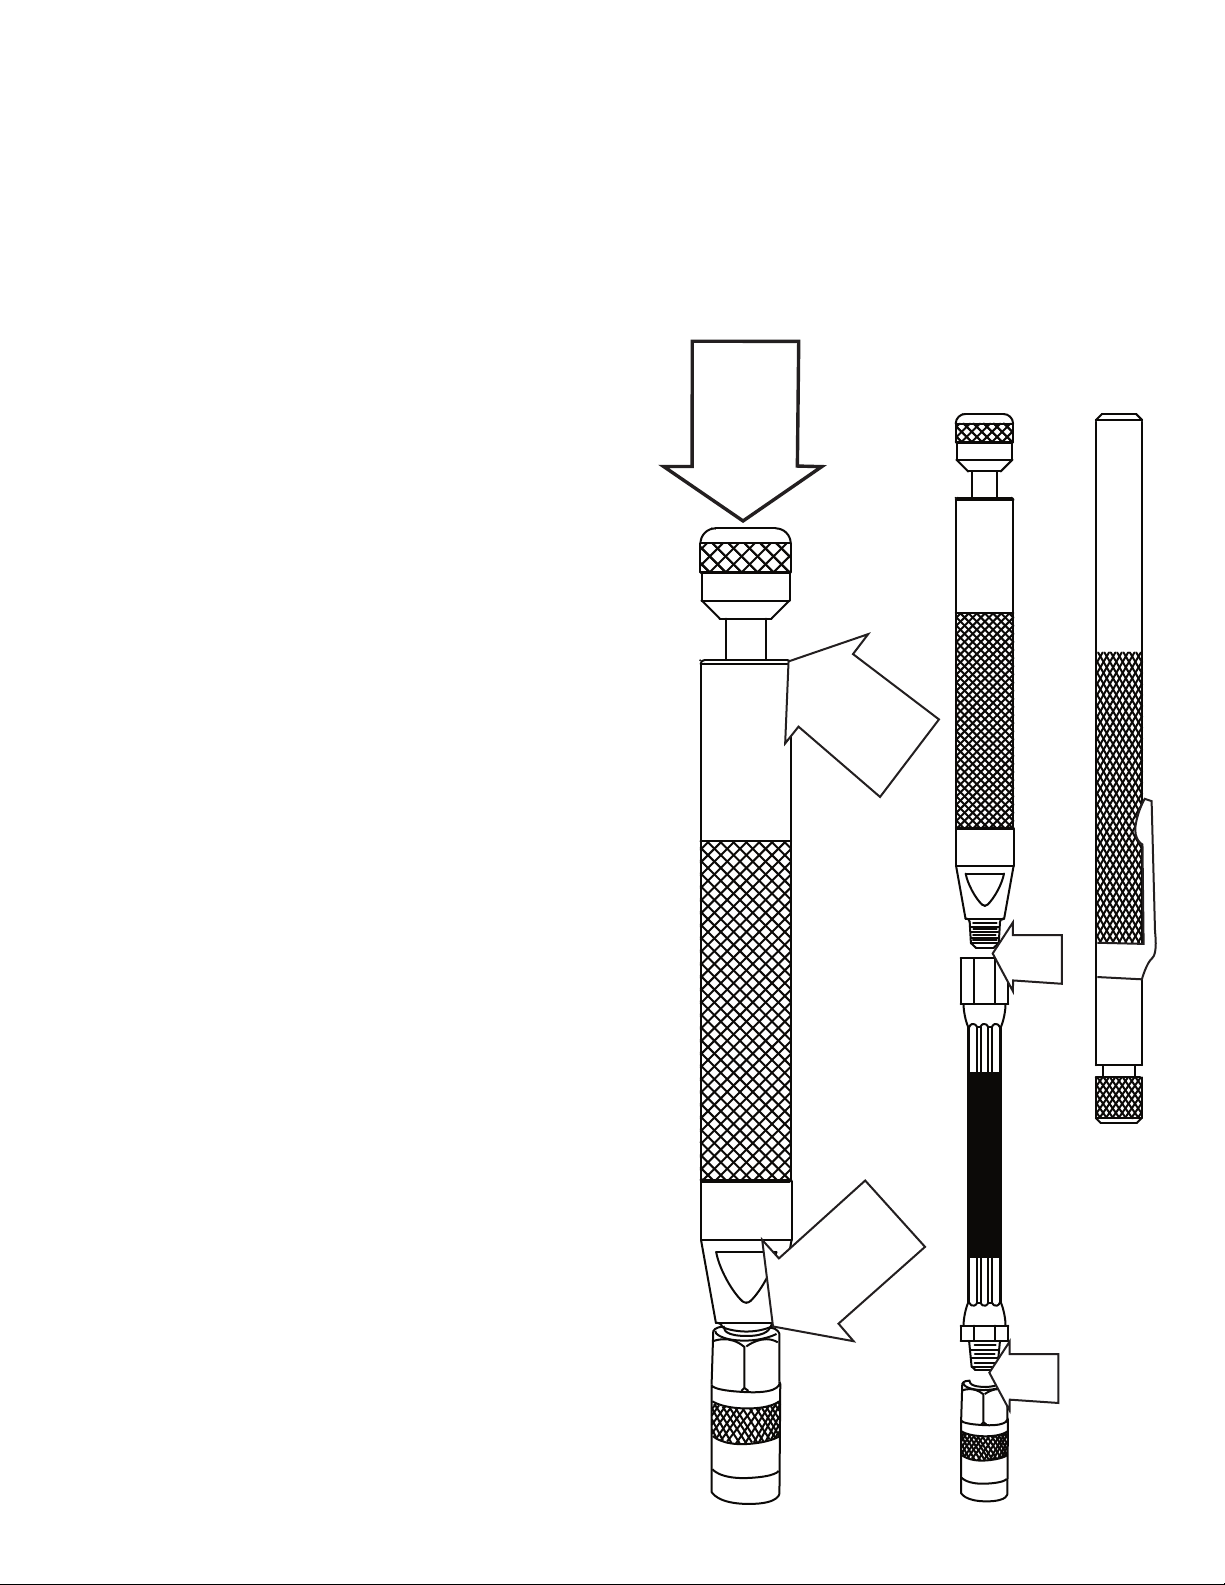
SET UP: First remove the piston from the tool body and ll
with non-aerosol, penetrating oil. Once the tool body has
been lled, reinsert the piston, gently working it into the core
of the body. Be sure to clean the piston and O-Ring before
inserting, as dirt makes the tool less eective. NOTE: A spare
O-Ring is located near the head of piston shaft and serves as
a marker to show when the tool body is empty. To get the
best use out of this tool, bleed all the air out of it. When the
piston is inserted into the tool body, air may get trapped
inside. Any air left in the tool reduces the hydraulic pressure
causing the tool to be less eective. (If the piston bounces
back when tapped, it has air in it!)
REMOVE THE AIR: After lling the tool body with light oil,
put the piston back and turn the tool upside down to allow
the air bubble to oat to the top. Place a rag over the end of
the tool and tap on the piston lightly with your hand until the
air bubble burps out. You are now ready to use the tool.
When bleeding, be sure and keep your face and eyes away
from expelling air and uid. (WEAR SAFETY GLASSES!)
USING THE TOOL: Once the air has been bleed from the tool,
you are now ready to unclog a stuck tting or joint. If using
the Professional Model, push the Grease Coupler over the
grease tting and tap the piston head with a light hammer. It
may take several taps, but the piston will eventually move
down into the tool body. This is the indication that the joint
is being opened. Once the piston has pushed all the oil out,
remove the tool and grease the joint. (Note: some joints are
more stubborn than others. Several attempts with the
Grease Joint Rejuvenator® may be necessary.) If using the
Pocket model, gently place the open end over the grease
tting and hold the tool down rmly. (The O-ring inside the
end of the tool creates a seal and keeps the oil from leaking
out.)
PRECAUTIONS: Be sure NOT to hit the tool too hard as you can
snap o a grease tting or damage the tool. If you nd a
stubborn tting, try loosening the grease tting one or two turns
to expel any trapped air and increase the cleaning pressure.
When the Grease Fitting Coupler on the end of the Professional
Model is new, it may be dicult to remove from a tting.
Unscrew the head a quarter turn to loosen the jaws holding the
tting. The jaws can be turned around for extra life. (Note: The
jaws are a wearable item and are not warranted.)
INSTALL AUXILIARY FLEX HOSE: Some applications may
require the use of the auxiliary hose to make a bend. To
install the ex hose, remove the female grease tting coupler
from the Professional Model #7862. Use sealant tape and
install the ex hose into the tool body, then install the grease
coupler on the end of the hose. This gives you exibility
when
trying to access tight places. The use of the hose should only
be temporary. The Grease Joint Rejuvenator® works best
without the hose. (Auxiliary hose can only be used with the
Professional Model.)
CLEANING: Keep unit dry and oiled. If unit rusts, use a light
steel wool and oil as soon as possible.
WARRANTY: Contact your distributor for warranty
claims and concerns.
PROFESSIONAL MODEL
POCKET
MODEL
TOOL BODY
FLEXIBLE EXTENSION
HERE
GENTLY
AFTER
FILLING
HEAD
PISTON
PATENT
PENDING
COUPLER
TAP
REMOVE
PISTON & ADD
PENETRATING
OIL HERE
SEPARATE HERE
ONLY WHEN
ATTACHING
EXTENSION
PATENT
PENDING
COUPLER
ATTACH
HERE
ATTACH
HERE
007862-7863-7864 IPA Instructions
 Loading...