

IONX T6XSMIPM User Manual

IONX Technical Data
Communications Management Unit (CMU)
IONX Support Center 1-800-621-8442, supportcenter@ionxlive.com
Installation Manual
Edge T-Series
Model T6X
IONX LLC
515 S. Franklin St.
West Chester, PA 19382
www.ionxlive.com
484.653.2600
_____________________________________________________________________________________
301614 – T6X Installation Manual Confidential
Revision Date: November 19, 2013 Revision: A
Process Owner: Engineering Page 1 of 21
1 Warning
WARNING In order to comply with hazardous classification, only those items
specifically listed can be used and must be used only as shown.
WARNING Installation shall be carried out in accordance with the applicable code of
practice by suitably-trained personnel.
WARNING Repair of this equipment shall be carried out in accordance with the
applicable code of practice.
WARNING Any machining, drilling, and/or sanding related to the installation of this
system should be pre-approved by the authorized department before work is started.
WARNING If the equipment is likely to come into contact with aggressive substances,
then it is the responsibility of the user to take suitable precautions that prevent it from being
adversely affected, thus ensuring that the type of protection is not compromised.
WARNING RF Device: Unit cannot be painted or coated with any material. Coating can
adverseIy affect the performance of the device. Unit shall be masked appropriately if post
installation coating is required.
WARNING Products contain Lithium Ion batteries. Proper disposal procedures are
required upon end of life conditions. If there is not corporate policy for hazardous waste
disposal, the units should be shipped back to IONX for proper disposal.
These instructions are not designed to imply or replace any operating or safety rules.
It is the responsibility of the installer to understand and follow all company safety practices.
IONX Support Center 1-800-621-8442, supportcenter@ionxlive.com
_____________________________________________________________________________________
301614 – T6X Installation Manual Confidential
Revision Date: November 19, 2013 Revision: A
Process Owner: Engineering Page 2 of 21
IONX Support Center 1-800-621-8442, supportcenter@ionxlive.com
WARNING
If using a knife to cut the tape, do not let the blade extend more than ½ inch inside of the
cardboard box.
2 Unpacking the CMU
2.1 Inspect shipping box/s to make sure there is no damage.
2.2 Carefully unpack the shipping box making sure to open the top of the box.
There will be instruction guide/s for modules associated with the system order.
2.3 Open shipping box/s and verify that the internal contents match the shipping receipt.
2.4 The installation instructions ensure at all times that the minimum separation distance
from the human body is always greater than 20 cm during installation.
2.5 Contact IONX in the event of any above problems toll-free at 800-621-8442.
[This space left blank intentionally]
_____________________________________________________________________________________
301614 – T6X Installation Manual Confidential
Revision Date: November 19, 2013 Revision: A
Process Owner: Engineering Page 3 of 21

IONX Support Center 1-800-621-8442, supportcenter@ionxlive.com
_____________________________________________________________________________________
301614 – T6X Installation Manual Confidential
Revision Date: November 19, 2013 Revision: A
Process Owner: Engineering Page 4 of 21

IONX Support Center 1-800-621-8442, supportcenter@ionxlive.com
Wireless Sensor Monitor initiated for GA0001099A.
Please remove the Red Label covering the T-Series device, and
look on the bottom for a green blinking light.
This will cause the device to wake-up, and send a message
within the next 5 minutes.
Please wait for further instructions...
**This is an automated report email, responding to this message
will re-issue the same command.
3 Activating the CMU
3.1 Before starting
3.1.1 Confirm your email address is set-up in the IONX TARA system by emailing
tara@ionxlive.com with “help” in the subject line.
3.1.2 If there is no reply, contact the IONX Support Center at toll-free at 1-800-621-8442 to
get your email address set-up to use TARA and IONXlive.net.
3.2 Setup Monitor Command
3.2.1 Start a new email message
To: type TARA@IONXLive.net
Subject: type
o ‘WSM’
o period ‘.’
o The serial number of the CMU
Example: WSM.GA0000123A
3.2.2 Send the message and wait for the following response:
_____________________________________________________________________________________
301614 – T6X Installation Manual Confidential
Revision Date: November 19, 2013 Revision: A
Process Owner: Engineering Page 5 of 21
IONX Support Center 1-800-621-8442, supportcenter@ionxlive.com
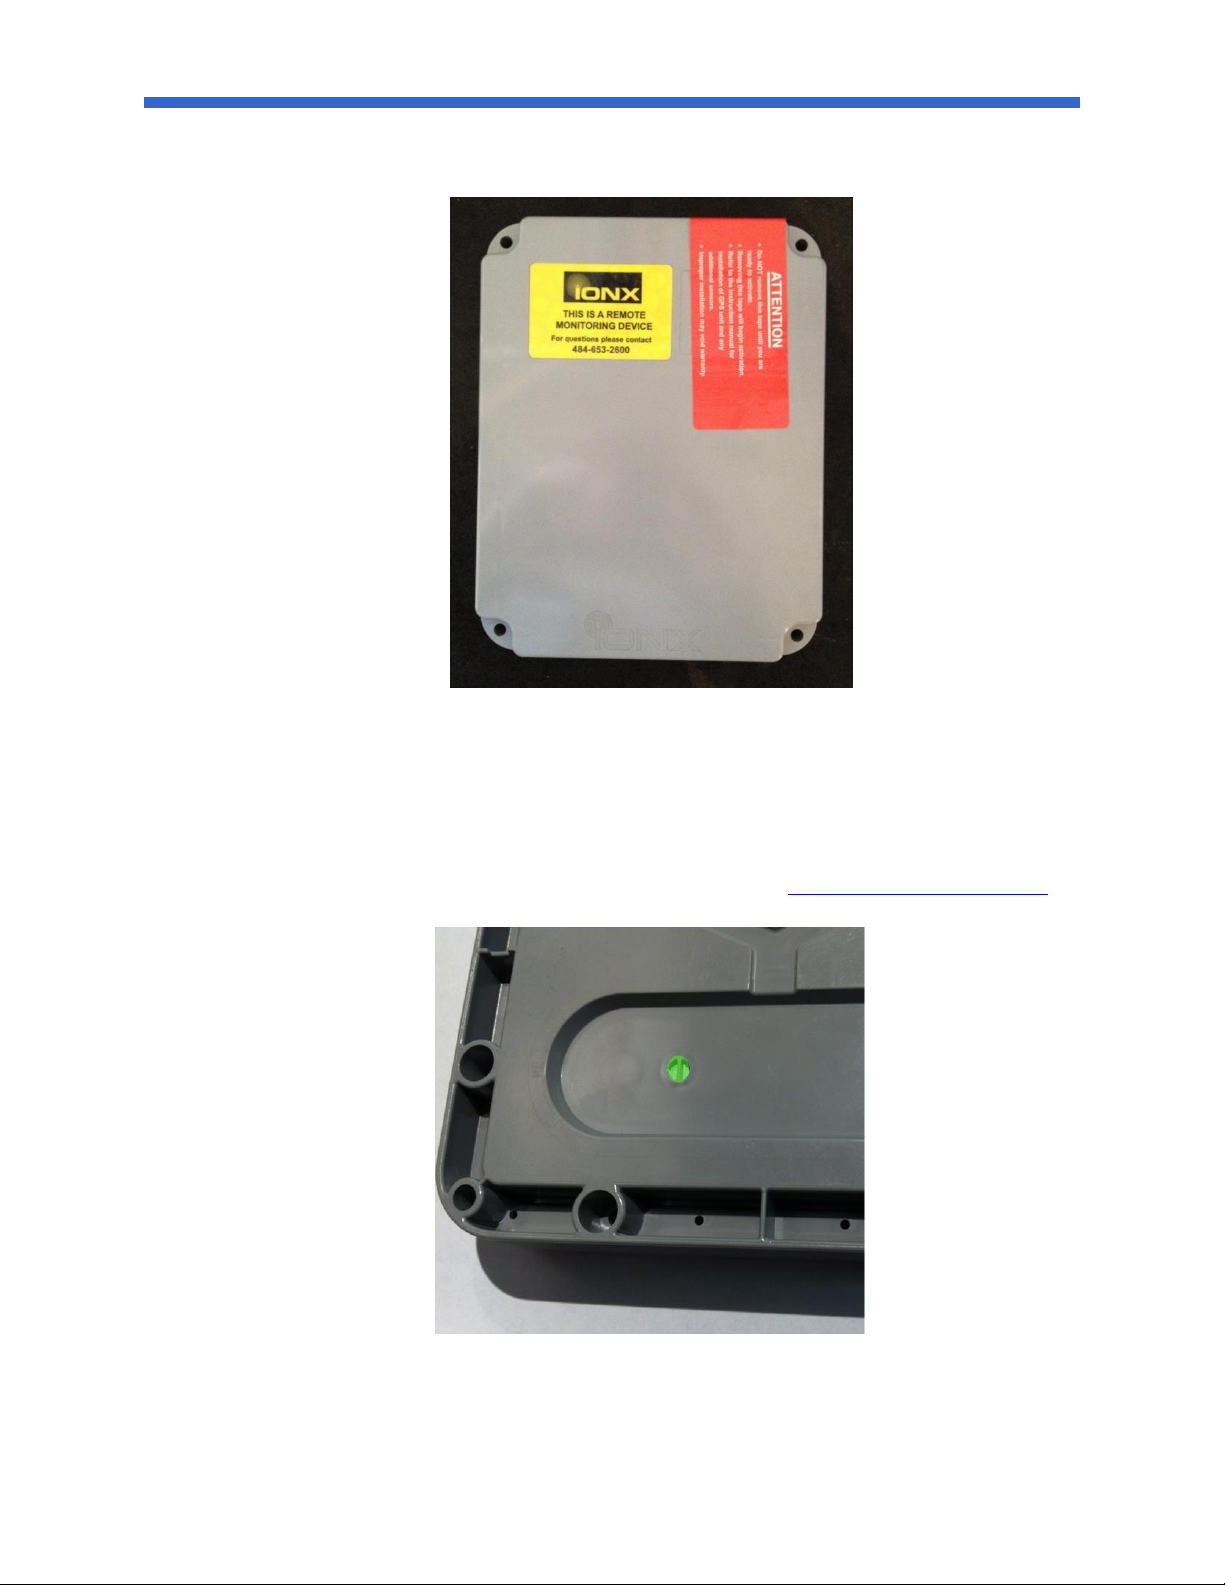
3.3 Remove the red label and magnet from the top of the CMU. (figure 1)
Figure 1: CMU T6X with red installation sticker intact
3.4 Flip over the CMU to see if the two white half circles in the recess are blinking green (Figure 2).
These two white half circles are the Status LED. The Status LED will blink green for 30-seconds
after removing the Red Label (which includes a small bar magnet) from the top of the CMU. If
the Status LED is not blinking or blinking any other pattern than green contact the IONX
Customer Support Center by phone at 1-800-621-8442 or email supportcenter@ionxlive.com.
Figure 2: Status LED on the bottom of the T Series CMU
_____________________________________________________________________________________
301614 – T6X Installation Manual Confidential
Revision Date: November 19, 2013 Revision: A
Process Owner: Engineering Page 6 of 21

IONX Support Center 1-800-621-8442, supportcenter@ionxlive.com
From: "Ionx, Tara" <TARA@ionxlive.net>
Date: May 21, 2012 5:39:33 PM CDT
To: "customer@customer.com>
Subject: WSM: GA0000123A - Terminal now awake
The Terminal is now awake. Remove the red label from all
of the wireless sensors now.
Wireless sensors associated with this terminal:
WS0000123A,WS0000124A,WS0000125A,WS0000126A
Please wait for further instructions...
**This is an automated monitoring email, replying to this
email will cancel the monitor.
Sample Installation Response
The following wireless sensors are now awake.
WS0000252A,WS0000223A
Please wait for further instructions...
**This is an automated monitoring email, replying to this email
will cancel the monitor.
3.5 You will get an email message from TARA when the CMU sends its power up message. See
example email in below:
If WSN Sensors are included, use the following instructions.
3.6 Remove the red labels from all the WSN’s
3.7 You will get a email message from TARA when the WSN’s send a Node Live message. See
example email in below:
_____________________________________________________________________________________
301614 – T6X Installation Manual Confidential
Revision Date: November 19, 2013 Revision: A
Process Owner: Engineering Page 7 of 21
 Loading...