

Ione RFLYNXR5U Users Manual
Lynx-R5 01.02.2008
2.4GHz Wireless Trackball Laser Mouse
User Guide
Thank you for purchasing Lynx-R5 Wireless Trackball Laser Mouse. Please take a
moment to go through this user guide for helpful information on using this product.
If you have any questions, please contact us at www.ione.com.tw, www.ione-usa.com
or www.ione-europe.com .
Safety Notice
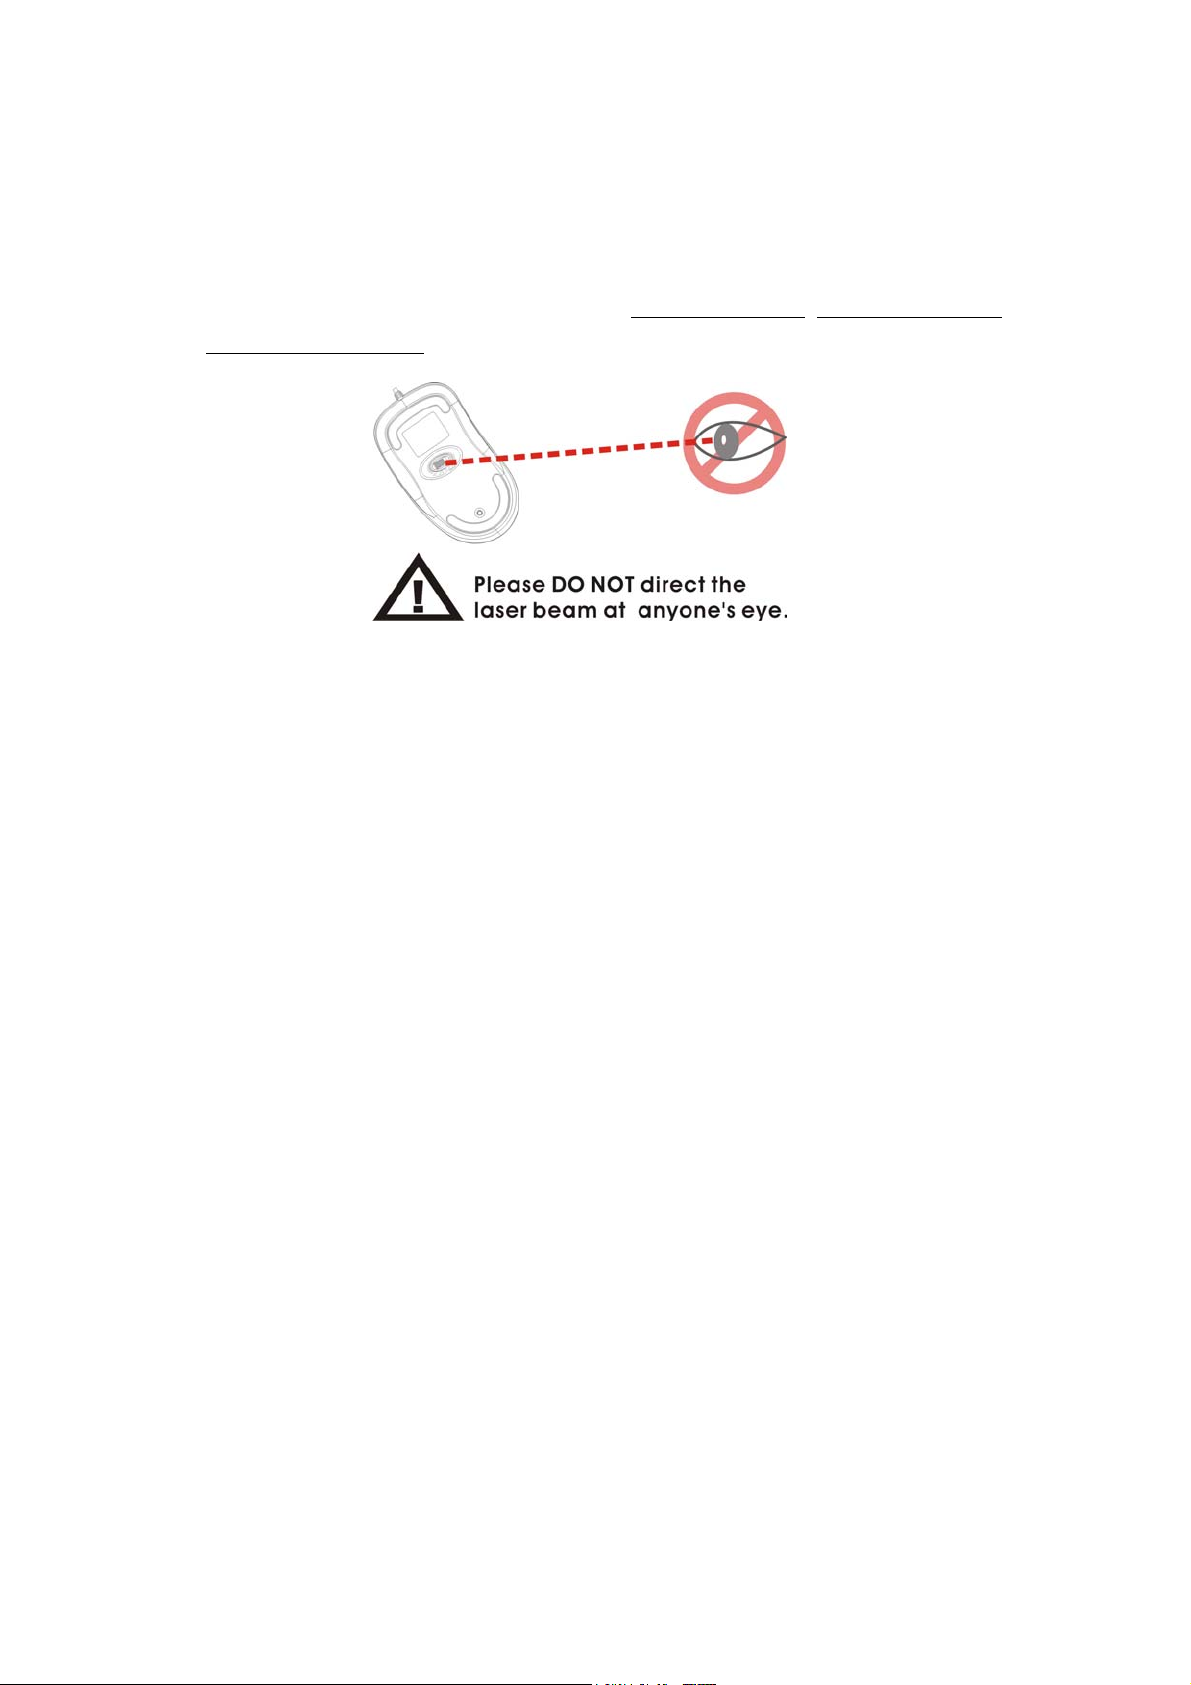
This product complies with IEC 60825-1, class I laser product.
Your product complies with FCC and CE rules.
This product has no serviceable parts. Use of controls or adjustments of procedures
other than the user guide may result in danger.
Introduction
Lynx-R5 is designed for wireless operation of your favorite computer applications.
Plug in its mini-receiver to your USB port and you can have a clutter-free wireless
environment. The operational range could reach up to 10 meters in open space
depending on the radio interference in the environment.
Lynx-R5’s RF technology will automatically switch between 72 channels when it
encounters radio band interference with other surrounded 2.4GHz devices such as
Wi-Fi wireless LAN 802.11 a/b/g, Bluetooth, DECT digital telephone, etc. However,
two units of Lynx-R5 in one room may activate simultaneously due to radio frequency
band overlapping. Please separate each other in a distance beyond 10 meters or in two
different rooms.
Lynx-R5 is equipped with high performance 800 dpi laser sensor with high speed
motion detection up to 20 IPS, which can accurately estimate motions over a wide
range of surfaces.
Feature
• Gorgeous polished white surface
• Innovative magnetic mechanism trackball design for 360° control
• Laser tracking delivers better sensitivity on various surfaces
• 2.4GHz wireless capability
• 800 dpi resolution with 20 IPS tracing speed for greater accuracy
• Up to 10 meters operational range
• Low power consumption with smart power saving function
Package Contents
1. Lynx-R5 Mouse
2. USB Dongle
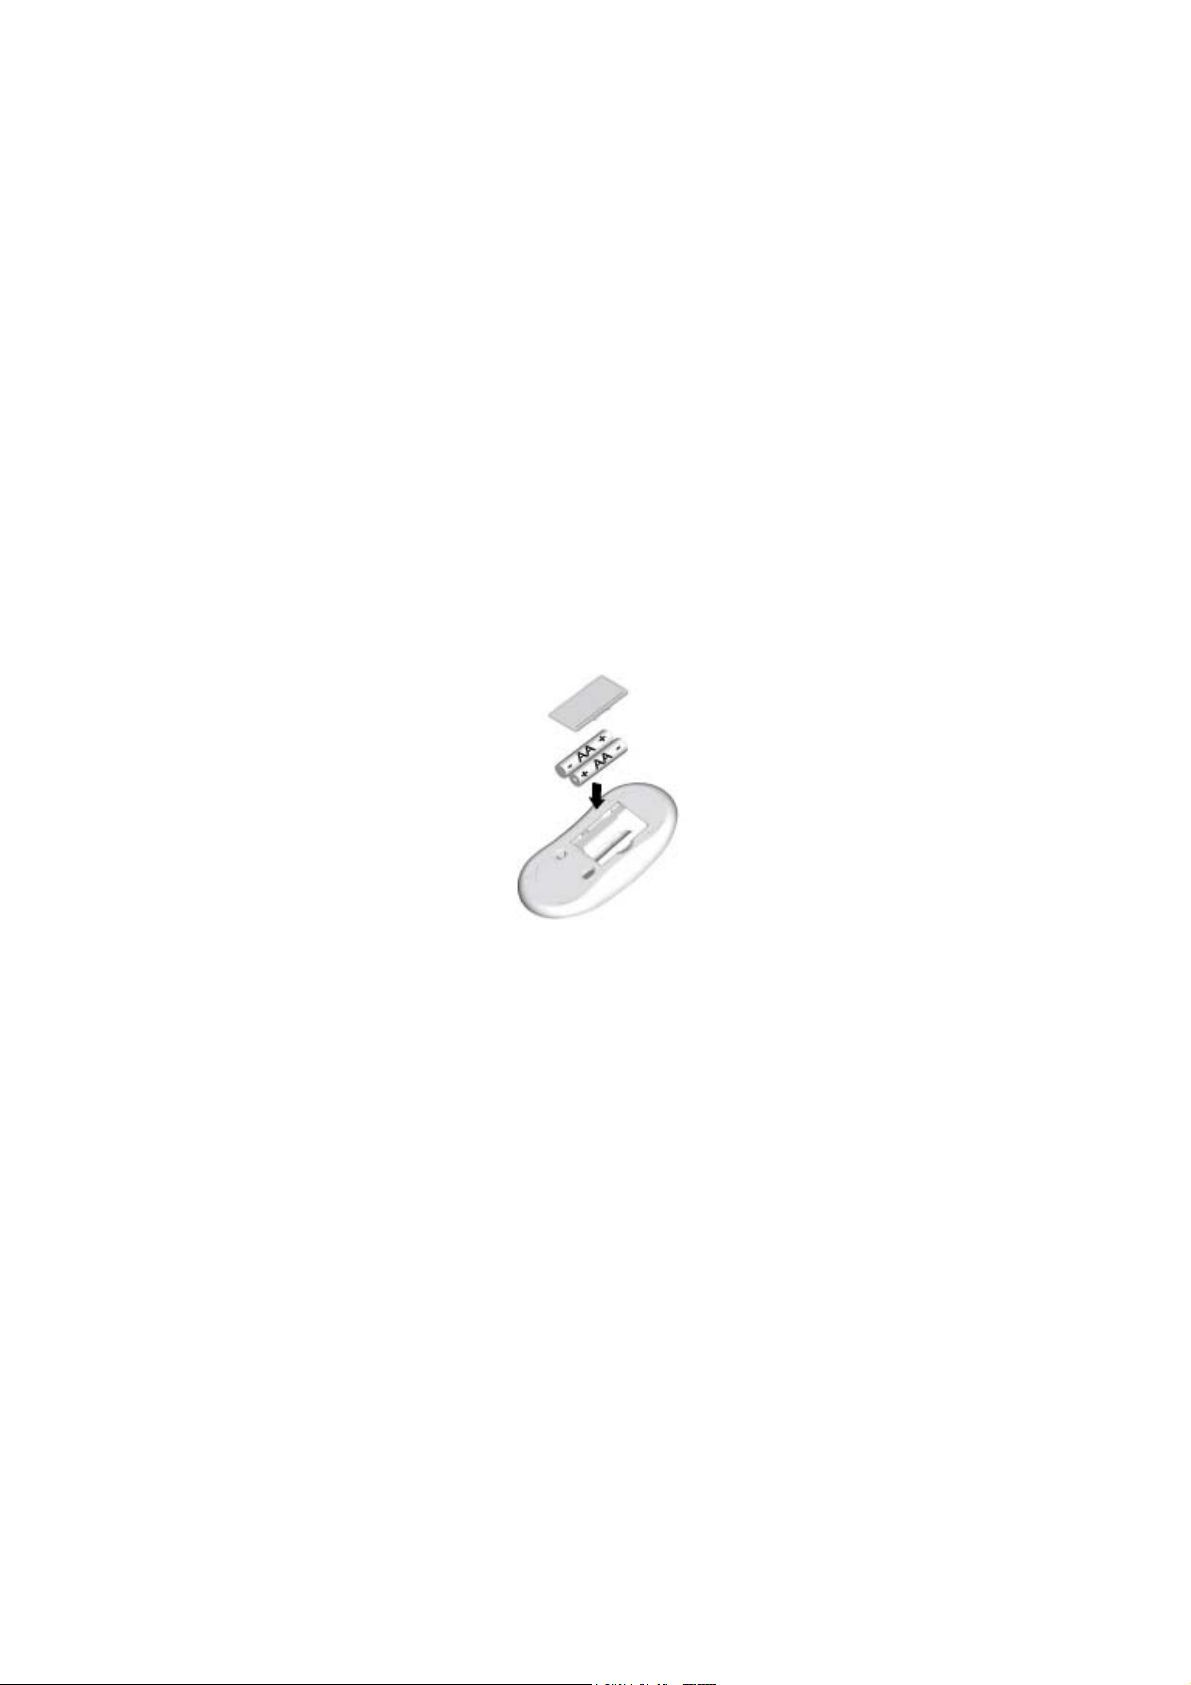
3. 2 x AA Batteries
4. User Guide
5. Software driver
Hardware Installation
Step1: Insert 2 AA batteries into the battery compartment with correct polarity.
Step2: Please refer to the +, - diagram inside the battery compartment.
(Step3: Turn on your computer and plug the dongle receiver into a USB port of your
computer.
Step4: Your computer will detect this USB device automatically.
Software Installation
Step1: Insert the Driver CD into the CD-ROM of the computer.
Step2: The installation program will start browse “My computer” to D:\setup.exe (D:
represents the drive name of the CD-ROM).
Step3: Follow the on-screen instruction to finish the installation.
Step4: After successfully installing the software, you will be asked to re-start the
computer. Please select “Yes” to re-start the computer. It is necessary to re-boot your
computer before running the mouse software.
 Loading...