

Page 1
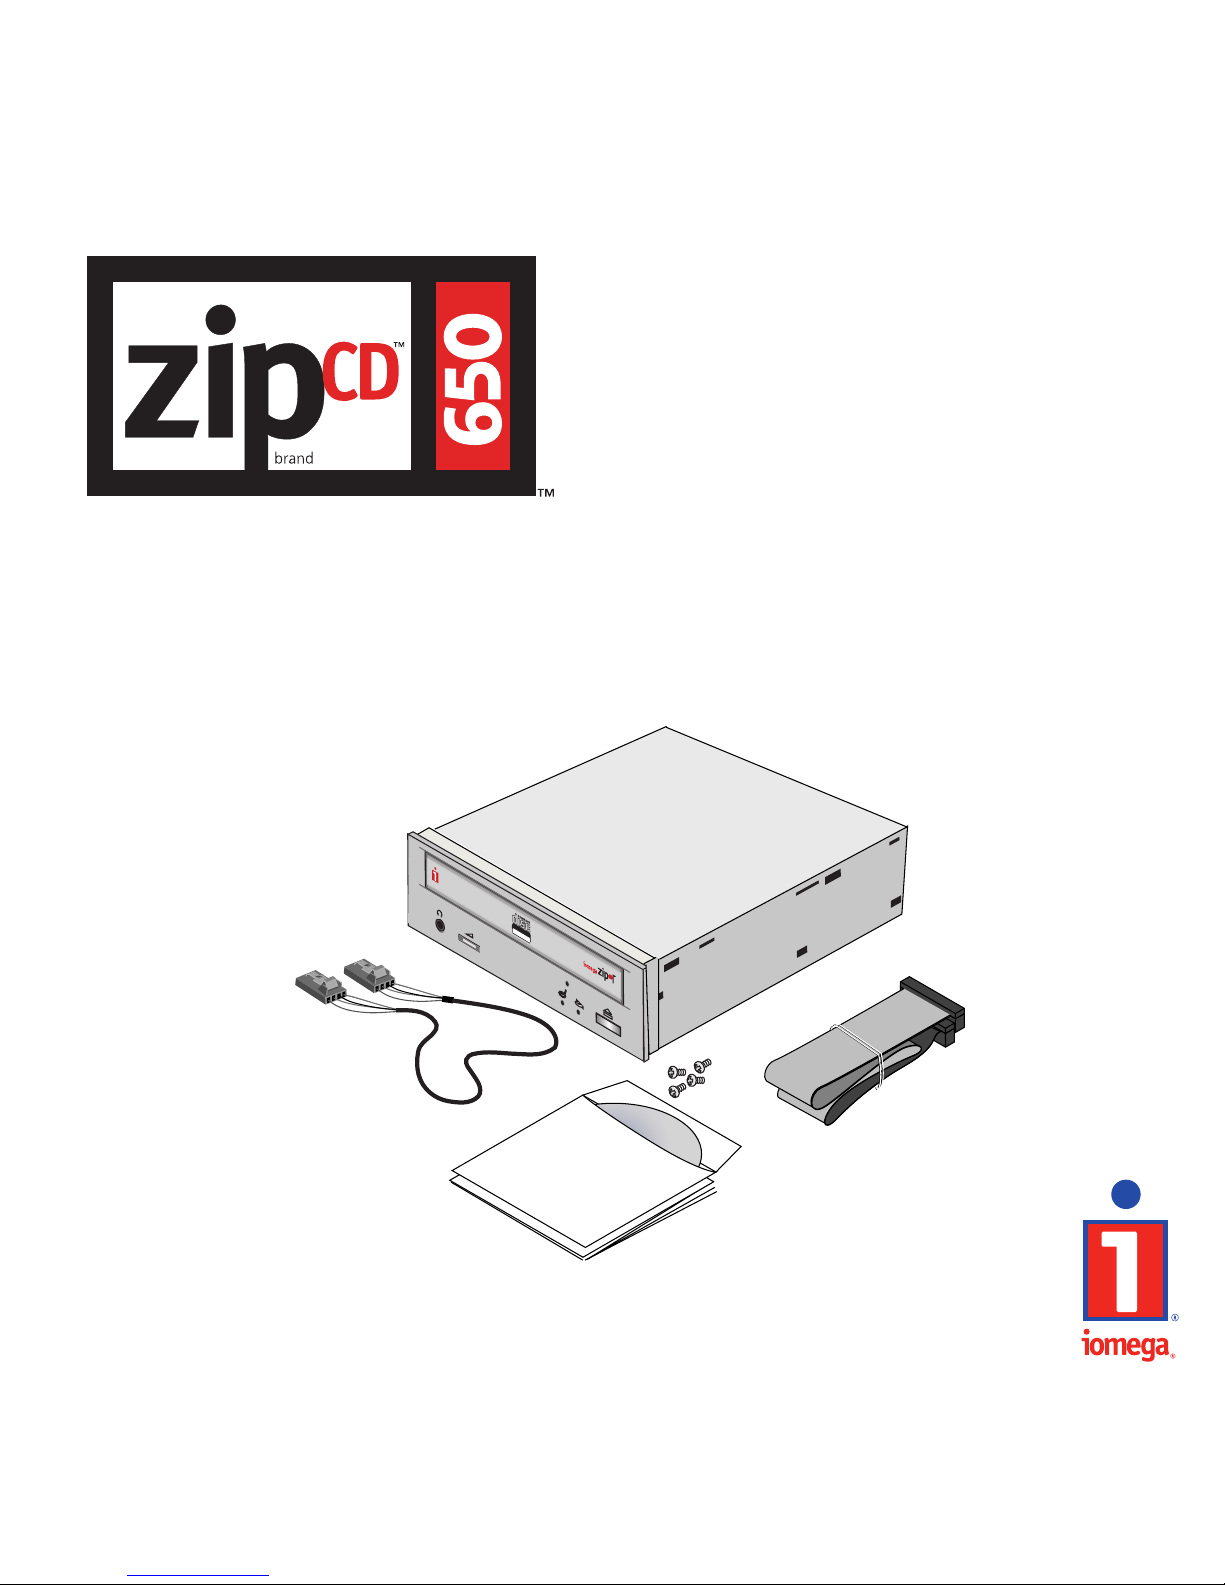
Internal ZipCD™ ATAPI Drive
PC Quick Install
W
R
I
T
I
N
G
P
H
O
N
E
S
D
I
S
C
I
N
O
P
E
N
C
L
O
S
E
!
Recordable
ReW
ritable
650
Page 2

Page 3
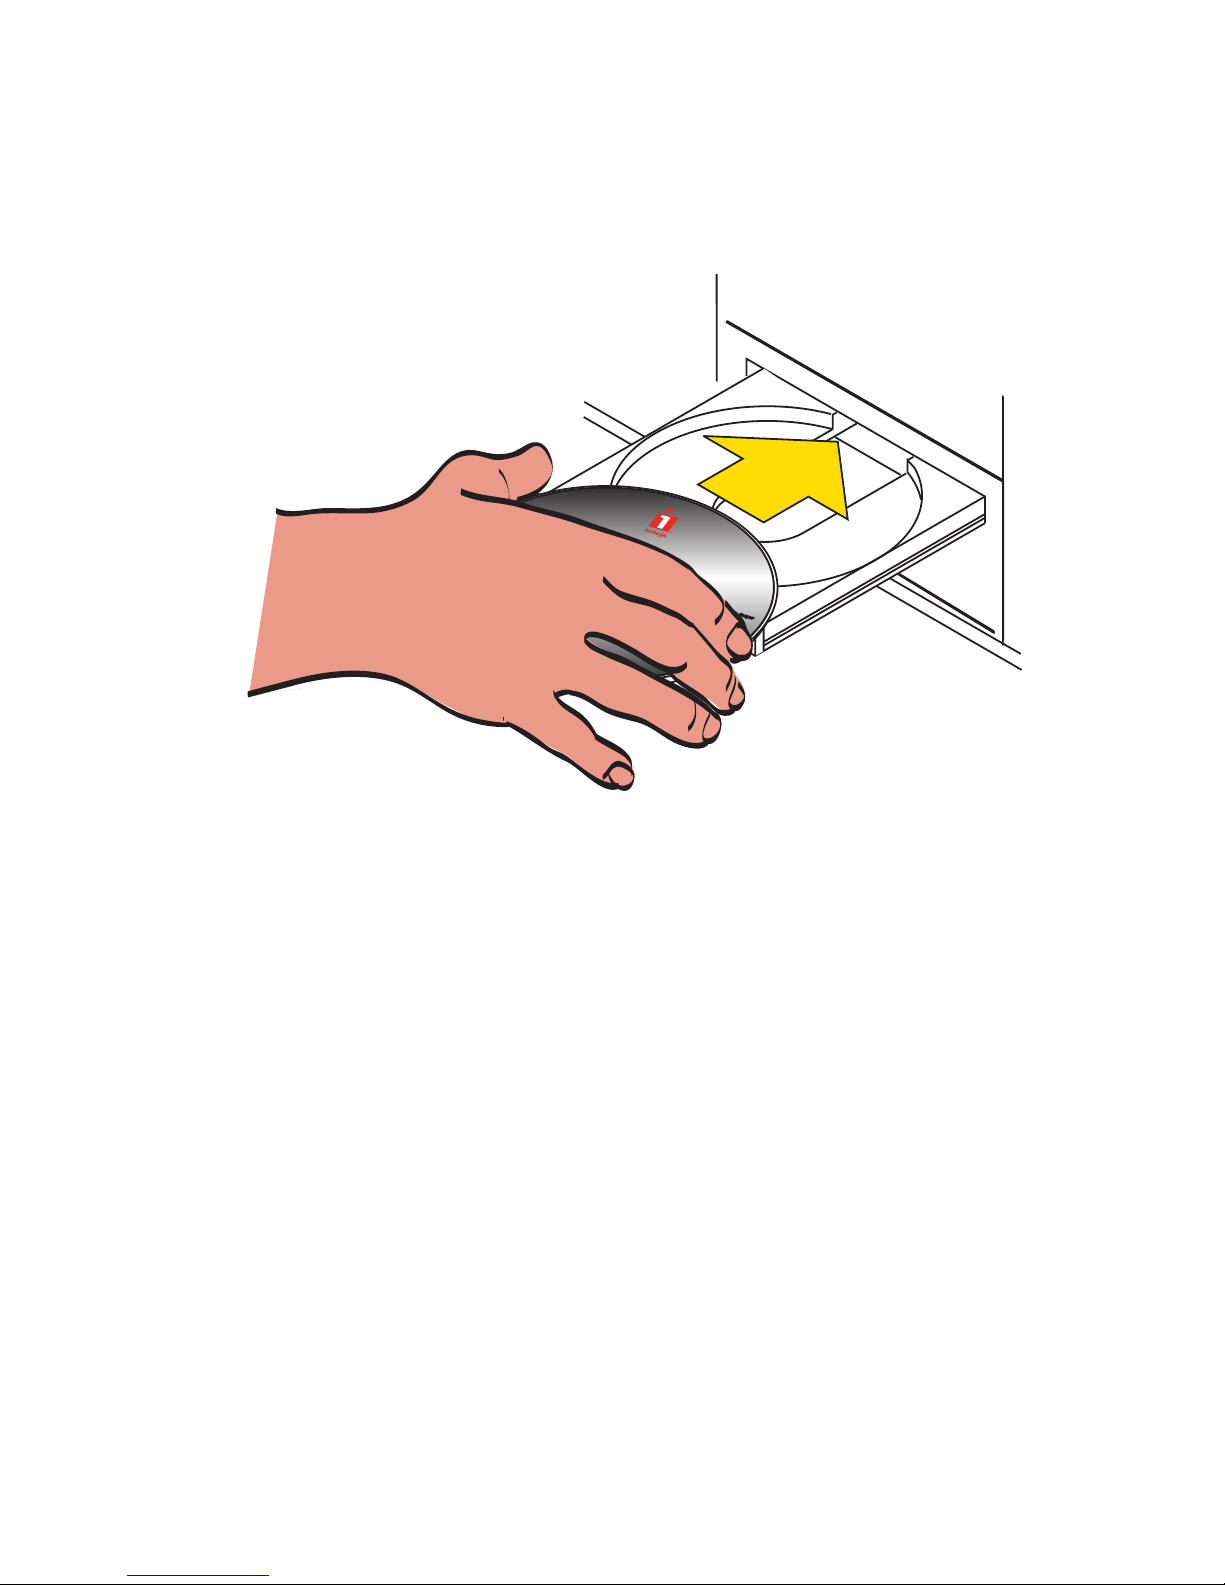
Start your computer, wait for the operating system to load,
then insert the ZipCD
™
software disc.
Select “Print Installation Instructions” to view and print detailed
installation instructions. See step 12 for information about viewing the
manual.
Select “Install ZipCD
™
Software” to install the software needed for your
ZipCD drive. Follow the onscreen instructions.
1
Page 4
1
2
3
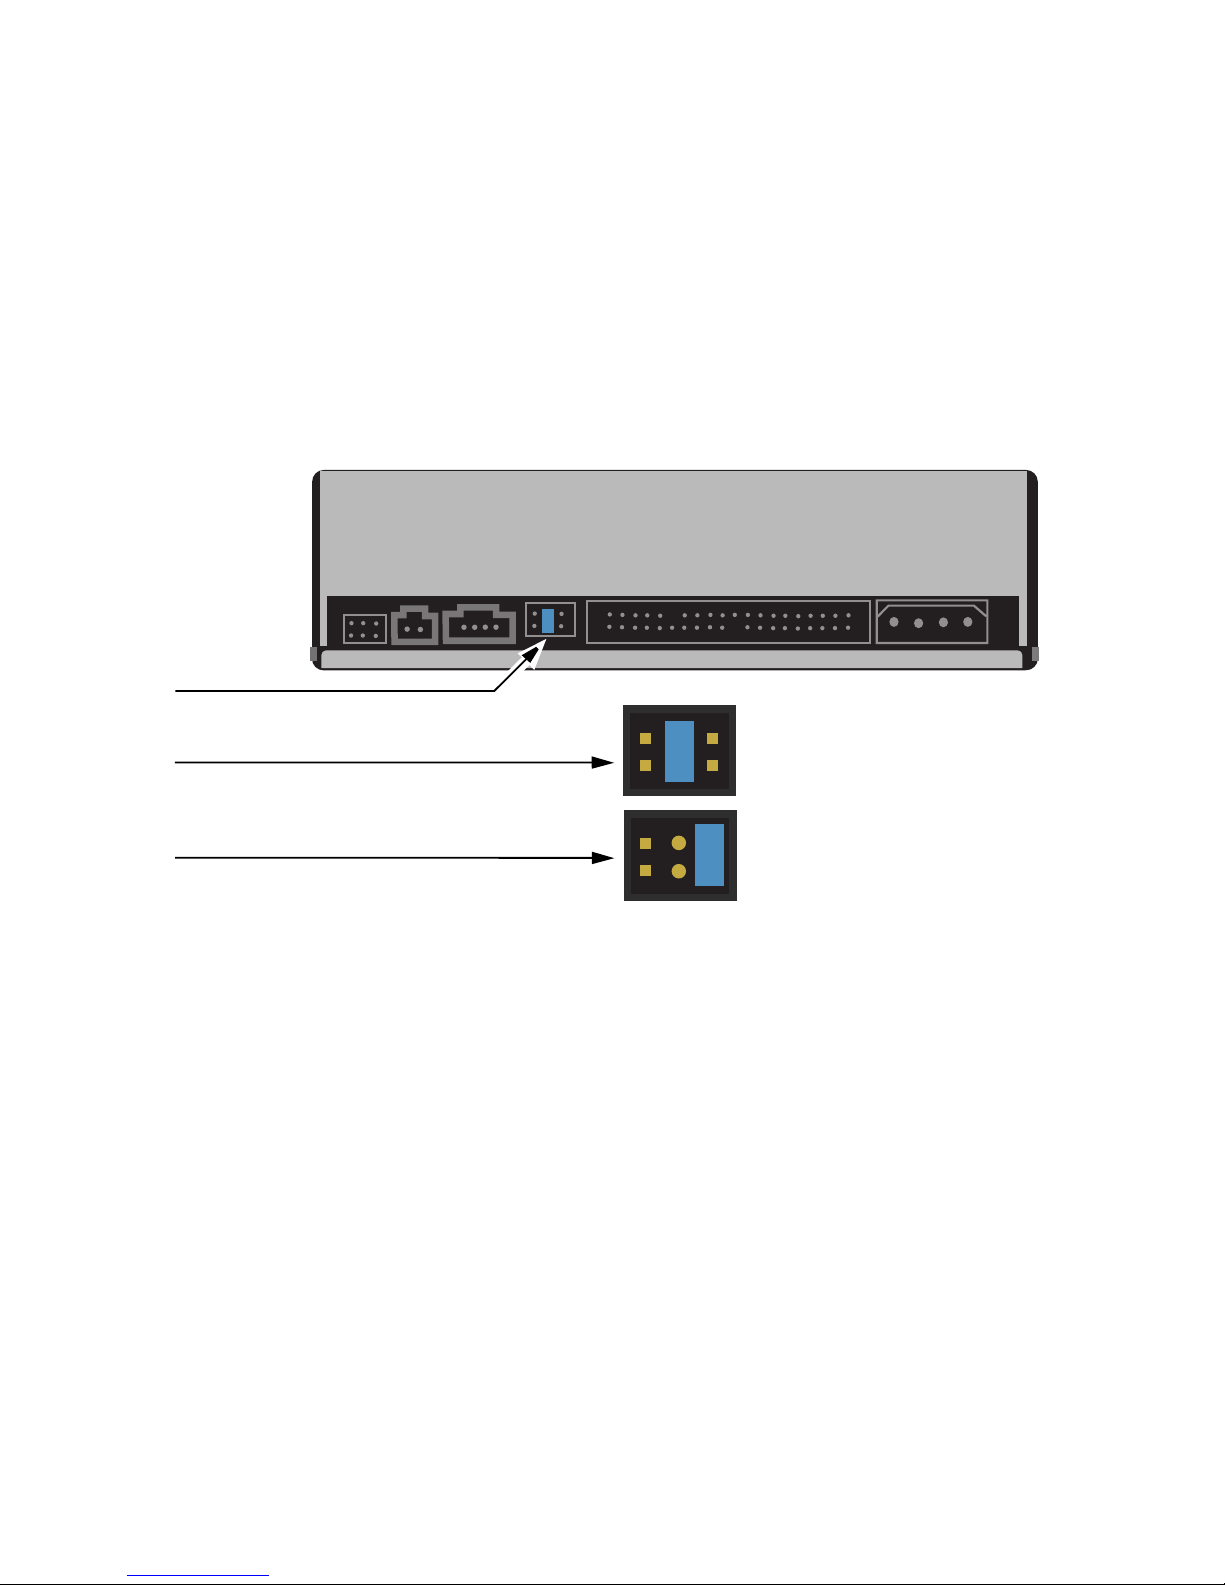
If necessary, change the ZipCD™ drive jumper setting 1.
Leave the setting in the Slave 2 position if you are connecting the ZipCD
™
drive on the same data cable with another device. Use the Master 3 setting if
the ZipCD drive will be the only device on the secondary IDE channel. Do
not use Cable Select unless your computer supports this mode. (Check your
computer documentation.)
2
Page 5
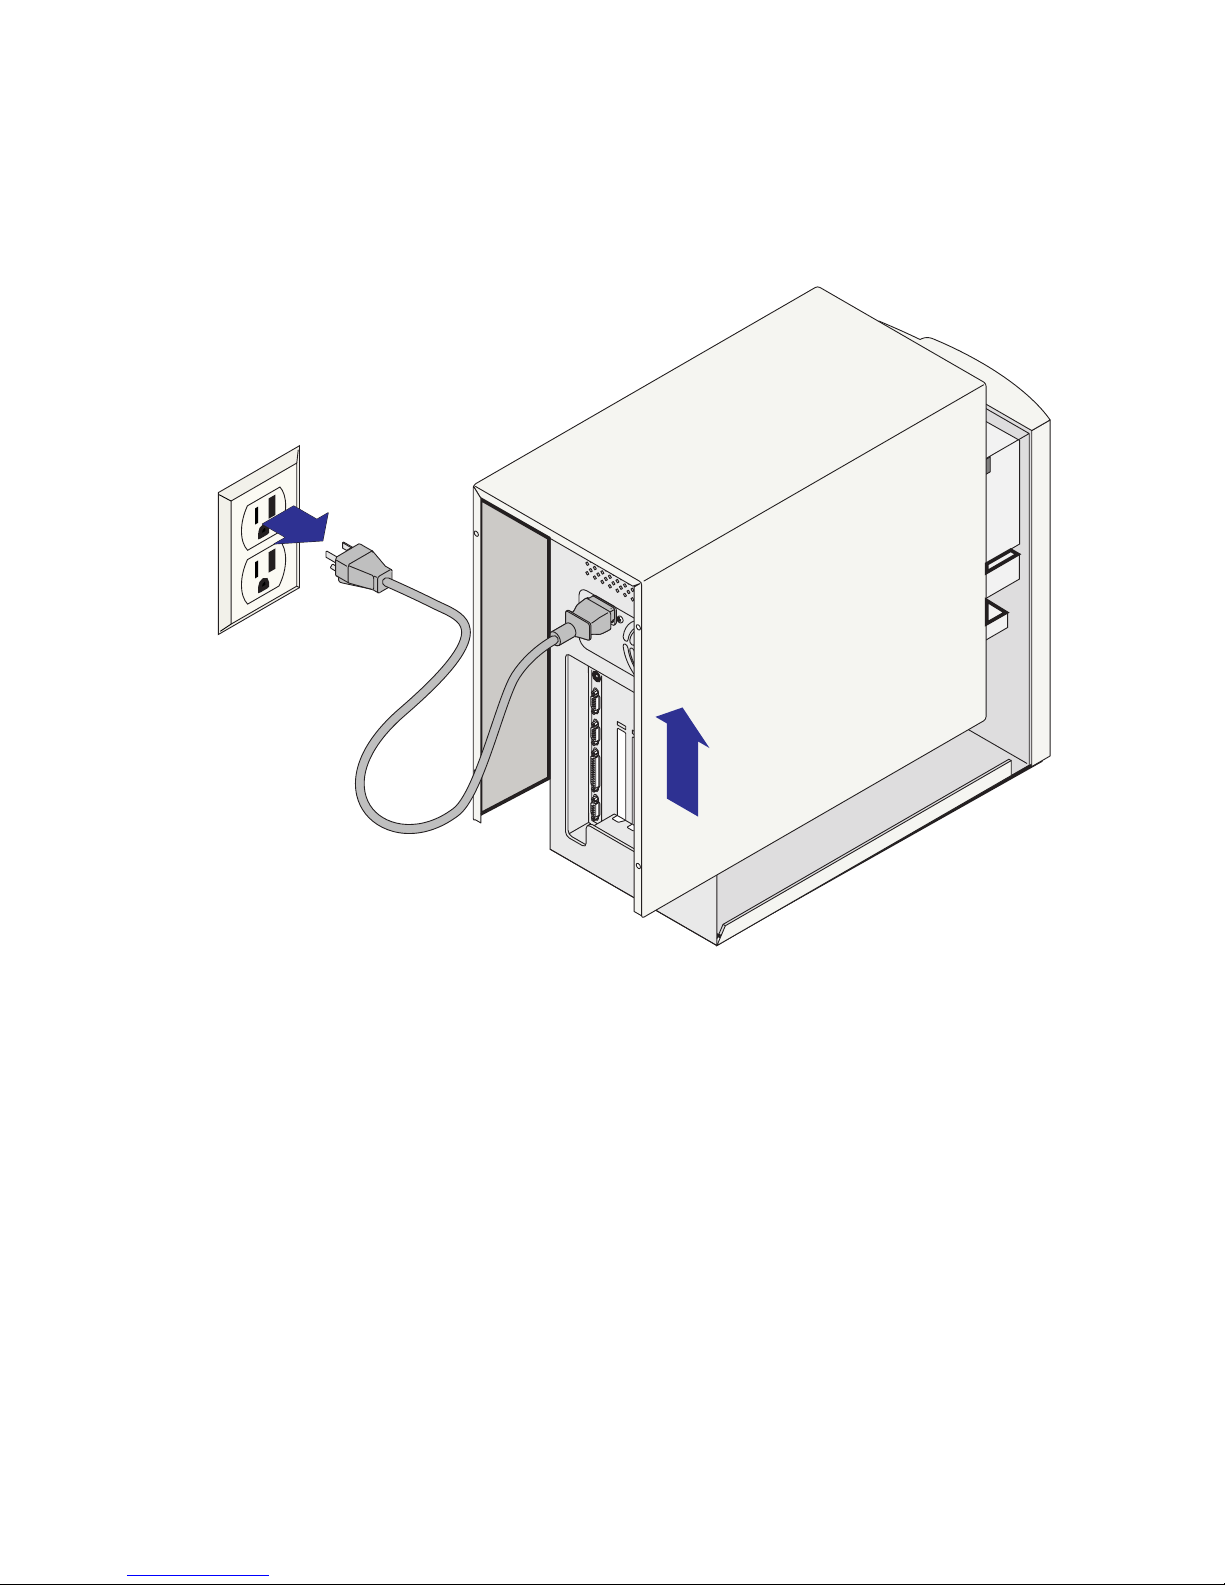
Shut down the computer, disconnect the power cord and
remove cover.
CAUTION! Always turn off power to the computer and all devices
connected to it before beginning any computer hardware change.
NOTE: Locate and write down the drive serial number for your drive.
3
Page 6
1
W
R
I
T
IN
G
PHONES
D
I
S
C
I
N
O
P
E
N
C
L
O
S
E
R
e
c
o
r
d
a
b
l
e
R
e
W
r
it
a
b
l
e
C
D
6
5
0
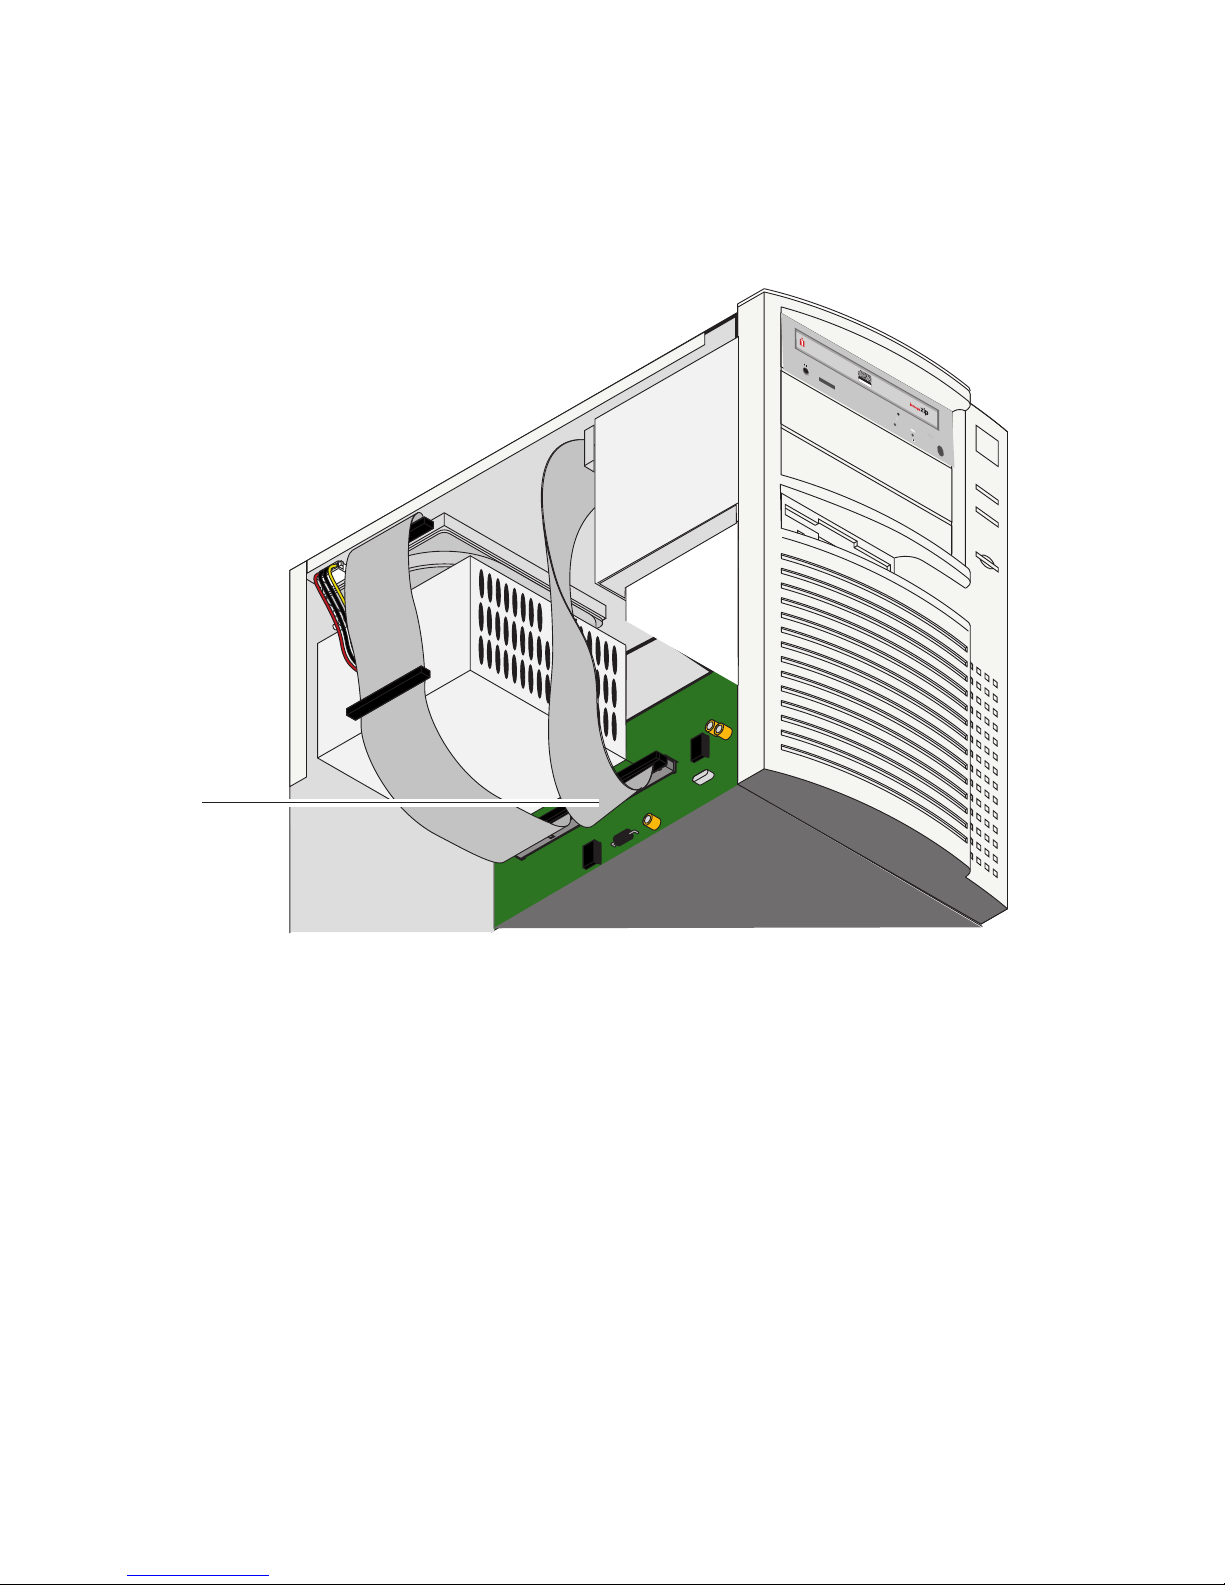
Select the IDE interface connection you want to use.
Connect the ZipCD™ drive to the secondary IDE channel 1 either in slave
configuration with another drive as master (e.g. CD-ROM) or in master
configuration as the only device. If you are unsure about the connection, see
step 11 to view and print the detailed instructions.
4
Page 7
5
W
R
I
T
IN
G
PHONES
D
I
S
C
I
N
O
P
E
N
C
LO
S
E
Recordable
ReWritable
CD
CD
6
5
0
650
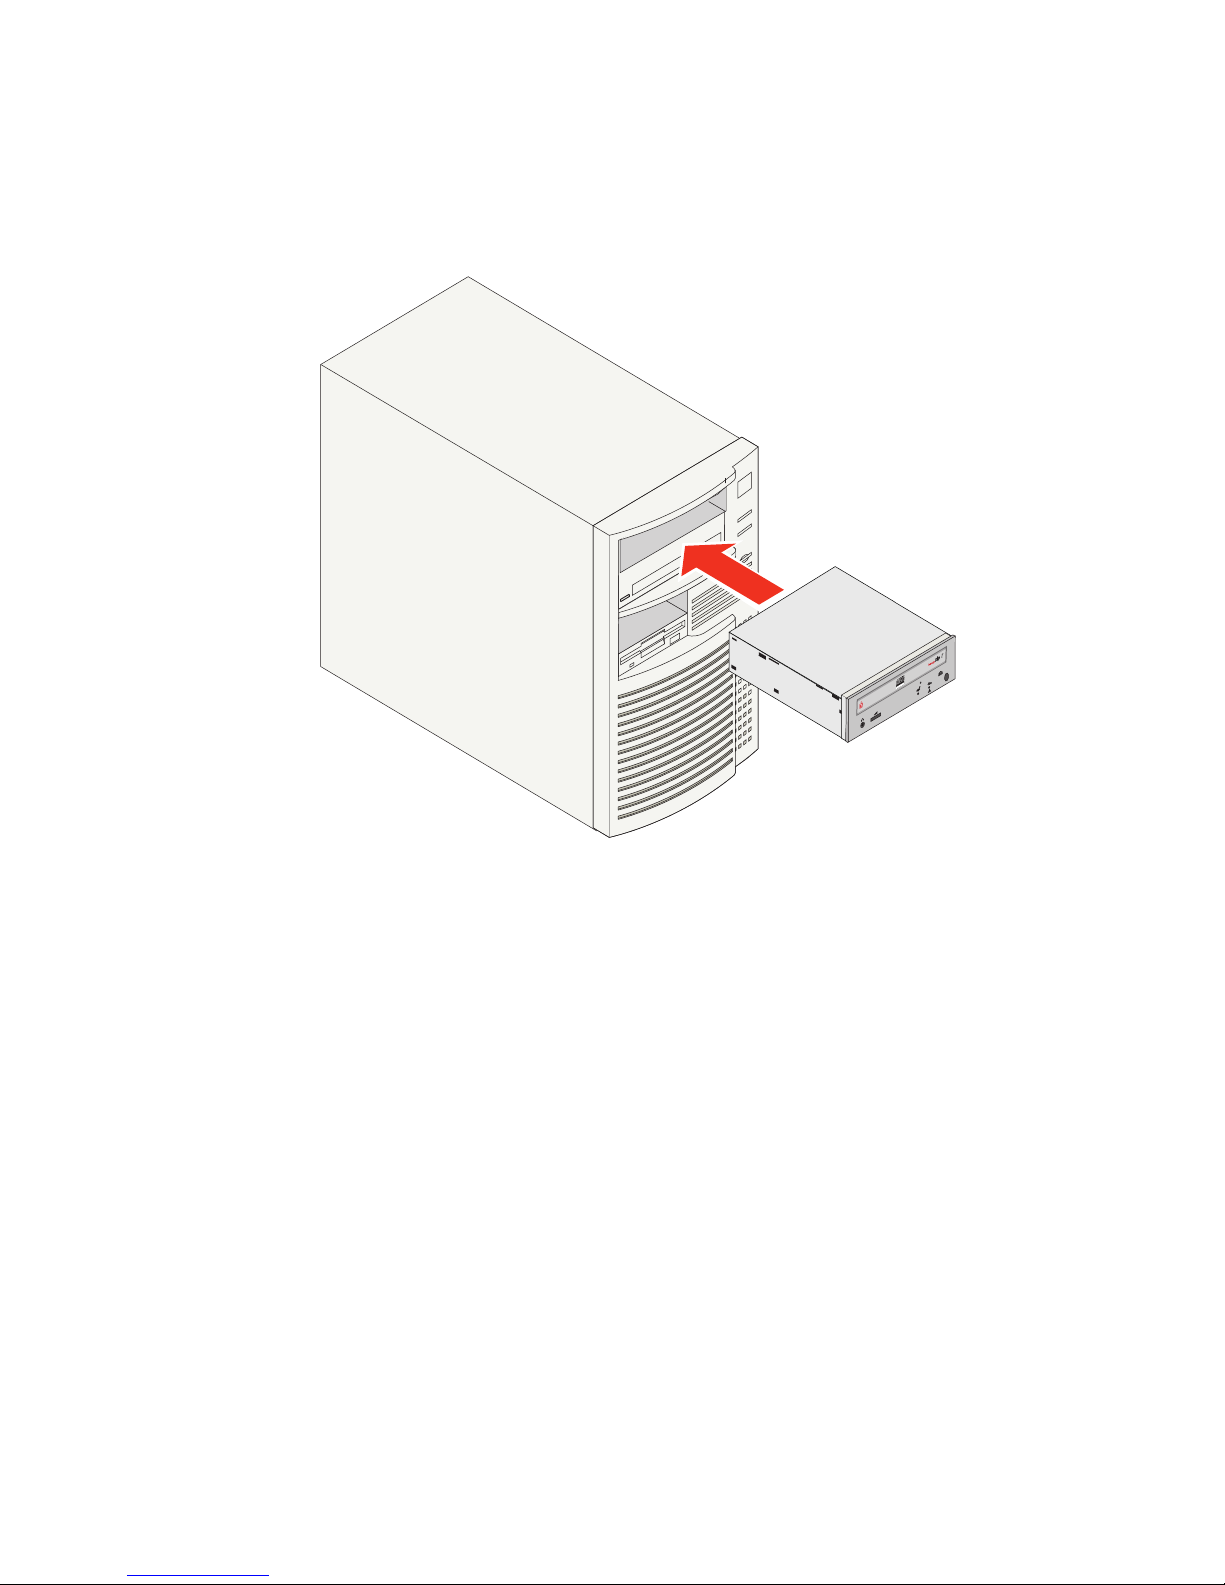
Locate a vacant 5.25” drive bay. Remove the panel cover and
slide the ZipCD
™
drive into the drive bay.
Some computers may require rails. Check your documentation.
NOTE: If it makes it easier to connect cables on your computer, you can
secure the ZipCD™ drive in the drive bay now. (See step 9.)
Page 8
6
M
A
ST
E
R
S
L
A
V
E
C
A
B
L
E
S
E
L
E
C
T
AUDIO OUT
R
G
N
D
L
C
S
M
S
L
A
I
D
E
P
IN
1
DC INPUT
+
5
G
N
D
+
1
2
ZipCD
PIN 1
Pin 1
40 Pin
Pin 1
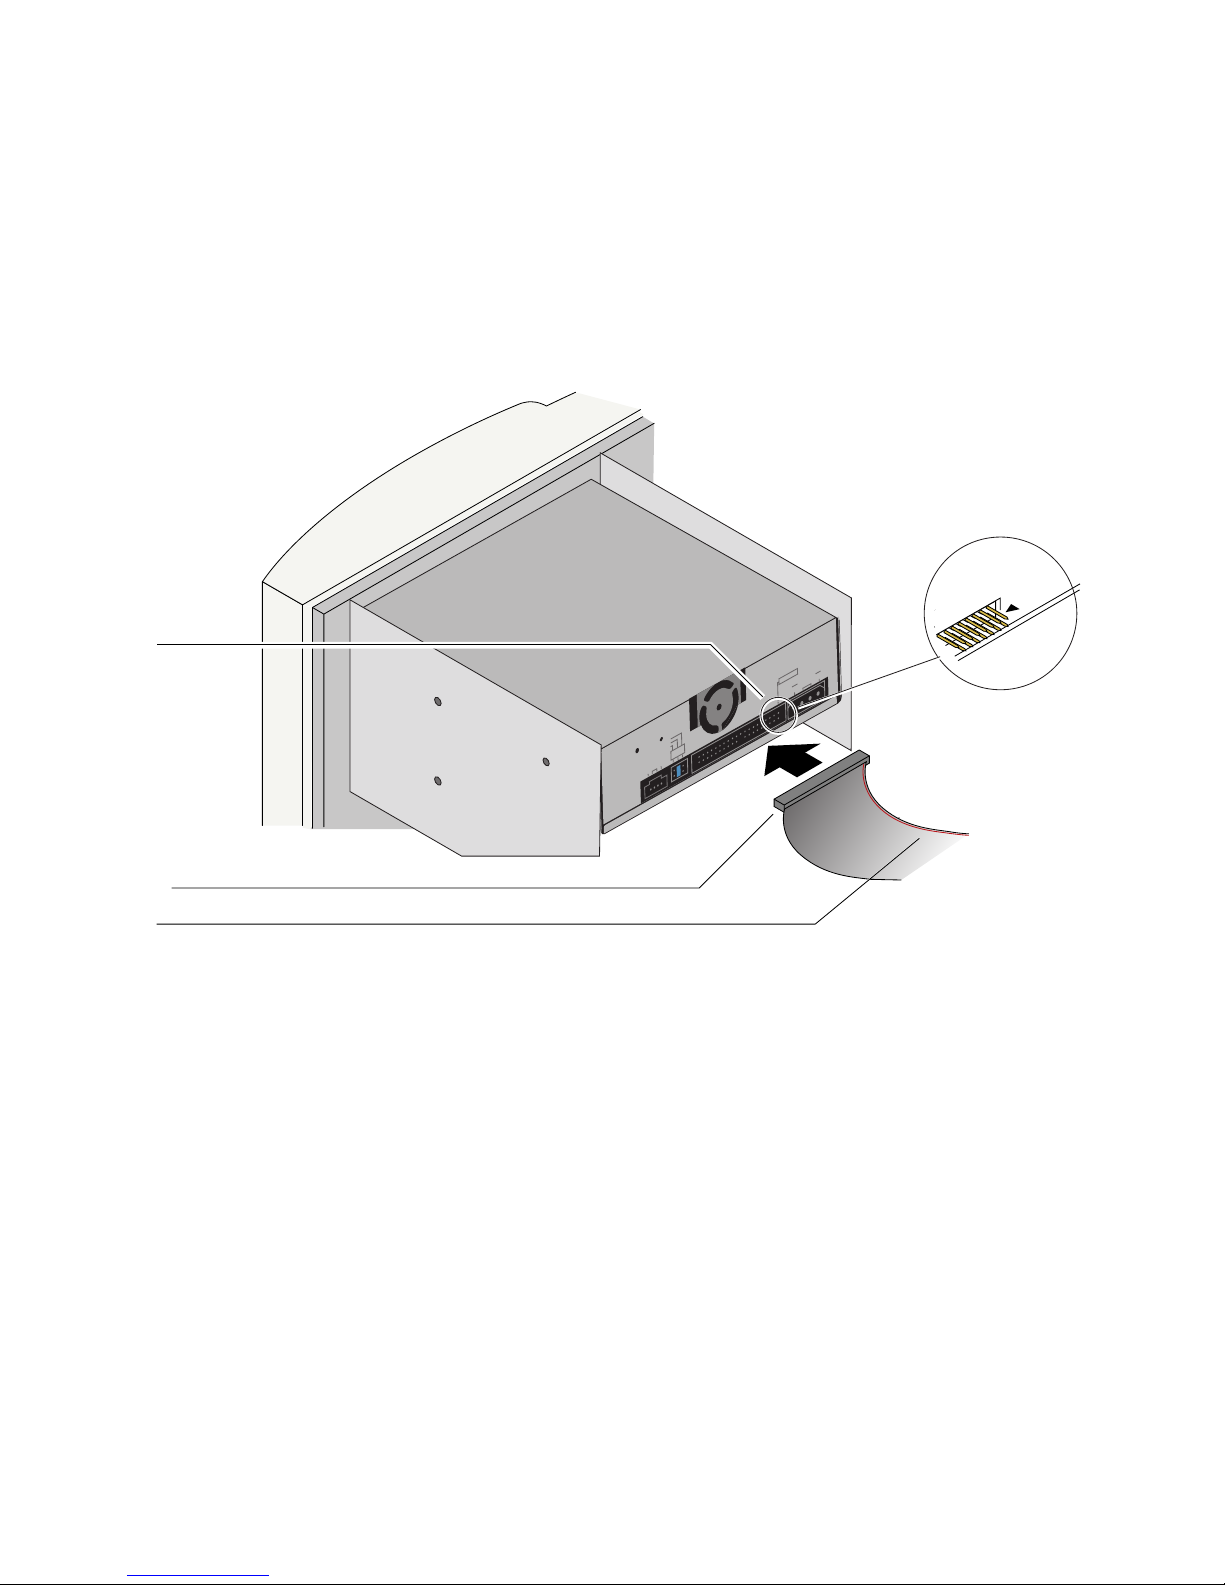
Connect the ZipCD™ drive to the computer’s IDE connection
using an IDE data cable.
NOTE: You can use either the cable included with the drive or an IDE cable
that may already be connected to the computer’s motherboard.
CAUTION! Make sure PIN 1 on the cable connects to PIN 1 on the ZipCD
™
drive, the motherboard, and any other connected device.
Page 9
MASTER
SLAVE
C
ABLE SELECT
AUDIO OUT
R GN
D L
C S M
S L A
IDE PIN1
DC INPUT
+5 GND +12
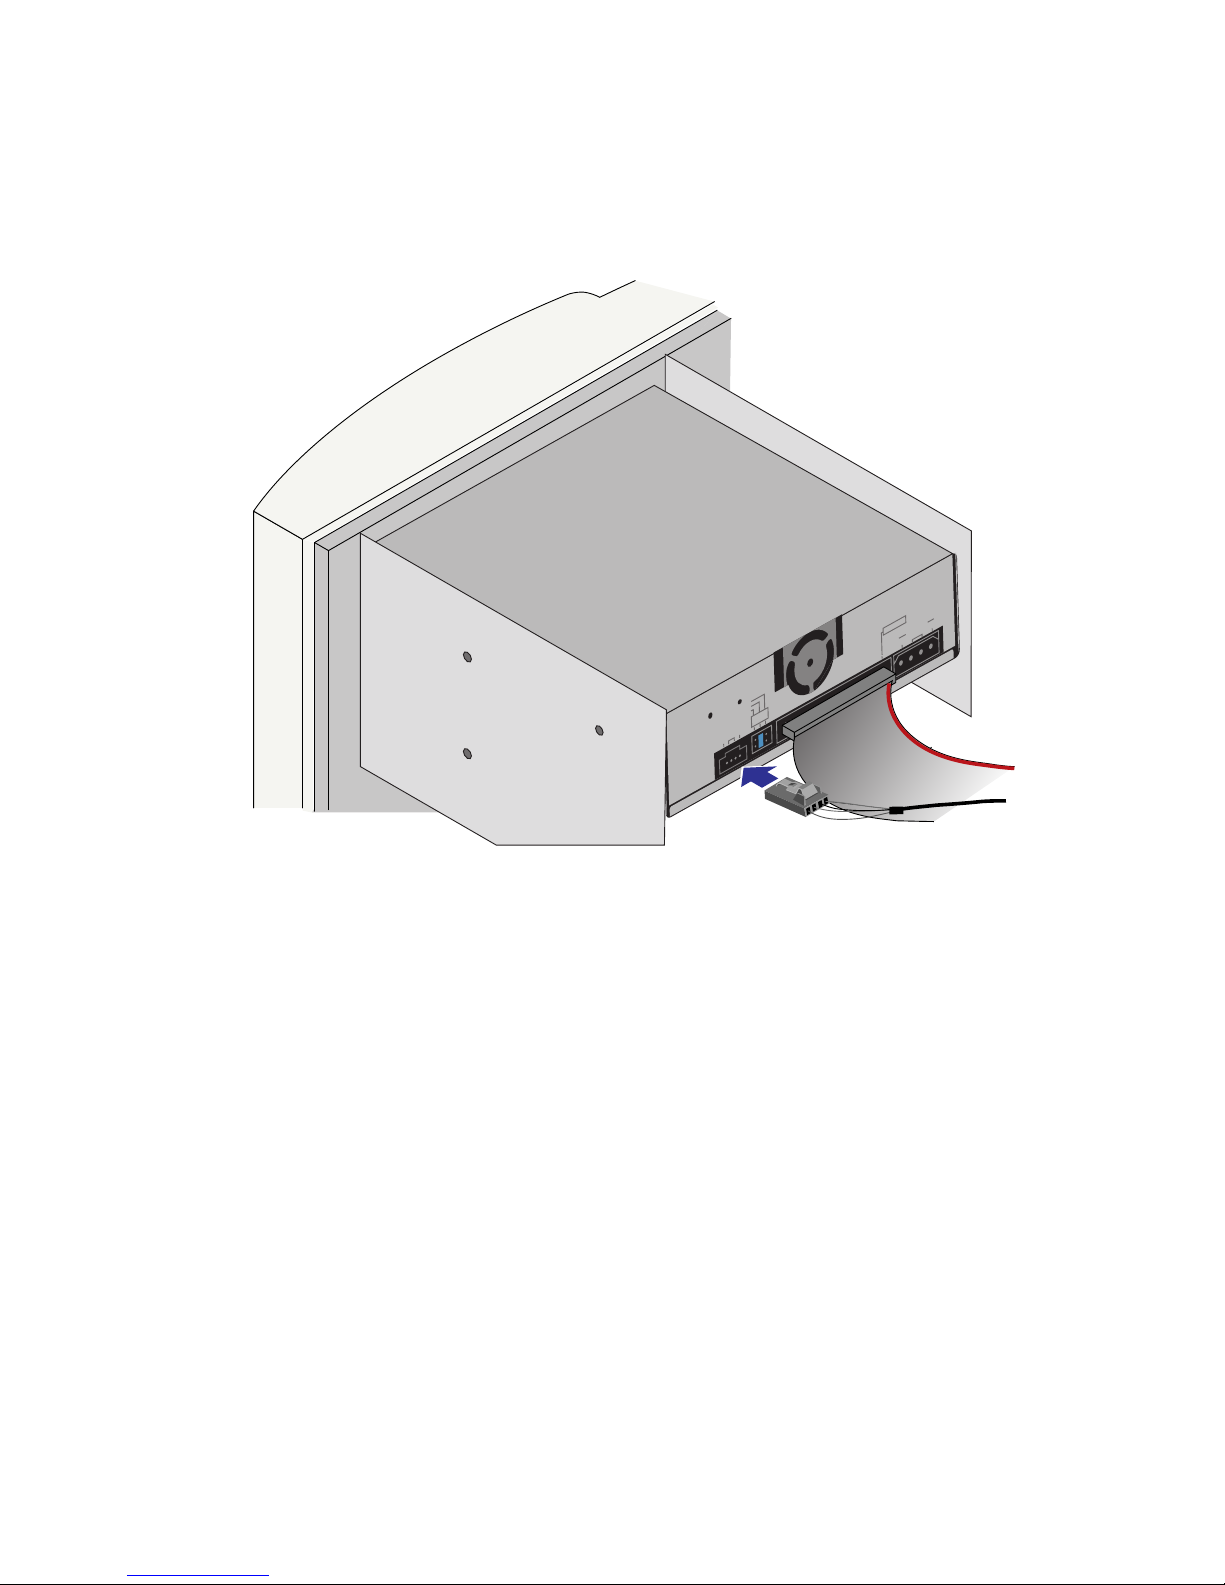
Skip this step if the computer’s CD-ROM drive is already
connected to the computer’s audio in port.
Connect the audio cable to the ZipCD™ drive and the computer’s audio
connector, usually located on the sound card or the motherboard. Check
your sound card documentation or your system’s documentaton and the
User’s Manual for more detailed instructions.
7
Page 10
M
ASTER
SLAVE
C
A
BLE SELEC
T
A
U
D
IO
O
U
T
R G
ND L
C S M
S L A
IDE PIN1
DC INPUT
+5 GND +12
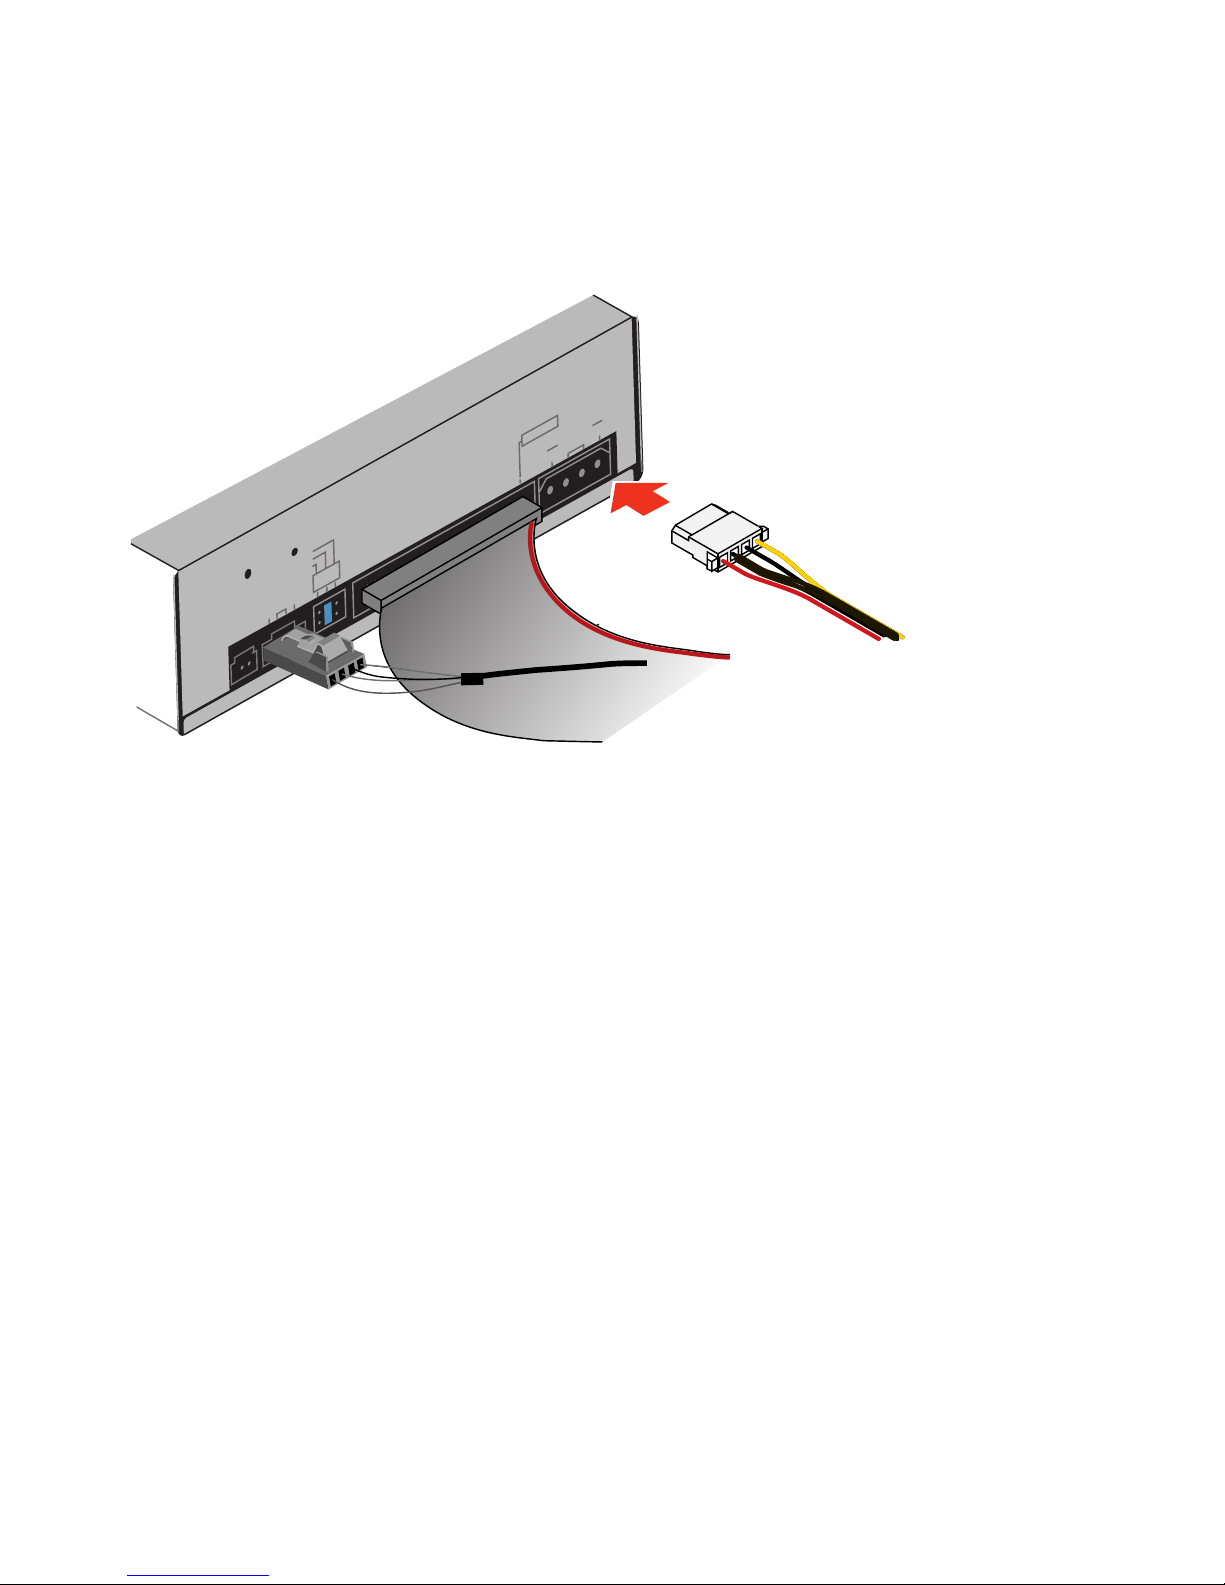
Connect a computer power supply cable.
You may need a Y-cable if your system’s power cable does not have a free
connector.
CAUTION! Make sure the power supply cable is securely connected to the
ZipCD™ drive.
8
Page 11
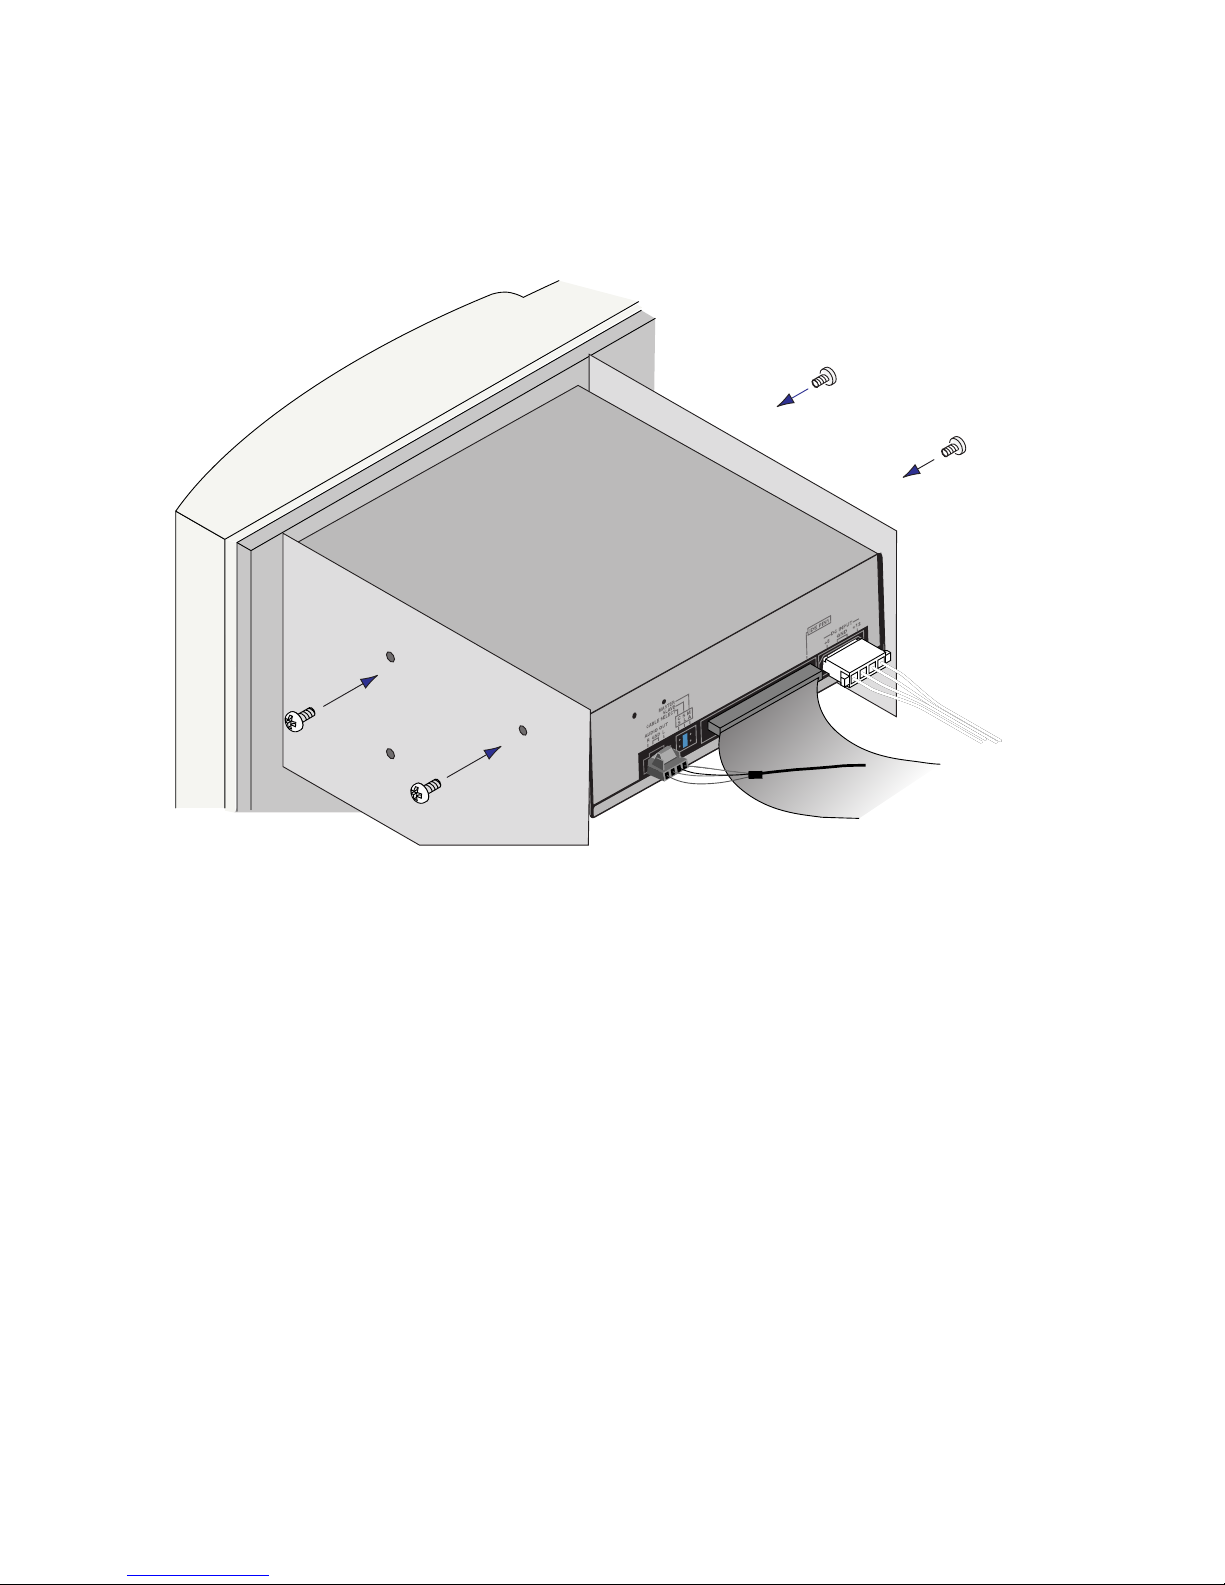
Secure the drive in the drive bay if needed.
If there is not a clear access to the drive bay mounting holes, refer to your
computer manual for additional instructions.
CAUTION! Mounting screws must not extend into the ZipCD™ drive farther
than 6.0 mm (about 0.25 inch).
9
Page 12
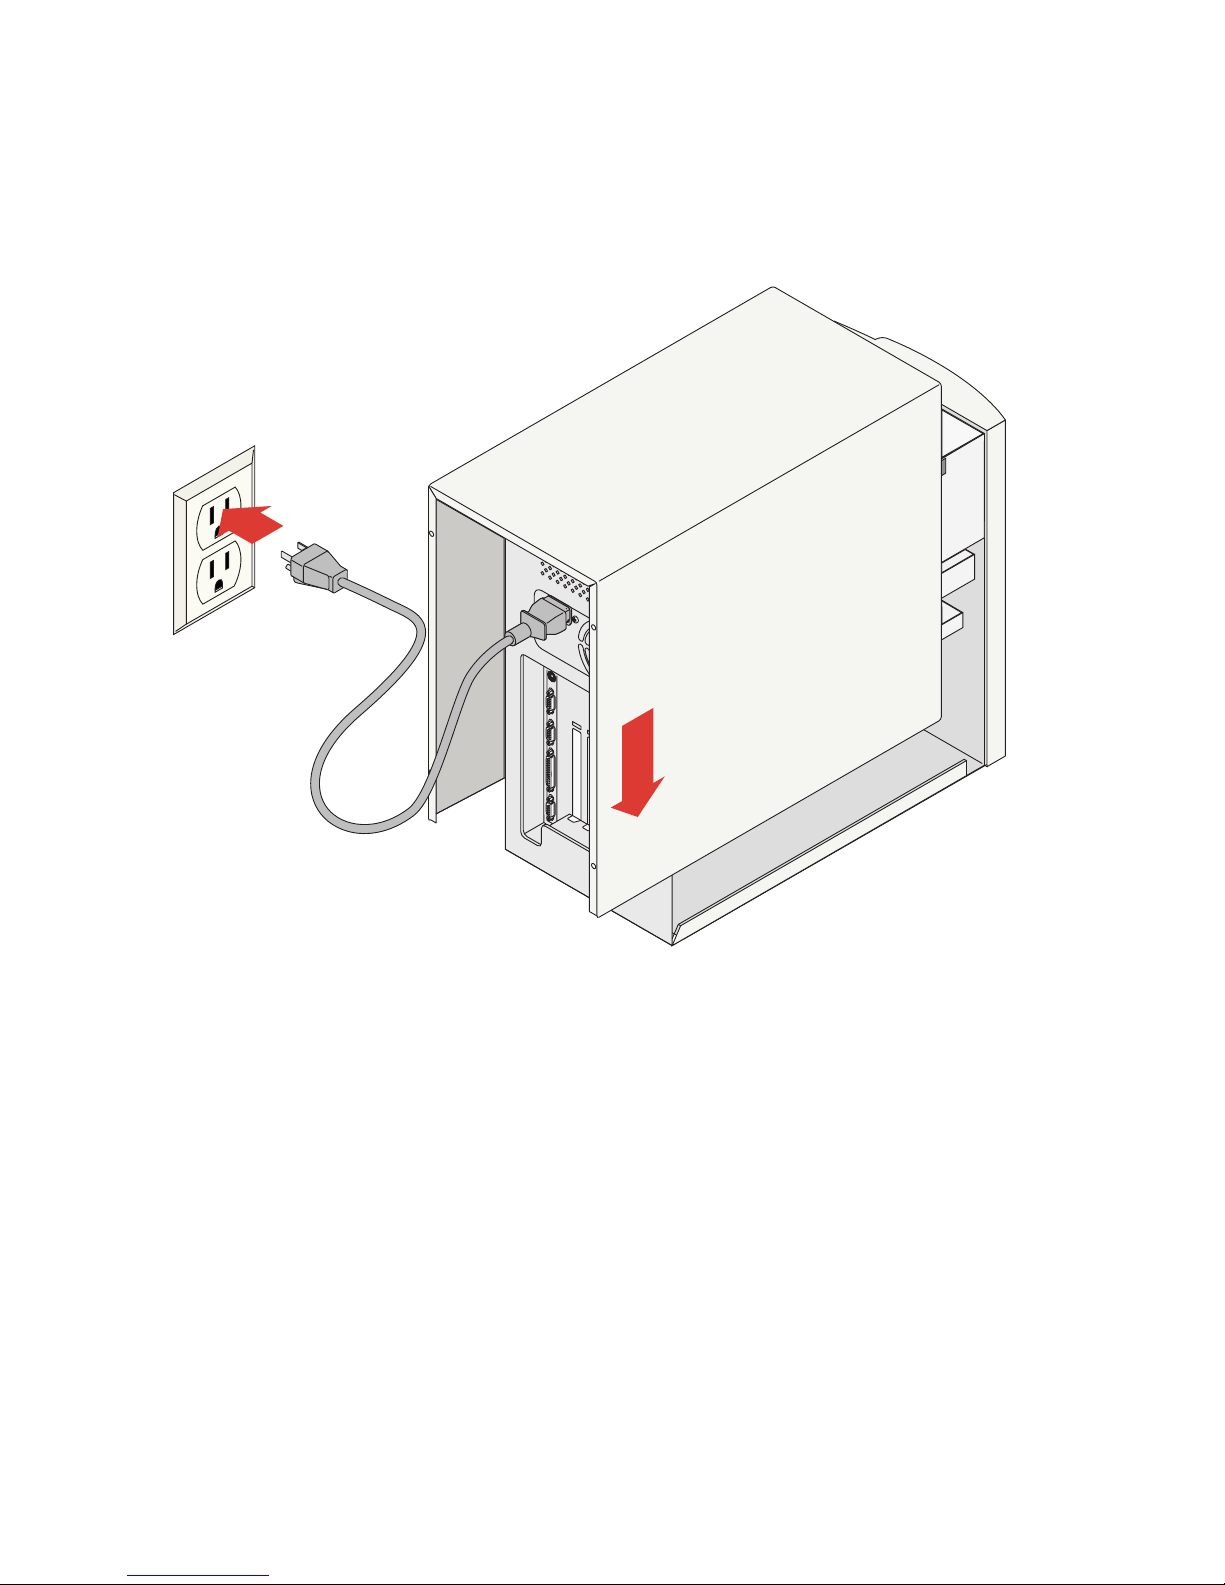
Check all connections, arrange the cables to fit under the
cover, and replace the computer cover.
Reconnect the power cord, turn on the power switch, and wait for the
operating system to load. Because the ZipCD
™
drive is plug-and-play, you
will not see “New Hardware Detected” in Windows.
10
Page 13
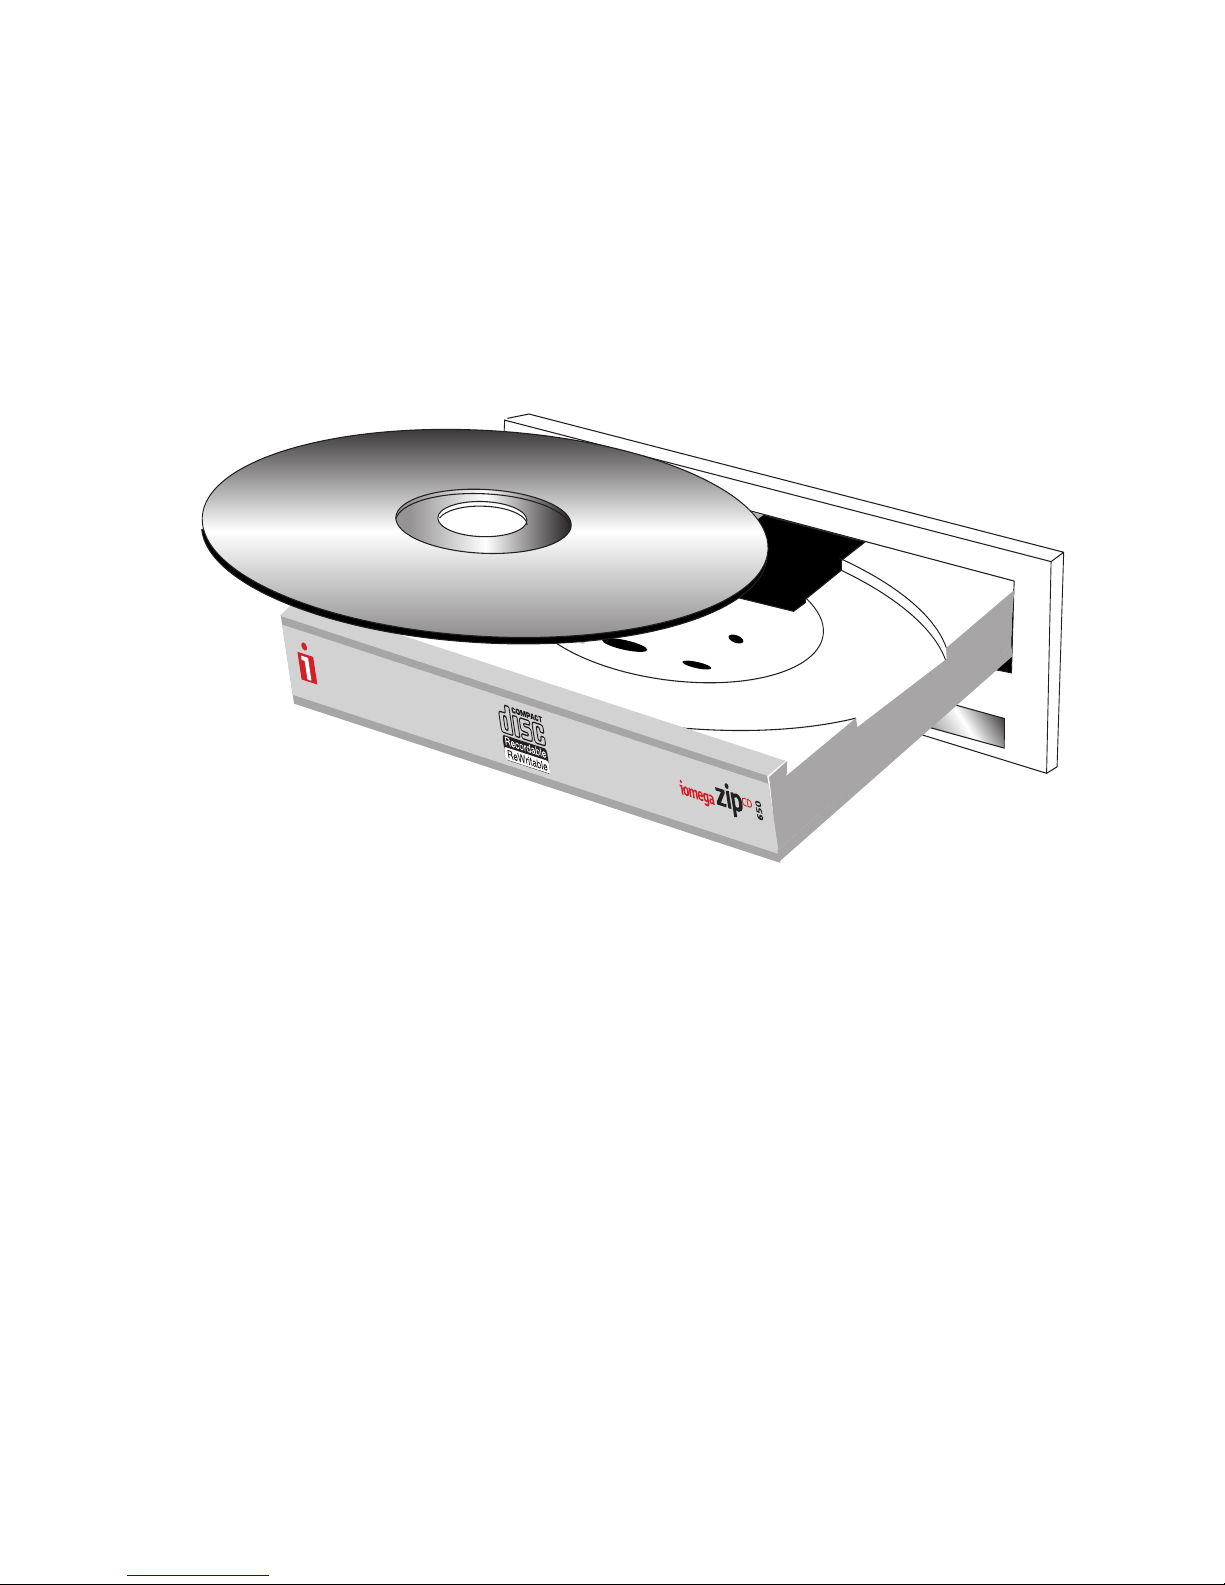
Congratulations! Your ZipCD™ drive is ready to use.
Write to CDs with your ZipCD™ drive using either CD-R or CD-RW
media. Use CD-R media for playing the CD on other computers and
stereos. Use CD-R media for writing once. Use CD-RW media to rewrite
multiple times.
11
Page 14

For detailed information about the ZipCD™ drive, view the
User’s Manual HTML on the ZipCD software disc.
To view the User’s Manual on the CD, you must have Microsoft® Internet
Explorer® 3.0 or higher or Netscape Navigator™ 4.5 or higher installed on
your system.
One way to locate the User’s Manual on the ZipCD
™
software disc is to right
click on the CD icon and select “Explore,“ then Docs\index.html.
12
Page 15

The User’s Manual includes a complete list of worldwide support options!
Iomega Web Site http://www.iomega.com
Iomega Web Support Site http://www.iomega.com/support
Customer Support (U.S. & Canada) 1-888-4-IOMEGA (1-888-446-6342)
Page 16

30211300 04/06/00 r07
Copyright © 2000 Iomega Corporation. Iomega, the stylized “i” logo, ZipCD, and the ZipCD brand block are
either registered trademarks or trademarks of Iomega Corporation in the United States and/or other countries.
Microsoft, Windows, and NT are registered trademarks or trademarks of Microsoft Corporation in the United
States and/or other countries. Certain other product names, brand names, and company names may be trademarks
or designations of their respective owners.
CE (European Community)
Product Name: Iomega Internal ZipCD
™
ATAPI drive
Model Numbers: ZIPCD-DVDROM
ZIPCD1024int
ZIPCDP1024int
ZIPCD1536int
The Iomega Internal ZipCD™ ATAPI drive conforms to the following
European Directive(s) and Standard(s): Application of Council Directives:
73/23/EEC, 89/336/EEC. Standards to which Conformity is declared:
EN60950, EN55022, EN50082-1, EN60825-1. Importer’s Name: Iomega
Netherlands branch of Iomega International, S.A.
Type of Equipment: Information Technology Equipment
Manufacturer/Responsible Party
Iomega Corporation
1821 West Iomega Way
Roy, UT 84067 U.S.A.
801-332-1000
CLASS 1
LASER PRODUCT
 Loading...