

Page 1
Technology Expert in Hypertension Management
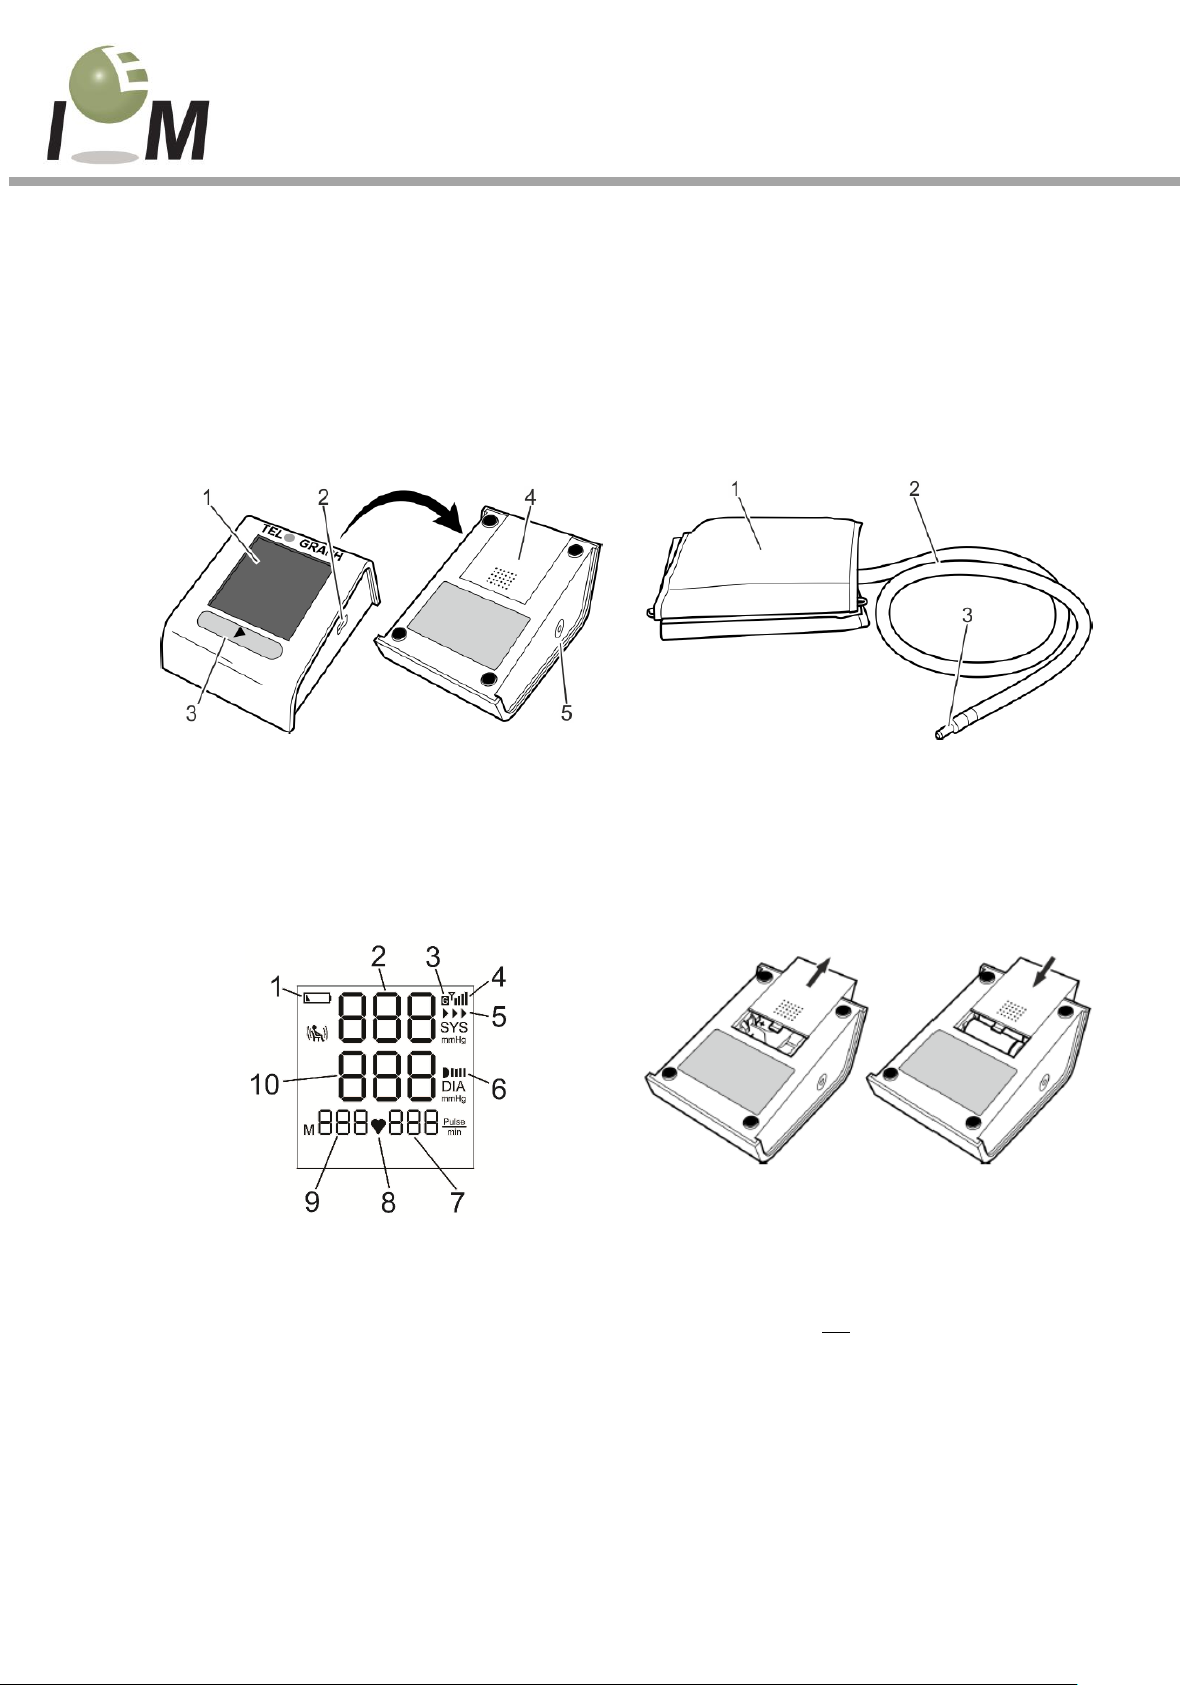
1. – Measuring device
2 – Cuff
(1) display (2) infra-red port
(3) START button (4) battery compartment cover
(5) air tube socket
(1) arm cuff (2) air tube
(3) air tube connection
3 – Display
4 – Inserting the batteries
(1) battery status (2) systolic value display
(3) mobile radio connection (4) signal strength
(5) data transmission (6) infra-red
(7) number of pulse beats per minute (8) pulse
recognised
(9) number of readings in the memory
(10) diastolic value display
- Open the battery compartment cover on the
bottom of the measuring device.
- Insert four batteries (AA, alkaline) with the correct
polarity. Take care not to press or hold down the
START button when inserting the batteries.
- Close the battery compartment cover.
The measuring device will automatically turn itself
on.
Short guide: Tel-O-Graph® GSM blood pressure measuring device
Important information, safety information and extensive instructions for the product and its functions,
which are referred to in this short guide, can be found in the user manual which is enclosed with the
product delivery contents! If you have any questions, please do not hesitate to contact our technical
support team at www.iem.de.
Page 2
Technology Expert in Hypertension Management
© I.E.M. GmbH | Rev. 1.0 – 23.06.2016 | www.iem.de
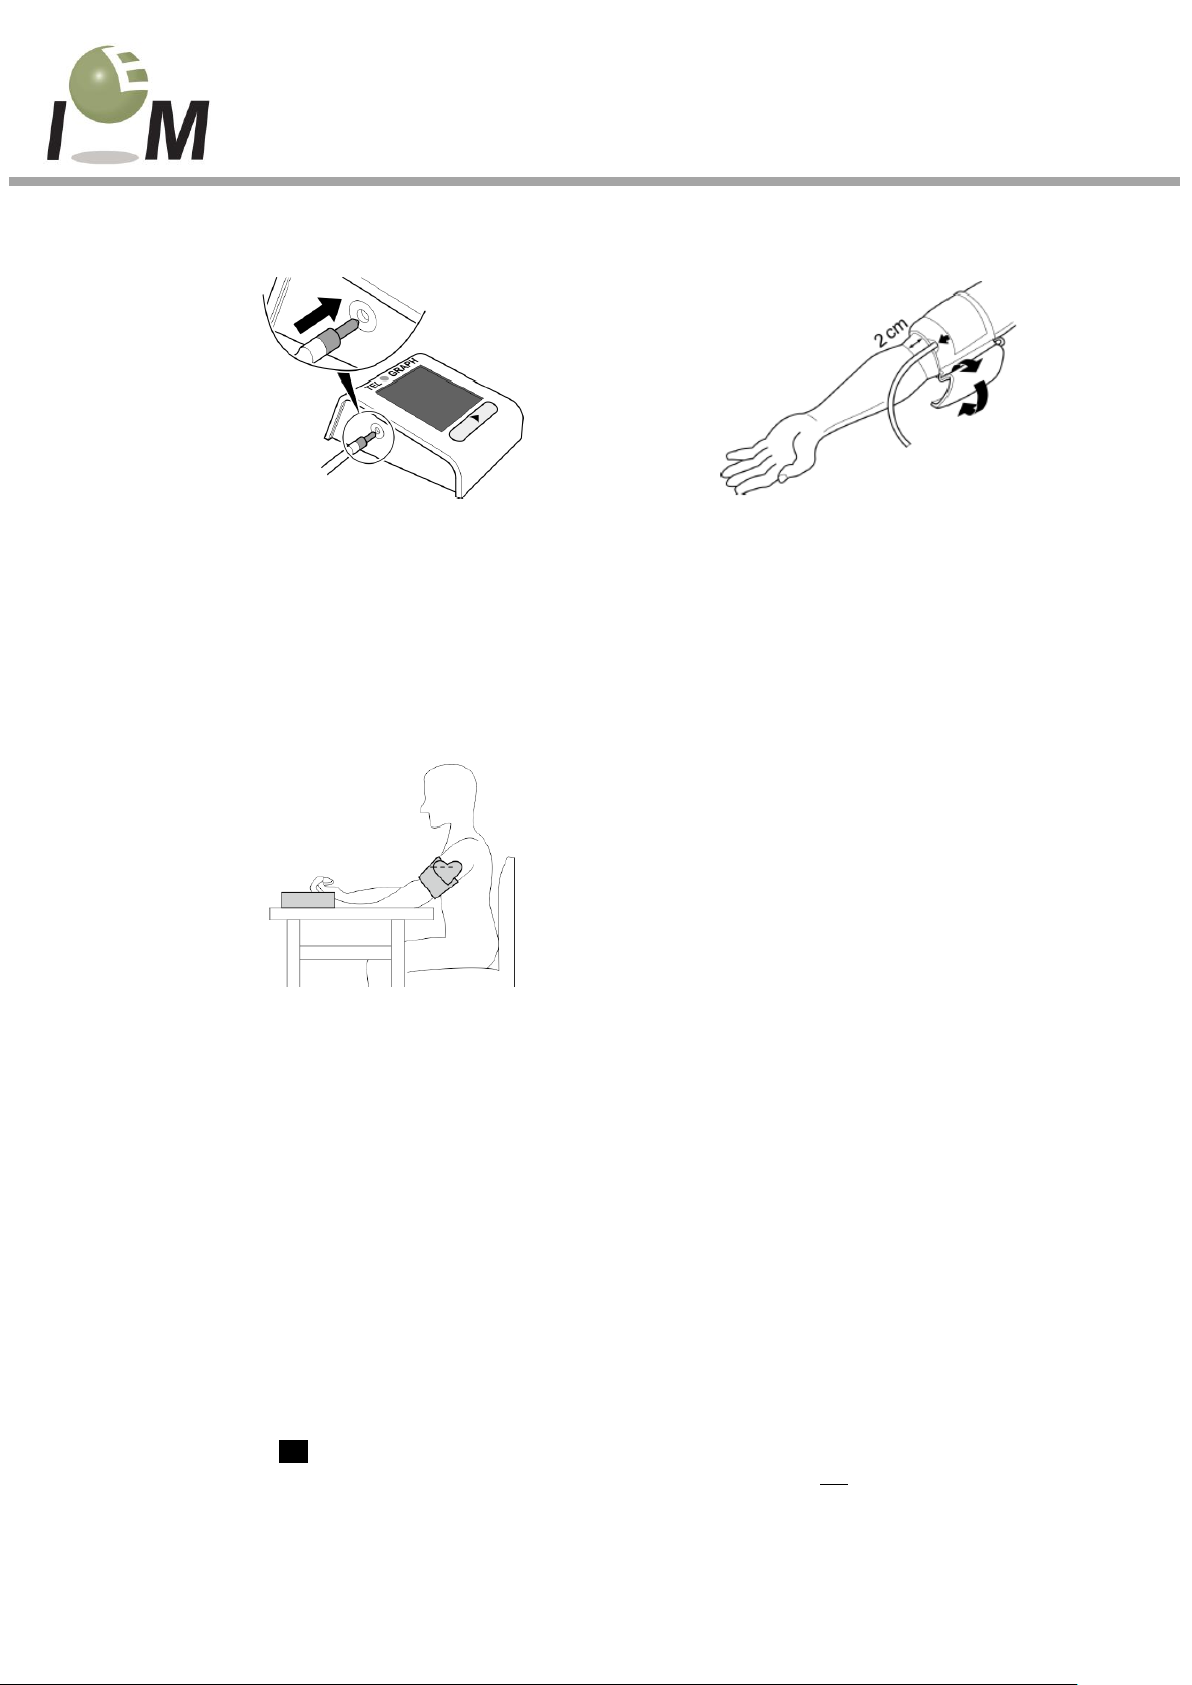
5 – Plugging in the cuff
6 – Putting on the cuff
Plug the air tube socket into the air tube connection
of the device.
- Put on the cuff and fasten it with the Velcro.
- The tube must run centrally along the inside of the
forearm, in the direction of the middle finger.
- The lower edge of the cuff must lie about 2 cm
above the crook of your arm.
- The artery marker must lie centrally on the inside
of your arm and point downwards.
7 – Correct sitting position
8 – Carrying out a reading
- Sit comfortably on a chair and place your elbows
on the table.
- The arm cuff should be the same height as your
heart.
- Relax your arm and turn the palm of your hand
upwards.
- Place your feet flat on the floor and place your
legs next to each other.
- Press the START button to start a reading. The
start of a reading is confirmed by a signal tone.
- During your first reading, the cuff pumps up
gradually in order to determine the pressure
necessary for calculating your systolic blood
pressure.
- During every further reading, it is immediately
pumped up to the systolic blood pressure value
that has already been determined.
- After pumping up, the pressure is gradually
released.
- A reading can be cancelled at any time by pushing
the START button again. The air is automatically
released!
9 – Transferring the data
10 – Information
- After your blood pressure values have been
measured, these appear on the display.
- Take off the arm cuff. The blood pressure reading
has ended.
- Following this, the blood pressure measuring
device establishes a connection to the mobile
phone network (Y).
- As soon as the mobile connection is established
(the symbol -G- appears on the display), the
readings are transferred ().
- A signal tone confirms the measurement values
have been successfully transferred.
- If the blood pressure values are not successfully
transferred, an error message appears on the
display. Note down the error code.
- The blood pressure values remain saved in the
measuring device and are transferred after the
next blood pressure reading.
- When changing the batteries take care to insert
the batteries with the correct polarity and when
inserting them, do not press or hold down the
START button.
 Loading...