

Page 1
PART NO. Q1173
Quick Start Guide
Wireless 1080p Computer to HDTV Kit
Page 2
1
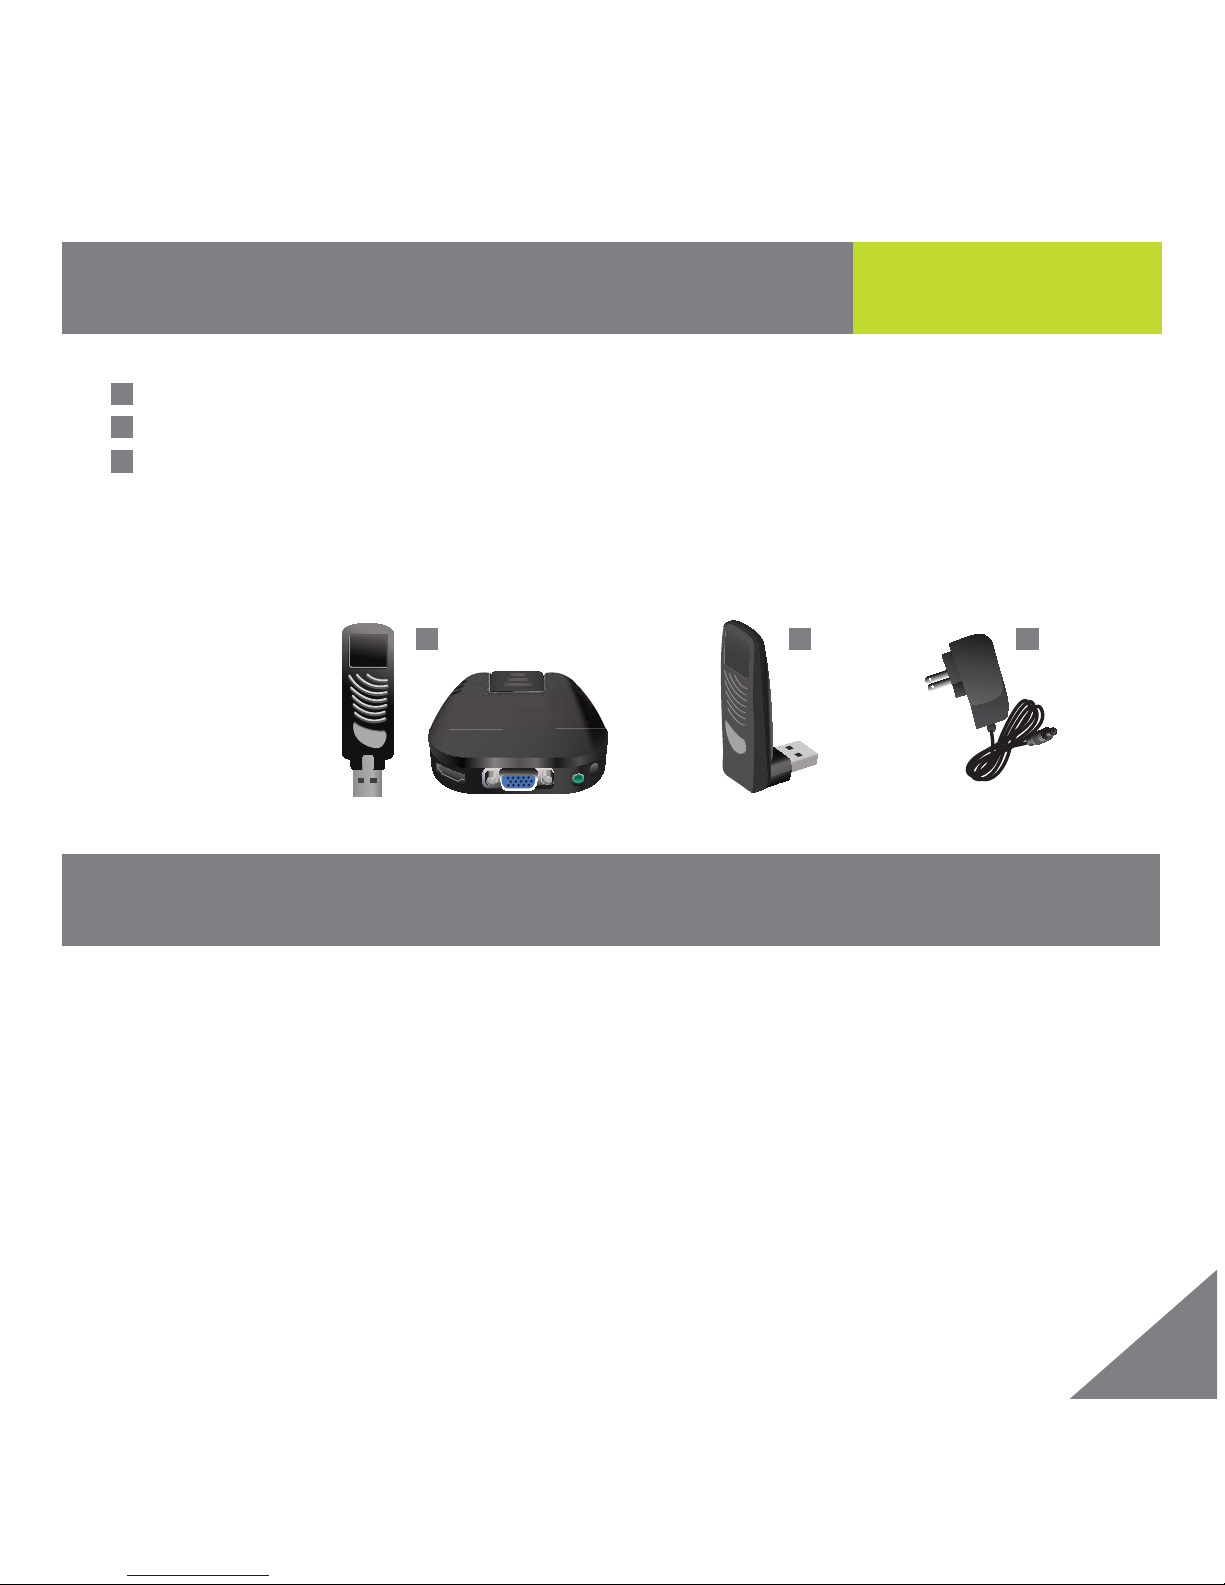
Package Contents
Requirements
Start Here!
1 x Wireless A / V Receiver (device adapter + A / V base)
1 x Wireless USB Transmitter (for computer)
1 x Power Adapter
1 x HDMI Cable
1 x Quick Start Guide
1 x Warranty/Registration Card
1 x Installation CD
1
2
3
1 2
3
PC:
• Microsoft Windows® 7, Windows Vista® SP2 or Windows® XP (32-bit) SP3
• 1.8 GHz processor (2.4GHz recommended) with 1GB RAM (3GB recommended)
• 1 USB 2.0 Port
TV:
• Flat-panel TV or Projector with HDMI or VGA (RGB / D-sub 15-pin / PC) port
• TV or audio system with HDMI, 3.5mm audio jack, or RCA connectors
“HDMI, the HDMI Logo, and High-Definition Multimedia Interface are trademarks of HDMI
Licensing LLC in the United States and other countries.”
Page 3
2
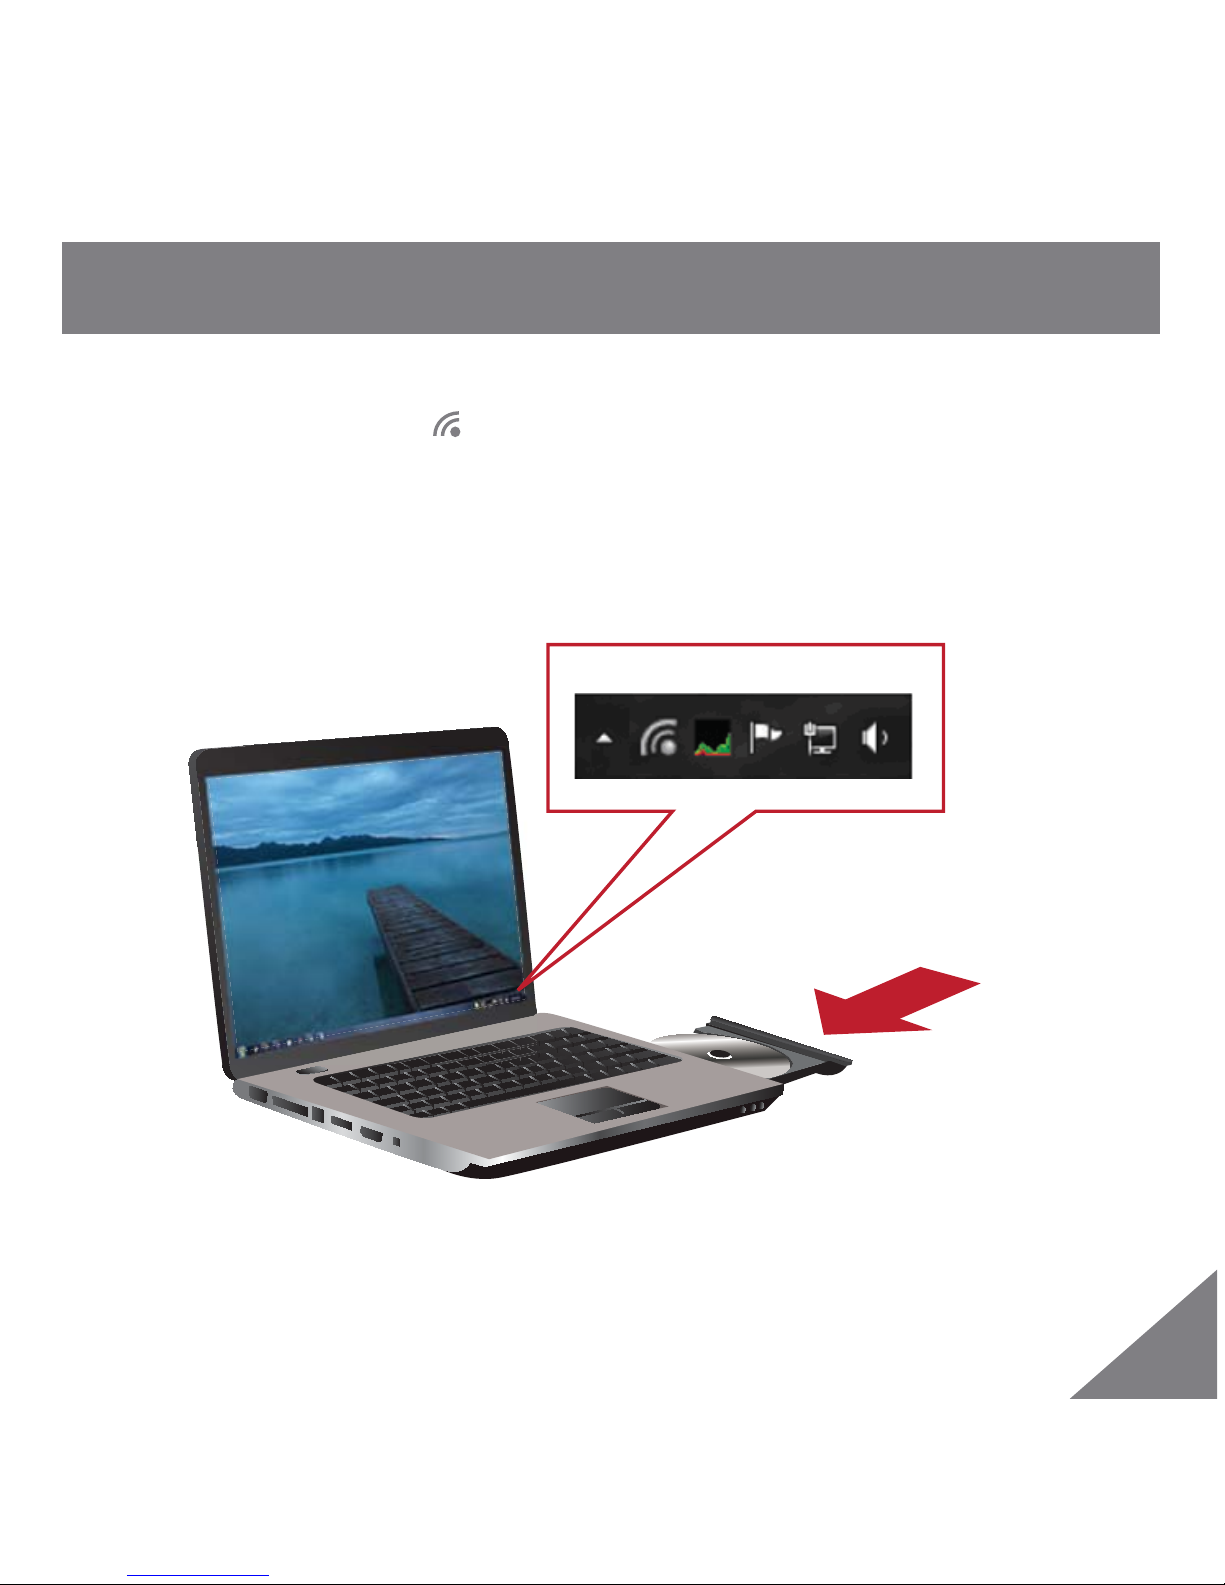
system tray
1. Insert the CD-ROM and follow the instructions to install the driver software.
2. A new Wireless USB icon will appear in the system tray after the installation.
3. Restart your system for the configuration changes made to fully take effect.
Software Installation
Page 4

3
Transmitter Installation
1. Plug the Wireless USB Transmitter to a USB 2.0 port on your computer (the tray icon
will change from Gray to Red ).
2. Please keep the Transmitter in upright position only.
Page 5

4
Tabletop
Wall Mounting
Receiver Installation
1. Depending on your installation application, slide the shutter to show the USB port.
2. Insert the Device Adapter.
3. Keep Device Adapter in upright position only.
Page 6

5
Connect power to the
BLACK port
1. Connect the A / V Base using the HDMI cable or a combination of VGA and audio
(3.5mm) cables (sold separately).
2. Slide in the prong changer to the AC adapter first. Connect the power cable to the
Black port. Tray icon turns Green and the display icon appears.
3. Change your TV’s input source setting accordingly (HDMI or VGA). Refer to the
operating instructions supplied with your TV or display.
Cords and Cables
HDMI cable
Page 7

6
30 ft (Max.)
1. Keep your Wireless Transmitter & Receiver at Max 30 ft. within line-of-sight.
2. Now you should be able to watch the same content as your laptop’s screen on your
HDTV - Mirror mode is set as default.
3. In Mirror Mode, the screen resolution is chosen automatically for both the laptop and
the HDTV. For better resolution and performance, you may change the setting to
Extended mode under the display icon in the system tray. This mode creates an
extended desktop environment for you to drag and drop various applications to your
preferred monitor or TV. For example, you can watch video on your TV while working
on the spreadsheet from your laptop.
4. Refer to your TV’s manual to adjust TV’s aspect ratio to show the full screen. You can
also use the “Fit to TV” function from the display icon to match your TV’s resolution.
Configuration
Line-of-Sight
Page 8

7
General Troubleshooting
Minor issues can generally be resolved by checking the following:
• Make sure that the TV was set on the correct “Input” source, such “HDMI 1”
• Detach and reattach the transmitter from your computer’s USB port, wait for the connection
to re-establish (may take a few seconds)
• Power cycle the Wireless HD receiver
• Change the display mode via the Displaylink GUI, or OS’ Display Properties between
“Extended” and “Mirror” mode
Audio Setting
• After the installation, your computer should direct the Audio to the AV adapter. If not, please
verify that the “USB PnP Sound Device” is selected as your Default Sound Playback Device:
• Right click on the Speaker icon at the right corner of your system tray, or go to Start ->
Control Panel -> Sounds and Audio Devices, then select Audio tab.
If there is still no sound coming from the TV, restart the media player, reload the Website, or
reopen the media file.
Troubleshooting
Extended Mode Mirror Mode
(extend your desktop area) (duplicates what is on the primary display)
Page 9

8
Video Playback
Under the display icon in the tray
Troubleshooting
• Use “Extended Mode”, and lower the extended screen resolution to 720p (1280 x 720)
• If available it is recommended to
use “Optimize for Video”
Online Video streaming: Windows XP
• Make sure to disable “Hardware Acceleration” on your Flash Player
• Right click on the video you’re watching, choose “Settings”
• Uncheck “Enable hardware acceleration” box
Windows Vista / Windows 7 Users
• Right click the desktop and select “Personalize”
• Select “Windows Color and Appearance”, then select “Windows Aero” from the Color
scheme list
Known Issues
• Many DVD and Blu-ray movie discs have copy protection mechanisms that prevent
playback on this Wireless TV kit. However, you can play discs containing the personal
content you created.
*Need more info? Right-click the Wireless USB Manager taskbar icon and select
“Help” or view the Tutorial Video included in the software CD-ROM
Page 10

9
This product has been tested and found to comply with the limits for a Class B device,
pursuant to part 15 of the FCC Rules. It is intended for use in residential setting, but may
also be used in commercial or industrial setting.
WE’RE HERE TO HELP YOU! NEED ASSISTANCE SETTING UP THIS PRODUCT?
Make sure you:
1. Use the live chat at www.iogear.com to try
and solve any issues you may be having
with the product
2. Visit the Tech Info Library/FAQ on
www.iogear.com (under the Support tab)
3. Call the tech support line at 1-866-946-4327
(U.S. only) or 949-453-8782
Federal Communications Commission (FCC)
Statement
Limited Warranty
Toll Free 866-946-4327 (USA)
Phone: 949-453-8782
19641 Da Vinci
Foothill Ranch, CA 92610
Contact
Warranty Information
This product carries a 1 Year Limited
Warranty.
For the terms and conditions of this
warranty, please go to
http://www.iogear.com/support/warranty
or call 1-866-946-4327
Page 11

10
A / V Base Mounting Template
For your convenience, you may use this drill template for easy marking of hole positions for
mounting the A / V base. Please make sure the chosen screws / fixtures are suitable for use in
the wall to which they are to be attached.
Page 12

About UsAbout Us
FUN
IOGEAR offers connectivity solutions that are
innovative, fun, and stylish, helping people enjoy
daily life using our high technology products.
GREEN
IOGEAR is an environmentally conscious company
that emphasizes the importance of conserving
natural resources. The use of our technology
solutions helps reduce electronic waste.
© 2011 IOGEAR
®
 Loading...