

IOGear GWU637 User Manual

1
User Manual
Manuel Utilisateur
Manual de Usuario
Ethernet-2-WiFi Universal Wireless Adapter
Adaptateur sans l universel Ethernet-2-WiFi GWU637
Adaptador inalámbrico universal GWU637
para Ethernet-2-WiFi
GWU637
PART NO. M1357
www.iogear.com

Designed in California, USA ©2015 IOGEAR® All rights reserved. ATEN is a registered trademark of ATEN
International Co., LTD. All other trademarks are the properties of their respective owners. Reproduction
in whole or in part without permission is prohibited. Tested to Comply With FCC and CE Standards. FOR
HOME OR OFFICE USE. Mac and the Mac logo are trademarks of Apple Computer, Inc. registered in the
U.S. and other countries. Specications subject to change without notice.

3
Table of Contents
Package Contents 4
Hardware Requirements 4
Overview 5
Setting Up Your Ethernet-2-WiFi Universal Wireless Adapter 7
Compliance Information 19
Limited Warranty 21
Contact 21
Contenu de l’emballage 22
Conguration matérielle requise 22
Vue d’ensemble 23
Conguration de l’adaptateur sans l universel Ethernet-2-WiFi 25
Déclaration de Conformité 37
Garantie limitée 38
Contact 38
Contenidos del Paquete 39
Requisitos de hardware 39
Generalidades 40
Cómo congurar el Adaptador inalámbrico universal para
Ethernet-2-WiFi
42
Información de Conformidad 54
Garantia limitada 55
Contacto 55

4
Package Contents
1 x GWU637 Ethernet-2-WiFi Universal Wireless Adapter
1 x USB Power Cable
1 x USB Power Adapter
1 x Ethernet Cable (3ft)
1 X Quick Start Guide
1 x Warranty Card
• Ethernet enabled device
• Wireless Router with WPS Setup or Wireless Router without WPS Setup and
Ethernet enabled Computer
Hardware Requirements
5
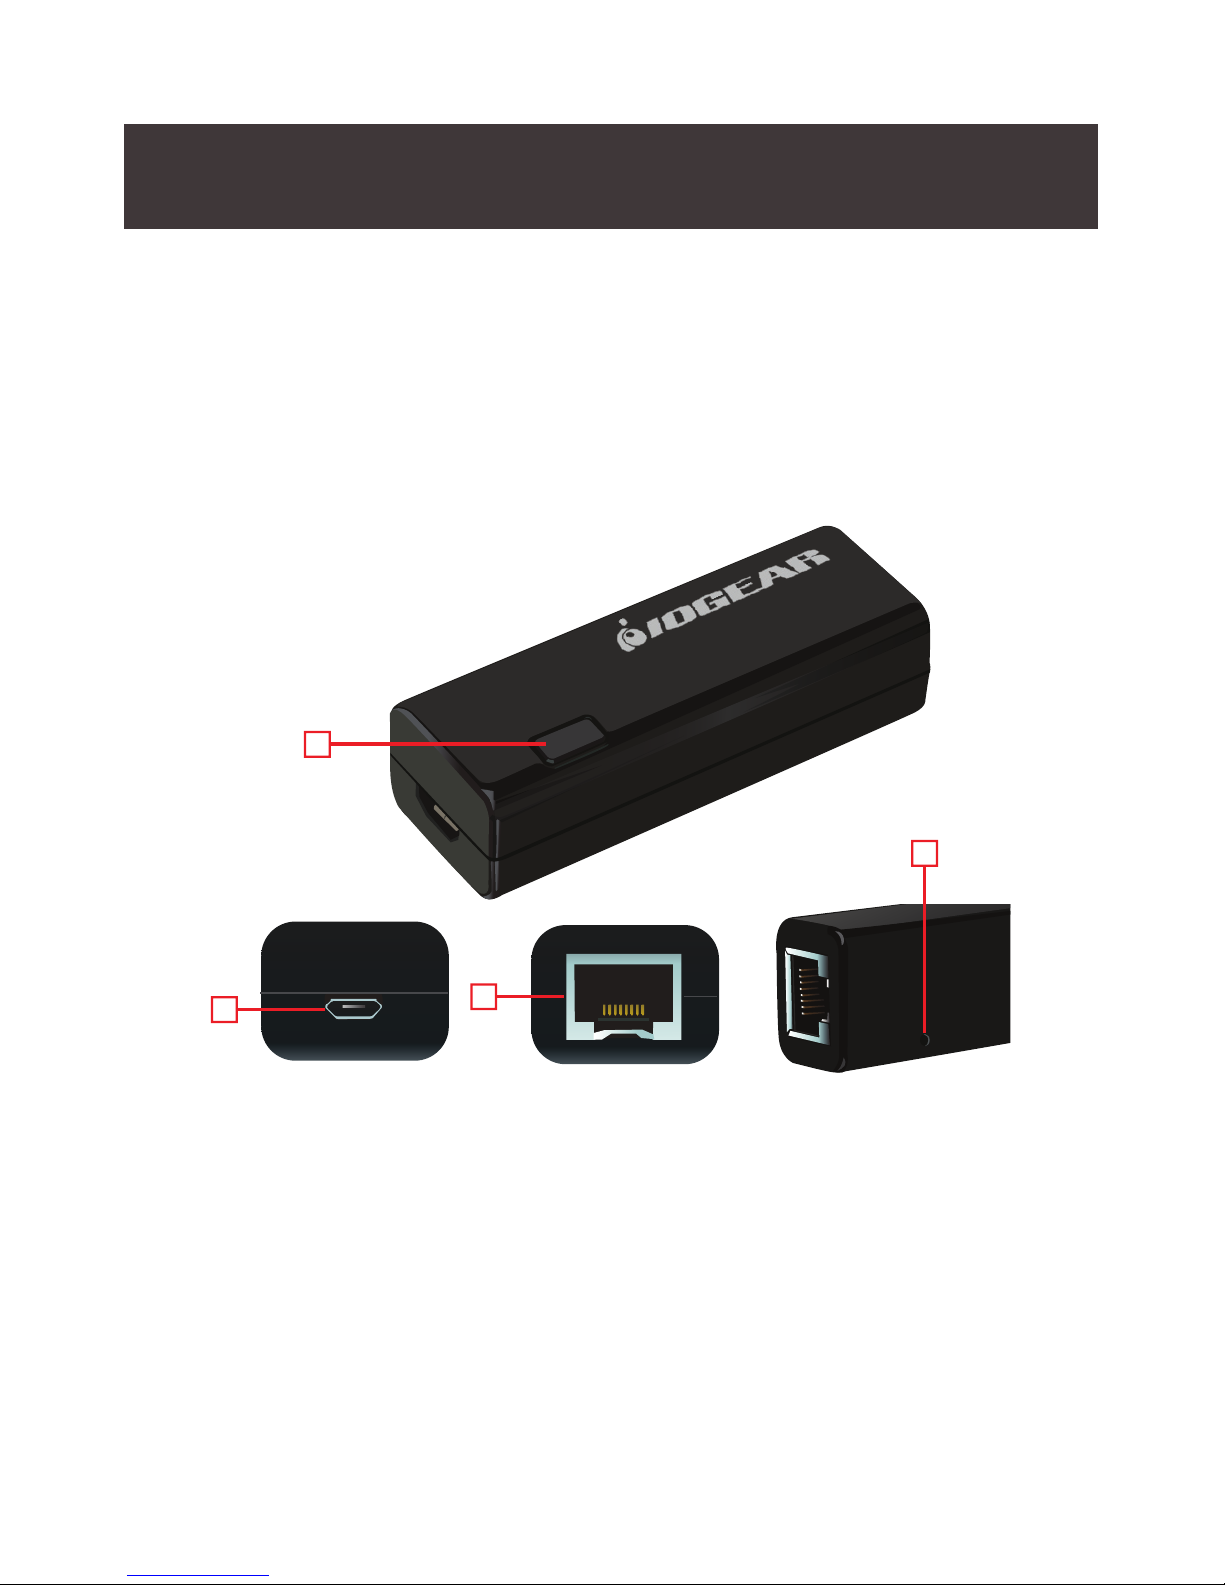
Overview
1. Wi-Fi Protected Setup (WPS) Button
- Push and hold the WPS button for 3 - 5 seconds to enable the WPS feature.
2. Micro USB Port
3. Ethernet Port
4. Reset Button
- Push and hold the reset button for 3 - 5 seconds to reset adapter to factory
default settings.
2
ETHERNET
3
ETHERNET
RESET
4
WLAN
WPS/RESET
ETHERNET
WPS
1
6
W
L
A
N
W
P
S
/R
E
S
E
T
E
T
H
E
R
N
E
T
WPS
5
6
7
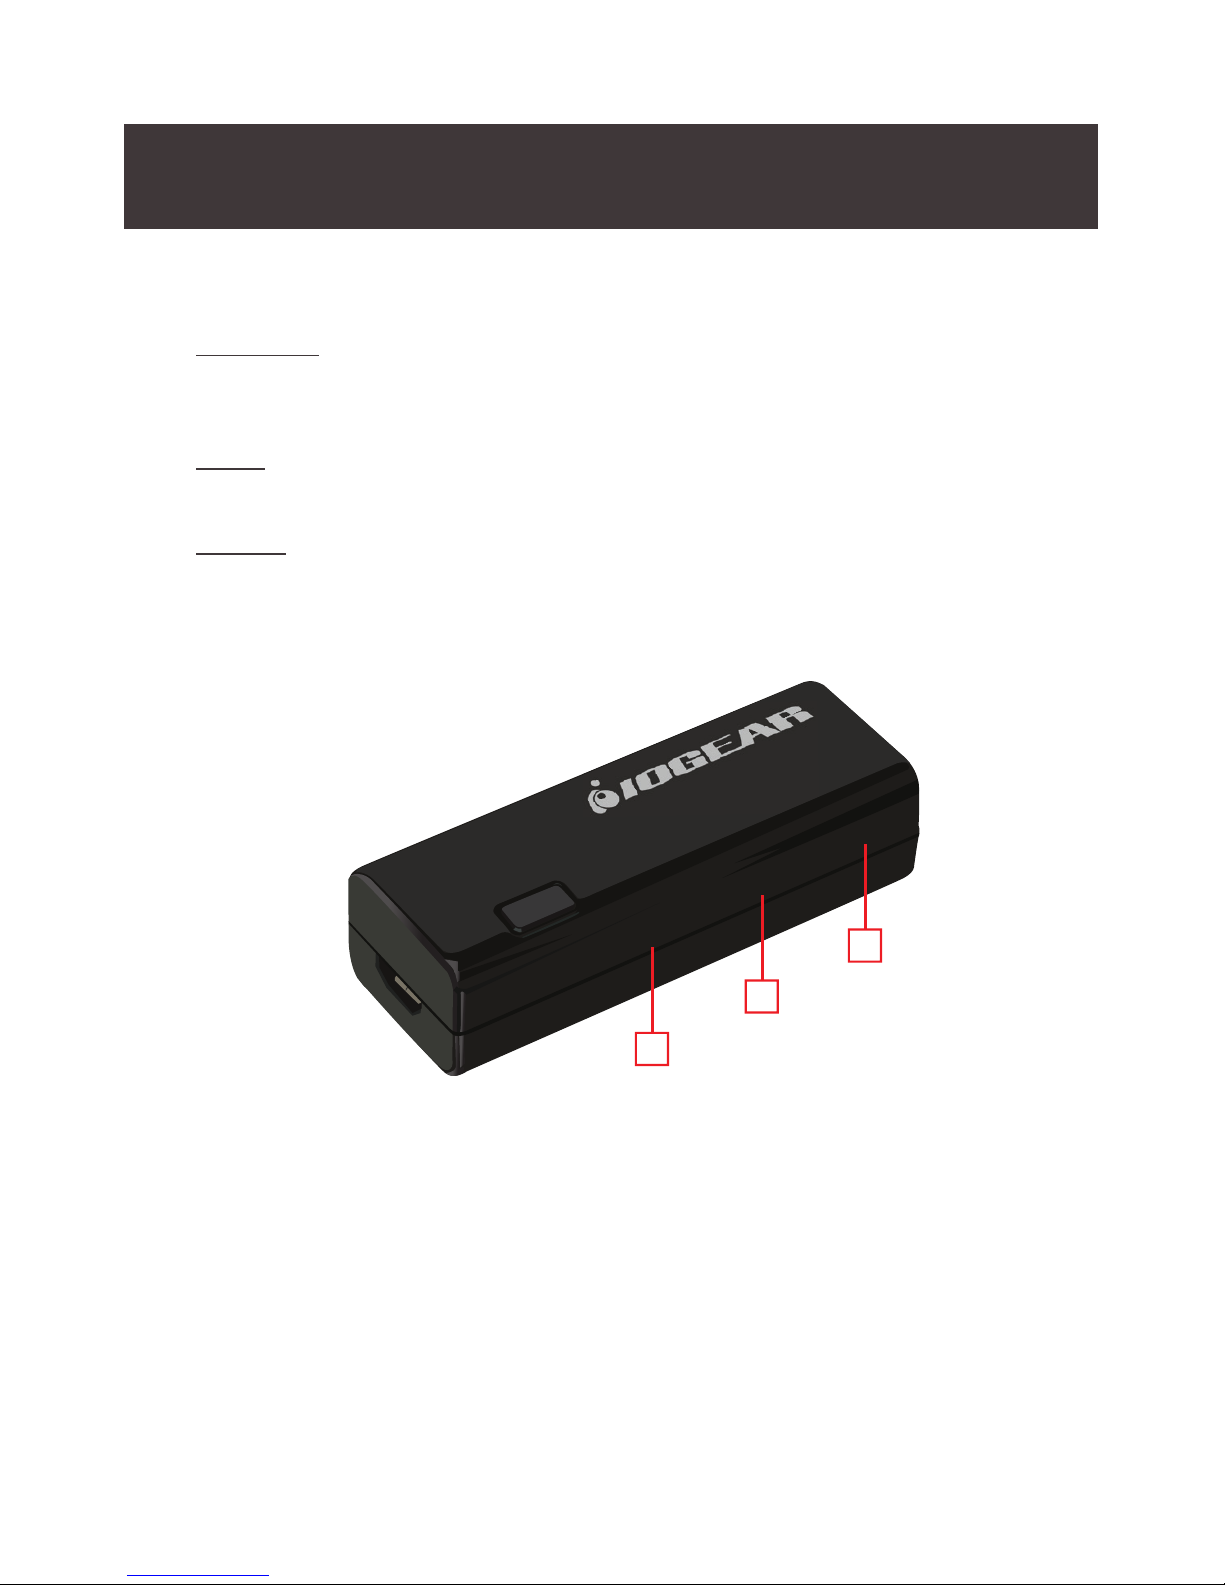
LED Indicators
5. WPS/Reset
a. Solid – The unit is being reset to factory default settings
b. Blinking – The WPS feature is enabled and active
c. Off – The WPS feature is not active
6. WLAN
a. Blinking – WLAN is transmitting or receiving data
b. Off – WLAN is off
7. Ethernet
a. Blinking – Data is being transmitted or received from connected
Ethernet device
b. Off – No active connection

7
Wireless Conguration Using Wi-Fi Protected Setup (WPS)
1. Power on your Ethernet-2-WiFi adapter by connecting the included micro-USB
cable to the USB power adapter and plugging into an available power outlet.
2. Refer to your wireless router’s user manual for instructions to enable Wi-Fi
Protected Setup.
3. Once your router enters into WPS pairing mode, press the WPS button on the
Ethernet-2-WiFi adapter within two minutes to connect the adapter to your
Wi-Fi network.
4. After the WPS/Reset and Ethernet LED indicators turn off, the WLAN LED will
begin blinking, indicating the Wireless Protected Setup is complete and has
successfully connected the adapter to your wireless network.
5. Use the included Ethernet cable to connect the Ethernet-2-WiFi adapter to your
Ethernet enabled device such as a Blu-Ray player, HDTV or game console.
Note: Make sure to set your Ethernet device’s network connection setting to
WIRED for proper operation.
Wireless Conguration - Windows
1. Start by disabling your PC’s wireless connection.
2. Next, power on your Ethernet-2-WiFi adapter using either of the
following methods:
• Connect the included micro-USB cable to the USB power adapter and plug
into an available power outlet. Connect the micro-USB cable to the
Ethernet-2-WiFi adapter.
• Connect the included micro-USB cable to the Ethernet-2-WiFi adapter
and plug into an available USB port on your computer.
Note: It will take approximately 20 - 30 seconds to complete the boot-up sequence.
When complete, the WLAN LED will blink to show it’s ready to be congured.
3. Connect one end of the included Ethernet cable to the Ethernet-2-WiFi adapter.
Connect the other end of the Ethernet cable into the Ethernet port on your PC.
Setting Up Your Ethernet-2-WiFi Universal Wireless Adapter
8
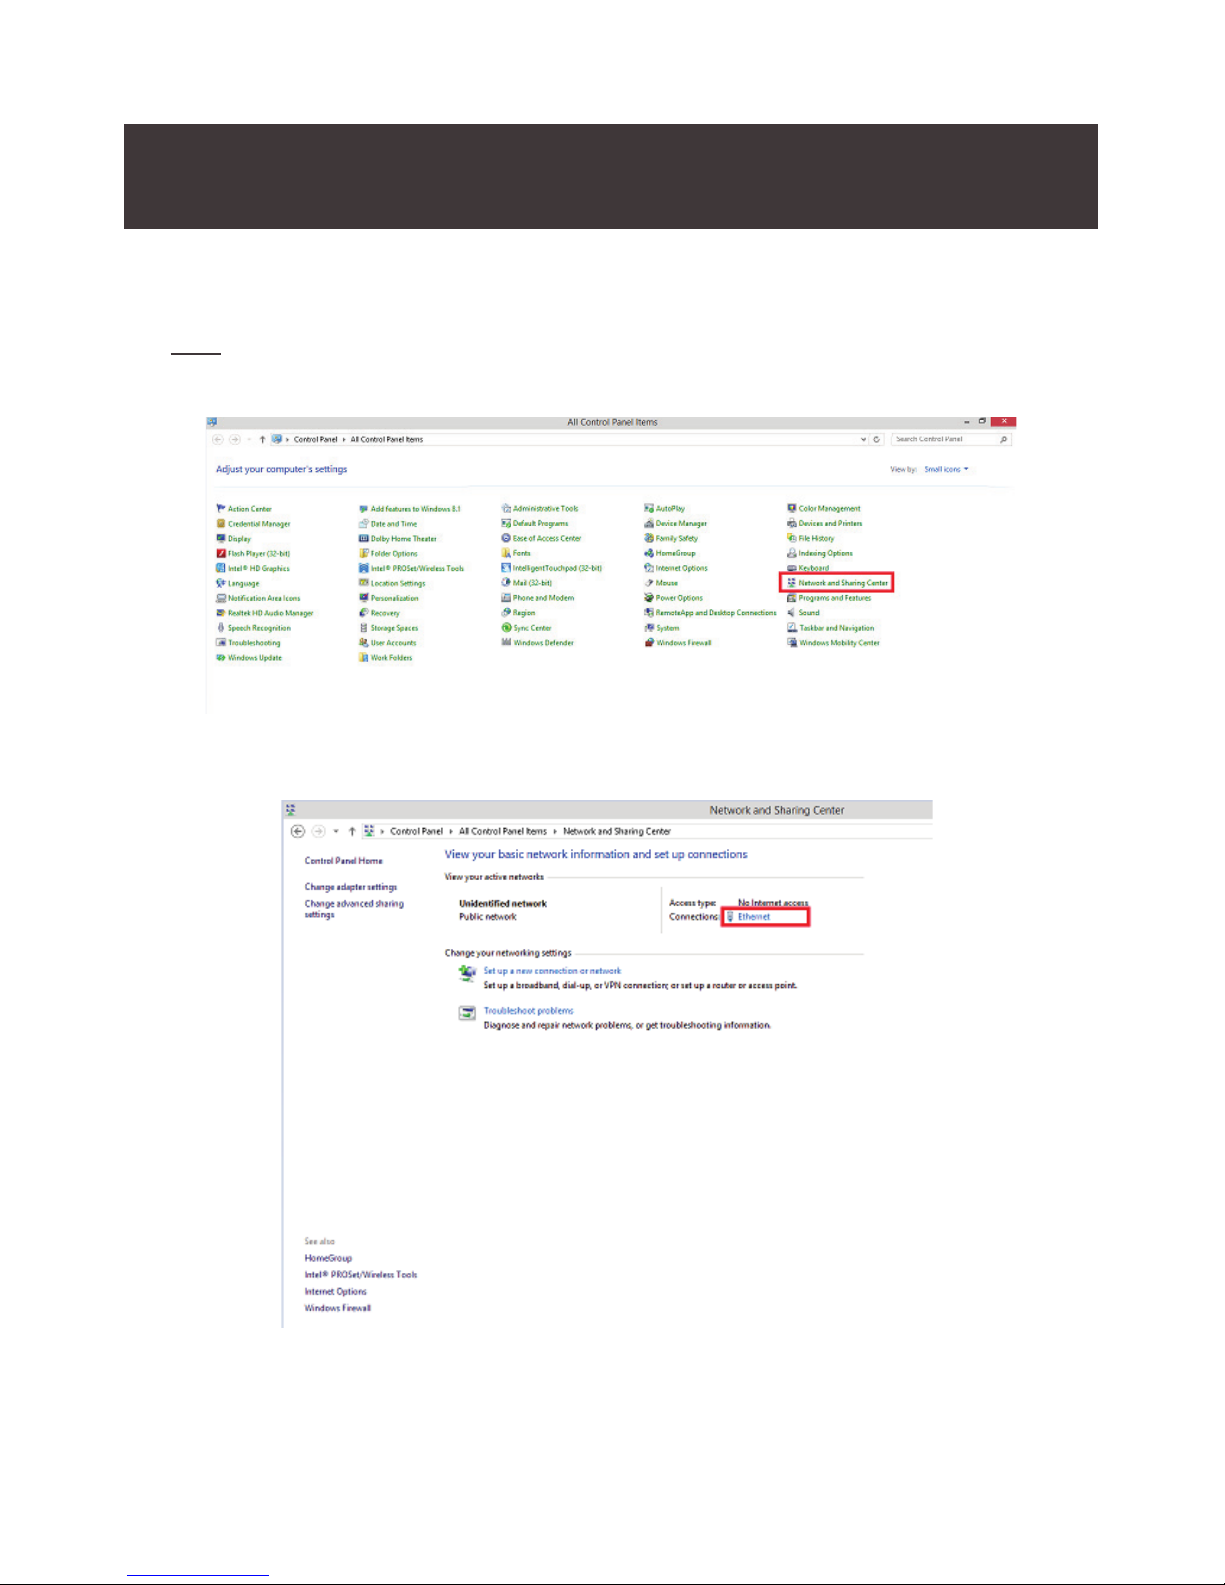
4. Open Control Panel and select Network and Sharing Center.
Note: Windows 10 users need to select Network and Internet settings before
arriving at Network and Sharing Center.
5. Click on Ethernet.
9
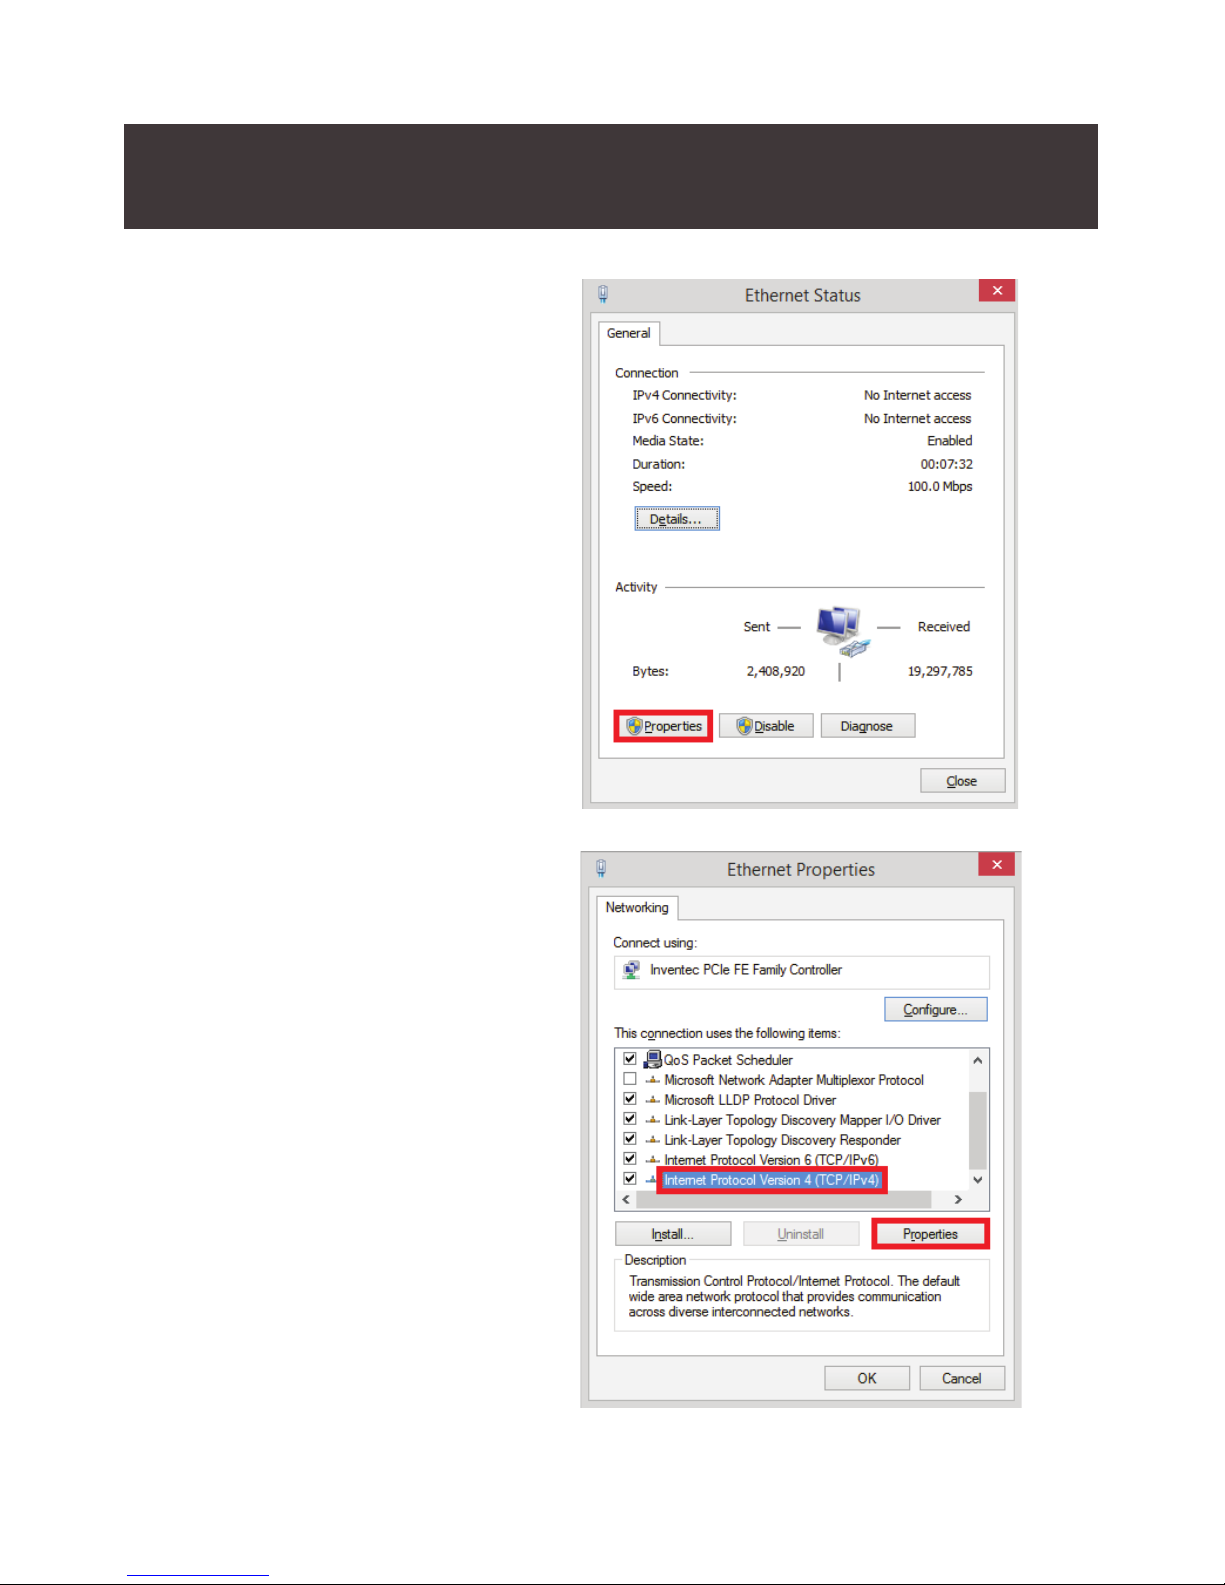
6. Select Properties.
7. Click to highlight Internet
Protocol Version 4 (TCP/IPv4)
and select Properties.
10
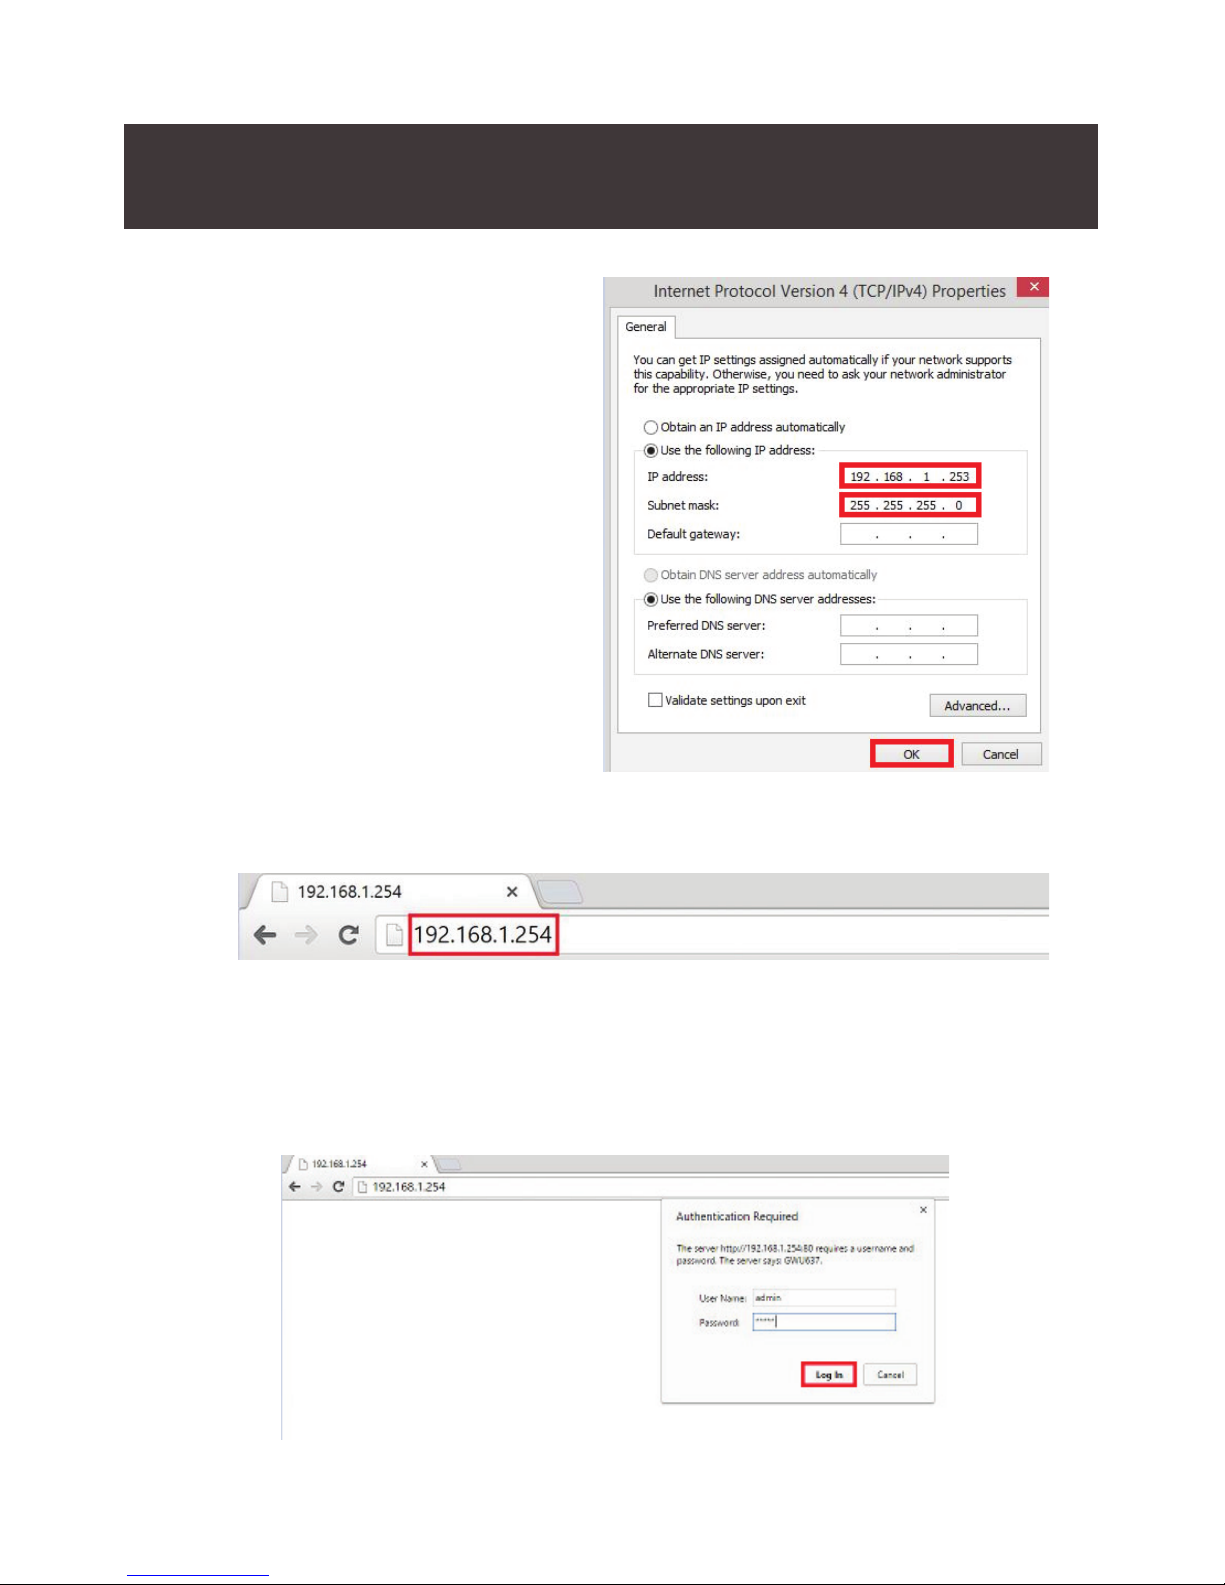
8. Choose Use the following IP
address. Enter 192.168.1.253
in the IP Address eld and
255.255.255.0 as Subnet mask.
Click OK to continue.
9. Open an Internet Browser and enter 192.168.1.254 in the address bar.
10. Enter the following factory default User Name and Password:
User Name: admin
Password: admin
Click the Log In button.
11
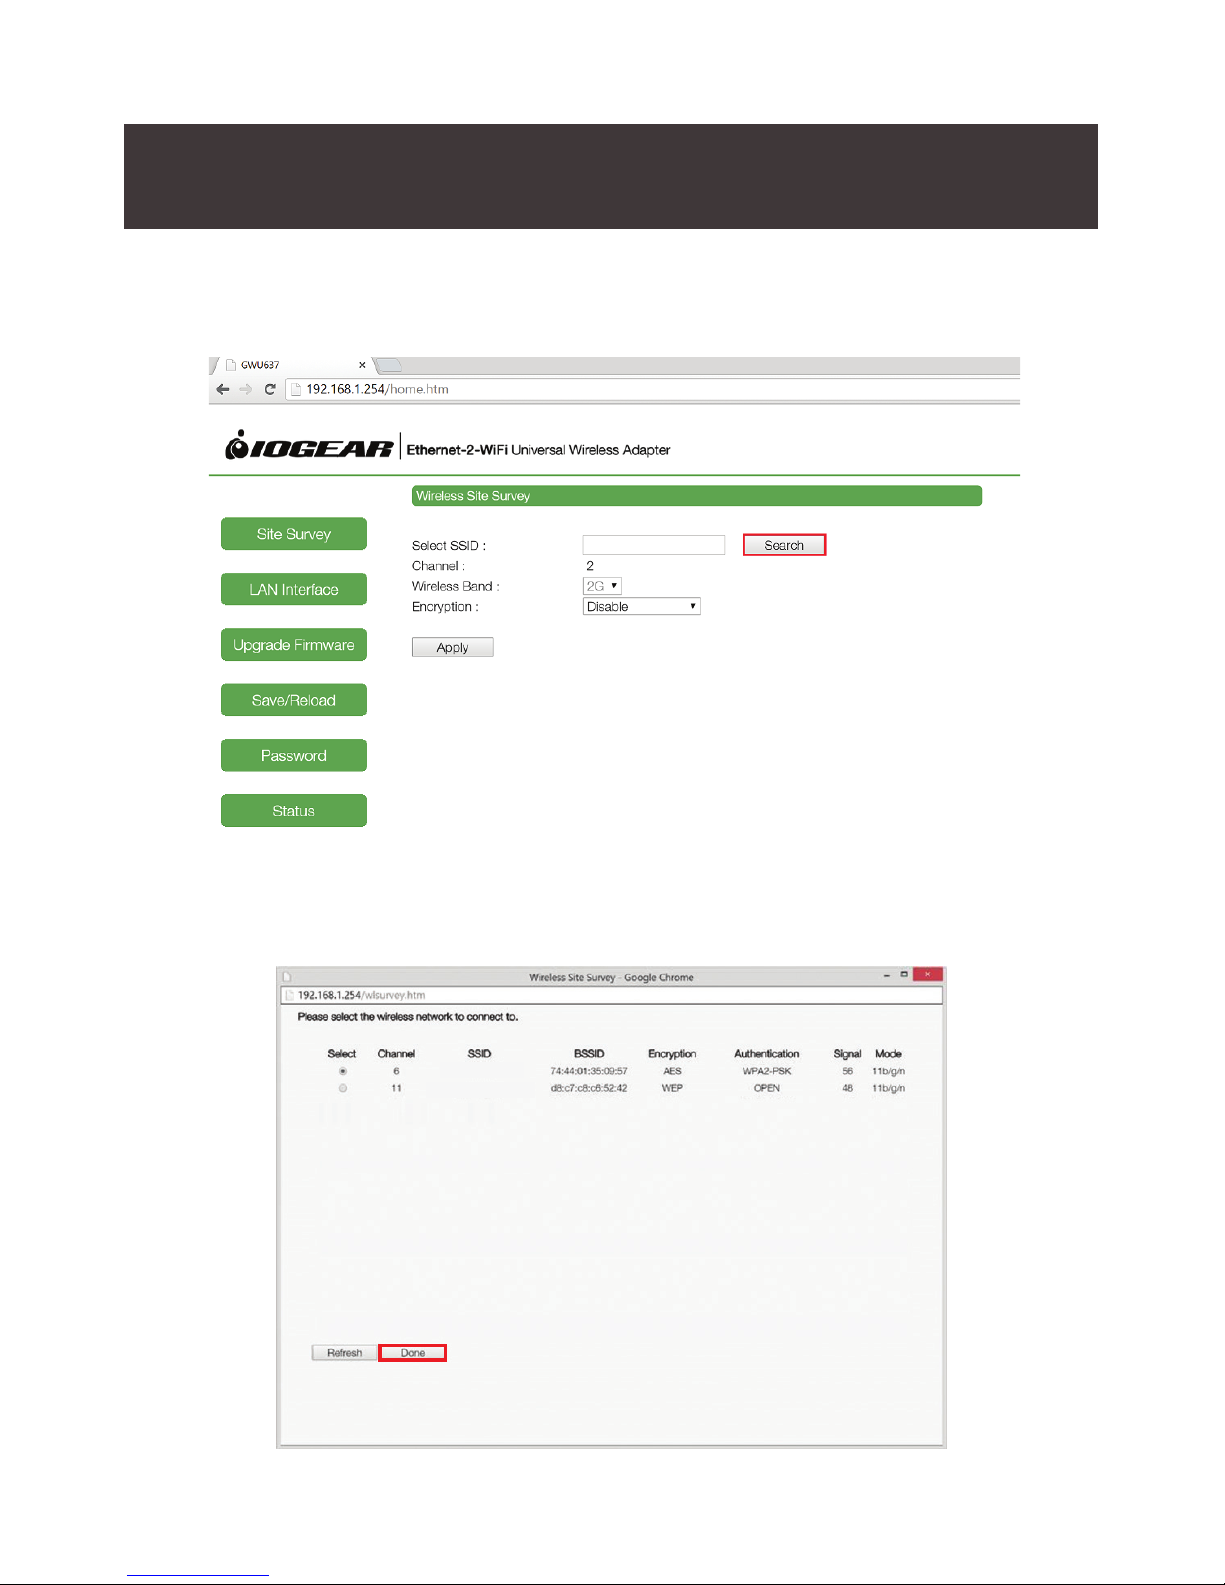
11. The Ethernet-2-WiFi conguration utility will launch in your browser.
Next, click Search to select the wireless network to connect the adapter to.
12. The Wireless Site Survey window will open. Select the desired wireless
network to connect to and click Done.
Home Network
Office Network
Wireless Connection is NOT ACTIVE
GWU637
Home Network
12
Wireless Connection is NOT ACTIVE
GWU637
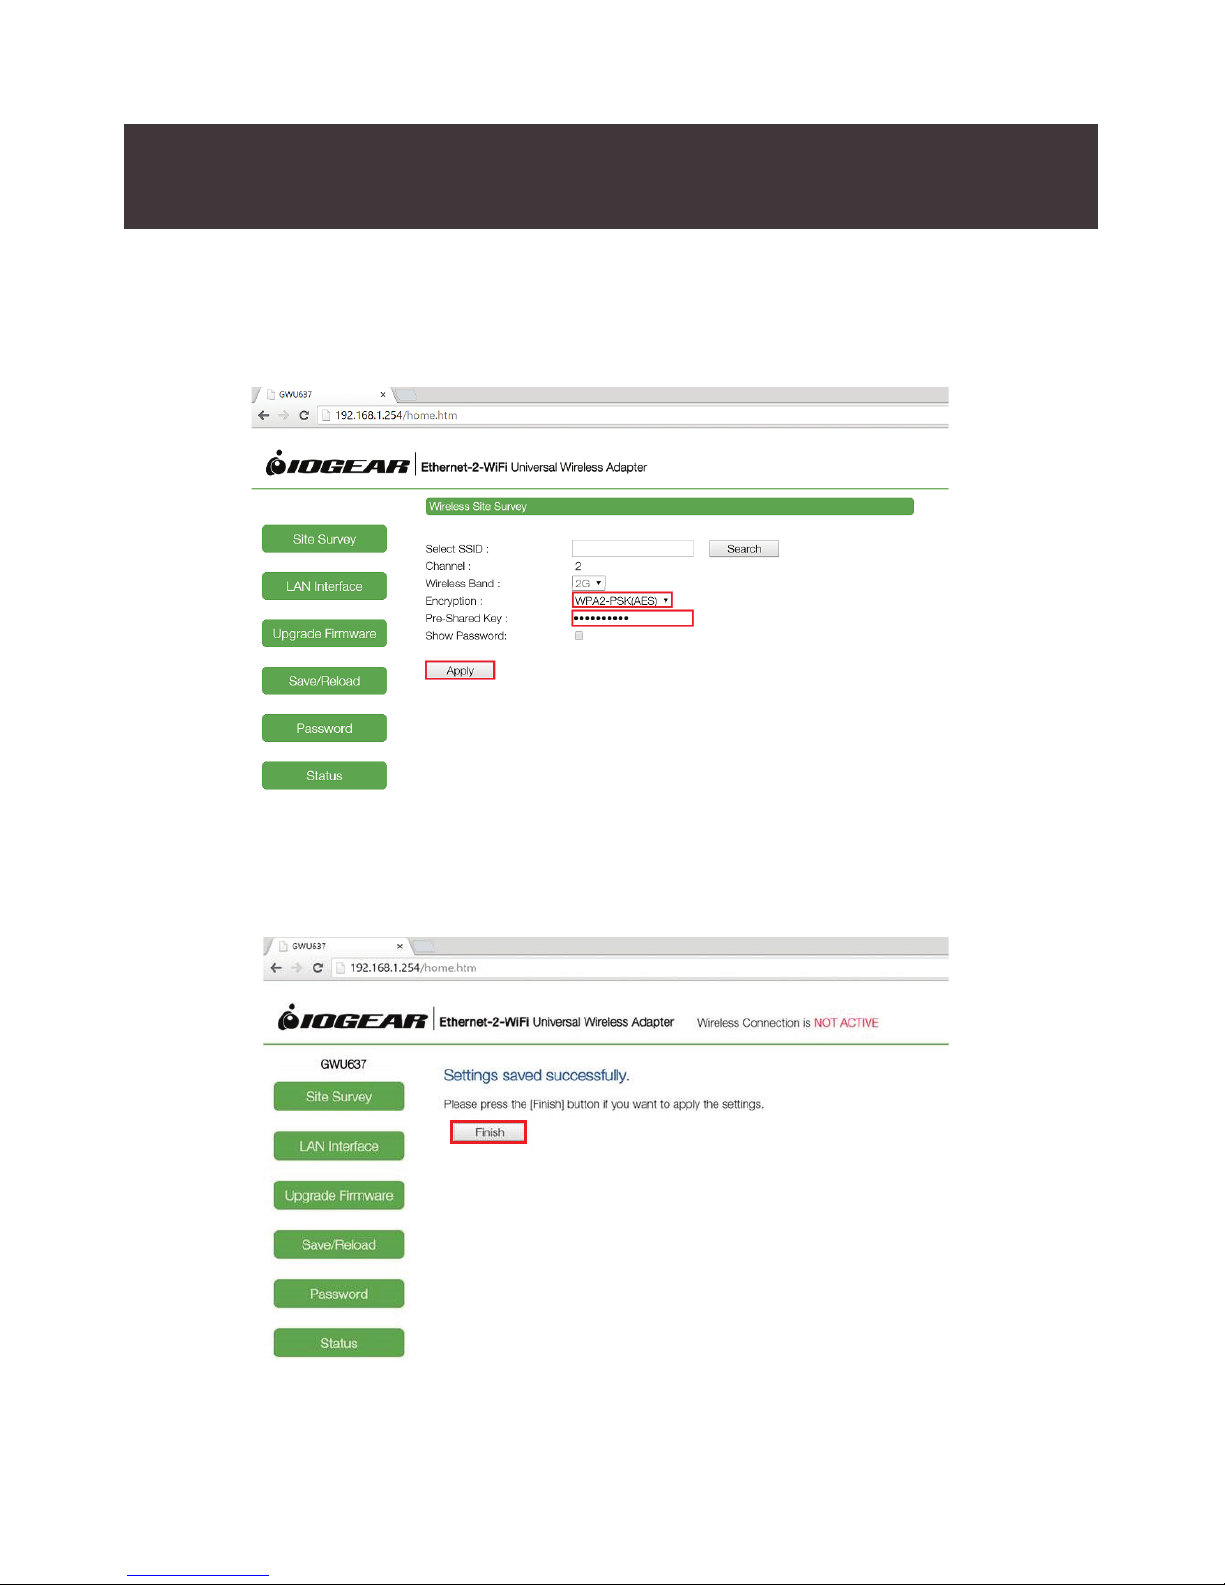
14. Click the Finish button to reect the updated settings.
13. If your wireless network is secured, choose the correct Encryption type
from the dropdown menu and enter your network password. Click the Apply
button to save settings.
Home Network
13
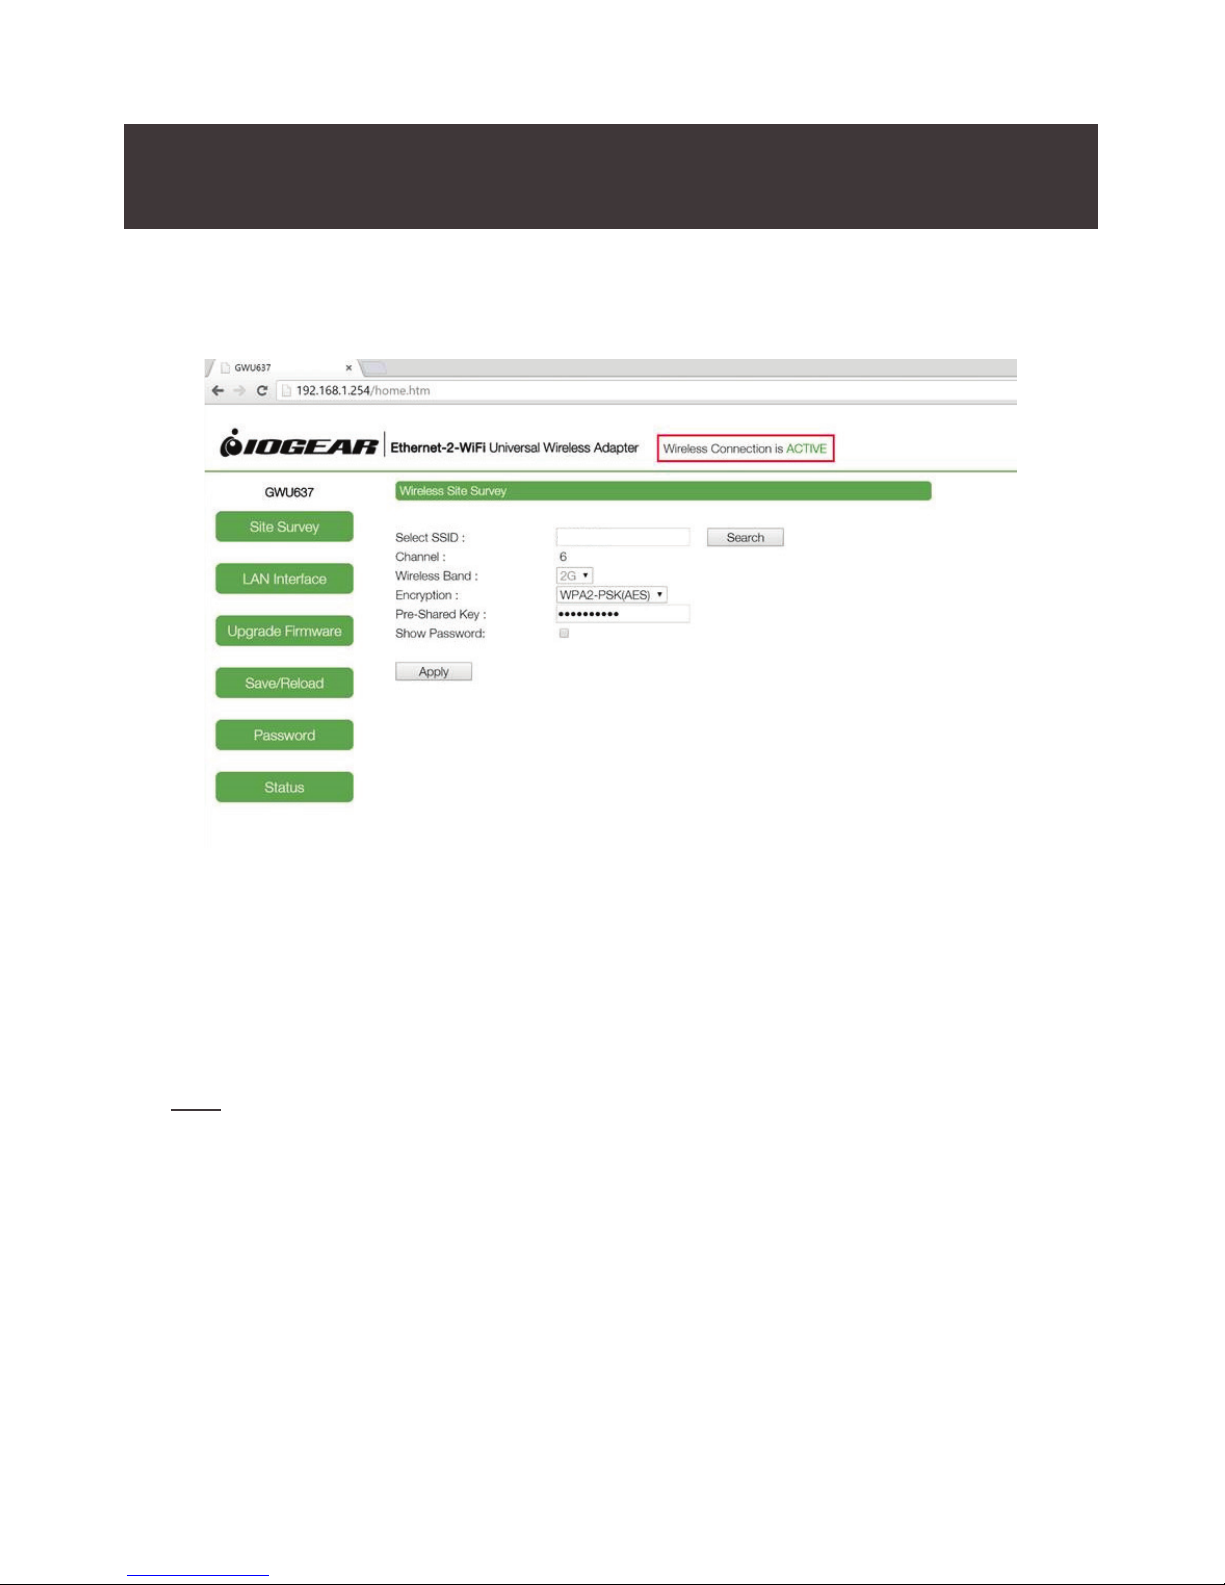
15. The adapter will reboot for 90 seconds. During the reboot process, the Wireless
Connection status will change to ACTIVE.
16. Close your browser and change the network settings on your computer back to
DHCP. Refer to steps 4 through 8.
17. Your Ethernet-2-WiFi adapter conguration is complete. Use the included
Ethernet cable to connect the adapter to your Ethernet enabled device such as
a Blu-Ray player, HDTV or game console.
Note: Make sure to set your Ethernet device’s network connection setting to WIRED
for proper operation.
Home Network
14
Wireless Conguration - MAC
1. Start by disabling your MAC’s wireless connection.
2. Next, power on your Ethernet-2-WiFi adapter using either of the following methods:
• Connect the included micro-USB cable to the USB power adapter and plug into
an available power outlet. Connect the micro-USB cable to the
Ethernet-2-WiFi adapter.
• Connect the included micro-USB cable to the Ethernet-2-WiFi adapter and plug
into an available USB port on your computer.
Note: It will take approximately 20 - 30 seconds to complete the boot-up sequence.
When complete, the WLAN LED will blink to show it’s ready to be congured.
3. Connect one end of the included Ethernet cable to the Ethernet-2-WiFi adapter.
Connect the other end of the Ethernet cable into the Ethernet port on your MAC.
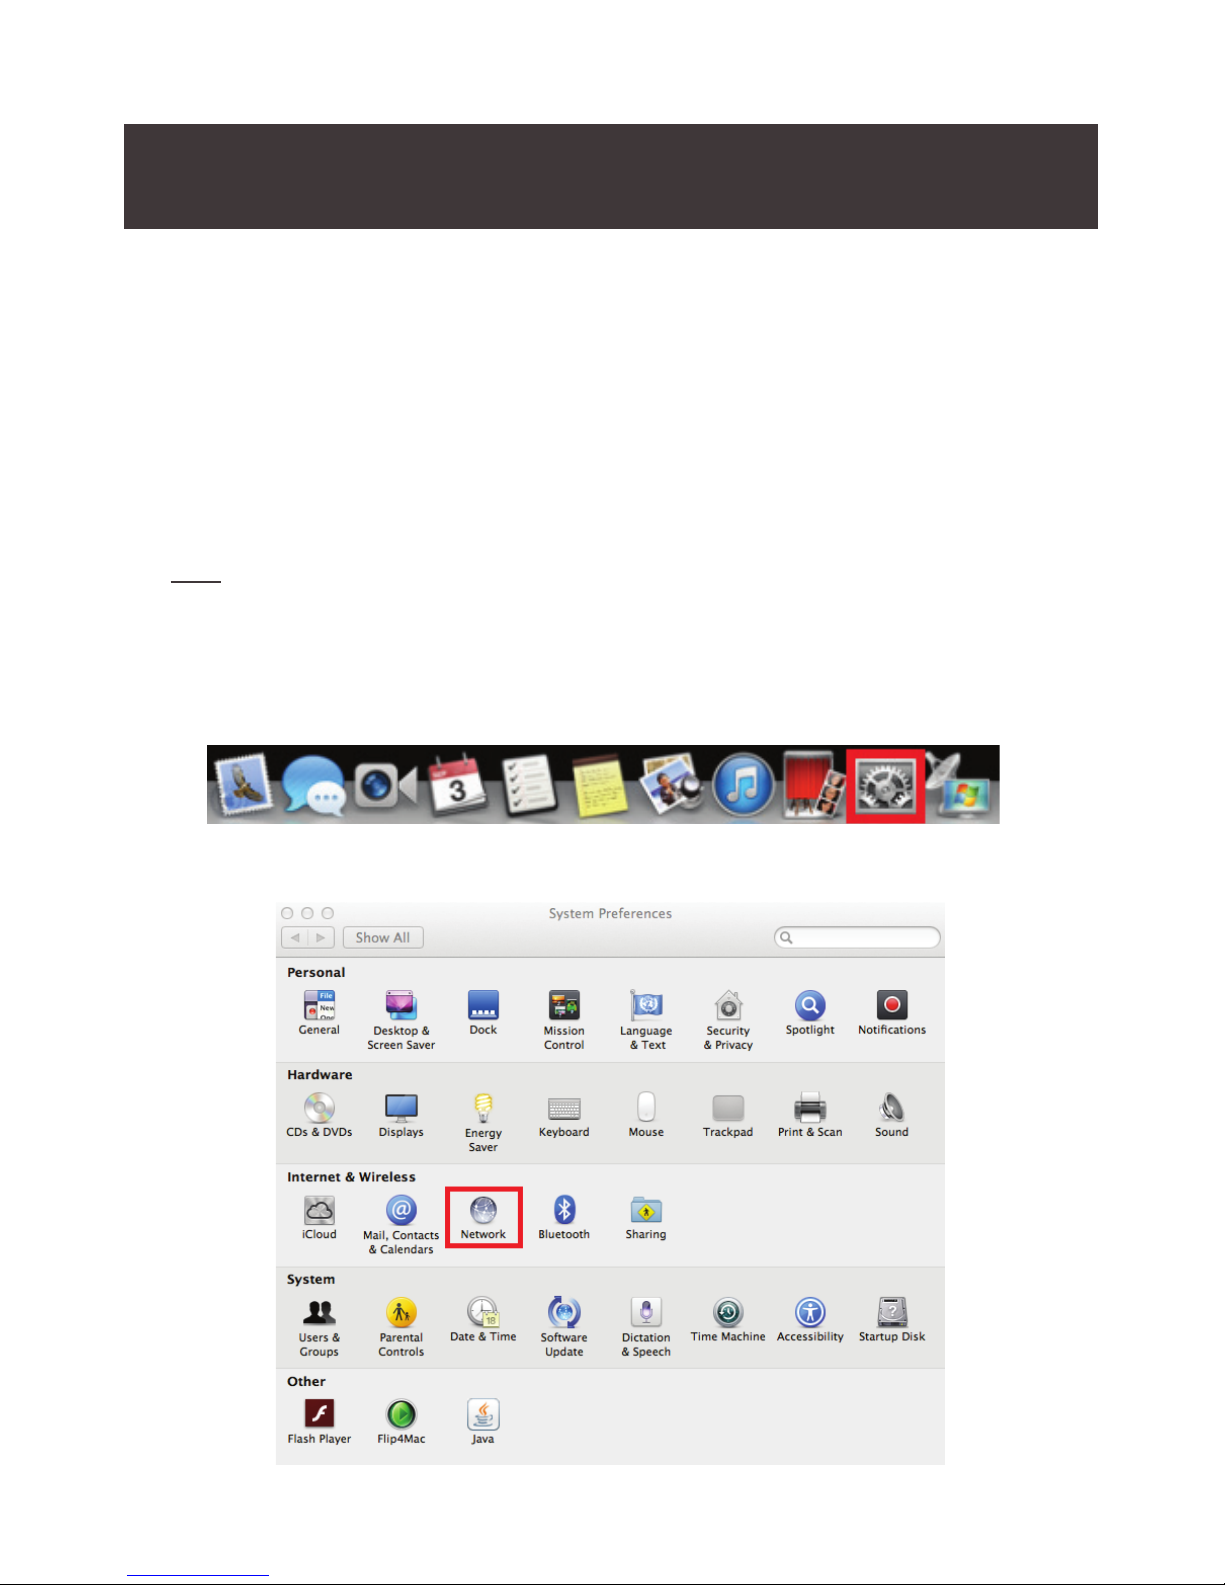
4. Open System Preferences from the Dock.
5. Select Network.
15
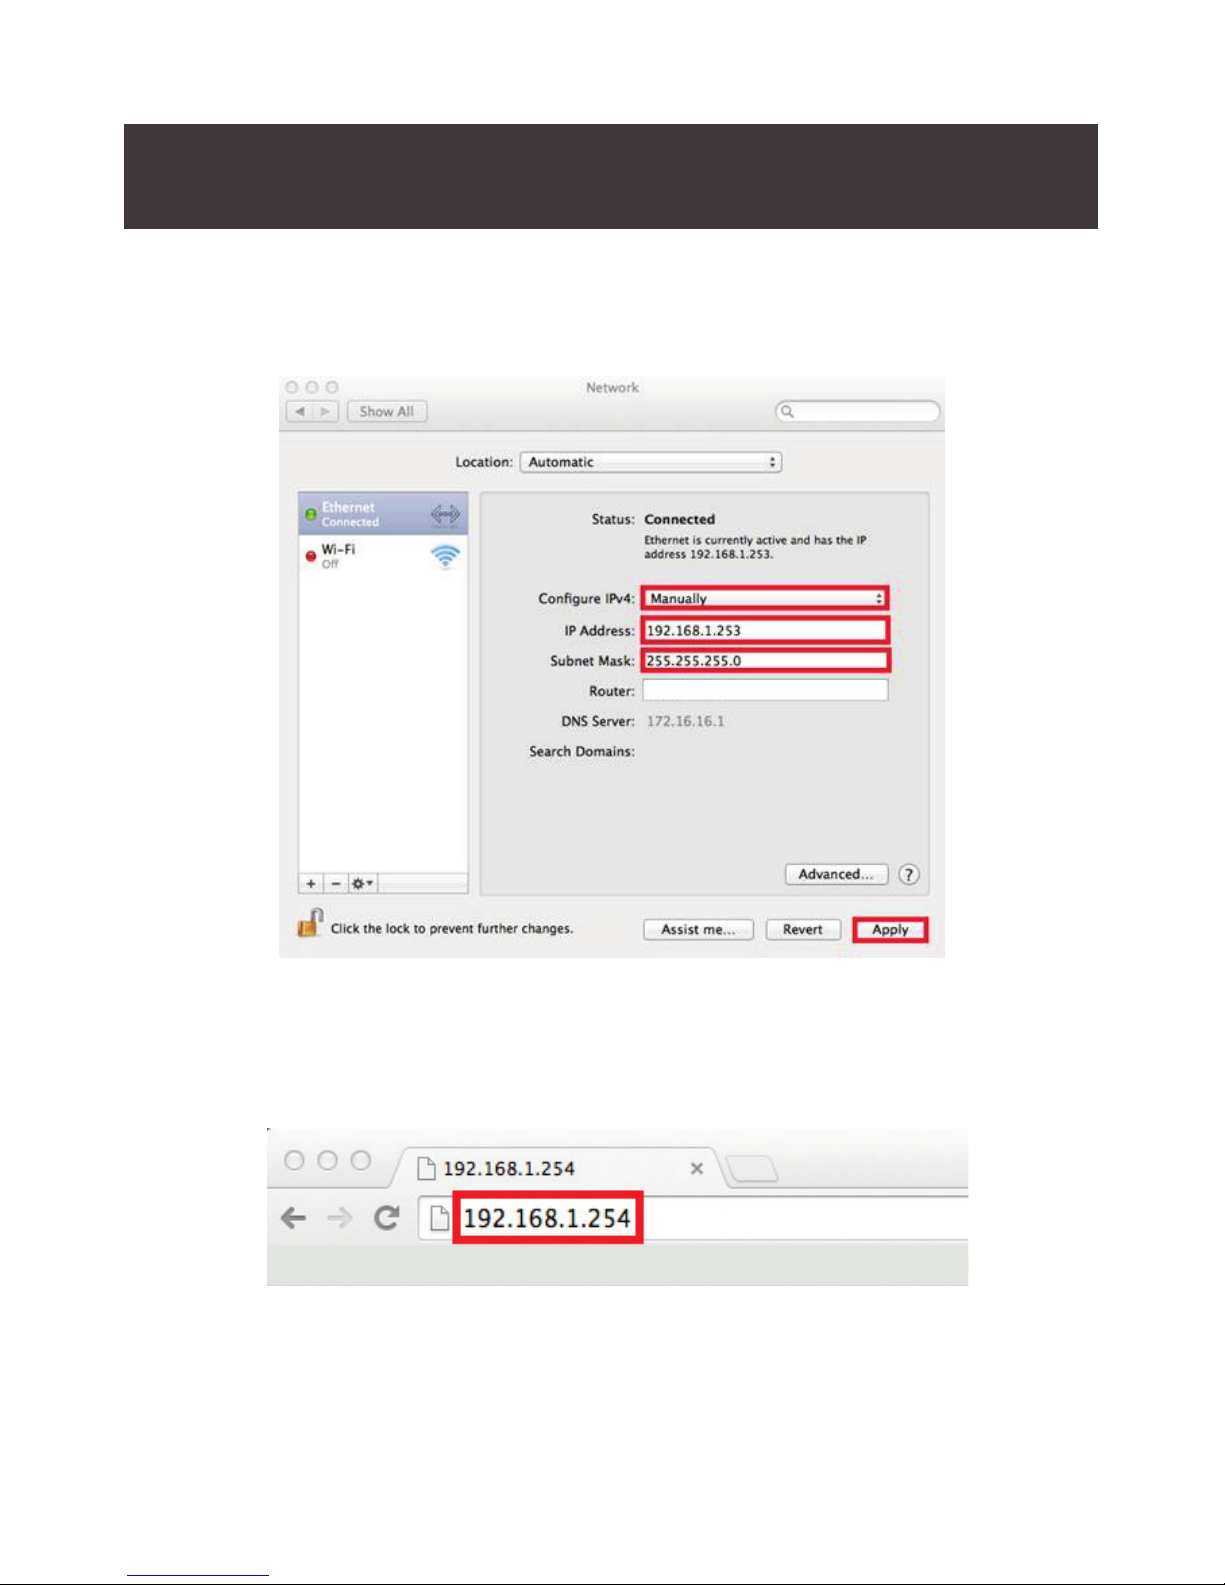
6. Select Ethernet in the left pane and select Manually from the Congure IPv4
dropdown menu. Enter 192.168.1.253 in the IP Address eld and 255.255.255.0
as Subnet Mask. Click the Apply button.
7. Open an Internet Browser and enter 192.168.1.254 in the address bar.
16
Wireless Connection is NOT ACTIVE
GWU637
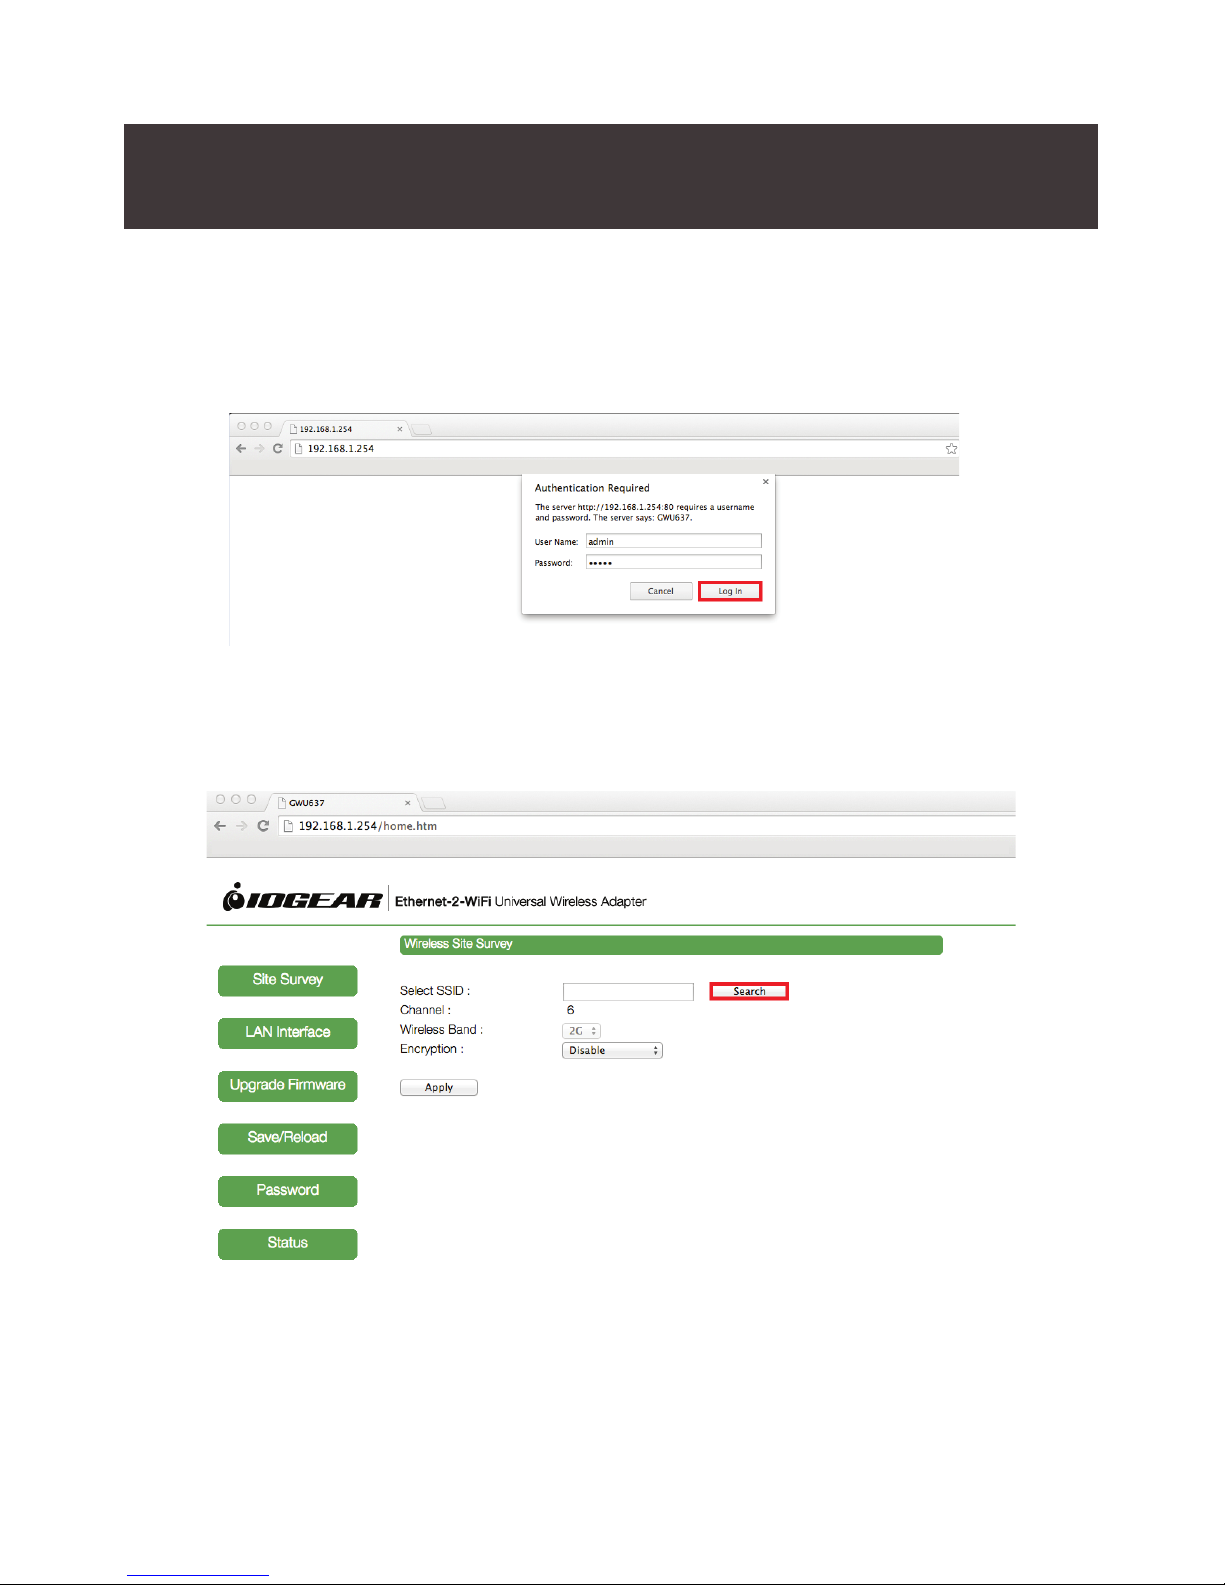
8. Enter the following factory default User Name and Password:
User Name: admin
Password: admin
Click the Log In button.
9. The Ethernet-2-WiFi conguration utility will launch in your browser. Next, click
Search to select the wireless network to connect the adapter to.
Home Network

17
10. The Wireless Site Survey window will open. Select the desired wireless network
to connect to and click Done.
11. If your wireless network is secured, choose the correct Encryption type from the
dropdown menu and enter your network password. Click the Apply button to
save settings.
Home Network
Office Network
GWU637
Wireless Connection is NOT ACTIVE
Home Network
 Loading...