

Page 1

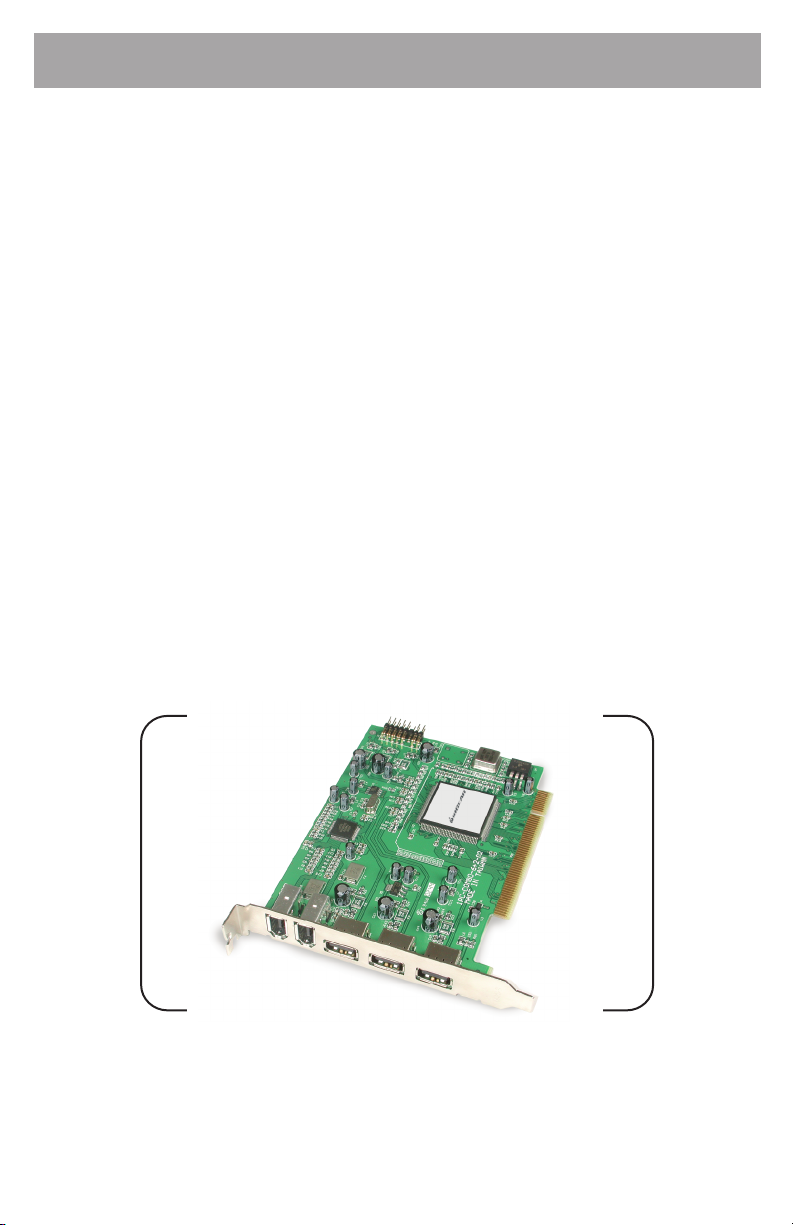
Hi-Speed USB 2.0/FireWire®
Combo PCI Card
GUF320 Quick Start Guide
Read this guide thoroughly and follow the installation and operation procedures
carefully to prevent any damage to the unit and/or any of the devices it connects to.
GUF320 package contains:
1 Hi-Speed USB 2.0/FireWire® Combo PCI card
1 Quick Start Guide
1 Installation CD-ROM
1 Warranty/Registration Card
Copyright © 2003 IOGEAR
All brand names and trademarks are the registered
property of their respective owners
PKG-M0076/QS
Page 2
1. Welcome
Thank you for purchasing IOGEAR’s Hi-Speed USB 2.0/FireWire® Combo PCI
card!
Once again, IOGEAR brings the cutting-edge technology of today and tomorrow
to your Macintosh or PC. You will enjoy the convenience and high-speed that has
made these technologies industry-standard.
Note:
Your order has been carefully packaged and inspected, and we hope you are pleased with the
IOGEAR product you purchased. Please inspect the contents of the package to ensure that you have
received all items and that nothing has been damaged. If you discover a problem, please contact your
dealer immediately for assistance.
Contact Information:
949-453-8782
23 Hubble
Irvine, CA 92618
USA
www.iogear.com
support@iogear.com
WARNING!
Your IOGEAR Hi-Speed USB 2.0/FireWire® Combo PCI Card is ESD sensitive, and can be damaged
by static electricity! Please follow proper and safe ESD handling procedures when handling this PCI
card, or opening your computer.
Please visit http://www.esda.org for information about Electro-Static Discharge.
Page 3

2. Hardware Requirements
Minimum System Requirements
Macintosh
• PowerMac G3 (Blue & White Tower) or later
• Mac OSX 10.1.5 or higher is required for USB 2.0 functionality
• 64MB of RAM
• Available PCI Slot
PC
• Pentium® or K6® – class processor (266Mhz or higher)
• Windows 98 Second Edition or later
• 64MB of RAM
• Available PCI Slot
Recommended System Requirements
Macintosh
• PowerMac G4 1.0Ghz or higher
• Mac OSX 10.2.5 (Jaguar) or later
• 256MB RAM
• Available PCI Slot
PC
• AMD Athlon® 2100+ or Intel Pentium® 4 2.0Ghz Processor
• Microsoft Windows XP or later
• 256MB RAM
• Available PCI Slot
3. Features
Product Features
• Two External FireWire® Ports
• Three External High-Speed USB 2.0 Ports
• 100% Backward-Compatible with USB v1.1 Devices
• Supports FireWire® Data Transfer Rates of 400Mbps
• Supports USB 2.0 Data Transfer Rates of 480Mbps
• Built to Industry-Standard IEEE 1394, 1394OHCI v1.0, and USB 2.0
Specifications
• Backed by IOGEAR’s Industry-leading 3-Year Factory Warranty!
Page 4

4. Installing the Combo PCI Card
Warning!
Carelessness in installing this device can result in permanent damage to your
computer, and will void your warranty. Please use care any-time you open your
Mac or PC and follow the manufacturer’s guidelines for proper handling
proceedures.
Win 98SE and ME users, please proceed to the next page for instructions on
installing the needed software prior to installing the PCI card.
Step. 1
Shut down your computer
Warning! - Always shut down your Computer before opening it to avoid
damaging its internal components or the components you want to install. Do not
open the computer or attempt to install items inside it while it is turned on. After
shutting down your computer, the internal components can be very hot. Let the
computer cool down before continuing.
Step. 2
Wait five to ten minutes to allow the computer's internal components to cool.
Step. 3
Unplug all the cables from the computer, except the power cord.
Step. 4
Open your computer's case.
Step. 5
Locate an open PCI slot within your computer.
Page 5

Step. 6
Use a non-magnetic screwdriver to unscrew and remove the PCI slot's metal cover.
Step. 7
Slide the IOGEAR Hi-Speed USB 2.0/FireWire
slot.
®
Combo Card into the open PCI
Step. 8
Install the locking-screw to secure the IOGEAR Hi-Speed USB 2.0/FireWire
Combo Card into the computer, then close the computer case.
5. Software Installation
FOR WINDOWS® 98SE & ME
®
Step. 1
Assuming your computer is already booted-up, and sitting at the Windows
desktop, please insert the IOGEAR CD-ROM that was included with your
IOGEAR USB 2.0/FireWire PCI Card
Page 6

Step. 2
• Open My Computer
• Open the IOGEAR CD
• Open the GUF320 folder
• Double-click the Installation file
Step. 3
The installation procedure will begin. Once it has finished, click the “Restart Later”
radio button, then click Finish.
Step. 4
Remove the IOGEAR CD-ROM from your computer and insert your Windows CDROM.
Step. 5
Shut-down your computer, leaving the Windows CD-ROM inside your computer.
Step. 6
It is now time to install the PCI card into your computer. Once the PCI card is
installed please come back to this section and proceed with step 6.
Step. 7
Boot your computer. You may be asked… 1) BOOT FROM HARD DRIVE or
2) BOOT FROM CD-ROM.
Select BOOT FROM HARD DRIVE.
Step. 8
As your computer boots into the Windows Operating System, it will begin to
prompt you for the drivers that belong to the IOGEAR USB 2.0/FireWire PCI Card.
The first thing Windows will detect is the “Ali PCI to USB Open Host Controller”.
Click Next
Step. 9
You will now be asked whether you wish to “Search for a list of compatible drivers”
or “Display a list of compatible drivers”. Select “Search...” then click Next.
Page 7

Step. 10
You will now be asked where to find these illustrious drivers. Uncheck all boxes
(Floppy, Hard Drive, Windows Update, etc.) except CD-ROM, then click Next.
Step. 11
Windows will find the drivers on the Windows CD-ROM, then proceed to ask you
“Which driver do you wish to install?” Since the Ali PCI to USB Open Host
Controller driver is already selected, we can safely click Finish.
Step. 12
This process will repeat 3 times – This process will repeat 3 times - This process
will repeat 3 times.
Step. 13
Now comes the fun part -- Hold on, we’re almost finished!
Windows will now detect a PCI OHCI Compliant IEEE 1394 Host Controller –
Wow…try saying that three times fast!
Step. 14
Windows will prompt you for the location of the device drivers for the PCI OHCI
Compliant IEEE 1394 Host Controller. Select “Search for a list of compatible
drivers” then click Next.
Step. 15
Ensure CD-ROM is the only location checked, then click Next.
Windows will now ask you if you wish to install the updated driver for the PCI
OHCI Compliant IEEE 1394 Host Controller, click Finish.
Step. 16
In a few short moments, the Windows desktop will appear.
There, now wasn’t that easy? You’ve now installed your IOGEAR USB
2.0/FireWire PCI Card all on your very own!
Page 8

FOR WINDOWS® 2000 & XP
Your Windows 2000/XP operating system natively supports the USB 2.0/FireWire®
Combo PCI card – No drivers are necessary!
However, please ensure you have the latest Service Packs installed…
• Windows 2000 – Service Pack 2 or later
• Windows XP – Service Pack 1 or later
FOR MACINTOSH – OSX 10.1.5 AND ABOVE
The USB 2.0/FireWire® Combo PCI card is natively supported within the OSX
operating system, with the exception of USB 2.0 functionality.
In an effort to provide our customers with the latest driver stack available, please
visit our website (http://www.iogear.com/support/download.php) to obtain the
latest USB 2.0 driver stack for OSX 10.1.x and OSX 10.2.x
To ensure your Combo PCI card is installed properly, check the Apple
System Profiler (under PCI Cards) to ensure that it is being detected.
Congratulations! You have completed installing the
IOGEAR Hi-Speed USB 2.0/FireWire
®
Combo PCI Card.
Page 9

6. Radio and TV Interference
This equipment has been tested and found to comply with the limits for a
Class B digital device, pursuant to Part 15 of the FCC Rules. These limits are
designed to provide reasonable protection against harmful interference in a
residential installation. This equipment generates, uses and can radiate radio
frequency energy and if not installed and used in accordance with the
instructions, may cause harmful interference to radio communications. However,
there is no guarantee that interference will not occur in a particular installation
IN NO EVENT SHALL THE DIRECT VENDOR'S LIABILITY EXCEED THE
PRICE PAID FOR THE PRODUCT FROM DIRECT, INDIRECT, SPECIAL,
INCIDENTAL, OR CONSEQUENTIAL DAMAGES RESULTING FROM THE
USE OF THE PRODUCT, DISK OR ITS DOCUMENTATION.
7. Warranty
IN NO EVENT SHALL THE DIRECT VENDOR'S LIABILITY FOR DIRECT,
INDIRECT, SPECIAL, INCIDENTAL OR CONSEQUENTIAL DAMAGES
RESULTING FROM THE USE OF THIS PRODUCT, DISK, OR ITS
DOCUMENTATION EXCEED THE PRICE PAID FOR THE PRODUCT.
The direct vendor makes no warranty or representation, expressed, implied, or
statutory with respect to the contents or use of this documentation, and especially
disclaims its quality, performance, merchantability, or fitness for any particular
purpose.
The direct vendor also reserves the right to revise or update the device or
documentation without obligation to notify any individual or entity of such
revisions, or updates. For further inquiries please contact your direct vendor.
 Loading...