

IOGear GUD3C01 Quick Start Manual

GUD3C01
PART NO. Q1390-a
www.iogear.com
Quick Start Guide
USB Type-C™ Docking Station
Guide de demarrage rapide
Station d’accueil USB Type-C
™
Guia de confirguarcion rapide
Estaciόn base de acoplamiento y conexiόn
USB Type-C
™
Package Contents
1 x USB Type-C™ Docking Station
1 x Type-C Cable
1 x 90W AC Power Adapter
1 x Quick Start Guide
1 x Warranty Card
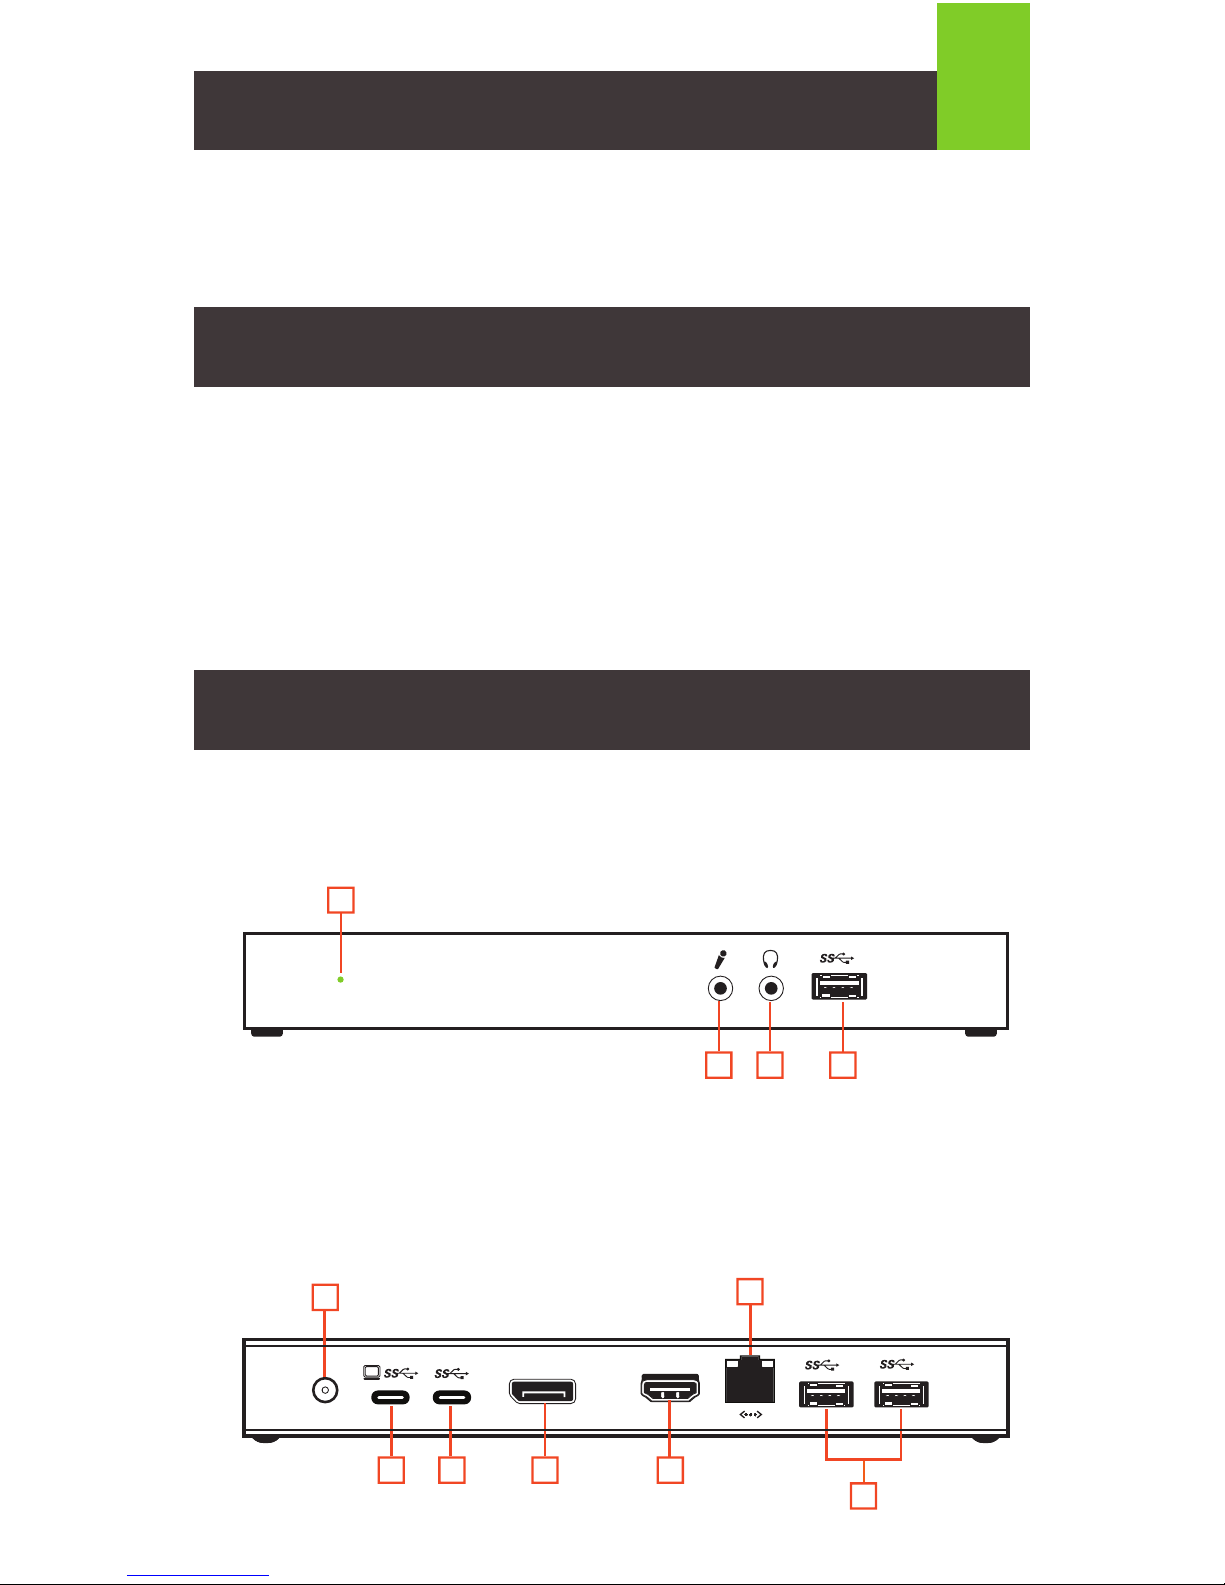
Overview
Front
1. Power-On Indicator
2. Audio Line-In
3. Audio Line-Out
4. USB 3.0 Port (Data/Charging)
Back
1. DC-In Port
2. USB Type-C host port
3. USB Type-C data port
4. DisplayPort
1
System Requirements
• USB Type-C enabled computers
• Windows
®
8.1 (32-bit / 64-bit) , Windows® 10 (32-bit / 64-bit)
• Mac OS X 10.10.5+ (Multi-Stream Transport (MST) is not supported
by Mac OSX)
• Only one additional video output can be utilized for extended desktop
under Mac OS
• Latest firmware may be required for 2016 Macbook
5. HDMI Port
6. Gigabit LAN Port
7. USB 3.0 Ports
USB Type-C™
Docking Station
1
2 3 4
HDMI
DC IN
20V 4.5A
DisplayPort
7
6
5432
1

2
Installation
Ports and Operation
Windows
1. Download the Windows driver from www.iogear.com
2. Save the .zip file where you can locate it easily.
3. Unzip the driver and run the Setup.exe file.
4. Windows should automatically install the driver. System Reboot might
be required.
5. Plug the included AC power adapter into the DC-In Port of the USB
Type-C Docking Station. Users should see a green LED light up in
the front.
6. Using the included Type-C cable, connect your USB Type-C enabled
PC to the USB Type-C host port of the USB Type-C Docking Station.
Mac OS X
1. Download the Mac OS X driver from www.iogear.com
2. Save the .dmg file where you can locate it easily.
3. Run the .dmg file.
4. Mac OS X should automatically install the driver. System Reboot might
be required.
5. Plug the included AC power adapter into the DC-In Port of the USB
Type-C Docking Station. Users should see a green LED light up in
the front.
6. Using the included Type-C cable, connect your USB Type-C enabled
Mac to the USB Type-C host port of the USB Type-C Docking Station.
1. Connect a 3.5mm audio cable for Line-in or use it as a microphone input.
2. Connect a 3.5mm audio cable for Line-out or use it as a headphone output.
3. Fast USB charging / data port to fast-charge and sync tablets
or smartphones.
Front
USB Type-C™
Docking Station
1 2
3
HDMI
DC IN
20V 4.5A
DisplayPort
75
64
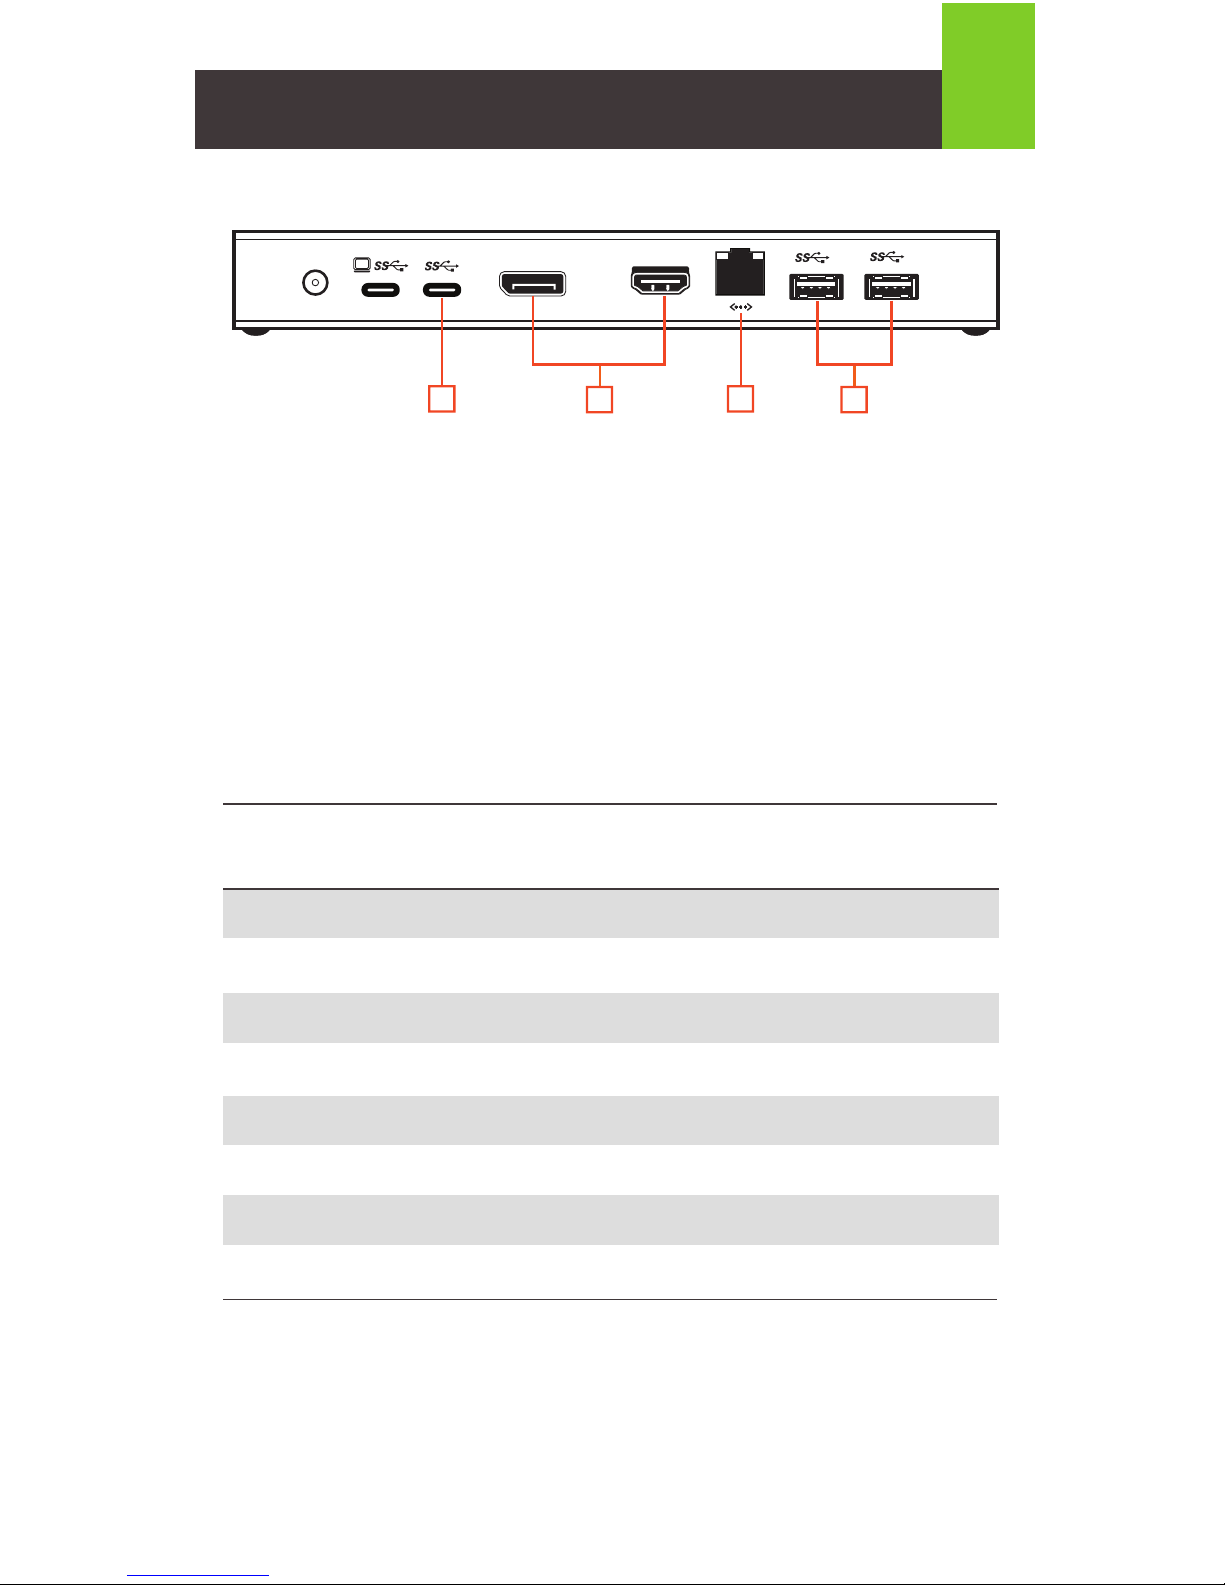
4. Connect Type-C compatible devices for easy data transfer.
5. The USB Type-C Docking Station can support an additional HDMI or
DisplayPort monitor. Connect the monitor to the docking station and your
computer will automatically detect the additional display.
6. Connect an Ethernet cable to the Gigabit LAN port for high speed
internet connection.
7. Connect any USB compatible devices. USB ports are compatible with
USB 3.0, 2.0 and 1.1 devices.
Back
3
Resolution
4K (3840 x 2160) 60Hz Yes No
4K (4096 x 2160) 60Hz Yes No
2K (2560 x 1600) 60Hz Yes Yes
4K (4096 x 2160) 30Hz Yes Yes
2k (2560 x 1600) 30Hz Yes Yes
Full HD (1920 x 1080p) 60Hz Yes Yes
4K (3840 x 2160) 30Hz Yes Yes
Full HD (1920 x 1080p) 30Hz Yes Yes
Frequency Single or
Mirror Mode
Dual Screen
Extended
Video Output Support

FCC Statement
This equipment has been tested and found to comply with the limits for a
Class B digital device, pursuant to Part 15 of the FCC Rules. These limits
are designed to provide reasonable protection against harmful interference
in a residential setting. This product generates, uses, and can radiate radio
frequency energy and, if not installed and used as directed, it may cause
harmful interference to radio communications. Although this product
complies with the limits for a Class B digital device, there is no guarantee
that interference will not occur in a particular installation.
CE Compliance
This device has been tested and found to comply with the following
European Union directives: Electromagnetic Capability (2004/108/EC).
IC Statement
Canada, Industry Canada (IC) Notices Complies with the Canadian
ICES-003 Class B specifications.
Compliance Information
External Monitor Settings: Mac OS X
Option 1: Extend Mode
1. Open System Preferences and click Displays.
2. Click on Arrangement to change the position of the displays
currently connected.
Option 2: Mirror Mode
1. Open System Preferences and click Displays.
2. Click on Arrangement.
3. Click the box marked Mirror Displays.
External Sound Settings: Mac OS X
1. Open System Preferences and click Sound.
2. Click on Arrangement to change the sound-output device to
currently connected USB DAC.
Monitor and Sound Settings
4
 Loading...