

IOGear GTD733 Quick Start Manual
GTD733
PART NO. Q1459
www.iogear.com
Quick Start Guide
Thunderbolt 3 Dual 4K Docking Station
Guide de démarrage rapide
Station d’accueil Thunderbolt 3
Guía de configuración rápide
Estación de Acoplamiento Thunderbolt 3
1
1 x GTD733
1 x AC Adapter
1 x Thunderbolt 3 Cable (0.5M)
1 x Warranty Card
Package Contents
• Thunderbolt 3 USB-C Enabled Computer
• USB-C port supports Thunderbolt 3 with DP Alt Mode
System Requirements
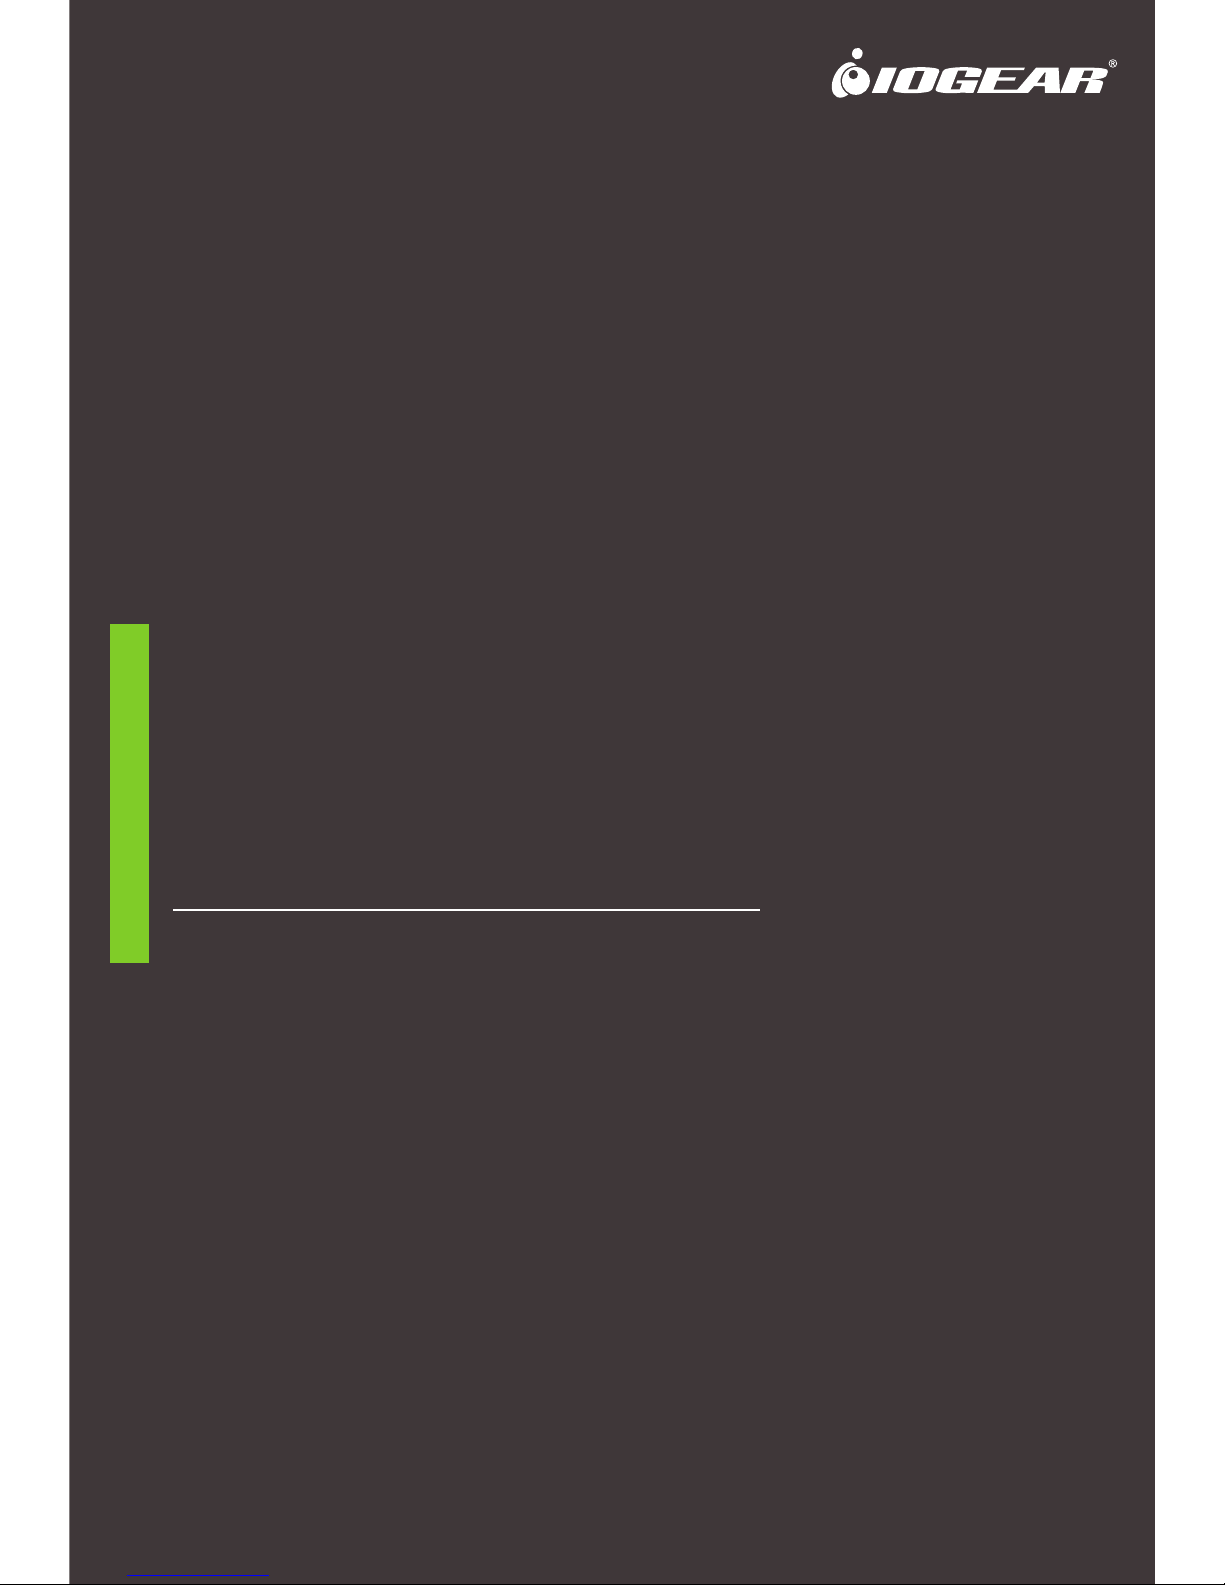
A. USB 3.1 USB-A Port
B. USB 3.1 USB-C Port
C. GbE LAN Port
D. USB 3.1 USB-A Port
E. 3.5 mm audio input
F. 3.5mm audio output
Overview
G. Thunderbolt 3 ports (1 for computer host,
1 for second video out)
H. Displayport Video Output
I. AC Adapter input
A
DisplayPort
B
C D E F
G
H I
or
2
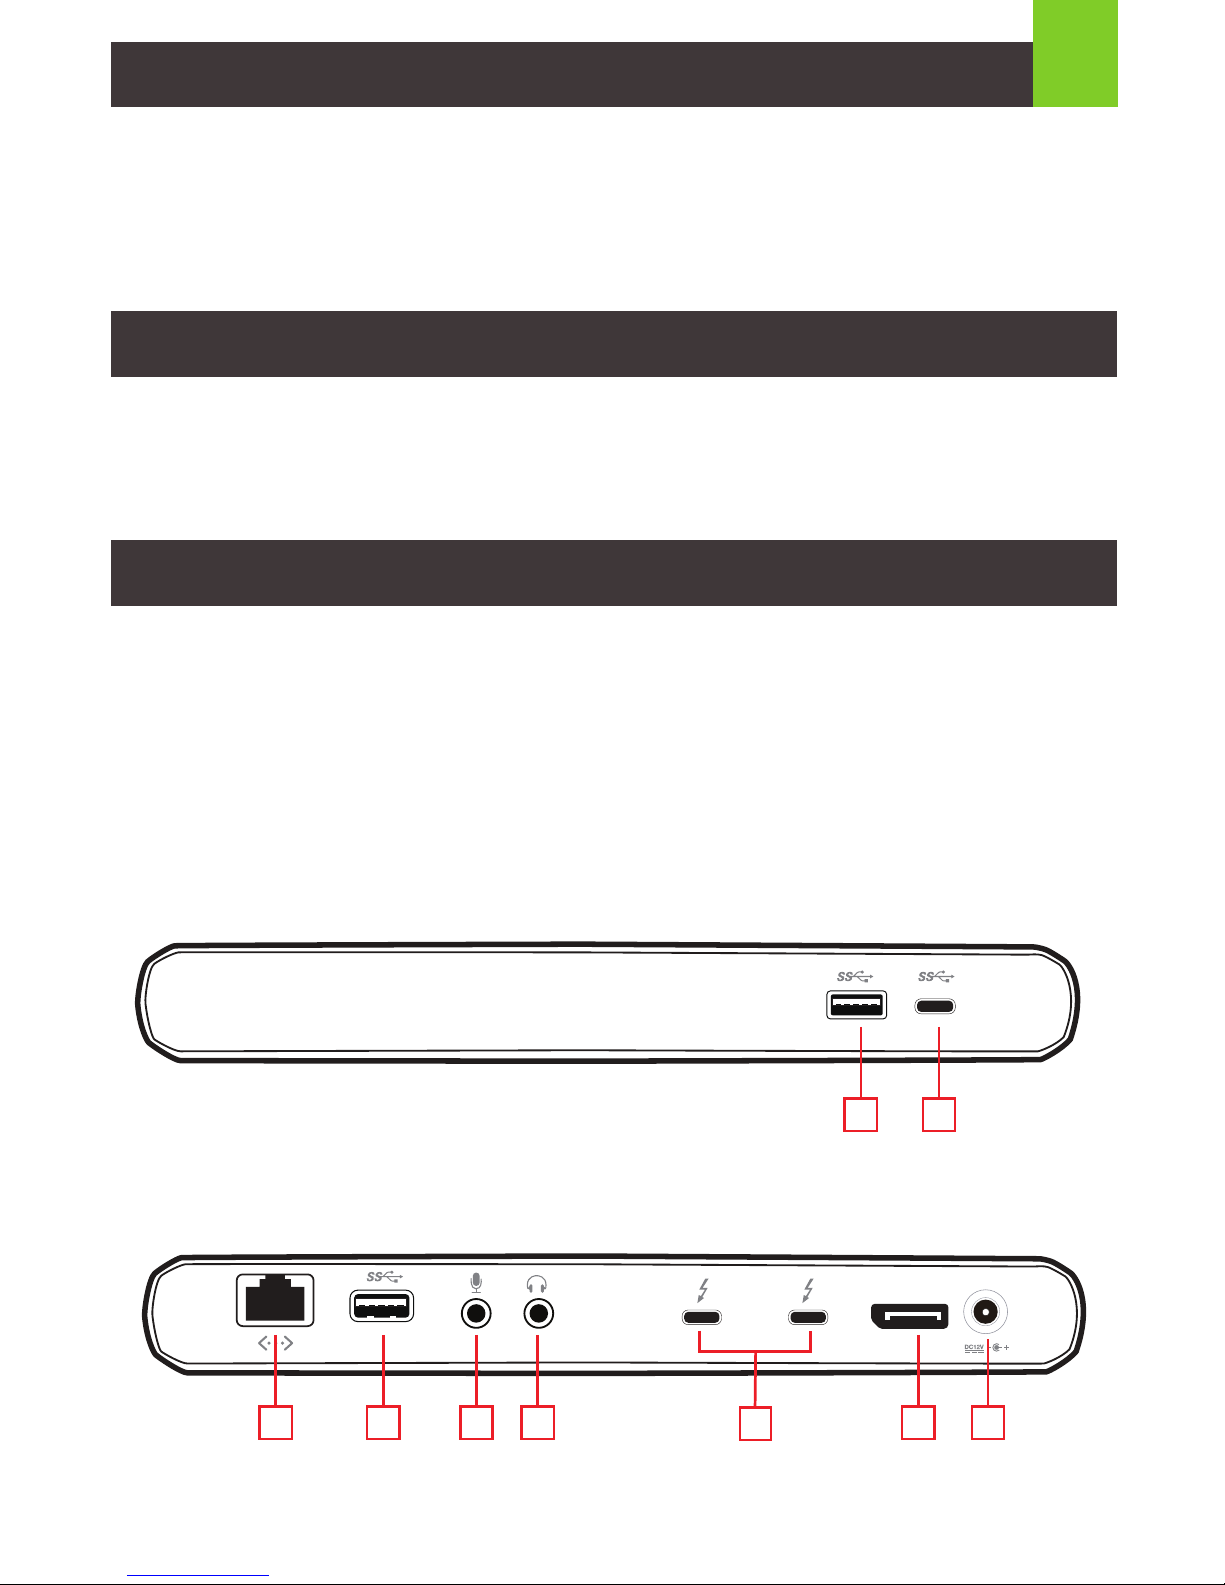
Hardware Installation
STEP 1. Connect the included AC Adapter to the DC input port on the
docking station.
STEP 2. Connect a DisplayPort cable from the docking station to the external
DisplayPort Monitor for up to 4K of resolution.*
STEP 3. You can connect a USB-C 4K Monitor directly to the rear Thunderbolt 3
port. For USB-C monitor setup, simply plug in the USB-C cable from your monitor to
the Thunderbolt 3 port. If your second monitor is equipped with HDMI, DisplayPort
or VGA input, use an USB-C to video adapter to connect it to your monitor.**
The same Thunderbolt 3 port for video output can also be utilized to connect or
daisy chain additional Thunderbolt 3 devices.
DisplayPort
DisplayPort
DisplayPort
DisplayPort
3
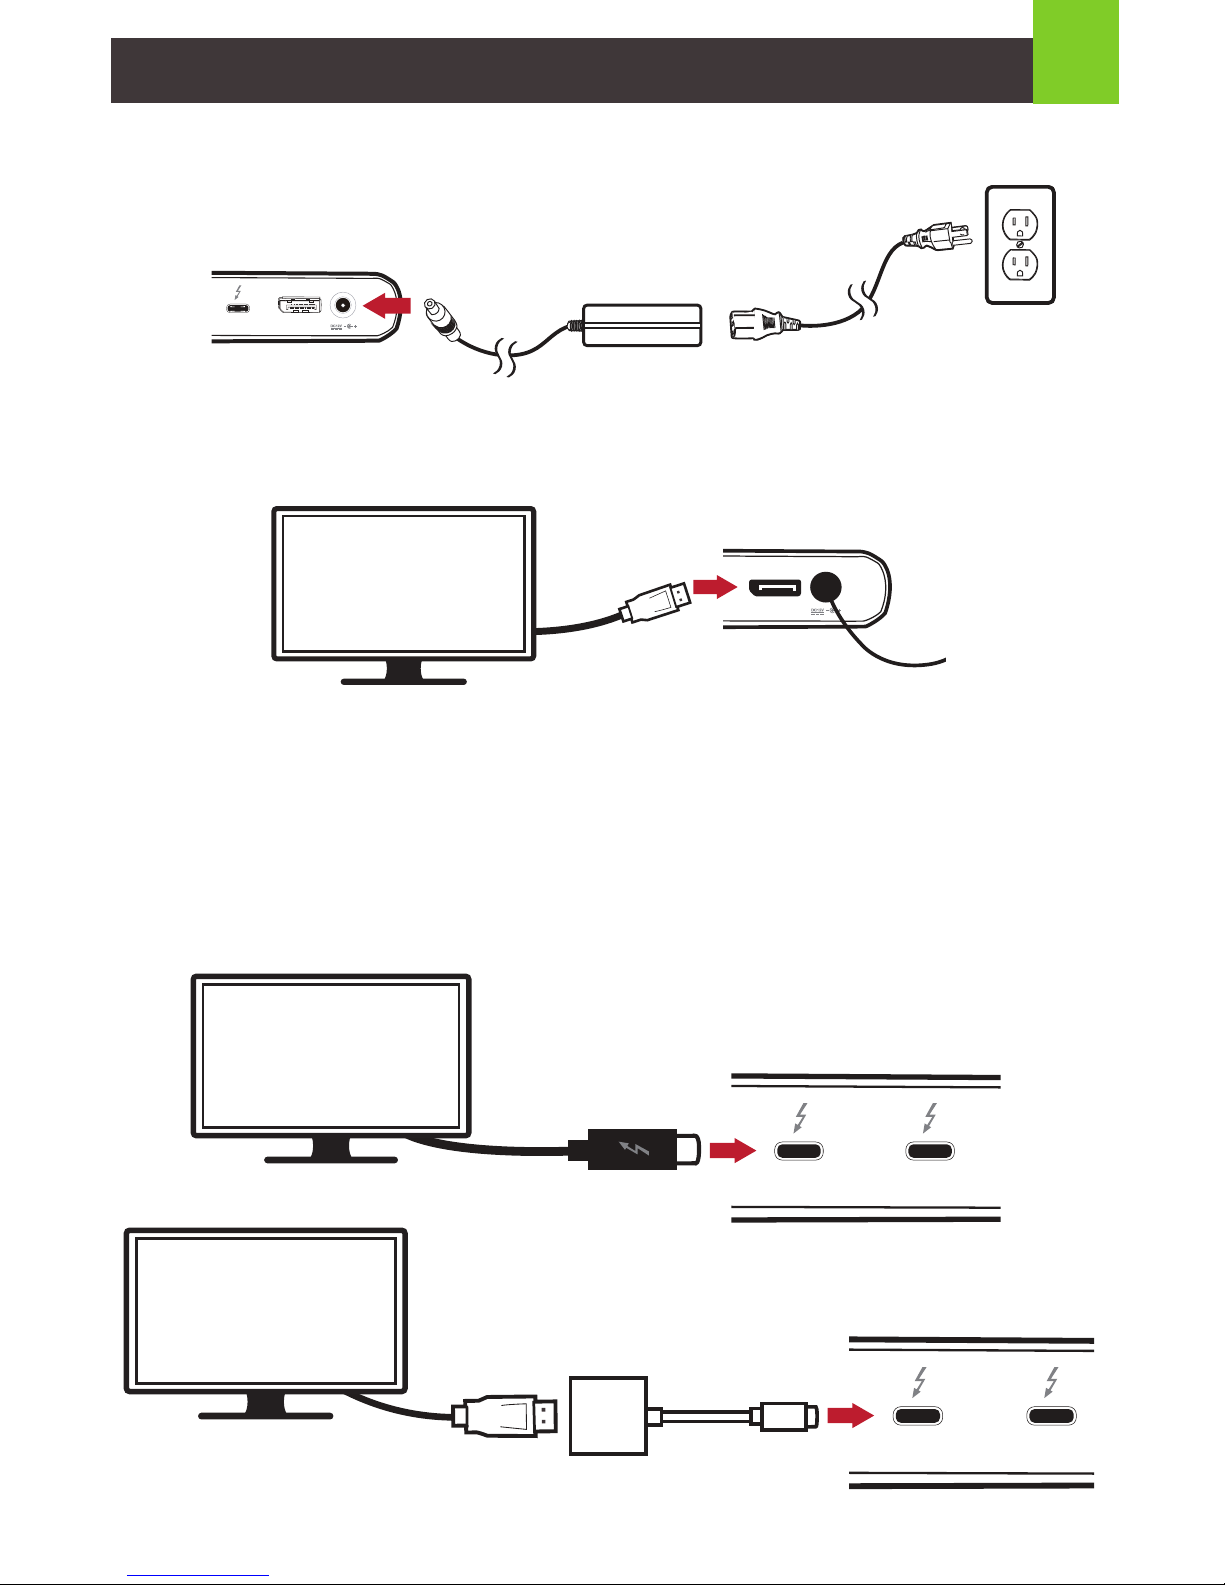
STEP 4. Connect your USB peripheral such as keyboard or mouse to the USB-A
ports on the docking station.
STEP 5. Connect your USB-C peripheral such as a card reader or hub to the front
USB-C port.
STEP 6. Connect your speaker or headphone to the 3.5mm audio output port.
STEP 7. Connect your microphone to the 3.5mm audio input port.
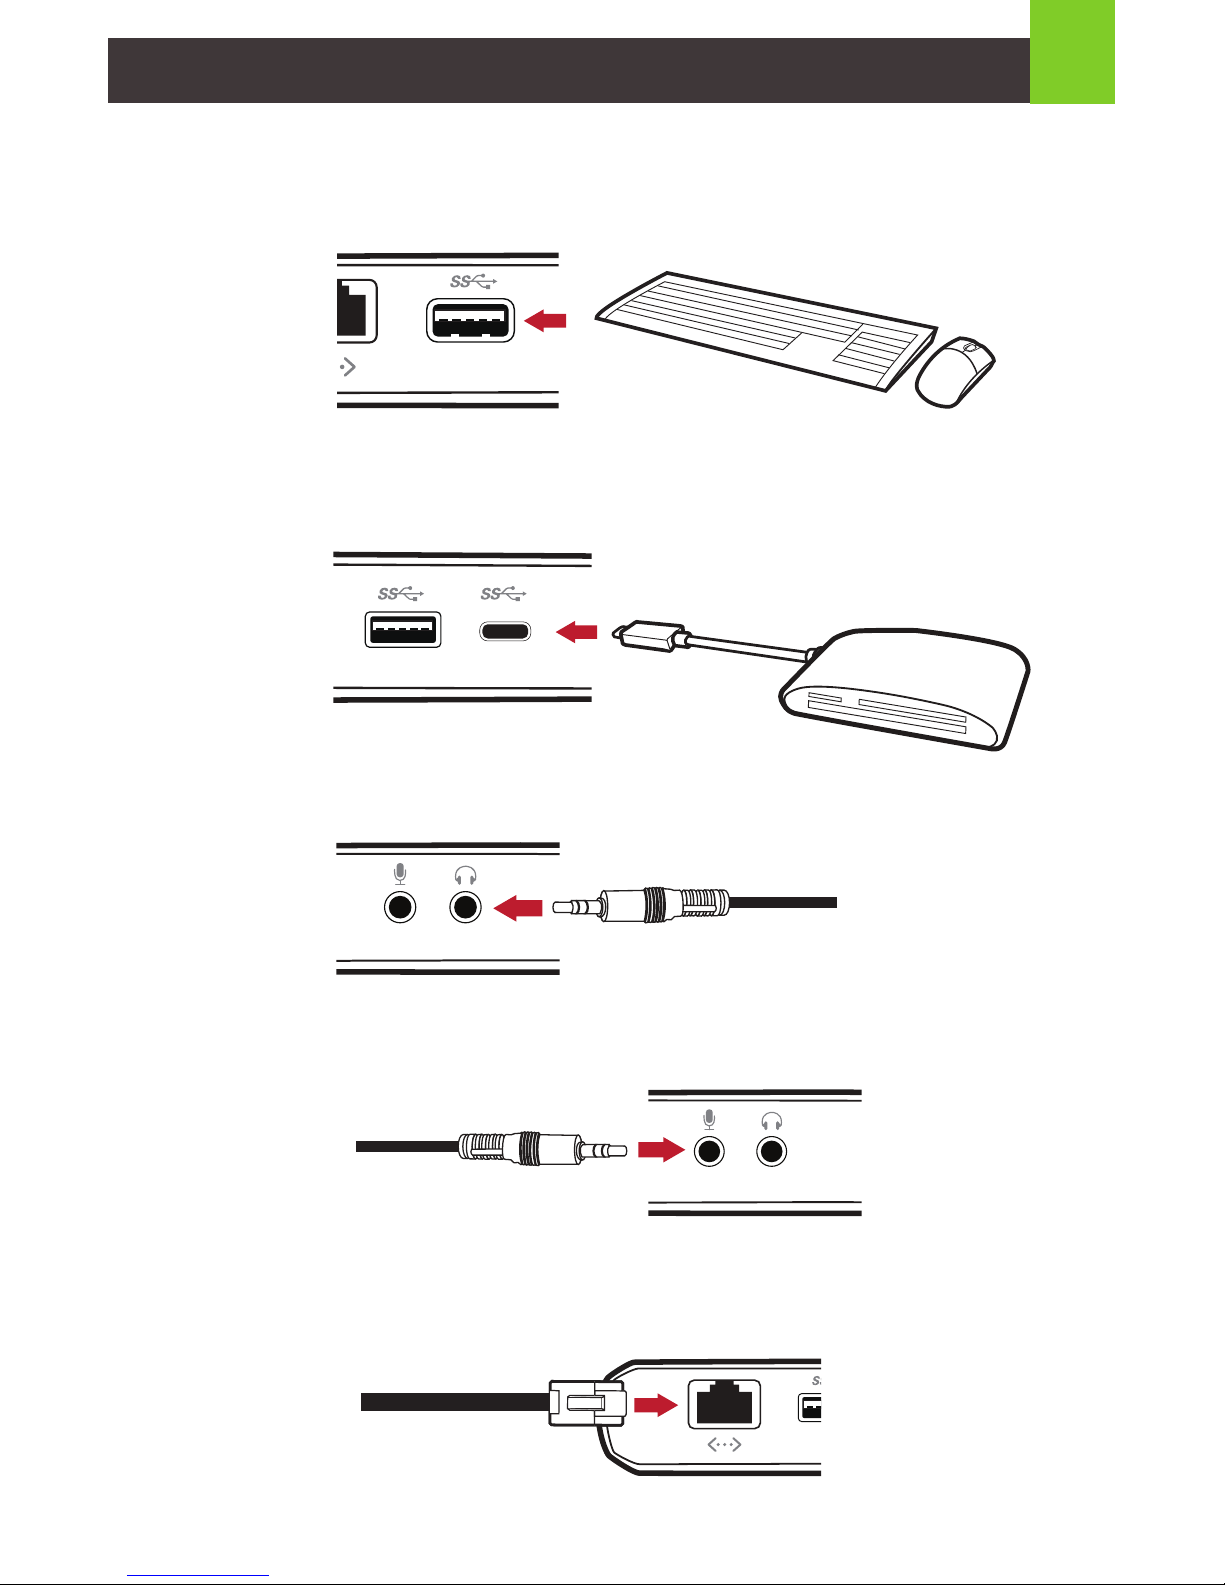
STEP 8. Connect your Ethernet cable to the Gigabit Ethernet port.
DisplayPort
DisplayPort
4
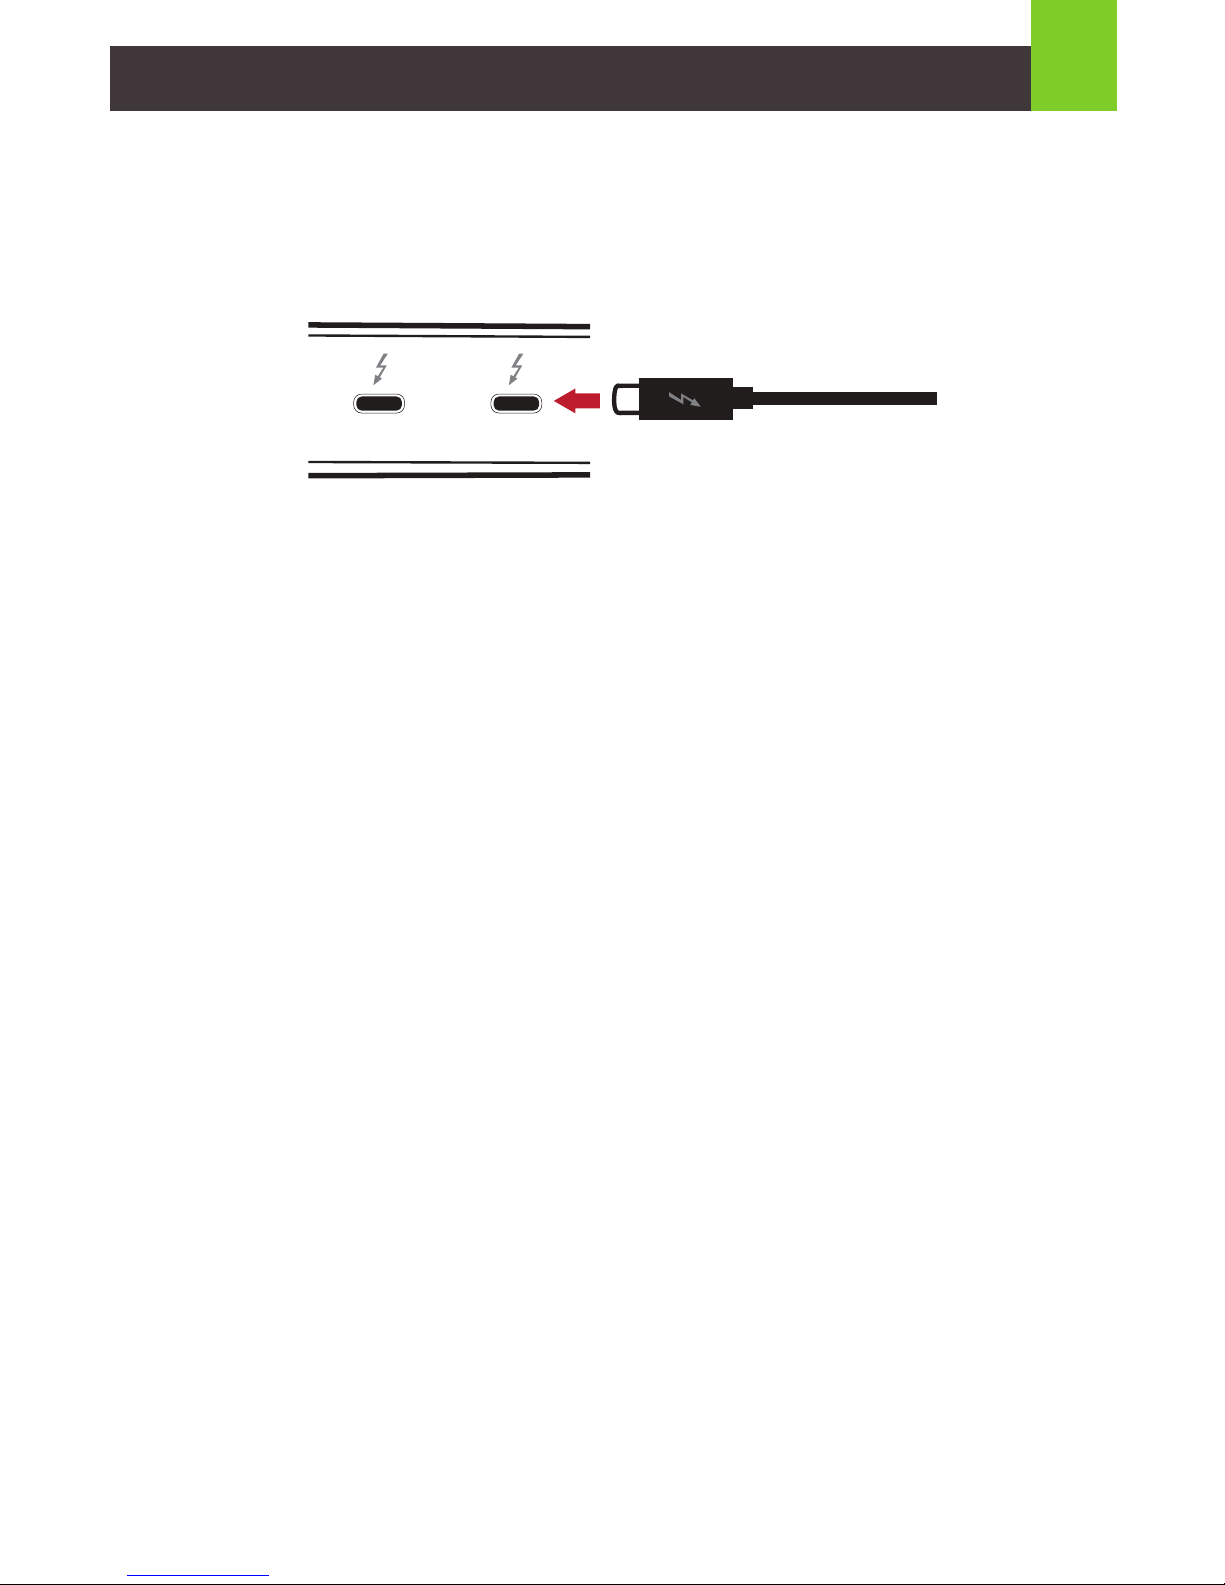
STEP 9.
Make sure your Thunderbolt 3 computer it turned on. Connect the included
Thunderbolt 3 cable from the host laptop’s Thunderbolt 3 port to the rear
Thunderbolt 3 port***
Note:
*Maximum resolution of one 5K or dual 4K is dependent on the capability of the
video display and its computer source.
** The following IOGEAR models are recommended:
• GUC3CVGA (USB-C to VGA, Max Resolution: 1920x1200)
• GUC3CVGA2 (USB-C to VGA, Max Resolution: 2048x1152)
• GUC3CHD (USB-C to HDMI, Max Resolution: 3840x2160)
• GUC3CHD2 (USB-C to HDMI, Max Resolution: 3840x2160)
• GUC3CDP (USB-C to DisplayPort, Max Resolution: 3840x2160)
• GUC3CDVI (USB-C to DVI, Max Resolution: 2560x1440)
***Thunderbolt 3 dock requires laptop equipped with Thunderbolt 3 technology.
Laptop with USB-C port may or may not contain Thunderbolt 3 Technology. Please
make sure the USB-C port on your laptop support Thunderbolt
DisplayPort
SD
microSD
CF
 Loading...