

IOGear GKM561R Quick Start Manual

2.4 GHz Multimedia Keyboard
with Optical Trackball and Scroll Wheel
Quick Start Guide
GKM561R
PART NO. Q1096-a
www.iogear.com
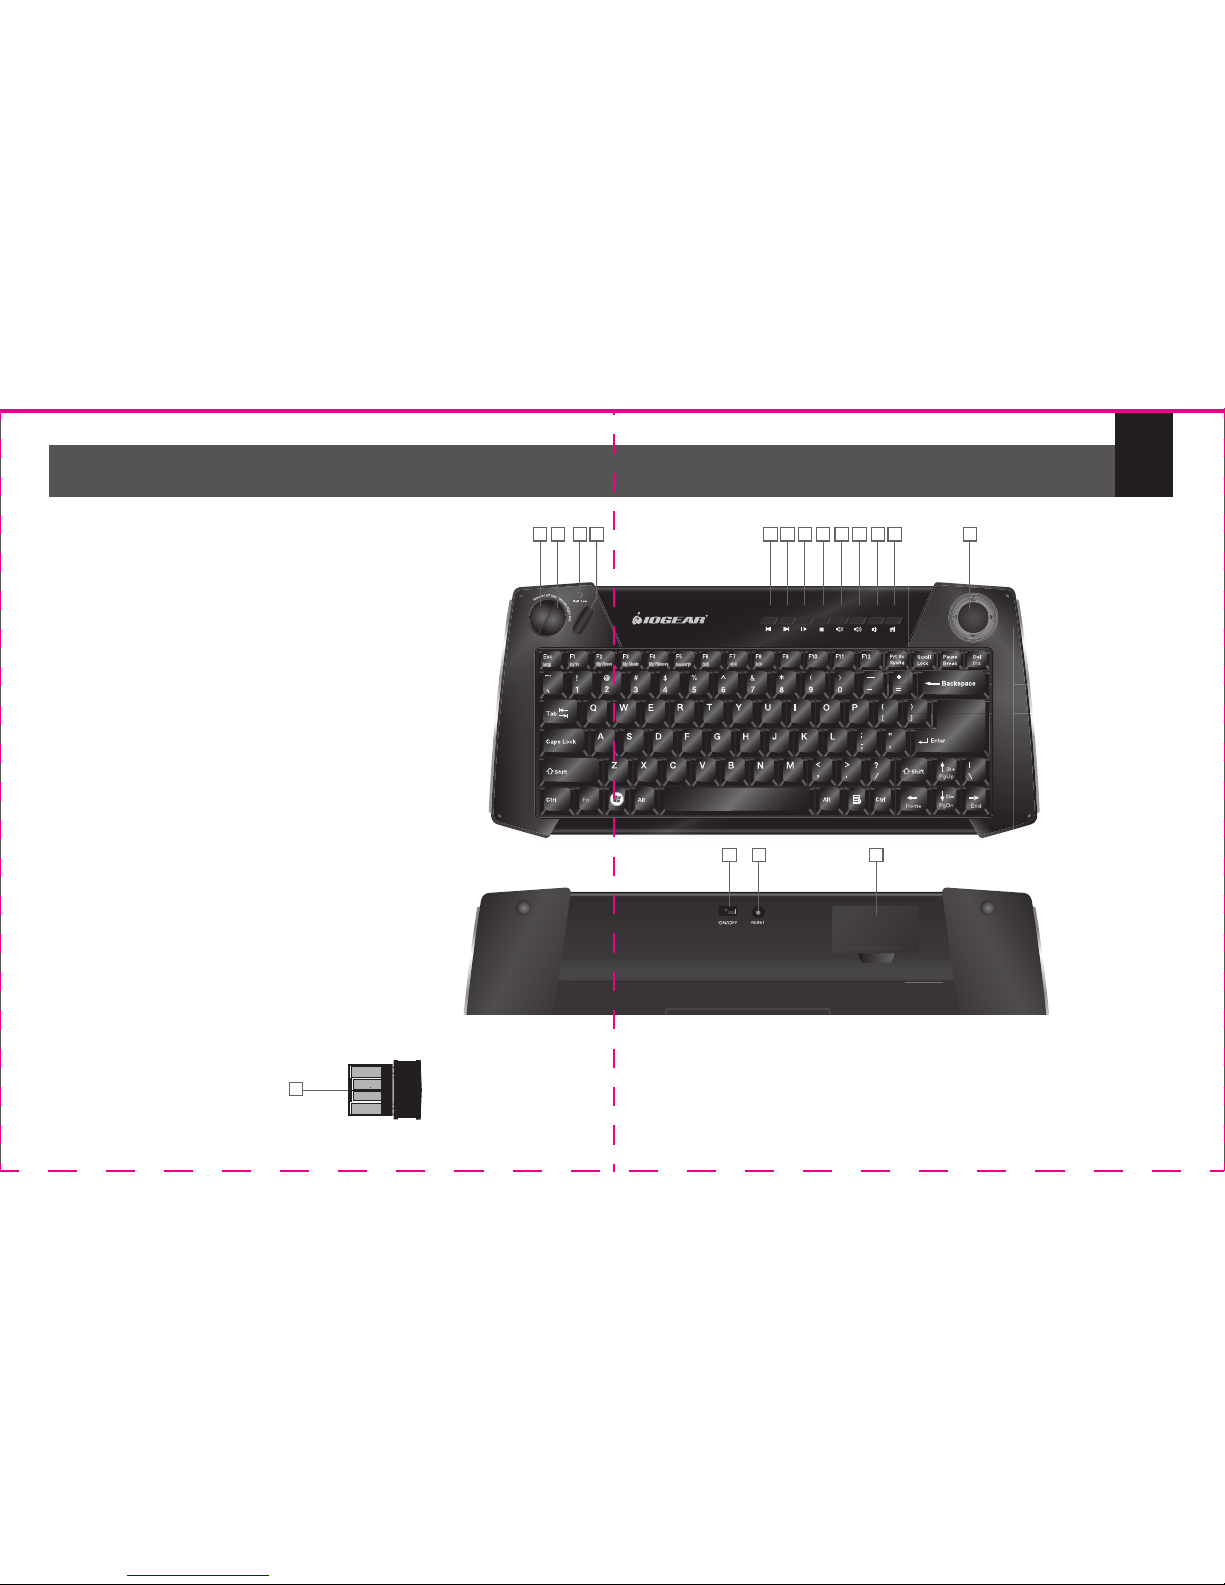
Overview
1
Keyboard – Front View
1. Mouse Left Click
2. Mouse Right Click
3. Battery low Indicator
4. Scroll Wheel
5. Last Track
6. Next Track
7. Play / Pause
8. Stop
9. Mute
10. Volume Up
11. Volume Down
12. Default Homepage (Internet Explorer)
13. Removable Optical Trackball
Keyboard – Back View
1. ON/OFF Switch
2. Reset Button
3. Battery Cover
USB RF Receiver
1. USB Connection
500DPI
1000DPI
1500DPI
1 2 3 4 5 6 7 8 91011 12 13
1
1 2 3

2
Package Contents
Requirements
1 x GKM561R 2.4GHz Multimedia Keyboard
1 x USB RF Receiver
1 x Cleaning Cloth
2 x AA Batteries
1 x Quick Start Guide
1 x Warranty Card
Computer / Devices*
• USB port
Operating System**
• Windows Vista
®
• Windows® 7
• Windows
®
8
• Windows
®
8.1
• Mac OS X v10.3.9 or later***
*Device must support USB HID keyboard device and USB
HID-compliant mouse in order to have the keyboard and mouse
functionality respectively.
**Media Center hotkeys are only supported with operating
systems that have Microsoft Windows Media Center.
***Some Mac special keys may not work.

Installation
3
AA
AA
STEP 1
Connect the USB RF
receiver into any open
USB port of your
computer while the
computer is turned on.
STEP 3
Turn on the keyboard by switching
the ON/OFF switch to the
ON position.
FINAL STEP
Now the keyboard and trackball should be working properly.
If the keyboard and trackball are not working, please see the
Pairing Section.
*Note: Please make sure the batteries are
installed properly as the directions that
are indicated inside the battery tray
STEP 2
Open the battery cover on the back of
the keyboard and insert the 2 included
AA batteries into the battery
tray.* Then, close the battery
tray by putting the battery
cover back on.
ON/OFF
RESET
 Loading...