

IOGear GCS1002, GCS1004 User Manual

www.iogear.com
User Manual
2/4-Port USB DVI KVM Switch
GCS1002 / GCS1004
PART NO. M1265-a

©2014 IOGEAR. All Rights Reserved. Part No. M1265-a IOGEAR, the IOGEAR logo, MiniView®, VSE are trademarks or registered
trademarks of IOGEAR. Microsoft and Windows are registered trademarks of Microsoft Corporation. IBM is a registered trademark
of International Business Machines, Inc. Macintosh, G3/G4 and iMac are registered trademarks of Apple Computer, Inc. IOGEAR
makes no warranty of any kind with regards to the information presented in this document. All information furnished here is for
informational purposes only and is subject to change without notice. IOGEAR. assumes no responsibility for any inaccuracies or
errors that may appear in this document.

3
Table of Contents
Introduction 4
Package Contents 4
Features 4
Requirements 5
Overview 6
Hardware Installation 8
Basic Operation 10
Hotkey Operation 11
Keyboard Emulation 16
The Firmware Upgrade Utility 18
Specications 21
Troubleshooting 22
Federal Communications Commission (FCC) Statement 23
CE Compliance 23
Limited Warranty 23
Contact 23

4
Introduction
Package Contents
This IOGEAR DVI KVM Switch GCS1002 / GCS1004 allows users to access up to two
(GCS1002) or four (GCS1004) computers from a single USB keyboard, USB mouse, and
DVI monitor. It supports resolutions up to 1920x1200 @60Hz. With IOGEAR’s DynaSyncTM,
there is no more delay or change of video resolution when switching between, or booting the
computers. It also comes equipped with an audio line out and has power on detection – it will
automatically switch to the next powered-on computer when the other is turned off. It also
allows each computer to access any peripherals connected to the USB 2.0 port. And with its
audio enabled, users can listen to the audio output of each computer on one set of speakers.
The setup is quick and easy; users just need to plug the cables into their appropriate ports.
There is no software to congure. Since the GCS1002 / GCS1004 intercepts keyboard input
directly, it supports multiple computing platforms (PC x86 / x64, Macintosh PowerPC, and Sun
Microsystems Sparc).
There are three convenient methods users can use to access the computers: port selection
pushbuttons located on the unit’s front panel; hotkey combinations entered from the keyboard;
and mouse port-switching by simply double-clicking on the scroll wheel of a USB mouse to
change the ports.
1 x GCS1002 / GCS1004 2/4-Port USB DVI KVM Switch
1 x 4ft 44-pin Custom KVM Cable set
1 x 6ft 44-pin Custom KVM Cable set (for GCS1004 only)
1 x Power Adapter (for GCS1004 only)
1 x User Manual
1 x Warranty Card
Features
• One DVI console controls up to two (GCS1002) or four (GCS1004) USB
interface computers
• DVI-D KVM cable set - includes one 4ft 44-pin custom KVM cable and one 6ft 44-pin
custom KVM cable (GCS1004 only) to connect up to four computers
• Fully compliant with DVI specication (Digital only)
• Supports multi-function and wireless mouse / keyboard
• Audio enabled – full bass response provides a rich experience for 2.1 channel surround
sound systems
• Superior video quality – up to 1920 x 1200 @60Hz
• Auto Scan Mode for monitoring all computers
• Multiplatform support – Windows, Linux, Mac, FreeBSD and Sun
• Console mouse port emulation / bypass feature supports most mouse drivers and
multifunction mice

5
Requirements
• Hot Pluggable - Add or remove computers for maintenance without powering down the
switch
• HDCP compliant
• Video DynaSyncTM
• Power on Detection - Automatically switches to the next powered-on computer when the
other is turned off
• Computer selection via front panel pushbuttons, hotkeys, and mouse switching function
• USB 2.0 mouse port can be used for USB hub and USB peripheral sharing
• Complete keyboard emulation for error-free booting
• Mac / Sun keyboard support and emulation
• Firmware Upgradable
• Plug & Play - No software installation required
Console:
• 1 DVI display
• 1 set of USB keyboard and mouse
• Speakers (optional)
Computers:
• 1 DVI Port
• 2 USB Ports
• Audio ports (optional)
• Computers with sound support
Cables:
• DVI-D KVM cable set – 4ft 44-pin cable / 6ft 44-pin cable (GCS1004 only) specically designed to work with this switch, may be used to link the computers. One (GCS1002) or two
(GCS1004) cable set(s) are provided with this package.
Note: The quality of the display is affected by the quality and length of the cables. If you
need additional cable sets, please contact your dealer to purchase the appropriate ones for
your switch.
• DVI cable for your DVI monitor
6
Overview
OS Version
Windows XP / 2003 / 2008 / Vista / X86 / X64 / 7 / 8 / 8.1
Linux RedHat 9.0 and higher
SuSE 10 / 11.1 and higher
Mandriva (Mandrake) Linux 2006 and higher
Debian 3.1 / 4.0
Ubuntu 7.04 / 7.10
Unix FreeBSD 5. 5 and higher
Sun Solaris 8 and higher
Novell Netware 6.0 and higher
Sun Solaris 9 and higher
Mac OS 9 to 10.5
Operating Systems:
The supporting operating systems are listed in the table below:
Note: Supports Linux Kernel 2.6 and higher.
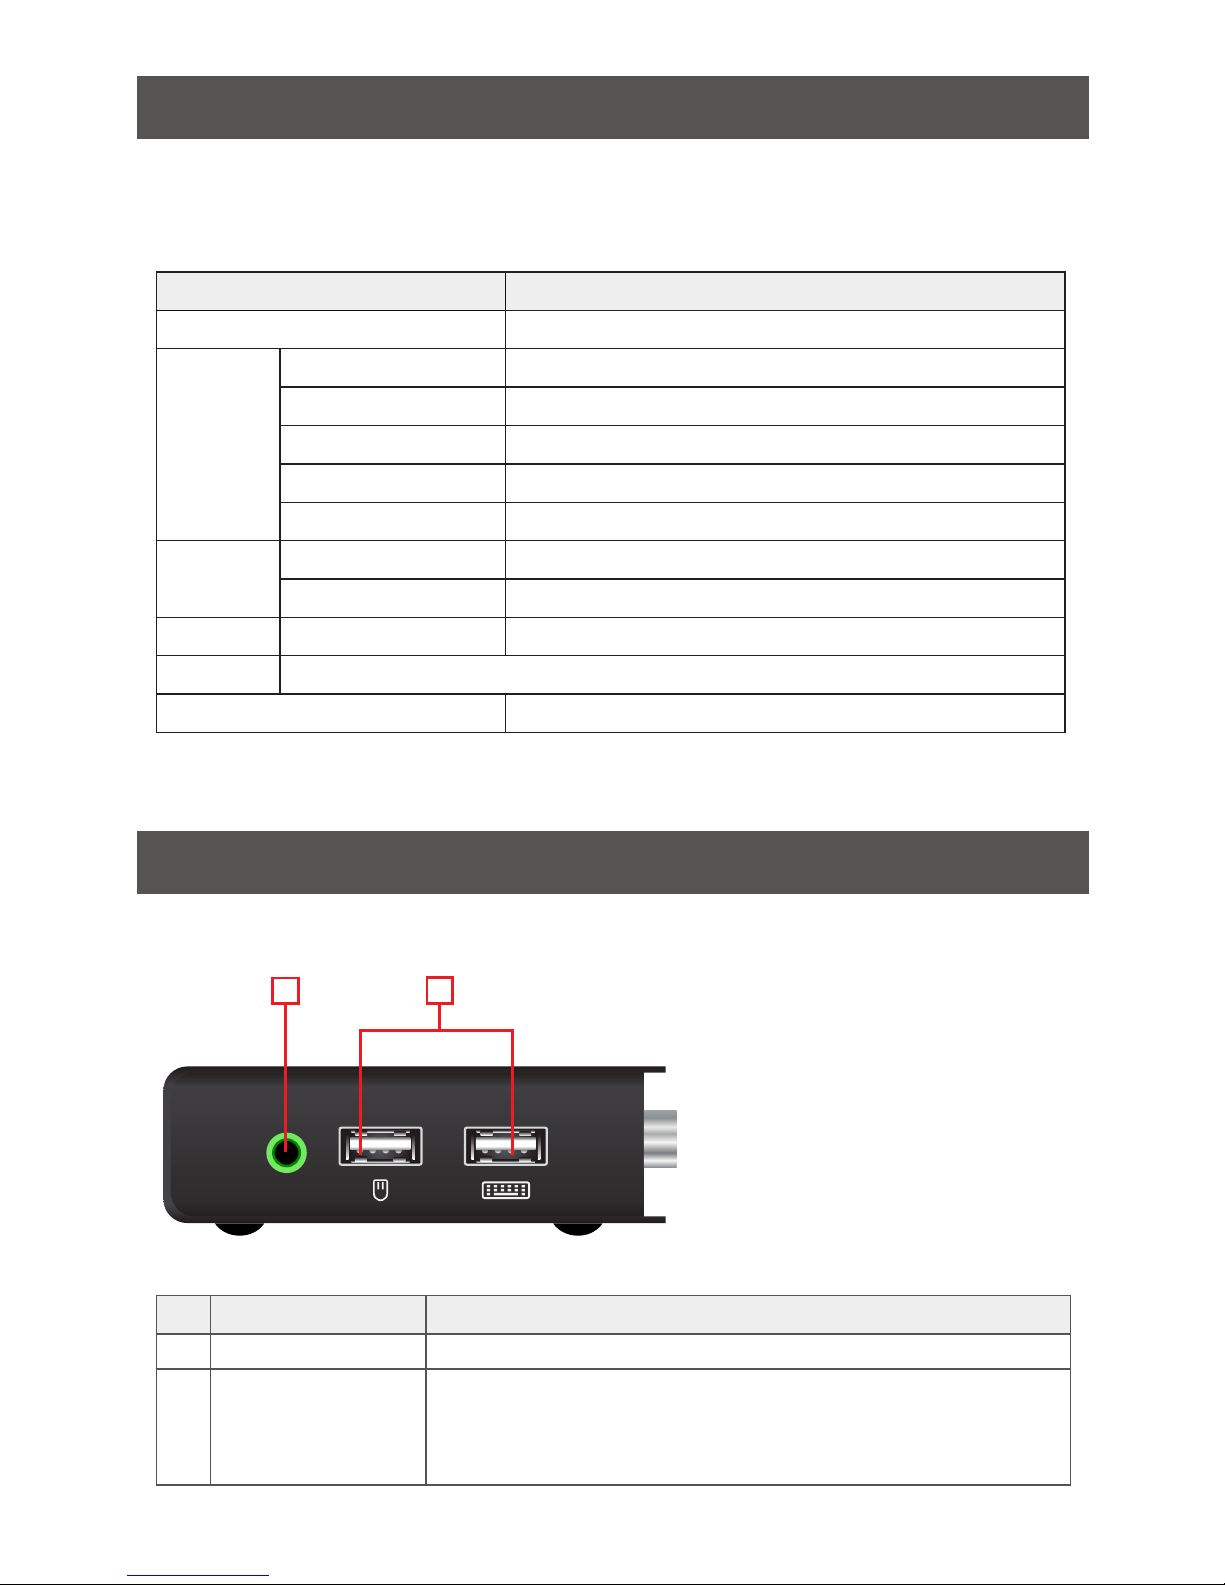
Audio
GCS1004 Side View
1
2
No Component Description
1
Audio Port The cable from your speakers plugs in here.
2
USB Console Ports: Your USB keyboard and USB mouse plug in here. The USB 2.0
mouse port can be used for connecting a USB hub and USB
peripheral sharing with mouse emulation off. An additional power
adapter might be required for the hub.
7
CPU 3 / 4 CPU 1 / 2
1 2 3 4
4-Port USB DVI KVM Switch
GCS1004
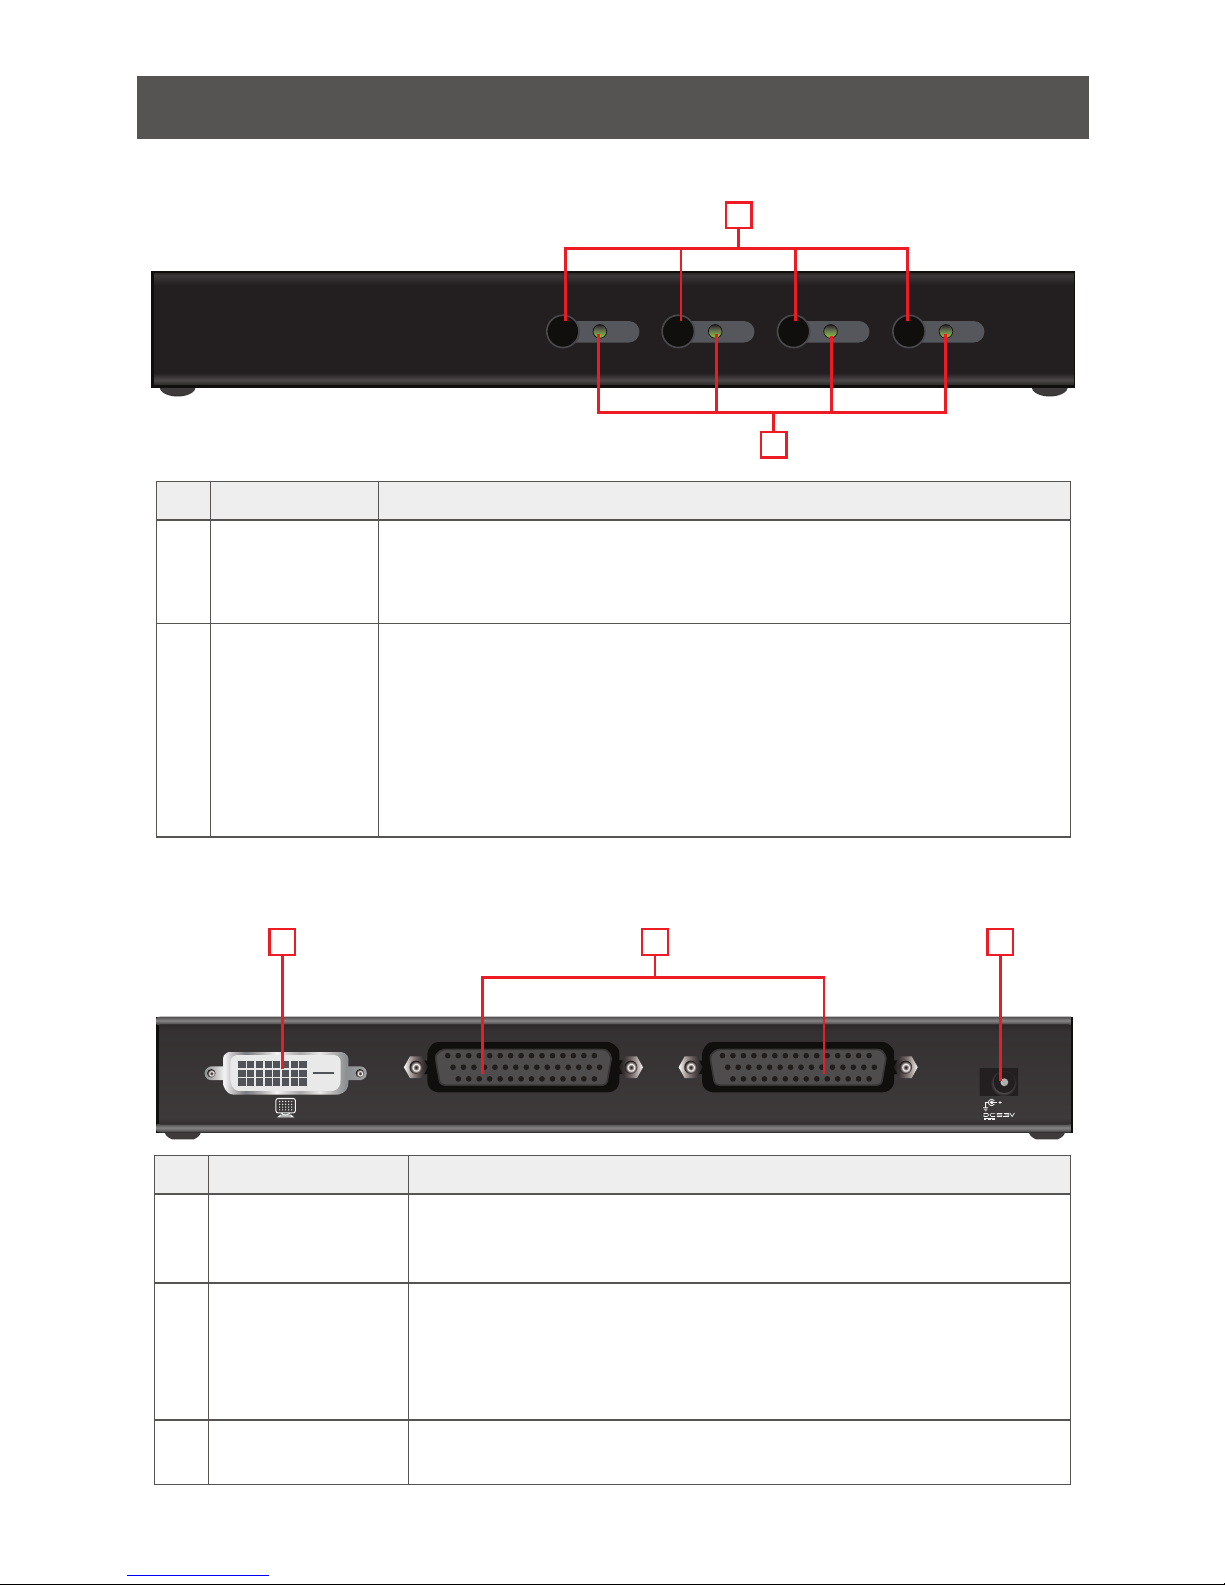
GCS1004 Front View
2
1
1
2
3
GCS1004 Back View
No Component Description
1
Port Selection
Pushbuttons
For manual port selection, press a port selection pushbutton to bring
the KVM focus to the computer attached to is corresponding port.
See Manual Port Switching, page 10 for more details.
2
Port LEDs The Port LEDs are built into the Port Selection Switches.
• Flashes indicate that the computer attached to the
corresponding port has the KVM focus and is being accessed in
Auto Scan Mode (see Auto Scanning, page 12).
• Lights steady to indicate that the computer attached to its
corresponding port is the one that has the KVM focus.
• The LED is off when the port is not selected.
No Component Description
1
DVI Console Port The cable from your DVI monitor plugs in here.
Note: The USB keyboard and USB mouse ports are located on the
unit’s side panel.
2
Computer Port(s): The cable(s) that link the switch to your computers plug in here.
Note: You can identify the computers by the port they are connected to – they are labeled CPU1 / CPU2 for GCS1002; CPU1 /
CPU2 / CPU3 / CPU4 for GCS1004.
3
Power Jack
(GCS1004 only)
The power adapter cable plugs into this power jack.

8
Hardware Installation
Cable Connections:
To set up your GCS1002 / GCS1004, refer to the installation diagram (the numbers in the
diagram correspond to the steps below), and follow the steps below:
1. Plug your speakers into the Audio port located on the unit’s side panel (optional).
2. Plug your USB keyboard and mouse into the USB Console ports located on the unit’s
side panel.
Note: The USB mouse port can also be used for other USB peripherals that you want
share between the computers with mouse emulation off.
Make sure that power to all the devices you will be installing has been turned off. You must
unplug the power cords of any computers that have the Keyboard Power On function.
Audio
2
1
2
 Loading...