

IOGear GCL1908, GCL1916 Quick Start Manual

GCL1908 / GCL1916
P AR T NO. Q1323 / Q1324
8/16-19” LCD KVM Switch
Quick Start Guide
www.iogear.com
1 x GCL1908 / GCL1916 19” LCD KVM with Rock Mount Kit
1 x USB KVM Cable; 1 x PS2 KVM Cable
1 x Power Cord
1 x Firmware Upgrade Cable
1 x Quick Start Guide
1 x Warranty Card
1 x Standard Long Rack Mount Kit
1
Package Contents
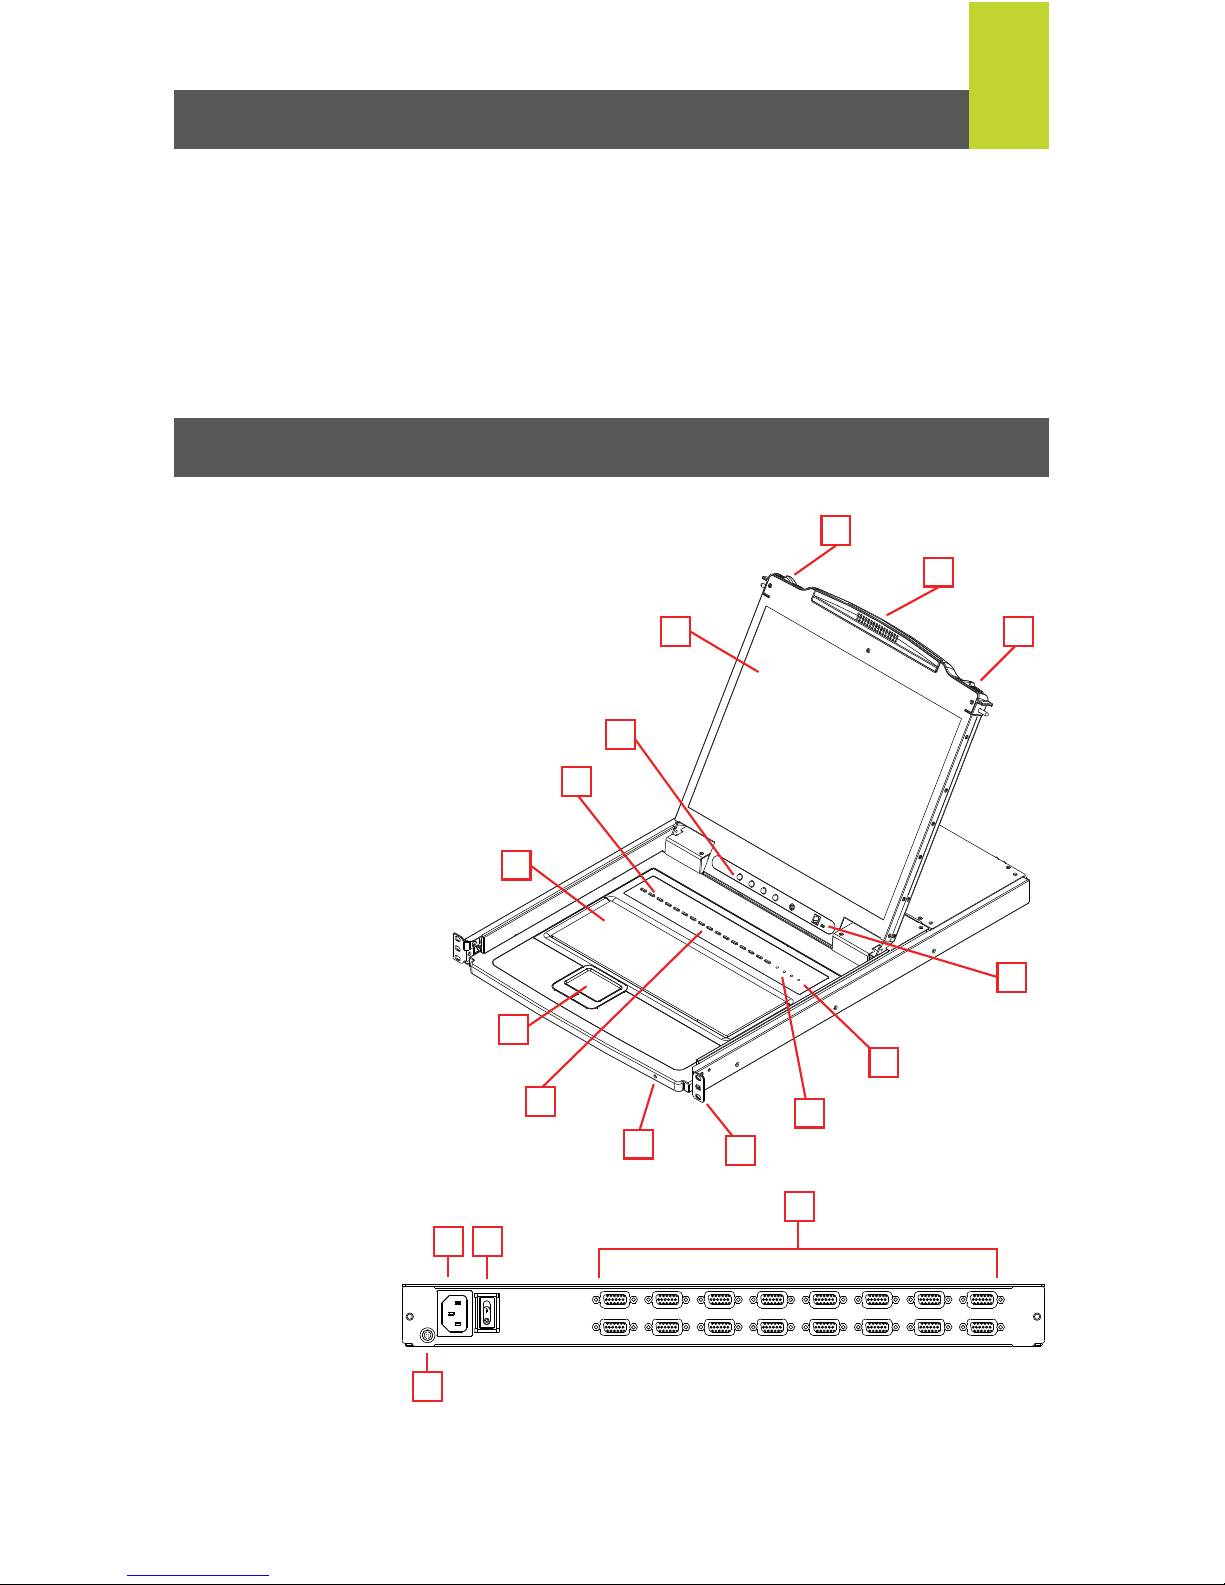
Front View:
1. Handle
2. Slide Release
3. LCD Display
4. LCD Controls
5. Port LEDs
6. Keyboard
7. Touchpad
8. Port Switches
9. Power LED
10. Rack Mounting Brackets
1 1. Lock LEDs
12. Reset Switch
13. Firmware Upgrade Section
Overview
Rear View:
1. Power Socket
2. Power Switch
3. KVM Port Section
4. Grounding T erminal
Note: The GCL1916 is pictured above. The GCL1908 rear panel is the same as the
GCL1916, except that it has 8 KVM ports instead of 16.
1
2
2
3
4
1 2
3
4
5
6
8
13
9
10
11
12
7
Side Mountng
Brackets
L Brackets
2
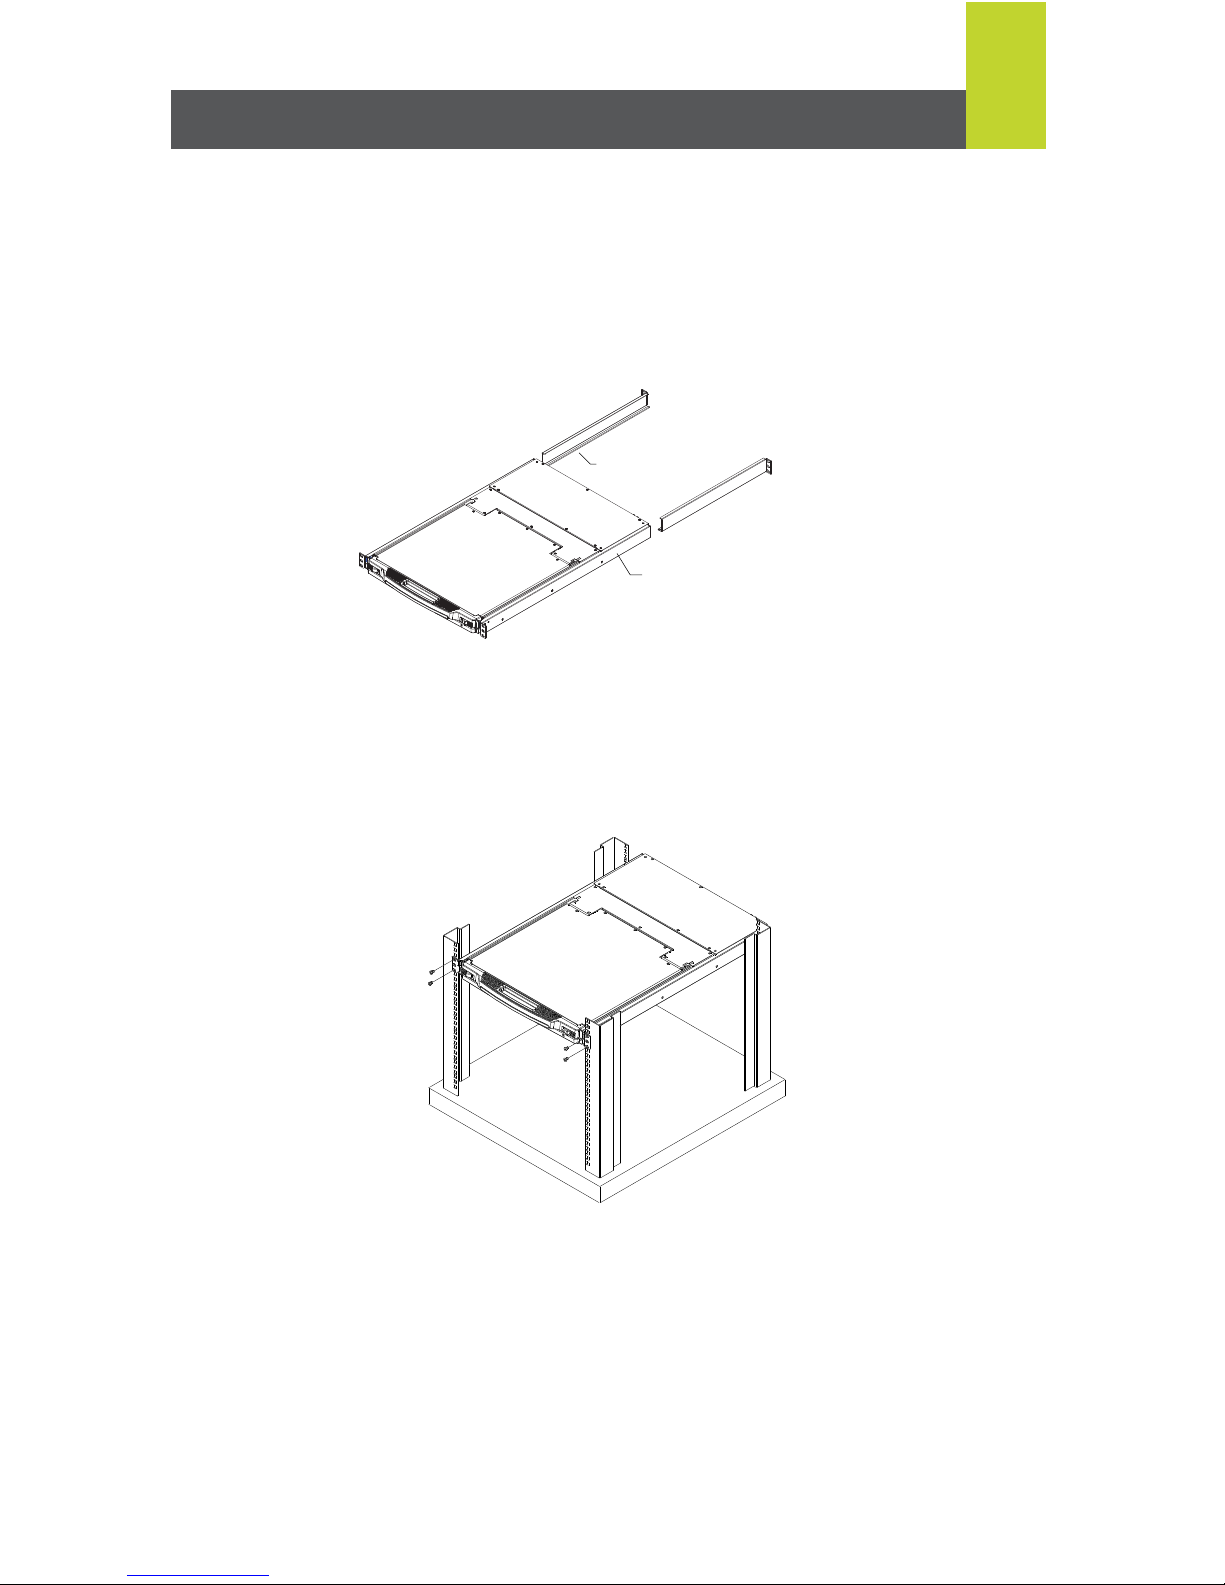
Hardware Installation
Step 1
While one person positions the switch in the rack and holds it in place, the second person
loosely screws the front brackets to the rack.
Standard Rack Mounting:
A standard rack mounting kit is provided with your GCL1908 / GCL1916 and can be mounted
in 1U of rack space. The following diagram shows the required components to mount the LCD
KVM to the rack.
Note: It takes two people to mount the switch: one to hold it in place; the other to screw it in.
 Loading...