

Inxus VERVE2 User Manual
Welcome to VERVE 2!
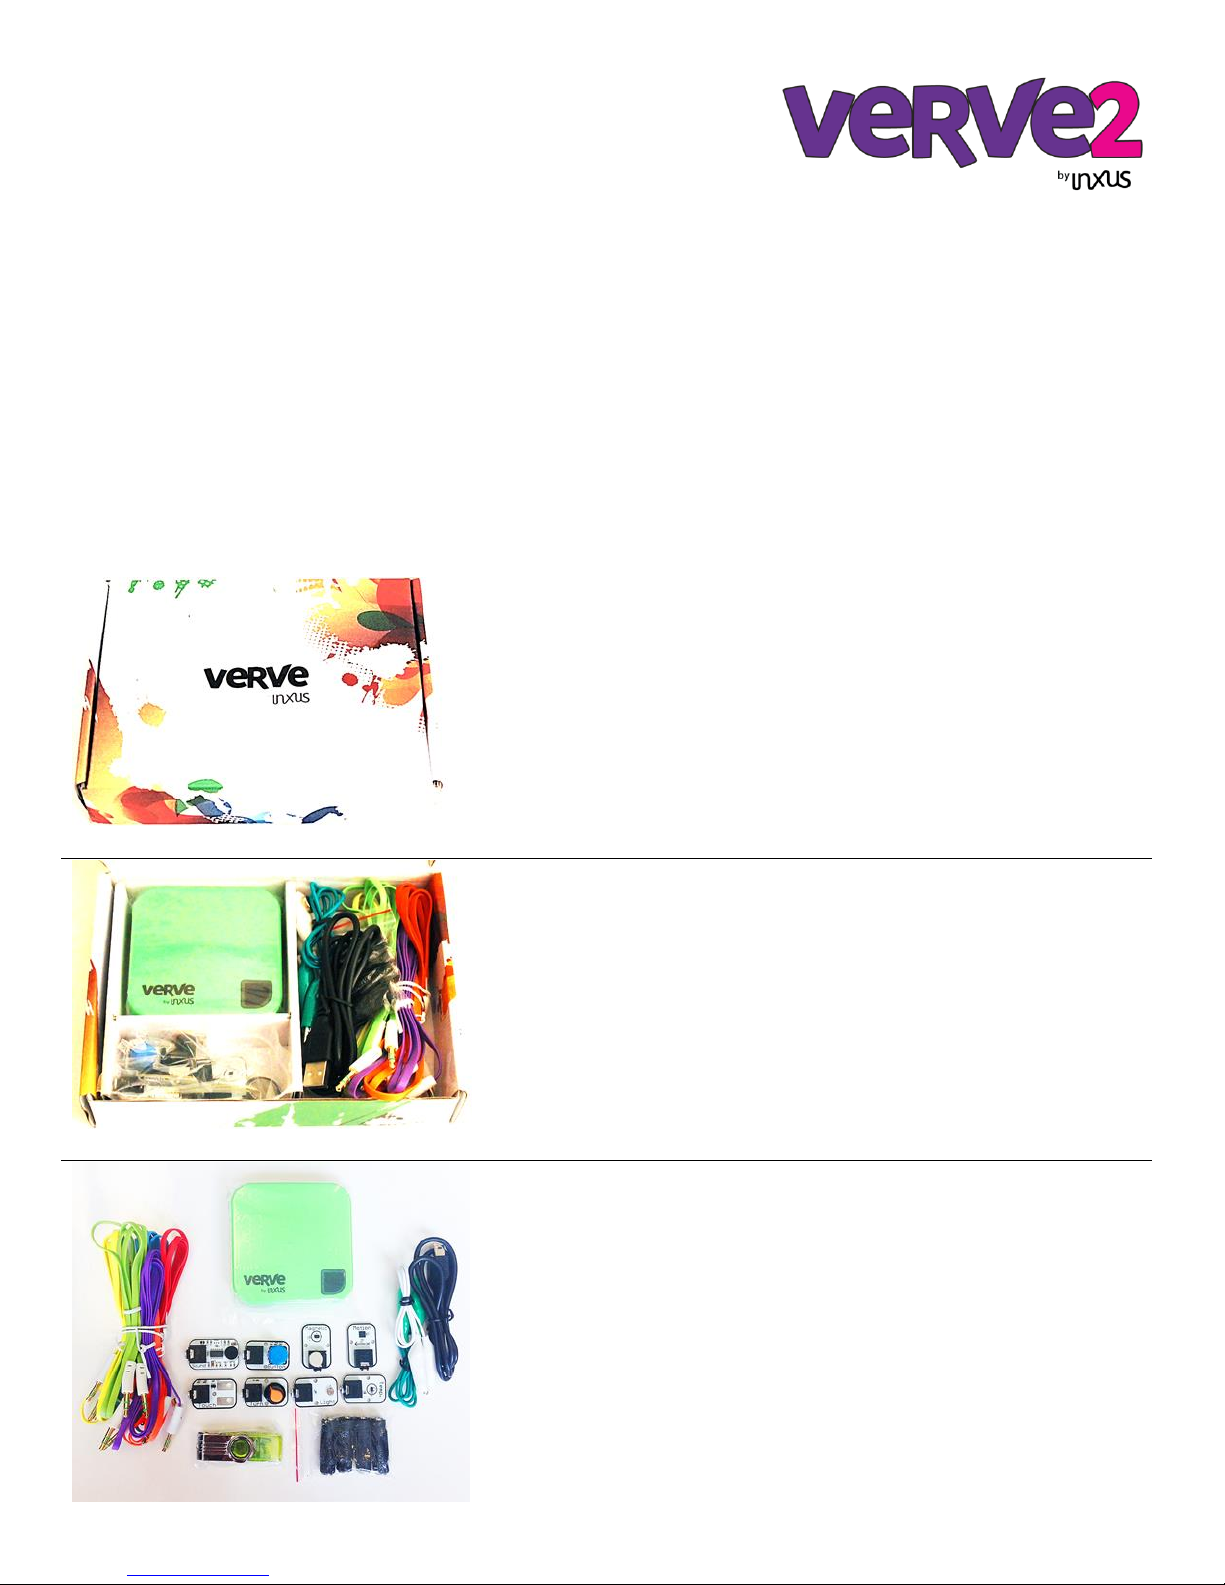
Remove all contents of your VERVE 2 kit.
Your VERVE kit contains everything you need to get started: (1)
VERVE 2, (8) 3.5mm sensor cables, (8) sensors, (1) USB thumb-drive,
(4) cable extenders, (2) alligator cables, (1) USB cable.
VERVE 2 First Time User Guide
The VERVE2 is THREE awesome products in one. First, it is a sensor system that you can use to easily control your
favorite games or apps with the world around you. Second, it’s a full blown, easy-to-use data acquisition system that lets
you collect and monitor data for your own research projects. Third, it’s a web data server that lets you read sensor data
through the internet.
This guide will help you set up your VERVE 2 and show you how easy it is to control your computer using sensors (along
with a couple fun demos!).
What’s in the box?
Here’s what you get with the VERVE 2 starter kit…
VERVE Set-up
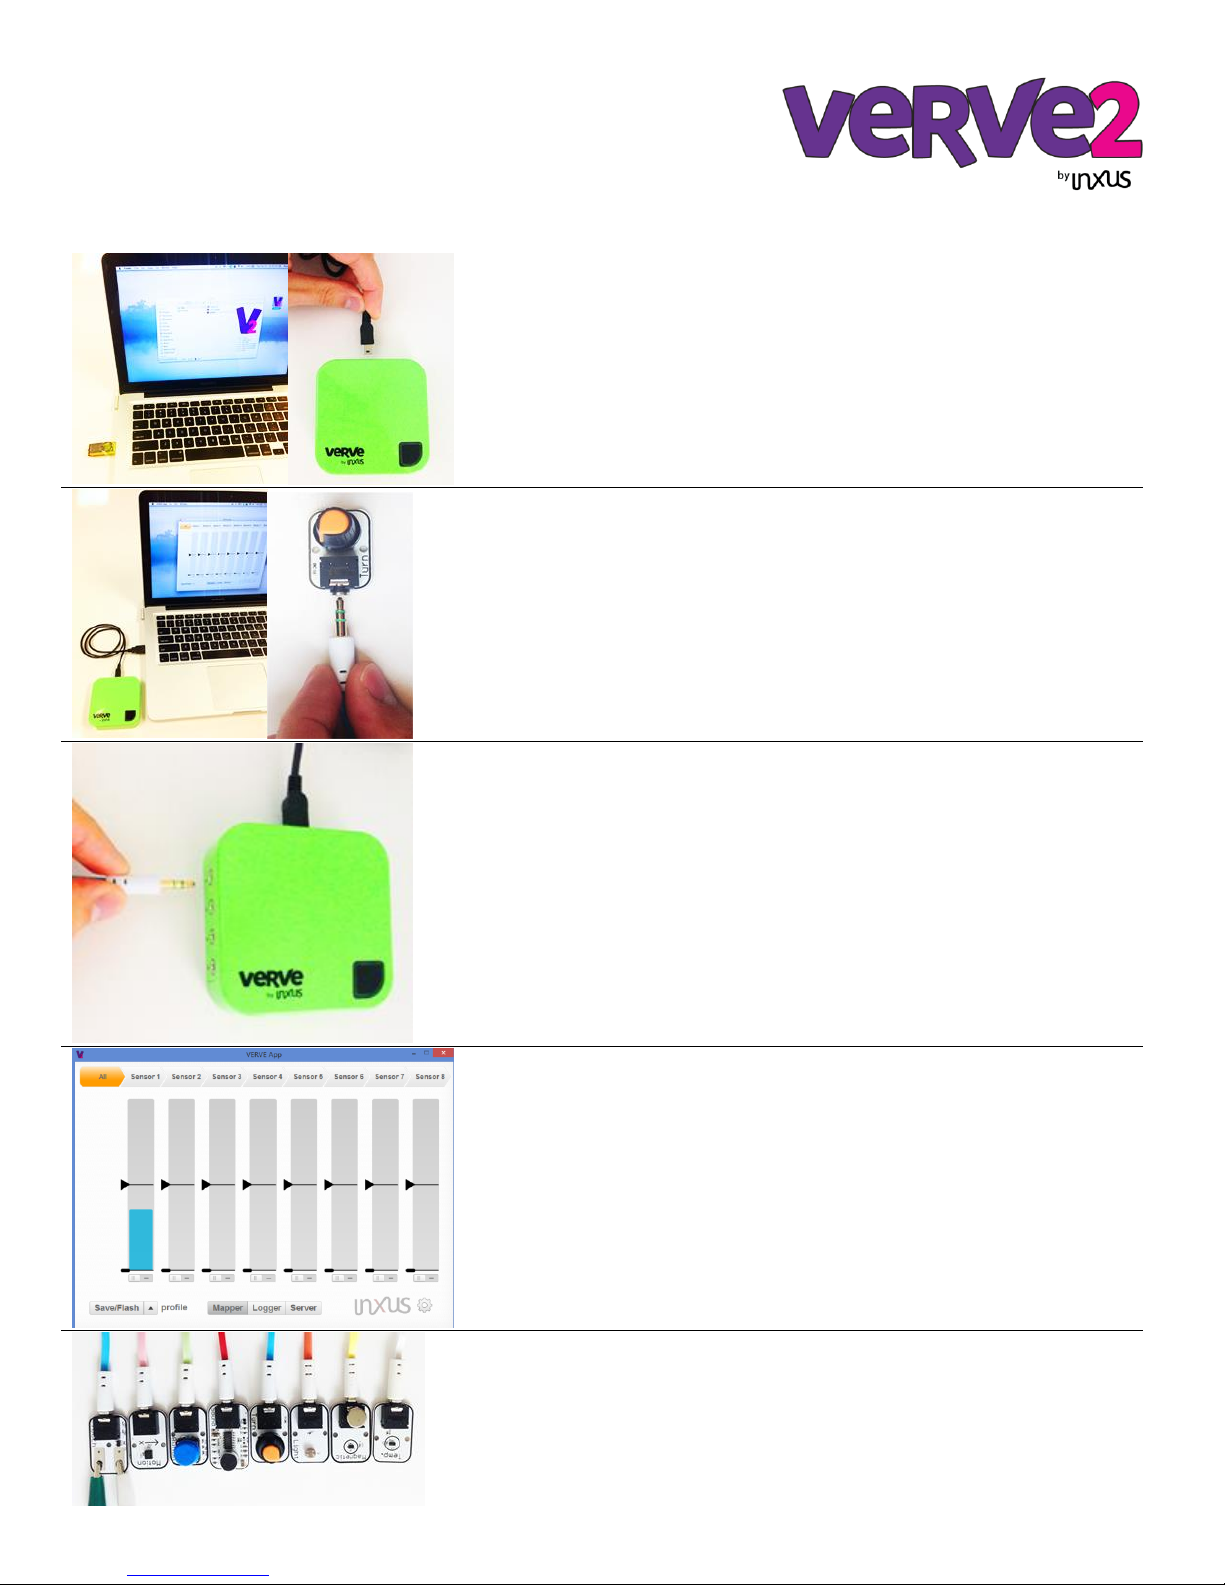
1. Plug the USB thumb-drive into your computer and open the
Windows or OSX folder. Drag-and-drop the VERVE app to your
desktop or preferred location on your computer.
2. Plug the mini-USB end of the USB cable into the back of the
VERVE and the other end into your computer. It may take up to
5 minutes for the drivers to load the first time.
3. Start the VERVE app. Some Mac or PC users may have to
option-click, or change security settings to allow apps from
unidentified developers.
4. Pick a sensor and connect it to a VERVE cable. We recommend
starting with the turn sensor.
5. Plug the other end of the cable into port labeled 1 on the
VERVE2 hub.
6. In the VERVE app, the blue bar shows you the response of the
sensor. As you rotate the turn sensor left to right you will see
the Sensor 1 bar move up and down.
7. Try plugging in these other sensors to see how they respond.
For more information, see the sensor guide on pages 9, 10.
Control your computer with the VERVE 2
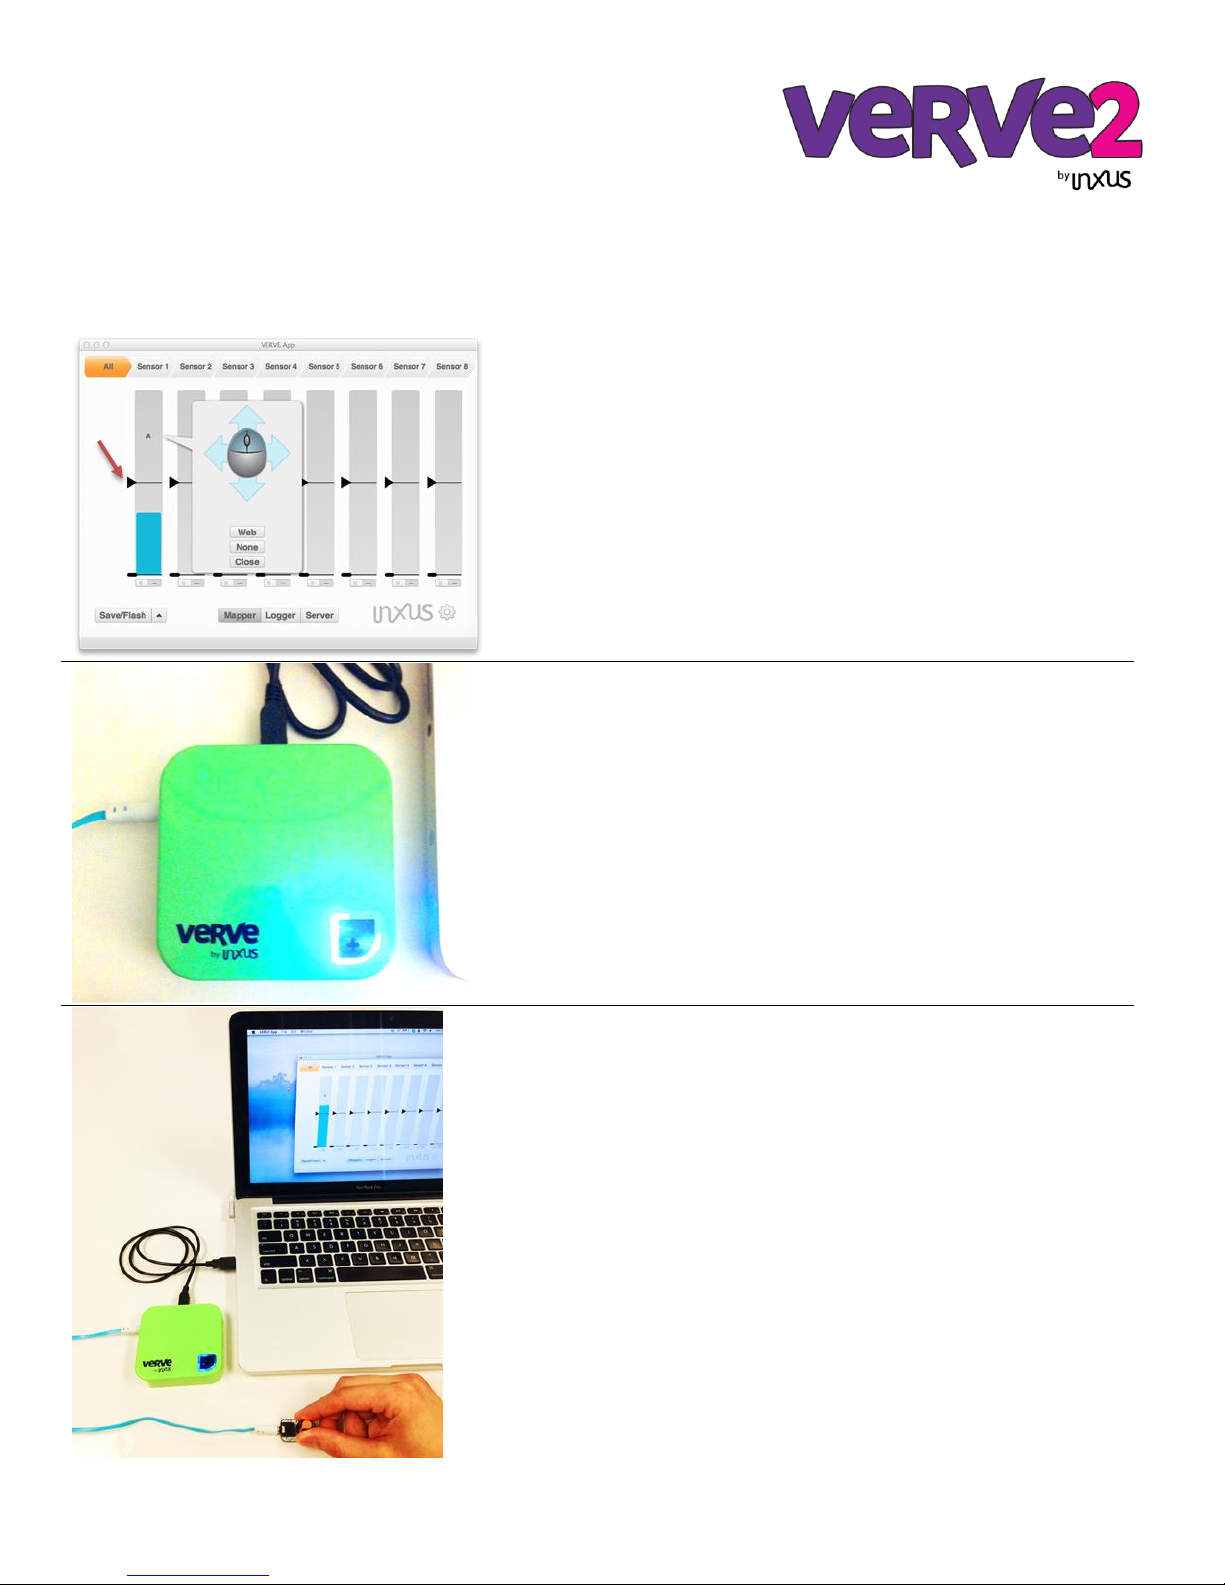
8. Click on the top zone of the first sensor with your mouse and
press the ‘A’ button on your keyboard. You should now see the
letter ‘A’ appear in the active zone.
Then, move the threshold bar up or down to set your threshold.
Click the Save/Flash button. Name and select a location for
your VERVE profile.
9. Press the black button on the VERVE 2; it should glow blue. This
indicates that the VERVE 2 is in keyboard emulation mode.
When your sensor value goes into an active zone, the keyboard
action gets triggered.
10. Open up a text editor like Notepad or Microsoft word. When
the turn sensor enters the range you specified, the VERVE 2 will
send the ‘A’ keystroke to your computer.
Congratulations, now you can control almost any app or game with
your sensor!
Hint: Instead of clicking the letter ‘A’, try pressing one of the mouse
arrow buttons shown in step #8 to control your mouse direction.
Now that you are familiar with how each sensor works, we will show you how to use these sensors to send a keystroke
to your computer. We will use the turn sensor as an example.
 Loading...