

Page 1
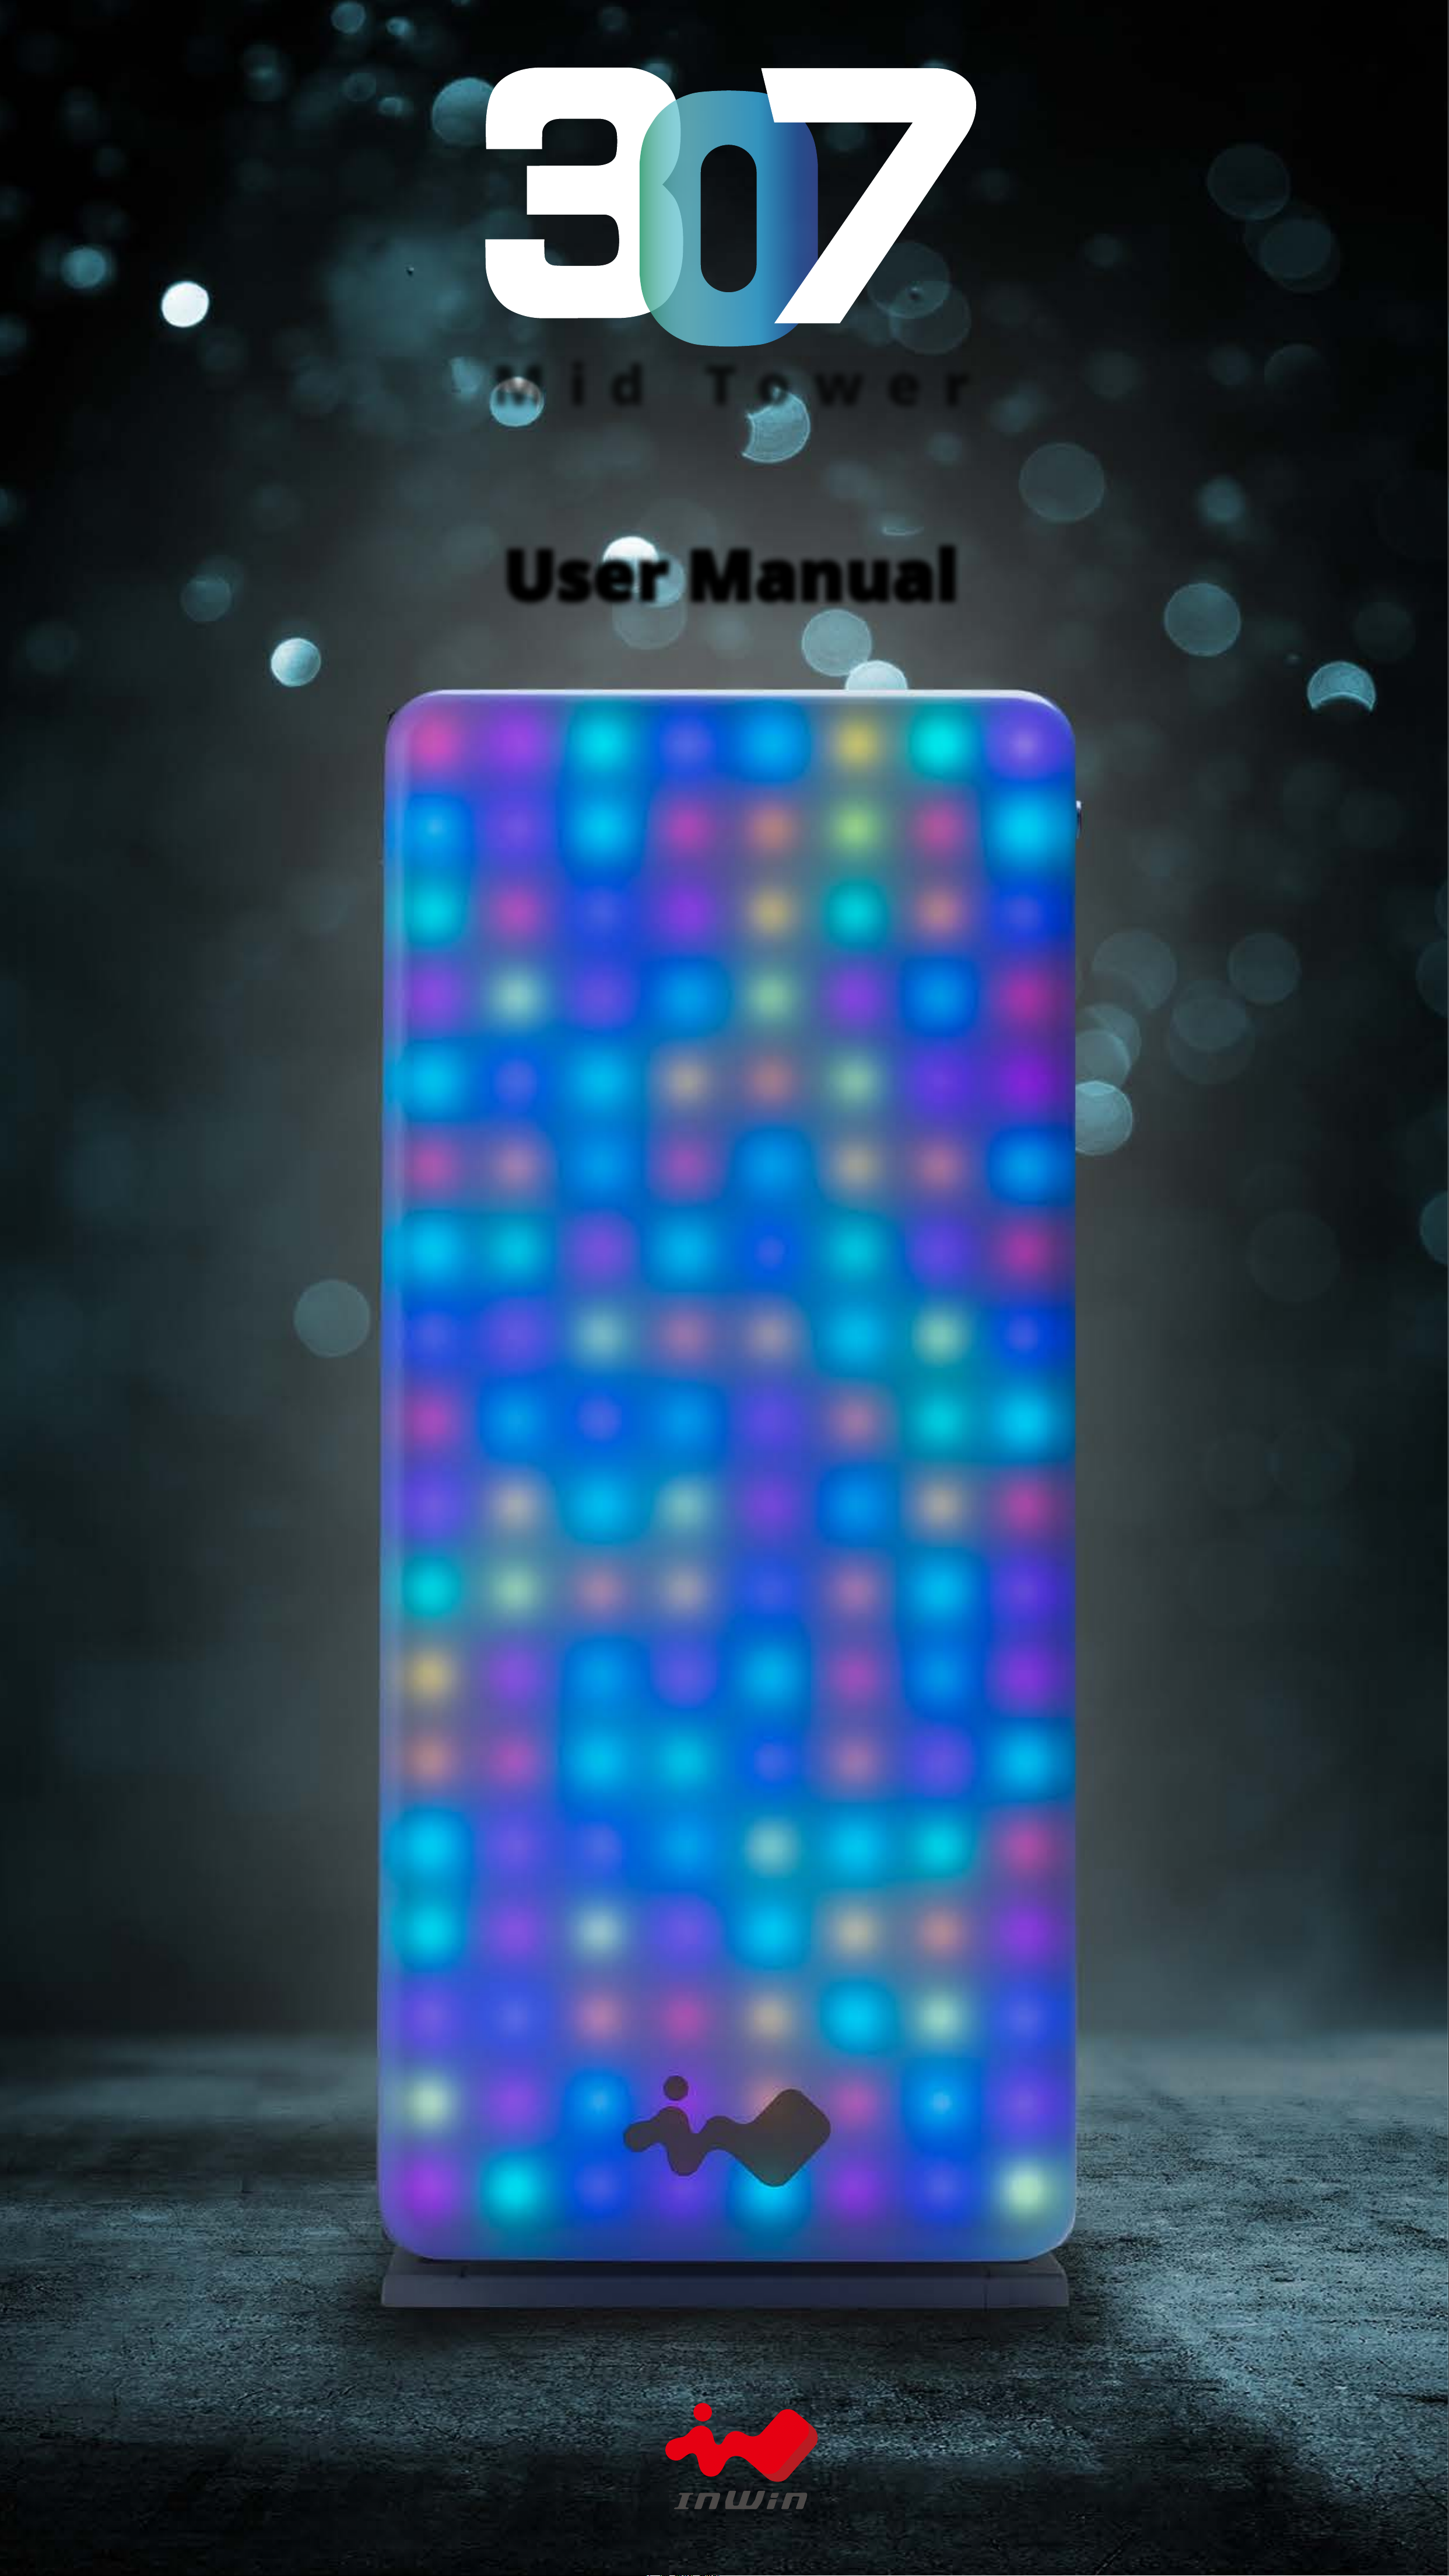
Mid Tower
User Manual
Page 2
Product Story
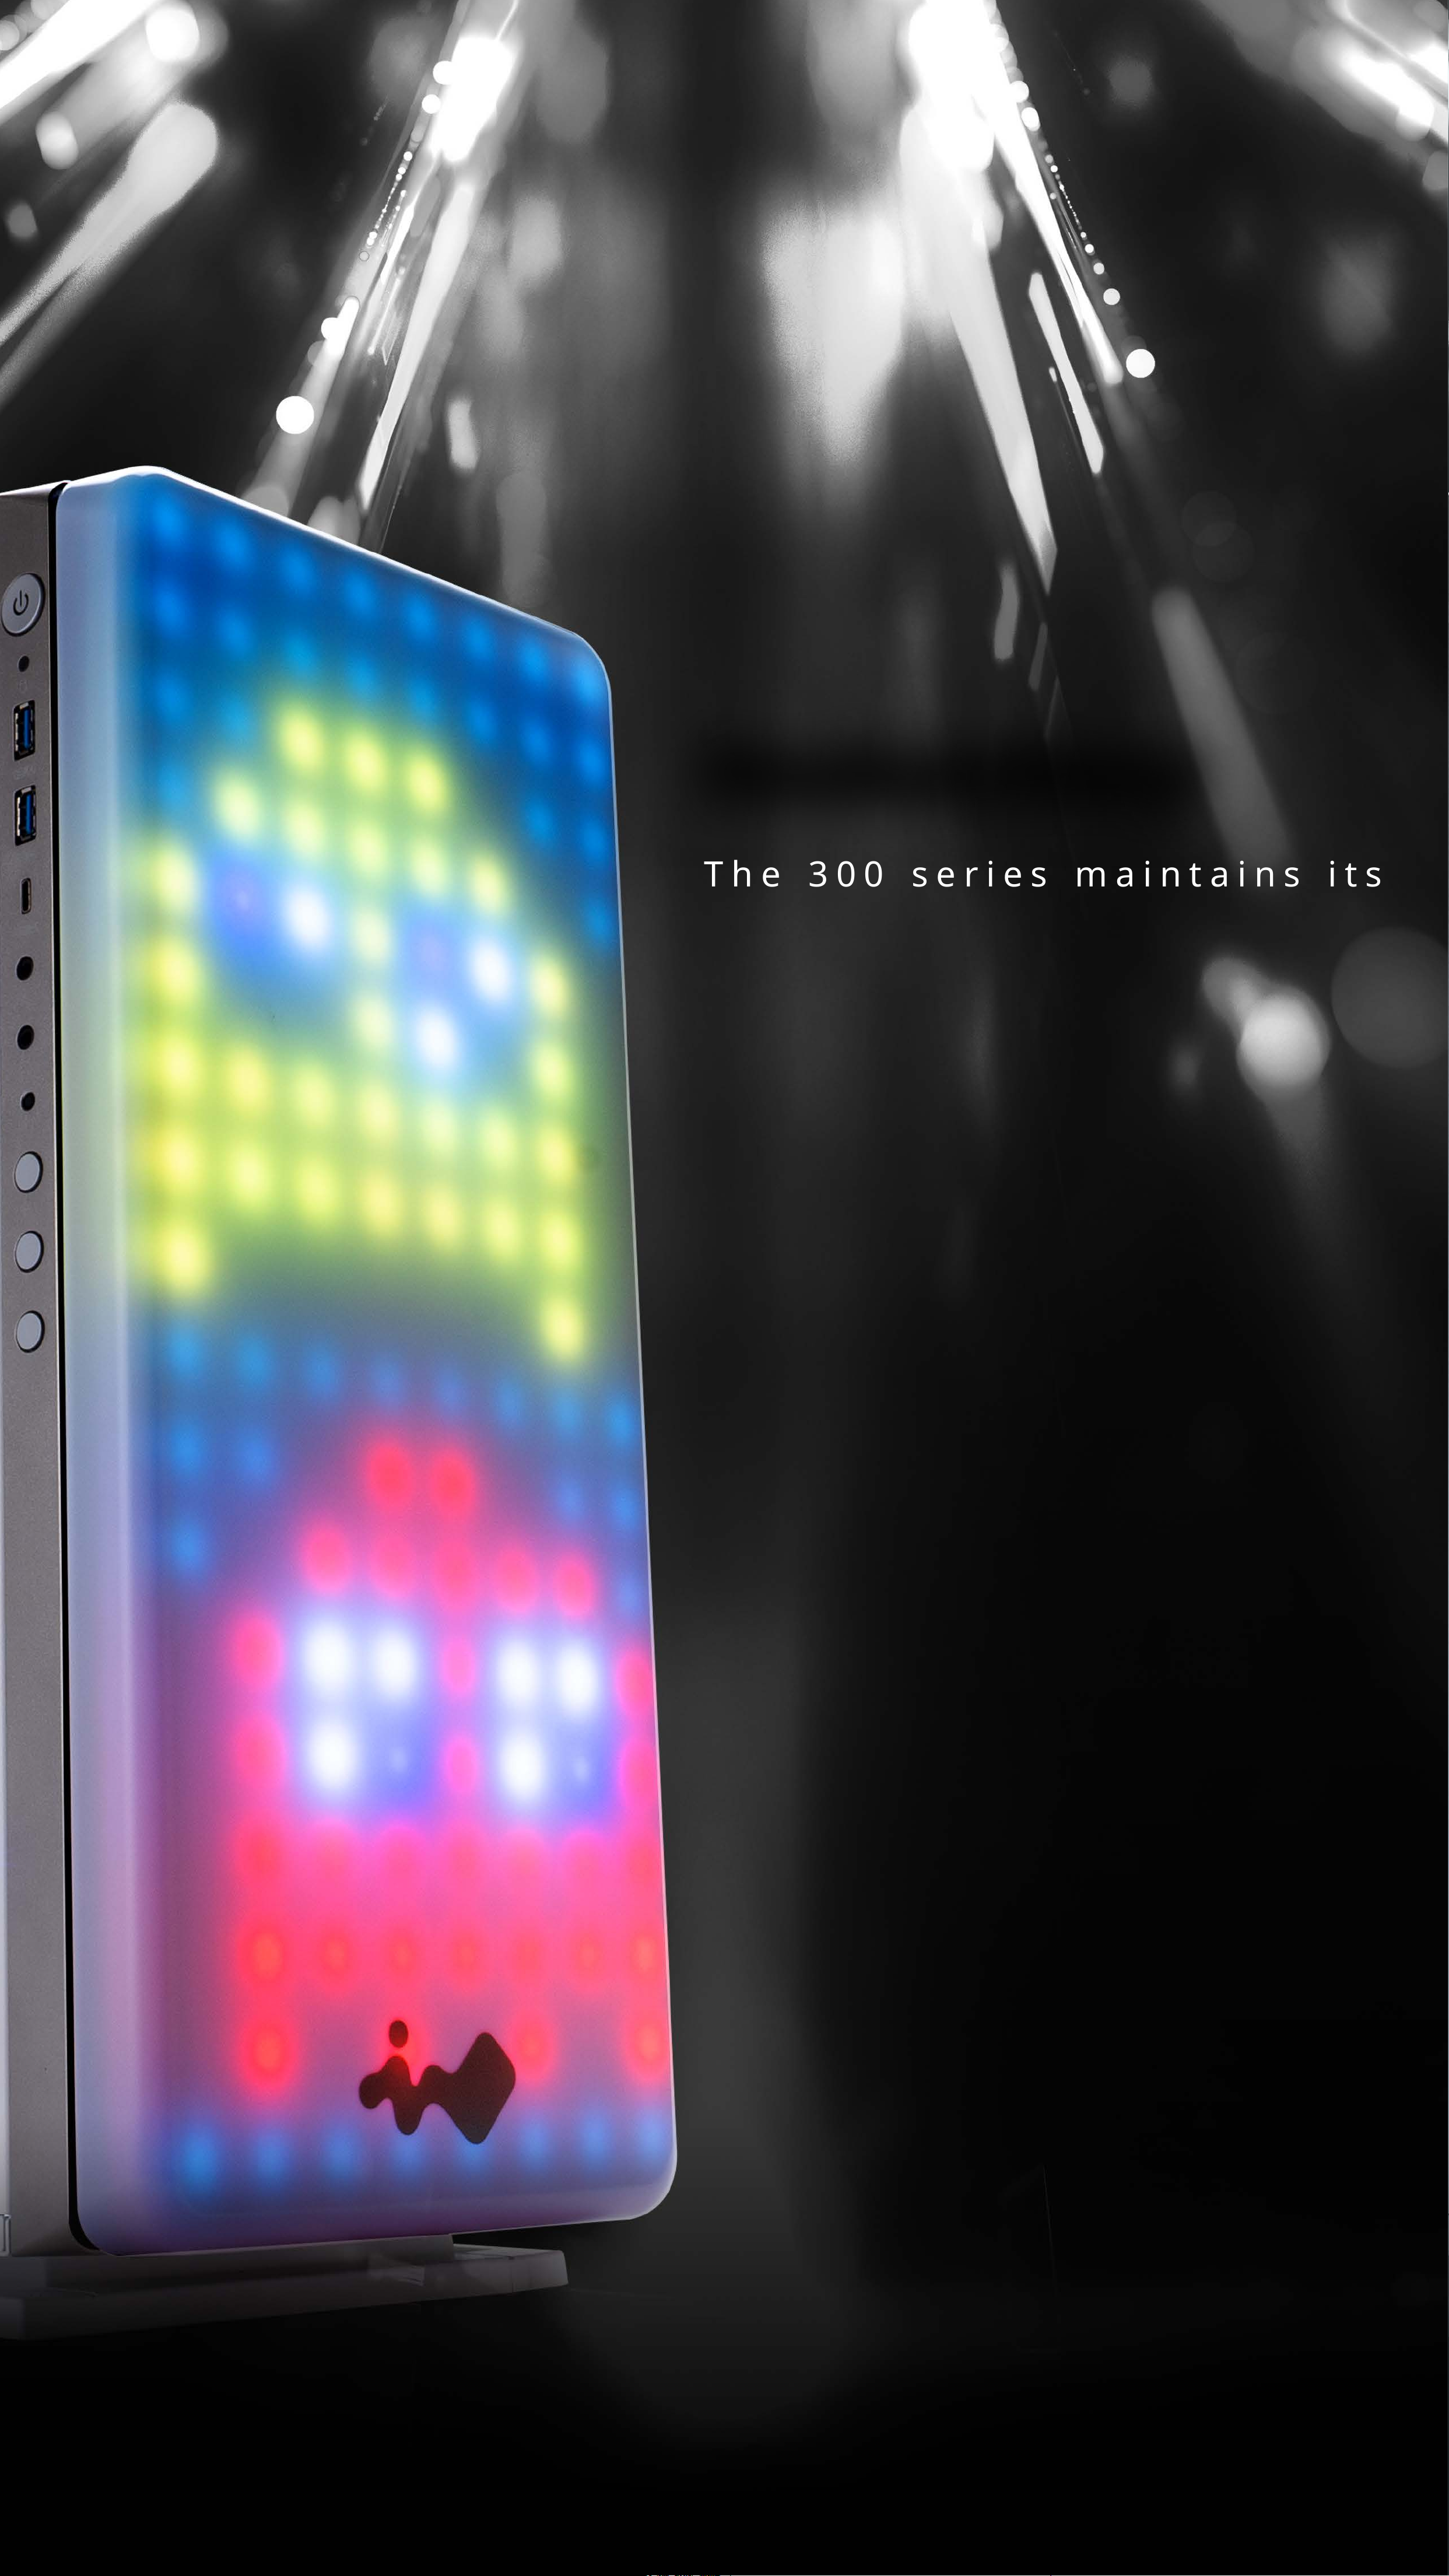
The 300 series maintains its
distinguished, simple and clean
appearance, which emphasizes the
quality of the materials. But, the new
307 chassis brings a fresh new design
concept to add and enhance to the
classic appearance of the 300 series. The
RGB LEDs are rich and saturated with
colors to provide an all new experience!
The 307’s built-in microphone integrates
with the environment and reacts
accordingly. A total of 12 lighting modes
are accommodated with GLOW, the
exclusive LED software. Users are free to
design their dream front panel and use it
in creative and customizable ways to suit
their desires. Master your creativity.
Page 3
Specication
Model
Color
Case Type
Material
M/B Compatibility
307
White
Mid Tower
SECC, Tempered Glass
12" x 10.7" ATX, Micro-ATX, Mini-ITX
Expansion Slots
Maximum
Compatibility
Front Ports
PCI-E x 7
VGA Card Length: 350mm
CPU Heatsink Height: 160mm
1 X USB 3.1 Gen 2 Type-C
2 x USB 3.0
LED Mode Button
Internal Drive Bays
Thermal Solution
Compatibility
HD Audio
2 x 3.5"
2 x 2.5"
2 Pre-installed (Max. up to 3 bays)
1 x 120mm Rear Fan / 120mm Radiator
3 x 120mm Top Fan / 360mm Radiator
3 x 120mm Bottom Fan
Power Supply
Compatibility
Product Dimension
(H x W x D)
Product Dimension
with screw & handle
PSII : ATX12V
- Length up to 200mm
480mm x 215mm x 532mm
18.9" x 8.5" x 20.9"
501mm x 238mm x 537mm
height
(H x W x D)
Package Dimension
(H x W x D)
Net Weight
19.7" x 9.4" x 21.1"
335mm x 610mm x 624mm
13.1” x 24” x 24.5”
11.61kg / 25.5lb
Gross Weight
* Our products comply with RoHS regulation
* Specifications may vary based on different regions
* Pre-installed glass panel. Extra fee for close panel.
14.06kg / 30.9lb
Page 4
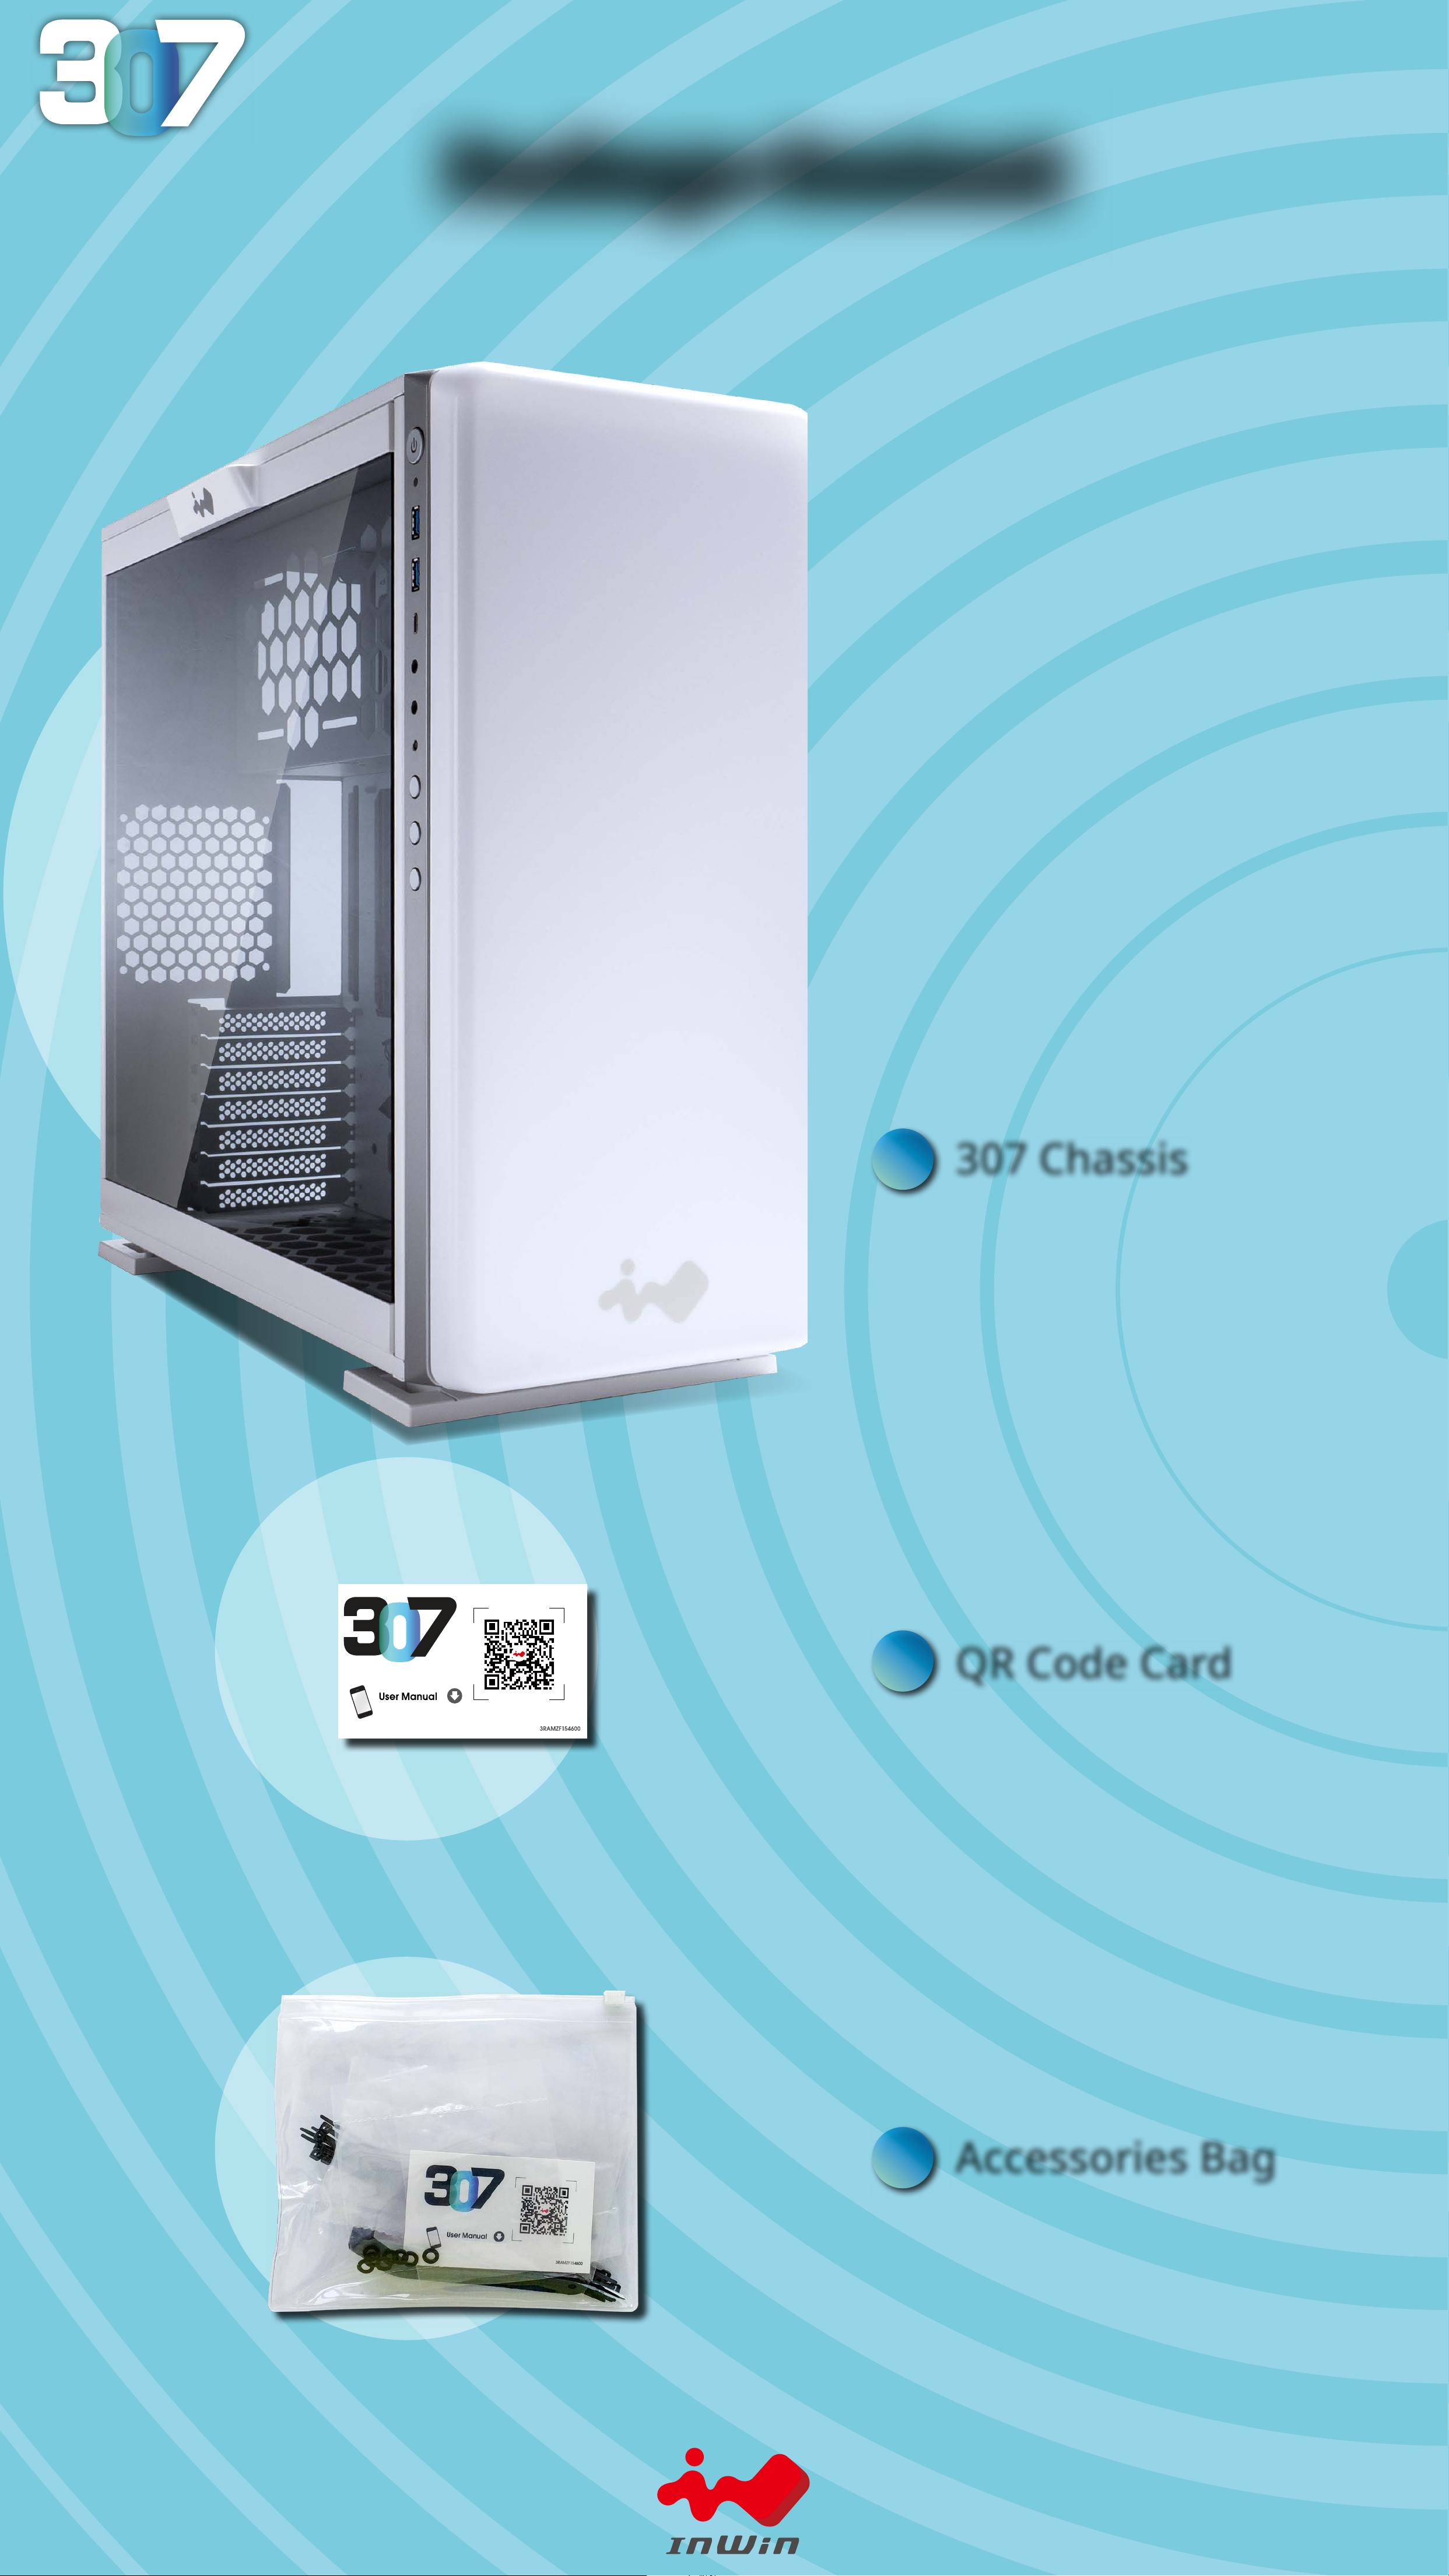
Package Content
1
307 Chassis
2
QR Code Card
3
Accessories Bag
Page 5
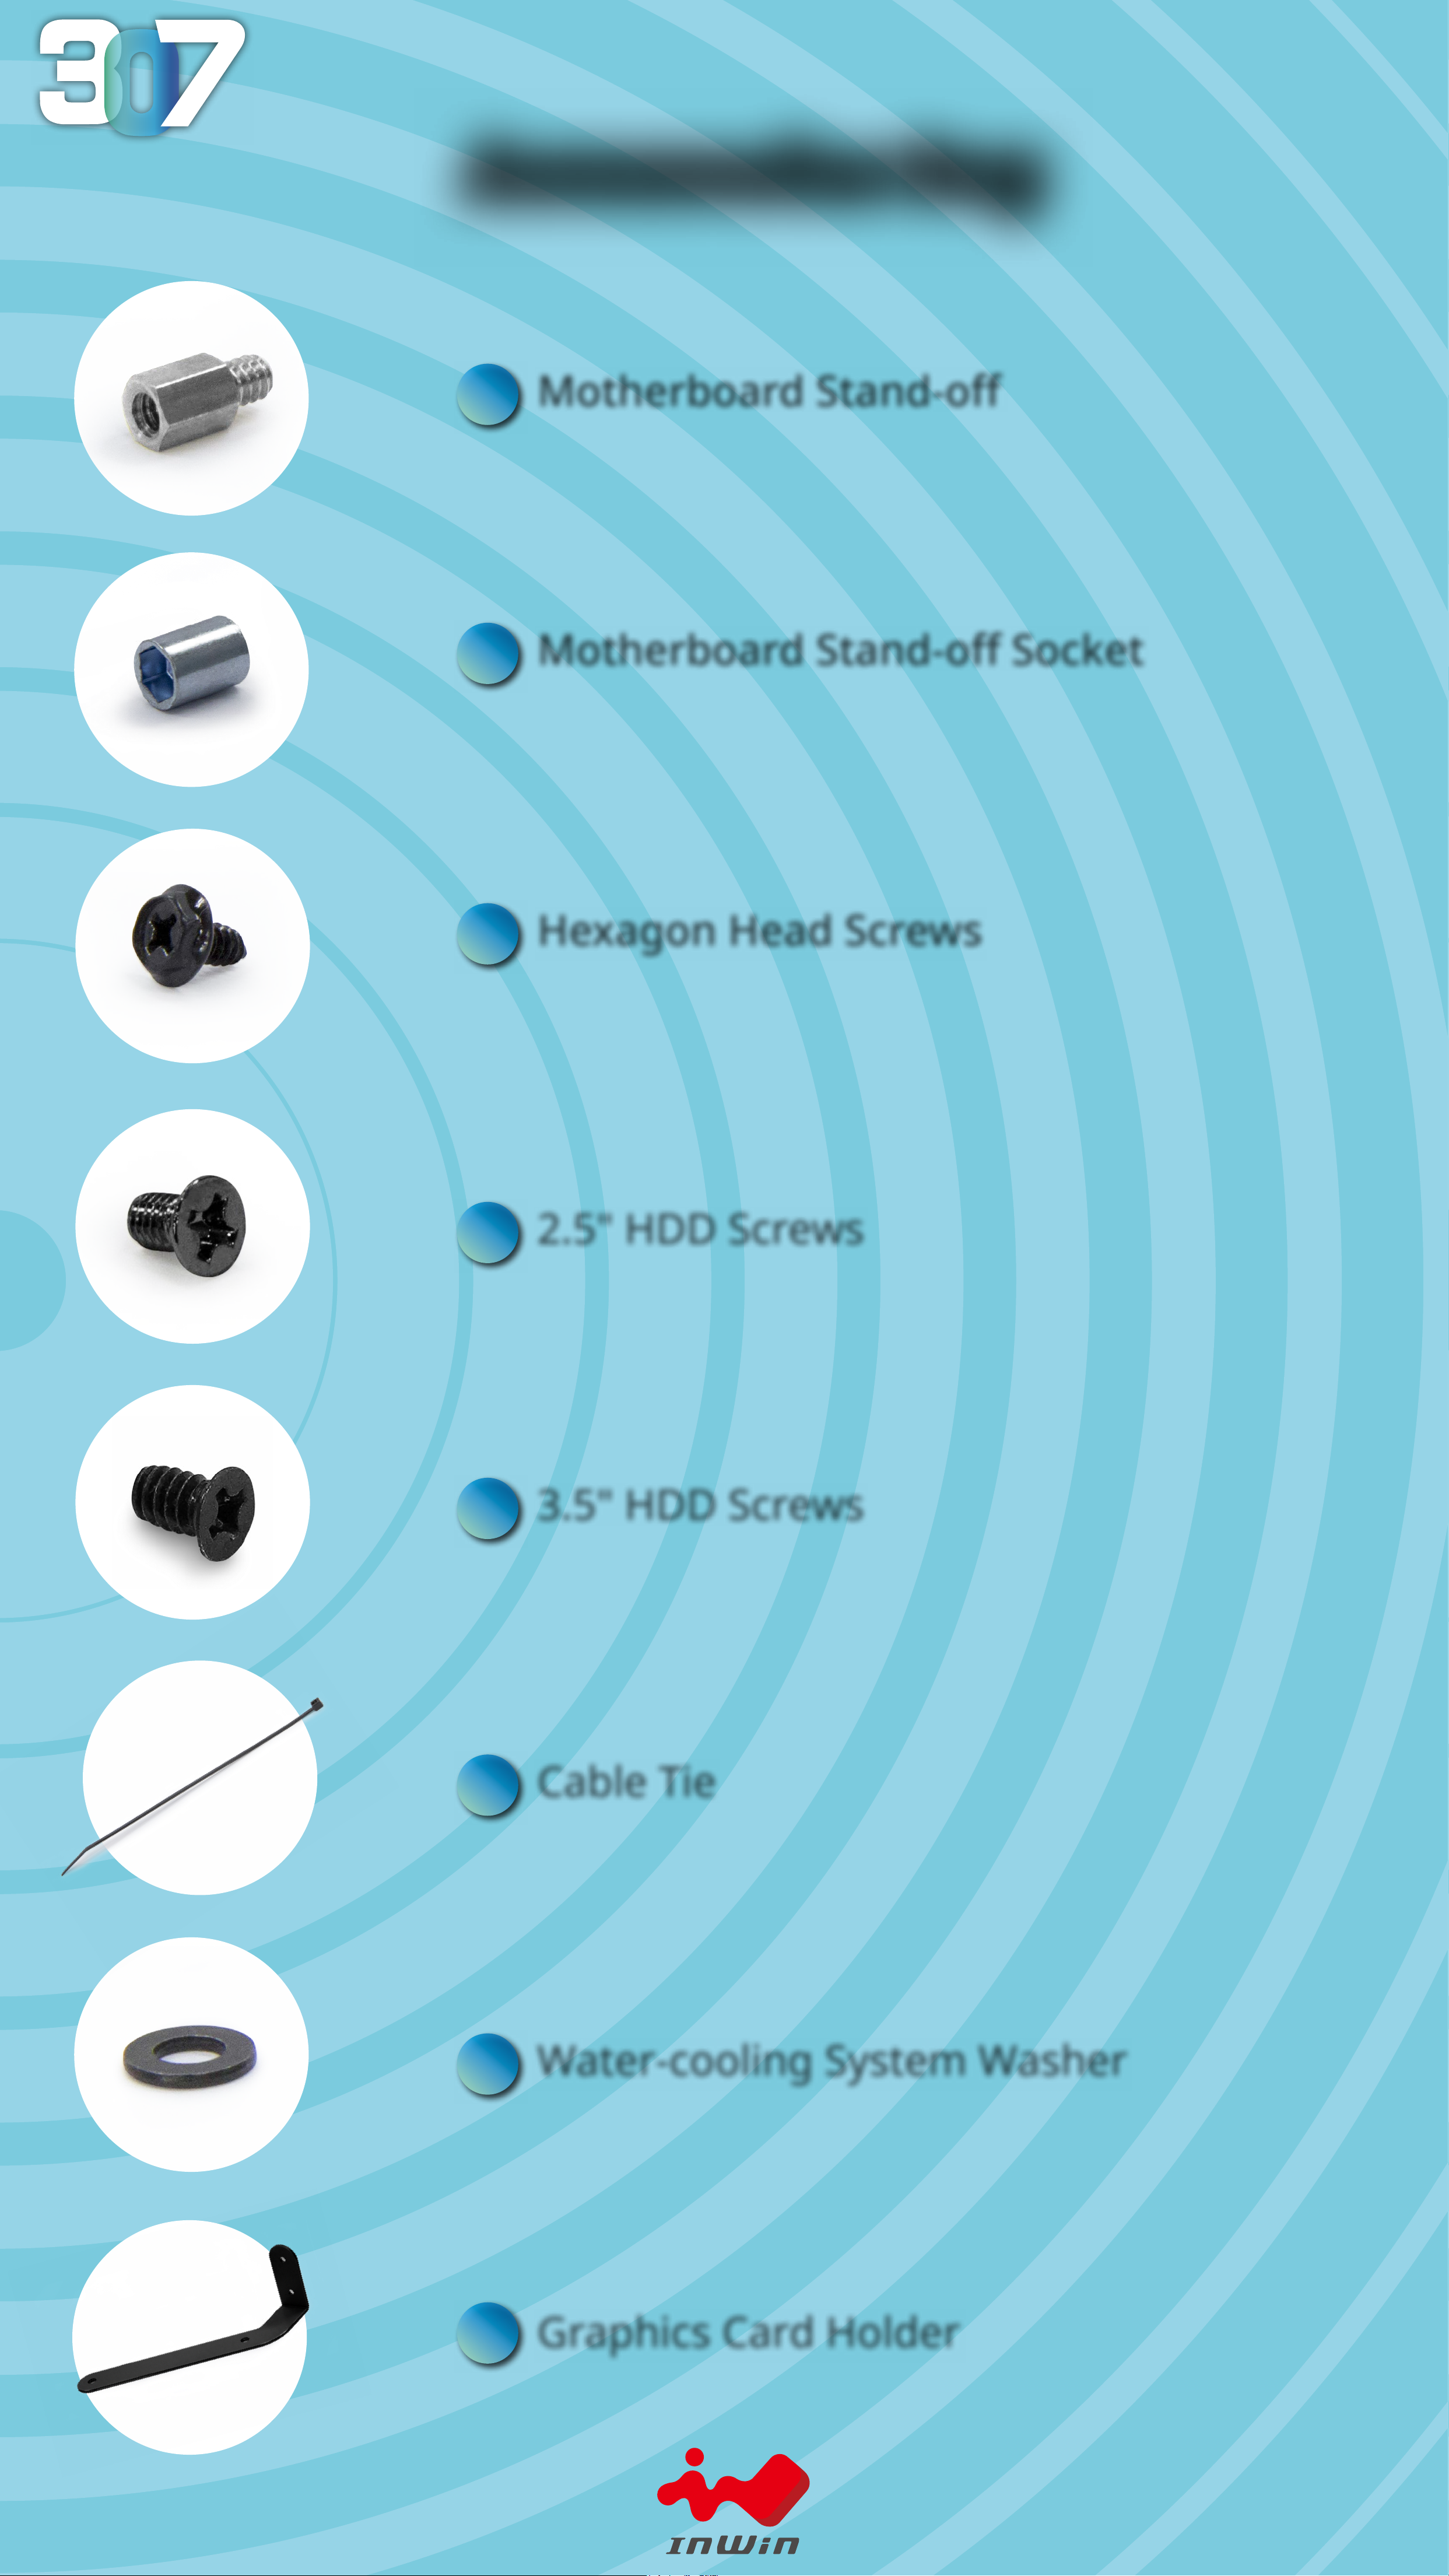
Accessories Bag
X7
A
B
Motherboard Stand-o
Motherboard Stand-o Socket
X1
X18
C
Hexagon Head Screws
X18
D
E
2.5" HDD Screws
3.5" HDD Screws
X10
X10
F
Cable Tie
X8
G
H
Water-cooling System Washer
Graphics Card Holder
X1
Page 6
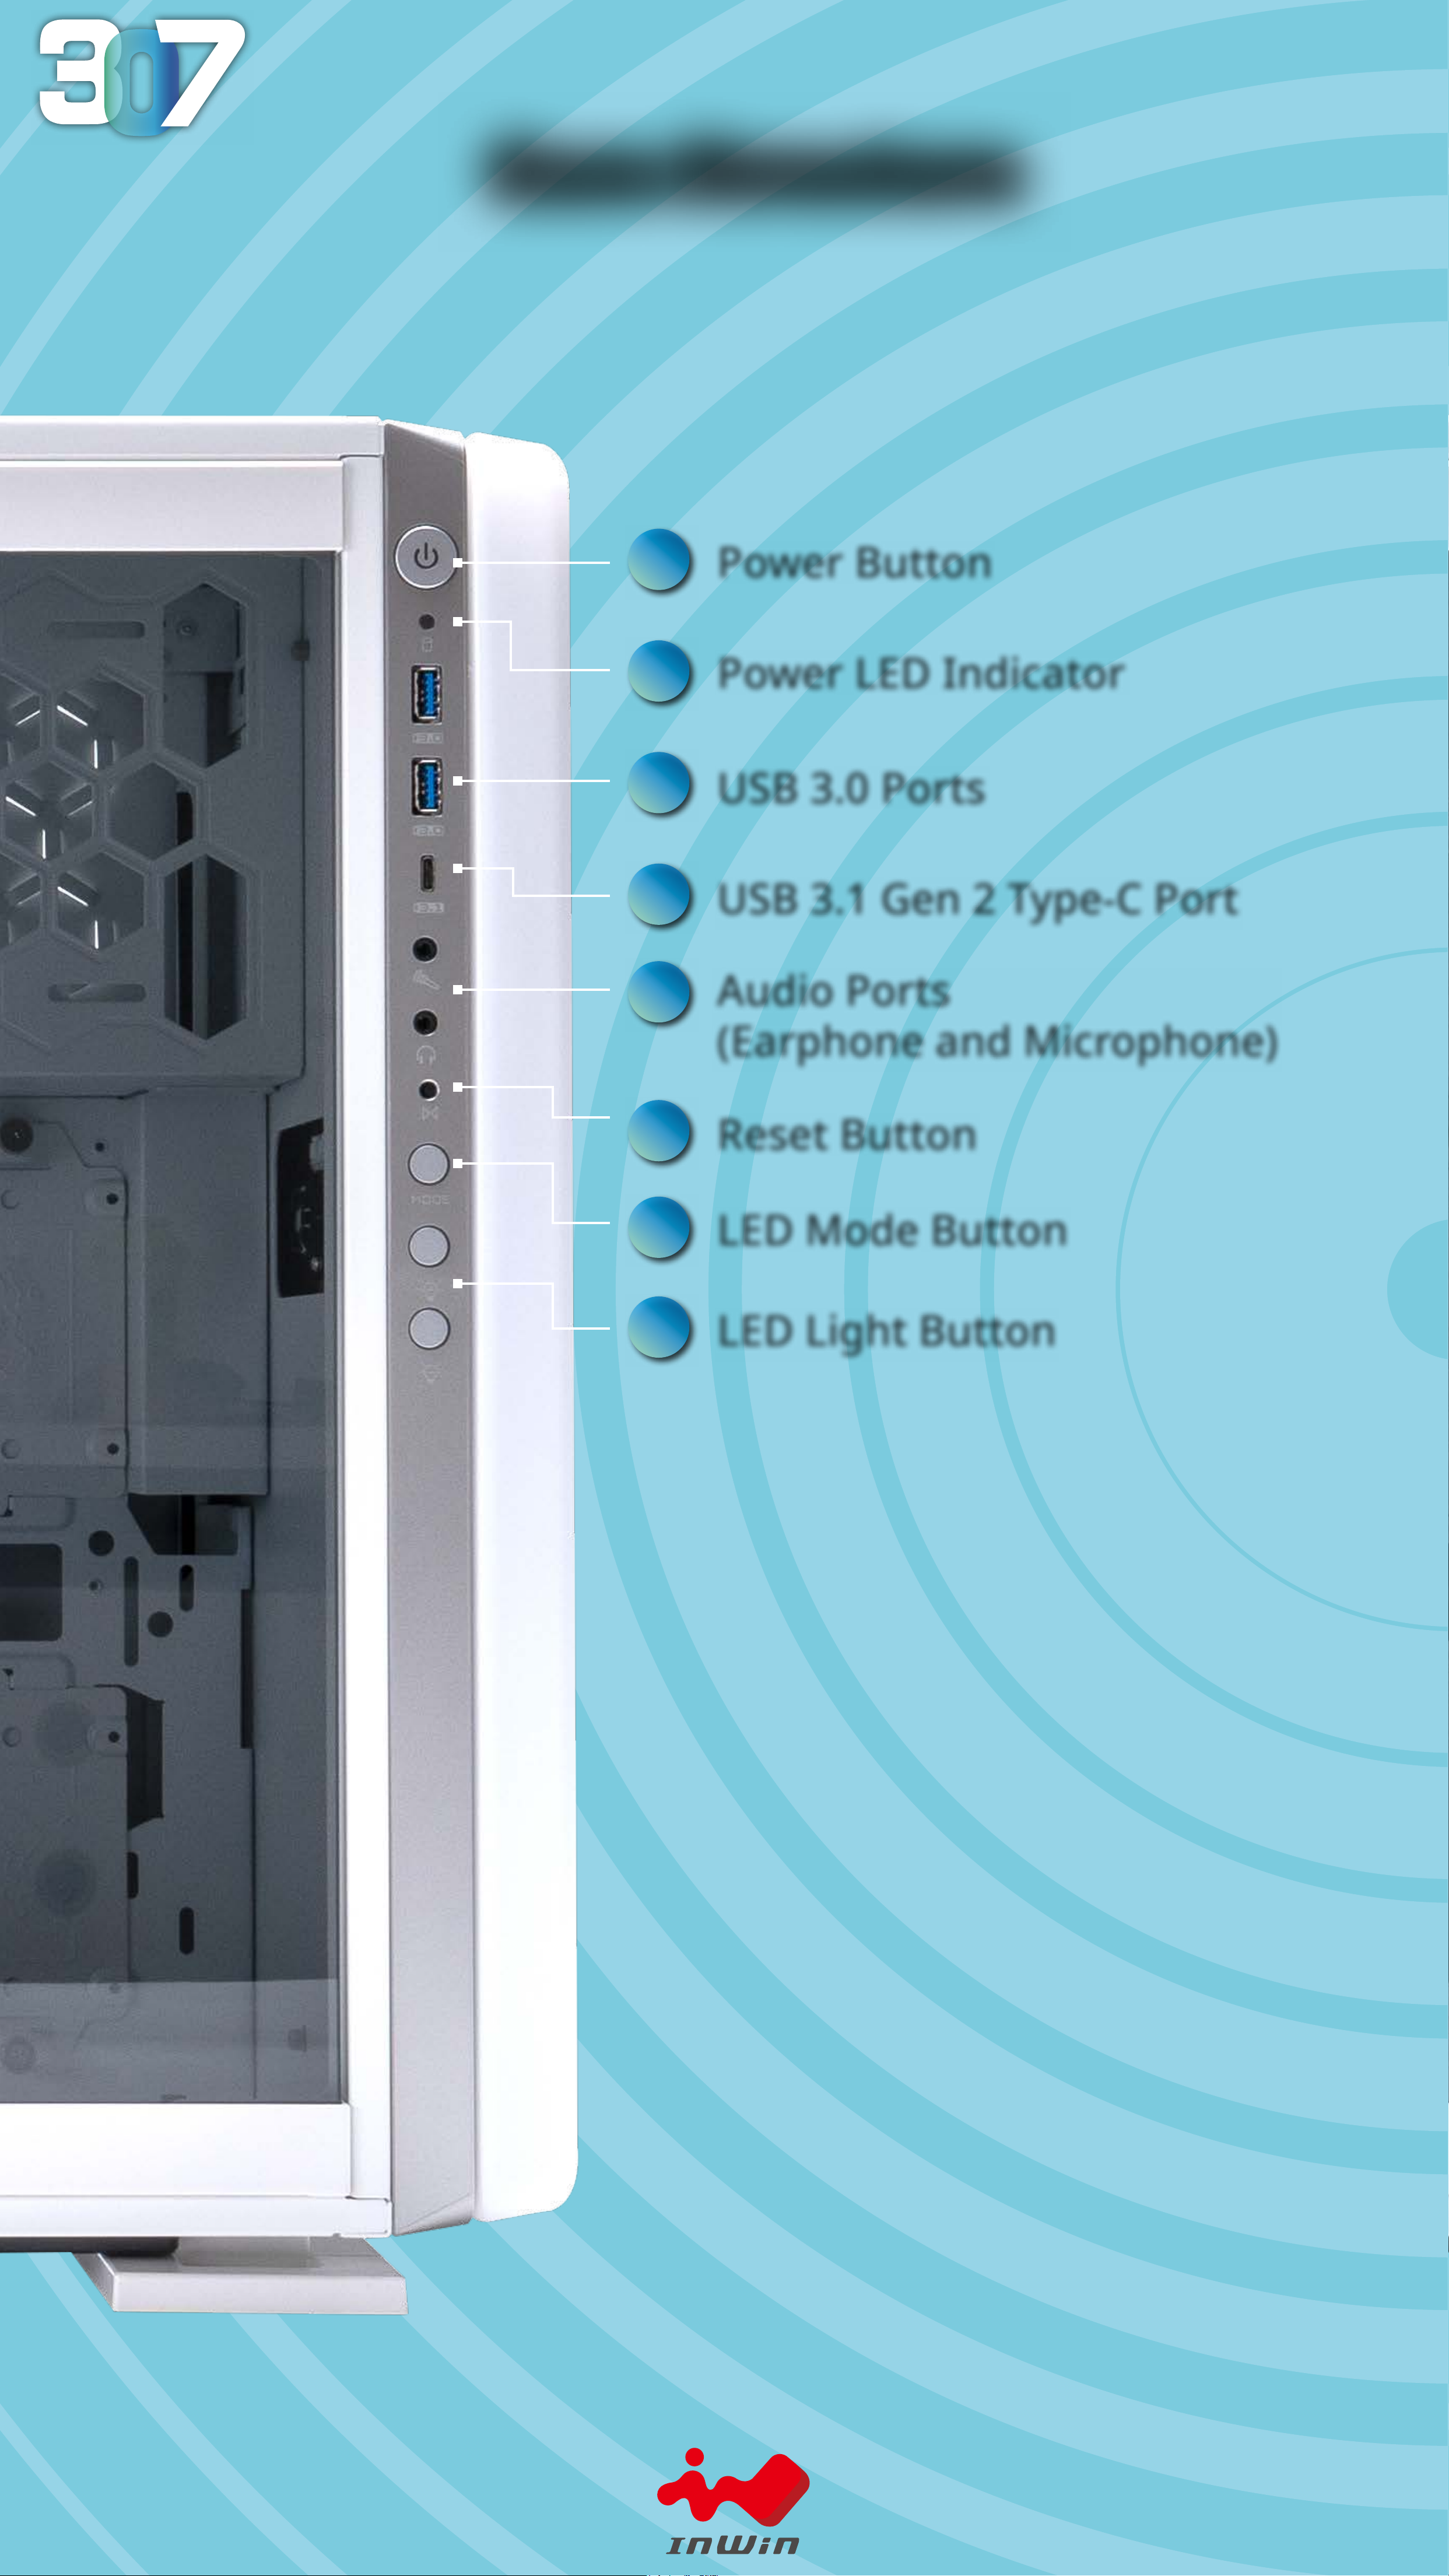
Case Structure
1
2
3
4
Power Button
Power LED Indicator
USB 3.0 Ports
USB 3.1 Gen 2 Type-C Port
5
6
7
8
Audio Ports
(Earphone and Microphone)
Reset Button
LED Mode Button
LED Light Button
Page 7
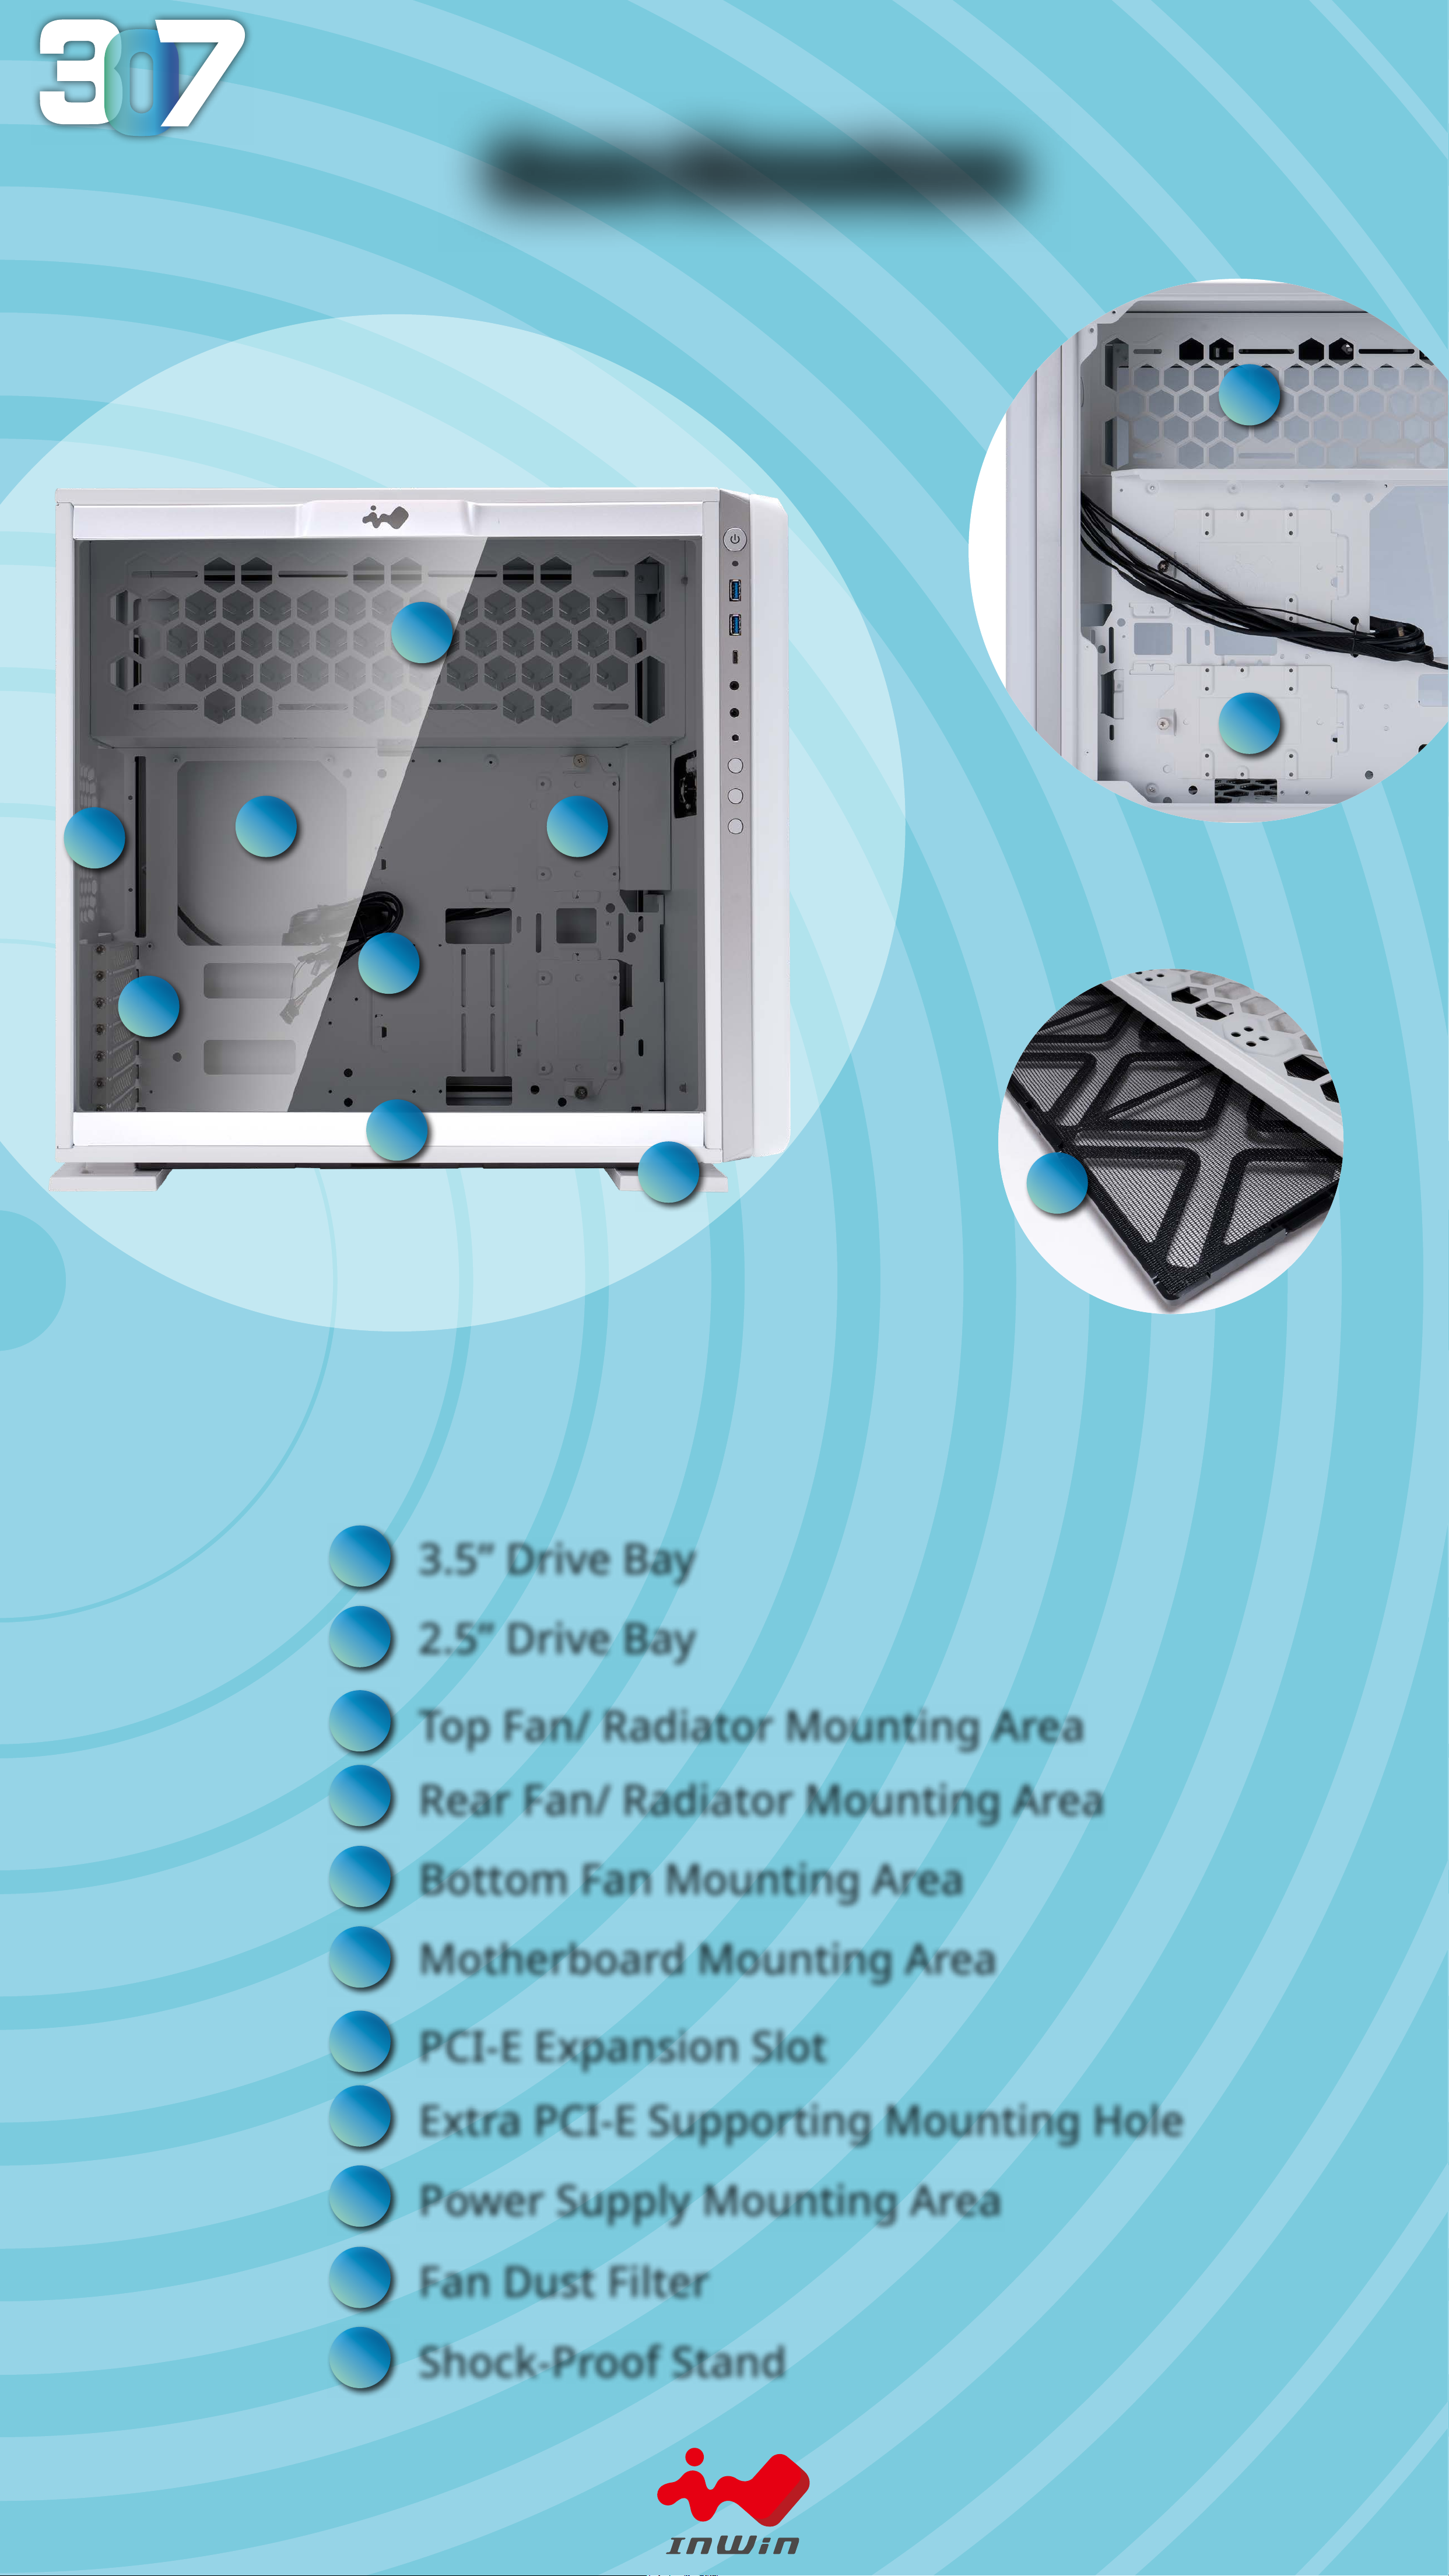
Case Structure
17
12
14
11
9
10
16
15
13
19
18
9
10
11
12
13
3.5” Drive Bay
2.5” Drive Bay
Top Fan/ Radiator Mounting Area
Rear Fan/ Radiator Mounting Area
Bottom Fan Mounting Area
14
15
16
17
18
Motherboard Mounting Area
PCI-E Expansion Slot
Extra PCI-E Supporting Mounting Hole
Power Supply Mounting Area
Fan Dust Filter
19
Shock-Proof Stand
Page 8

Installation Guide
1
Opening the Chassis
Please remove by pressing the handle on top of panel.
2
Power Supply Installation
Please pull out the insulating paper.
Pull
Page 9

Installation Guide
3
Power Supply Installation
Parts Required: Hexagon Head Screws
Power supply can be mounted on the top bracket
4
Motherboard Installation
Parts Required: Motherboard Stand-O, Motherboard StandO Socket, Motherboard Screws
Page 10

Installation Guide
POWER LED
RESET SW
POWER SW
H.D.D LED
(Depend On Motherboard)
POWER LED
POWER SW
5
Expansion Card Installation
Parts Required: Hexagon Head Screws, Graphics Card Holder
6.a
I/O Wires Installation
Page 11

PORT2_2 Blue 10
SENSE_SEND Purple 8
PORT2_R Yellow 6
PORT1_R White 4
PORT1_L Red 2
9 Brown SENCE2_R
7 Key
5 Green SENSE1_R
3 Orange PRESENCE#
1 Black GND
HD AUDIO
Installation Guide
6.b
HD Audio Header
6.c
USB3.0 Header
Page 12

Installation Guide
6.d
Type-C Cable
6.e
LED Pipe Power
Ensure the beveled edge of the PSU connector is properly
aligned with the beveled edge of the LED light connector
Red
Black
GND Black
12V Yellow
PSU Connector LED Light Connector
Black GDN
Black 12V
Page 13

Installation Guide
6.f
USB-Strip
Please plug in USB port on motherboard.
7
2.5” Drive Bays Installation
Parts Required: 2.5” HDD Screws
Page 14

Installation Guide
8
3.5” Drive Bays Installation
Parts Required: 3.5” HDD Screws
9
Fan / Liquid Cooling Radiator Installation
Parts Required: Water-cooling System Washer
Page 15

Installation Guide
10
Completing Installation
Parts Required: Cable Ties
Page 16

GLOW Software Instructions
The InWin exclusive GLOW software encourages users to create
their own unique lighting effect. Choose your own style! The
simple and clean intuitive interface is easy to operate. GLOW
possesses 12 different lighting modes, but the most intriguing
is Creation Mode, which grants users access to design their own
front panel to match their preferred theme. The only limitation is
your own imagination!
1
Please click “download” on 307 website to install the GLOW
software.
2
After downloading the GLOW on the desktop, please click to
open it.
Page 17

GLOW Software Instructions
Mode descriptions:
Night Light
Create an atmosphere
in dark room
Candle
Lighting effect by
voice catching from
microphone
Sky
Cloud floating in sky
Music
Equalizer mode’s lights
reveal the rhythm of
music
Vortex
Rotating vortex
Bounce
Light moves like
bouncing ball
Twinkling
Like stars twinkling
in night sky
Time
Clock display the time
Time Tunnel
Dazzling tunnel effect
Hourglass
Double click to set the
time, maximum 60min.
E.C.G
Heartbeat effect by
voice catching from
microphone
Creation
Customize own
lighting effect
Clap hand to reset the
time when red flash light
shows time up.
Page 18

GLOW Software Instructions
Each mode provide 3 color
to choose, except Candle
Mode.
Lights & Speed: Colors:
Control lights and speed by
+ and - by buttons, there
have 7 levels.
Page 19

GLOW Software Instructions
Please adjust the setting
from small number.
Hourglass time setting:MIC threshold settings:
Please setting from 1 to 60
minutes.
Page 20

GLOW Creation Mode
Brush
Eraser
File
Painting
Palette
SlideShow:
Trash Can
Save
Provide 4 plates to create
image, which offer 60
second maximum to
setting slideshow time on
front panel.
Page 21

Copyright © 2018 In Win Development Inc. All Rights Reserved.
 Loading...