

Page 1

Page 2
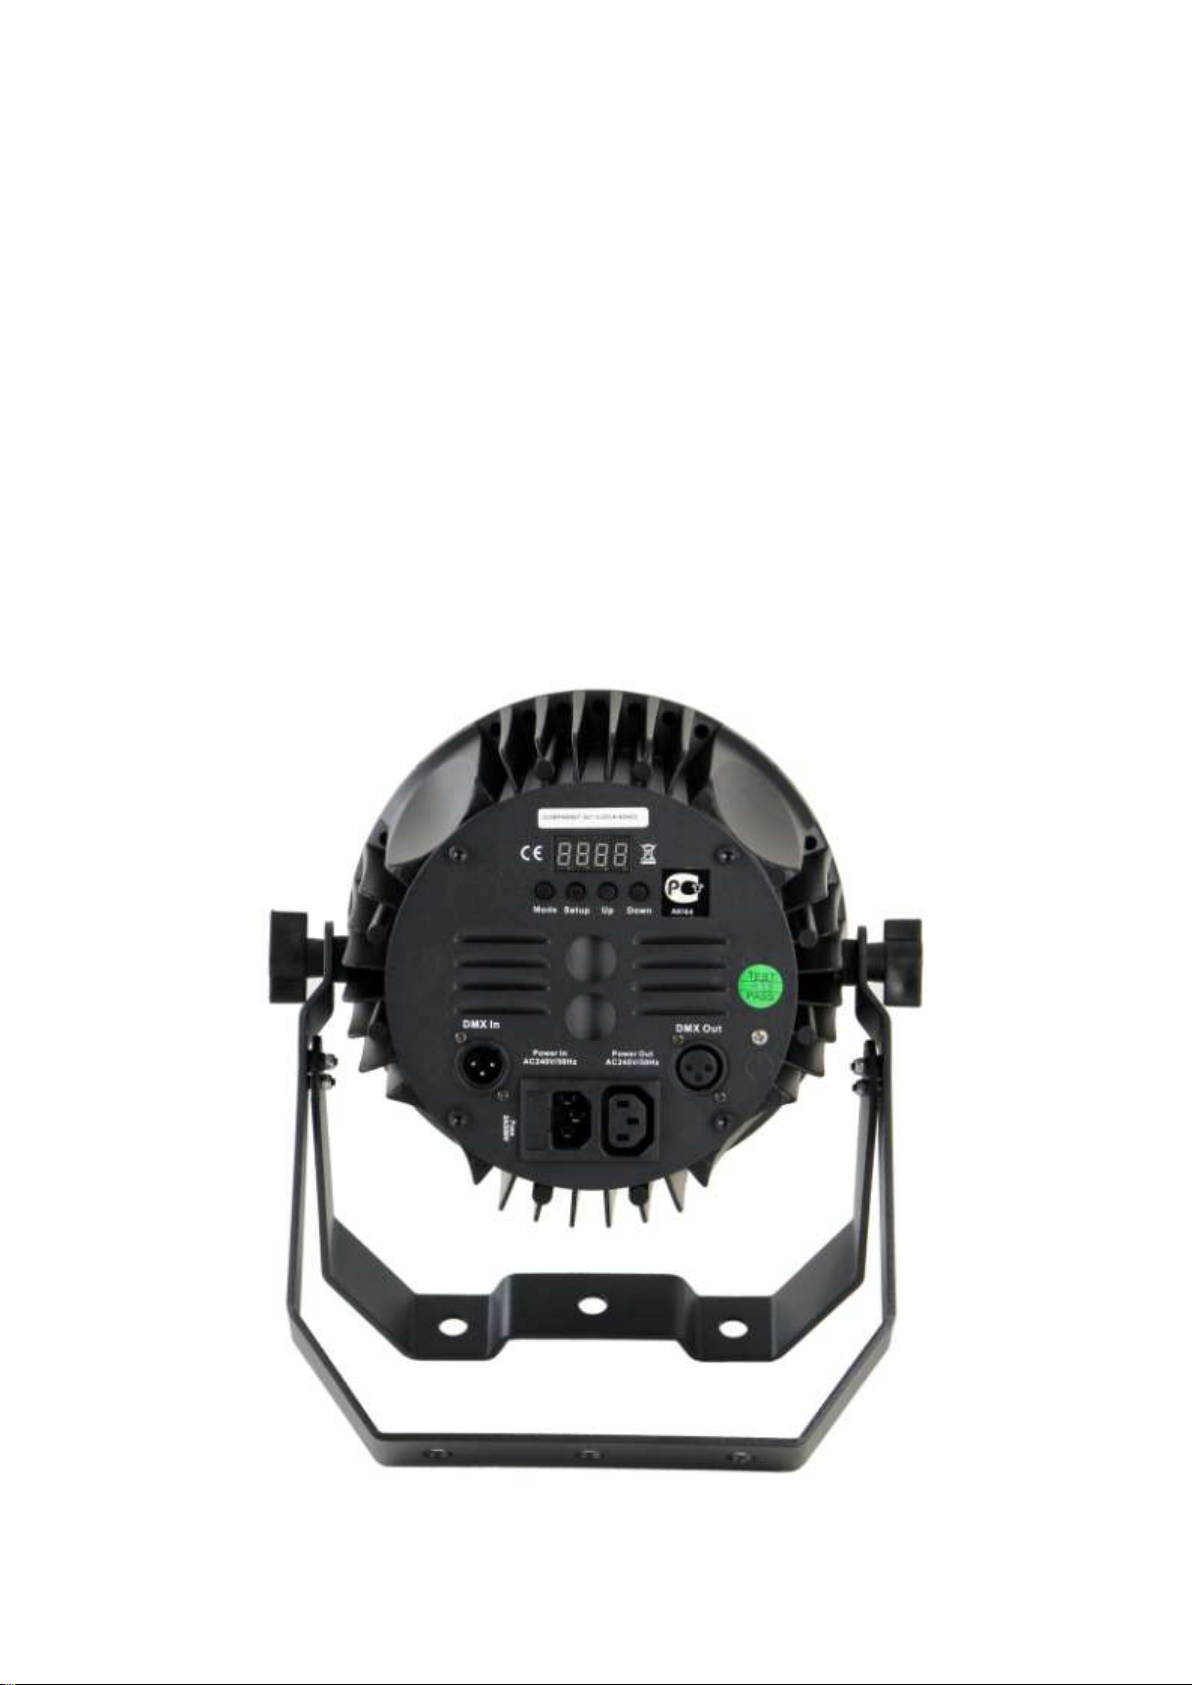
Die Casting COB Par, Tri-60W RGB
User Manual
Our Die-casting COB Par light offers many effects which you want; it is suitable for DJs, bands, nightclubs and other
performers who want LED stage light. Please read the manual before operation.
A. SPECIFICATION
1. Voltage: AC 100/240V, 50Hz/60Hz
2. Power consumption: 65W
3. LED: COB Tri-60W
4. Control feature: DMX mode, M/S, Built-in programs, auto running, sound active, static color
5. DMX channels: 3, 6, 7 CH
6. Beam angle: 90°
7. Weight: 3.68 kg
8. Size: 279*156*330mm
Page 3

B. Photometric Characteristic Chart
LED display
Color
White
Red
Orange
Pale yellow
C. OPERATION
This fixture is with rich effect programs, LED dislay for easier operation, there are six working modes:
·Auto running
·Built-in programs
.Static color
·Sound active
·DMX mode
·Slave mode
1. Auto Running Mode
Press the “MODE” enter auto running mode menu , the fixture will auto running six built-in programs ~
, the user can set their running speed, strobe speed in built-in programs mode, the preset effect will operation in turn
in auto running mode.
2. Built-in Programs Mode
1) Press the “MODE”, enter built-in programs mode menu “ ”.
2) Press the “UP” or “DOWN”, select the effect programs ~ .
When LED display show “ ”, press the “SETUP” can enter to choose static color, press the “UP” or “DOWN” can
select twelve built-in static color(see sheet 2), press the “SETUP” can set the selected color strobe , through “UP”
or “DOWN” can adjust the strobe speed “ ~ ”.
3) When LED display show “ ~ ”, the first time press the “SETUP”, will show “ ”, at this time
through the “UP” or “DOWN” to set the programs running speed ~ ; the second time press the “setup”,
will show “ ”, at this time press the “UP” or “DOWN” to set the programs strobe speed ~ .
Sheet 2 LED static color
Page 4

Green
Cyan
Blue
Purple
Pink
Yellow
Cool white
Warm white
Program
Description
Static color
Seven color fading
Three color fading
Dream
Seven color hopping
Three color hopping
Other hopping
Setting
Operation instruction
R LED diming,press UP and DOWN to set the “R“ brightness
(0—255)
G LED dimming, press UP and DOWN to set the ”G”
brightness(0--255)
B LED dimming,press UP and DOWN to set the ”G” brightness
(0--255)
Strode mode,press UP and DOWN to set the speed ( 0—99)
Sheet 3 Built-in program
3. Dimming Mode
This mode is dimming mode “Colr”, press the “SETUP” enter to choose R, G, B dimming and single color strobe.
4. Sound-Active Mode
1) Press the “MODE”, enter to sound active mode menu “ ”.
2) Press the “UP” or “DOWN”, set the sensitivity of the sound active “ ~ ”.
5. DMX Mode
1) Press the “MODE”, enter DMX mode menu “ ”.
This product has automatic identification functions. Once receive DMX signal will enter to DMX mode. Once the signal
disappear, will return the former mode.
Page 5

2) When the LED display shows “ ”, press the “UP” or “DOWN” button, set the DMX address “ ~ ”.
Channel Val ue Funct i on
1 0-255 R 0-100%
2 0-255 G 0-100%
3 0-255 B 0- 100%
Channel Val ue Functi on
1 0- 255 Master di mmi ng
2 0- 255 R 0-100%
3 0- 255 G 0-100%
4 0- 255 B 0-100%
0-- 10 No f uncti on
11-255 Sound-acti ve
0-- 19 LED no str obe
20-255 Strobe(CH1-CH4), l arger val ue, faster speed
0-- 255 Sound-acti ve sensi ti vity
6
5
Channel Val ue Functi on
1 0-255 Master di mmi ng
2 0-255 R 0-100%
3 0-255 G 0-100%
4 0-255 B 0- 100%
0-- 24 No fuct i on
25-49 Auto running
50-74 Program 2
75-99 Program 3
100-124 Program 4
125-149 Program 5
150-174 Program 6
175-199 Program 7
200-255 Sound acti ve
6
0-255 Program running speed, l arger value, faster speed
0-19 LED no strobe
7
0-255 Strobe speed. l arger val ue, f aster speed
5
3) When the LED display shows “ ”, press the “SETUP” button enters to set the DMX working modes: ,
,
4) When the LED display shows” ”, press the “SETUP” button enters to the DMX Dimming mode. Press “UP” and
“DOWN” button to choose turn on or turn off the dimming function. It will be hysteresis phenomenon when under dimming
mode.
DMX Mode1:
DMX Mode2:
DMX Mode 3:
6. Master/slave Mode
This mode is M/S Mode, the salve fixtures will follow the programs after they were linked to the master fixture via DMX
cables.
Page 6

C. Restore factory setting
Press “MODE”, LED displays , enter to the setting menu .
Press the “MODE” and “SETUP” at same time for a few seconds later, will restore factory settings, the data will be
initialized.
D. Product information
Press “Mode”, LCD shows then enter to the product information. Press “UP” and “DOWN” to choose the options.
When shows , press “SETUP” to check the product version
When shows , press “SETUP” to check the temperature control
When shows , means no temperature control
When shows , means normal temperature control
When shows , means temperature control dysfunction
Page 7

ООО «ИНВАСК»
Адрес: 143406, Московская область, Красногорск, ул. Ленина, дом 3-Б
Тел. (495) 565-0161 (многоканальный)
Факс (495) 565-0161, доб. 105
http://www.invask.ru e-mail: invask@invask.ru
Сервис-центр «ИНВАСК»
Адрес: 143400, Московская область, Красногорск, Коммунальный квартал,
дом. 20
Тел. (495) 563-8420, (495) 564-5228
e-mail: service@invask.ru
 Loading...