

Invitrogen E-Gel Safe Imager, E-Gel iBase, E-Gel Go! Quick Reference
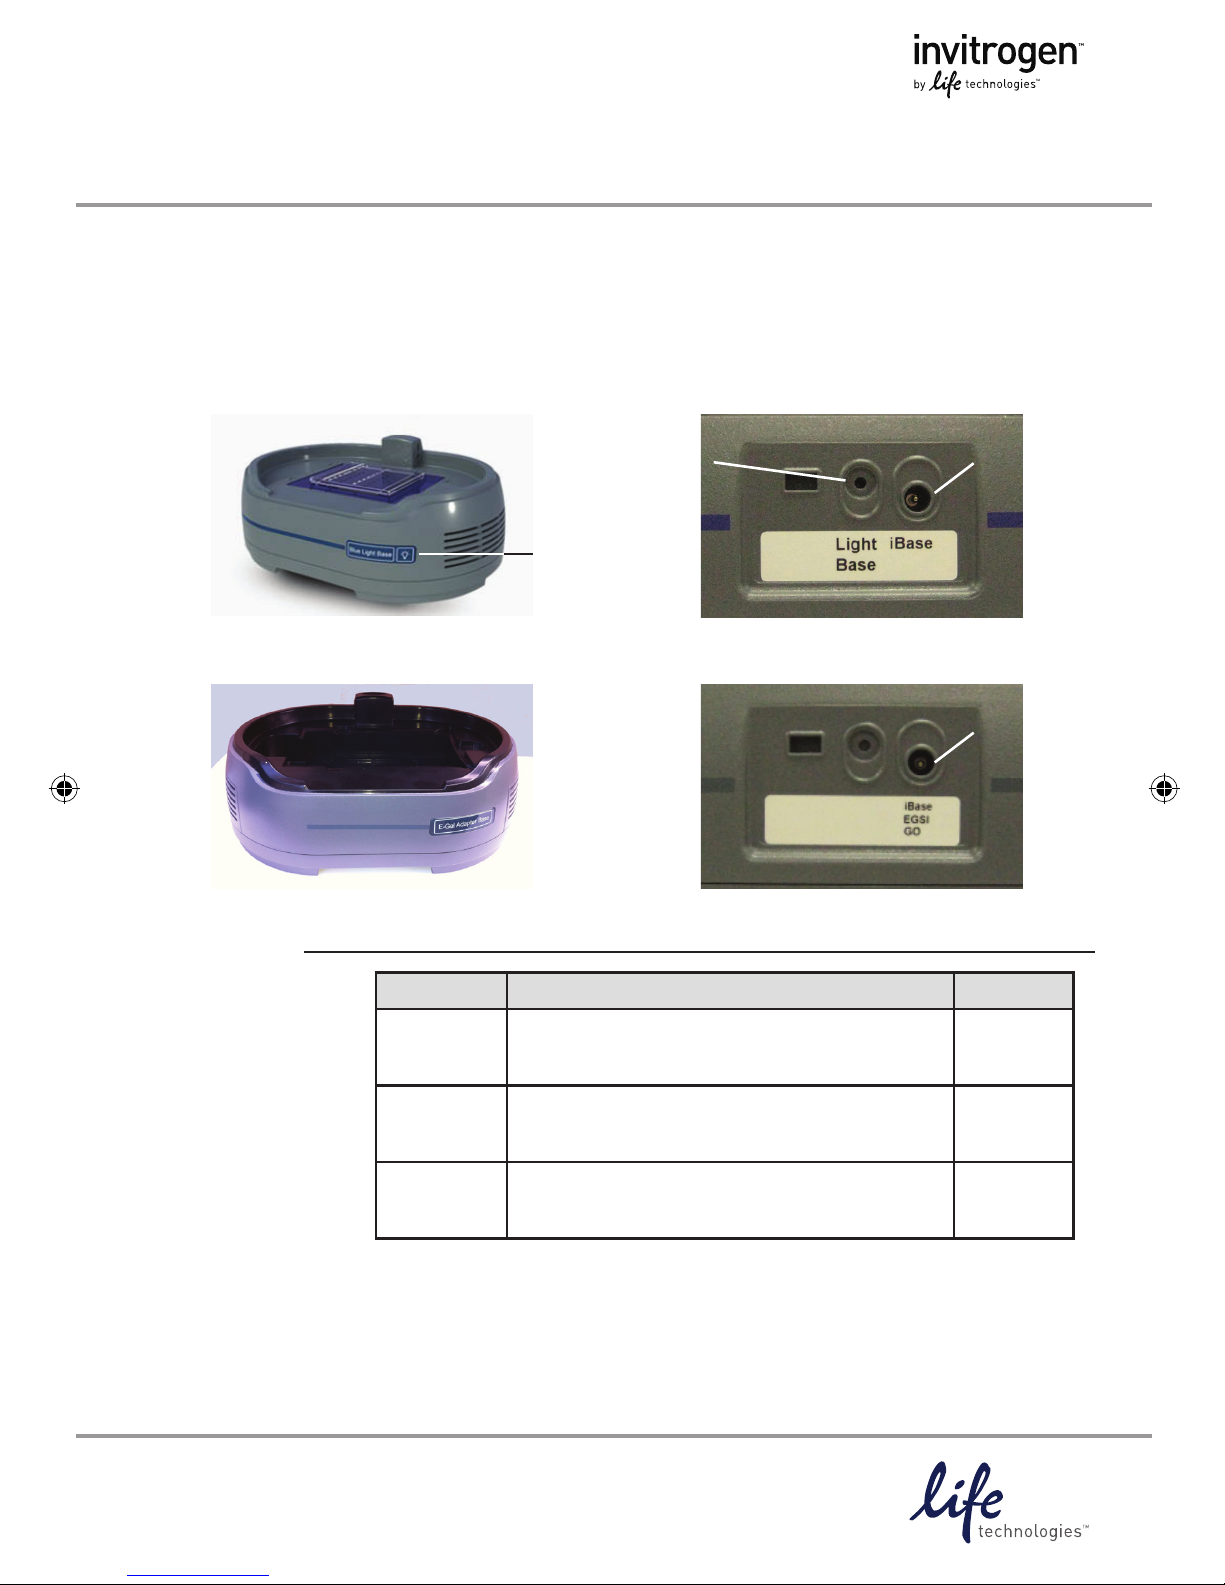
E-Gel® Imager Light/Adaptor Base
Cat. nos. 4466602, 4466603, 4466604
Rev. Date: 6 August 2011
Part no. 25-1072
MAN0004954
Intended Use
For research use only. Not intended for any animal or
human therapeutic or diagnostic use.
QUICK REFERENCE
E-Gel® Imager Adaptor Base
E-Gel® Imager Light Base
Catalog no. Components Quantity
4466602 E-Gel® Imager UV Light Base
Universal 12 V Power Cord
1
1
4466603 E-Gel
®
Imager Blue-Light Base
Universal 12 V Power Cord
1
1
4466604 E-Gel
®
Imager Adaptor Base
DC Connector Cable
1
1
Kit contents
ON/OFF
Power Button
Directions for installation of the E-Gel® Safe Imager™, E-Gel® iBase™ Device, and E-Gel®
Go! Base with the E-Gel
®
Imager UV/Blue-Light Base, or E-Gel® Imager Adaptor Base are
described below. For detailed instructions refer to the E-Gel
®
Imager Gel Documentation
System manual included in the software CD, or contact Technical Support.
E-Gel® Imager Adaptor Base Port
E-Gel® Imager Light Base Ports
48 V Power
Port
12 V Power
Port
48 V Power
Port
E-Gel® iBase™ with the E-Gel® Imager Light Base
The E-Gel® Imager Blue-Light Base
and E-Gel
®
Imager UV Light Base
can be used to provide transillumination for the E-Gel
®
iBase™.
For best results, afx the E-Gel
®
Imager Light Diffuser to the bottom
of the E-Gel
®
iBase™ when using this
conguration.
Installing
the E-Gel®
iBase™ with
the E-Gel®
Imager
Light Base
Page 2
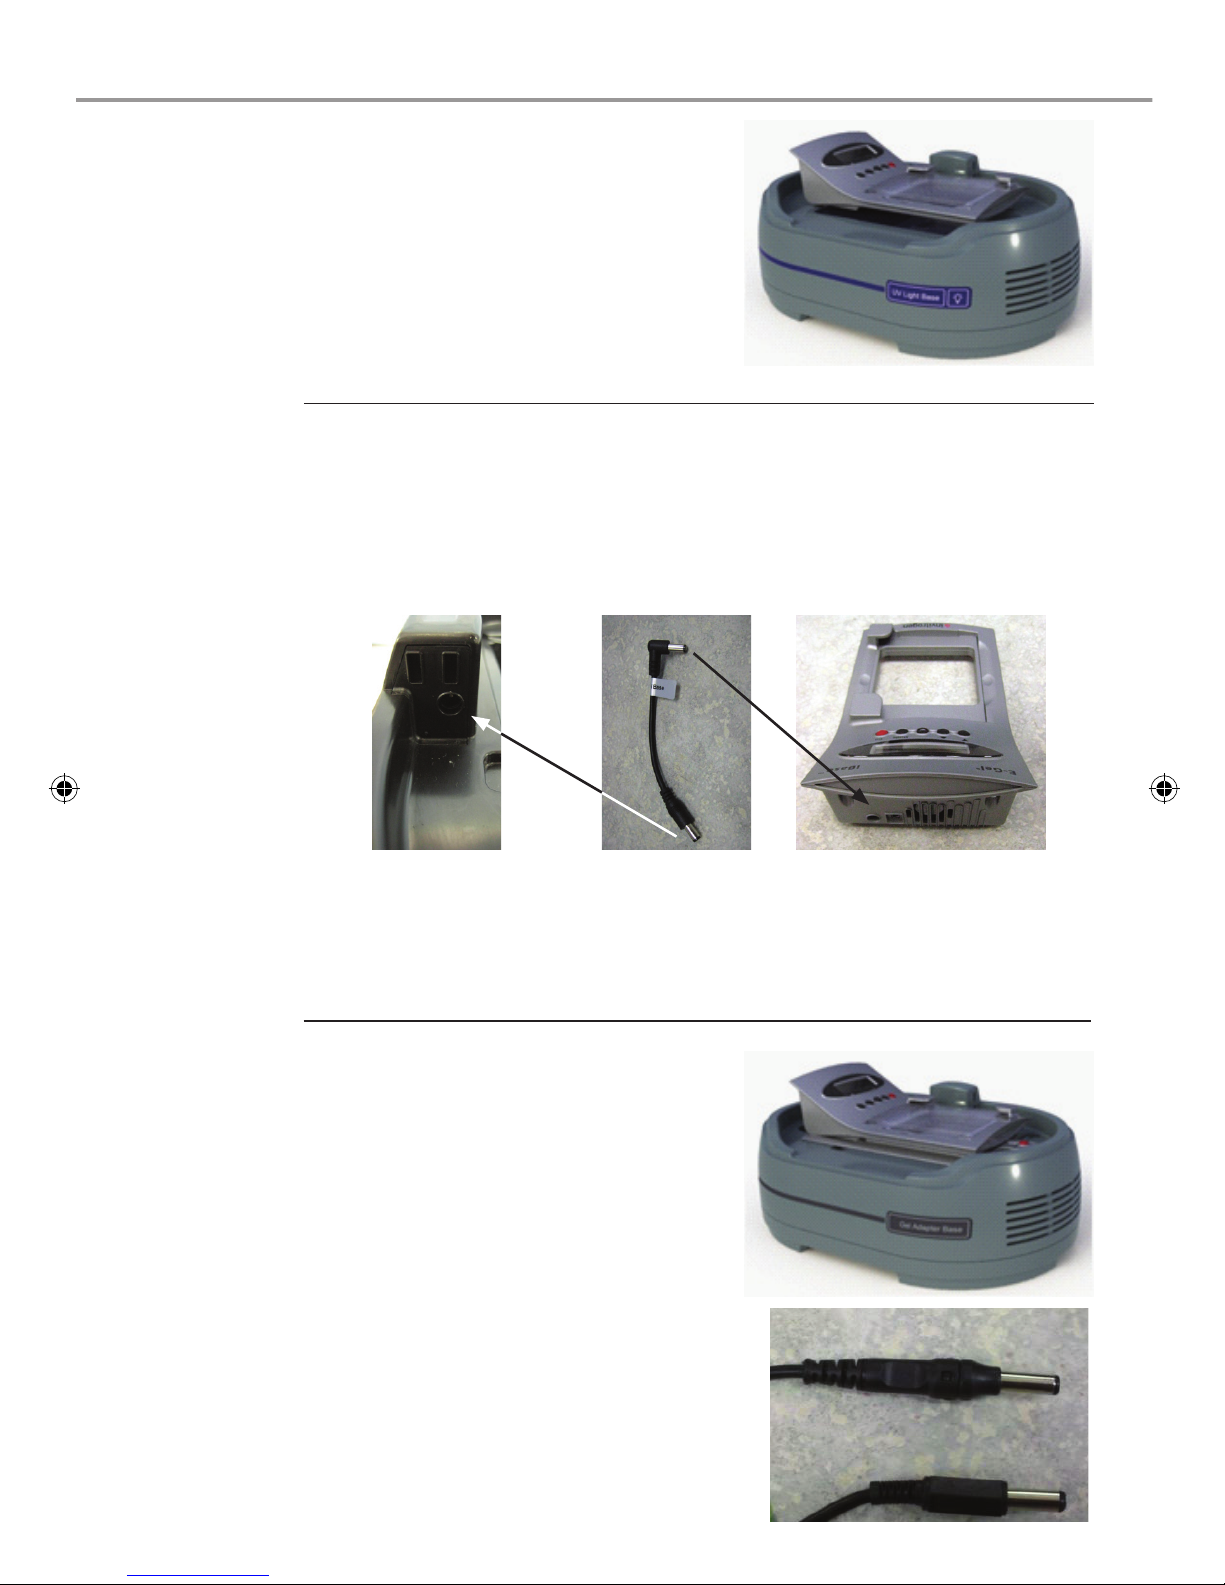
Installing
the E-Gel®
iBase™ with
the E-Gel®
Imager
Adaptor Base
DC Connector
Cable
1. Place the E-Gel® iBase™ directly onto the transilluminator surface of
the E-Gel
®
Imager Light Base.
2. Connect the DC Connector Cable between the E-Gel
®
iBase™ and the
E-Gel
®
Imager Adaptor Base.
3. Connect the E-Gel® iBase™ power supply cable to the 48 V power
port at the rear of the E-Gel
®
Imager Light Base.
4. The E-Gel
®
iBase™ Device is now ready for use with the E-Gel®
Imager system.
E-Gel® Imager
Adaptor Base
E-Gel
®
iBase™ Device
The E-Gel® Safe Imager™ can be
used with the E-Gel
®
Imager
Adaptor Base to provide
transillumination for imaging with
the E-Gel
®
iBase™ Device.
Note: Make sure to press the ON
button of the E-Gel
®
Safe Imager™.
for 2 seconds to extend the duration of transillumination.
Important: There are two types of
plug on the E-Gel
®
Safe Imager™.
Choose the appropriate
installation method for the E-Gel
®
iBase
™
/E-Gel® Safe Imager™ based
on whether your E-Gel
®
Safe
Imager
™
has Plug A, or Plug B.
Plug A
Plug B
 Loading...