

Page 1
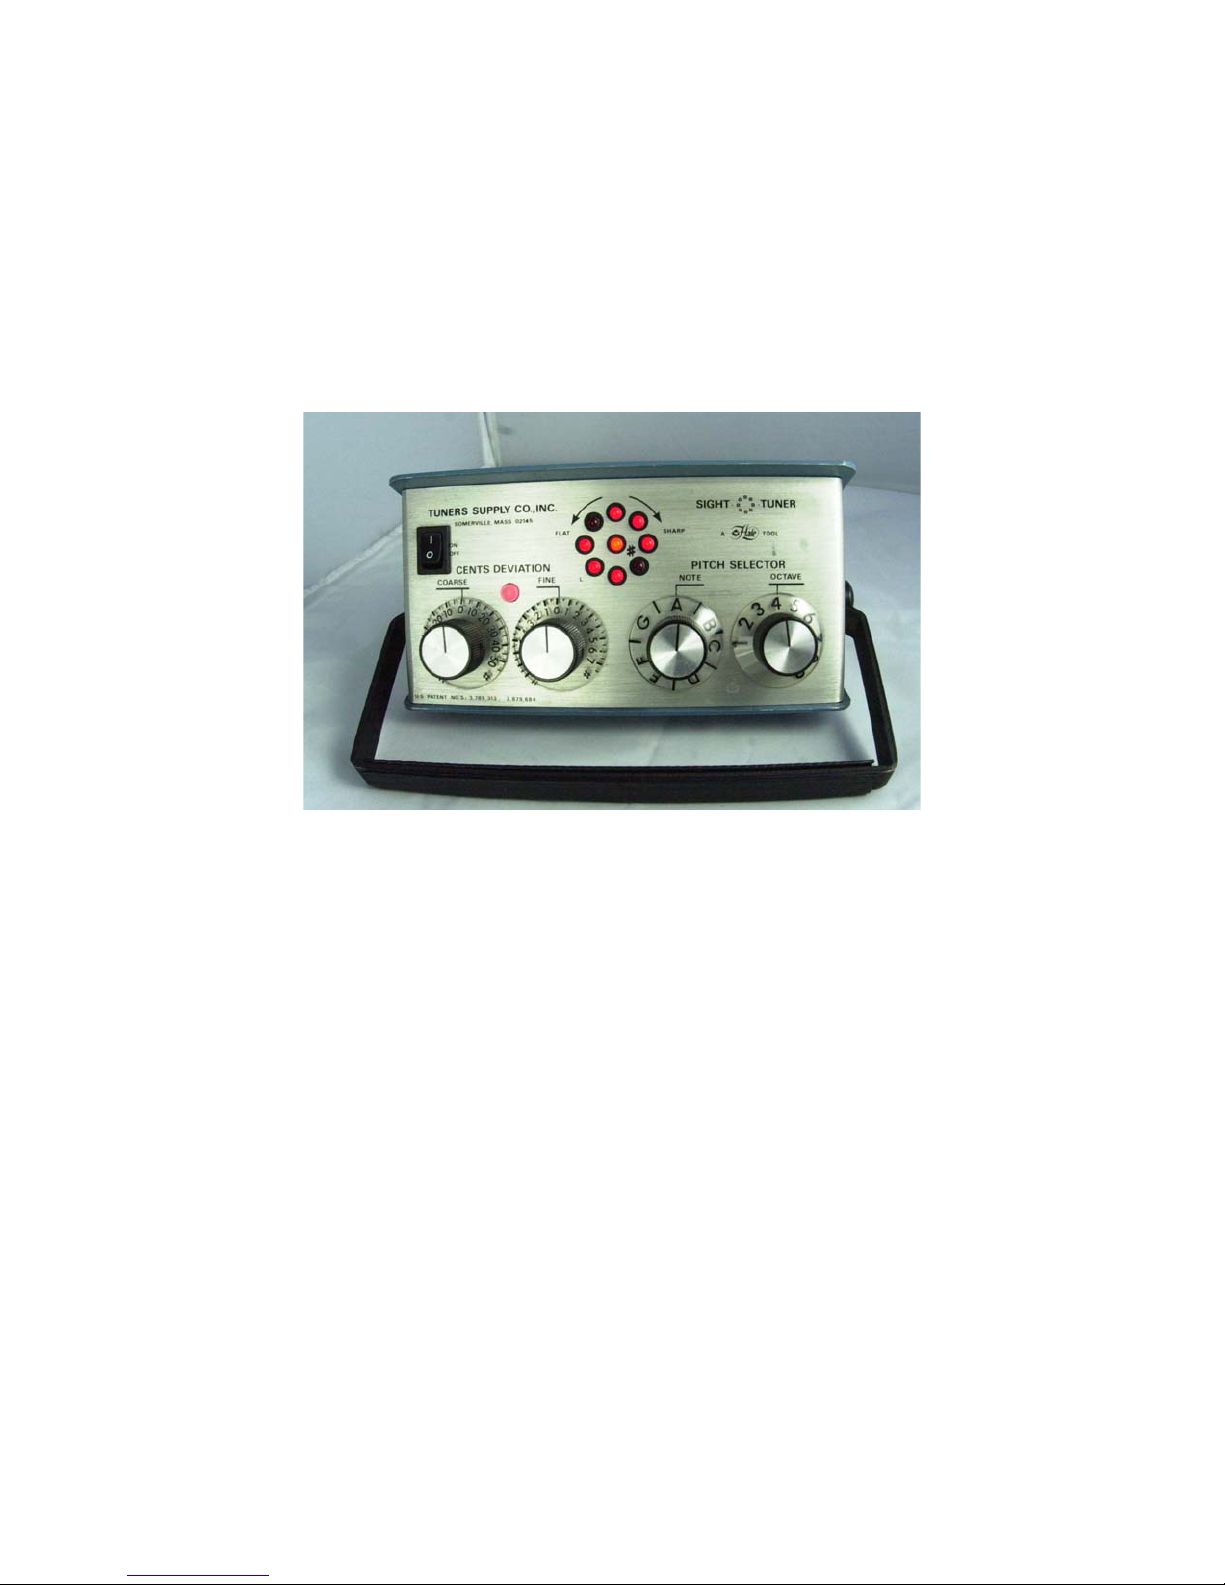
SIGHT-O-TUNER II
OPERATING MANUAL
INVENTRONICS, INC.
130 MIDDLESEX RD, Suite 14
TYNGSBORO, MA 01879-2725
www.Accu-Tuner.com
1-800-FAST-440
Outside USA/Canada CALL 978-649-9040
Page 2

WRITTEN BY:
PAUL L. SANDERSON
BRIAN DAY
THIS MANUAL IS COPYRIGHTED. ALL RIGHTS ARE RESERVED. THIS DOCUMENT MAY NOT, IN
WHOLE OR PART, BE COPIED, PHOTOCOPIED, REPRODUCED OR TRANSLATED WITHOUT PRIOR
CONSENT IN WRITING FROM INVENTRONICS, INC.
©2012 INVENTRONICS, INC.
TYNGSBORO, MA 01879
INTRODUCTION .............................................................................. 2
GETTING STARTED ......................................................................... 3
LOW BATTERY INDICATOR .............................................................. 3
THE TWO MODES OF OPERATION .................................................... 3
THE TUNE MODE............................................................................ 3
STRETCH TUNING .............................................................................. 3
MEASURING THE F4 STRETCH NUMBER ........................................... 4
STRETCH TUNING PARTIALS ................................................................. 5
STRETCH TUNING FROM C3 TO F6........................................................ 5
UNISON TUNING.................................................................................5
TUNING BEYOND C3 TO F6.............................................................. 6
DIRECT TUNING THE HIGH TREBLE................................................... 6
DIRECT TUNING THE BASS.............................................................. 6
CENTS OFFSET FOR HZ AT A4 ...............................................................7
INPUT-OUTPUT JACKS .................................................................... 7
BATTERY CARE............................................................................... 8
LITHIUM ION.................................................................................. 8
BATTERY CHARGING CIRCUIT ......................................................... 8
ONE YEAR WARRANTY.................................................................... 8
APPENDIX A ................................................................................... 9
CONCISE STEP-BY-STEP TABLES OF STANDARD ROUTINES .............................9
1
Page 3

APPENDIX B.................................................................................... 9
CENTS TABLES FOR NON-EQUAL TEMPERAMENTS ........................................9
CENTS OFFSET FOR HZ AT A4 ............................................................. 10
APPENDIX C ................................................................................. 10
AURAL AND VISUAL TUNING................................................................10
APPENDIX D ................................................................................. 11
WHAT ARE PARTIALS AND BEATS? ........................................................ 11
APPENDIX E.................................................................................. 12
THE TWO-OCTAVE "A" TEMPERAMENT .................................................. 12
APPENDIX F.................................................................................. 15
CONTIGUOUS-INTERVAL TUNING TESTS FOR ELECTRONIC PIANO TUNERS.......... 15
APPENDIX G ................................................................................. 16
OCTAVE TUNING .............................................................................. 16
SIGHT-O-TUNER II SPECIFICATIONS................................................ 17
INPUT/OUTPUT JACKS ..................................................................18
SIGHT- O-TUNER® II
INSTRUCTION MANUAL
INTRODUCTION
The Musicalibrator (later renamed the Sight-O-Tuner (SOT)) was originally invented and designed by
Dr. Albert E Sanderson in the early seventies as a prototype to tune pianos. The invention led to the
application and granting of eight patents on circuit design and the method of measuring
inharmonicity to create a tuning that took inharmonicity into account. The patent rights were later
licensed to Tuners Supply to produce the Sight-O-Tuner. After a few years went by, there was an
attempt by Tuners Supply to change overnight the reimbursement terms of the contract that led to
a lawsuit. Those problems with the contract prompted Al Sanderson to redesign and start
producing the Sanderson Accu-Tuner® in his basement. By producing the product himself, Dr.
Sanderson had control over the quality and quantity of the units produced. Initially Inventronics was
repairing the Sight-O-Tuners to help out piano technicians in an attempt to keep quality of the SOT
up to Dr. Sanderson’s standards.
Jumping forward thirty years, recently the last person repairing the Sight-O-Tuners passed away,
and we received quite a few phone calls asking who would repair the Sight-O-Tuners. This got the
ball rolling to create a solution. Quite a few of the components in the SOT are no longer available
and repairing the original circuit design was not an option. So one of Inventronics employees, Brian
Day, started working on the idea of replacing the entire electronics and using some of the circuit
designs Inventronics uses in the production of the Accu-Tuners. This is the solution Inventronics has
come up with to keep the SOT owners in business until they are ready to step up to the Sanderson
Accu-Tuner.
Tuning with the new electronics in the Sight-O-Tuner II (SOT II) is very similar to the previous SOT
with two new features:
2
Page 4

1) The SOT II can automatically set the cents for a Stretch Tuning.
2) Coarse cent dial can be set up to jump to the nearest five cent increment, for more
accuracy.
GETTING STARTED
When the SOT II is turned on, the SOT II starts in the self-calibrating state for two seconds, two
LEDs will be lit, generally at three and nine o’clock, and then automatically switches over ready to
tune.
The SOT II will be fully charged when received. The Lithium Ion (Li-ion) battery will function for
thirty or more hours before charging is required. This battery is tolerant of deep discharge, and the
SOT II will turn itself off at a safe low-battery voltage, shortly after the Lo Battery LED is lit.
LOW BATTERY INDICATOR
The SOT II indicates the low battery similar to the original SOT, the LED between six and nine
o’clock will remain lit. Shortly after the LO Batt LED is lit, the SOT II will turn itself off to before a
low battery condition can create unstable results.
THE TWO MODES OF OPERATION
The Sight-O-Tuner II has two basic modes of operation:
1) The TUNE mode.
2) The Stretch Mode
1) When the SOT is first turned on, calibration signal will display for two seconds, and then it
enters the TUNE mode.
2) There is a new button between the COARSE and FINE labels on the face of the SOT. Once you
have measured the stretch number, press the STRETCH button, the partial and cents deviation
for the stretch tuning will automatically be set internally.
THE TUNE MODE
Immediately after exiting from the CALIBRATION mode, whatever the combination of the NOTE,
OCTAVE, FINE and COARSE cents knobs are set to is the pitch that the SOT will be tuning. This is
essentially what you see is what you get, as long as the STRETCH button is NOT LIT.
STRETCH TUNING
The previous Stretch Calculator slide rule is replaced with the ability of the new microprocessor to
set the partial and cents automatically for you. This improvement will make the tuning of a piano
quicker and being able to re-check the tuning almost instantaneous. In this mode, the Sight-O-Tuner
II creates a 41 note tuning that is derived from the measurement of the stretch number from F4 on
the piano being tuned. Every time the note or octave is changed, the computer references the
stretch tuning from the memory and sets the partial and cents deviation correctly for that note.
The new SOT has the stretch tuning curves built in for stretch numbers from 2.0 to 9.0, which
works out to fifteen different stretch curves are built in for automatic setting of the cents knob.
3
Page 5

MEASURING THE F4 STRETCH NUMBER
1) Set the Sight-O-Tuner to F5, zero cents in the TUNE mode (stretch button not backlit). Play one
string of F4 and use the COARSE cents knob to stop the rotation of the LEDs.
2) Turn the OCTAVE knob to step up one octave to F6, and play F4 again, and use the FINE cents
knob to stop the rotation of the LEDs. The fine cents knob now displays the F4 stretch number,
which is the difference in cents between the second and fourth partials of F4. Please jot down
the stretch number for use in step 5 or make a mental note.
3) Now set the SOT to note A, octave 4, and both COARSE and FINE cents to zero. Tune the note
A4 on the piano or if not tuning to A 440 Hz, offset the cents accordingly.
4) Step the SOT up one octave to A 5, play the note A4 on the piano and use the COARSE and
FINE cents knob to stop the rotation of the LED’s.
5) Now press STRETCH button, the STRETCH button will be backlit red, now turn the FINE cents
knob to the stretch number you measured in step 2. Now the SOT II will automatically set the
CENTS for the selected stretch number. No need to turn either of the CENTS knobs, just set the
NOTE and OCTAVE switches to the desired note between C3 and F6. The COARSE knob has
no effect on the setting of the stretch number, if the stretch number is 8.0 set the FINE cents
knob to -1.0, stretch number of 9.0 set the FINE cents knob to -2.0.
6) Now the microprocessor will automatically set the cents for the correct deviation according to
the old stretch calculator slide card.
You are all set to start tuning the note C3. To start at any other note between C3 and F6, just
proceed to that note with the NOTE and OCTAVE switches.
SOT II with the STRETCH button lit.
4
Page 6
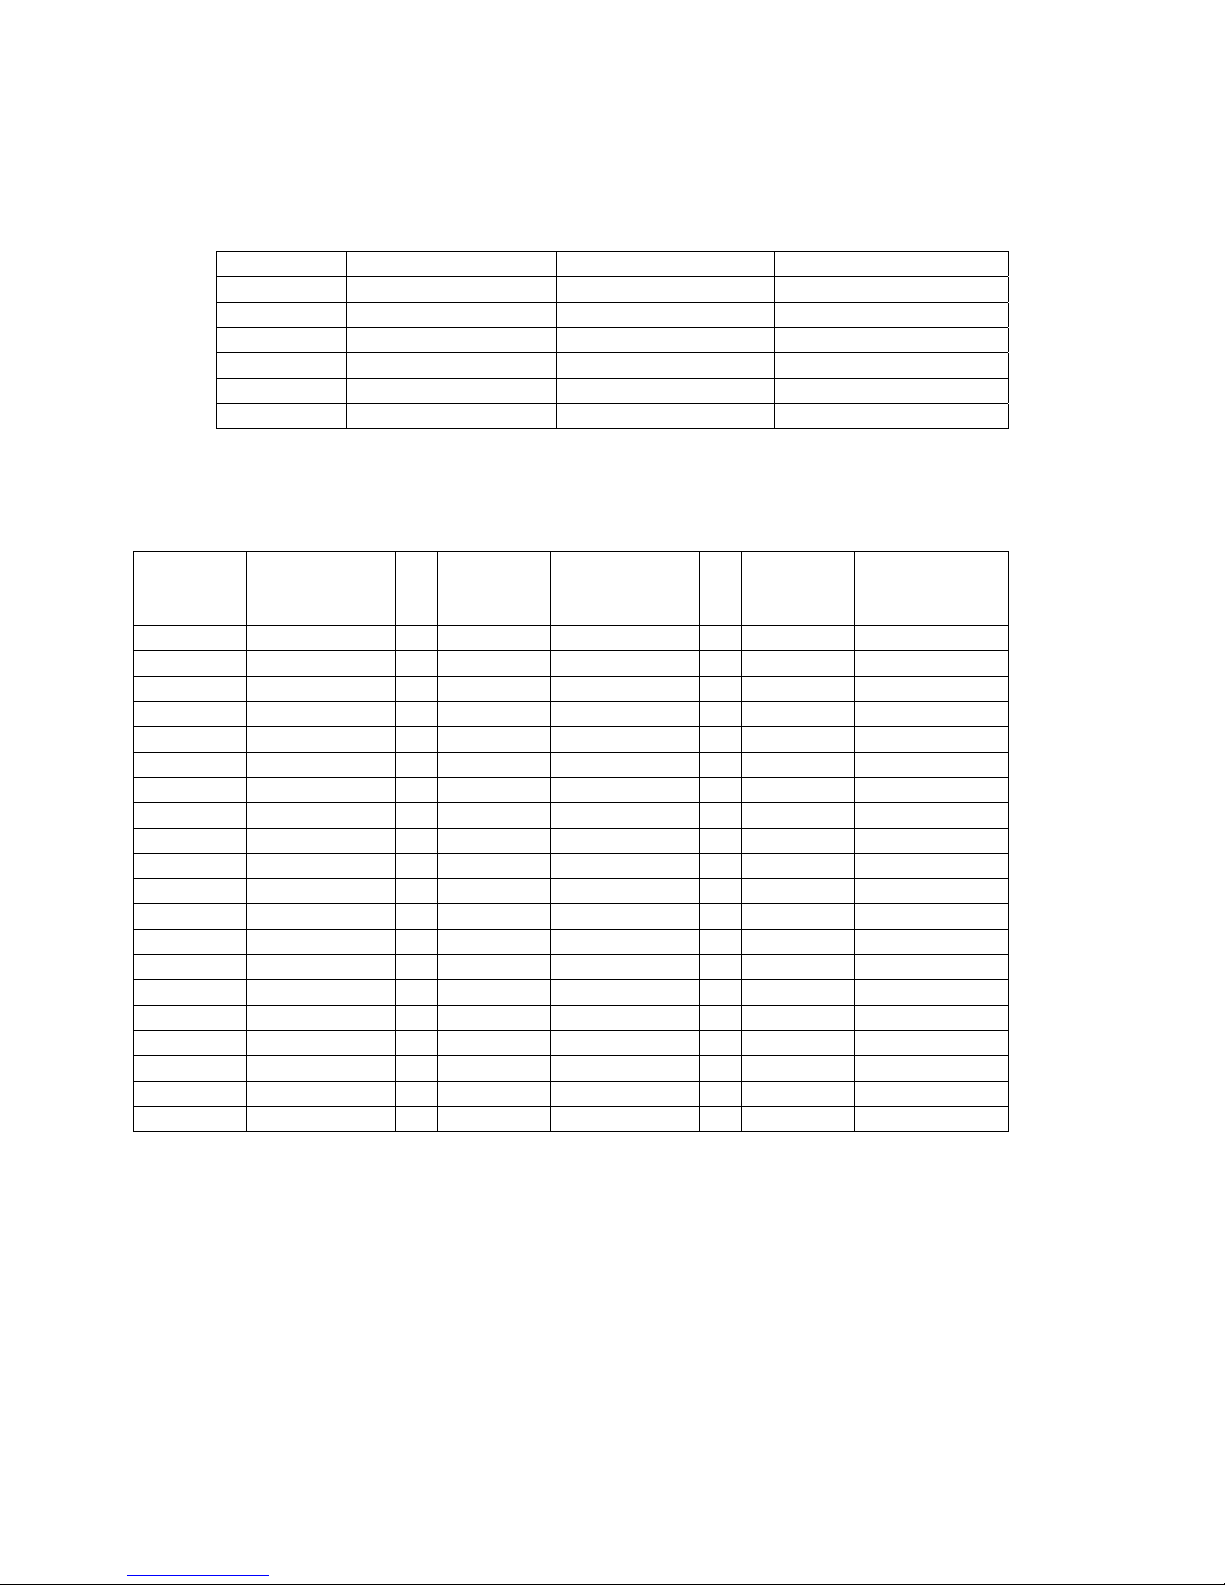
STRETCH TUNING PARTIALS
When the SOT II creates a stretch tuning, the program creates the tuning and it is automatically set
the SOT II to the correct partial in the following manner. This is illustrated in more detail in the
following tables:
OCTAVE PARTIAL KEYBOARD PITCH OF PARTIAL
Octave 3 Fourth Partial C3 C5
Octave 4 Fourth Partial F4 F6
Octave 4 Second Partial F#4 F#5
Octave 5 Second Partial F5 F6
Octave 5 Second Partial F#5 F#5
Octave 6 First Partial F6 F6
Just to reiterate, C3 to F4 fourth partial, F#4 to F5 second partial, F#5 to F6 fundamental partial as
shown in the table below.
Piano
Note
C3 C5 F#4 F#5 F#5 F#5
C#3 C#5 G4 G5 G5 G5
D3 D5 G#4 G#5 G#5 G#5
D#3 D#5 A4 A5 A5 A5
E3 E5 A#4 A#5 A#5 A#5
F3 F5 B4 B5 B5 B5
F#3 F#5 C5 C6 C6 C6
G3 G5 C#5 C#6 C#6 C#6
G#3 G#5 D5 D6 D6 D6
A3 A5 E5 E6 E6 E6
A#3 A#5 F5 F6 F6 F6
B3 B5
C4 C6 2nd Partial 1st Partial
C#4 C#6 (Fundamental)
D4 D6
D#4 D#6
E4 E6
F4 F6
4
STRETCH Tuning from C3 to F6
After the stretch tuning has been selected, (stretch button backlit) tuning can start on any note
between C3 and F6. When ready to tune the next note, turn the NOTE and or OCTAVE knobs. For
every semitone the SOT will automatically update the partial and cents deviation for the next note,
continue this way for the notes C3 to F6. Just to verify: the SOT should be set to the note on the
piano you are tuning and the SOT II automatically selects the partial and cents deviation.
Unison Tuning
Unisons may be tuned aurally along with a stretch tuning of the center string, or each string may be
tuned individually to the SOT II and the unisons checked aurally later on. The SOT II will do an
excellent job of tuning unisons when the strings of a given note are well matched. (They are on
SOT
Automatically
listening to
th
Partial
Piano
Note
SOT
Automatically
listening to
Piano
Note
Automatically
listening to
SOT
5
Page 7

most notes.) The fact that some strings are mismatched makes it extremely important for the tuner
to check all unisons aurally when they have been tuned with the SOT II. However, do not try to
check the unisons aurally during any pitch raise. Pulling up adjacent strings affects the pitch of the
strings that have already tuned. The settling process on a string is not complete until another
octave or so has been tuned.
Aural unison tuners should be aware that pulling in two outside strings to the tuned center string
will affect the pitch of the center string. The amount is roughly equal to one-fifth of the net pitch
change. As a result, when there is more than a few cents pitch change involved, tuning unisons
aurally can actually leave them out of tune in the end! To avoid getting into this situation, give the
piano a quick pitch raising (or lowering) before trying to do a fine-tuning. If the piano is more than
five to ten cents flat, it will actually save time to do a quick pitch raise before attempting to finetune the piano.
TUNING BEYOND C3 TO F6
DIRECT TUNING THE HIGH TREBLE
Tuning the high treble with the SOT is relatively easy. The best tuning for each note can be
determined by reference to one, two or three already-tuned notes. These notes lay one octave,
octave-fifth, and two octaves lower than the note being tuned.
1) Set the SOT II to the NOTE and OCTAVE of the note being tuned (in TUNE mode).
2) Play the reference notes one at a time and see how they look on the rotating LEDs.
3) Turn the CENTS knob up or down until a cents setting that is a good compromise between the
reference notes. A cents setting where some of the reference notes rotate slowly sharp and
some rotate slowly flat.
4) Then tune the note.
Tuning is more challenging in the last octave because a good compromise may be impossible to
find. Decide which interval will take priority and tune mainly to satisfy its requirements. At this
point many tuners stick to the single octave, but tune one or two cents wide. Others prefer to tune
the double octave, which gives a sharper top end, or the octave-fifth, which is quite a bit sharper.
The choice is up to personal taste and the customer preference.
DIRECT TUNING THE BASS
Tuning the bass is similar in principle to tuning the high treble. Set the SOT II with reference to
several previously tuned notes and compromise among them to place the note being tuned.
The best reference notes lay an octave, an octave-fifth, and a double octave-fifth higher than the
note being tuned. To use these reference notes, set the SOT II a double-octave-fifth higher than the
note being tuned (on its sixth partial).
1) Play each reference note one at a time.
2) Turn the CENTS knob until a good compromise setting is found, one where some reference
notes are rotating slightly flat, others slightly sharp.
3) Tune the note.
4) Continue this procedure all the way down to A0.
In contrast to the situation in the high treble where the three tests diverge, the three bass tests
usually work nicely all the way down to A0.
6
Page 8
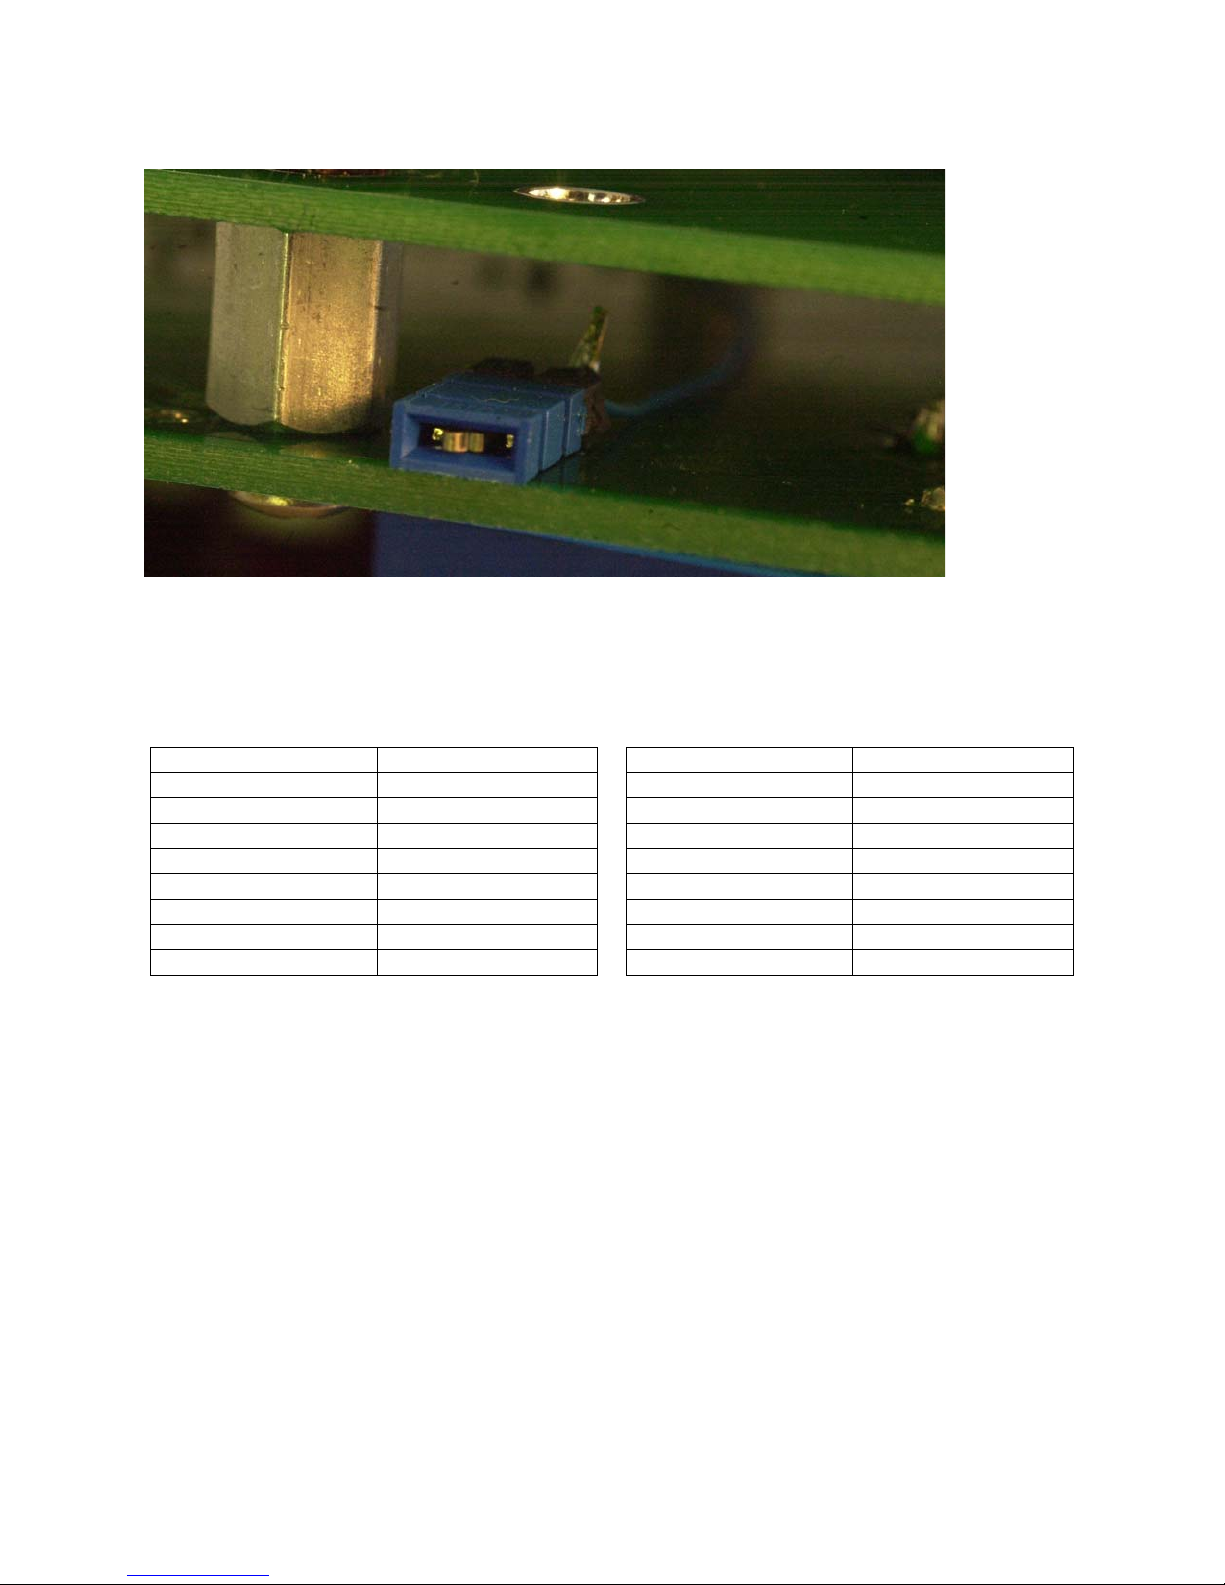
Changing the COARSE cents control, if you would like to increase the accuracy of the SOT II, you
can move a jumper to have the coarse cents control jump to the nearest five cent increment.
With the jumper in the position above, shorting out the two pins, the coarse cents knob will jump to
the closest five cent increment. The jumper is physically located beneath the FINE cents trimmer on
the PC board.
Cents Offset for Hz at A4
Frequency of A4 Cents Offset Frequency of A4 Cents Offset
446 23.5 438 -7.9
445 19.6 437 -11.8
444 15.7 436 -15.8
443 11.8 435 -19.8
442 7.9 430 -39.8
441 3.9 420 -80.5
440 0.0 415.3 -100.0
439 -3.9 415 -101.3
Formula for calculating cents offset of A4 at 420Hz: Log (420/440,2)*1200 = -80.54
INPUT-OUTPUT JACKS
There is one input for charging the battery and one output jack on the SOT II. The output jack can
be set up for a variety of outputs. The standard use for the jack when originally manufactured was
for an audio input.
AUDIO IN: An electrical audio input jack. Signals are fed into this phono jack for silent
measurements of pitch, or tuning electronic musical instruments. This input is suitable for levels
from 0.01 to 10 volts.
The SOT can also be set up with the output jack to do either of the following options:
OSC OUT: A phono jack, which puts out a modified saw tooth wave (one that is quite pleasant to
listen to) at the pitch called for by the settings of the SOT II controls. This has a variety of uses.
The frequency calibration of the instrument can be checked with this output. It can also be fed into
7
Page 9

an amplifier and broadcast, to give an aural pitch standard for any purpose. One purpose is an aid
to fast piano chipping or rough pitch raising.
FLTR OUT: A phono jack output from the audio filter. The audio filter amplifies sounds whose pitch
corresponds to the pitch selected on the SOT II. It is useful for listening to the beats at the
coincident partial of two notes forming a musical interval. This feature can be a valuable training
aid for aural tuners.
BAT CHGR: Located on the ON-OFF end of the SOT, this jack is used for charging the battery. DO
NOT use battery chargers other than ones recommended for the SOT II, even when the plug is
compatible with the SOT II jack, because voltage ratings and polarity can differ, too high voltage
may damage the battery charger circuit in the SOT. (The Radio Shack model 273-355 is a
compatible unit.) Battery charger specifications, output 9 volts DC, 800 plus milliamps, 2.1 mm
barrel, positive on the inside of the barrel, negative on the outside. The battery will be eighty
percent charged after a period of five and a half hours, completely saturated after eight hours.
BATTERY CARE
LITHIUM ION
The battery used in the SOT II, is a Lithium Ion (Li-ion) battery. The new Li-ion will run the SOT for
30 plus hours, and can be recharged hundreds of times. To achieve the longest battery life we do
recommend that the SOT II be used until the low battery is displayed. Li-Ion batteries do not benefit
from nightly charging, but will last longer if used to capacity before recharging.
BATTERY CHARGING CIRCUIT
The Li-Ion battery in the SOT II has a large capacity and presently is supplied with a 9.0 Volt, 800
milliamp AC adapter. When the SOT II charger is first plugged in, the red LED will be lit while the
battery is charging in the high current mode. The battery will charge at high current for roughly five
and a half hours before stepping down to a trickle charge stage. When the SOT shifts down to the
trickle charge stage the red LED will no longer be lit. The battery is charged to roughly eighty
percent during the high current charging and gets topped off with the trickle charging. Inventronics
still recommends charging the SOT II overnight, but the majority of the charging occurs in the first
five and a half hours.
ONE YEAR WARRANTY
INVENTRONICS offers a 1-year warranty from date of purchase, on parts and labor. We will repair
or replace the SOT II, as determined at the factory, should it be found defective. This warranty is
not transferable, and applies only to the original purchaser of the equipment. Damage from the
result of misuse, modification, or tampering with the equipment will void this warranty.
8
Page 10

APPENDIX A
Concise Step-by-Step Tables of Standard Routines
1. Measurement and Storage of F4 Stretch Number:
TURN ON SOT, NOTE=F, OCT=5, CENTS=0.0, tune F4 to stop LEDs,
OCT up to F6, CENTS up to stop LEDs, PRESS STRETCH button.
Ready to start tuning from C3 to F6.
APPENDIX B
Cents Tables for Non-equal Temperaments
Pythagorean Temperament.
A 0.0 Db -15.6
A# 13.7 D -2.0
Bb -9.8 D# 11.7
B 3.9 Eb -11.7
C -5.9 E 2.0
C# 7.8 F -7.8
The usual practice is to use only the above flats.
Meantone Temperament
A 0.0 Db 27.4
A# -24.0 D 3.5
Bb 17.1 D# -20.5
B -6.8 Eb 20.5
C 10.3 E -3.4
C# -13.7 F 13.7
The usual sharps and flats are C#, F#, G#, Bb, and Eb.
Marpurg's Temperament 1.
A 0.0 C# 0.0
A# 5.9 D 5.9
B 3.9 D# 3.9
C 2.0 E 2.0
Werckmeister III, Correct Temperament No. 1
A 0.0 C# 2.0
A# 7.8 D 3.9
B 3.9 D# 5.9
C 11.7 E 2.0
Kirnberger III, Corrected Temperament
A 0.0 C# 2.0
A# 7.8 D 3.9
9
F# 5.9
Gb -17.6
G -3.9
G# 9.8
Ab -13.7
F# -10.3
Gb 30.8
G 6.8
G# -17.1
Ab 23.9
F 0.0
F# 5.9
G 3.9
G# 2.0
F 9.8
F# 0.0
G 7.8
G# 3.9
F 9.8
F# 2.0
Page 11

B 0.0 D# 5.9
C 11.7 E -2.0
G 7.8
G# 3.9
Young's Temperament No.1
A 0.0 C# -3.9
A# 2.0 D 2.0
B -3.9 D# 0.0
C 5.9 E -2.0
F 3.9
F# -5.9
G 3.9
G# -2.0
Vallotti or Fairchild Temperament
(REF: Piano Technicians Journal, Oct. 82, p.20.)
Steve Fairchild independently developed this temperament in 1982 while looking for a temperament
to smooth out the simple keys on small pianos. It greatly reduces the harshness caused by
excessive inharmonicity, and for that reason could also be called the "Piano Teacher's Delight"
temperament.
A 0.0 C# 0.0
A# 5.9 D 2.0
B -3.9 D# 3.9
C 5.9 E -2.0
F 7.8
F# -2.0
G 3.9
G# 2.0
Cents Offset for Hz at A4
Frequency of A4 Cents Offset Frequency of A4 Cents Offset
446 23.5 438 -7.9
445 19.6 437 -11.8
444 15.7 436 -15.8
443 11.8 435 -19.8
442 7.9 430 -39.8
441 3.9 420 -80.5
440 0.0 415.3 -100.0
439 -3.9 415 -101.3
Formula for calculating cents offset of A4 at 420Hz: Log (420/440, 2)*1200 = -80.54
APPENDIX C
Aural and Visual Tuning
(The best of both worlds)
By James W. Coleman, Sr.
Owen Jorgenson wrote the definitive work on temperaments and tuning. In his book "Tuning the
Historical Temperaments" he traces the natural progress of aural tuning systems from the
Pythagorean and Just Intonation systems through several Meantone temperaments to the Well
temperaments and the Equal temperament. It is this last system in which most piano technicians
are engaged. The basis of this system is the need or desire to be able to play in all keys with
equally out of tune parallel intervals. This need was borne out of the practice of composers who
became far ranging in their tonalities of a particular composition.
The earliest popular approaches to tuning the equal temperament involved tuning a series of twelve
4ths or 5ths such that each 5th was narrowed slightly and each 4th was widened slightly in such a
10
Page 12

way that they were all equally out of tune. The difficulty with this approach was that it took 12
steps before one could tell if he was doing alright.
More recent approaches to equal temperament involve one or two test intervals for each step taken
in the tempering system. More care is being given to insure that each interval (such as the minor
3rds, major 3rds, 4ths, 5ths, minor 6ths, major 6ths) is equally tempered and is compatible with all
its parallel similar intervals. Some of the more popular recent temperament systems are by George
Defebaugh, Bill Stegeman, Dr. Al Sanderson (2 octave A-A temp) James Coleman (F-A temp) and
Mark Peele (10th temp). These may be seen demonstrated at various Piano Technician's Guild
Institutes, Conferences and Seminars.
Since the Stretch Calculator tunings involve the accurate tuning of the 4th partial of each note in
the F-F temperament, all the intervals which involve the 4th partials will be beautifully tempered
(such as major 3rds, 4ths). Other intervals such as minor 3rds, major and minor 6ths, which are
involved with higher order partials, will also be beautifully tempered. Since the greatest irregularity
in partial alignments occurs in the 1st, 2nd, and 3rd partials, there may be some slight unevenness
heard in the octave and 5ths.
Now, by the simple practice of playing certain test intervals while tuning with the Stretch Calculator
mode, one can have a double check on his aural test as well as assuring that the visual judgments
are more accurate. If one tunes the stretch tuning system from top to bottom or at least from C5
down, when the 4th 1/2 step down is achieved, a major 3rd aural test is available without the upper
note interfering with the LED display. In arriving at the seventh 1/2 step down, a 5th is available for
aural judgment without LED interference from the upper note of the interval. This 5th interval can
be followed on down to C3. One may notice a slight variation in the sound of the 5ths especially as
one approaches the lower area of the scale. Sometimes this is merely due to the slipping or
instability of the previously tuned upper note of the 5th. But, with the shorter scaled pianos,
irregularity of the lower partials may cause the beat frequency to be greater than expected. At this
point one may make a decision to alter the lower note to smooth out of the 5th interval (which of
course may change the beat rate in other intervals based on this lower note). By doing this
judiciously one can have a better tempering than can be had with either aural or visual methods
alone.
APPENDIX D
What are Partials and Beats?
By James W. Coleman, Sr.
A piano string has a series of partials (sometimes erroneously called harmonics) which are approximately whole number multiples of the fundamental frequency (first partial). For example the 3rd A
on a piano (counting from A0, A1, A2) has a theoretical frequency of 110 cycles per second (or
Hertz). If it is multiplied by 2, you have 220 Hz (2nd partial). If one places his finger lightly on the
middle of a string, he can force it to vibrate at its 2nd partial. If A2 is lightly touched at a distance
of 1/3 the length from one end after the note is played, the string will be forced to vibrate at its 3rd
partial (approximately 330 Hz which is 3 times the fundamental pitch). One can continue to divide
the string by 1/4, 1/5, 1/6, 1/7, 1/8, etc. This will cause the string to sound at its 4th, 5th, 6th,
7th, and 8th partials respectively.
In order to further clarify, let me say that when a string is forced as above to vibrate in three parts
by touching it at the 1/3 point; we say that this is the 3rd partial because one can see the string
breakup into 3 parts with 2 nodal points in between. At the same time one notices that the pitch
jumps one octave plus a 5th (19 half-steps above).
One should learn the note location for the partial series for each note of the chromatic scale. Here
are the notes that correspond to the locations of the first 12 partials of the note Middle C.
C4 C5 G5 C6 E6 G6 Bb6 C7 D7 E7 F#7 G7
11
Page 13

Oct 5th 4th 3rd 3rd 3rd 2nd 2nd 2nd 2nd half
When one is listening to various tempered intervals, there is at least one particular area where one
can hear the beat phenomenon between coincident partials of the two notes. For example: when
listening to the 5th (F3-C4), these 2 tones have partials which occur in close proximity to the note
C5 (the 3rd partial of F and the 2nd partial of C). These are called the first of lowest coincident
partials. If there is a slight difference in the pitch of the two coincident partials, one can hear a
slight waver in the tone. This is called the beat phenomenon at the pitch of C5. It is the difference
of frequency or Hz of these two partials. One can calculate the beat speed if one knows the cents
reading of each of these two partials. The following formula is helpful to convert cents difference
to beats per second!
Beats=ref. note Hz x 2 raised to (upper cents deviation/1200) minus ref. HZ x 2 raised to (lower
cents dev./1200).
The reference note frequency can be found in charts, but it is so easy to calculate using the 1/12
root of 2, which is the half step ratio. If we need to know the Hz of C5 we merely multiply A440
times 1.0594631 three times to get 523.2251. In the process we find A# at 466.164, B 493.883.
If we wish to find Hz below A440 we divide by 1.0594631. G# equals 415.305, G=391.995 etc.
Now let's use the formula above to find the beat rate of the interval F3-A3 (Major 3rd). The 5th
partial of F3 is at the note location of A5. The 4th partial of A3 is also near A5. When properly
tuned, on most pianos they will create a beat rate of approximately 7 beats per second. Let's say
that the 4th partial of A3 reads +3.7 cents and the 5th partial of F3 reads -10 cents at the
reference note of A5 (880 Hz). At A5, -10 cents is the same as G# +90 cents since we have 100
cents per half step. Now, taking the higher reading first, we have
Ref Hz 880 x (2 raised to (3.7/1200)) = 881.883
Ref Hz 830.61 x (2 to (90/1200) power) = 874.932
This leaves us with a difference of 6.95 Hz, which is the beat frequency of the lowest coincident
partials of these two notes.
With the aid of a scientific calculator one can easily compute the beat rate of any interval. Dr.
Sanderson has an excellent set of notes on how to tune a beautiful 2 Octave Temperament by
carefully measured intervals using either aural principles or machine techniques. You may find it
interesting to measure your resulting interval widths after setting a careful machine tuning or vice
versa, you may find it more interesting to measure interval widths after very carefully tuning by ear.
(See Appendix E)
APPENDIX E
The Two-Octave "A" Temperament
By Dr. A.E. Sanderson
The two-octave A temperament is probably the first temperament designed to take into account the
inharmonicity of pianos strings. Inharmonicity not only changes the beat rates from their theoretical
values for all intervals on a piano, it also creates impossible tuning conflicts as well. The simple
octave splits up into different kinds of octaves, depending upon which pair of coincident partials are
tuned to zero beat. Even the single, double, and triple octaves are incompatible intervals on a piano,
and can only be tuned to sound "as good as possible," not perfect, because inharmonicity makes
perfection literally unattainable.
The two-octave A temperament is tuned from the "outside in." That is, the wide intervals, two
octaves and the double octave, are tuned first. This is done so that octave tuning problems with a
piano will show up at the earliest possible stage when they are relatively easy to correct with small
compromises. Many pianos have, unfortunately, incompatible tuning requirements, and by tuning
12
Page 14

the three A's first, we can establish a double octave and two octaves that fit as well as is possible
both with each other and with the scale of the given piano.
Next we subdivide this wide interval into six equal parts by tuning six contiguous major thirds that
fit between the three A's perfectly. Finally, with every fourth note already tuned, we fit the three
missing notes within each major third primarily by tuning a pattern of thirds and fourths.
Tuning wide intervals first and then subdividing them has important advantages over the usual
methods of building up wide intervals by tuning a succession of narrow ones. In the first place, it
guarantees that the wide intervals will be as harmonious as possible, and that the narrow intervals
will be adjusted or forced to be compatible with them. Secondly, small errors in tuning narrow
intervals cannot add up to become large errors in the wide intervals, no matter how difficult the
scale of the piano. This not only leads to greater accuracy on well-scaled pianos, but also greatly
reduces the number of problems associated with tuning poorly scaled pianos.
Direct-Interval Tuning
Direct-interval tuning is a way of using the Sight-O-Tuner II that exactly simulates the way fine aural
tuners tune by ear. Each interval is tuned by setting its width to a specified number of cents, which
is verified by a direct measurement. Hence the term "direct-interval tuning". The sequence of
intervals followed is circular, just as in aural tuning, and this makes it quite easy for the tuner to
check each interval aurally as it is tuned. (If you are not familiar with measuring the width of
intervals in cents, refer to the section entitled "Measuring the Width of Musical Intervals").
First, two single octaves and the double octave are tuned using direct-interval measurements.
Second, the double octave is subdivided in six equal parts with a set of contiguous major thirds that
mathematically fit this span perfectly, as determined by direct interval measurements. This leaves
every fourth note tuned, and the three untuned notes within each major third are then tuned with
fourths and thirds, again by direct interval measurements. Follow the step-by-step procedure below,
and be sure to check all intervals aurally as you tune:
Step 1. Tune A4 to zero cents, and A3 from A4 as a 2-4 octave 1 cent wide. (Refer to Appendix H
if you are not familiar with the different kinds of octaves.)
Step 2. Tune A2 from A3 as a 3-6 octave 1 cent wide. Check the A2-A4 double octave, and if it is
more than 4 cents wide, divide the excess by three and narrow both octaves by this amount. (E.g.,
if double octave is 5.5 cents wide, 5.5-4 is 1.5, divide by 3, and narrow both octaves .5 cent.)
Step 3. Tune three major thirds of equal cents width between A2 and A3. You must first guess
how wide to tune them and then see how the guess works out and revise it if necessary. A good
first guess is 13.5 cents. So tune F3 from A3 13.5 cents wide, then C#3 from F3 13.5 cents wide.
Measure the width of the A2-C#3 third. If it is also 13.5 cents wide, you were lucky and these
three thirds are the correct width on the first guess. If you were not so lucky, average the three
thirds (two of which were 13.5 cents wide), and tune all three to this average value by retouching
C#3 and F3.
Step 4. Now tune C#4 from A3, and F4 from C#4, as thirds of this same value. You have now
tuned five contiguous thirds all the same width, a width that fits exactly the A2-A3 octave. To see
whether this width fits the A3=A4 octave, measure the width of the last third, F4-A4. If this
agrees with the other thirds, you were lucky again and these six thirds are all tuned. If you weren't
lucky, take the discrepancy of the last F4-A4 third, divide it by 3, and move F4 by this amount in
the direction that will reduce the discrepancy. (E.g., if you had five thirds at 13.5 cents, and the last
was 12 cents the discrepancy is 1.5 cents. Take one-third of this, 0.5 cents, and move F4 flat by
this amount. This leaves you with four thirds at 13.5, one at 13, and one at 12.5. This is quite
reasonable on that "inharmonic instrument," the piano).
13
Page 15

Step 5. Now every fourth note is tuned from A2 to A4. Fill in the missing notes between F3 and
C#4 to get a nine-note mini-temperament. You must now take a guess at the width of the fourths,
try it on the mini-temperament, and revise it as necessary to make the fourths fit with the thirds,
whose width you already know. A good first guess for fourths is 2.5 cents. Tune up a fourth from
F3 to A#3 down a third from A#3 to F#3, up a fourth from F#3 to B3 and stop. Now tune down a
fourth from C#4 to G#3, up a third from G#3 to C4, down a fourth from C4 to G3 and stop. You
have filled in the six missing notes of the mini-temperament, now you can tell whether your guess
on the width of the fourths was correct from the width of the G3-B3 third, which is the check
interval.
Step 6. Measure the width of the G3-B3 third and compare it to what it should be. If it is smaller
than the other thirds, your fourth guess was also too small, and vice versa. The size of the error in
the fourths equal one-quarter the error in the G3-B3 check interval because four fourths were tuned
to get to the check interval.
Step 7. Retune the mini-temperament as in Step 5 with the new correct value for the widths of the
fourths. Check it aurally to see that you have five perfectly rising thirds, and four equally good
fourths. This result can always be achieved even on the most poorly scaled piano, since we have
not been asked to make any compromises up to this point.
Step 8. Tune outwards from the mini-temperament with major thirds down to A2 and up to A3.
The thirds tuned downwards are constant width but the thirds tuned upwards may have to be
calculated if their width varies. Use straight-line interpolation based on the three known thirds in
the A3-A4 octave, to get numbers for the missing thirds. (E.g., in Step 4 these three thirds, A3C#4, C#4-F4 and F4-A4 were 13.5, 13, and 12.5 cents, respectively. Straight-line interpolation
gives values of 13.4, 13.3, and 13.1 for A#3-D4, B3-D#4 and C4-E4, and 12.9, 12.8, and 12.6 for
D4-F#4, D#4-G4 and E4-G#4, respectively).
Step 9. The electronic tuning of the two octaves A2-A4 is now complete. A very careful aural
check is advisable at this point. Pay particular attention to the fourths, which are wider than
theoretical owing to the effects of inharmonicity. The fifths are purer than theoretical for the same
reason, and rarely cause any trouble.
Aural Tuning
The two-octave "A" temperament may be tuned aurally with exactly the same note-tuning
sequence. This makes it easy to check an electronic tuning aurally at every step--very helpful in
avoiding errors. Aural tuners can study and possibly improve their tuning by using the SOT II to
measure the width of tuned intervals after setting this two-octave temperament very carefully by
ear.
Step 1. Tune A4 to 440 Hz. Use F2 as test note, 17th to fork should beat same as 17th to A4.
Tune A3 from A4 as a 2-4 octave, 1\2 beat wide. That is, the tenth should beat 1\2 beat per
second (bps) faster than the third.
Step 2. Tune A2 from A3 as a 3-6 octave 1\2 beat wide. That is, the major sixth should beat 1\2
bps faster than the minor third.
Step 3. Check the double octave, a 1-4 interval to be less than 1 beat wide. That is, the 17th beat
should be less than 1 bps faster than the third. If the double octave is too wide, compromise both
octaves slightly to get and acceptable double octave.
Step 4. Divide the A2-A3 octave into three equal parts by tuning C#3 and F3. These thirds can be
tested very accurately with the contiguous thirds test. This test states that two contiguous thirds
must have relative beat rates in the ratio of 4 to 5, that is 4 beats of the lower one require the same
amount of time to complete as 5 beats of the upper one. This test then does not require knowledge
of beats per second, only a good sense of rhythm or tempo. In this case, C#3 and F3 are correctly
14
Page 16

tuned when 4 beats of A2-C#3 occur at the same tempo as 5 beats of C#3-F3, and in addition, 4
beats of C#3-F3 occur at the same tempo as 5 beats of F3-A3.
Step 5. Now tune C#4 and F4 to divide the A3-A4 octave into three equal parts with thirds. You
may have to taper the width of the thirds downwards slightly in the upper octave on account of the
inharmonicity of the piano.
Step 6. Check that the three major tenths formed on the seven notes tuned so far also in the ratio
of 4 to 5. Also check the C# and F octaves with both the third-tenth and minor-third-sixth tests.
Scale problems will show up at this stage, and it may be necessary to compromise slightly the
perfectly rising thirds to get satisfactory octaves and tenths.
Step 7. Fill in the six untuned notes between F3 and C#4 to get a nine-note mini-temperament, but
be sure not to change already tuned notes. Tune up a fourth from F3 to A#3, down a third from
A#3 to F#3, up a fourth from F#3 to B3 and stop. Then tune down a fourth from C#4 to G#3, up a
third from G#3 to C4, down a fourth from C4 to G3 and stop. Check the G3-B3 third, which is the
test interval for this tuning. If it is too small, you must expand your fourths, and vice versa. With
just nine notes to worry about, it is always possible to get five perfectly rising thirds and four
matched fourths no matter how poorly scaled the piano may be. The beat rates may not be very
close to theoretical, but they will be right for the given piano and its inharmonicity characteristics.
So tune the piano, and let the beat rates fall where they may!
Step 8. Tune down to A2 and up to A4, and use the contiguous third test to place each note
initially. Check each note with the fourth and fifth, and then the major sixth and octave as they
become available. The final result should be two octaves tuned with rising thirds all the way, with
all fourths quite even and acceptable, and with all fifths nearly pure.
APPENDIX F
Contiguous-Interval Tuning Tests for Electronic Piano Tuners
By Dr. A.E. Sanderson
Two contiguous musical intervals are intervals that touch each other, in other words, share the note
in the middle. Tests that use contiguous intervals are easy to learn and use, and tell the tuner
explicitly which notes are at fault and what to do to correct them.
Contiguous major thirds will beat in the ratio of four to five because the major third itself consists of
two notes whose frequencies are in the ratio of four to five. Displacing any interval up the
keyboard will speed it up theoretically in the ratio of the frequencies of the two root notes involved.
Therefore two contiguous major thirds should beat in the ratio of four to five, two contiguous minor
thirds in the ratio of five to six. Similarly, two contiguous fourths should beat in the ratio of three
to four and two contiguous fifths in the ratio of two to three. However, on the piano this
theoretical relationship holds well only for the major and minor thirds. The fourths and fifths are so
strongly affected by inharmonicity that these contiguous intervals beat at almost the same speeds.
Using the above facts, we can develop a test for one note of the piano at a time. Take C4 for
example. Play down a third and up a third G#3-C4 and C4-E4, keeping time at the rate of four
beats of the lower one, and then at five beats of the upper one. Think of it as four beats to the
measure, followed by five beats to the measure. The tempo of the two kinds of measures should
agree. If the upper beat rate is too fast, it indicates that C4 may be flat, and vice versa.
Before moving C4, we need more evidence. Play down a fourth and up a fourth, G3-C4 and C4-F4,
and listen for near equality of the beat rates, or an upper beat rate just slightly faster than the
lower. If C4 is flat the upper fourth will be faster than the lower, and vice versa. If both the fourth
15
Page 17

test and the third test indicate the C4 is flat, this is very strong evidence that C4 should be moved.
But to nail down your decision, you can add a contiguous fifth test as well.
To check contiguous fifths, play down a fifth and up a fifth, F3-C4 and C4-G4. If C4 is flat, the
lower fifth will beat faster than the upper.
In our example, we have now used three tests, and six other notes to check up on one note. If all
the tests indicate that C4 is flat, then it is a good idea to move C4. If some tests say flat and some
say sharp, then leave C4 where it is and go on to test other notes. Eventually you will find the main
culprit or culprits, the notes for which all three tests say the same thing. Move these notes without
hesitation. Your temperament will improve steadily as you find and correct each note that fails all
three contiguous tests.
The range of this contiguous-interval test is at least from C3 to C5, a two-octave span. After
tuning the whole piano, unisons and all, start applying this test at C3. Move up one semitone at a
time, and correct any note that fails all three tests before moving on. Go up to C5 this way. If you
like, you may make a second pass from C3 to C5 and polish your tuning even more. Eventually you
will reach the point where no notes can be improved upon, and at that point you will have an
extremely fine tuning. A supertuning if you will!
APPENDIX G
Octave Tuning
By Rick Baldassin
Tuning octaves with the Accu-Tuner can be directly related to tuning octaves aurally with specific
interval tests. These interval tests and electronic setting instructions have been included here for
three primary reasons: 1) So that aural tuners will know which Accu-Tuner settings correspond to
the interval tests they have been using. 2) So that Accu-Tuner users may expand their aural tuning
abilities by checking aurally with interval tests, and 3) To raise in general the level of knowledge
relating to octave tests, electronic setting instructions, and their use in piano tuning.
Knowing that there are several types of octaves, aural tests and electronic setting instructions are
necessary to insure that the appropriate type is being tuned in a given area of the piano. Since only
one type is in tune at a time, and so rare is the exception, the tests and setting instructions for one
type only should be used at a time. The exception, of course, would be in a transitional area,
changing from one type to another.
Two different aural tests along with the electronic setting instructions have been provided so that
the findings may be double-checked. Since the aural tests employ the use of intervals for
comparison, both expanded and contracted, and either the upper note or lower may be the reference
to which we are tuning, four classifications of aural tests result. Be sure to note the Classification
for each test so as to correctly interpret the findings and make the proper adjustments in tuning the
octave.
CLASS A: Lower note is the reference note. If the beat rate between the test note and the upper
note is too slow as compared to the beat rate of the test note and the reference note, raise the
upper note. If the beat rate with the upper note is too fast, lower the upper note.
CLASS B: Upper note is the reference note. If the beat rate between the test note and the lower
note is too slow as compared to the beat rate of the test note and the reference note, raise the
lower note. If the beat rate with the lower note is too fast, lower the lower note.
16
Page 18

CLASS C: Lower note is the reference note. If the beat rate between the test note and the upper
note is too slow as compared to the beat rate of the test note and the reference note, lower the
upper note. If the beat rate with the upper note is too fast, raise the upper note.
CLASS D: Upper note is the reference note. If the beat rate between the test note and the lower
note is too slow as compared to the beat rate of the test note and the reference note, lower the
lower note. If the beat rate with the lower note is too fast, raise the lower note.
The object in each case is to obtain an equal beat rate between the upper and lower notes of the
octave, and the test note. Each test is given a name corresponding to the intervals employed in the
test. In naming the intervals, "P" denotes a so-called "Perfect" interval, "M" denotes a "Major"
interval, "m" denotes a minor interval, "A" denotes an "Augmented" interval, and "d" denotes a
"diminished" interval. It must be noted that some of these intervals are very hard to hear in the
bass region of the piano. These checks, however, are still valid. To make use of these checks, hold
down one of the octave notes and the test note without playing them. (You may have to use the
sostenuto pedal in some cases). Play the strike note with a staccato blow. Repeat this procedure
with the other octave note and the test note. When the two beat rates are the same, the type of
octave, which has been tested for, will have been tuned. The strike note in all cases is the note
listed in the electronic setting instructions for that particular type of octave.
Octave Type Aural Tests Classifications
2:1
4:2
6:3
8:4
10:5
12:6
4:1
8:2
M10 - M17
P5 - P12
M3 – M10
P4 – P5
m3 – M6
P12 – P5
m6 – M3
P11 – P4
M6 – m3
A4 – d5
m10 – m3
P19 – P12
M3 – M17
P4 – P12
m6 – M10
P11 – P5
A
C
A,B
C,D
B
B
B
D
D
B
B
B
A
C
B
D
Electronic Setting
Instructions
on the upper note Treble
octave above the
upper note
twelfth above the
upper note
two octaves above
the upper note
seventeenth above
the upper note
nineteenth above
the upper note
on the upper note
octave above the
upper note
Area Generally
Used
Midrange
Midrange,
Bass
Low Bass
Medium Pianos
Lower bass
Large pianos
Lower bass
Large pianos
Midrange,
Treble
Bass
SIGHT-O-TUNER II SPECIFICATIONS
NOTE RANGE:
9 Octaves. C1 through B 9 (A4 = 440.00 Hz).
CENTS RANGE:
±62.5 cents with ±0.1 cents accuracy throughout the scale.
CALIBRATION ACCURACY:
Built-in 440.00 Hz crystal frequency standard for self-calibration, accurate to ±0.1 cents.
DISPLAYS:
Rotating light-emitting-diode (LED) display for continuous analog FLAT or SHARP tuning indicator.
Separate LED wide-range sharp/flat indicator.
17
Page 19

STRETCH CALCULATOR:
Built-in stretch calculator with automatic selection of CENTS settings.
MICROPHONE:
Built-in high-fidelity electret microphone. No external microphone required.
TEMPERATURE DRIFT:
Less than ±0.1 cents in temperatures from 40°F to 100°F.
BATTERY:
Rechargeable Lithium Ion (Li-ion) battery with thirty plus hours of operation per charge. Will
recharge in 7 to 8 hours and has a long life expectancy. Sight-O-Tuner II may be battery operated
or plugged into an AC line.
SIZE & WEIGHT: 7.25" wide, 2" high and 4.5" deep. Weight 2.0 lbs.
INPUT/OUTPUT JACKS
FLTR OUT: Filtered audio output at pitch selected by NOTE, OCTAVE and CENTS settings.
OSC OUT: Oscillator output for broadcasting an oboe-like tone at pitch selected by NOTE, OCTAVE
and CENTS settings. (Use Speaker/Amplifier listed below.)
BAT CHGR: Input for battery charger plug.
Notes
18
 Loading...