

Page 1

• USER’S MANUAL
• ΕΓΧΕΙΡΙΔΙΟ ΧΡΗΣΗΣ
• MANUAL UTILIZATORULUI
• BEDIENUNGSANLEITUNG
• DESHUMIDIFICATEUR DESSECHANT
MODELS:
R2-ION8L
DEHUMIDIFIER
|FRANÇAIS
Page 2

2
INDEX
Important Safe Guards
Product Features
Ambient Environment For Operating
Component Diagrams
Operating Instructions:
a. Functions of the Control Panel & Key Pads
b. Operation Of Key Pads
c. Performances Of Dehumidify, Dry and Whisper Quiet
d. Water Resevoir Full Alert
e. Internal Over Heating Protection
f. Continuous Drainage
g. Tipping Protection
Maintenance & Repair
Specifications
Page 3
3
Important Safe Guards
!
Please read these instructions carefully before your first use of this
product.
1.
3. Please be sure that your electricity supply is 220~240V / 50Hz.
4. Do not use the unit in the bathroom or shower room
5.
It is not advised for children under 8 to use this appliance. Please
make sure children 8 and above and persons with physical, sensory or mental capabilities are supervised and understand the use
and hazards involved.
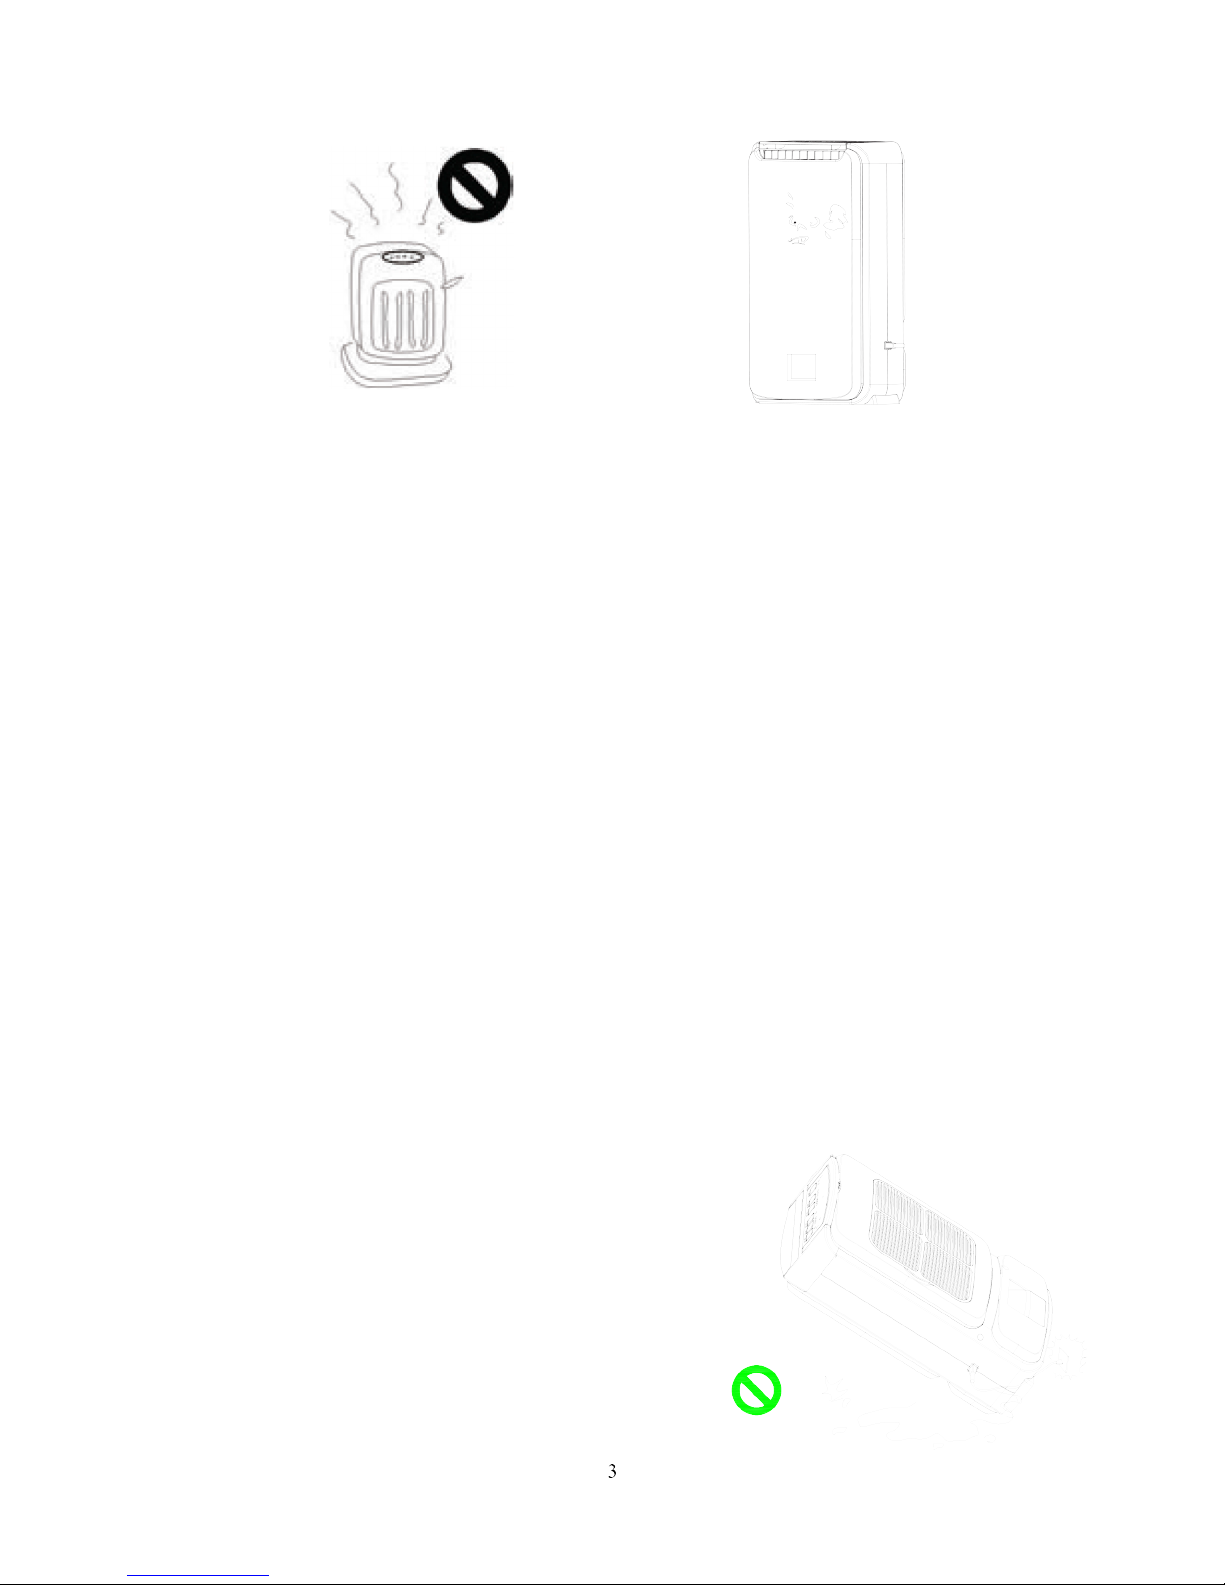
Do not place the unit in direct sunlight or near other heating
sources.
2.
Children should be supervised to ensure that they do not play
with the appliance.
Page 4

4
6. Do not use the unit near flammable materials or fire.
7. Close supervision is required when the unit is used by or near
8.
9.
10.
children. Do not attempt to repair, dismantle or modify this unit. Contact
your authorized service technician for repair or maintenance of this unit.
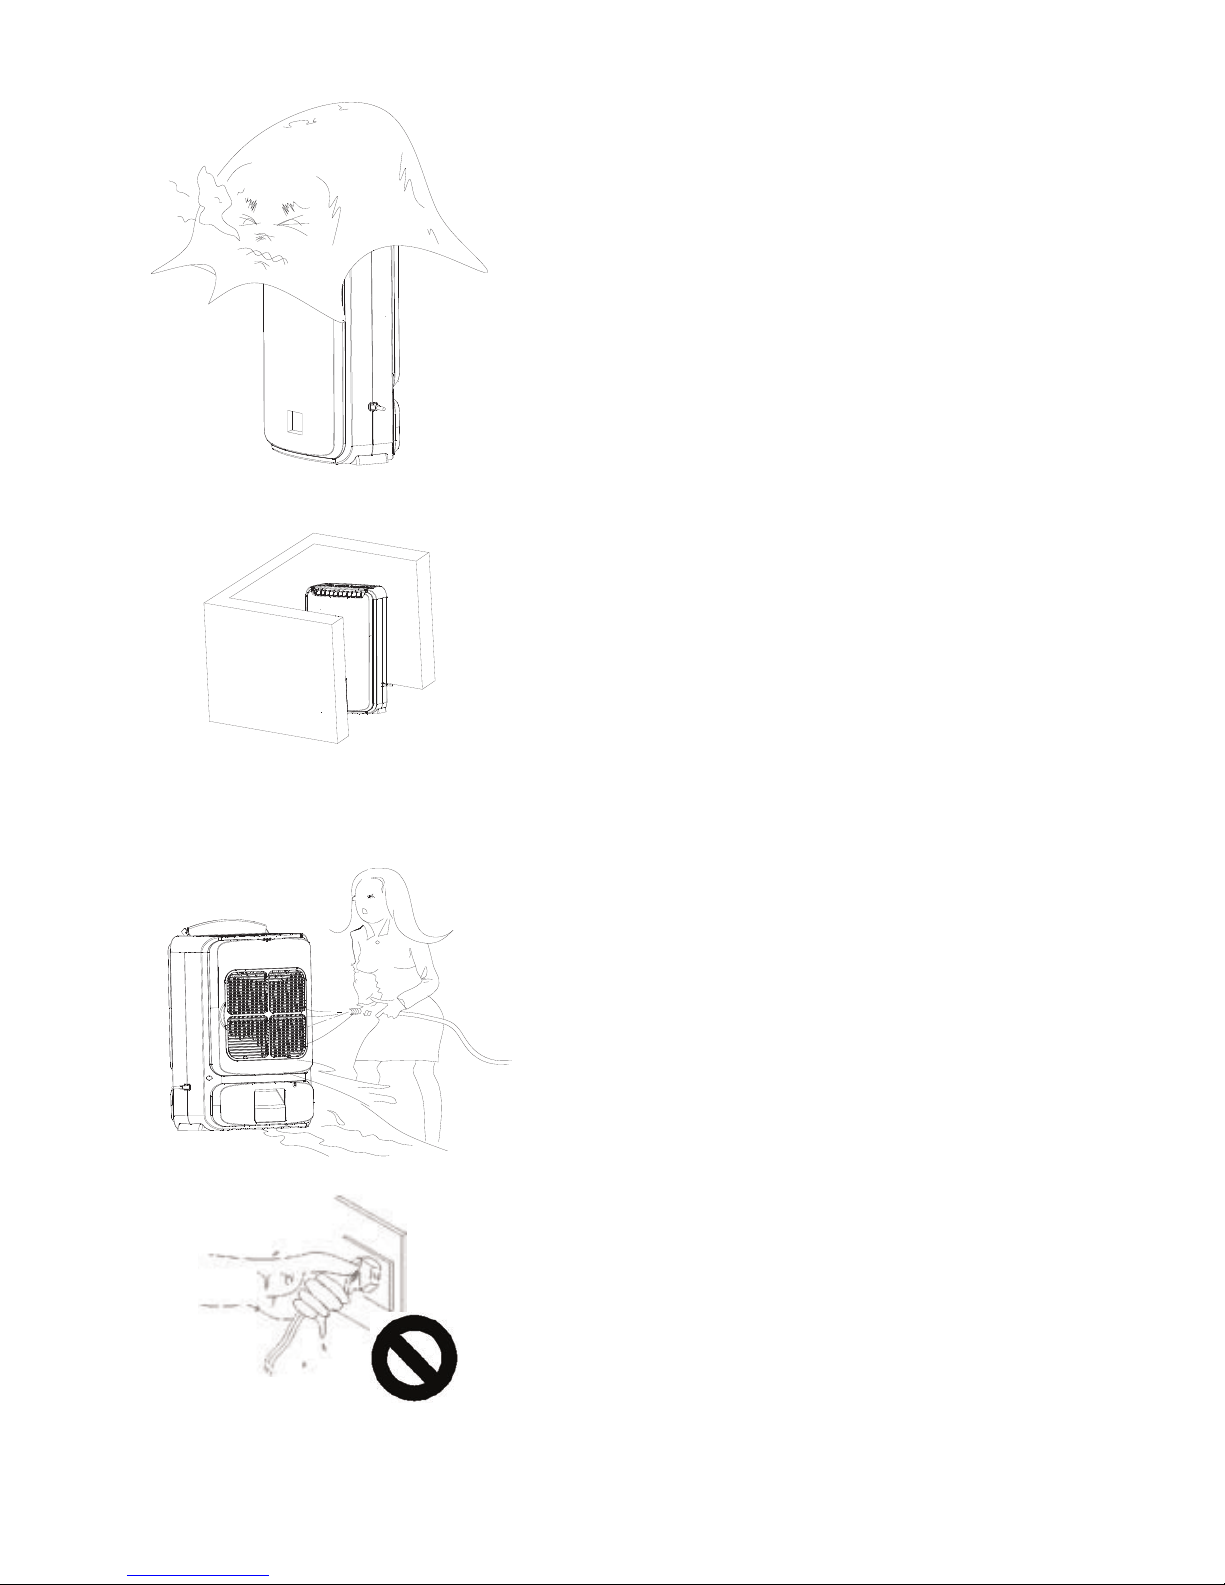
Do not block or restrict the airflow around unit. Make sure to position
the unit so that the air inlet and exhaust grills are not obstructed.
Ensure that the unit is used on a stable and flat floor. There is a risk that
the unit may be unstable and topple over if the floor is uneven. An uneven
floor may cause excessive noise and vibrations.
If the unit ever tips or falls over, unplug the power cord
immediately. Make sure the unit has dried out completely before
resuming operation.
Page 5

5
11.
12.
13.
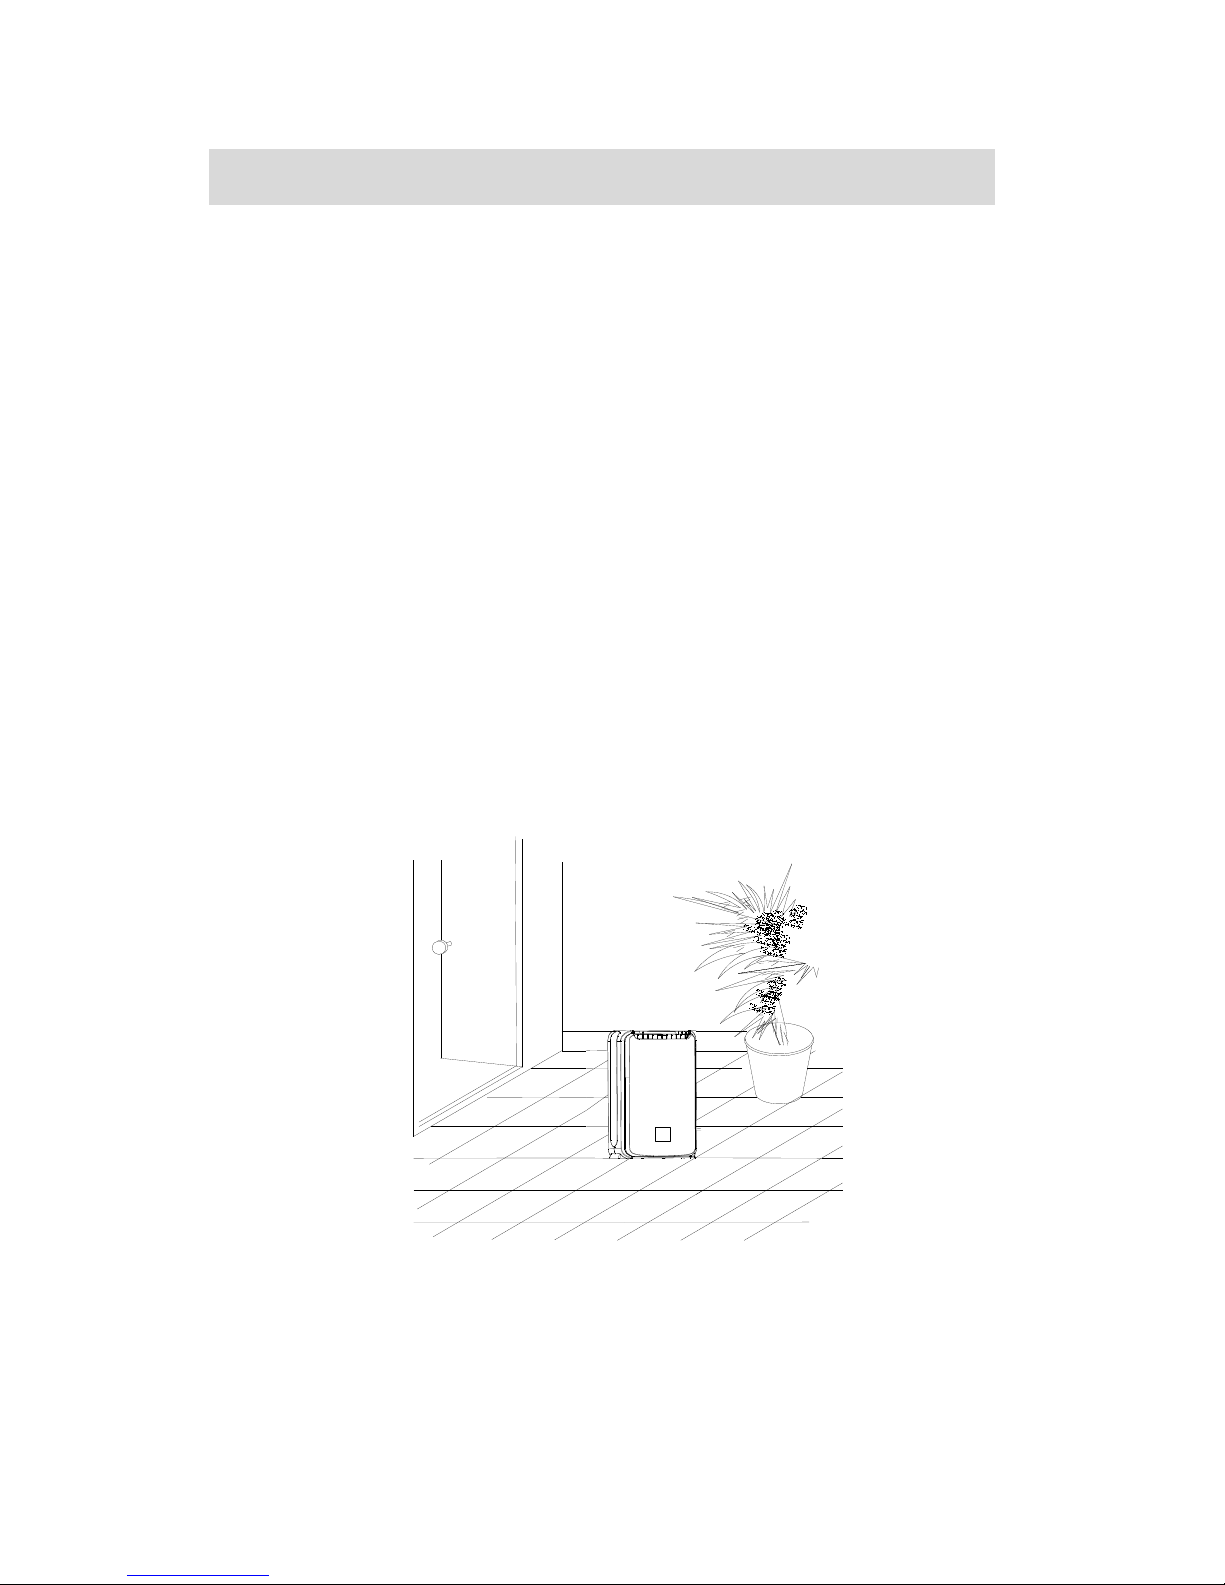
Make sure that no objects block the air inlet and exhaust. Allow
30 cm of clearance around the unit.
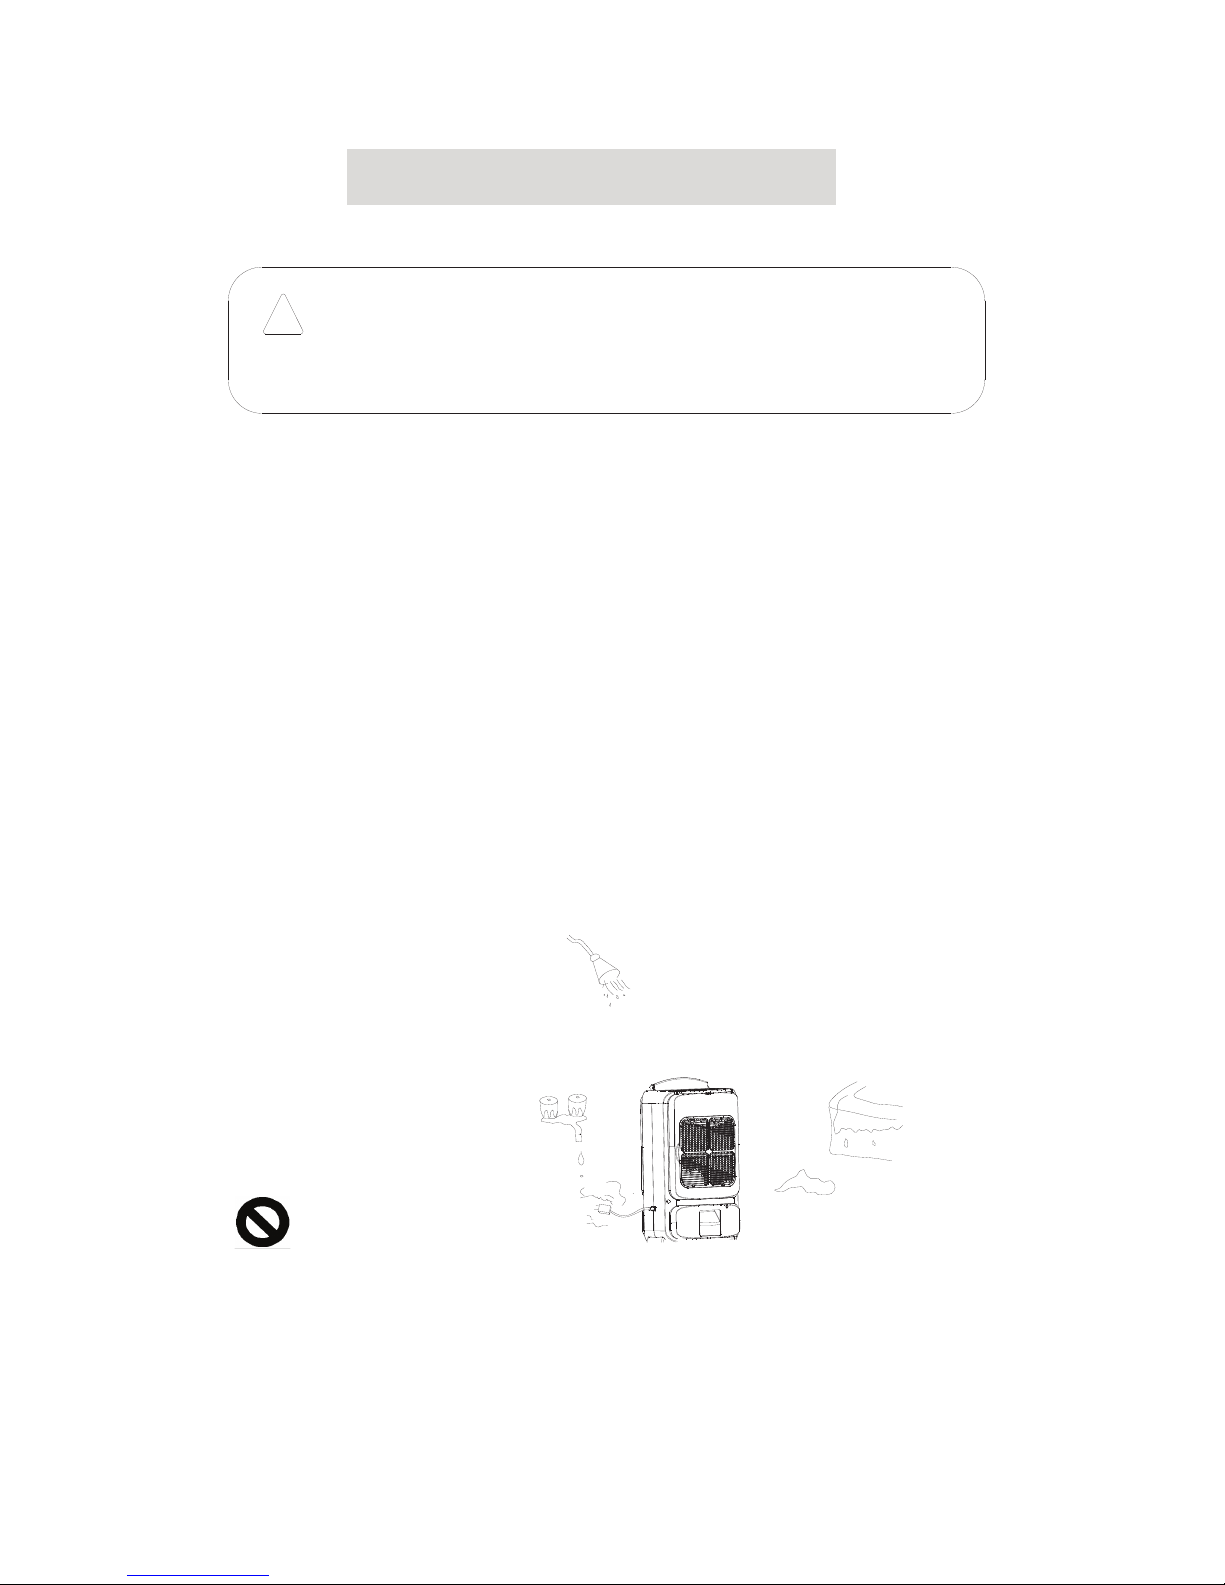
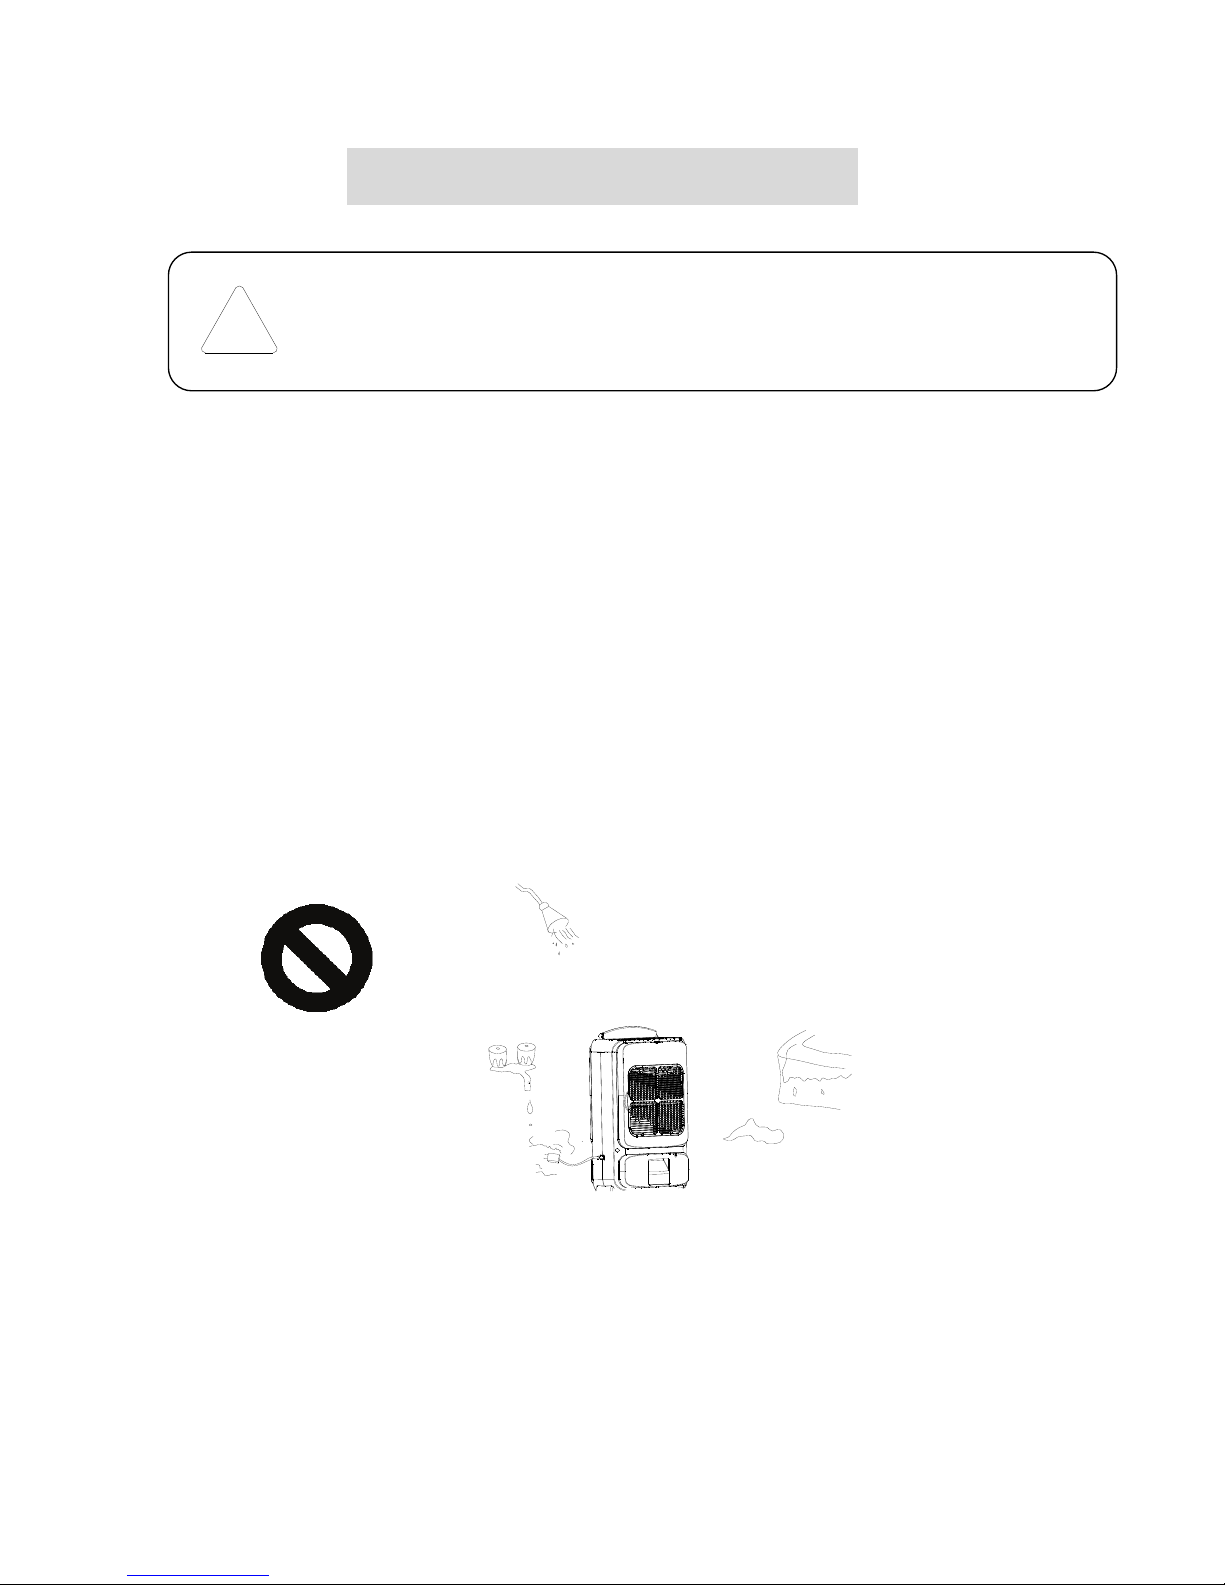
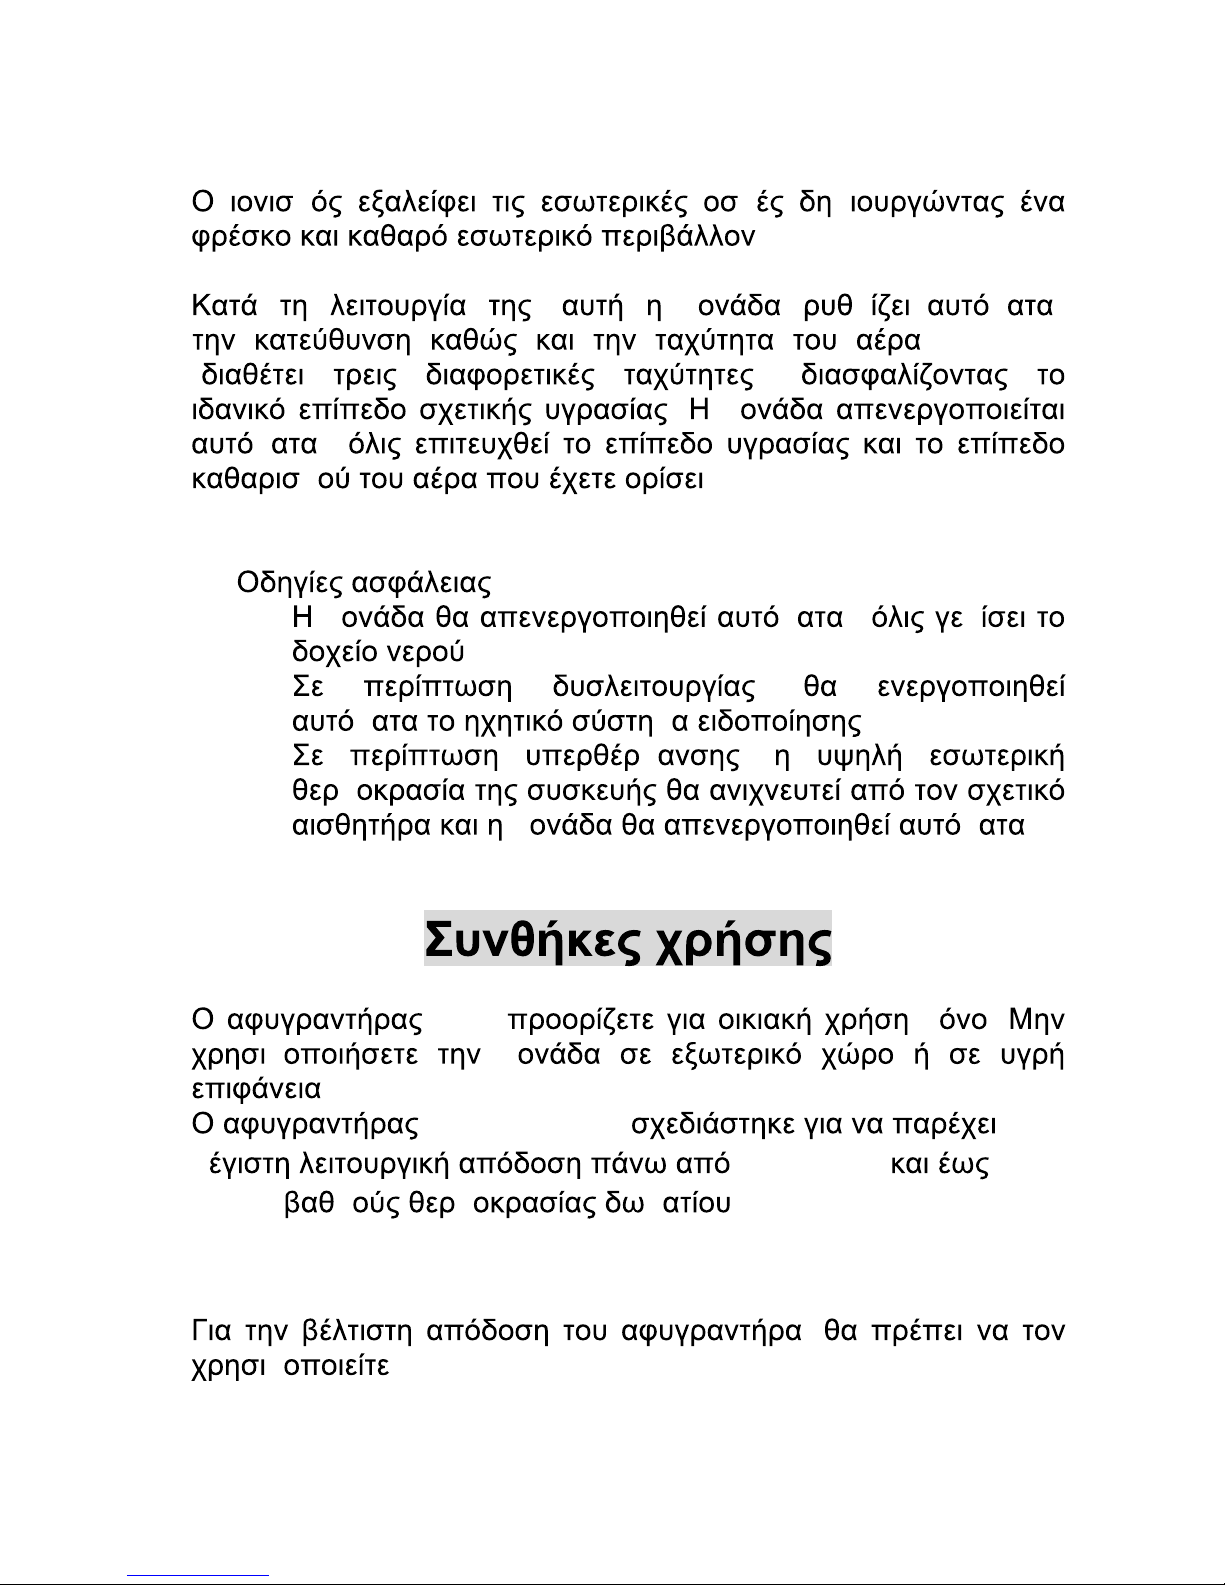
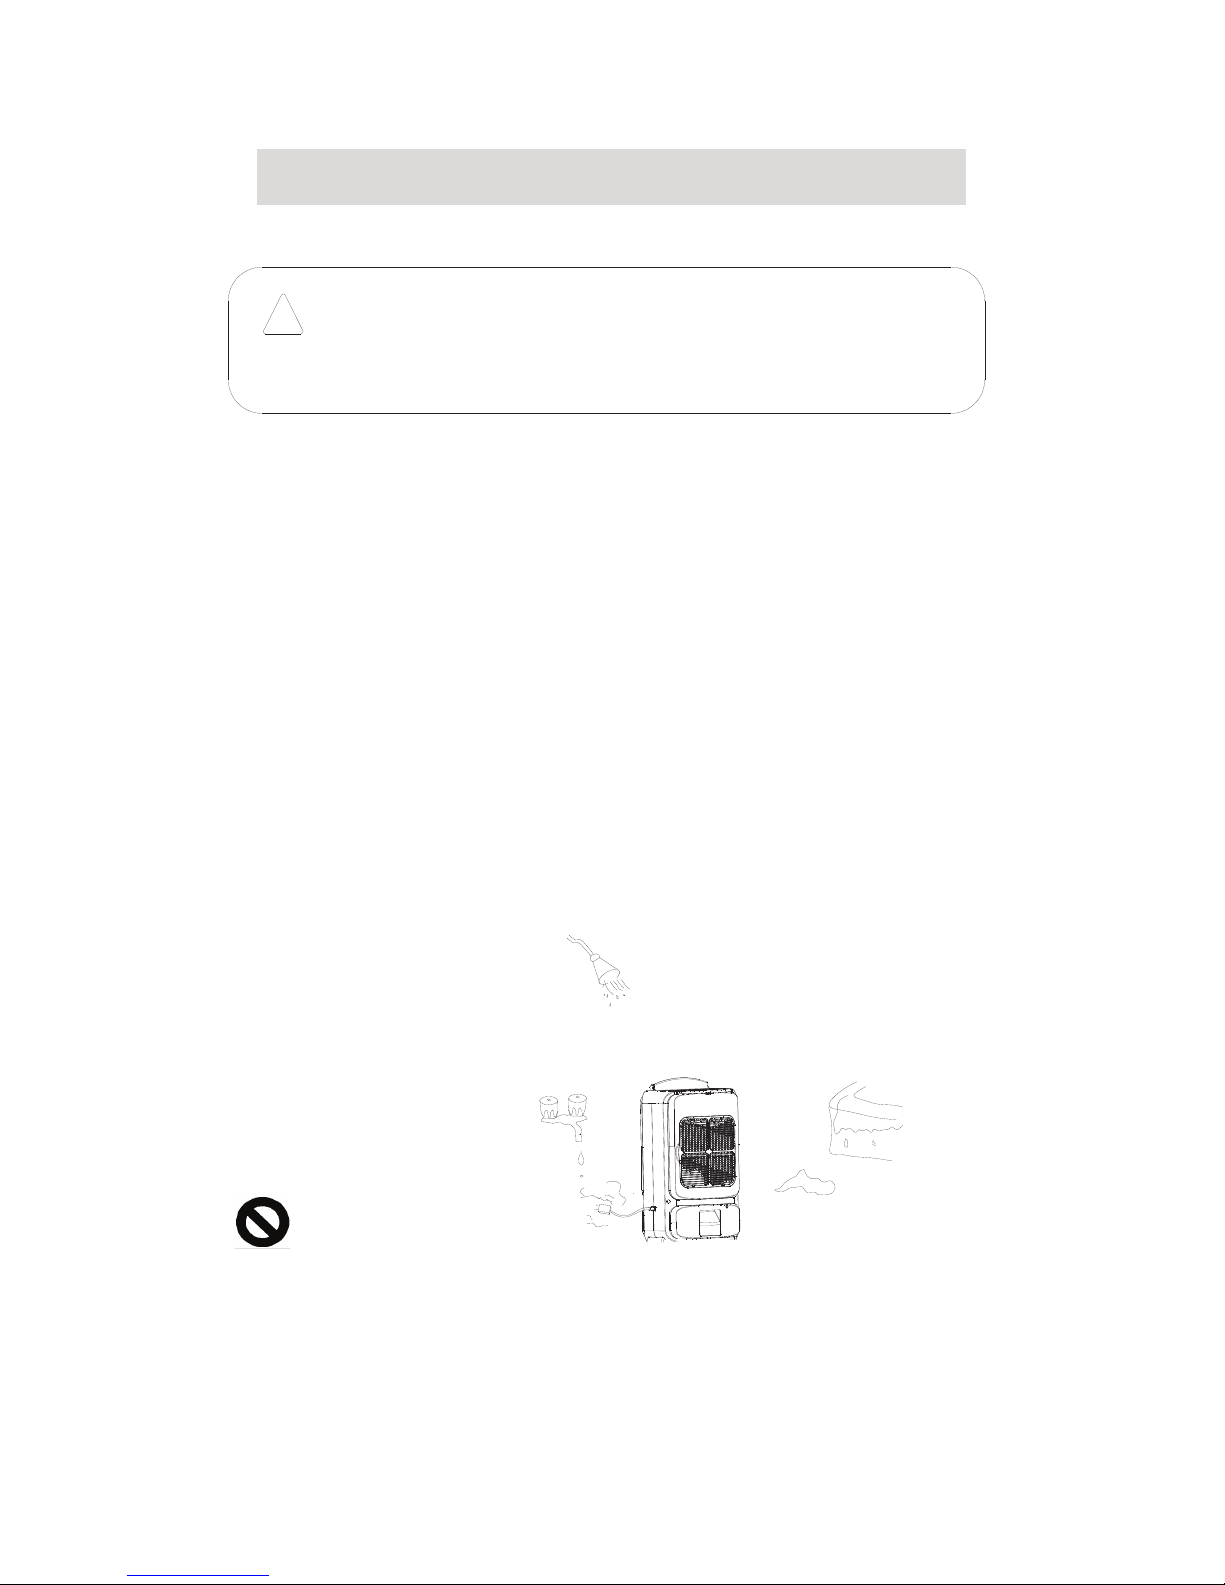
Do not spray water on the unit. Doing so may cause irreparable
damage to the unit or cause electric shock.
Do not unplug the unit from power socket with wet hands.
Page 6

6
14.
15.
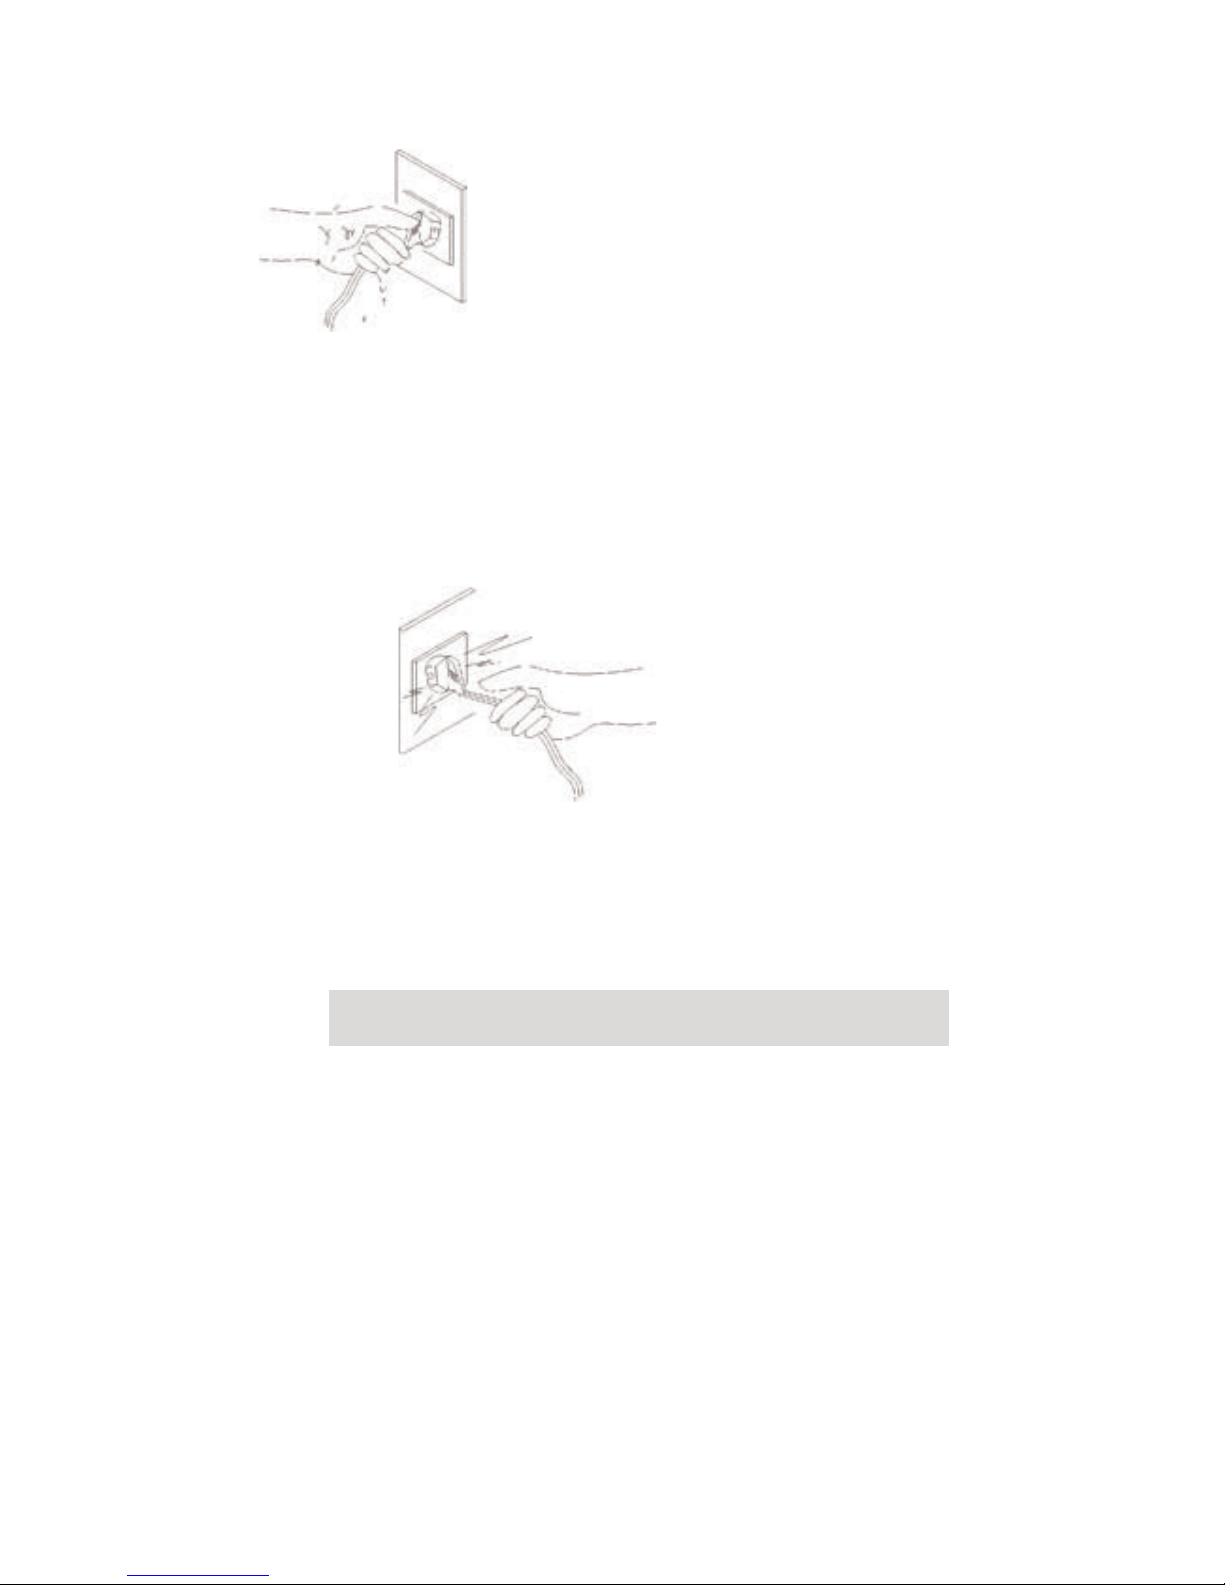
16. To disconnect the power, grip the plug and pull it out from
power socket, never pull or tug on the cord.
17. Do not insert any objects in the unit air inlet and exhaust
as this may cause damage to the internal parts.
Product Features
Switch off the power before removing the plug.
Be sure to empty the water whenever the water tank is full or
when the unit will not be used for a prolonged time.
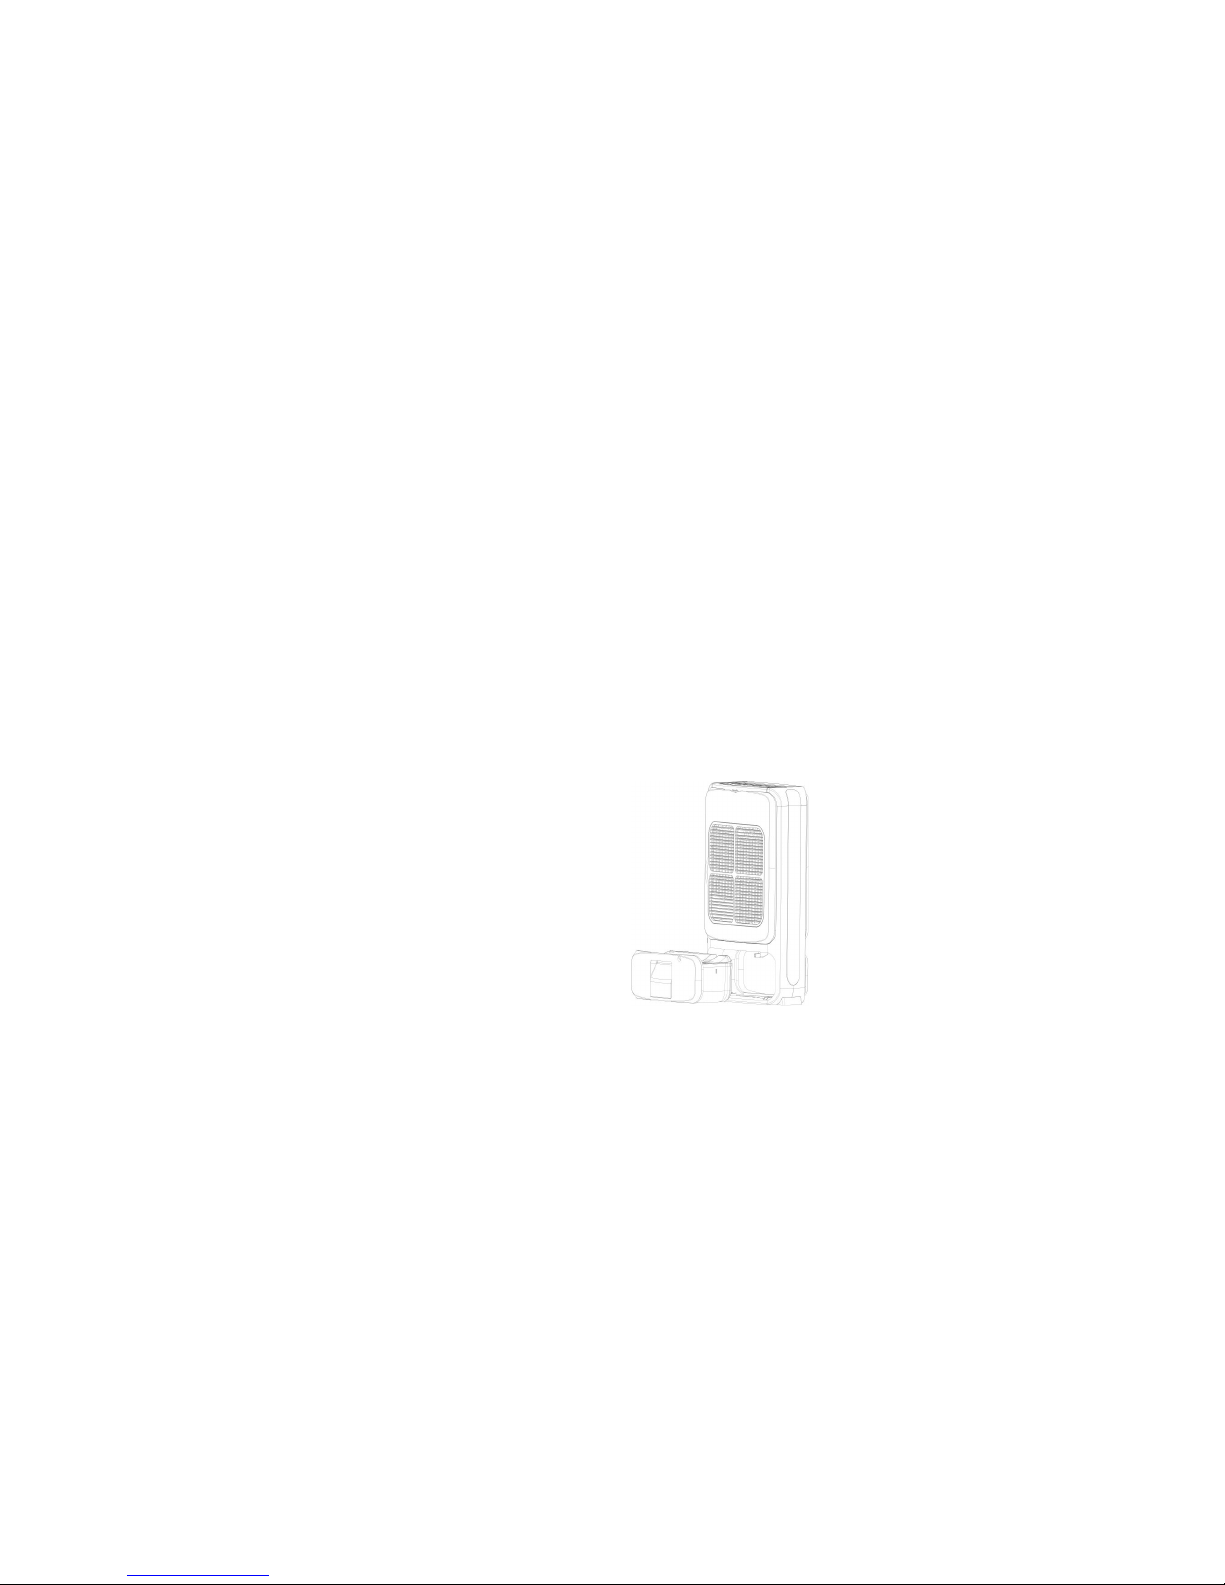
This superior dehumidifier is completely mobile, lightweight and
economical. Enjoy its easy operation and multi functions of dehumidification, dry, and ionization modes. Ideal for rooms with low
room temperature and high levels of humidty.
During dehumidification the air panels flip up to 45 degrees, releasing warm air, which can dry clothes. The ionization feature eliminates indoor odors creating a fresh and clean living environment.
Page 7

7
Preset safety functions:
1. When the water tank is full, the unit will automatically stop.
2. If un
it malfunctions, an alarm system will activate.
3.
This appealing unit automatically incorporates air direction
with 3 air velocity settings. The unit will turn off when the moisture
in the air reaches the set position and air purification.
The unit will automatically shut off the power when the temperature
sensor detects excessively high internal temperatures.
Page 8
8
Ambient Environment For Operating
This dehumidifier is intended for household use only. Do not use
this unit outdoors or on wet surfaces.
This dehumidiffier is designed to provide an optimum operating
performance above 1oC (33oF) and up to 37oC (98oF) of the room.
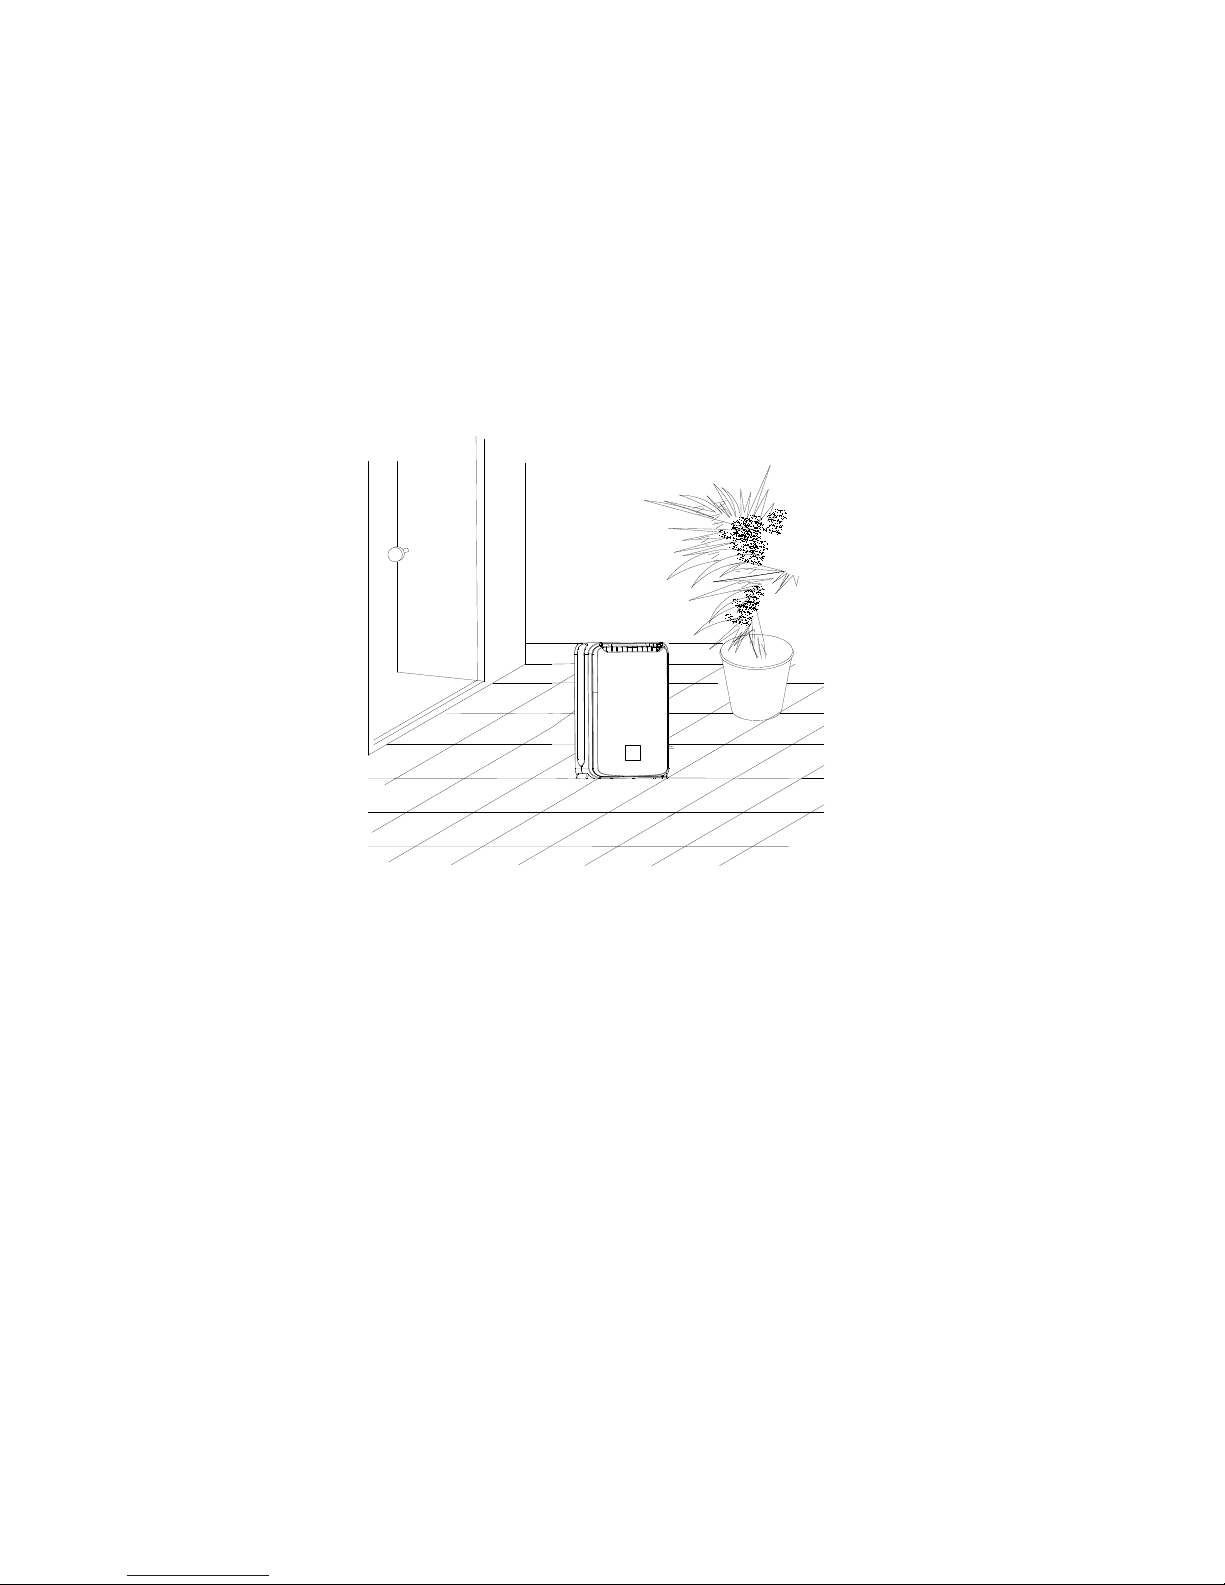
Please close all windows and doors to ensure the highest efficiency.
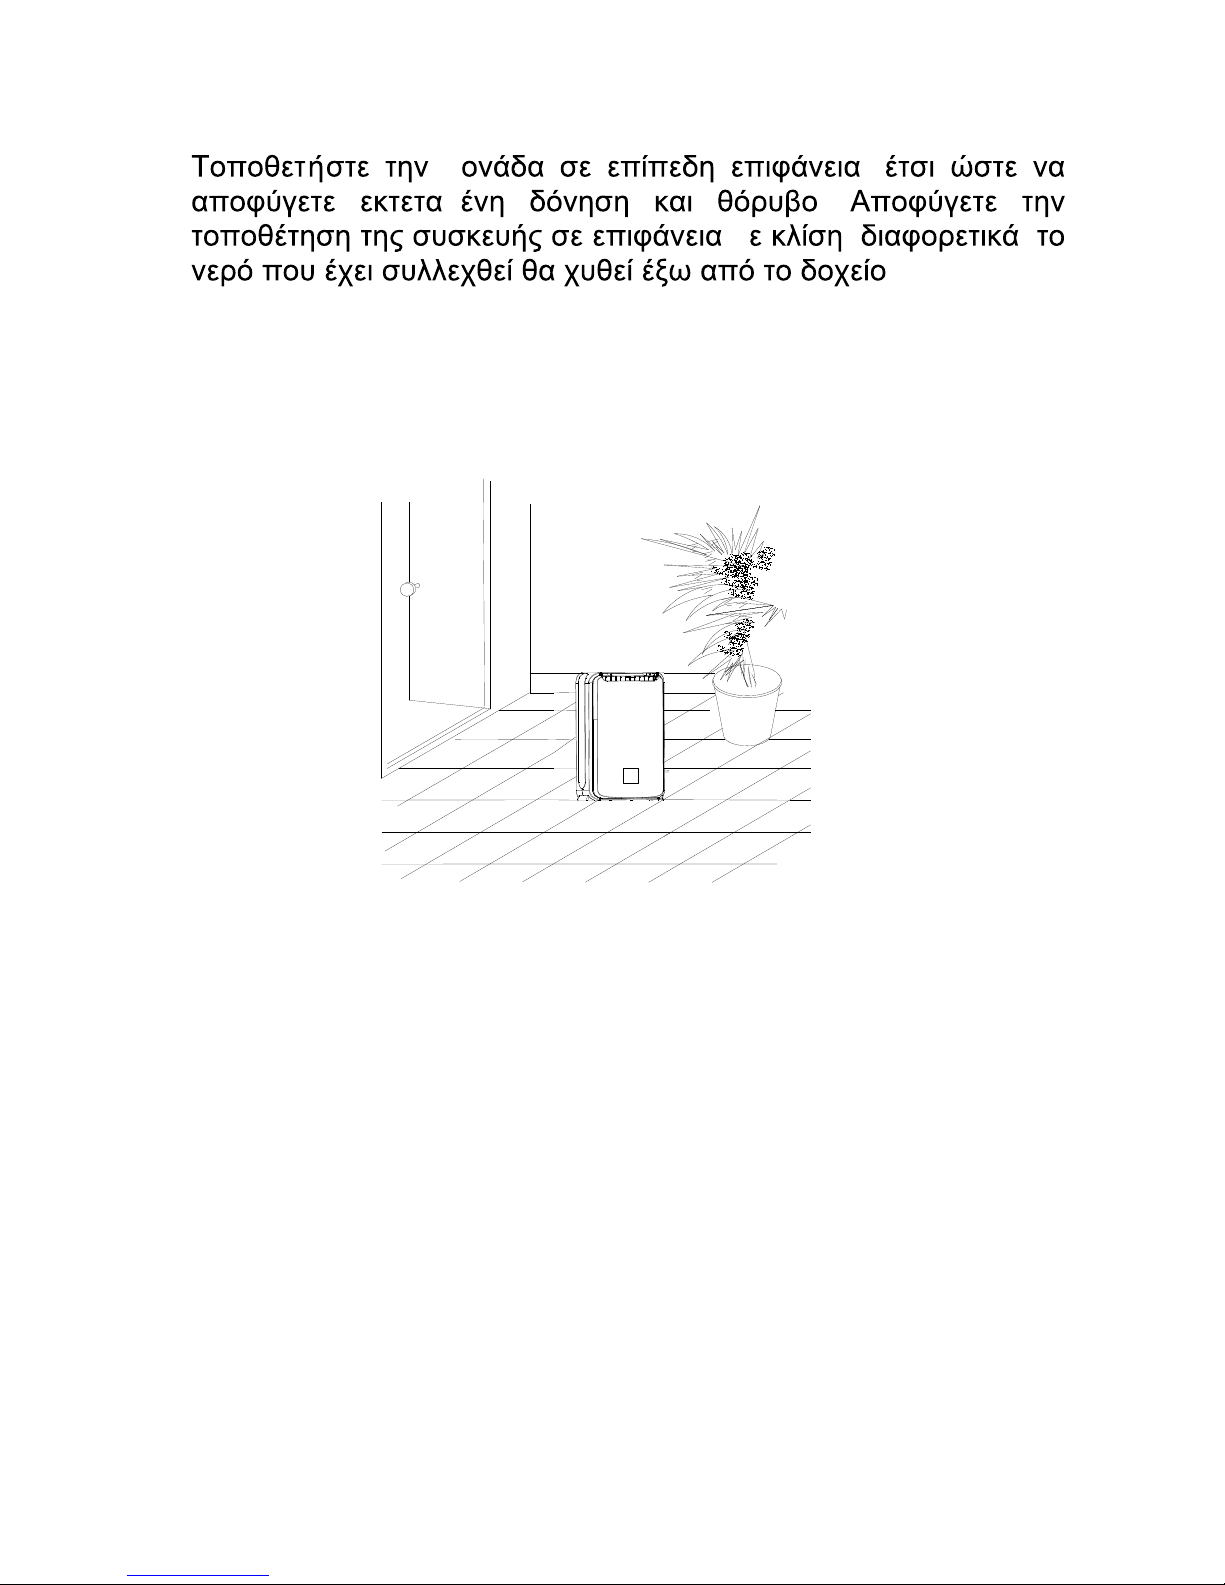
Place the unit on a flat surface to reduce possible excessive
vibration and noise. Never tilt the unit as the water in the reservoir may
spill out.
Page 9
9
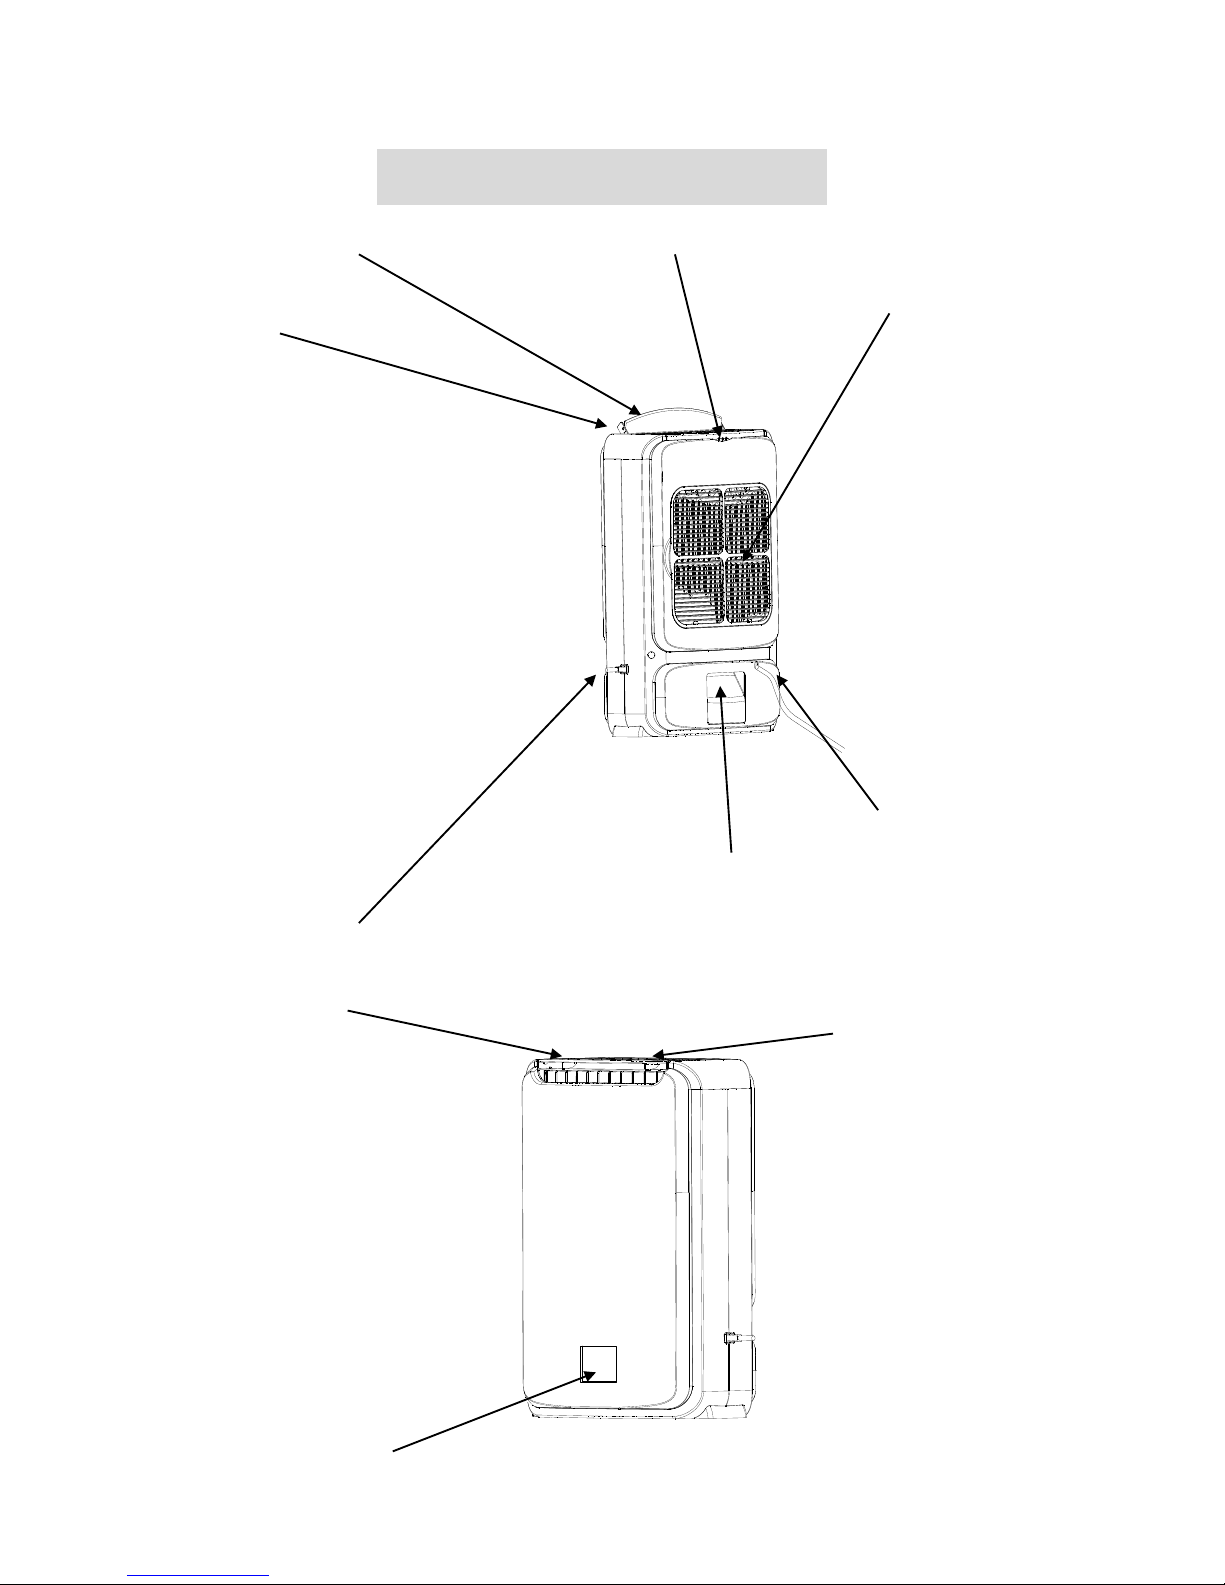
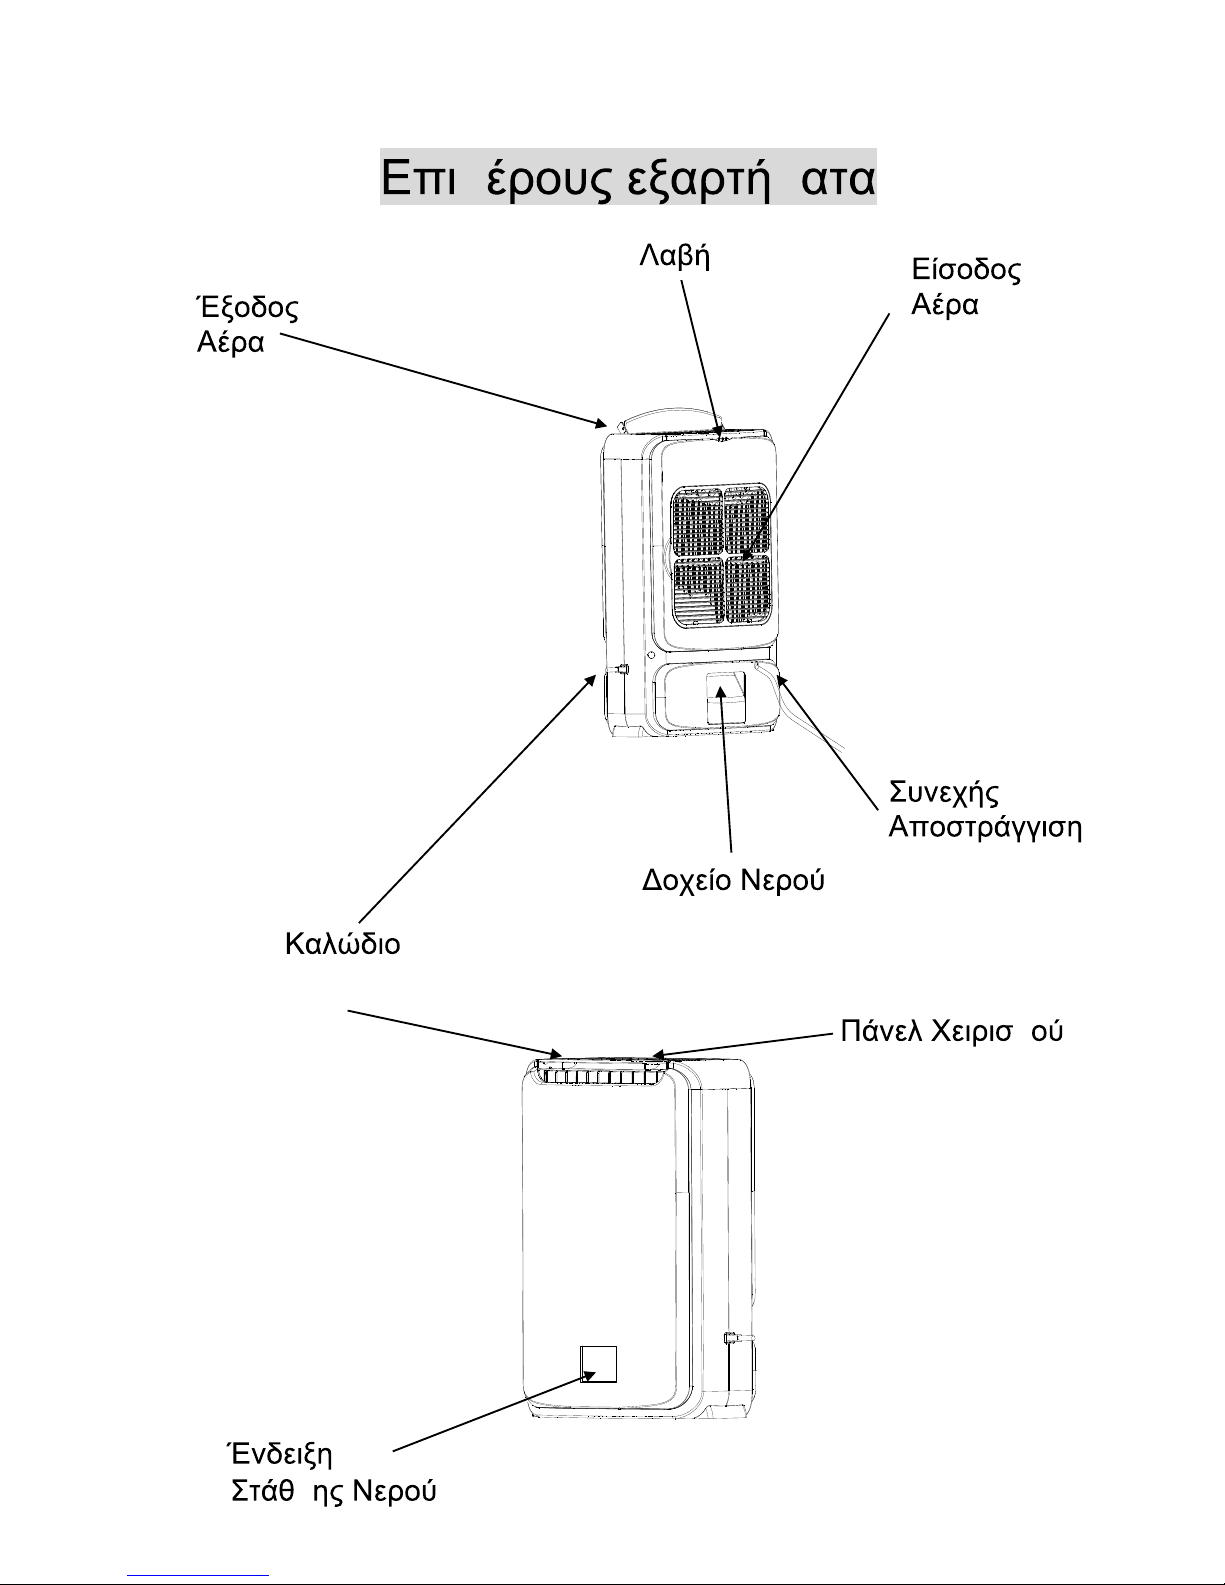
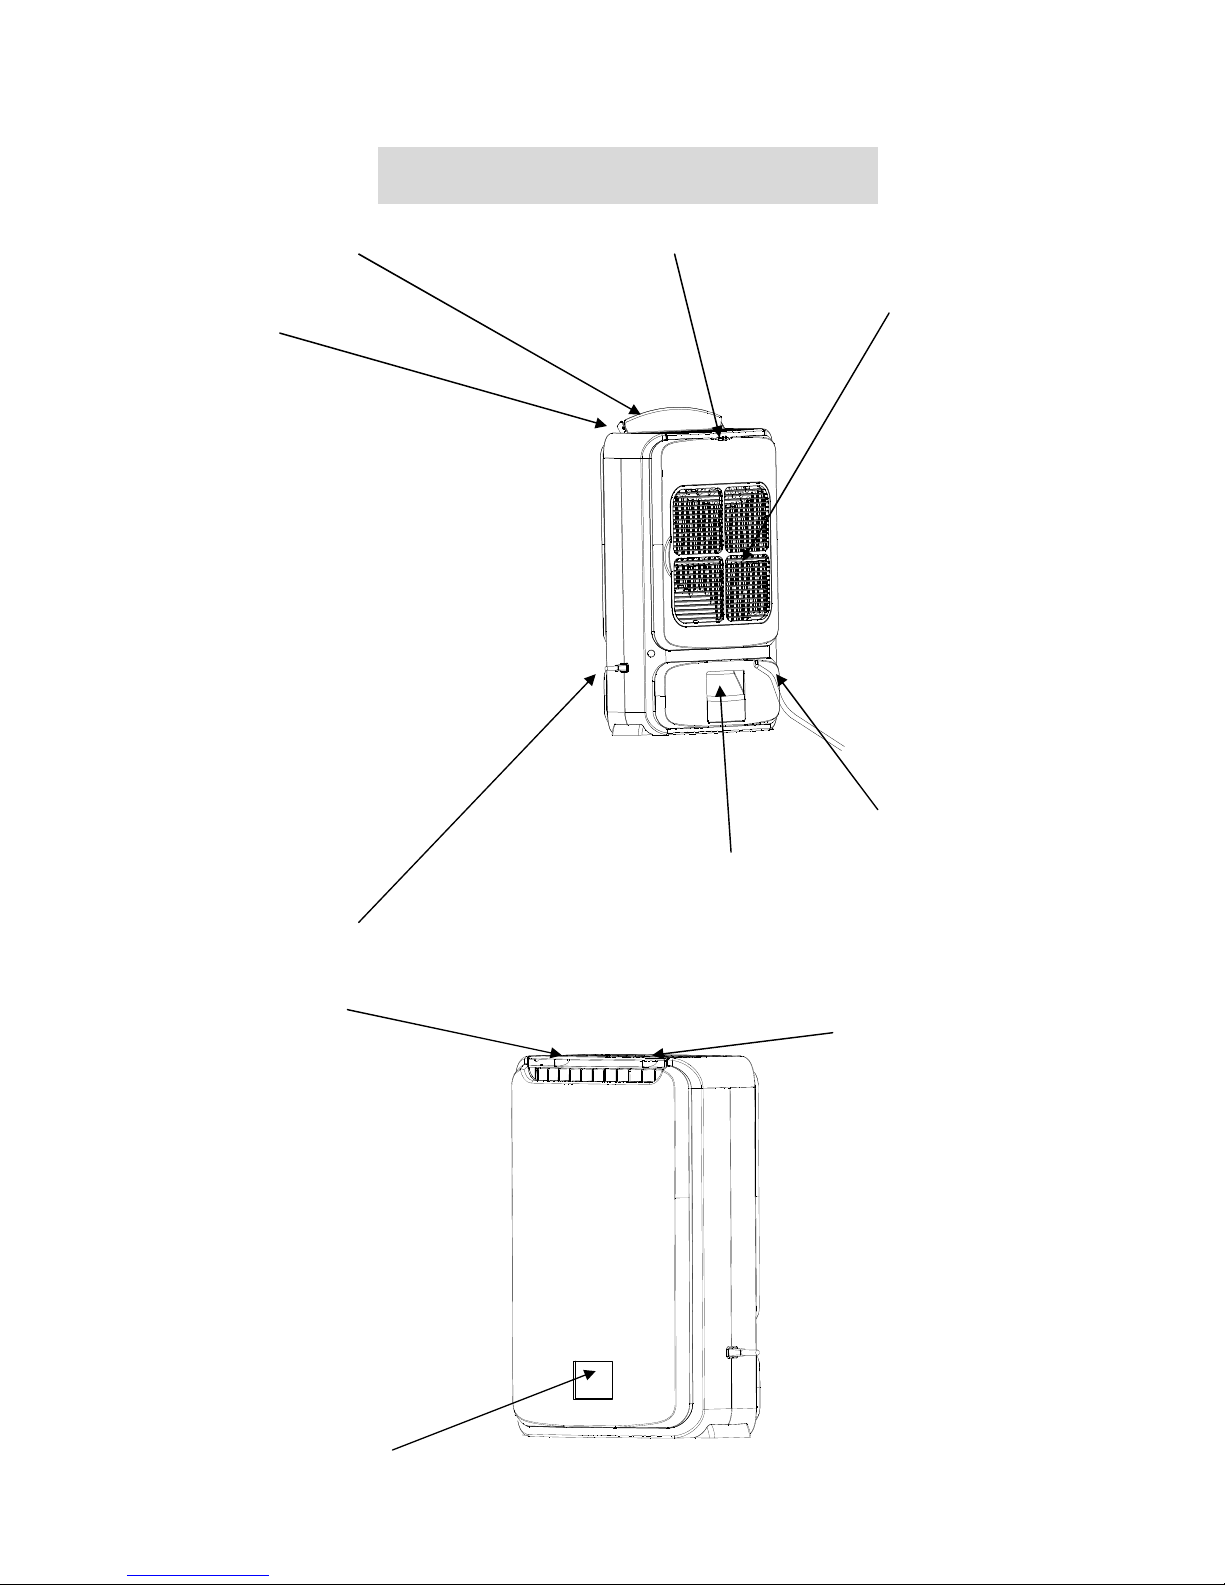
Component Diagrams
Auto Air Guide Panel Handle
Air outlet
Air Intake Grill
Continuous Drainage
Water Reservoir
Power Cord
LED Monitor
Control Panel
Water Pane
Page 10
10
Operating Instructions:
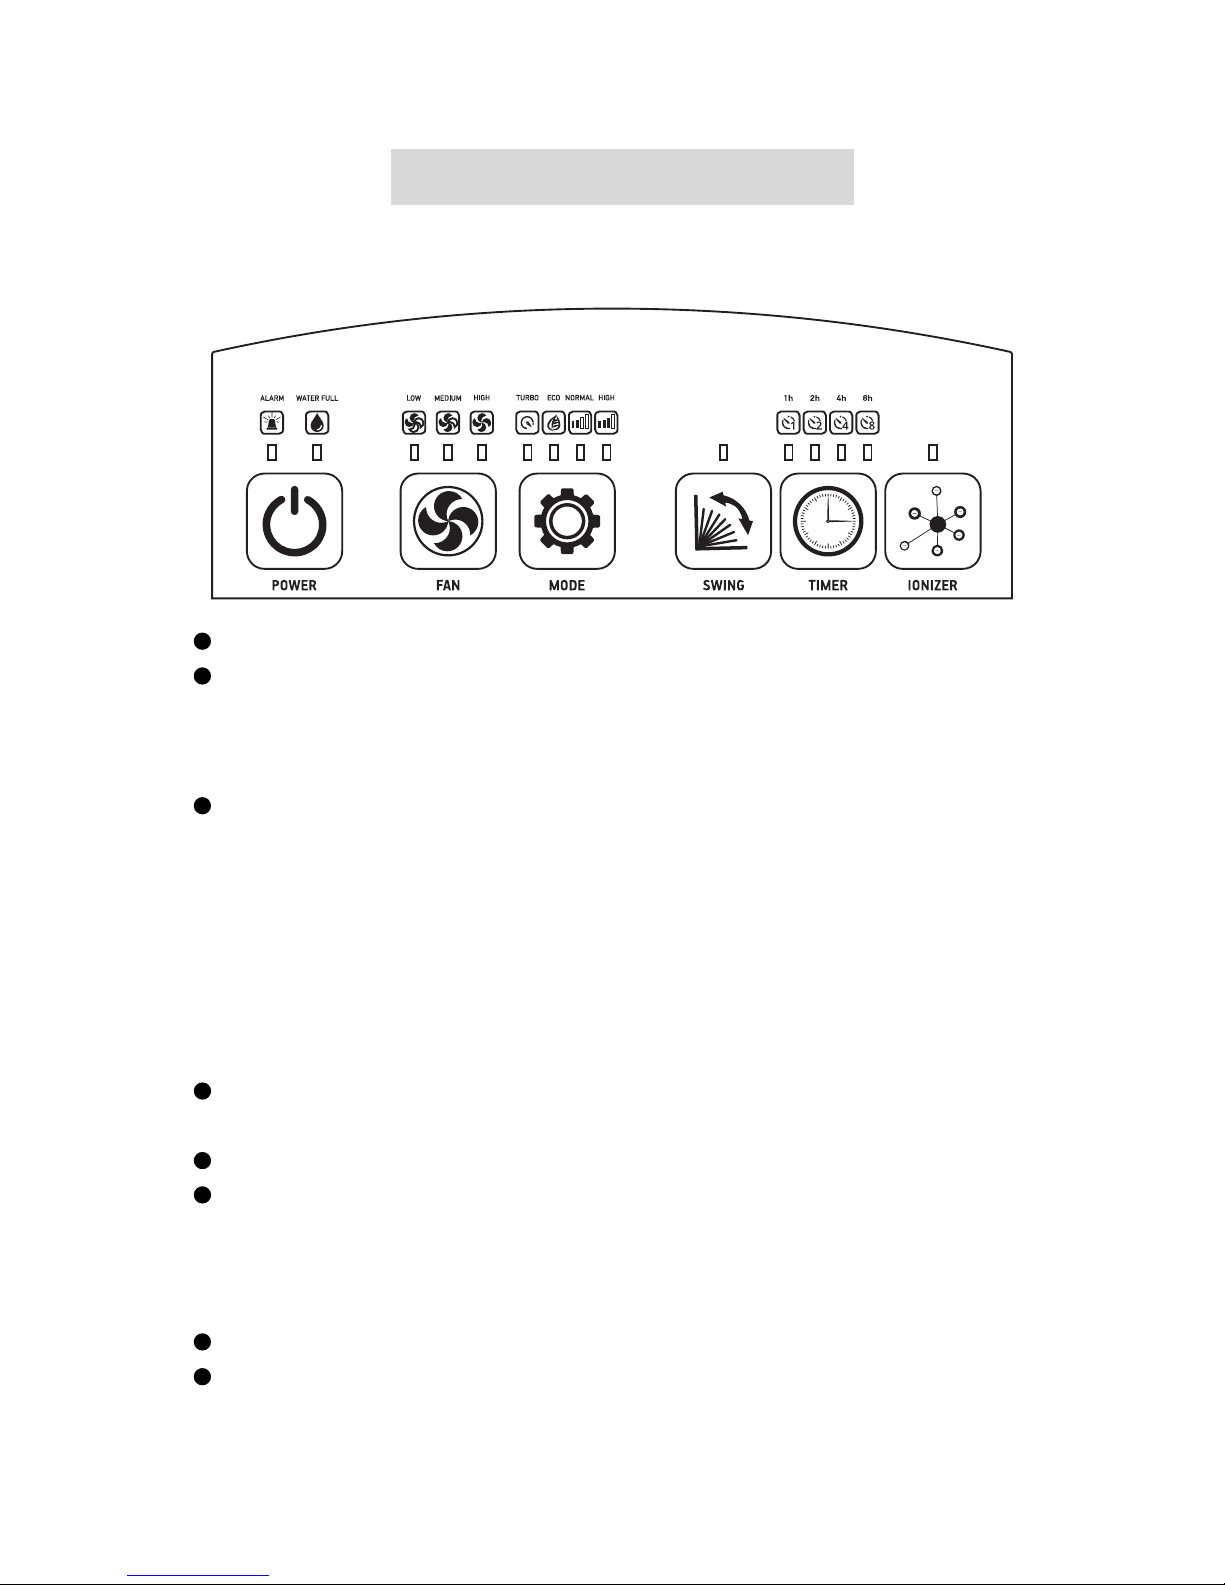
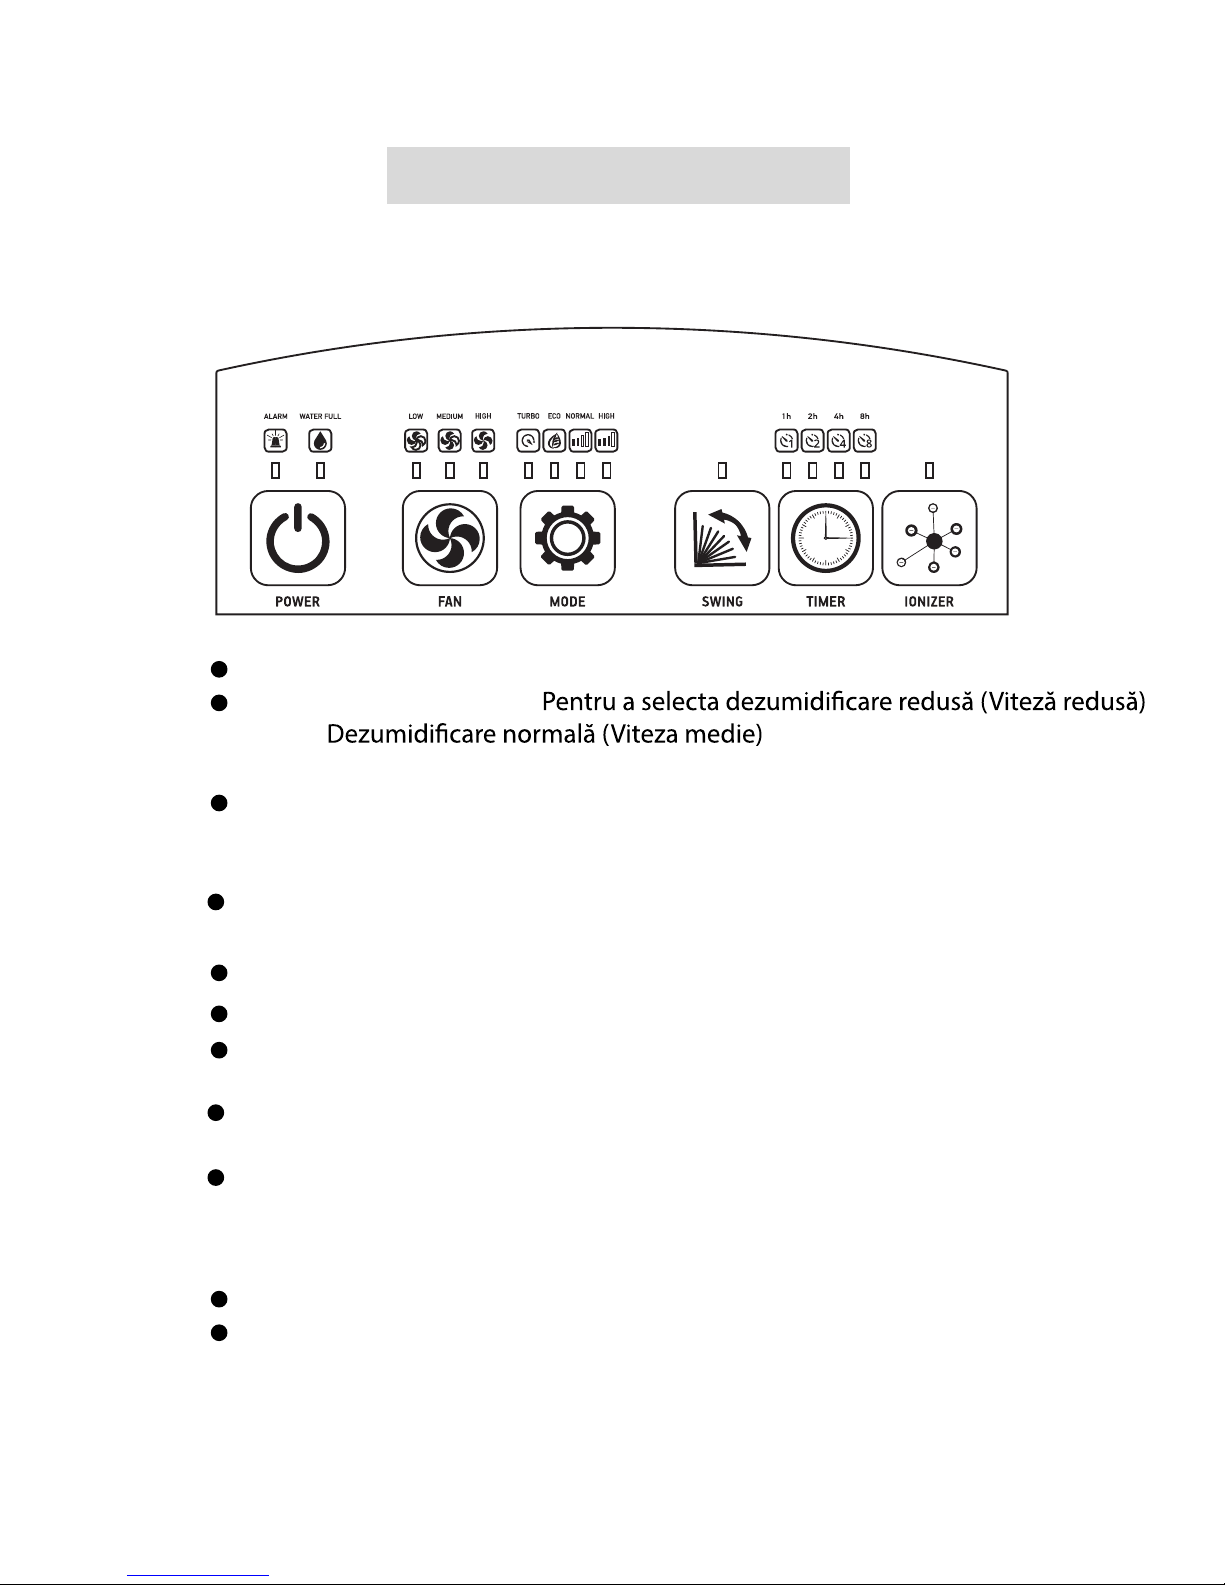
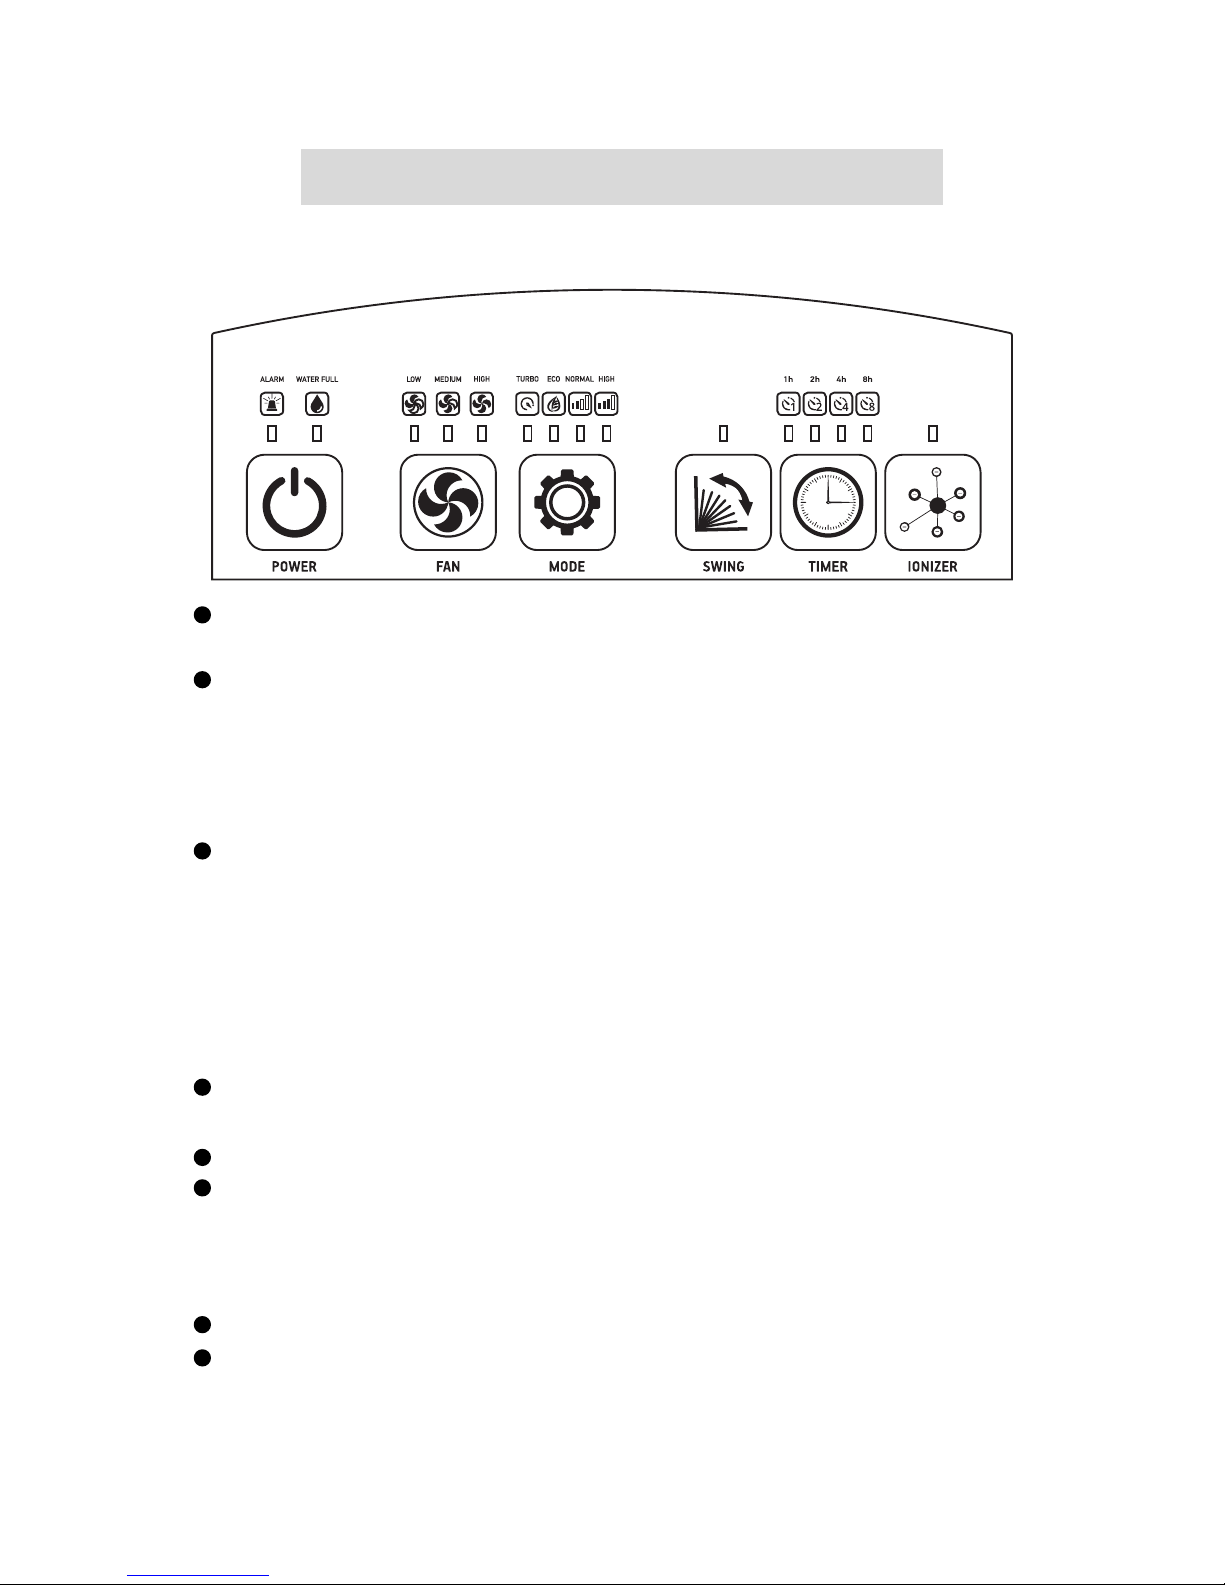
Functions of the Control Panel & Key Pads:
Power: To turn on and off the unit.
Fan: To select quiet dehumidification (Low speed)
Normal dehumidification (Medium speed)
Faster Dry (High speed)
Mode button: Press this button to select one of the following
functions:
Dry-Turbo mode - RH 35%.
High mode - 40%RH.
Normal mode - 50%RH.
Eco mode - 60%RH.
Timer: To set the unit off by 1 /2 / 4 /8 hours settings.
Ion: Switch on / off Ionizer
Operation Of Key Pads
Plug into power socket.
Swing: Moves the air guide flaps, providing better distribution of the
outgoing air.
Press the POWER (on /off button). The unit starts up with Continuous
dehumidification and the air guide flaps positioned at 90 degrees.
Page 11

1.
2.
Press Fan:
Press Mode:
Dry (TURBO) - Continuous dehumidifying
During the Continuous dehumidifying function(TURBO), the appliance
will operate continuously, extracting humidity from the air. When this
function is selected the appliance will keep working until the water tank
is full disregarding the relative humidity of the area.
Economical function (ECO) - RH 60%
During the econom ical function (ECO), the dehumidifier will operate to
keep the humidity at 60%. When 60% humidity level is reached,
the dehumidifier will stop dehumidifying and the fan will keep
operating. When the humidity of the area rises above 60%, the
dehumidifier will start operating again.
Normal dehumidification (Medium speed - NORMAL) - RH 50%
During the normal dehumidification mode (NORMAL), the dehumidifier
will operate to keep the humidity at 50%. When 50% humidity level is
reached, the dehumidifier will stop dehumidifying and the fan
will keep operating. When the humidity of the area rises above 60%, then
the dehumidifier will start operating again.
Fast dehumidification (High speed - High) - RH 40%
During the fast dehumidification mode (HIGH), the dehumidifier will
operate to keep the humidity at 40 %. When 40% humidity level is
reached, the dehumidifie r will stop dehumidifying and the fan
will keep operating. When the humidity of the area rises above 40%,
the dehumidifier will start operating again.
11
When the unit is turned on the alarm will beep 3 times.
LED monitor displays corresponding functions and status.
Select Quiet (L), normal dehumidification (M) or faster dry (H).
Keep pressing until you have your desired selection.
1. Continuous sets humidity ratio in the room
2. L (Quiet dehumidification) setting.
3. M (Normal dehumidification) setting.
4. H (Faster dry) setting. A humidity ratio can not be set using this
function.
5. LED pilot lamp illuminates the function status.
Sets the operating mode to Turbo-Eco-Normal-High.
Keep pressing until you have your desired selection.
Page 12
12
2.
Water Resevoir Full Alert
Internal Over Heating Protection
Press Swing:
Press Ionizer:
Press Timer:
1.
Safety function
When the unit is set on L / M /H, the air guide flaps will change
angles between 90 and 45 degrees. Press again to stop the air guide
at the existing angle
Switches On or Off the ionizer.
LED blinks when the ionizer is turned on.
Sets the unit to power of in 1/ 2 / 4/ 8 hours.
When the appliance is tilted at 45º or more, its function will stop
for safety reasons.
The fan will keep working for 4 more minutes at a low speed.
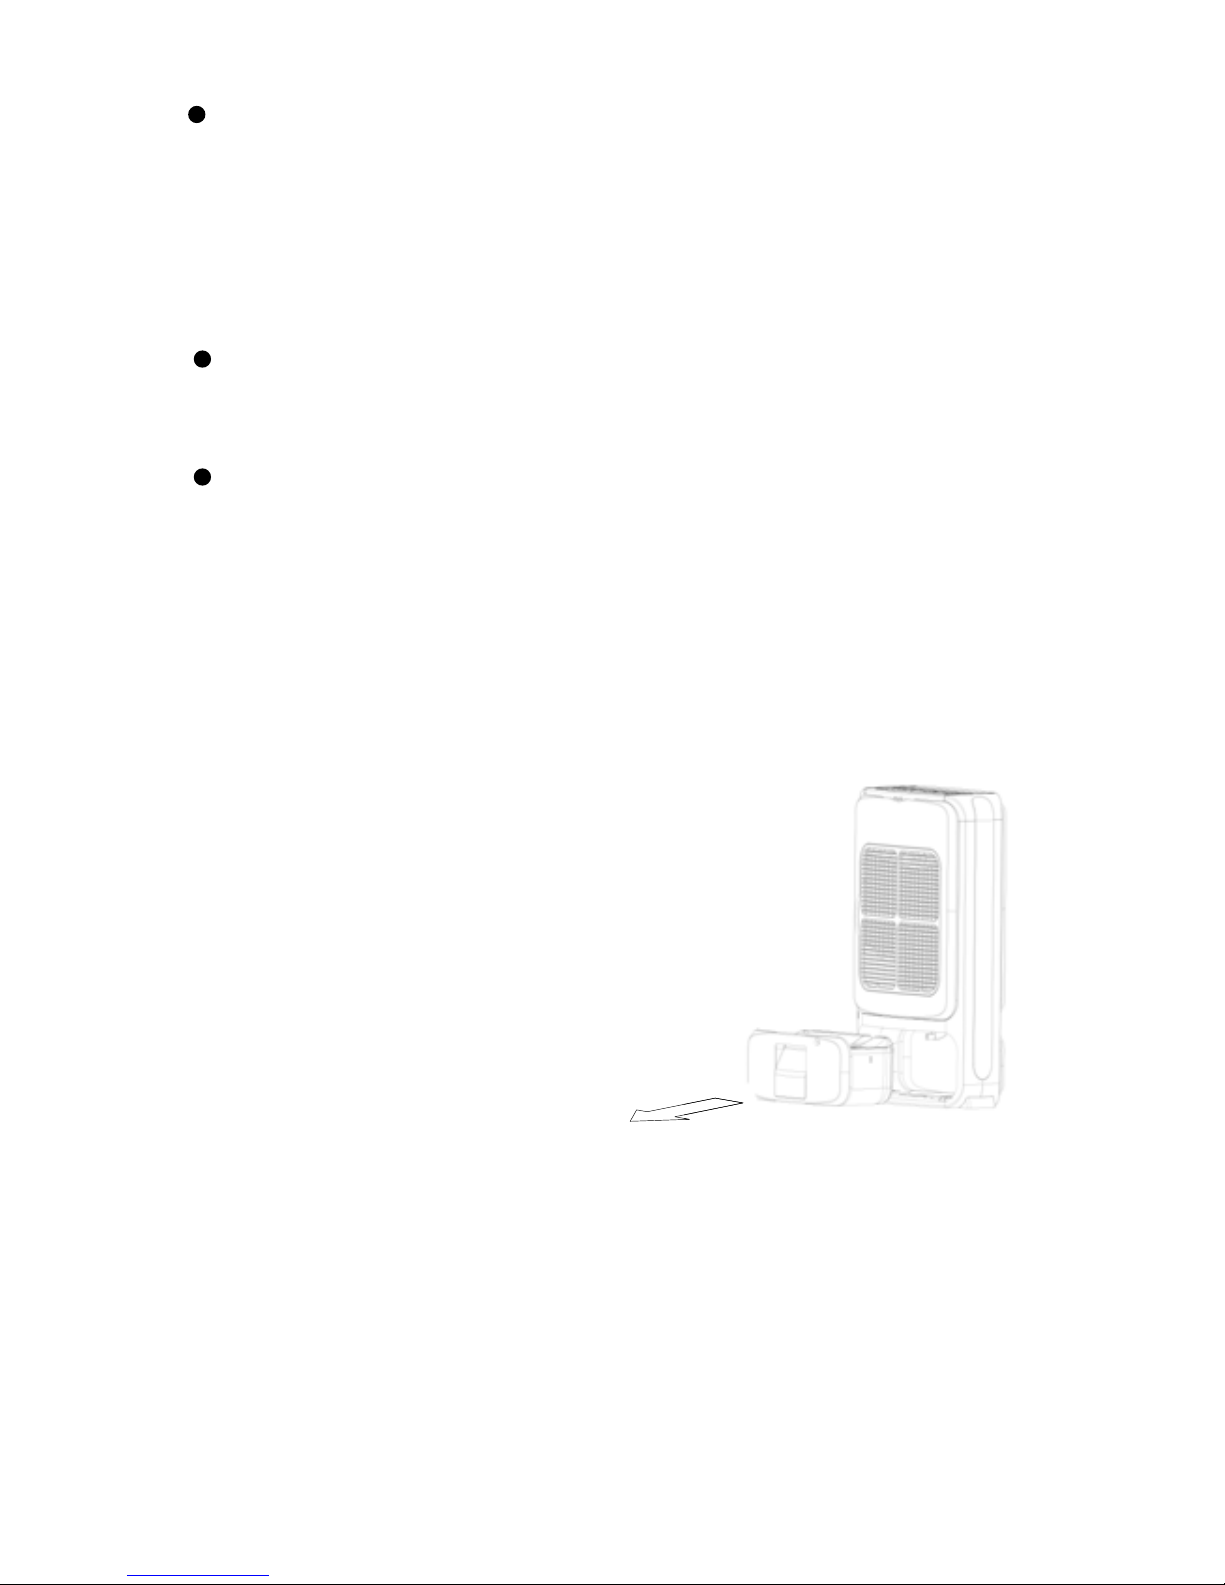
When the water reservoir is full the alarm will
beep. The icon on the LCD monitor will blink
and the unit automatically stops operating. The
water reservoir must be removed, emptied and
reinstalled before the unit continues operation.
LED blinks when the air guide is moving between 90 and 45
degrees.
LED goes off when the air guide stops at the existing angle.
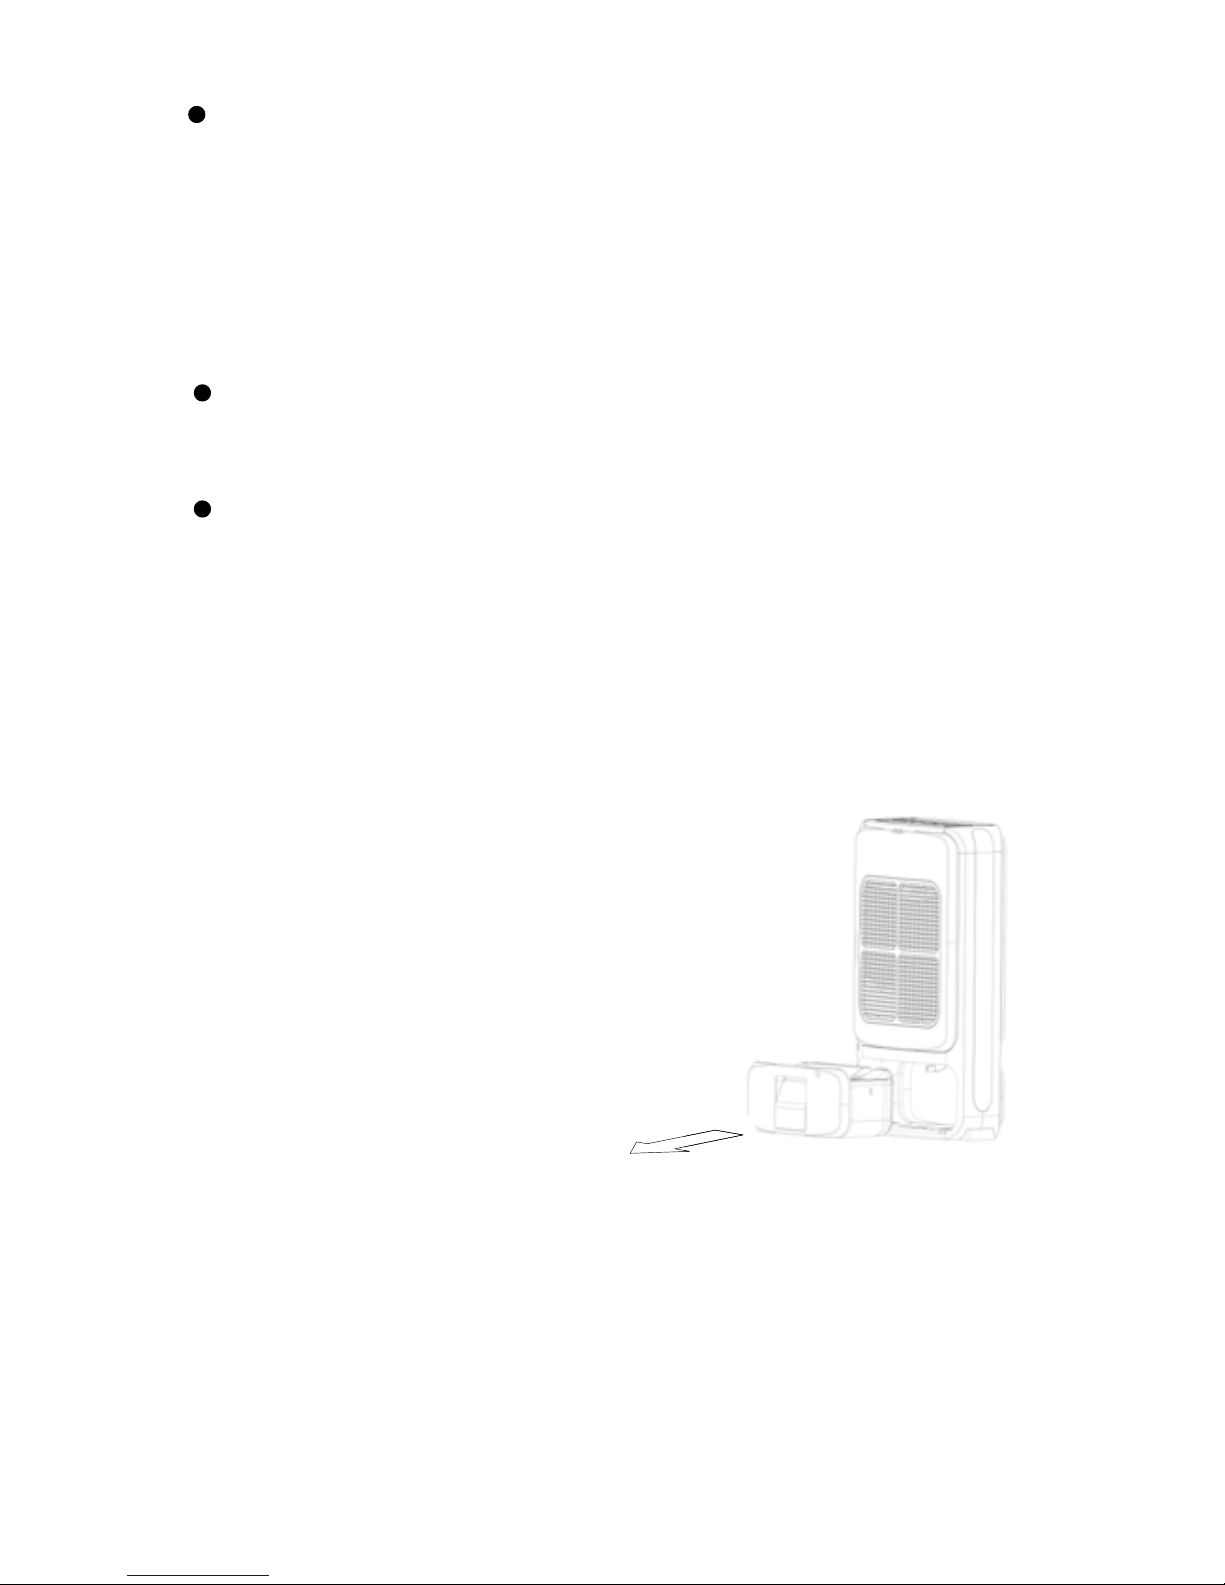
Remove water reservoir in
accordance with the arro
w direction
During operating, malfunctions may occur if the air intake or exhaust
are obstructed or blocked by objects. This can cause high internal
temperatures and the unit will automatically shut down. Unplug the
unit immediately and resume operation after 5 minutes.
Page 13

13
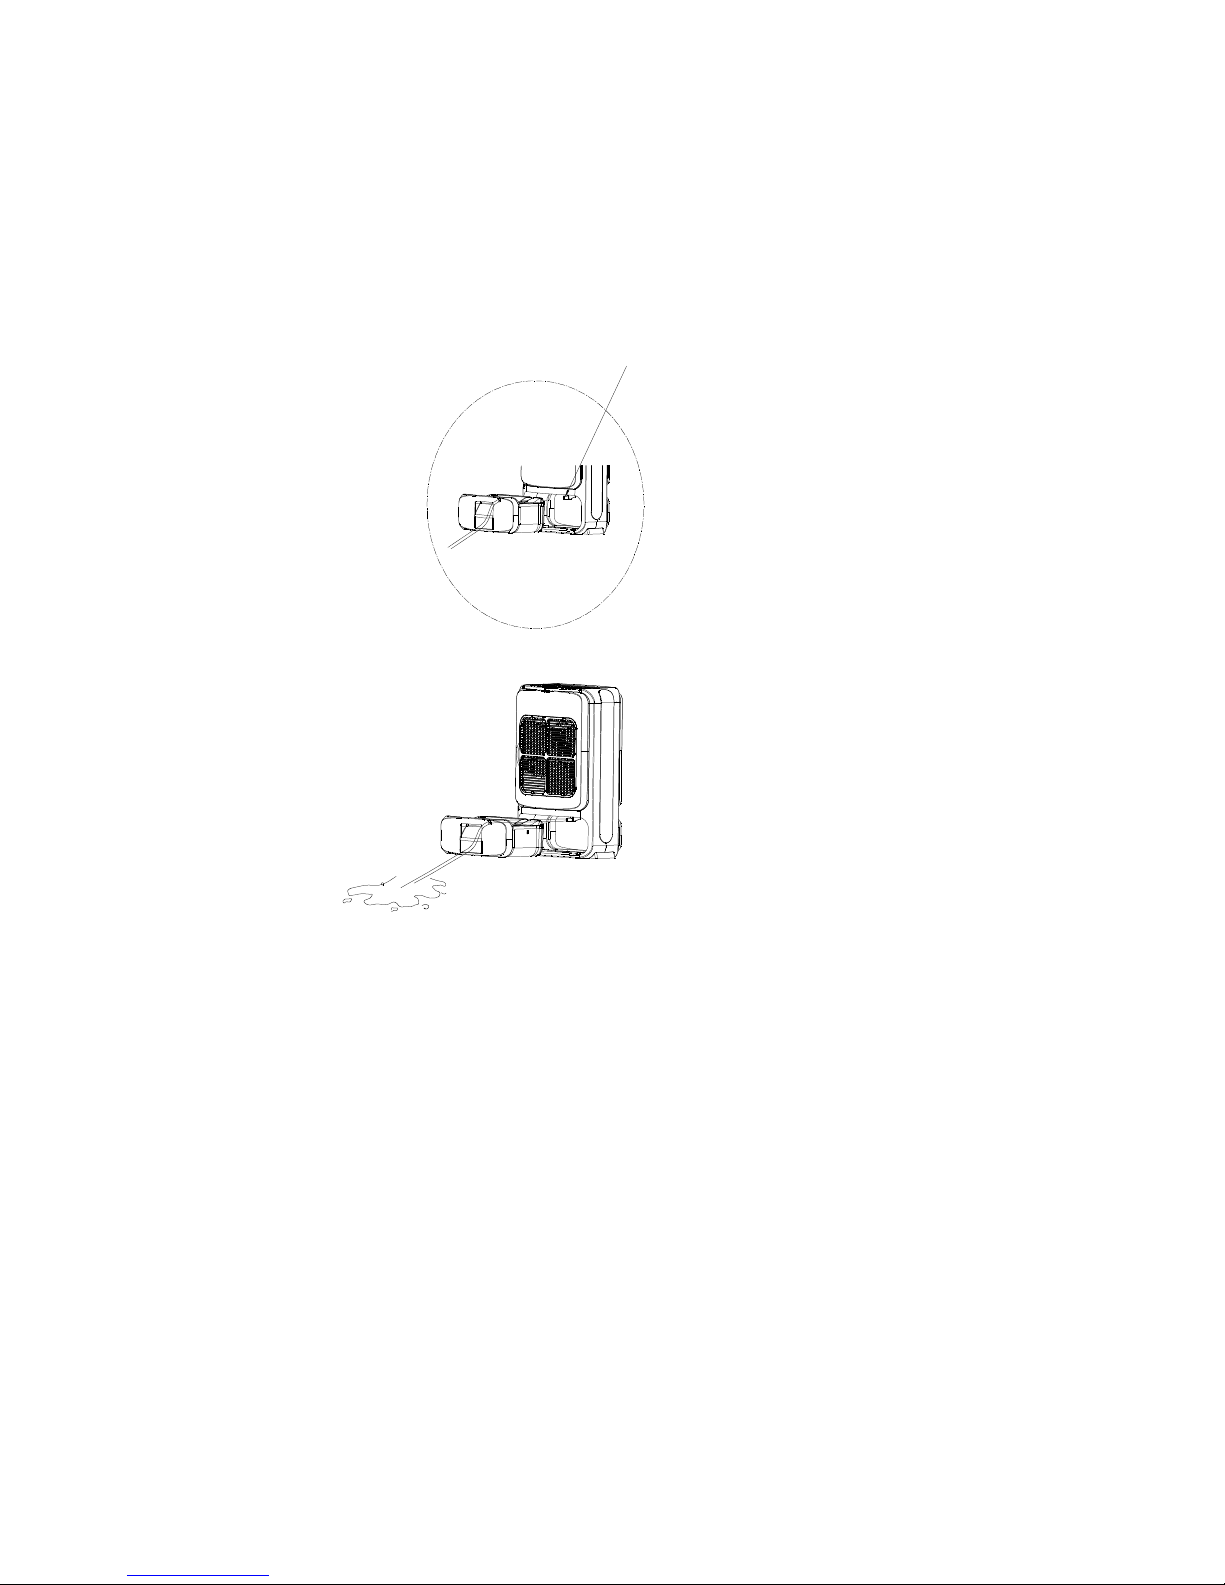
Continuous Drainage
Ensure that the unit is unplugged. Remove the water reservoir and connect a water drain hose to the spigot (as shown on figures). The other
end of this hose should be led to a drain or a suitable receptacle to collect the water.
Note- for the unit to drain correctly, make sure the hose stays below the
level of the spigot.
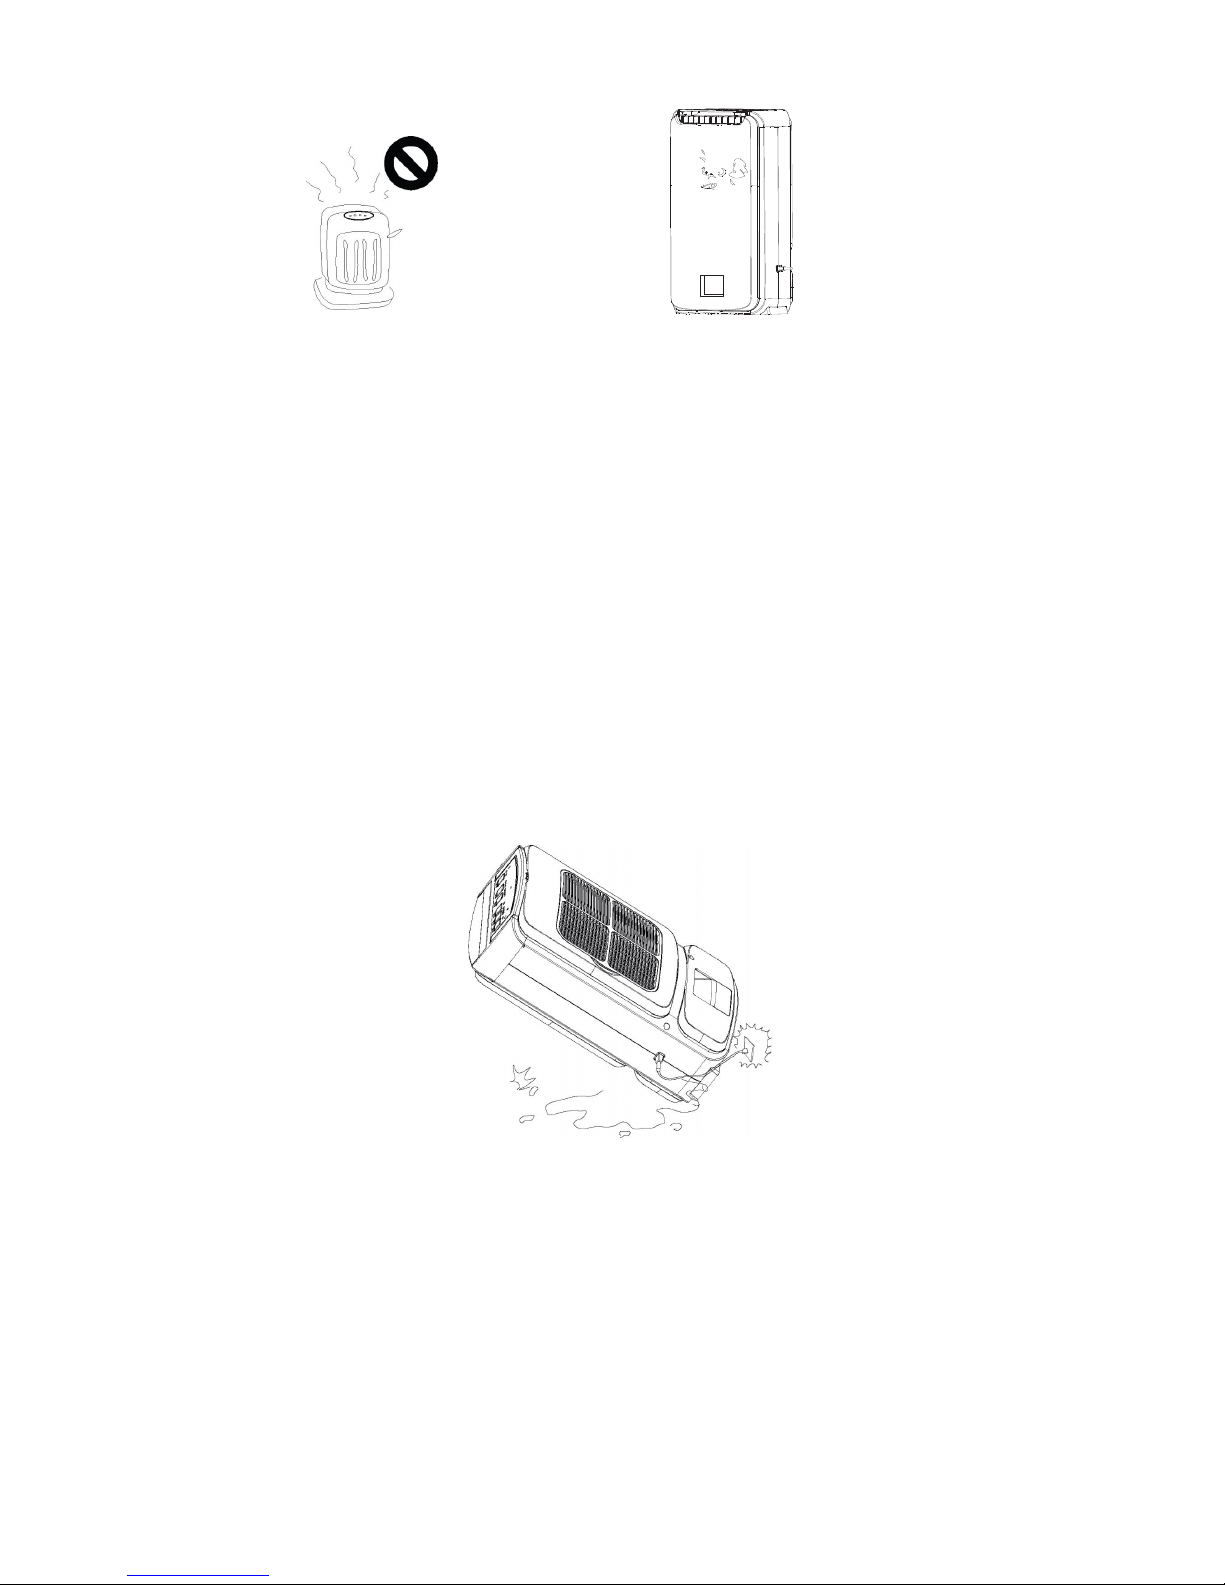
The unit has a heater inside. In order to avoid over heating, the
unit is equipped with a tipping switch that automatically shuts off
the unit if it should tip over.
Water spigot
Tipping Protection
Page 14
14
Maintenance & Repair
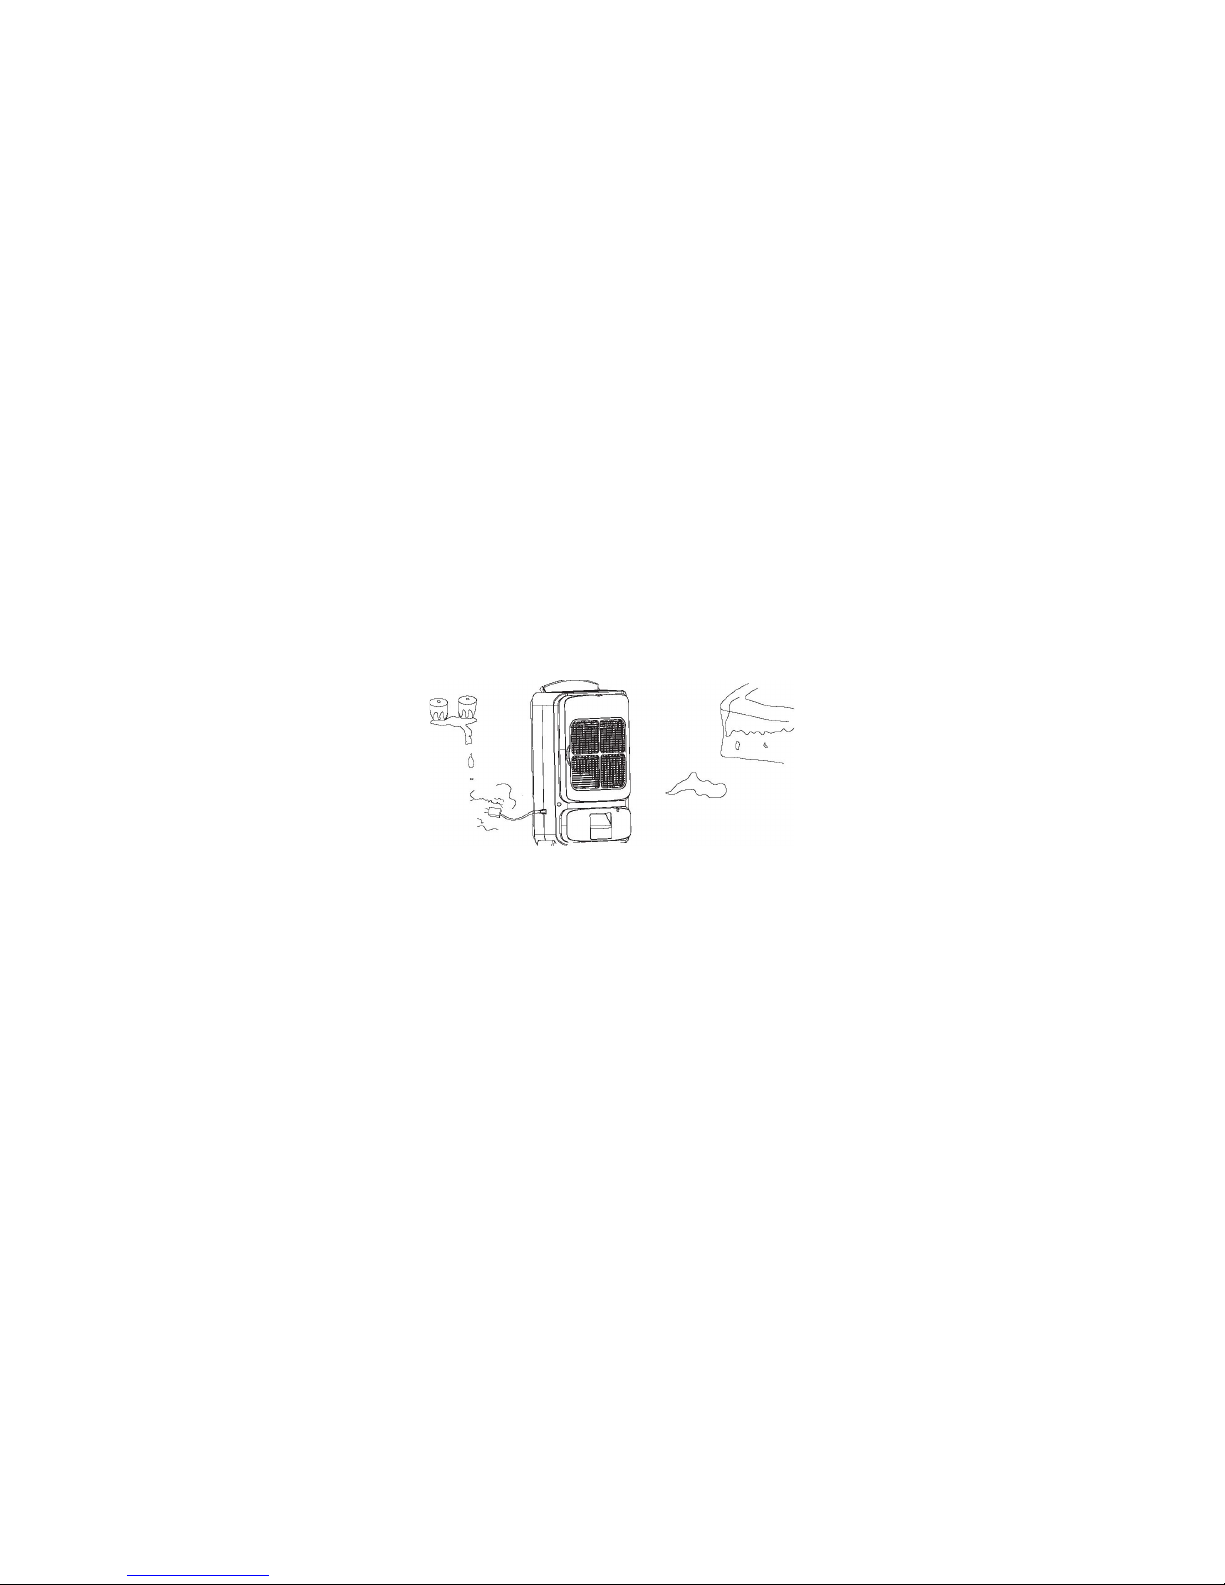
External cleaning:
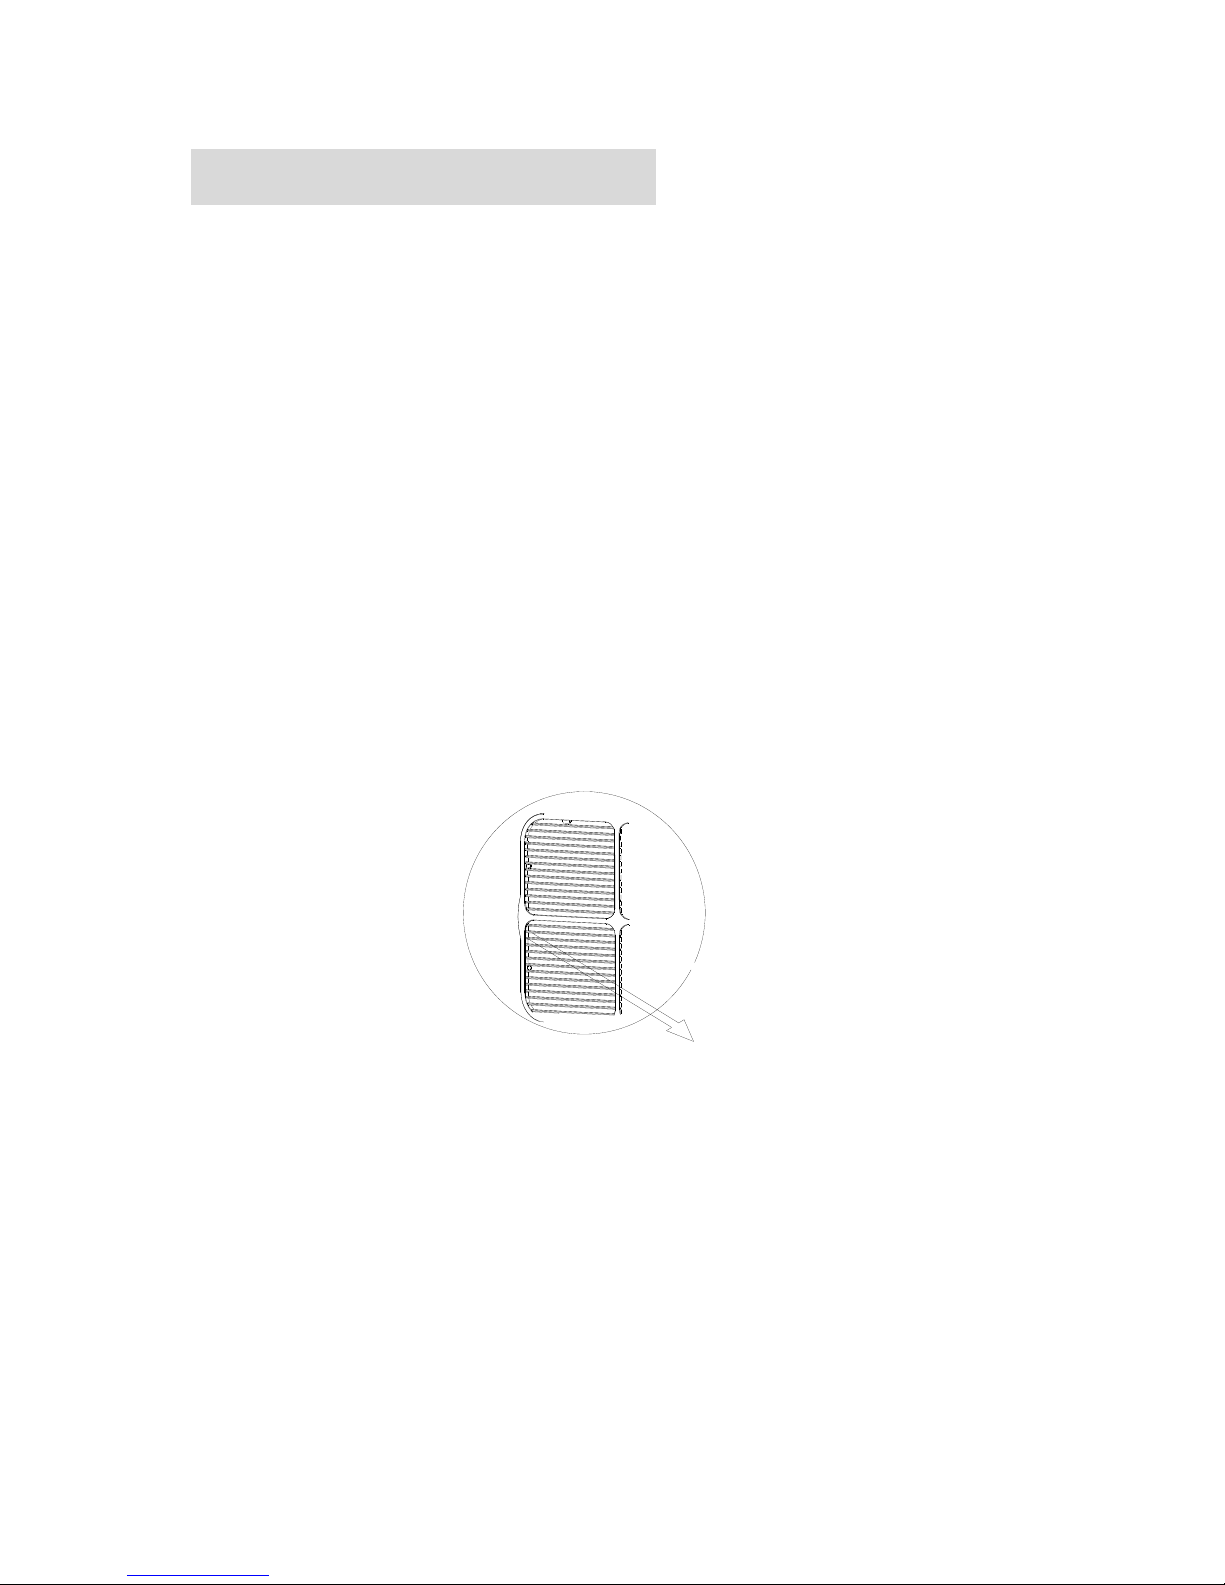
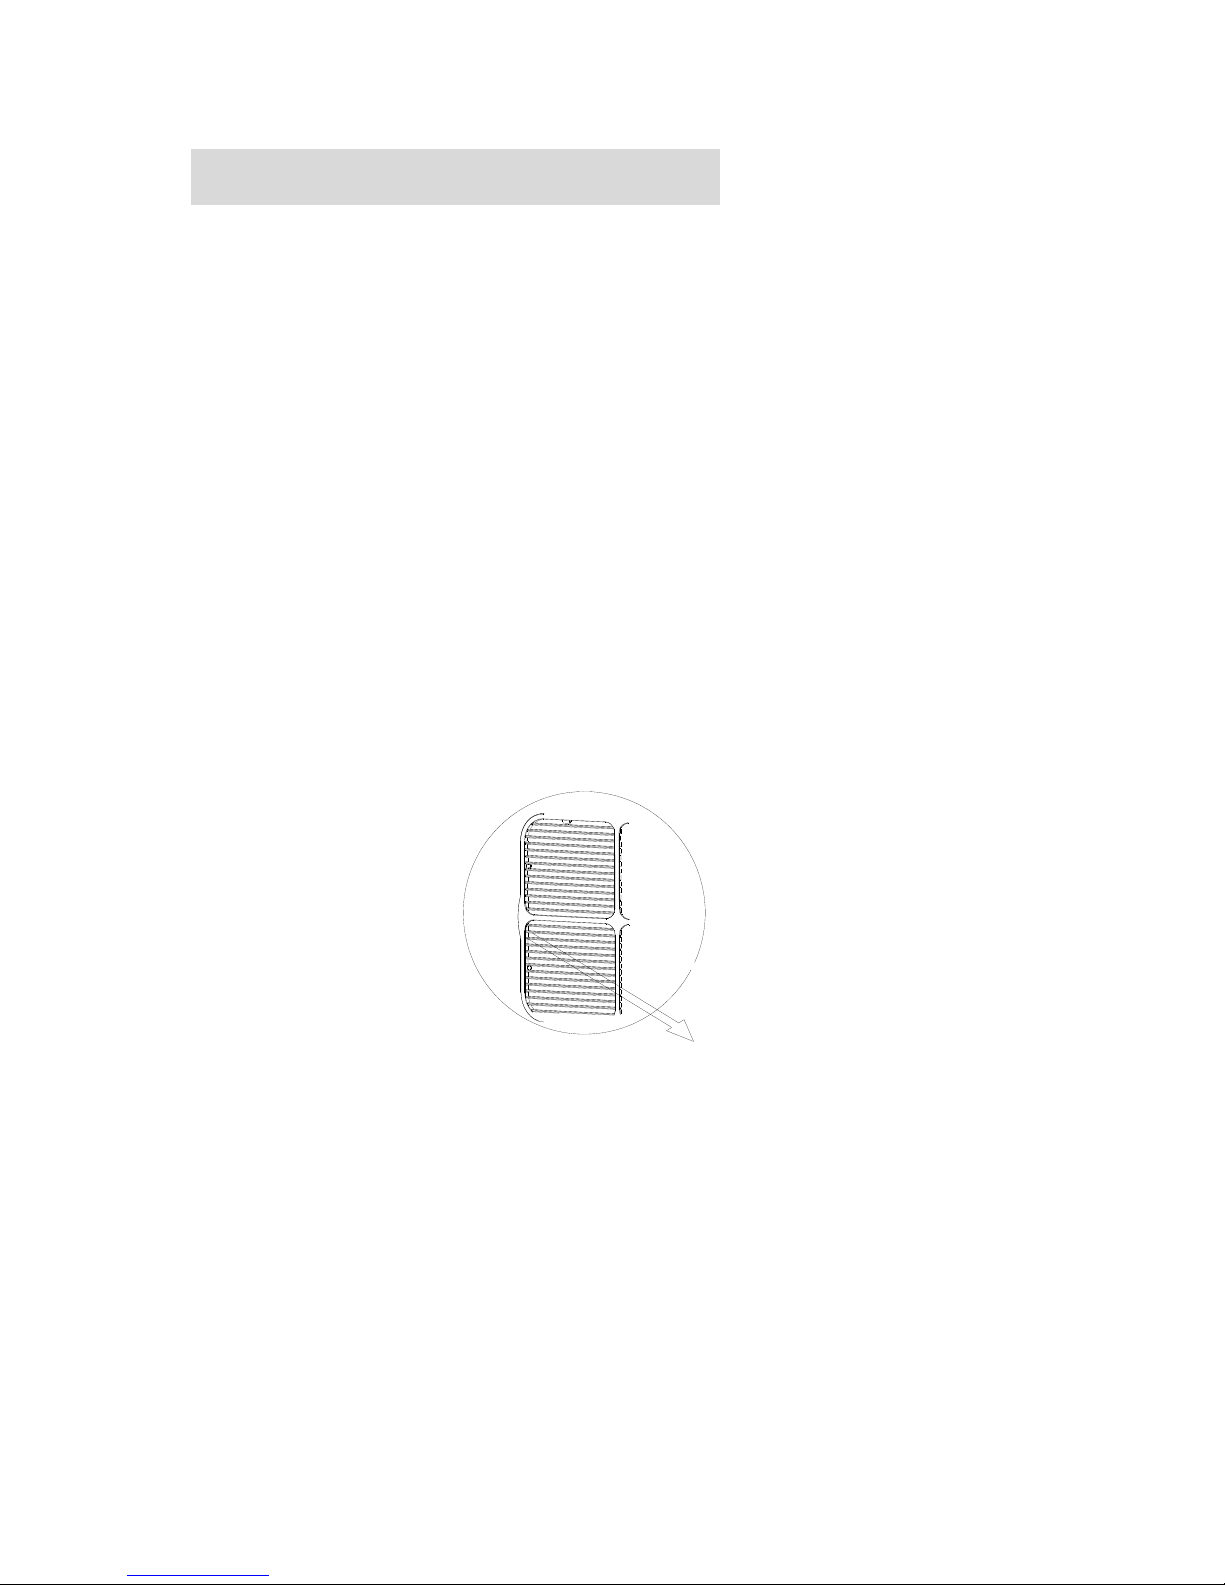
Cleaning the Filter:
Pull out the filter as shown
Repair:
Before carrying out any maintenance or cleaning of the unit, make sure
that the power to the unit is turned off and the unit is unplugged.
Do not clean the unit with any abrasive cleaning agents or solvents.
Do not apply any water directly on or into the unit while cleaning.
Only use a soft clean cloth for all cleaning purposes.
Manually remove the air filter.
Use a vacuum cleaner or a clean, damp cloth to clean the filter.
(As shown in the figure)
Allow the filter to completely dry before replacing it in the unit.
If the unit or power cord is damaged, stop using it immediately. Bring
the unit to our service center for repair. Never attempt to dismantle,
repair or modify the unit.
Page 15

15
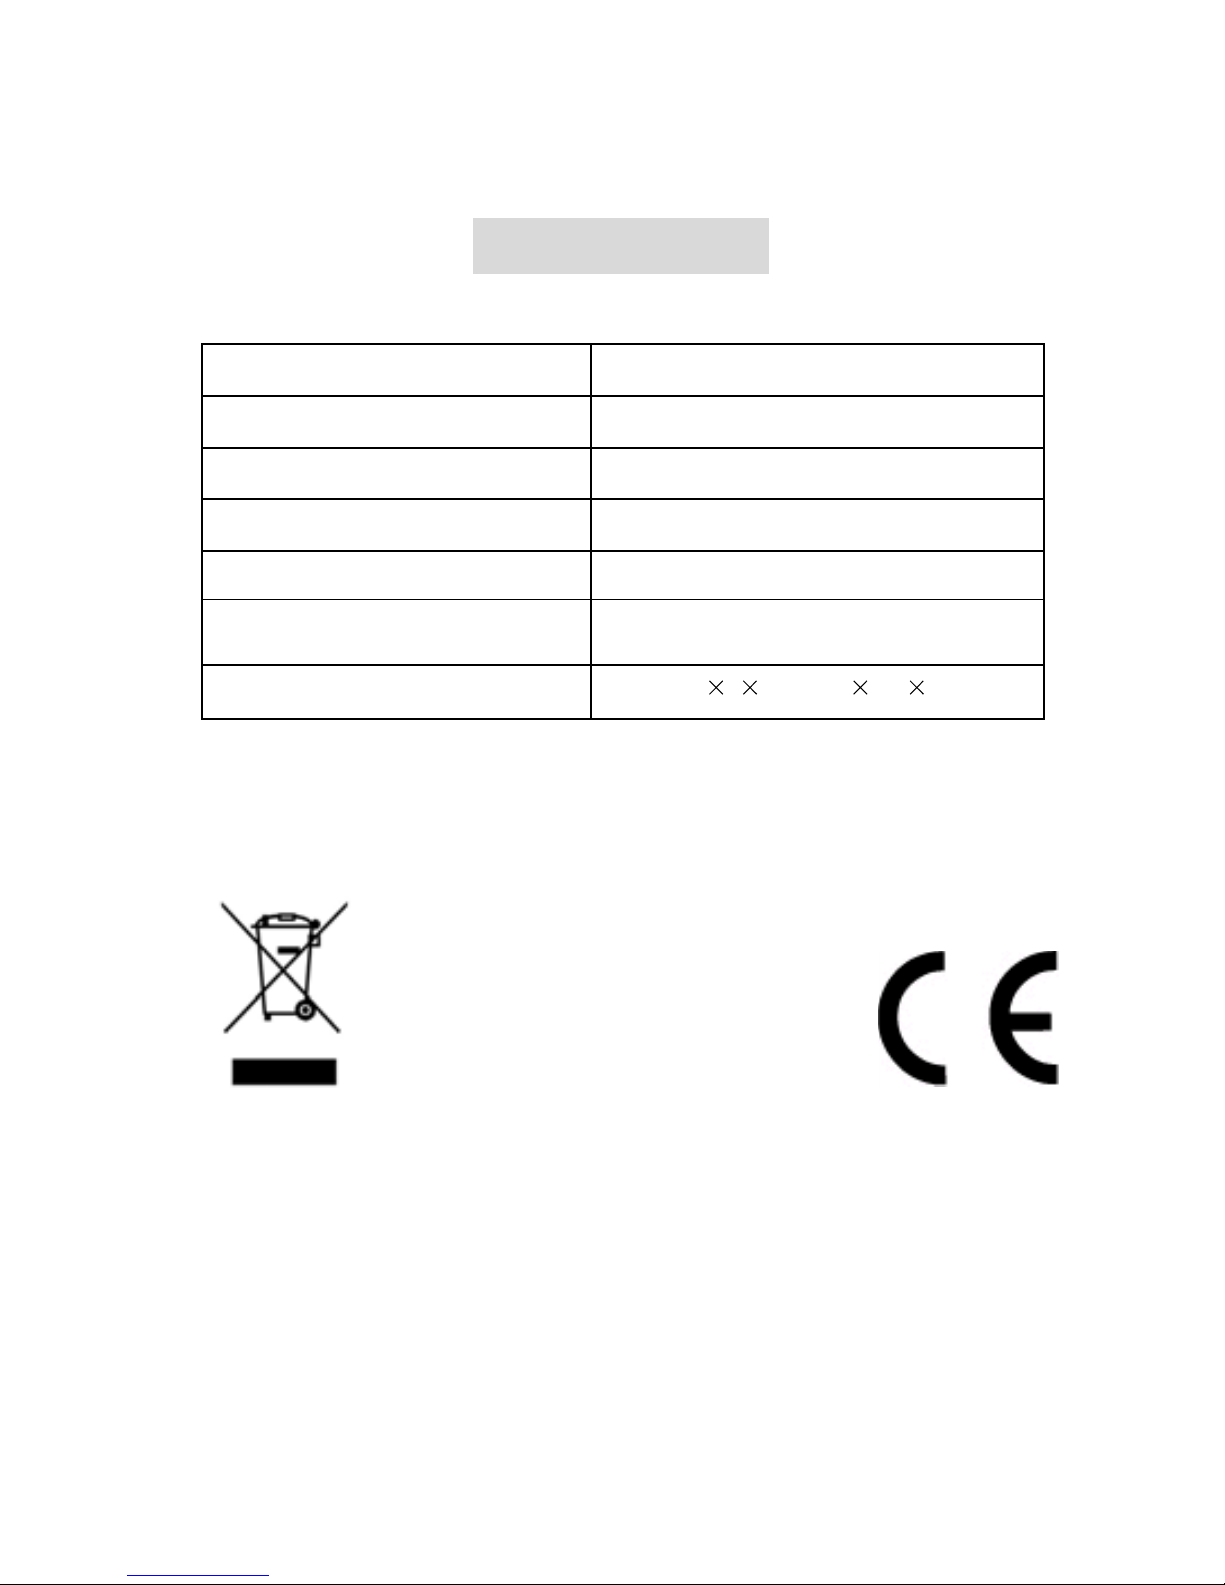
Specifications
Model No.
Rise
Power Rated
220-240 V/50Hz
Dehumidification
8L/D
Consumption
*30/330/650 W
Air Flow
115 CBM/PERHOUR
Capacity of Water Reservoir
2L
Unit Dimension
L M H 351 180 500mm
ROHS
*30W during fan function/ 330W during ECO function / 650W during TURBO function
Page 16

Activate your warranty.....
in
5
simple
steps!
For the electronic
warranty submission
please use the following link
Scan here for the
warranty form
http://www.inventoraiconditioner.com
/warranty-inventor
Select the product type
(airconditioner or appliance) for
which the warranty will be activated
Choose the warranty that
corresponds to your product
purchase
Fill in the required information
(owner, retailer and appliance)
and press send
You will receive a confirmation
e-mail for the activation of
your warranty
Connect to the following link
http://www.inventorairconditioner.com/warranty-inventor
Page 17
Page 18
•
•
•
• µ µ
•
o
( µ )
o
o , µ
o
o
•
•
Οδηγίες Ασφαλείας
Page 19
2
!
!"#$%&' (')(*&%('
!5657539Gµ. *45J208. A690.78472 84/ 9*+,-./ A6989G
E6+04µ9A94@0.8. 89 0>,7.764µB<9 A69:;<.
1. K 0>07.>@ *.< A6996-L.854 ,45 E6@0+ 5A; 289µ5
(0>µA.6435µJ5<9µB<D< A54*4H<) µ. B33.4M+ .µA.46-5/ @
,<H0+/ @ 289µ5 µ. µ.4DµB<+ 1>047@ 754 A<.>µ5847@ 475<;8
+85 .78;/ .2< J6-079<854 >A; 8+< .A-J3.M+ 58;µD< A9> .-<54
>A.G?><5 ,45 8+< ασφάλειά 89>/.
2. I5 A54*42 ?5 A6BA.4 <5 .A4J3BA9<854 B804 H08. <5 µ+< A5-L9><
µ. 8+< µ9<2*5.
3. !5657539Gµ. J.J54D?.-8. ;84 + A569E@ 6.Gµ589/ .-<54 220240V/50Hz
4.
'+< E6+04µ9A94.-8. 8+< 0>07.>@ 089 µA2<49 754 08+<
<89>L4B65.
5.
'+< 89A9?.8.-8. 8+< µ9<2*5 79<82 0. 7539641B6 @ 233./
0>07.>B/ ?B6µ5<0+/. H µ9<2*5 *.< ?5 A6BA.4 <5 .78-?.854
2µ.05 089< ήλιο όταν τίθεται σε λειτουργία.
Page 20
αποσυναρμολόγηση, επισκευή ή συντήρηση της συσκευής μόνοι σας.
7. Απαιτείται στενή επίβλεψη όταν η μονάδα χρησιμοποιείται
από παιδιά ή κοντά σε παιδιά. Μην επιχειρήσετε την
αποσυναρμολόγηση, επισκευή ή συντήρηση της συσκευής
μόνοι σας. Οι εργασίες πρέπει να εκτελούνται μόνον από
εξουσιοδοτημένο συνεργείο.
8. Βεβαιωθείτε ό
τι η μονάδα είναι τοποθετημένη σε στ
αθερό
κ
αι επίπεδο δάπεδο. Στην περίπτωση που τ
ο δάπεδο δεν
είναι στ
αθερό ή επίπεδο, υπ
άρχει κίνδυνος η συσκευή να
είναι αστ
αθής και να ανπ
οδογυρίσει. Επίσης η συσκευή
μπ
ορεί να σημειώσει περαιτέρω αύξηση δόνησης κ
αι
μεγαλ
ύτερο θόρυβο.
9. Σε περίπτ
ωση που η μονάδα αναποδογυρίσει κ
αι πέσει,
βγάλτε τ
ο καλώδιο τροφοδοσίας από την πρίζ
α αμέσως. Εάν
η μονάδα έχει πέσει κ
αι το δοχείο νερού είναι γεμάτ
ο,
σιγουρευτείτε ό
τι η μονάδα έχει στεγνώσει ολοκληρωτικ
ά
προ
τού την ξαναχρησιμοποιήσετε.
10. Μην εμπ
οδίζετε ή περιορίζετε τ
ον
αερισμό γύρω από την μονάδα. Η
μονάδα πρέπει να τ
οποθετηθεί έτ
σι
ώστε να μην περιορίζεται ούτε η
είσοδος του αέρα στη συσκευή, ούτε
η έξ
οδος αέρα από τις περσίδες.
6. Μην χρησιμο
ποιείτε την μονάδα κοντά σε εύφλεκτα υλικά ή φωτιά.
Page 21
4
11. Για την επαρκή κυκλοφορία του αέρα
παρακαλούμε αφήστε ελεύθερο πεδίο
30 εκατοστών γύρω από την μονάδα.
Κανένα εξωτερικό αντικείμενο
δεν πρέπει να αποτρέπει την είσοδο και
έξοδο του αέρα.
12. Μην ρίχνετε νερό στην μονάδα.
Υπάρχει κίνδυνος ηλεκτροπληξίας
και μπορεί να προκληθεί ανεπανόρθωτη
ζημία στη μονάδα.
13. Μην βγάζετε την μονάδα από την
πρίζα με βρεγμένα χέρια.
Page 22

5
14. )A.<.6,9A94@08. 8+< 0>07.>@ A6989G 8+< J,23.8. 5A; 8+
A6-L5.
15. )*.4208. 89 *9E.-9 <.69G ;85< 5>8; ,.µ-0.4 @ 0.
A.6-A8D0+ A9> 079A.G.8. <5 µ+< E6+04µ9A94@0.8. 8+<
0>07.>@ ,45 µ.,239 E69<47; *4208+µ5.
16. O45 <5 5A90><*B0.8. 8+< 0>07.>@, A4208. 89 14/ 754
J,238. 89 5A; 8+< πρίζα, χωρίς <5 865J@C.8. 89 753H*49.
17. '+< .402,.8. 75<B<5 5<847.-µ.<9 08+< .-09*9 754 BC9*9
5B65 (A.60-*./). &A949*@A98. 5<847.-µ.<9 µA96.- <5
.A41B6.4 .A47-<*><5 5A98.3B0µ585 5< B6?.4 0. .A51@ µ. 85
.0D8.6472 +3.786472 µB6+.
+,-,./0-12/1.3 4-5678/59
K .C.34,µB<+ 5>8@ 0>07.>@ 51G,65<0+/ .-<54 9479<9µ47@,
.351642, .G793+ 08+< µ.851962, 50153@/ 08+< E6@0+ 754
0><*>2L.4 84/ 3.489>6,-./ 51G,65<0+/, 08.,<Hµ589/ 754
49<40µ9G. "-<54 758233+3+ ,45 E6@0+ 0. E5µ+3B/ ?.6µ97650-./
*Dµ58-9> 754 >M+32 .A-A.*5 >,650-5/.
P582 8+< 51G,65<0+, 94
A.60-*./ BE9>< 73ί0+ 45 µ946H< 754 +
0>07.>@ .C2,.4 ?.6µ; 5B65. R804 µA96.-8. <5 08.,<H0.8. 69GE5
89A9?.8H<85/ 85 µA69082 5A; 8+ 0>07.>@.
Page 23
6
µ µ µ
.
, µ µ
µ
( ),
. µ
µ µ
µ .
:
1.
µ µ µ µ
.
2.
,
µ µ .
3.
µ ,
µ
µ µ .
Rise µ .
µ µ
desiccant Rise
µ 1°C (33°F) 37°C
(98°F)
µ µ µ .
.
,
µ
σε κλειστό χώρο με κλειστές τις πόρτες και τα
παράθυρά σας.
Page 24
7
µ ,
µ .
µ , ,
.
Page 25
9
µ µ
µ
µ
Οθόνη LED
Page 26
9
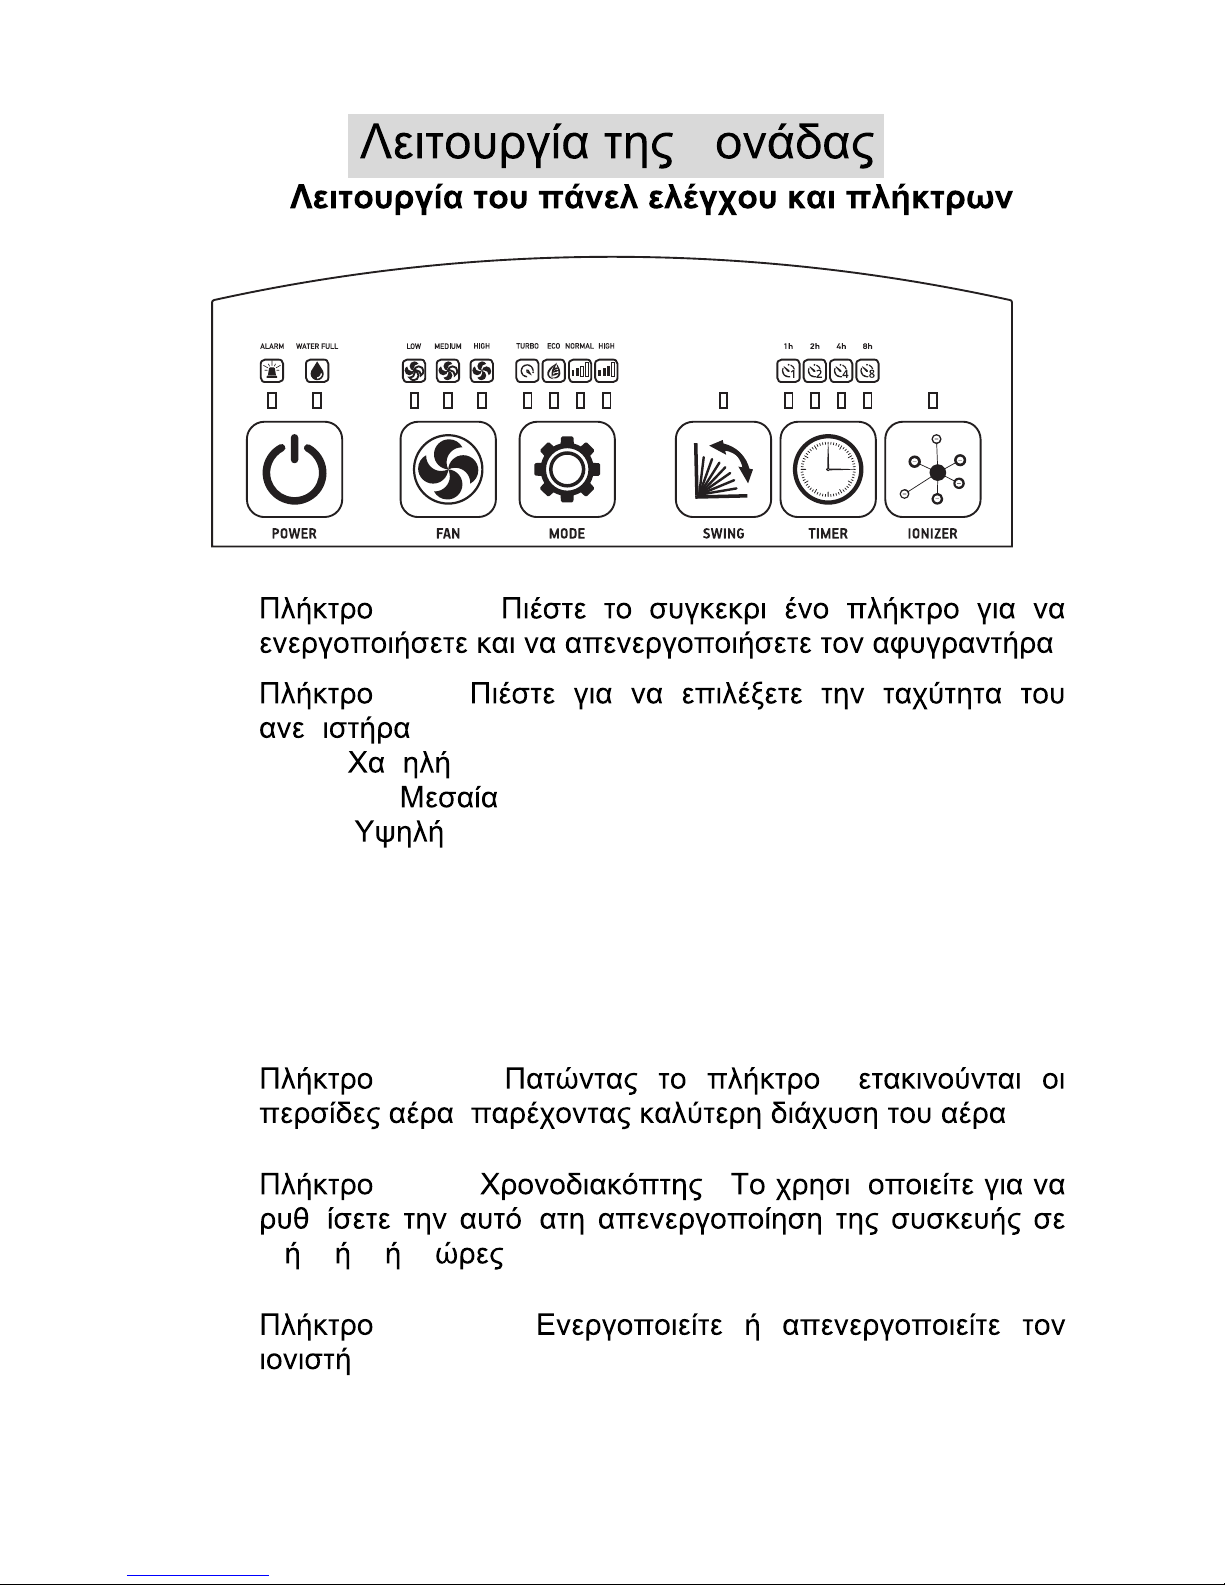
µ
• Power: µ
.
•
Fan:
µ .
Low –
µ
Medium –
High –
•
Πλήκτρο Mode: Πιέστε για να επιλέξετε λειτουργία
Στεγνώματος - TURBO (Σχετική Υγρασία 35%)
Οικονομική λειτουργία - ECO (Σχετική Υγρασία 60%)
Κανονική αφύγρανση - NORMAL (Σχετική Υγρασία 50%)
Γρήγορη αφύγρανση - HIGH (Σχετική Υγρασία 40%)
•
Swing: µ
, .
•
Timer ( ): µ
µ µ
1 2 4 8 .
.
•
Ionizer :
Page 27

10
POWER (on/off )
, µ
90 µ .
, µ 3
.
led µ µ
.
MODE:
ς
ί
µ
κλίση
Page 28

11
IONIZER
µ LED .
.
, µµ 1/2/4 8 .
σε θέση 90°.
ανάβει
Swing
µ ECO/NORMAL/HIGH,
SWING
µ 90 45 µ . , µ
µ µ .
o Η ένδειξη LED ανάβει όταν ο αέρας διαχέεται σε κλίση
45
ο
.
o
LED , µ
ΛΕΙΤΟΥΡΓΙΑ ΑΣΦΑΛΕΙΑΣ
Όταν η κλίση του αφυγραντήρα είναι πάνω από 45°, η λειτουργία της
συσκευής θα σταματήσει για λόγους ασφαλείας. Ο ανεμιστήρας θα
λειτουργήσει για 4 λεπτά στην χαμηλή ταχύτητα.
Γρήγορη αφύγρανση (Υψηλή ταχύτητα - High) - ΣΥ 40%
Κατά την διάρκεια της Γρήγορης λειτουργίας (High), ο αφυγραντήρας
λειτουργεί διατηρώντας την υγρασία του χώρου στο 40%. Όταν
επιτευχθεί η υγρασία στο 40%, τότε ο αφυγραντήρας σταματάει την
αφύγρανση και ο ανεμιστήρας συνεχίζει να λειτουργεί για επιπλέον
4 λεπτά. Όταν η υγρασία του χώρου αυξηθεί, τότε ο αφυγραντήρας θα
ξεκινήσει και πάλι την κανονική του λειτουργία.
µ
.
Χρονοδιακόπτη
Page 29

12
Άδειασµα του δοχείου νερού
Όταν η συσκευή είναι σε λειτουργία και το δοχείο νερού
γεµίσει θα ακουστεί ο ήχος ειδοποίησης 10 φορές και η
συσκευή θα απενεργοποιηθεί αυτόµατα. Κατά την διάρκεια
της ειδοποίησης η αντίστοιχη ενδεικτική λυχνία στην LCD
οθόνη θα αναβοσβήνει. Θα πρέπει να αδειάσετε το δοχείο
νερού και στη συνέχεια να το τοποθετήσετε και πάλι στη
συσκευή για να επαναλειτουργήσει.
Αφαιρέστε το δοχείο νερού
σύµφωνα µε τον δείκτη
κατεύθυνσης
Πίσω µέρος
συσκευής
Page 30

13
µ µ
,
µ
µ . µ .
µ µ
µ 5 .
µ .
µ ( ).
µ
.
κατάλληλο
µ
µ
µ .
δείτε
το
Page 31

14
Προστασία σε περίπτωση πτώσης
Στο εσωτερικό της συσκευής υπάρχει τµήµα θερµάστρας. Για
αποφυγή υπερθέρµανσης η συσκευή είναι εφοδιασµένη µε
διακόπτη ανίχνευσης αναποδογυρίσµατος της συσκευής ώστε να
διακόπτετε η λειτουργία της αυτόματα όταν πέσει κάτω.
Water spigot
Page 32

15
µ µ
.
µ
µ
µ
µ µ
µ
µ :
µ µ
µ µ
( )
τον καθαρισμό
.
.
ή χλυαρό νερό.
Page 33

16
Αφήστε το φίλτρο να στεγνώσει πριν το εγκαταστήσετε στην
συσκευή.
Επισκευή:
Εάν
η συσκευή ή το καλώδιο τροφοδοσίας υποστεί ζηµιά,
σταµατήσετε την χρήση αµέσως και µεταφέρετε την συσκευή σε
εξουσιοδοτηµένο συνεργείο ή συνεργάτη µας για επισκευή.
Παρακαλούµε µην επιχειρήσετε να αποσυναρµολογήσετε,
επισκευάσετε ή να τροποποιήσετε την συσκευή µόνοι σας.
Τραβήξτε το φίλτρο
όπως φαίνεται
Page 34
17
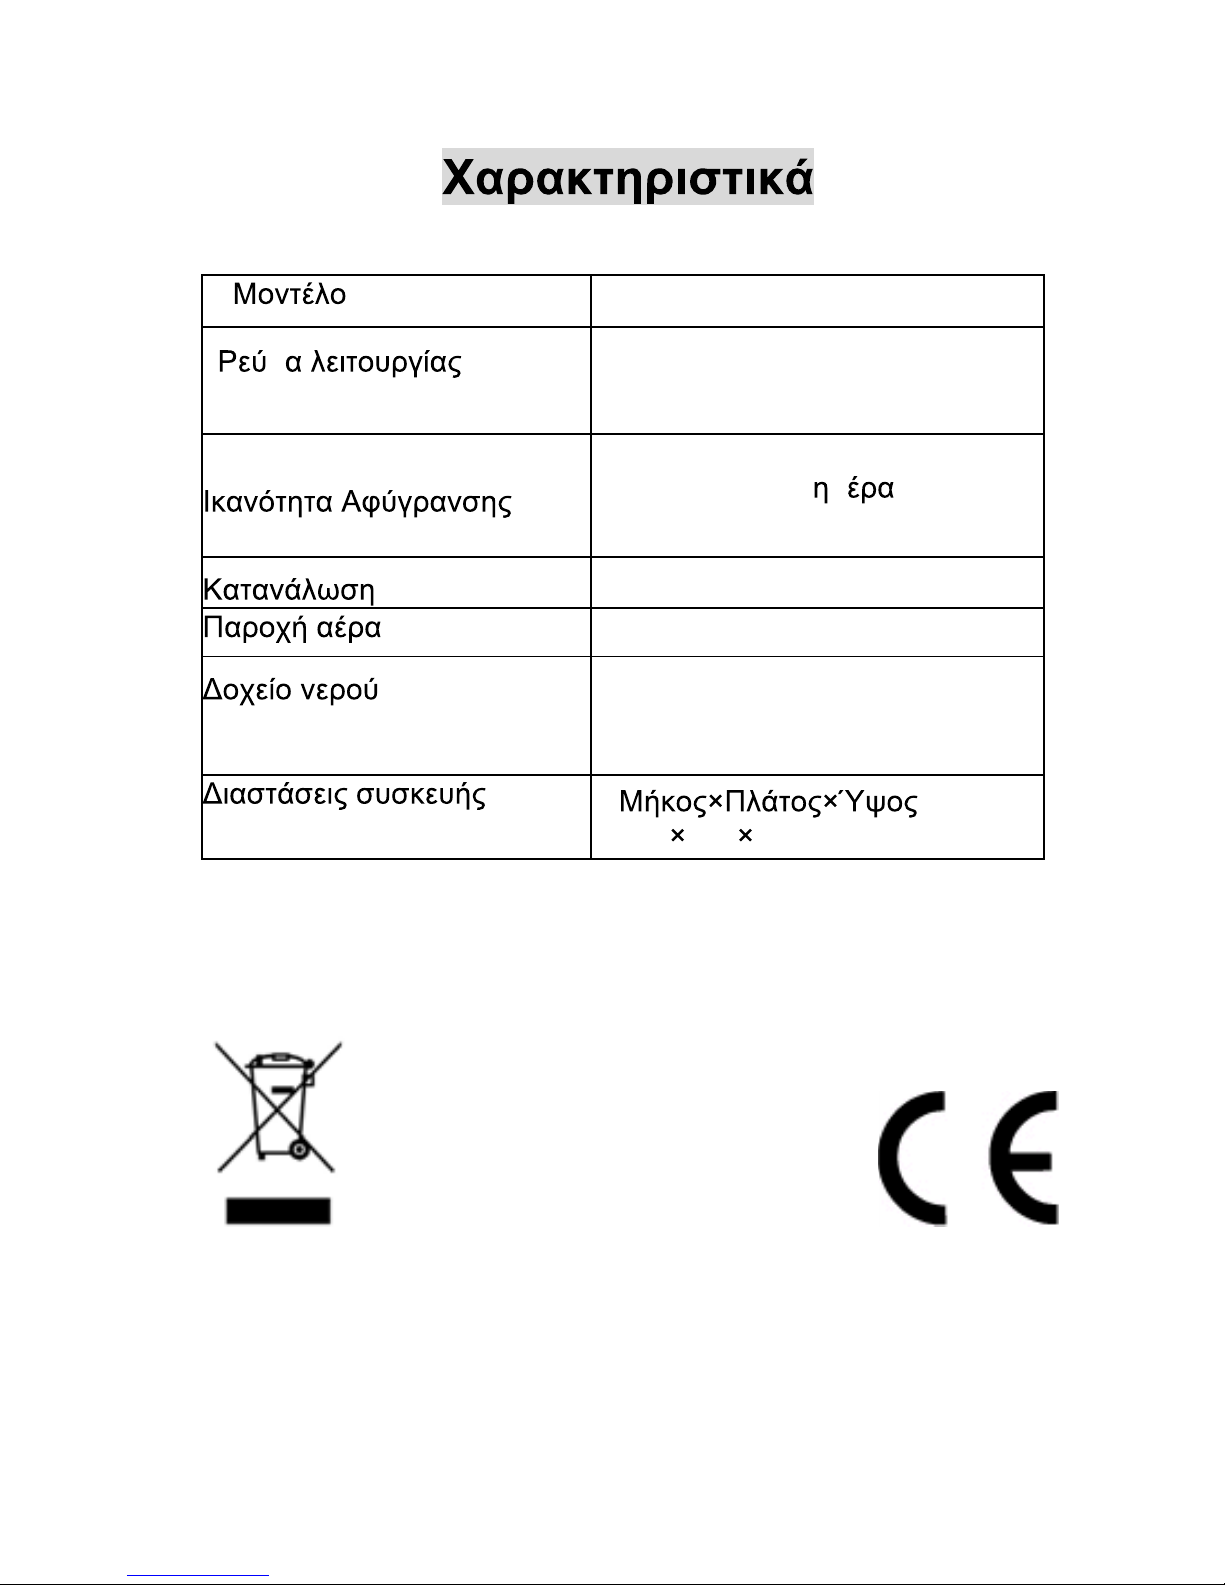
Rise
µ
220-240 V/50Hz
8lt/ µ
*30/330650 W
115 m
3
/h
2L
351 180 500mm
ROHS
*Κατανάλωση 30W λειτουργία ανεμιστήρα / 330W λειτουργία ECO /
650W λειτουργία TURBO
Page 35

Ενεργοποιήστε την εγγύηση σας...
σε
5
απλά
Συνδεθείτε στο site της
στον ακόλουθο σύνδεσµο
http://www.inventoraircondition.gr/
egiisi-inventor/
Επιλέξτε τον τύπο του προϊόντος
(κλιµατιστικό ή συσκευή) για το
οποίο θα ενεργοποιηθεί η εγγύηση
Συµπληρώστε τα απαιτούµενα
στοιχεία (κατόχου, εµπόρου και
συσκευής) και πατήστε αποστολή
Επιλέξτε την εγγύηση
που αντιστοιχεί στο προϊόν
που έχετε στην κατοχή σας
Θα λάβετε επιβεβαιωτικό
µήνυµα στο e-mail σας για
την ενεργοποίηση της εγγύησης
Για την υποβολή
ηλεκτρονικών εγγυήσεων
πληκτρολογήστε
την παρακάτω διεύθυνση
https://www.inventoraircondition.gr/egiisi-inventor
Σκανάρετε εδώ
για τα έντυπα
των εγγυήσεων
Inventor
Page 36
Page 37

Page 38

INDEX
Măsuri de siguranță importante
Caracteristici ale produsului
Mediul înconjurător și funcționarea aparatului
Schița componentelor
Mod de funcționare:
a. Funcțiile așajului & tastelor
b. Fucționarea tastelor
c. Funcția de dezumidicare, uscare și funcționarea silențioasă
d. Protecția de umplere a rezervorului de apă
e. Drenaj continuu
Întreținere și reparare
Specicații
2
Page 39

Măsuri de siguranță importante
Vă rugăm să citiți aceste instrucțiuni cu atenție înainte de prima
utilizare a acestui produs.
1.
2.
3. Asigurați-vă că alimentarea cu energie electrică este de 220 ~ 240V /
4.
Acest aparat nu este destinat utilizării de către persoane (inclusiv
copii) cu capacități fizice, senzoriale sau mentale reduse, sau lipsite
de
experiență și cunoștințe, cu excepția cazului în care acestea au
fost supravegheate și instruite cu privire la utilizarea aparatului de
către o persoană responsabilă pentru siguranta lor.
Copiii trebuie supravegheați pentru a va asigura că nu se joacă cu
aparatul.
50Hz.
Nu folosiți aparatul în baie sau in cabina de duș.
5. Nu așezați aparatul în apropierea radiatoarelor sau aparatelor de
încălzire, de asemenea, nu poziționați aparatul în lumina directă a
soarelui.
3
Page 40

surse de foc.
7. Este necesară supravegherea aparatului atunci când este utilizat în
aparratul decât prin centrul nostru de servicii.
8. Asigurați-vă că aparatul este utilizat pe o suprafață stabilă și plană
(podea). Dacă suprafața podelei nu este dreaptă, există riscul ca
vibrații excesive și zgomot.
9. În cazul în care aparatul se răstoarnă sau cade, deconectați imediat
cablul de alimentare. Asigurați-vă că unitatea s-a uscat complet înainte
de punerea în funcțiune în cazul în care rezervorul de apă era plin.
blocate sau obturate.
obturati
intrare
4
Page 41

Pastrati libera o suprafata de cel putin 30 de cm in jurul aparatului
obie
cte străine care blochează întrarea și evacuarea aerului.
12. Nu pulverizați apă pe unitate, aceasta poate provoca daune ireparabile la
aparat și risc de electrocutare.
13. Nu deconectați aparatul de la priză cu mâinile ude.
5
Page 42

14. Opriți alimentarea înainte de a scoate ștecherul din priză.
15. Goliți rezervorul de apă când acesta este plin sau nu este folosit pentru o perio
adă îndelungată.
16. Pentru a deconecta aparatul de la priză, tineți de aceasta și trageți cablul afară
din priză, nu trageți direct de cablu.
17.
Nu introduceți obiecte în grilele de admisie și evacuare a aerului, orice obiect
introdus poate deteriora piesele componente.
Caracteristici ale produsului
Acest aparat cu absorție circulară este economic, si usor de manevrat si utilizat in
conditii de siguranta. Aparatul beneficiază de funcții multiple de dezumidificare,
uscare, ionizare, și este ideal pentru camere cu temperaturi scazute și umiditate
ridicata.
În timpul dezumidificarii, flapsurile de ghidare a aerului se mișcă la 45 de grade, iar
aerul cald evacuat ajuta la uscarea hainelor. Funcția de Ionizare elimină mirosu-rile
din interior și creează o atmosfera placuta, curata si sanatoasa.
6
Page 43

Acest aparat este dotat cu flapsuri pentru directionarea cat mai eficienta a
aerului, 3 trepte de viteza si optiunea de setare a nivelului dorit de
umiditate. Atunci cand nivelul setat de umiditate este atins, unitatea se va
opri automat.
Măsuri de precauție:
1. În cazul în care rezervorul de apă este plin, aparatul se va opri
automat.
2. Dacă unitatea este defectă, un semnal de alarma se va activa.
3.
In cazul unei supraicalziri a aparatului, senzorul intern de
temperatura va detecta acest lucru si va opri automat
dezumidificatorul.
Conditii ambientale pentru functionare.
Aparatul cu absorție circulară este destinat exclusiv uzului casnic. Nu
folos-iți aparatul în aer liber sau pe o suprafață umedă.
Aparatul cu absorție circulară este proiectat pentru a oferi o performanță
optimă de operare in incaperi cu temperaturi intre 1oC (33 oF) și 37 oC
(98oF).
Pentru eficienta ridicata, in timpul functionarii, va recomandam sa inchideti
toate usile si ferestrele din incaperea respectiva.
7
Page 44
Așezați aparatul pe o suprafață plană, pentru a reduce vibrațiile excesive
și zgomotul. Nu înclinați aparatul, în caz contrar, apa din rezervor se poate
vărsa.
8
Page 45
Panou de ghidare
automată a aerului
Refulare aer
Schema componentelor
Mâner
Grila absorție aer
Cablu alimentare
Monitorizare Led
Drenaj continuu
Rezervo
r de apă
Panou de control
Pan o u rez ervor apă
9
Page 46
Mod de funcționare
Funcțiile panoului de control & a tastelor
POWER
Butonul ventilator (FAN):
Selectarea modului de functionare (MODE):
Modul Turbo acest mod va selectat pentru dezumidicare continua, nivelul
umiditatii relative ind de 35%.
Modul ECO - acest mod va selectat pentru a asigura un nivel al umiditatii
relative de 60%.
Modul HIGH (intens) - acest mod va asigura o umiditate relativa de 40%.
Modul NORMAL - Acest mod va mentine umiditatea relativa la 50%.
Butonul SWING - va permite reglarea apsului pentru o distributie
ecienta a aerului.
Butonul temporizator (TIMER) - Acest buton va permite sa programati
oprirea aparatului in 1/2/4/8 ore.
Butonul ionizator (IONIZER) : Acest buton va permite pornirea/oprirea
functiei de ionizare.
: Pentru a porni și opri apara tu l.
.
Dezumidicare rapida. (Viteză mare)
Conectați ștecherul la priza
Butonul POWER (pornire/oprire) - Atunci cand apasati acest buton,
aparatul va intra in modul DEZUMIDIFICARE CONTINUA si apsurile vor
reglate la un unghi de 90 de grade.
Funcțiile tastelor
10
Page 47

1. La pornire, aparatul va emite un semnal sonor (3 bip-uri).
modului selectat.
Butonul FAN - Acest buton va permite selectarea vitezei ventilatorului si,
Puteti selecta modul silentios (L), normal (M) sau rapid (H).
al umiditatii.
5. LED-ul se va aprinde in dreptul modului de functionare selectat.
Apasand butonul MODE, veti putea selecta modul de functionare :
TURBO-NORMAL - ECO - HIGH sau RECIRCULARE.
activat, aparatul va funcitona in continuu pana cand rezervorul de apa
este plin. Nu veti putea selecta nivelul umiditatii relative in incapere.
Modul ECO (umiditate relativa 60%) - Aparatul va functiona pana cand
umiditatea ajunge la nivelul de 60%. Atunci cand nivelul este atins,
functia de dezumidicare se va dezactiva si doar ventilatorul va functiona.
Cand umiditatea va depasi nivelul de 60%, functia de dezumidicare
va reactivata.
in aceleasi conditii ca la punctul anterior, mentinand nivelul umiditatii la 50%.
functiona pentru a mentine nivelul umiditatii la 40%, in conditiile de
la punctele anterioare.
ghidarea aerului.
Flapsurile se vor regla in functie de modul selectat L/M/H, in unghiuri
intre 45 si 90 de grade. Pentru a seta unghiul dorit, apasati inca odata
butonul SWING.
Apasa butonul IONIZER pentru a porni sau opi functia de ionizare.
LED-ul se va aprinde intermitent atunci cand este activata aceasta functie.
11
Page 48

Apasati butonul TIMER pentru a putea programa dezumidificatorul
sa se opreasca automat in 1, 2, 4 sau 8 ore.
Protecția la umplerea rezervorului
Când rezervorul de apă
10 ori. In acelasi timp, display-ul va afisa intermitent o pictograma iar
aparatul se va opri automat. Pentru ca aparatul sa reporneasca, goliti
rezervorul si montati-l.
este plin, se va declansa un semnal sonor, de
Indepărtați rezervorul de
apă în direcția indicata de săgeată.
Protecție la supraîncălzire
Durata de funcționare, defecțiuni sau obiecte introduse in grila de
admisie sau refulare a aerului pot duce la ridicarea temperaturii echipamentului. În oricare din aceste cazuri, aparatul se va opri automat.
Deconectați imediat aparatul de la priză și reporniți-l
dupa 5 minute.
Drenaj continuu
Asigurați-vă că aparatul este deconectat de la sursa de alimentare.
Scoateți afară rezervorul de apă și conectați un furtun de evacuare a
apei (după cum se arată în desen). Celălalt capăt al acestui furtun
trebuie dus la un canal de scurgere sau un recipient adecvat pentru a
colecta apa.
12
Page 49
Notă - Pentru un drenaj corect, nicio parte a furtunului nu trebuie să
e deasupra nivelului unde acesta este conectat.
Conectare furtun
Protecție la răsturnare
Aparatul se încălzește în interior. În scopul de a evita această încălzirea,
aparatul este echipat cu întrerupător care oprește automat funcționarea
atunci cand aparatul se răstoarnă.
13
Page 50

Întreținere si reparații
Înainte de a efectua orice operațiuni de întreținere sau curățare a
aparatului, asigurați-vă că acesta este oprit și cablul de alimentare
este scos din priză.
Curățarea exterioară a unității:
Nu curățați aparatul cu agenți de curățare abrazivi sau solvenți
In timpul procesului de curatare, nu turnati apa direct pe aparat.
Folositi o cârpă moale curată pentru curățarea aparatului.
Curățarea ltrului:
Scoateți manual ltrul de aer.
Folosiți un aspirator sau spălați în apă rece pentru a curăța ltrul.
(Așa cum se arată în desen)
Uscați bine ltrul înainte de a îl introduce înapoi în aparat
Reparații:
În cazul în care cablul de alimentare este deteriorat, nu mai utilizați
aparatul și mergeti imediat la centrul nostru de service pentru reparații.
Nu încercați să demontați, reparați sau modicați aparatul de unul singur.
Scoateți ltrul
conform desenului
14
Page 51
Model
Rise
Putere nominală
Consum energetic
Debit de aer
220-240 V/50Hz
8L/zi
*30/330/650 W
115 CBM/ora
2L
Capacitate rezervor apă
Dimensiunile aparatului
*30W Modul Ventilator / 330W modul ECO / 650 W Modul TURBO
H
35
180 500mm
ROHS
15
Page 52

Activati-va garantia...
in
5
Pasi
simpli!
Scanati codul QR pentru
a obtine formularul de garantie.
Accesati link-ul de mai jos:
https://www.inventoraerconditionat.ro/
certificatul-de-garantie-inventoraer-conditionat-si-electrocasnice
Alegeti tipul de produs pentru
care vreti sa activati garantia
(aparat de aer conditionat, alt
aparat electrocasnic).
Alegeti tipul de garantie
corespunzator produsului
achizitionat.
Completati formularul cu
informatiile cerute (numele
proprietarului, magazinul,
produsul) si apasati SEND.
Veti primi care va confirma
activarea garantiei.
Pentru inregistrarea
electronicaa garantiei, va rugam sa
accesati link-ul de mai jos :
https://www.inventoraerconditionat.ro/certificatul-de-garantie-inventor-aer-conditionat-si-electrocasnice
Page 53

Page 54

Page 55

INHALTSVERZEICHNIS
• Wichtige Sicherheitshinweise
• Produktmerkmale
• Umgebungsbedingungen für den Betrieb
• Komponentendiagramme
• Betriebseinleitung:
a. Funktionen der Systemsteuerung & Tasten
b. Betrieb der Tasten
c. Entfeuchtungsbetrieb, Trockenbetrieb und flüsterleiser Betrieb
d. Schutz vor Wasserüberfüllung
e. Kontinuierliche Entwässerung
• Instandhaltung und Reparatur
• Technische Daten
2
Page 56
Wichtige Sicherheitshinweise
EINLEITUNG
Lesen Sie vor dem Gebrauch des Gerätes die Anweisungen der Bedienungsanleitung
aufmerksam durch. Die Nichtbeachtung dieser Anweisungen kann zu Verletzungen oder
Geräteschäden führen. Der Hersteller haftet nicht für Schäden, die durch die Nichtbeachtung
dieser Anweisungen verursacht werden.
1. Dieses Gerät kann nicht von Kindern und von Personen mit beeinträchtigten, körperlichen
oder geistigen Fähigkeiten bzw. eingeschränkter Wahrnehmung oder ohne Erfahrung und
Kenntnisse verwendet werden. Bedingung ist hierbei ihre Beaufsichtigung und Anleitung
hinsichtlich der sicheren Handhabung des Geräts und das Bewusstsein der damit verbundenen
Risiken. Kinder dürfen nicht mit dem Gerät spielen.
2. Bitte stellen Sie sicher, dass Ihre Stromversorgung 220 ~ 240V / 50Hz beträgt.
3. Das Gerät darf nicht im Badezimmmer oder in der Dusche benutzt werden.
4. Stellen Sie das Gerät nicht in der Nähe von Heizkörpern, Heizgeräten oder im direkten
Sonnenlicht auf.
3
Page 57
5. Das Gerät darf nicht in der Nähe von brennbaren Materialien oder Feuer verwendet
werden.
6. Eine Beaufsichtigung ist unbedingt erforderlich, wenn das Gerät von Kindern oder in
deren Nähe benutzt wird. Versuchen Sie es nicht selber zu demontieren, zu reparieren
oder das Gerät zu modifizieren. Dies sollte nur von unserem Kundendienst
vorgenommen werden.
7. Stellen Sie sicher, dass das Gerät auf einer stabilen und ebenen Bodenfläche
verwendet wird. Wenn die Bodenoberfläche nicht eben ist, gibt es ein Risiko, dass das
Gerät umkippen könnte. Außerdem könnten dadurch auch übermäßige Vibrationen und
Lärm entstehen.
8. Falls das Gerät je umkippen oder umfallen sollte, ziehen Sie sofort das Netzkabel.
Stellen Sie sicher, dass das Gerät vor dem Betrieb gründlich ausgetrocknet ist, wenn
das Gerät jemals umkippen oder umfallen sollte und dabei der Wassertank gefüllt ist.
9. Blockieren oder beschränken Sie nicht die Luftzirkulation um das Gerät. Das Gerät
muss für den Einsatz so positioniert werden, dass die Lufteinlassund Luftablassgitter
ohnehin nicht blockiert oder eingeschränkt werden.
4
Page 58

10. Es muss genügend freier Abstand von 30 cm um das Gerät herum bestehen, und es
sollen keine Fremdkörper den Lufteinlass und den Auslass blockieren.
11. Kein Wasser auf das Gerät sprühen; dies kann zu irreparablen Schäden am Gerät
führen und es besteht die Gefahr eines elektrischen Schlags.
12. Ziehen Sie das Netzkabel nicht mit nassen Händen aus der Steckdose.
5
Page 59

13. Schalten Sie das Gerät aus, bevor Sie den Stecker aus der Steckdose ziehen.
14. Leeren Sie das Wasser, wenn der Wassertank voll ist oder wenn es über einen längeren
Zeitraum nicht in Gebrauch ist.
15. Um die Stromversorgung abzutrennen, greifen Sie am Stecker und ziehen Sie ihn aus
der Steckdose und ziehen Sie nie am Kabel.
16. Schieben Sie keine Gegenstände in die Lufteinlass-und Luftauslassgitter der Einheit, da
das eingefügte Objekt in Verbindung mit gefährlichen internen spannungsführenden Teilen
kommen könnte.
Produktmerkmale
Profitieren Sie von der neuen Entfeuchtungstechnologie Dessicant. Dieser moderne Trockenmittel
Entfeuchter ist sparsam, leicht und freibeweglich. Er ist sicher im Betrieb mit Mehrfachfunktionen
für Entfeuchtung, Trocknen und Ionisierung. Ideal geeignet für Räume mit Raumtemperaturen
die unter 15 °C liegen und mit hoher Feuchtigkeit.
Während der Entfeuchtung liegen der Luftverteiler bei 45 Grad und das Gerät extrahiert warme
Luft. Die warme Luft ermöglicht die Wäschetrocknung. Die Ionisierung beseitigt Innengerüche
und erschafft eine frische und saubere Wohnumgebung.
Während des Betriebes dieses attraktiven Gerätes, stellt sich die Richtung und Windgeschwindigkeit
automatisch ein (3 Geschwindigkeitsstufen ) und gewährleistet somit eine optimale Luftfeuchtigkeit.
Bei Erreichung des von Ihnen gewünschten Feuchtigkeitsgrades und der Luftqualität, schaltet das
Gerät automatisch ab.
6
Page 60

Sichererungsfunktionen:
1. Bei vollem Wassertank stoppt das Gerät automatisch.
2. Bei einer Störung, wird ein Alarmsystem ausgelöst.
3. Das Gerät verfügt über einen Temperatursensor, der bei einer unnormal hohen
Geräte Temperatur dieses automatisch abschaltet.
7
Page 61

Umgebungsbedingungen
für den Betrieb
Der Dessicant Luftentfeuchter ist nur für den Hausgebrauch bestimmt. Benutzen Sie
dieses Gerät nicht im Freien oder auf einer nassen Oberfläche.
Das Gerät ist konstruiert, um eine optimale Betriebsleistung bei 1°C(33°F) bis zu 37°C(98 °F)
zu liefern.
Um höchste Effizienz zu erreichen, schließen Sie alle Fenster und Türen.
Stellen Sie das Gerät auf eine ebene Fläche, um mögliche übermäßige Vibrationen und
Geräusche zu reduzieren. Kippen Sie das Gerät nie, da sonst Wasser aus dem
Wasserbehälter austreten kann.
8
Page 62

Komponentendiagramm
Luftauslass
Netzkabel
Wassertank
Kontinuierliche Entwässerung
LED Anzeige
Wasserstand
Fenster
Bedienfeld
9
Luftverteiler Griff
Lufteinlassgitter
Page 63

Betriebseinleitung:
Beschreibung der Bedienungsblende
• Power: Zum Ein- und Ausschalten des Geräts.
• Swing-Funktion: Dank der Swing Funktion wird die Luft optimal in verschiedene
Richtungen ausgeblasen und dezent verteilt.
• Timer/Zeitschaltuhr: 4 Stufen-Zeitschaltuhr. Mit der Zeitschaltuhr können Sie den Betrieb
auf 1/2/4 oder 8 Stunden programmieren.
• Ion: Ein- / Ausschalten des Ionisators.
• Netzstecker in die Steckdose.
• Drücken auf POWER (Ein / Aus-Taste). Das Gerät beginnt die kontinuierliche Entfeuchtung,
flatternde Luftführung steigt auf 90 Grad.
• Fan: Taste zur Auswahl der Ventilator Geschwindigkeit und Entfeuchtung mit 3
Geschwindigkeitsstufen.
Low: Niedrige Ventilator Geschwindigkeit
Medium: Mittlere Ventilator Geschwindigkeit
High: Hohe Ventilator Geschwindigkeit
• Mode/Modus:
Turbo-Modus, ist bei Einschaltung des Gerätes voreingestellt. Das Gerät wird mit
kontinuierlicher Entfeuchtung betrieben.
High-Modus, bedeutet ein relativer Entfeuchtungsbetrieb bei 40% Luftfeuchtigkeit(RH)
Normal-Modus, bedeutet ein relativer Entfeuchtungsbetrieb bei 50% Luftfeuchtigkeit(RH)
Eco-Modus, bedeutet ein relativer Entfeuchtungsbetrieb bei 60% Luftfeuchtigkeit(RH)
Betriebsweise der Tasten
10
Page 64

1. Ein Alarm-Ton erklingt 3 mal, wenn Sie das Gerät einschalten.
2. Das LED-Display zeigt die entsprechenden Funktionen und deren Status an.
3. Mit Drücken der Fan Taste wählen Sie die Ventilator Geschwindigkeit und
Entfeuchtung mit 3 Geschwindigkeitsstufen.
Low: Niedrige Ventilator Geschwindigkeit
Medium: Mittlere Ventilator Geschwindigkeit
High: Hohe Ventilator Geschwindigkeit
Die LED Kontrolllampe leuchtet, um den jeweiligen Status anzugeben.
Drücken der Swing Taste:
Durch das Drücken der Taste, kann die optimale Luftverteilung aktiviert und
eingestellt werden. Die Luftverteilung bewegt sich zwischen 45° und 90°. Wird die
Luftverteilung gestoppt, bleibt der Verteiler im bestehenden Winkel stehen. Bei
Deaktivierung der Swing-Funktion erlischt die LED-Anzeige.
Drücken der Mode/Modus Taste:
Einstellen der Betriebsarten zwischen: Turbo-Eco-Normal-High
Turbo-Modus, ist bei Einschaltung des Gerätes voreingestellt. Im kontinuierlichen
Betrieb (TURBO), arbeitet das Gerät durchgehend und mindert somit die
Feuchtigkeit aus der Luft. Das Gerät arbeitet so lang, bis der Wassertank voll ist,
unabhängig von dem Luftfeuchtigkeitsgrad. Auf dem Display leuchtet die
entsprechende LED Leuchte, um die gewählte Betriebsart nachzuweisen.
Eco-Modus, hier hält das Gerät die Feuchtigkeit bei 60%. Wenn die Feuchtigkeit
60% erreicht hat, stoppt der Luftentfeuchtungsvorgang, aber der Ventilator läuft
weiter. Sobald die Luftfeuchtigkeit steigt, startet der Entfeuchter wieder seine
normale Funktion. Auf dem Display leuchtet die entsprechende LED Leuchte, um
die gewählte Betriebsart nachzuweisen.
Normal-Modus, hier hält das Gerät, die Luftfeuchtigkeit konstant bei 50%. Sobald
die Feuchtigkeit 50% erreicht hat, stoppt der Luftentfeuchtungsvorgang, aber der
Ventilator läuft weiter. Wenn die Luftfeuchtigkeit steigt, startet der Entfeuchter
wieder seine normale Funktion. Auf dem Display leuchtet die entsprechende LED
Leuchte, um die gewählte Betriebsart nachzuweisen.
High-Modus, hier hält das Gerät die Feuchtigkeit konstant bei 40%. Sobald die
Feuchtigkeit 40% erreicht hat, stoppt der Luftentfeuchtungsvorgang und der
Ventilator läuft für weitere 4 Minuten weiter. Sobald die Luftfeuchtigkeit steigt,
startet der Entfeuchte wieder seine normale Funktion. Auf dem Display leuchtet
die entsprechende LED Leuchte, um die gewählte Betriebsart nachzuweisen.
11
Page 65
• Drücken der Ionizer Taste:
Ein- oder Ausschalten des Ionisators. Die LED blinkt, wenn er eingeschaltet ist.
• Drücken der Timer Taste:
Einstellen der Zeit zur Betriebsausschaltung beim Wählen zwischen 1 / 2 / 4 / 8
Stunden.
Schutz vor Wasserüberfüllung
Wenn der Wassertank voll ist, ertönt ein 10 facher Alarm-Ton. Außerdem blinkt die
Kontrolllampe auf dem Display und das Gerät stoppt automatisch den Betrieb. Der
Wasserbehälter muss entnommen, entleert und danach wieder eingesetzt werden,
bevor das Gerät wieder eingesetzt werden kann.
Entfernen Sie den
Wasserbehälter
entsprechend der
Pfeilrichtung
Schutz vor internen Überhitzungen
Sollte es aufgrund einer Fehlfunktion, Defektes oder Fremdkörpern, die den Luftzugang
behindern zu einer Überhitzung des Gerätes kommen, so schaltet das Gerät
automatisch ab.
Ziehen Sie sofort den Netzstecker aus der Steckdose und nehmen Sie den Betrieb
nach 5 Minuten wieder auf.
12
Page 66

Kontinuierliche Entwässerung
Stellen Sie vorab sicher, dass der Netzstecker des Gerätes von der Stromversorgung getrennt
ist. Entfernen Sie den Wassertank und schliessen einen Ablaufschlauch am Gerät an. (wie auf
den Abbildungen angezeigt) Das andere Ende dieses Schlauches muss in einen Abwasserkanal
oder einen geeigneten Behälter geleitet werden, um das Wasser ablaufen zu lassen.
Notiz: damit das Gerät korrekt entwässert wird, sollte kein Teil des
Schlauches über dem Niveau des Wasserhahns sein.
Wasserhahn
Fall/Kipp - Schutz
Das Gerät verfügt über einen Schutz- Mechanismus zur Vermeidung einer Überhitzung. Einen
sogenannten Kipp-Schalter. Bei Kippen oder Fallen des Gerätes wird dieser automatisch aktiviert
und der Entfeuchter abgeschaltet.
13
Page 67

Instandhaltung und Reparatur
Vor der Durchführung von Wartungsarbeiten oder vor der Reinigung des Geräts, stellen
Sie sicher, dass das Gerät ausgeschaltet ist und das Netzkabel aus der Steckdose
gezogen wurde.
Die äußere Reinigung des Gerätes:
Reinigen Sie das Gerät mit keinen scheuernden Reinigungsmitteln oder Lösungsmitteln.
Sprühen Sie während der Reinigung kein Wasser direkt auf das Gerät.
Verwenden Sie nur ein weiches Tuch für alle Reinigungszwecke
Reinigung des Filters:
Entfernen Sie den Luftfilter manuell.
Zum Reinigen verwenden Sie einen Staubsauger oder waschen Sie den Filter in kaltem
Wasser. (Wie in Abbildung gezeigt wird)
Ziehen Sie den Filter, wie auf dem Bild gezeigt wird heraus. Lassen Sie diesen gut trockenen,
bevor Sie ihn wieder in das Gerät einsetzten.
Reparatur:
Wenn das Gerät oder das Netzkabel beschädigt ist, stoppen Sie sofort den Betrieb und bringen
Sie das Gerät zu unserem Kundendienst für die Reparatur, und versuchen Sie niemals das
Gerät selber zu demontieren, zu zerlegen, zu reparieren oder zu modifizieren.
14
Page 68
Technische Daten
ROHS
Modell-Nr. : Rise
Nennleistung 220-240 V / 50 Hz
Entfeuchtung 8L / D
Energieverbrauch
650 W
Luftstrom
115 Kubikmeter pro Stunde
Kapazität des Wassertanks 2 Liter
Abmessungen des Geräts
L x M x H 351 x 180 x 500mm
Page 69

Registrieren Sie Ihre Garantie...
in
5
einfachen
Schritten!
Für die elektronische
Garantieregistrierung benutzen
Sie bitte den folgenden Link
http://www.inventorappliances.com/garantie
Hier scannen -
Garantieformular
Wählen Sie das Produkt für die
Garantieregistrierung aus
(Klimaanlagen oder
Haushaltsgeräte)
Wählen Sie die Garantie aus,
die Ihrem Kauf entspricht
Bitte füllen Sie alle erforderlichen
Felder aus (Besitzer, Einzelhändler
und Gerät) und drücken senden
Sie erhalten eine Bestätigungs
E-Mail über die Registrierung
Ihrer Garantie
Klicken Sie auf den folgenden Link:
http://www.inventorappliances.
com/garantie
Page 70

Page 71

Page 72

2
INDEX
Mesures importants de protection
Caractéristiques du produit
Environnement ambiant/Conditions de fonctionnement
Diagramme des composants
Introduction au fonctionnement
a. Fonctions du panneau de contrôle et du clavier
b. Fonctionnement du clavier
c. Performance de déshumidification, de sèchement
et de fonctionnement silencieux
d. Protection contre le remplissage
e. Drainage continu
.
Maintenance et réparation
Spécifications
Page 73
3
Mesures importants de protection
!
Veuillez lire ces instructions attentivement avant d’utiliser
pour première fois ce produit
1. Cet appareil n’est pas destiné à usage par des personnes
(y compris les enfants) à capacités physiques, sensorielles ou mentales réduites ou des personnes qui manquent d’expérience ou de
connaissance, sauf ils sont surveillées ou consultées la manière
d’utilisation de cet appareil par une personne responsable de leur
sécurité.
2. Les enfants doivent être surveillés pour garantir qu’ils ne jouent
pas avec cet appareil.
3. Veuillez s’assurer que l’approvisionnement en électricité est
220-240V/5Hz.
4. Ne pas utiliser l’unité dans la salle de bain ou de douche.
5. Ne pas placer l’unité près des radiateurs ou des appareils
de chauffage et en plus, ne pas mettre en marche l’unité si elle est
exposée directement à la lumière du soleil.
Page 74

4
6. Νe pas utiliser l’unité dans un endroit où il y a des
matériaux inflammables ou des incendie.
7. La surveillance étroite est nécessaire au cas où l’unité est utilisée
par ou près des enfants et ne pas essayer de démonter, réparer ou
modifier l’unité sauf si vous adressez au centre de service.
8. Garantir que l’unité est utilisée dans une surface stable et plate. Si
la surface de sol n’est pas stable, il y a le risque d’instabilité et de
renversement ainsi que le risque de vibration excessive et de bruit.
9. Si l’unité est renversée ou basculée, débrancher immédiatement le
cordon d’alimentation. S’assurer que l’unité s’assèche à fond avant
la mise en marche, si l’unité est renversée ou basculée au cas où le
réservoir d’eau est rempli.
10.Ne pas bloquer ou limiter l’écoulement d’air autour de
l’unité. L’unité doit être positionnée de telle manière que l’entrée
d’air et les grilles d’échappement ne soient pas bloquées ou restreintes de toute façon.
Page 75

5
11. Laisser une espace suffisant libre de 30 cm autour de l’unité et ne pas
insérer des objets étrangers qui bloquent l’entrée d’air et l’échappement.
12. Ne pas pulvériser l’eau sur ou dans l’unité, pour éviter le risque des dommages irréparables de l’unité ou des chocs électriques.
13. Ne pas débrancher l’unité de la prise électrique avec les mains mouillées.
Page 76
6
Caractéristiques du produit
-
14. Couper l’alimentation avant de retirer la fiche de la prise.
15. Vider l’eau au cas où le réservoir de l’eau est rempli ou l’unité n’est pas utilisée pendant une période prolongée.
16. Pour débrancher l’unité, tenir la fiche et la retirer de la prise mais ne jamais
tirer le cordon.
17. Ne pas pousser d’objets dans l’entrée d’air ou dans les grilles d’échappement
de l’unité, parce que tout objet inséré peut causer des dommages aux pièces
électriques internes.
Ce dessiccateur rotatif supérieur est un appareil économique, léger, facilement
déplacé et le fonctionnement sécuritaire de fonctions de déshumidification, de
sèchement et d’ionisation est bien procédé. Il est particulièrement adapté aux
endroits de température basse mais d’humidité haute.
Pendant la déshumidification, le déflecteur d’air bat à 45 degrés et l’air chaud
échappé permet à sécher des vêtements. L’ionisation élimine les odeurs intérieurs
en créant un environnement propre et frais.
Page 77

7
Dans l’intervalle, cette unité attrayante règle automatiquement la direction d’air à travers de 3 réglages de la vitesse d’air, en maintenant l’humidité aux niveaux idéaux. L’unité cesse à fonctionner quand l’humidité
de l’air arrive aux niveaux souhaités.
Protection adéquate :
1. Quand le réservoir d’eau est rempli, l’unité cesse automatiquement.
2. Si l’unité est mal fonctionnée, un système d’alarme sera activé.
3. Si le fonctionnement de l’unité est anormal, la température haute
excessive interne sera détectée par le détecteur de la température et
l’unité sera automatiquement débranchée.
Page 78

8
Environnement ambiant/
Conditions de fonctionnement
Le dessiccateur rotatif est destiné seulement à usage résidentiel. Ne pas
utiliser l’unité aux endroits externes ou dans des surfaces mouillées.
Le dessiccateur rotatif est conçu de telle manière qu’il assure une perfor-
mance de fonctionnement optimale supérieur de 1ο C (33ο F) jusqu’à 37
ο C (98ο F) de chambre.
Pour réussir la plus haute efficacité, veuillez fermer toutes les fenêtres
ou/et les portes.
Positionner l’unité dans une surface plate pour réduire la vibration exces
-
sive et le bruit. Ne jamais incliner l’unité, autrement, l’eau dans le réser-
voir peut se déverser.
Page 79

9
Diagramme des composants
Déflecteur automatique d’air
Poignée/Manche
Grille d’aspiration
Sortie d’air
Drainage continu
Réservoir d’eau
Cordon d’alimentation
LED Moniteur
Panneau de contrôle
Panneau d’eau
Page 80
10
Introduction au fonctionnement:
Fonctions de panneau de contrôle et de clavier de contrôle:
Fonctionnement du clavier de contrôle
Power (Bouton de démarrage): Appuyer sur ce bouton pour allumer
ou éteindre l’unité.
Fan (ventilateur): Pour sélectionner la fonction de déshumidification
silencieux (vitesse basse)
la fonction de déshumidification normale (vitesse moyenne)
la fonction de séchage plus rapide (vitesse haute)
Bouton mode : Appuyer sur ce bouton pour sélectionner une de fonctions suivantes :
Séchage – Mode Turbo – RH 35%
Mode éco – 60% RH
Mode normal – 50% RH
Mode haut – 40% RH
Swing: Pour déplacer le déflecteur d’air, afin de réussir la distribution meilleure de la sortie d’air.
Timer (Minuterie) : Pour régler le déclenchement de l’unité à 1/2/4/8 heures.
Ion : Allumer ou éteindre l’Ioniseur
Connecter à la prise
Appuyer sur le bouton Power (bouton de démarrage
) pour que l’unité entre à
la déshumidification continue et le déflecteur d’air est élevé à 90 degrés.
Page 81

1. La sonnerie s’alarme 3 fois quand l’unité est mise en marche.
2. Le moniteur LED montre les fonctions et l’état.
.
Appuyer sur le bouton FAN (ventilateur):
Appuyez sur le bouton Mode:
Séchage (TURBO) – Déshumidification continue
Pendant le fonctionnement de déshumidification continue (TURBO),
l’appareil se fonctionne continuellement, en extrant l’humidité d’air. Quand
cette fonction est sélectionnée, l’appareil continuera à se fonctionner jusqu’au
moment où le réservoir d’eau sera rempli en ignorant l’humidité relative de la région.
Fonction économique (ECO) – RH 60%
Pendant la fonction économique (ECO), le déshumidificateur se fonctionnera
pour garder l’humidité à 60%. Quand les niveaux d’humidité arrivent à 60%,
le déshumidificateur cesse la fonction de déshumidification et le ventilateur
continue à fonctionner. Quand l’humidité de l’endroit arrive à plus de 60%,
le déshumidificateur commencera à fonctionner à nouveau.
Déshumidification normale (Vitesse moyen – NORMALE) – RH 50%
Pendant la fonction de déshumidification normale, le déshumidificateur se
fonctionnera pour garder l’humidité à 50%. Quand les niveaux d’humidité
arrivent à 50%, le déshumidificateur cesse la fonction de déshumidification
et le ventilateur continue à fonctionner. Quand l’humidité de l’endroit arrive
à plus de 60%, le déshumidificateur commencera à fonctionner à nouveau.
Déshumidification rapide (Haute vitesse – Haut) – RH 40%
Pendant la fonction de déshumidification rapide (HAUTE), le déshumidificateur
se fonctionnera pour garder l’humidité à 40%. Quand les niveaux d’humidité
arrivent à 40%, le déshumidificateur cesse la fonction de déshumidification et le
ventilateur continue à fonctionner. Quand l’humidité de l’endroit arrive à plus
de 40%, le déshumidificateur commencera à fonctionner à nouveau.
11
Sélectionner la fonction silencieuse – Bas=(L), la fonction de normal
déshumidification – Moyen= (M), et la fonction de séchage
rapide – Haut (H) et choisir entre les fonctions susmentionnées.
1. L’indice « continu » s’apparait à l’écran pour régler le ratio d’humidité
dans la chambre.
2. L (déshumidification silencieuse)
3. M (déshumidification normale)
4. H (séchage rapide). Sous ces conditions, le ratio d’humidité ne peut pas
être réglé.
5. La lampe témoin LED s’allume en fonction des divers états.
Régler le mode de fonctionnement entre les choix Turbo-Eco-Normal-Haut
et circuler parmi ces choix.
Page 82
12
Protection contre le remplissage
Protection contre la surchauffe interne
Appuyez sur le bouton Swing
Appuyez sur le bouton d’Ioniseur:
Appuyez sur le bouton Timer (Minuterie):
Poste de vigilance
Quand l’unité est réglée aux fonctions L (bas)/ M (moyen)/ H (Haut),
le déflecteur d’air changera l’angle entre 90 et 45 degrés. Appuyer encore
une fois, le déflecteur arrêtera à l’angle existant.
1. LED b illumine, le déflecteur se déplace entre 90 et 45 degrés.
2. LED se déclenche, le déflecteur arrête à l’angle existant.
Allumer ou éteindre l’Ioniseur.
LED cligne quand il est allumé.
Régler la fonction de déclenchement à 1/2/4/8 heures.
Quand l’appareil est incliné à 45ο ou plus, sa fonction cessera pour des raisons de sécurité.
Le ventilateur continuera à fonctionner pendant 4 minutes ou plus à basse vitesse.
Quand l’eau condensée est remplie, la sonnerie alarmera 10 fois.
Entretemps, l’icône indiqué au moniteur LCD clignote, l’unité
cesse automatiquement à fonctionner.
Le réservoir d’eau doit être retiré pour être vidé et
réinstallé avant que le dessicatif rotatif commence
à marcher à nouveau.
Retirer le réservoir d’eau conformément
à la direction de la flèche
Pendant le fonctionnement, le mauvais ou anormal fonctionnement peut être causé
au blocage ou à l’empêchement de l’entrée ou de la sortie d’air par des objets étrangers, qui peut occasionnellement résulter la montée de la température interne et l’unité
s’arrêtera automatiquement.
La débrancher immédiatement et la retirer de la prise et ensuite la mettre en marche
après 5 minutes.
Page 83

13
Drainage continu
Garantir que l’unité est débranchée. Retirer le réservoir d’eau et relier le
tuyau de vidange d’eau au robinet (comme illustré aux figures. L’autre
extrémité du tuyau doit être mené à une fuite ou à un récipient approprié
à recueillir l’eau.
Note – afin que l’unité est correctement vidée, aucun part de tuyau ne doit
être situé au-delà du niveau du robinet d’eau.
Dans l’unité il y a un radiateur. Afin d’éviter la surchauffe, la machine
est équipée d’un interrupteur de bascule pour qu’elle cesse
automatiquement à fonctionner quand elle est tombée.
Robinet d’eau
Protection contre les chutes
Page 84
14
Maintenance et réparation
Nettoyage externe de l’unité:
Nettoyage du filtre:
Retirer le filtre comme illustré
Réparation
Avant la maintenance ou le nettoyage de l’unité, s’assurer que l’unité
est débranchée et le cordon d’alimentation est retiré de la prise.
Ne pas nettoyer l’unité en utilisant des abrasifs ou des détergents.
Ne pas mouiller directement l’unité pour la nettoyer
Utiliser seulement un chiffon douce et propre pour des fins de nettoyage
Retirer manuellement le filtre d’air.
Utiliser un aspirateur ou laver en utilisant d’eau froide pour nettoyer le filtre.
(Comme illustré à la figure)
Permettre de sécher à fond avant de replacer le filtre dans l’unité
Si l’unité ou le cordon d’alimentation sont détruits, veuillez cesser
immédiatement à l’utiliser et l’amener à notre centre de service pour
le réparer et ne jamais essayer de démanteler, de réparer ou de modifier
l’unité par vous-même.
Page 85
15
Spécification
No de modèle
Rise
220-240 V/50Hz
Déshumidification
8L/D
Consommation
*30/330/650 W
Ecoulement d’air
115 CBM/PAR HEURE
Capacité du réservoir d’eau
2L
Dimension de l’unité
L M H 351 180 500mm
ROHS
*30W pendant la fonction de ventilateur/330W pendant la fonction ECO/ 650W pendant la fonction turbo
Puissance nominale
Page 86

Activez votre plan de garantie…
à
5
pas
simples!
Pour soumettre la fiche de garantie
Veillez à cliquer le lien suivant :
http://www.inventorappliances.com/produits-garantie
Scannez ici pour
la fiche de garantie
Choisissez le type de produit
(air condition ou appareil) pour
lequel la garantie sera activée
Choisissez la garantie qui
correspond à votre produit
Complétez les informations
demandées (propriétaire,
détaillant et appareil) et
cliquez « Envoi »
Vous recevrez un mél de
confirmation concernant
l’activation de votre garantie.
Suivez le lien suivant :
http://www.inventorappliances.
com/produits-garantie
Page 87

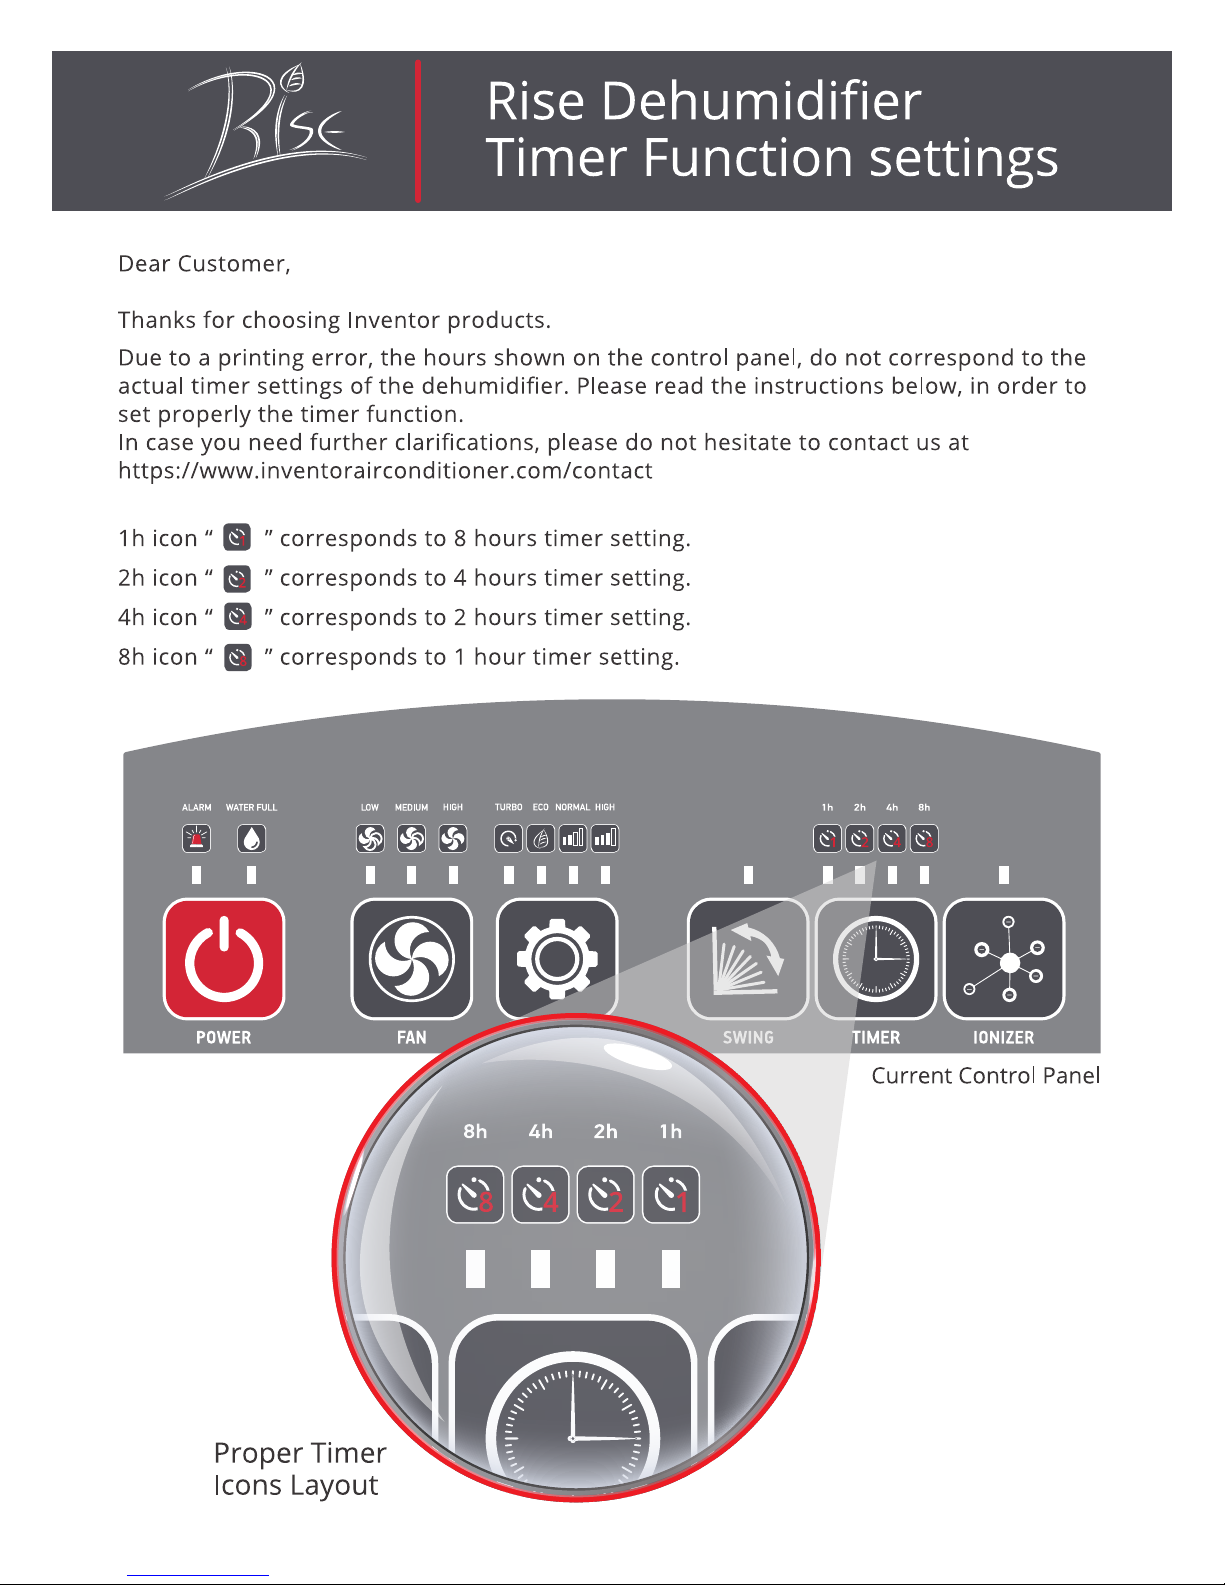
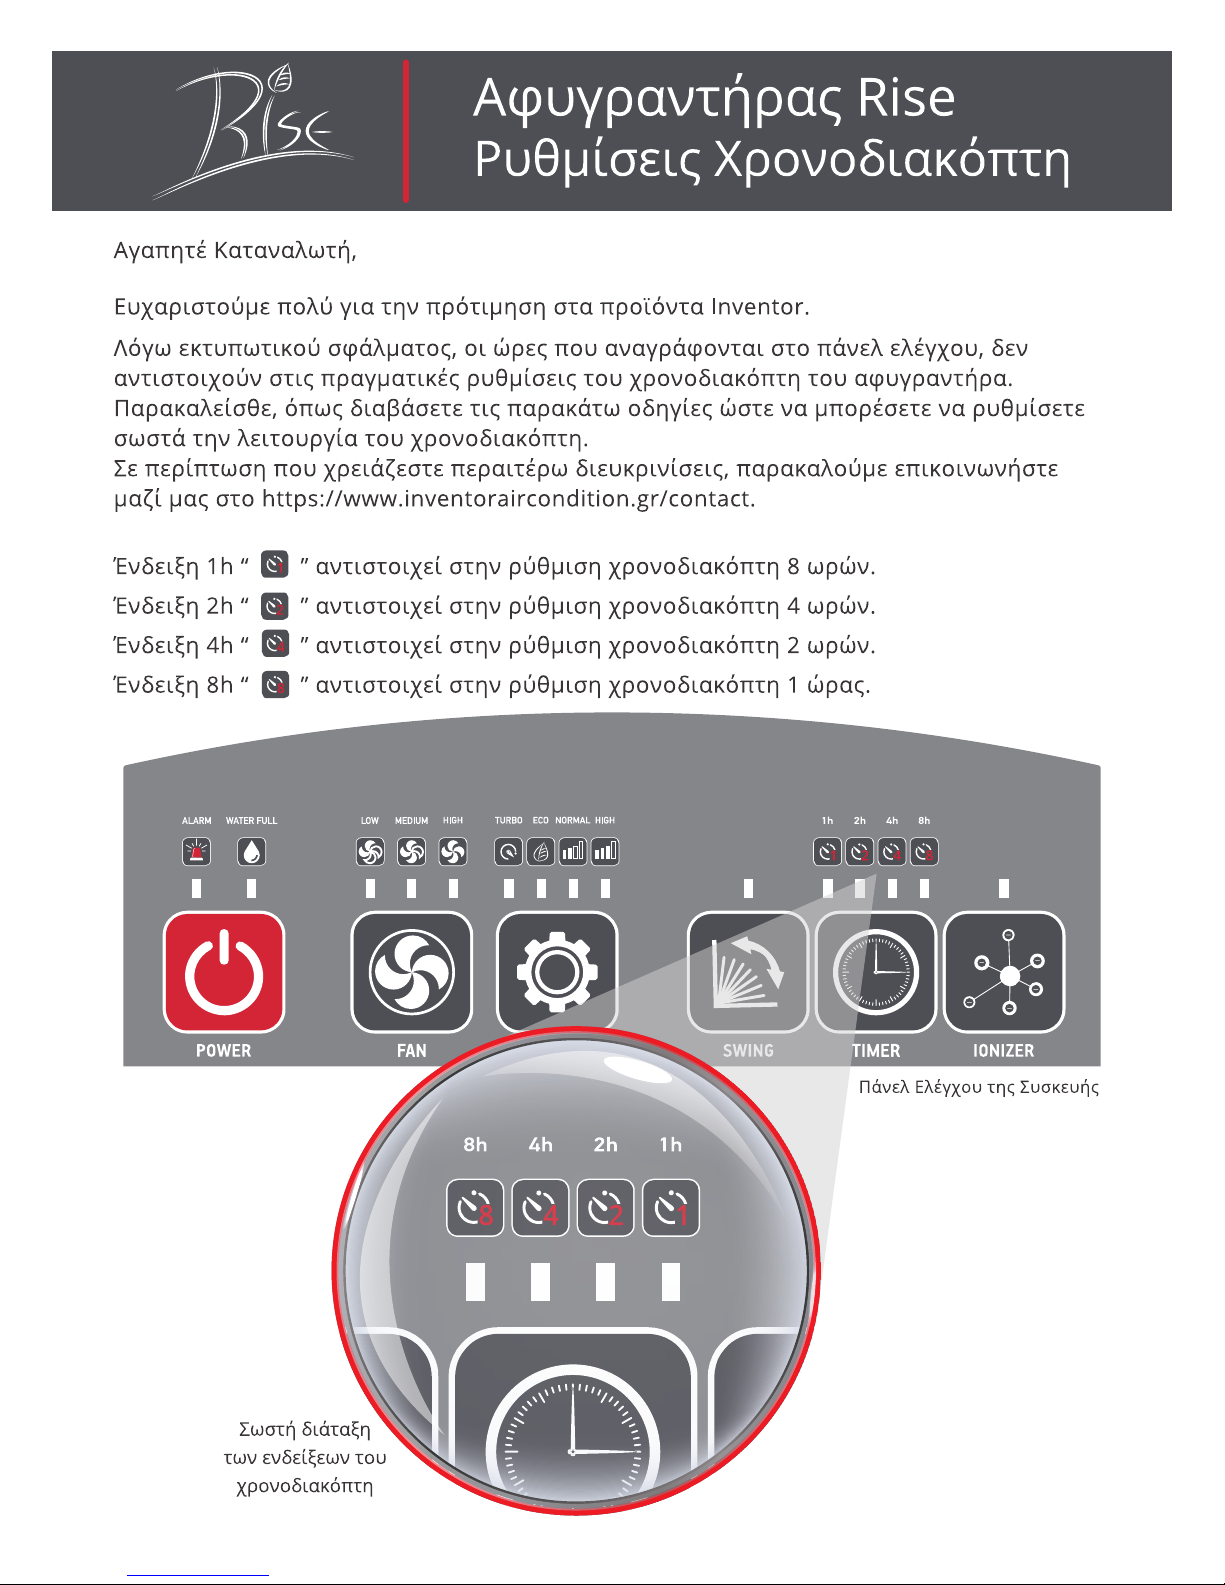
Rise déshumidificateur
Réglage de fonction «Timer (Minuterie)»
Cher client,
On vous remercie de choisir les produits d’Inventor.
A cause d’une erreur d’impression, les heures indiquées dans le panneau de contrôle
ne correspondent pas aux réglages actuels de timer (minuterie) du déshumidificateur.
Veuillez lire les instructions ci-dessous, afin de régler proprement la fonction de timer.
Au cas où vous voudriez des clarifications supplémentaires, veuillez ne pas hésiter à
nous contacter à : https://www.inventorairconditioner.com/contact
1h icône « » correspond au réglage de la minuterie de 8 heures.
2h icône « » correspond au réglage de la minuterie de 4 heures.
4h icône « » correspond au réglage de la minuterie de 2 heures.
8h icône « »
correspond au réglage de la minuterie de 1 heure.
Panneau de
contrôle actuel
Minuterie propre
Mise en page des icônes
Page 88

DEHUMIDIFIER
 Loading...