

Page 1

Installation guide for connecting the IntraCode
Installation guide for connecting the IntraCode
Installation guide for connecting the IntraCode Installation guide for connecting the IntraCode
panel to a central unit
panel to a central unit
panel to a central unit panel to a central unit
Residential
Residential
ResidentialResidential
EC standards:
- The panel complies with the R&TTE Directive 1999/5/EC: electrical standard EN 300 330-
2 (2001) applied.
- The panel complies with the telephone network standards TS-103 021 and TR-103 000.
Cabling:
- The cables connected to the central unit must not be placed in the vicinity of other sources of
electrical power (e.g. mains power supply).
Operating warranty
- The panel is guaranteed to operate within a temperature range of between -20°C and +70°C in
which relative humidity does not exceed 70%.
End of life product recycling:
The panel and its accessories must not be disposed of with unsorted municipal waste, but
must follow the WEEE (Waste Electrical and Electronic Equipment) collection and recycling
channel.
Size of the panel
THE WALL PLUGS SUPPLIED
TO USE
USE A 7 DIAMETER DRILL
2 screws for fixing the panel to the base
Installation guide for connecting an Intratone panel
to the Intratone Residential central unit
Page 1 / 2 V231 – 0069 – AA
Page 2
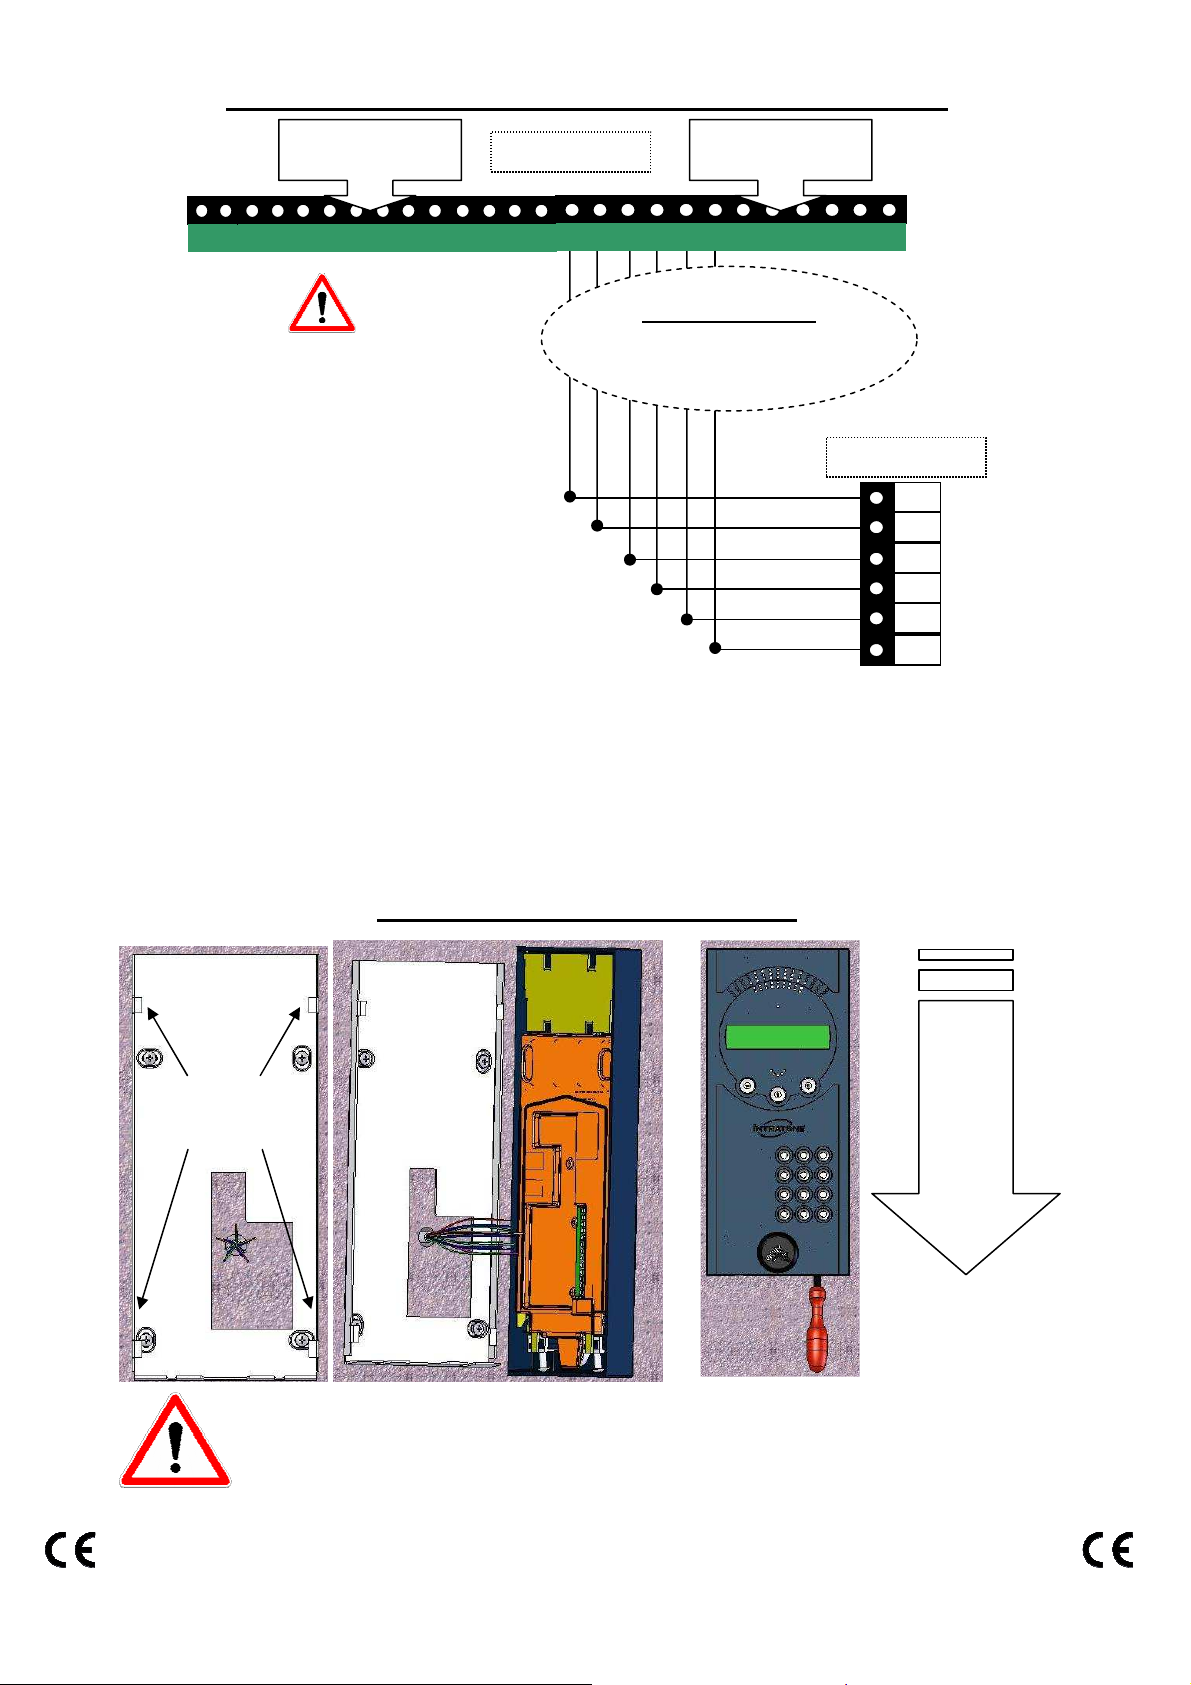
Cabling of a panel connected to connector 2
+
1 2 3 4 5 6 7 8 9 10 11 12
11 13 14 15 16 17 18 19
C R T
12
1 2 3 4 5 6 7 8 9 10 11 12
21 23 24 25 26 27 28 29
C R T
22
11 1
12 1
13 1
14 1
15 1
16 1
Connector 1
11 to 19 and CRT
Central unit
Connector 2
21 to 29 and CRT
• With a GSM unit, connector
no.1 cannot be connected to a
panel.
• With a PSTN line, connector
no.1 can be connected to a panel.
• Do not connect 2 panels in
parallel.
Length - Diameter
Max 100 m using 0.60mm
Max 200m using 0.9mm
Panel
The panel can also be connected to connectors 3 or 4 of an optional card. The
cabling is identical, only the numbers of the terminals change.
To connect the pushbutton and the CRT relay to the electric lock or the
magnet lock, refer to the instructions for the Intratone Residential
central unit. Do not use panel terminals PB, C, R or T.
Installation of the panel
Slide to
close
Fixing lugs for
AND
the panel
Fix the panel by
screwing it in
place
Do not pinch the cables when closing: risk of cutting when
tightening.
Installation guide for connecting an Intratone panel
to the Intratone Residential central unit
Page 2 / 2 V231 – 0069 – AA
 Loading...