

Page 1

I600 & I600-AMP
User Manual
Thank you for purchasing an Intrasonic Technology product. Our products are built to
provide you with years of high quality sound.
If you need assistance with the installation or operation of this product, please contact our
Customer Service Support team at 1‐877‐435‐0670. You may also get information on this and
other Intrasonic Technology products on our website atwww.intrasonictechnolgy.com
Intrasonic Technology | 9525 Forest View Street | Dallas, Texas 75243|877‐435‐0670
pg.
1
Page 2

Important Safety Instructions
1. Read these Instructions.
2. Keep these Instructions.
3. Heed all Warnings.
4. Follow all instructions.
5. Do not use this apparatus near water.
6. Clean only with a dry cloth.
7. Do not block any ventilation openings. Install in accordance with the manufacturer’s instructions.
8. Do not install near any heat sources such as radiators, heat registers, stoves, or other apparatus (including amplifiers) that
produce heat.
9. Do not defeat the safety purpose of the polarized or grounding - type plug. A polarized plug has two blades with one wider than
the other. A grounding type plug has two blades and a third grounding prong. The wide blade or the third prong are provided for
your safety. When the provided plug does not fit into your outlet, consult an electrician for replacement of the obsolete outlet.
10. Protect the power cord from being walked on or pinched particularly at plugs, convenience receptacles, and the point where
they exit from the apparatus.
11. Only use attachments/accessories specified by the manufacturer.
12. Use only with a cart, stand, tripod, bracket, or table specified by the manufacturer, or sold with the
apparatus. When a cart is used, use caution when moving the cart/apparatus combination to avoid
injury from tip-over.
13. Unplug this apparatus during lightning storms or when unused for long periods of time.
14. Refer all servicing to qualified service personnel. Servicing is required when the apparatus has been damaged in any way,
such as power-supply cord or plug is damaged, liquid has been spilled or objects have fallen into the apparatus, the apparatus
has been exposed to rain or moisture, does not operate normally, or has been dropped.
15. To reduce the risk of fire or electric shock, do not expose this apparatus to rain or moisture. The apparatus shall not be
exposed to dripping or splashing and that objects filled with liquids, such as vases, shall not be placed on apparatus.
16. The mains plug /appliance coupler is used as disconnect device, the disconnect device shall remain readily operable.
17.
18.
Protective earthing terminal. The apparatus should be connected to a mains socket outlet with a protective earthing
connection.
The battery (battery or batteries or battery pack) shall not be exposed to excessive heat such as sunshine, fire or the like.
19.
- This lightning flash with arrowhead symbol within an equilateral triangle is intended to alert the user to the presence of noninsulated “dangerous voltage” within the product’s enclosure that may be of sufficient magnitude to constitute a risk of electric
shock.
- Warning: To reduce the risk of electric shock, do not remove cover (or back) as there are no user-serviceable parts inside.
Refer servicing to qualified personnel.
- The exclamation point within an equilateral triangle is intended to alert the user to the presence of important operating and
maintenance instructions in the literature accompanying the appliance.
FCC STATEMENT
1. This device complies with Part 15 of the FCC Rules. Operation is subject to the following two conditions:
(1) This device may not cause harmful interference.
(2) This device must accept any interference received, including interference that may cause undesired operation.
2. Changes or modifications not expressly approved by the party responsible for compliance could void the user's authority to
operate the equipment.
NOTE: This equipment has been tested and found to comply with the limits for a Class B digital device, pursuant to Part 15 of the
FCC Rules. These limits are designed to provide reasonable protection against harmful interference in a residential installation.
This equipment generates uses and can radiate radio frequency energy and, if not installed and used in accordance with the
instructions, may cause harmful interference to radio communications. However, there is no guarantee that interference will not
occur in a particular installation. If this equipment does cause harmful interference to radio or television reception, which can be
determined by turning the equipment off and on, the user is encouraged to try to correct the interference by one or more of the
following measures:
Reorient or relocate the receiving antenna.
Increase the separation between the equipment and receiver.
Connect the equipment into an outlet on a circuit different from that to which the receiver is connected.
Consult the dealer or an experienced radio/TV technician for help.
FCC Radiation Exposure Statement
This equipment complies with FCC radiation exposure limits set forth for an uncontrolled environment. This equipment should be
installed and operated with minimum distance 20cm.
Intrasonic Technology | 9525 Forest View Street | Dallas, Texas 75243|877‐435‐0670
pg.
2
Page 3

Contents
1INTRODUCTION
2SPEC
.................................................................................................................................................................................................................
3 I600 ASSEMBLY
4 I600 EXPLOSION DIAGRAM
...............................................................................................................................................................................................
................................................................................................................................................................................................
.............................................................................................................................................................................
5I600‐AMP ASSEMBLY – SOLD SEPARATELY
6I600‐AMP EXPLOSION DIAGRAM
7USERINTERFACE
7.1 P
7.2 H
OWER ON &INTO THE SYSTEM
OME SCREEN
7.2.1 Buttons
7.2.2 Words
7.3 A
UDIO SOURCE
7.3.1 Buttons
7.4 AM/FM T
7.4.1 Buttons
7.4.2 Words
7.5 B
LUETOOTH
7.5.1 Buttons
7.5.2 Icons
7.5.3 Words
7.6 MP3 S
7.7
IPOD DOCKING SCREEN
7.7.1 Buttons
7.7.2 Words
7.8 AUX S
7.8.1 Buttons
7.9 USB S
7.9.1 Buttons
7.9.2 Words
7.10 P
LAY LIST
7.10.1 Buttons
7.11 EQ S
7.11.1 Buttons
7.12 S
ETTINGS SCREEN
7.12.1 Buttons
7.13 T
IME &DATE
7.13.1 Buttons
7.13.2 Words
7.14 Language Screen
7.14.1 Buttons
7.15 B
ACKLIGHT
7.15.1 Buttons
7.15.2 Words
7.16 B
ACKDROP
7.16.1 Buttons
7.17 T
OUCH TONE
7.17.1 Buttons
..............................................................................................................................................................................................
............................................................................................................................................................................................
...............................................................................................................................................................................................
...............................................................................................................................................................................................
.........................................................................................................................................................................................
.............................................................................................................................................................................................
UNER SCREEN
.............................................................................................................................................................................................
...............................................................................................................................................................................................
..............................................................................................................................................................................................
.............................................................................................................................................................................................
..................................................................................................................................................................................................
...............................................................................................................................................................................................
...........................................................................................................................................................................................
CREEN
..............................................................................................................................................................................
.............................................................................................................................................................................................
...............................................................................................................................................................................................
............................................................................................................................................................................................
CREEN
.............................................................................................................................................................................................
...............................................................................................................................................................................................
.................................................................................................................................................................................................
.........................................................................................................................................................................................
..............................................................................................................................................................................................
CREEN
.........................................................................................................................................................................................
......................................................................................................................................................................................
.........................................................................................................................................................................................
...........................................................................................................................................................................................
..............................................................................................................................................................................
.........................................................................................................................................................................................
...............................................................................................................................................................................................
.........................................................................................................................................................................................
...........................................................................................................................................................................................
...............................................................................................................................................................................................
.........................................................................................................................................................................................
............................................................................................................................................................................................
.........................................................................................................................................................................................
....................................................................................................................................................................
...................................................................................................................................................................
............................................................................................................................................................................
....................................................................................................................................................
4
4
4
6
7
8
9
9
9
9
10
10
10
11
11
11
11
12
12
12
12
13
13
13
13
13
14
14
14
14
15
15
15
15
15
16
16
16
16
17
17
17
17
18
18
18
18
Intrasonic Technology | 9525 Forest View Street | Dallas, Texas 75243|877‐435‐0670
pg.
3
Page 4

Introduction
1
This user manual is designed to help the new users navigate and perform common tasks with the IST‐I600 Audio
system. Thank you for choosing the IST‐1600.
2 Spec
Power: 100‐240VAC 2.5A 50/60Hz
3.5mm input: 1Vp‐p20‐20KHz
RCA input (AUX IN): 1Vp‐p20‐20KHz
RCA output (AMP OUT): 1.6Vp‐pmax.20‐20KHz
RMS Output Power: 8x10W@8ohm max.
LCD: 4.3” TFT, resistor touch panel
USB connector output: DC5V 500mA
30 pin connector output: DC5V 500mA
3 I600 assembly
Intrasonic Technology | 9525 Forest View Street | Dallas, Texas 75243|877‐435‐0670
pg.
4
Page 5

Intrasonic Technology | 9525 Forest View Street | Dallas, Texas 75243|877‐435‐0670
pg.
5
Page 6

I600 Explosion diagram
4
Intrasonic Technology | 9525 Forest View Street | Dallas, Texas 75243|877‐435‐0670
pg.
6
Page 7

I600‐AMP assembly–Sold Separately
5
Intrasonic Technology | 9525 Forest View Street | Dallas, Texas 75243|877‐435‐0670
pg.
7
Page 8

I600‐AMP Explosion diagram
6
Intrasonic Technology | 9525 Forest View Street | Dallas, Texas 75243|877‐435‐0670
pg.
8
Page 9

User Interface
7
7.1 Power On & Into the system
After the I600 unit has been powered on the display will appear with the IST Logo with software and hardware
versions. After several seconds this screen will disappear and the Home Screen will appear.
7.2 Home Screen
The Home Screen gives you several convenient options for playing music, display, time and date.
7.2.1 Buttons
Audio Source: Press the button and the Audio Source screen will give you playing options
Settings: Set Time/Language/Backlight/Backdrop/Touch Tone/Default Reset
Mute: Set the system Mute the music that is playing
Volume: Pressing this button will make the volume bar disappear or re‐appear
Shut Off: Press and hold down button for system shut down, click once and display disappears
Intrasonic Technology | 9525 Forest View Street | Dallas, Texas 75243|877‐435‐0670
pg.
9
Page 10
Volume Buttons: C lick the button +/‐ to increase/decrease the volume
Volume Bar: Depress button and drag left/right to increase/decrease volume
Bluetooth: Icon indicating that Bluetooth is active on the device
Alarm: Icon indicating that an alarm has been set one the device. Press to disable
7.2.2 Words
AM/PM: AM/PM appears on Home Screen when time format is 12‐hour clock
Time: Displays the current Time/ Day/Date
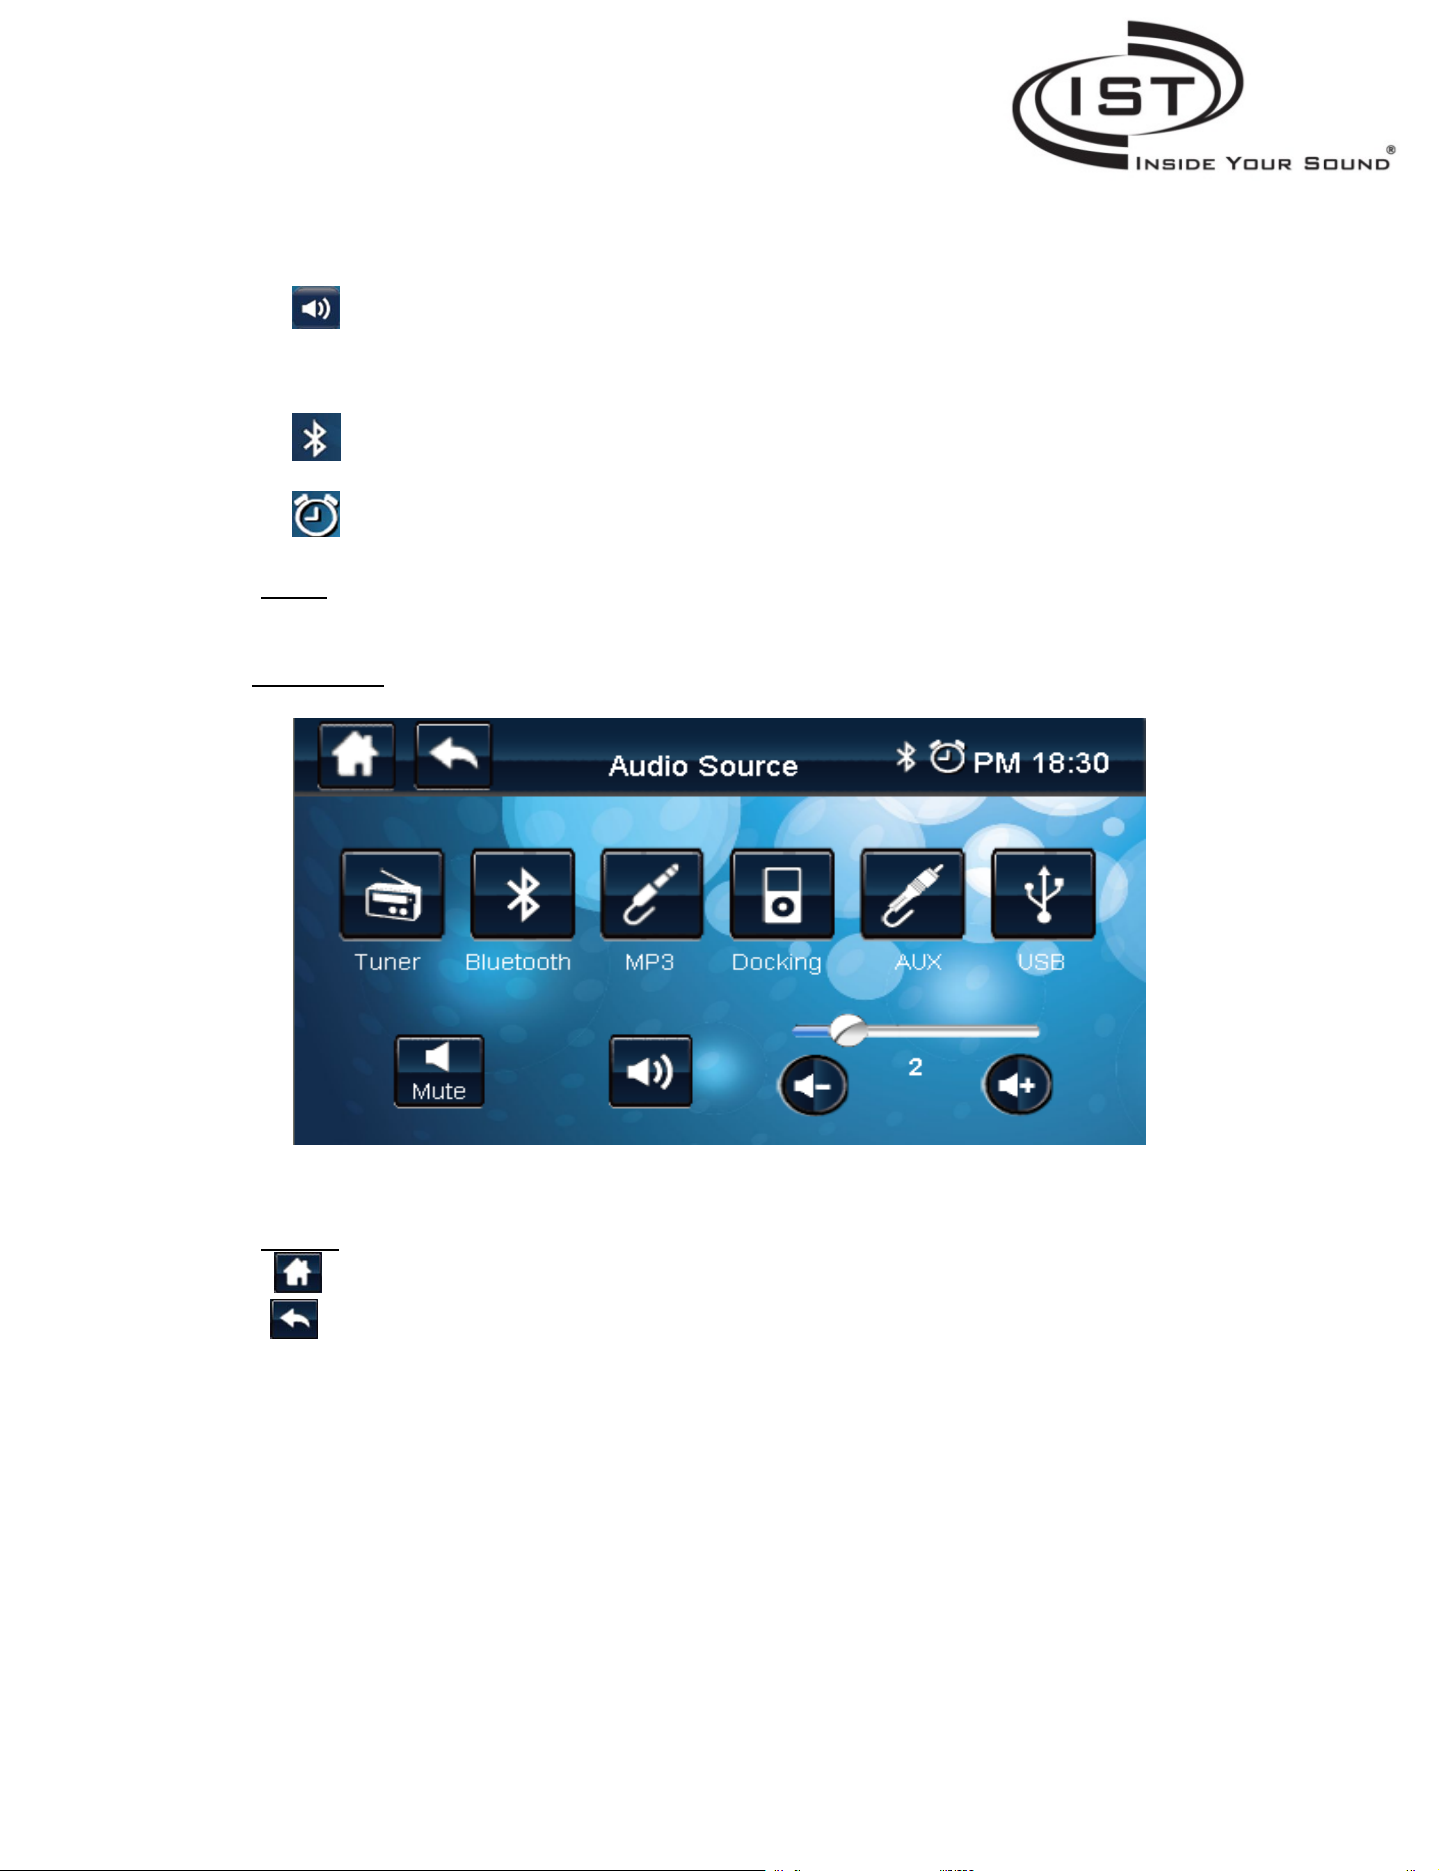
7.3 Audio Source
7.3.1 Buttons
Back: Returns back one screen. Back button appears on every screen
Tuner: Press this button to go to the Radio Screen for AM/FM station selection
Bluetooth: Press this button to enter the Bluetooth Screen
MP3: Press this button to enter the MP3 Screen to be used with a 3.5mm cable
iPod Docking: Press this button to enter the iPod Docking Screen. (when you dock your iPod or iPhone
AUX: Press this button to enter the AUX Screen. AUX is located on the back of the unit
USB: Press this button to enter the USB Player Screen. (used with a USB Flash drive or USB cable
Intrasonic Technology | 9525 Forest View Street | Dallas, Texas 75243|877‐435‐0670
Home: Return to the Home Screen. Home button appears on every screen
you will automatically go to the iPod Screen
connected to a music source)
pg.
10
Page 11

7.4 AM/FM Tuner Screen
7.4.1 Buttons
AM/FM: Change the radio band.
Tuner</>: Change the radio frequency, Press and hold to “seek” a radio channel
EQ: Enter the Tuner’s Graphic Equalizer to adjust treble and bass frequencies
Preset: There are 6 buttons to set and save radio channels. Once you find a station you would like
to “save” press and hold the Preset B utton to save the channel
7.4.2 Words
Radio Frequency:
7.5 Bluetooth
Display the current radio frequency. When you click the radio frequency, it will open a
keypad interface and you can set the frequency value by the keypad.
Intrasonic Technology | 9525 Forest View Street | Dallas, Texas 75243|877‐435‐0670
pg.
11
Page 12
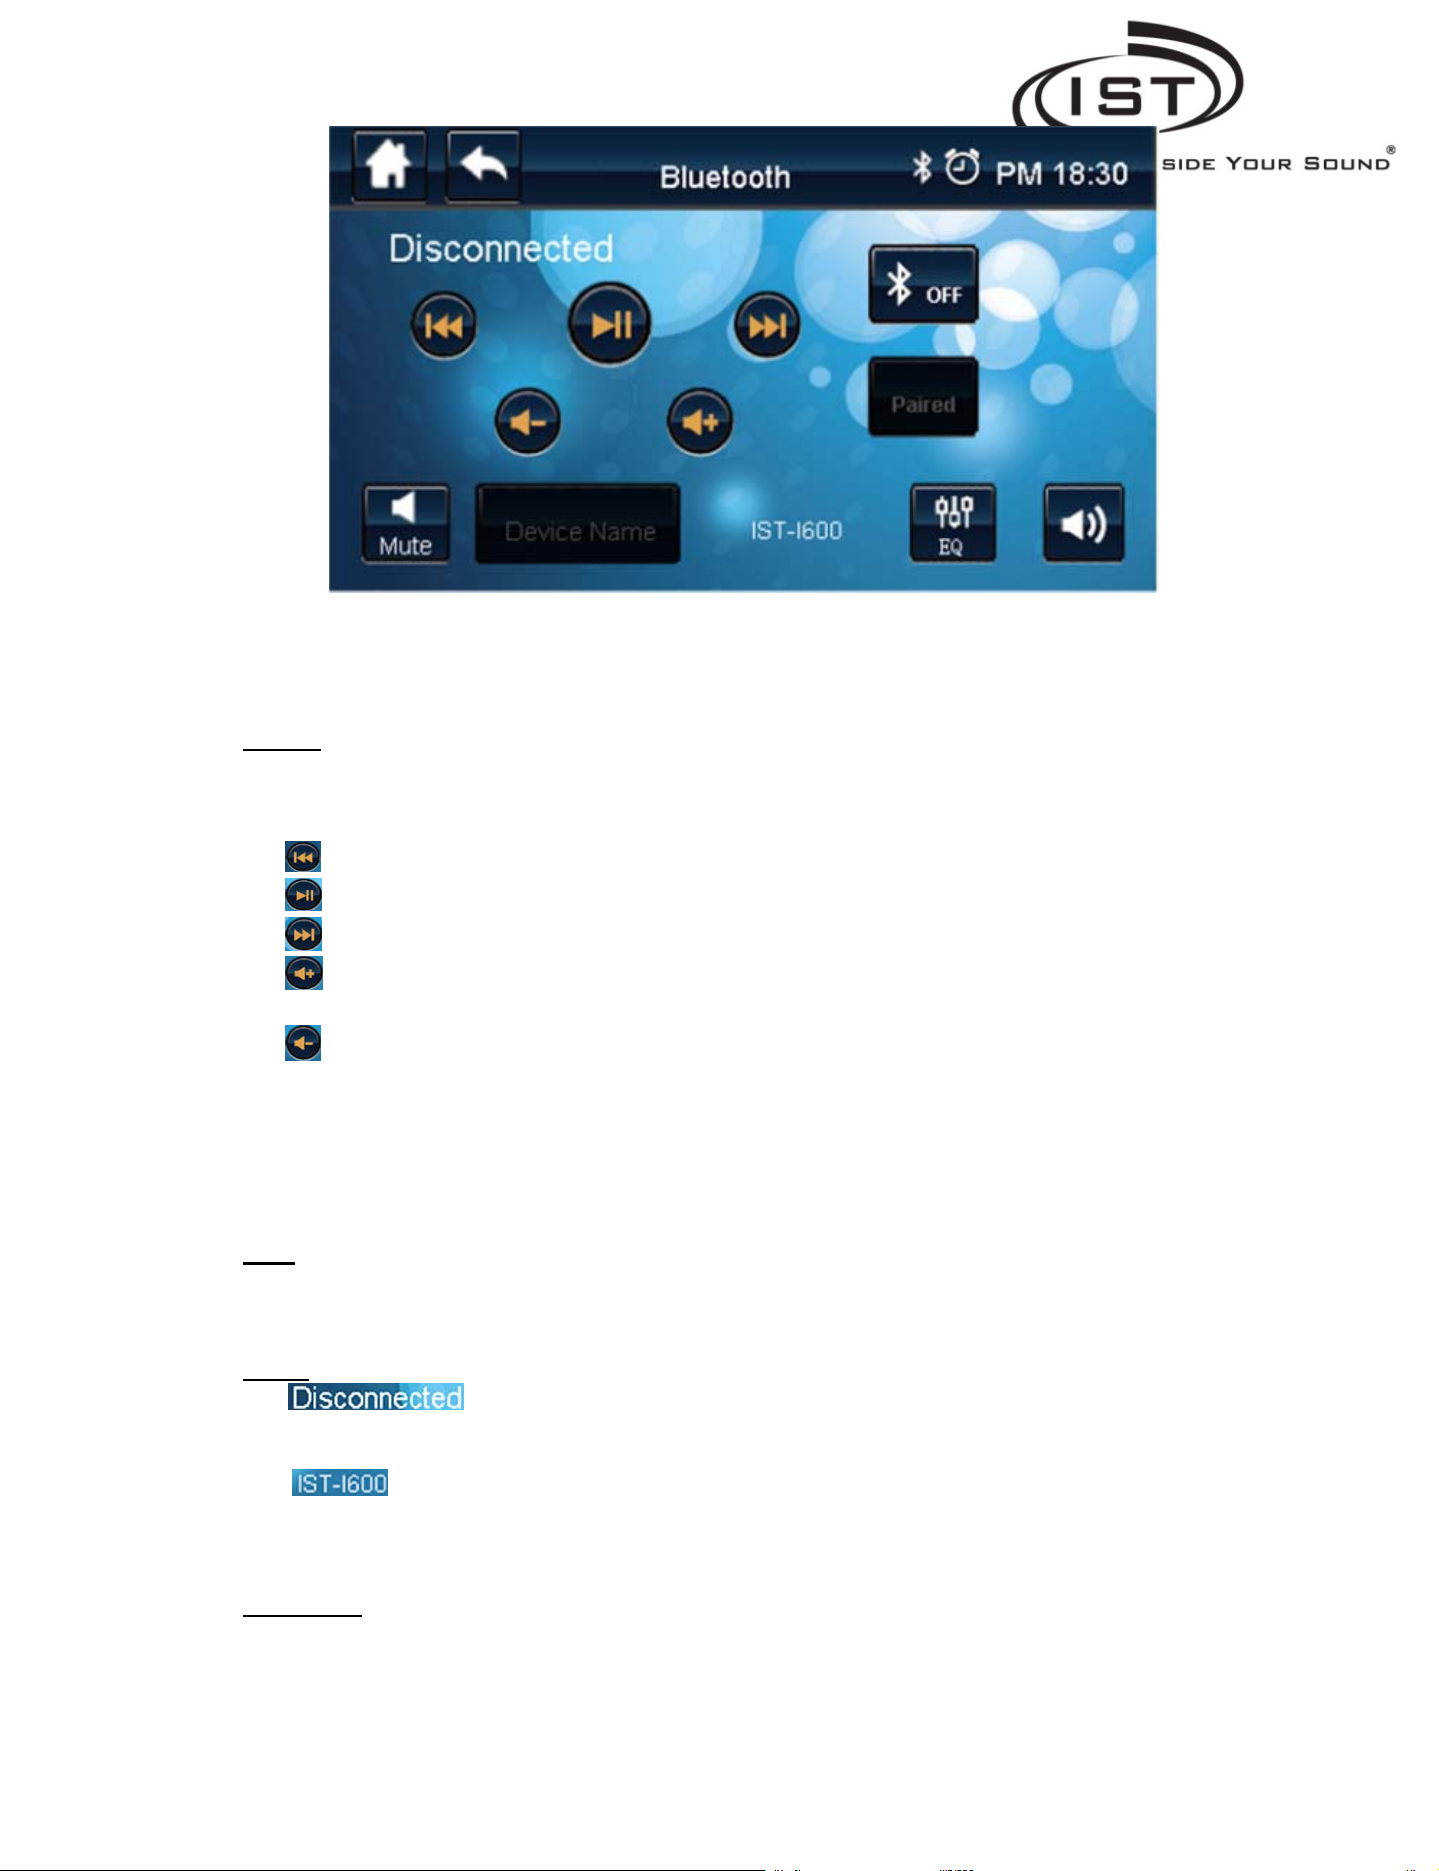
7.5.1 Buttons
Bluetooth On/Off:
Paired: Press this button to pair the Bluetooth device with the IST600
EQ: Enter the Bluetooth Graphic Equalizer to adjust treble and bass frequencies
Device Name: You can change the Bluetooth name, click for an alpha keypad to change the name,
7.5.2 Icons
Bluetooth: Icon indicating that Bluetooth is active on the device. When Bluetooth is “on” icon will
Press this button to turn on/off the Bluetooth, It indicate the status of the Bluetooth.
Previous: Play the previous music on the Bluetooth device.
Play/Pause: Play or pause the music on the Bluetooth device.
Next: Play the next music.
Bluetooth Volume +:
Bluetooth device volume up.
Bluetooth Volume ‐:
Bluetooth device volume down.
example: iPad, iPhone, etc.
appear at the right of the title.
7.5.3 Words
7.6 MP3 Screen
Intrasonic Technology | 9525 Forest View Street | Dallas, Texas 75243|877‐435‐0670
Status:
Bluetooth Status Display. (Power on, power off, connected, disconnected)
Device name:
Display the current device name of the Bluetooth.
pg.
12
Page 13
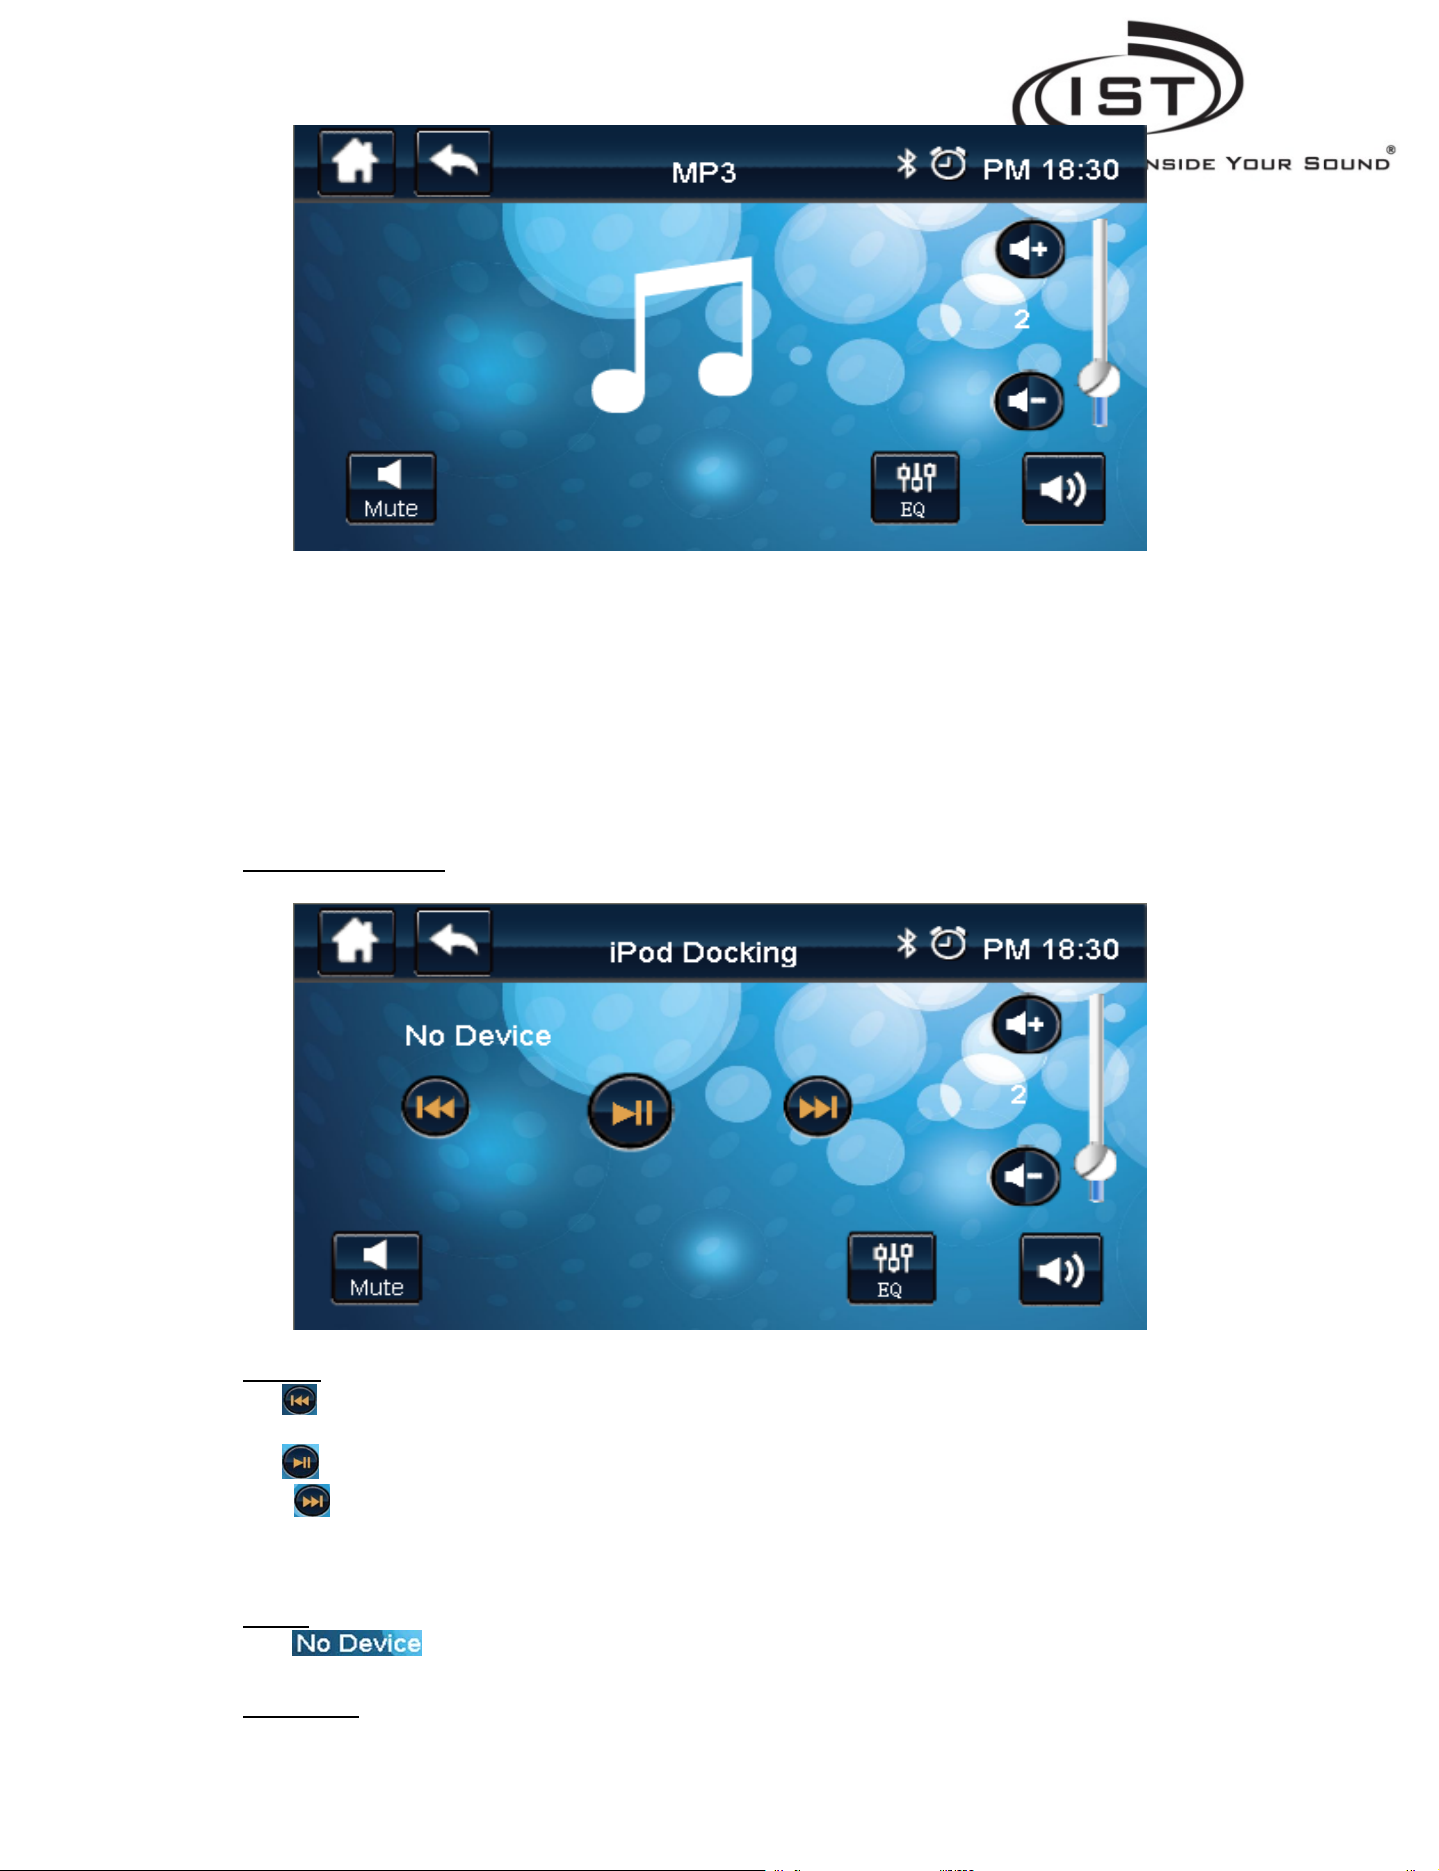
7.7 iPod Docking Screen
7.7.1 Buttons
Previous: Play the previous music on the Apple devices.
Play/Pause: Play or pause the music on the Apple devices.
Next: Play the next music on the Apple devices.
EQ: Enter the iPod Docking Graphic Equalizer to adjust treble and bass frequencies
7.7.2 Words
7.8 AUX Screen
Intrasonic Technology | 9525 Forest View Street | Dallas, Texas 75243|877‐435‐0670
Device Status: Displays the status of the Device, such as “No Device”.
pg.
13
Page 14

7.8.1 Buttons
EQ: Enter the AUX Graphic Equalizer to adjust treble and bass frequencies
7.9 USB Screen
Upon plugging in a USB flash drive music automatically will begin playing and a song list will appear
7.9.1 Buttons
Play List: Click to enter Play List interface.
EQ: Enter the USB Graphic Equalizer to adjust treble and bass frequencies
7.9.2 Words
Previous: Play the previous music. Press and hold button will fast backwards.
Play/Pause: Play or pause the music.
Next: Play the next music. Press and hold button will fast forward.
Play Time:
Intrasonic Technology | 9525 Forest View Street | Dallas, Texas 75243|877‐435‐0670
pg.
14
Page 15

7.10 Play List
Songs that have been pre‐loaded on the USB Flash Drive will appear and selected one song at a time,
shuffle or repeat the song list in its entirety.
Display the play time of the music.
7.10.1 Buttons
Home: Return to the home page
Back: Return to the pre‐interface.
7.11 EQ Screen
7.11.1 Buttons
Default: Set the default EQ.
Save: Save the Graphic Equalizer settings for each Input Selection
7.12 Settings Screen
Intrasonic Technology | 9525 Forest View Street | Dallas, Texas 75243|877‐435‐0670
pg.
15
Page 16
7.12.1 Buttons
Time &Date: Enter the Time & Date Settings
Language: Change the Language Settings
Backlight: Change the Backlight Settings
Backdrop: Change the Background Settings
Touch Tone: Change the Touch Tone Settings
Reset All: Sets the system to factory settings, excluding the Time & Date.
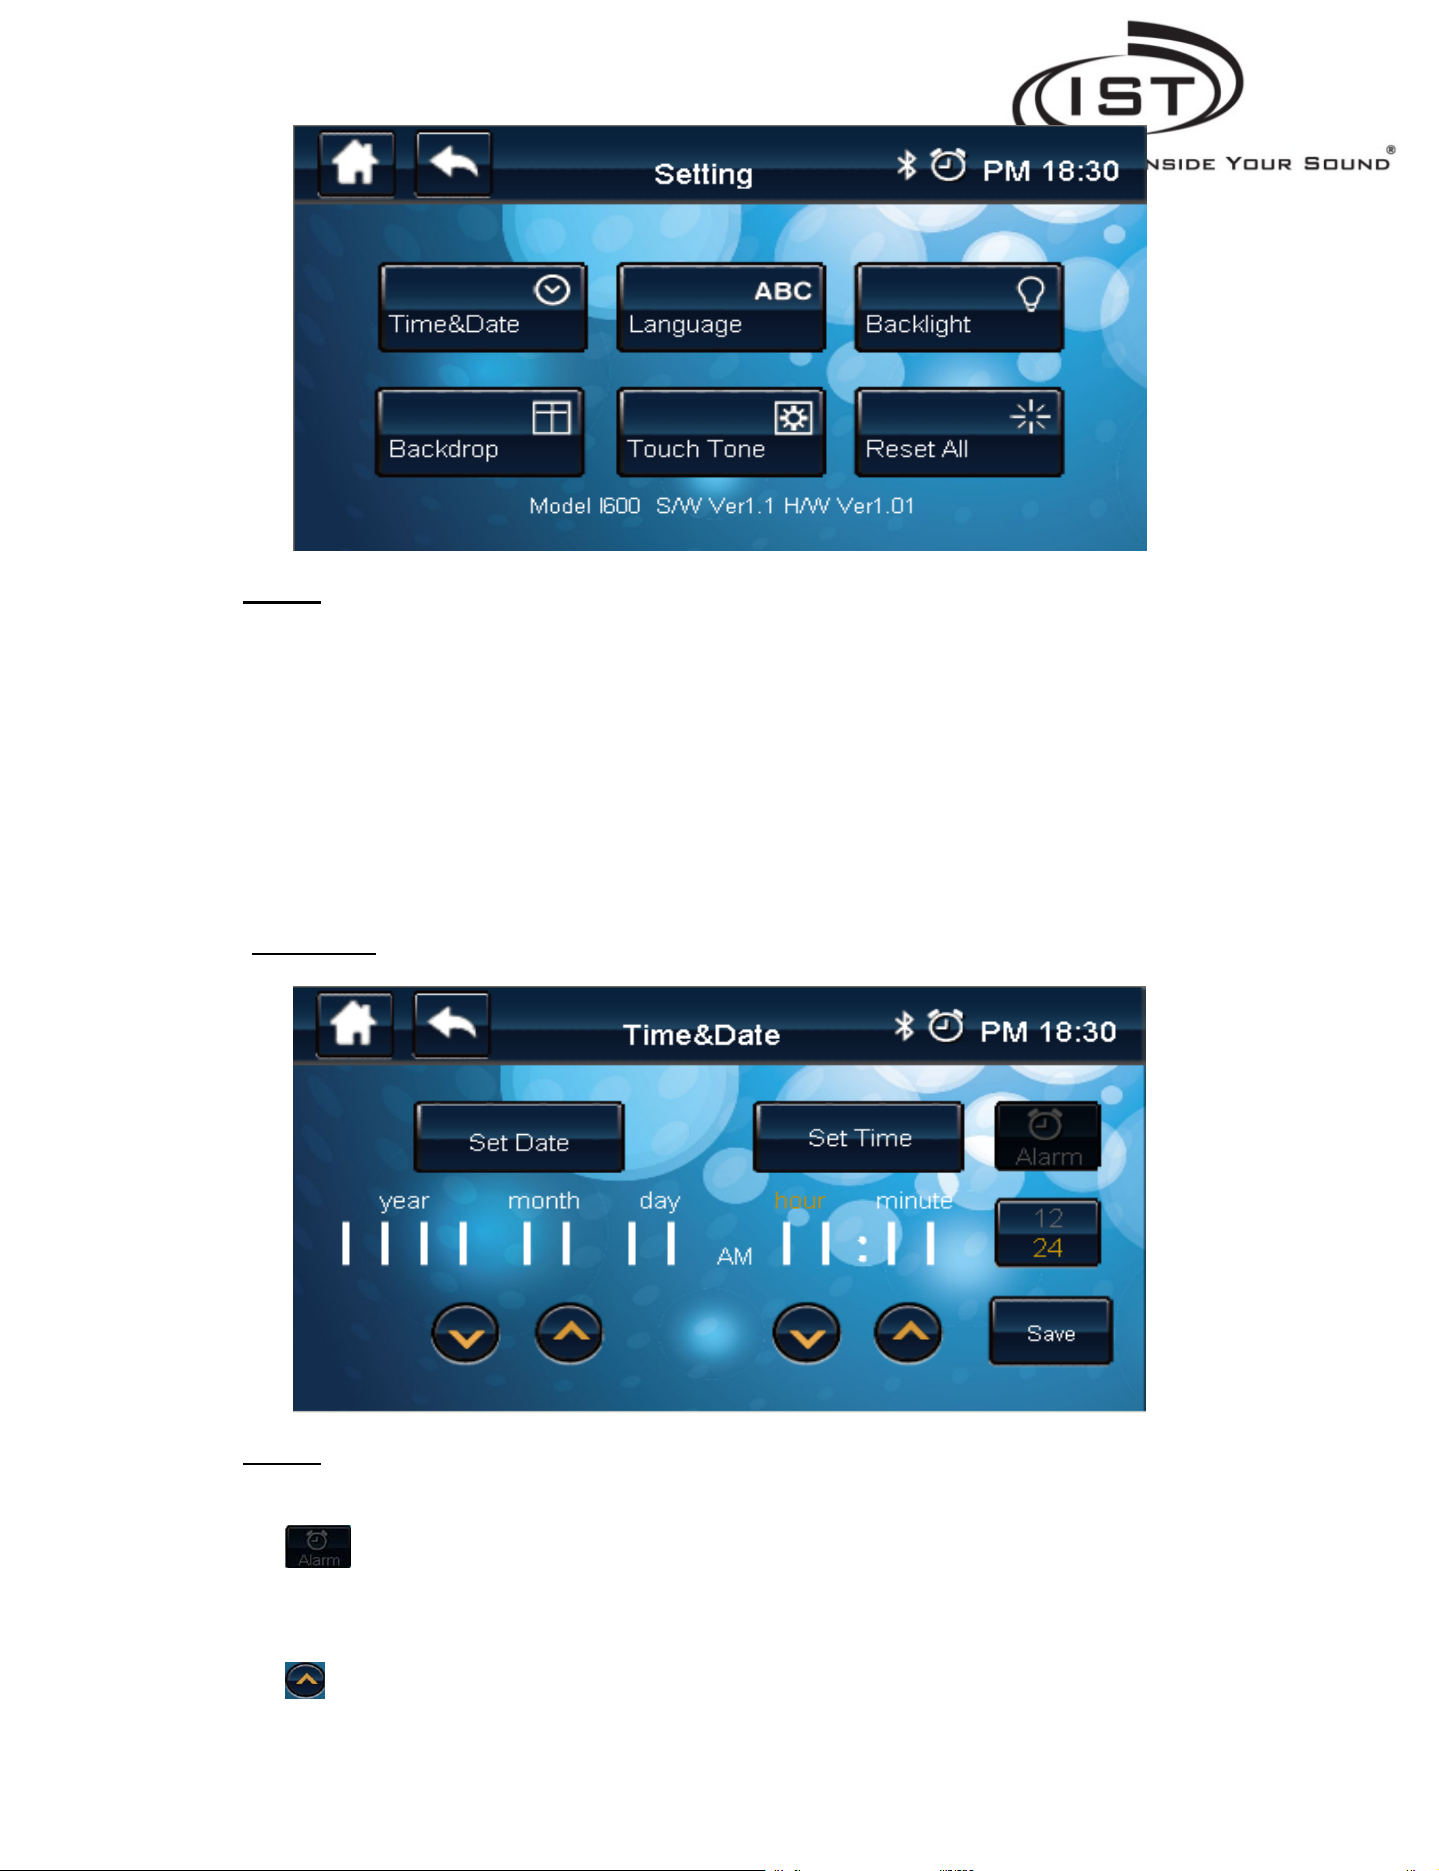
7.13 Time & Date
7.13.1 Buttons
Set Date: Press to set the year/month/day.
Set Time: Press to set the hour/minute.
12/24 hour clock: Change the time format.
Save: Save the Time & Date a fter you set that.
Alarm Enable/Disable:
Highlight means Enable, Grayed means disable.
Up: Increases the Time & Date.
Intrasonic Technology | 9525 Forest View Street | Dallas, Texas 75243|877‐435‐0670
pg.
16
Page 17
Down: Decreases the Time & Date.
7.13.2 Words
Year/month/day/hour/minute:
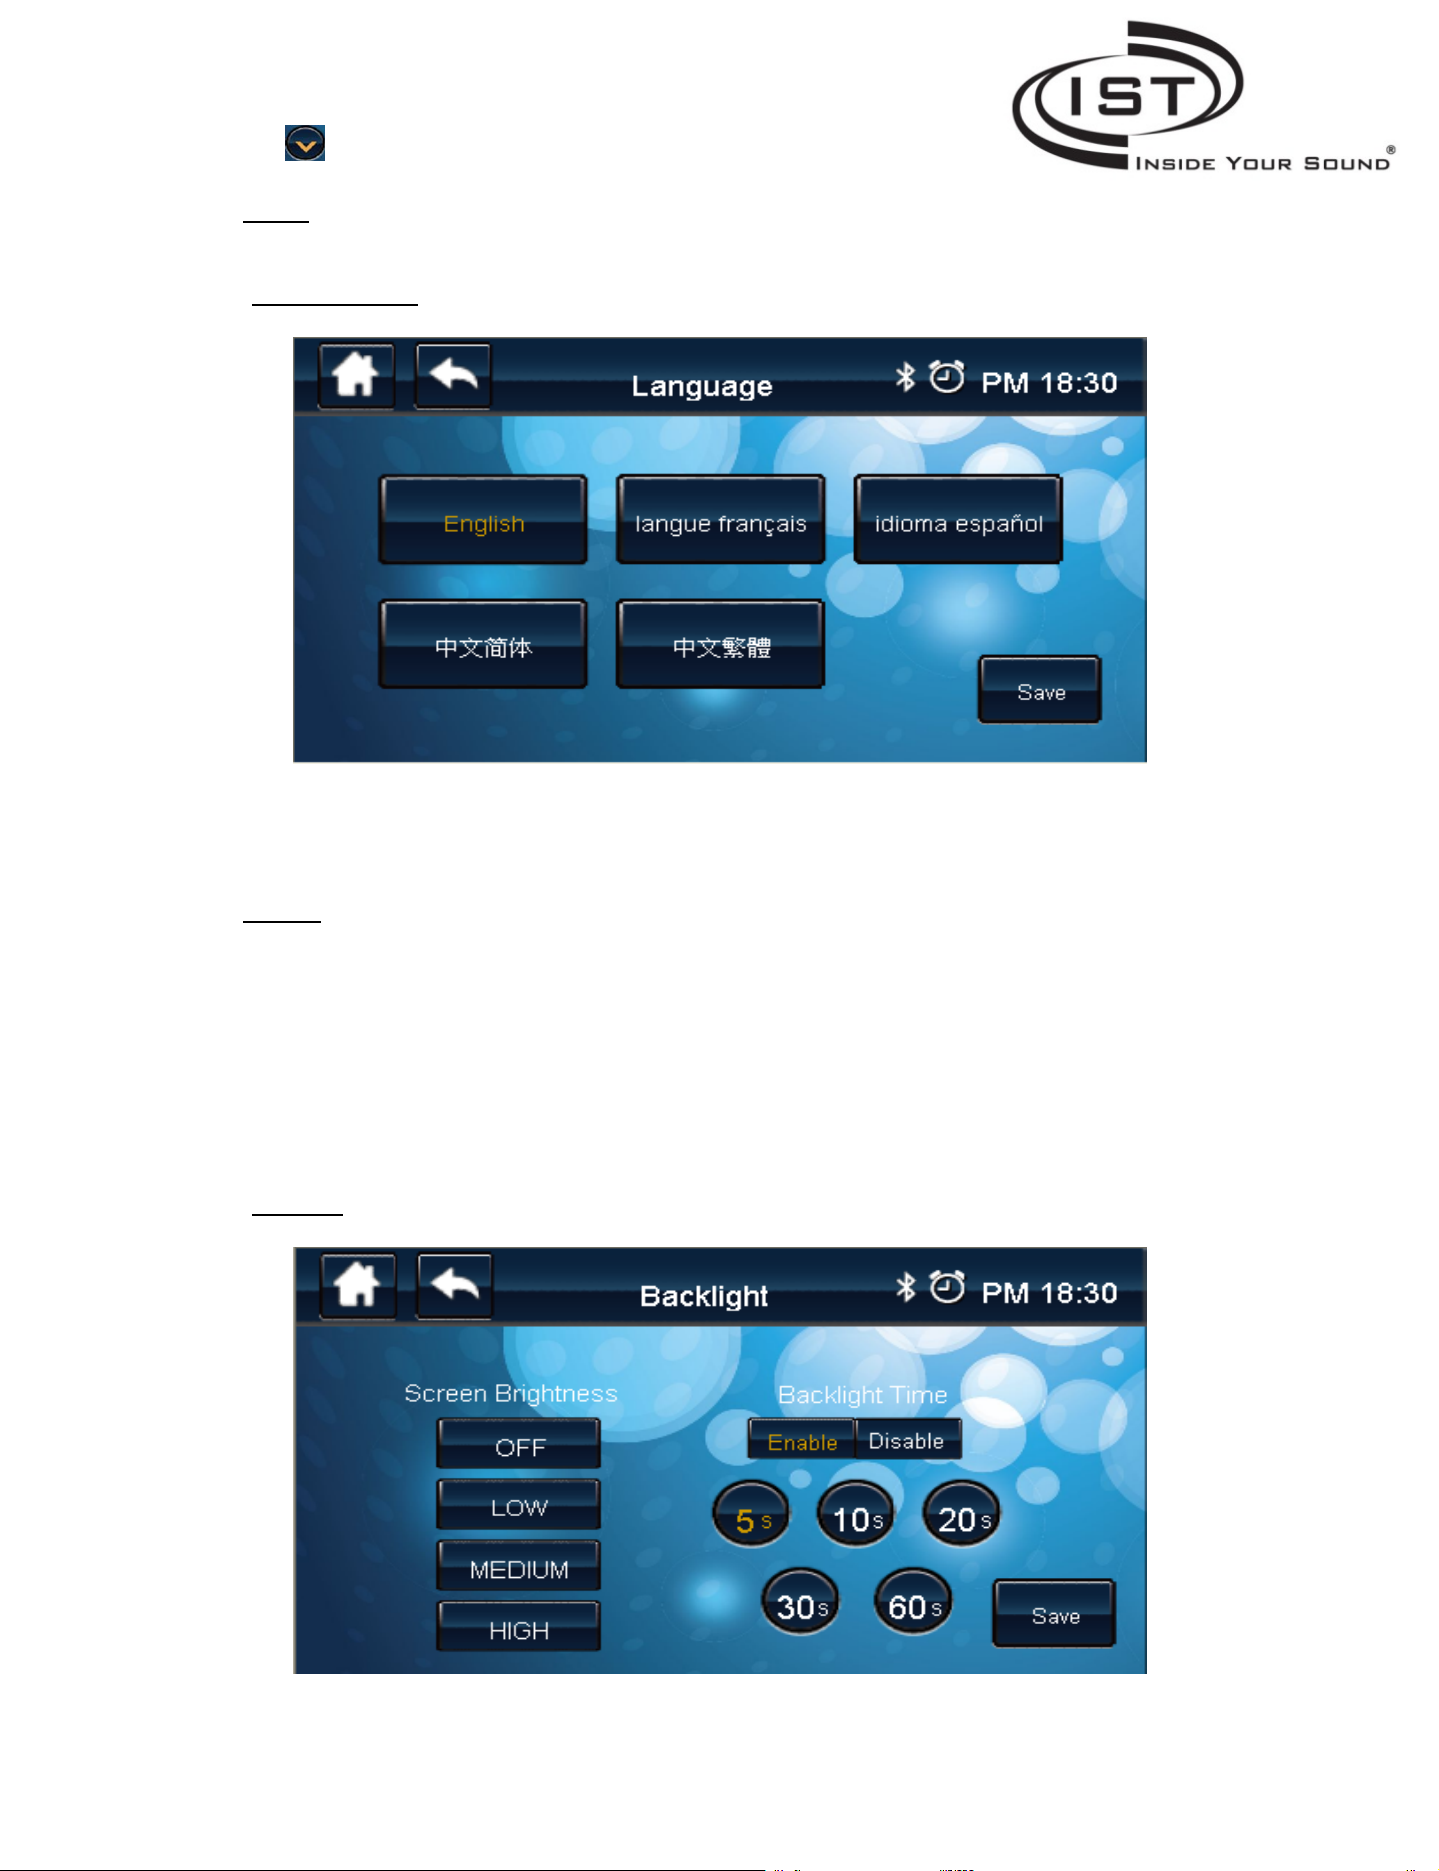
7.14 Language Screen
7.14.1 Buttons
English: Select the English language.
French: Select the French language.
Spanish: Select the Spanish language.
Chinese (Si): Select the Simplified Chinese.
Chinese (Tr): Select the Traditional Chinese.
Save: Save the Language Setting.
7.15 Backlight
Intrasonic Technology | 9525 Forest View Street | Dallas, Texas 75243|877‐435‐0670
pg.
17
Page 18

7.15.1 Buttons
OFF: Shut off the backlight.
LOW: Set the backlight brightness low.
MEDIUM: Set the backlight brightness medium.
HIGH: Set the backlight brightness high.
Enable: Enable the backlight auto‐shutoff.
Disable: Disable the backlight auto‐shutoff..
Backlight Time Select: Select the time for shut off the backlight.
Save: Save the Backlight Setting.
7.15.2 Words
Screen Brightness: Backlight Brightness Setting
Backlight Time: Backlight Time Setting.
7.16 Backdrop
7.16.1 Buttons
Press to select the global background for all screens
Save: Save the backdrop setting.
7.17 Touch Tone
Intrasonic Technology | 9525 Forest View Street | Dallas, Texas 75243|877‐435‐0670
pg.
18
Page 19
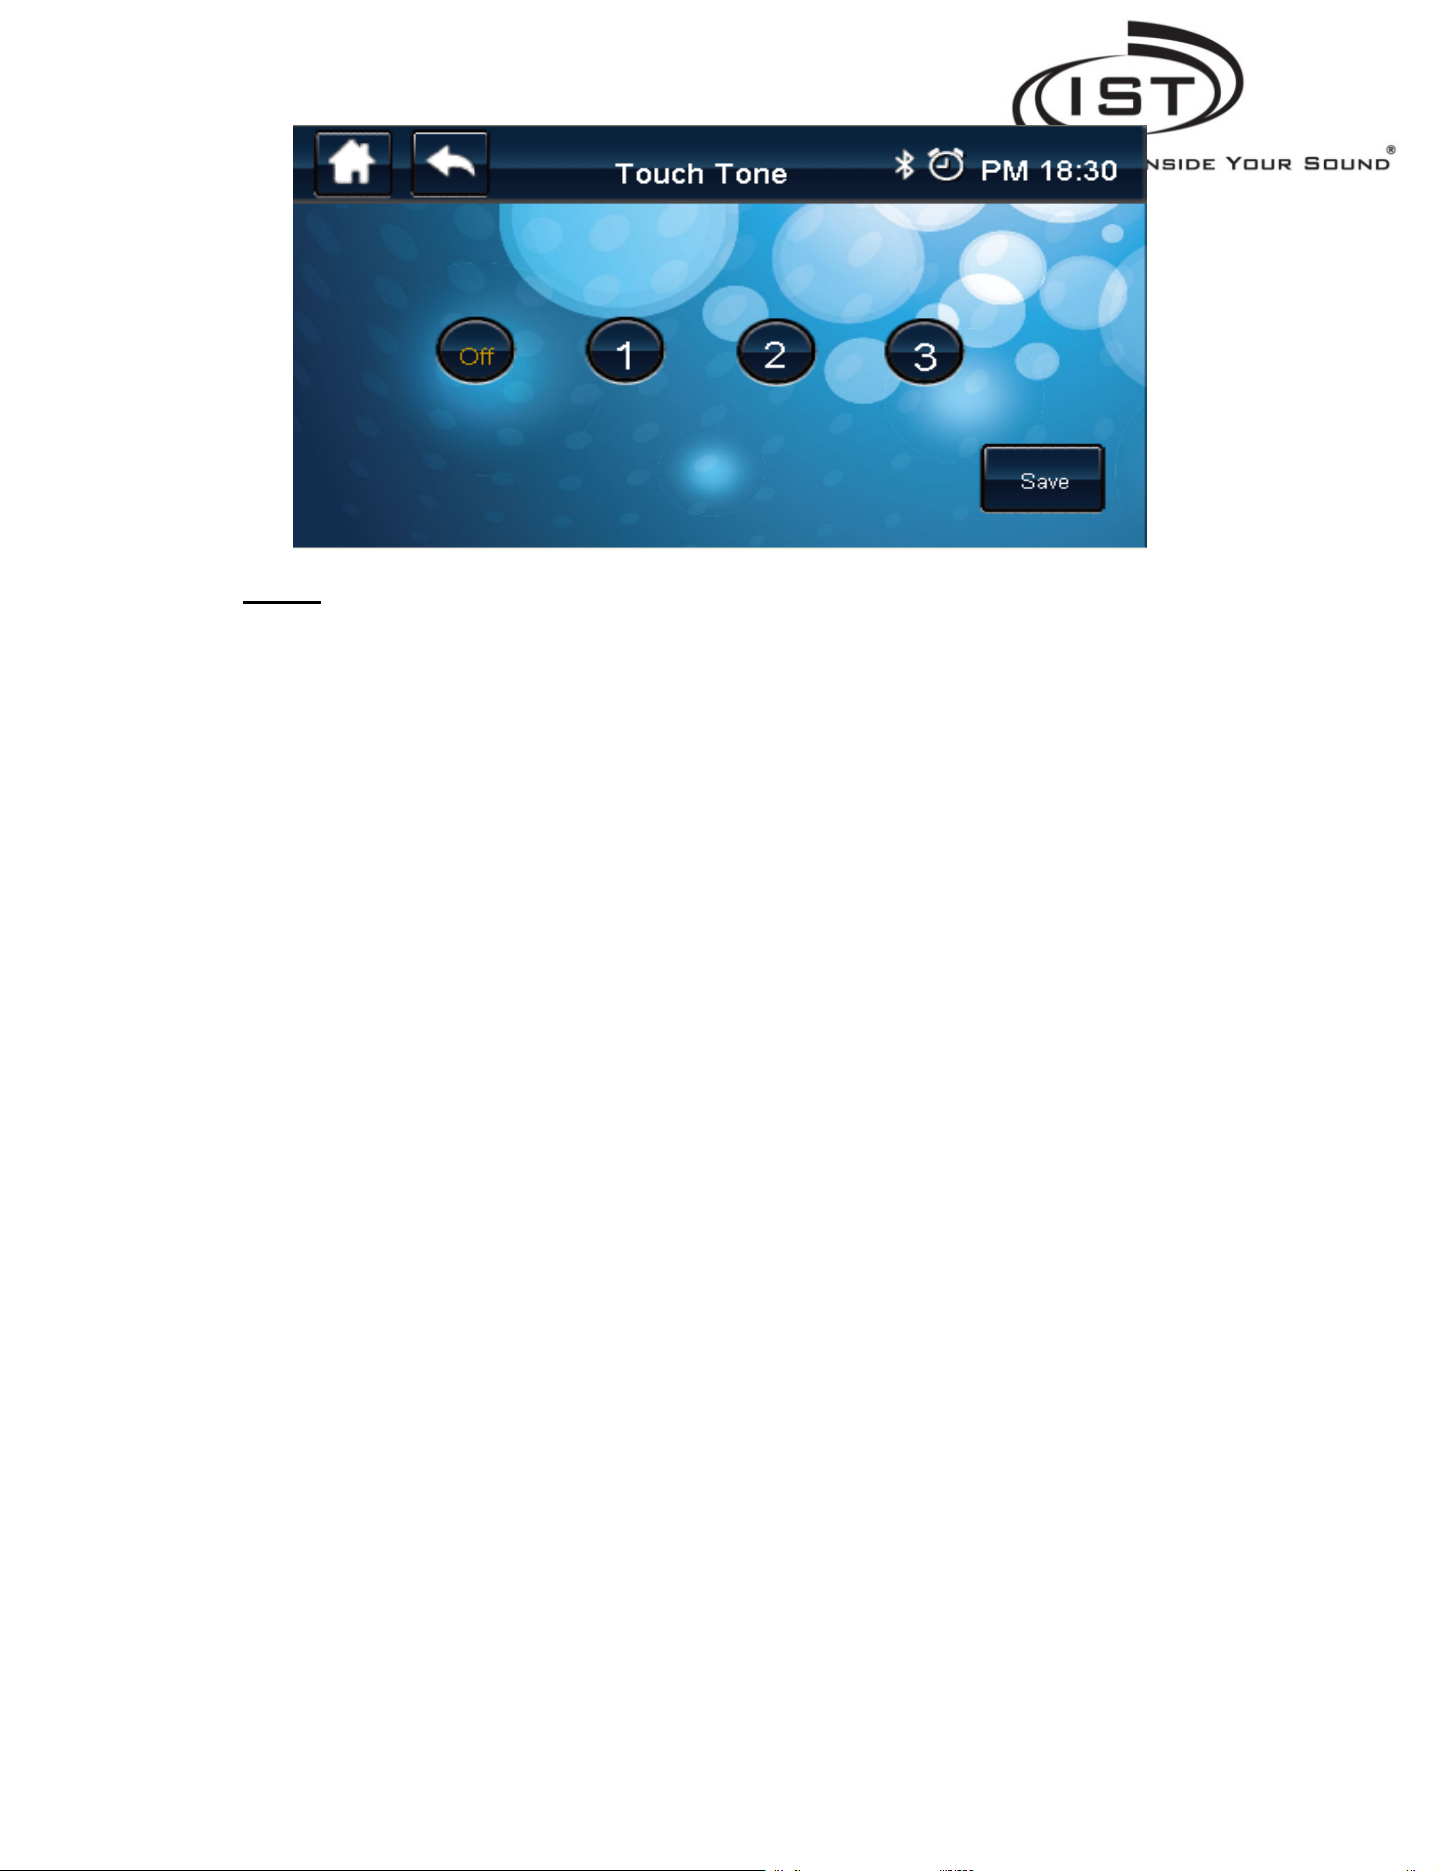
7.17.1 Buttons
On/Off: Shut off touch tone or not.
Touch Tone: Select the touch tone.
Save: Save the touch tone setting.
Intrasonic Technology | 9525 Forest View Street | Dallas, Texas 75243|877‐435‐0670
pg.
19
 Loading...