

InTouch Health Xpress Quick Start Manual
Operating the Xpress
Xpress™ Quick Start Guide
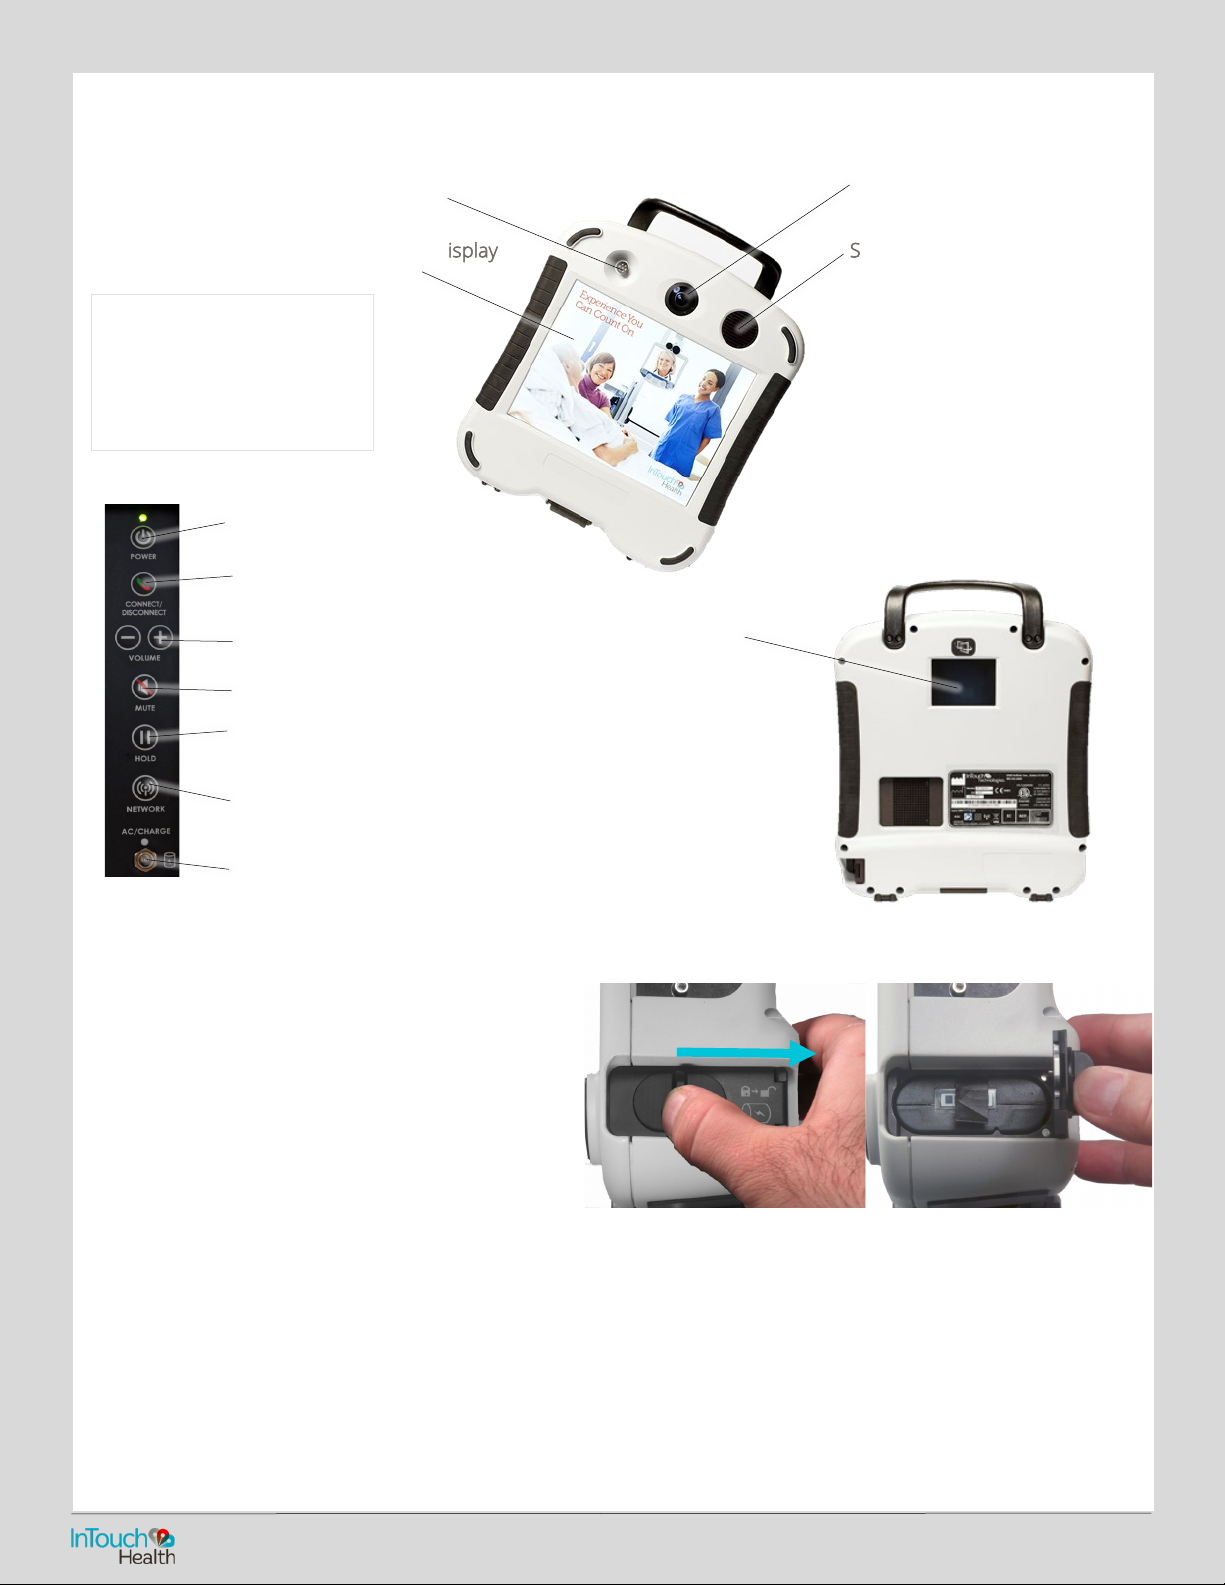
Directional Microphone
Touch Screen Display
When someone is logged in,
their video feed and
username is displayed.
Otherwise a screensaver will
be seen on the screen.
Power (ON/OFF)
Connect/
Disconnect
Volume Control
Mute
Hold
Camera
Speaker
Tap the screen (out of
sessions) to show status,
battery charge, wireless signal
quality and other information.
Viewnder
Press NETWORK to select from wireless
networks using the touch Screen Display
Power Connector
Installing the Battery and Charging
1. Slide the latch to unlock and open the battery
door as shown.
2. Pull the tab to remove the battery.
3. Install the charged battery with the tab exposed.
4. Slide the latch to close the battery door.
5. Plug the Xpress AC/DC power adapter into a
standard, grounded 120 Volt AC outlet to charge
the device.
NOTE: The Xpress battery can be changed while in
session if the Xpress is connected to an AC power
supply with the InTouch Health provided power
adapter.
Allow the Xpress to charge initially for at least 5 hours to
reach a full charge. Other than charging the batteries, no user
maintenance of the batteries is required.
The battery can last approximately 3 hours on a full charge.
The Xpress will not run if the battery charge is less than 20%.
The system will charge to 20% from 85% in 4.25 hours.
The system will charge to 20% from 100% in 5 hours.
-006
-14243
24/7 Technical Support (877) 484-9119
P/N: MA
Xpress™ Quick Start Guide
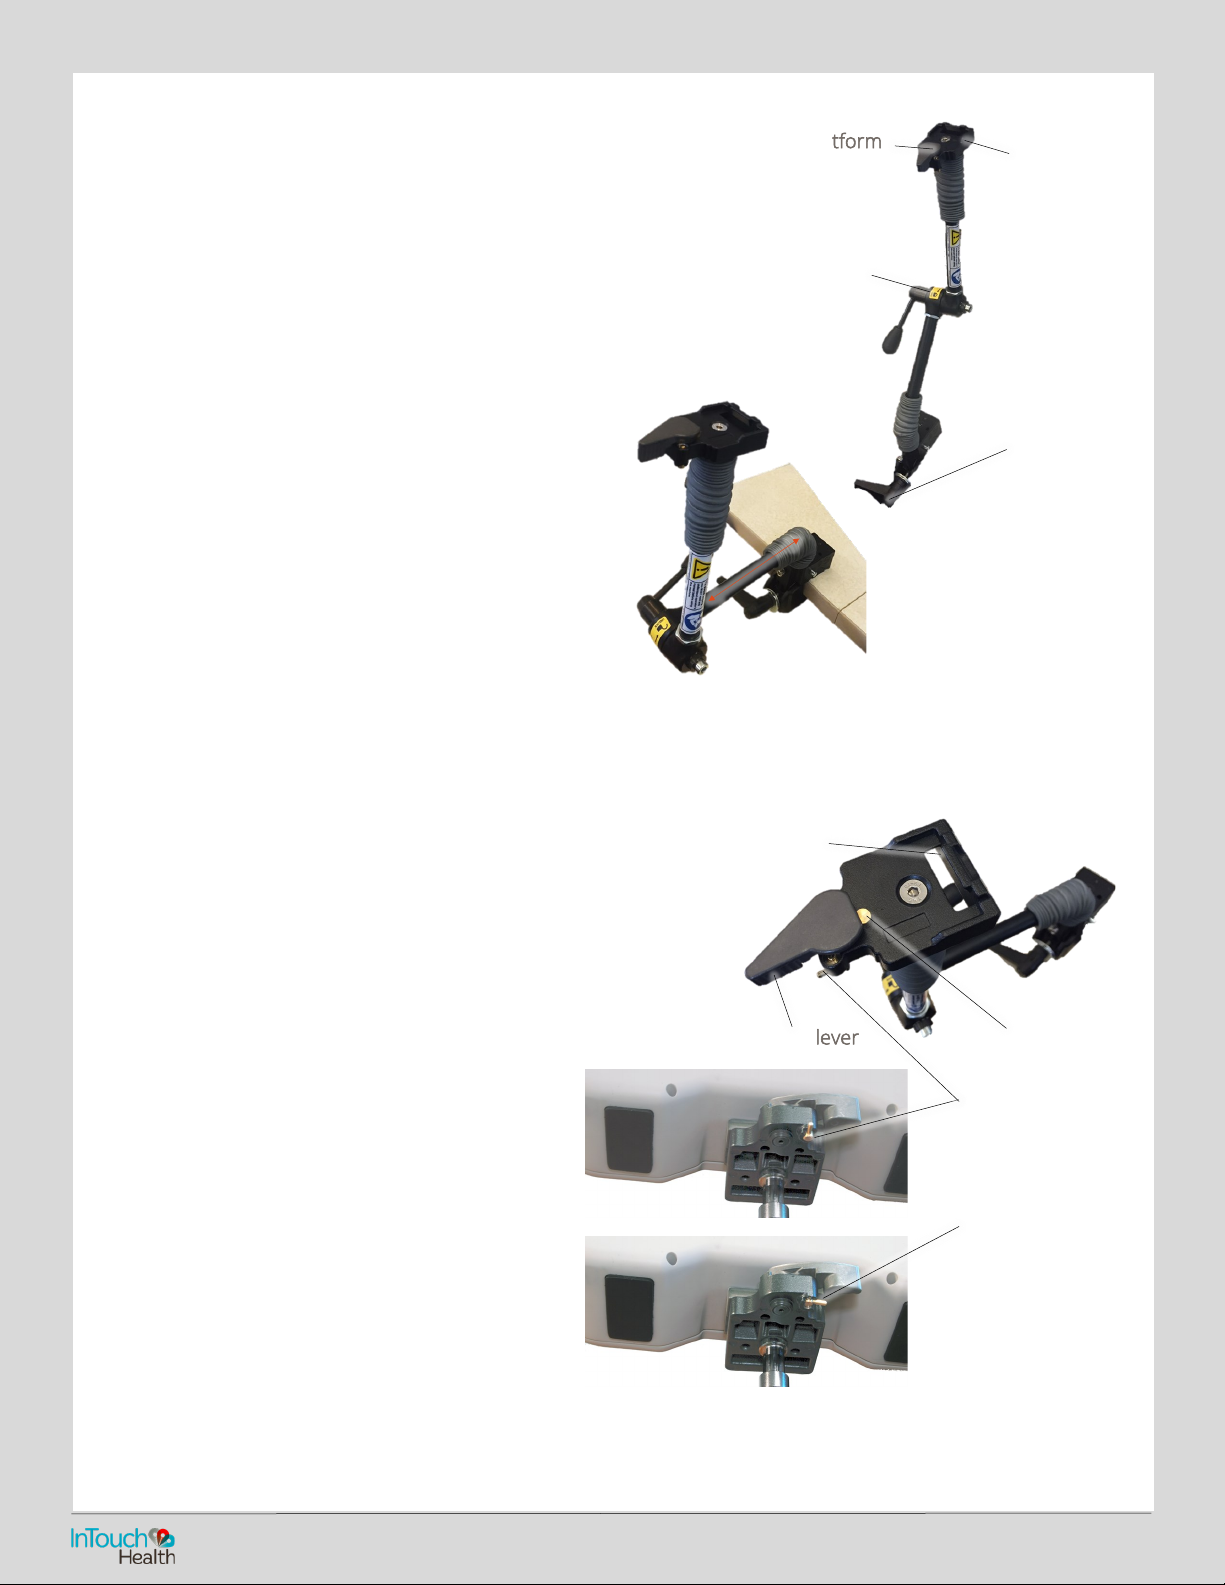
Adjusting the Xpress Mounting Arm
1. Secure the arm clamp to an appropriate support.
2. Hold the platform (or Xpress handle) and unlock the
Lock Release lever to set the location of the
mounting platform. The mounting platform should
be parallel to the ground for best results.
CAUTION: When the Lock Release lever is unlocked, all
three pivot points are freed to move. Support the Xpress
with its handle when repositioning so that it does not fall.
Platform
3. Lock Release
lever (Pull
upwards until it
snaps into
locking position)
2. Set
platform
location
3. Lock the release lever.
WARNING: The Xpress mounting arm is adjusted at the
factory to securely hold the Xpress steady under a vertical
acceleration of 3 gravities with a moment arm of 10 inches
(25.4 cm). To reduce the risk of injury, do not extend the
mounting arm platform further than 10 inches (25.4 cm)
from the base mounting point.
WARNING: To prevent the possibility of injury, do not
secure the Xpress Mounting Arm to any support structure
within 36 inches (91.4 cm) of a patient’s head or critical
areas.
Installing the Xpress on Mounting Platform
1. Insert the front edge of the Xpress mounting plate
into the platform.
2. Lower the rear edge of the Xpress mounting plate
on to the latch button. This will release the locking
lever.
3. Press the locking lever tight.
1. Secure
Arm
Clamp
WARNING:
10” (25.4 cm) maximum
10” (25.4 cm)
NOTE: For best results, mount arm on at, parallel surfaces.
Insert front edge
of Xpress
Locking lever
Horizontal extension
Latch button
Quick Release
enabled
Quick Release
disabled
24/7 Technical Support (877) 484-9119
 Loading...