

Intimidator 1000cc Kohler Diesel, 750EFI Kohler Gas Owner's Manual

OWNER’S
MANUAL
1000cc Kohler Diesel
750 EFI Kohler Gas
UTVRevised 12-16-2013
2014

PAGE 2
Owner Memo
Name: ____________________________________
Purchasing Date: ____________________________
Type: _____________________________________
Pin Number: _______________________________
Special Notice: _____________________________
Key Number: _______________________________

PAGE 3
OWNER’S MANUAL
Table of Contents:
Title ........................... Page Number
Introduction ...................................................... Page 4
Definitions ........................................................Page 4
Safety Labels ...............................................Pages 4-8
ROPS and FOPS Inspection Guide ............. Pages 9-10
General Safety ..........................................Pages 11-14
Safe Riding Gear ............................................. Page 15
Features, Controls and Operation ............Pages 16-32
New Vehicle Break-in ......................................Page 33
Service and Maintenance ........................ Pages 34-61
Storing and Maintaining Appearance ...... Pages 62-63
Transporting your Intimidator ......................... Page 64
Accessories ....................................................Page 64
Specifications ..........................................Pages 65-70
Troubleshooting .......................................Pages 72-77
Warranties ...............................................Pages 78-81
Service Record ........................................Pages 82-83
Training Certificate ..........................................Page 84
Safety Checklist ..............................................Page 85
PAGE 4
INTRODUCTION
READ THIS OWNER’S MANUAL. The Intimidator is and off-
road vehicle and is not a toy. The Intimidator is an adult
vehicle only and can be hazardous to operate. Failure to
follow the warnings and instructions in this manual can
result in severe injury or death.
PIN NUMBER:
Product Identification Number is located
between the seat back and cargo bed.
DEFINITIONS
DANGER:
A Danger indicates a hazardous situation that, if not
avoided, may result in serious injury or death.
WARNING:
A Warning indicates a situation that, if not avoided, may
result in property damage.
Notice
A Notice indicates a situation that could result in property damage.
SAFETY LABELS
For your protection, warning labels have been placed
on the vehicle. Read and follow the instructions of the
labels on the vehicle carefully. If any label becomes
illegible or comes off, contact your authorized dealer
to purchase a replacement.
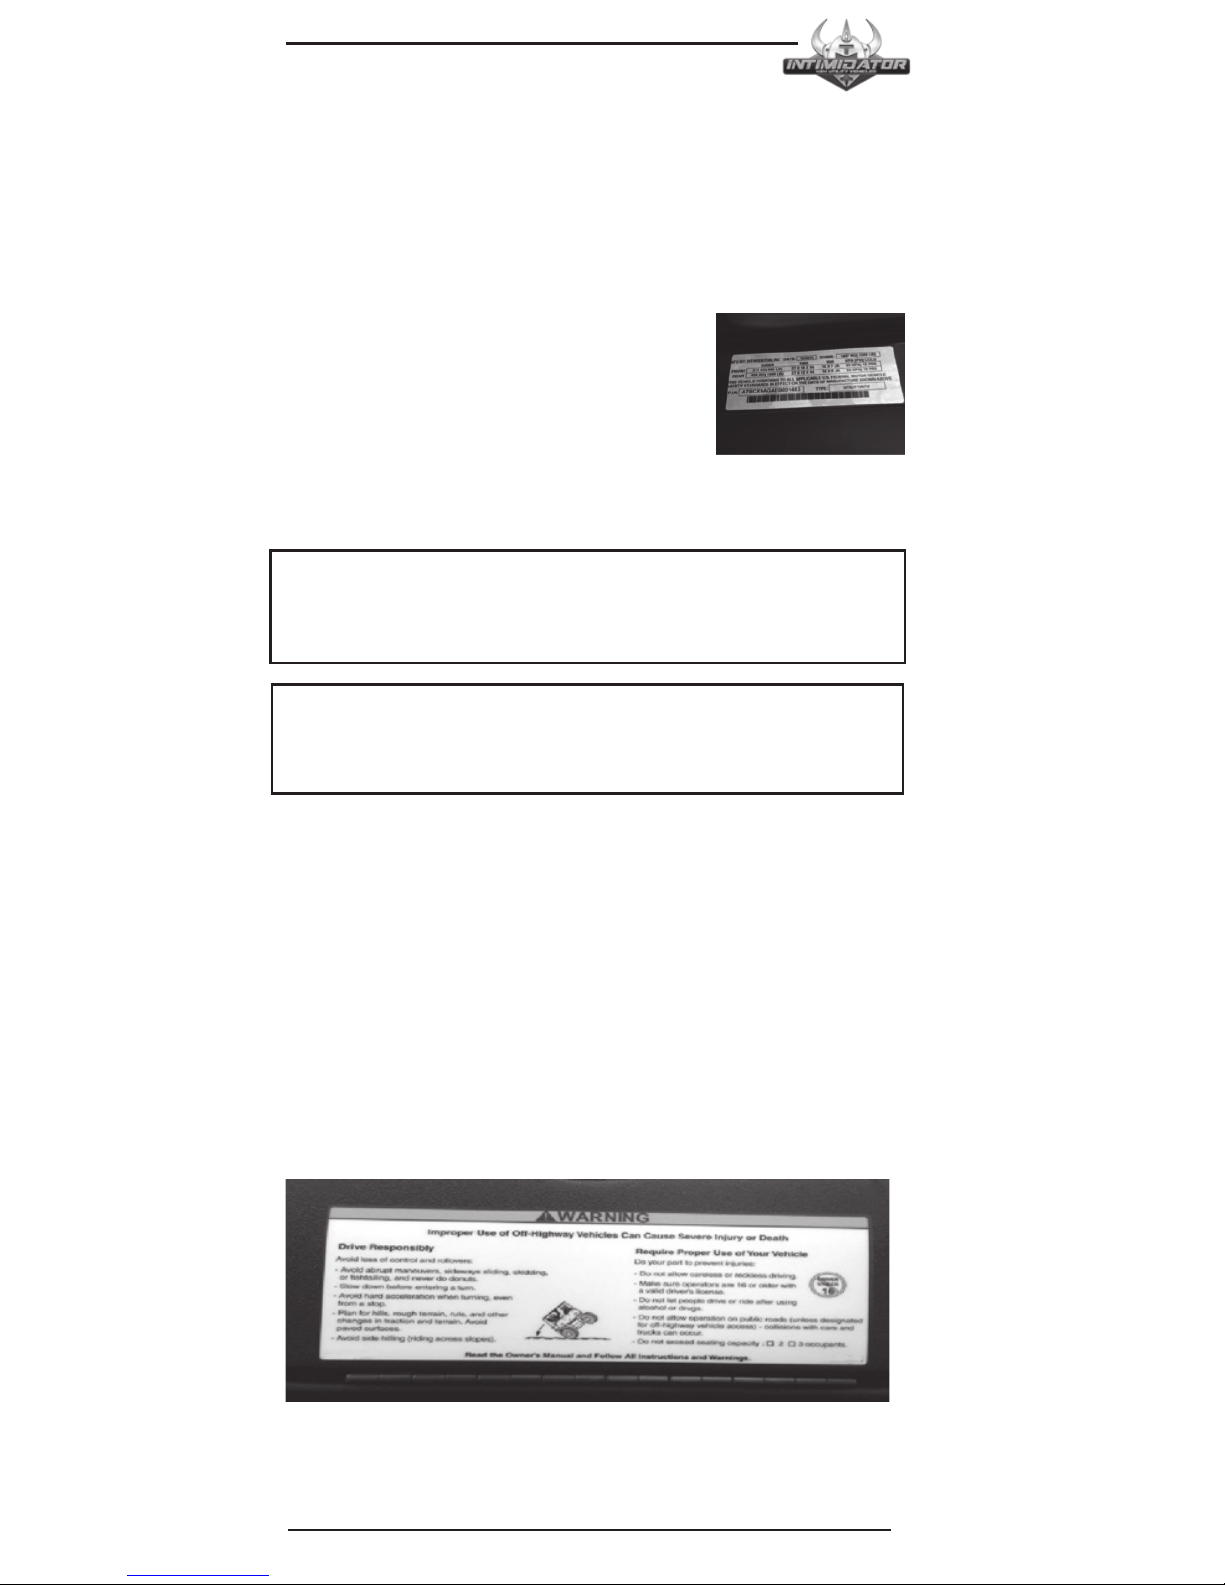
Discretionary and Age Warning – Located on vehicle dash.
PAGE 5
OWNER’S MANUAL
DANGER:
Improper Use of Off-Highway Vehicles Can Cause
Severe Injury or Death
Drive Responsibly
Avoid loss of control and rollovers:
• Avoid abrupt maneuvers, sideways sliding, skidding, or
fishtailing, and never do donuts.
• Slow down before entering a turn.
• Avoid hard acceleration when turning, even from a stop.
• Plan for hills, rough terrain, ruts, and other changes in
traction and terrain. Avoid paved surfaces.
• Avoid side hilling (riding across slopes).
Require Proper Use of Your Vehicle
Do your part to prevent Injuries:
• Do not allow careless or reckless driving.
• Make sure operators are 16 or older with a valid drivers
license.
• Do not let people drive or ride after using alcohol or
drugs.
• Do not allow operation on public roads (unless
designated for off-highway vehicle access) – collisions
with cars and trucks can occur.
• Do not exceed seating load capacity.
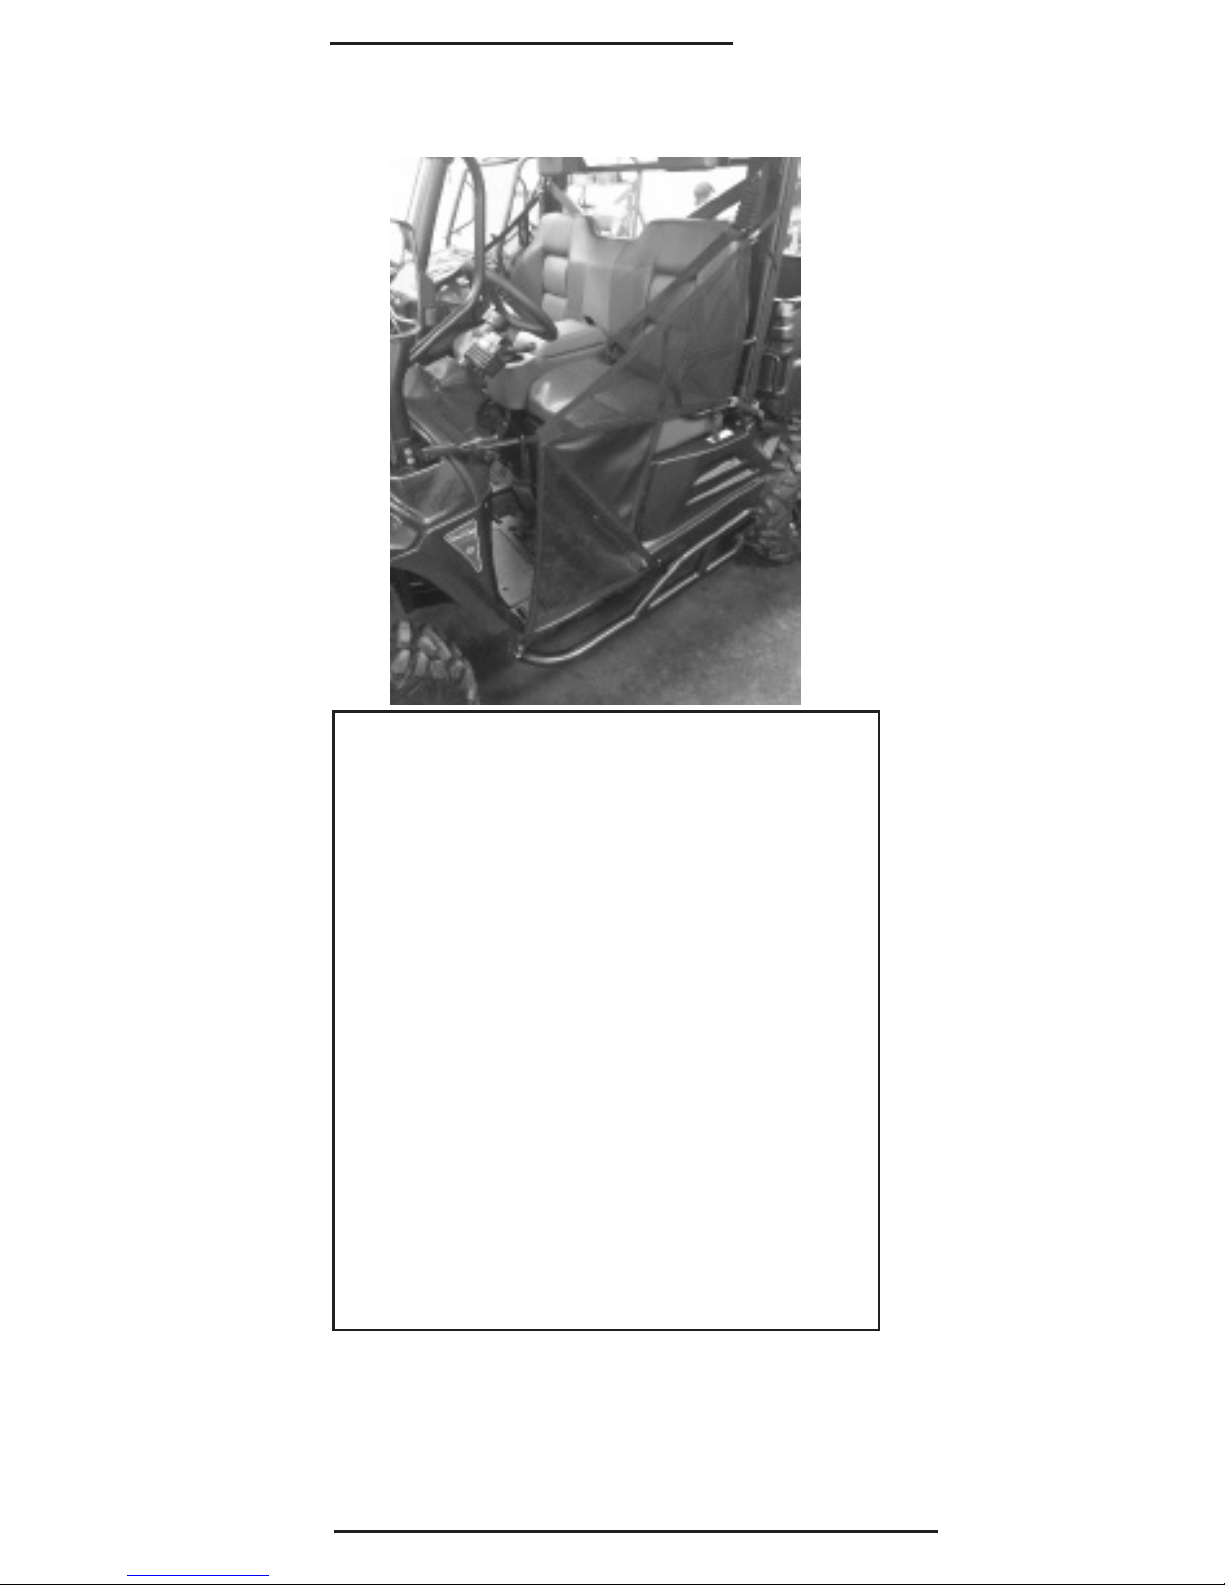
Seat belt and Safety Warning – Located on vehicle firewall.
DANGER:
Operator and passengers must fasten seatbelt and both safety cab
nets while the vehicle is in use. Safety cab net must remain tight at
all times and not be damaged. If safety cab net is damaged or shows
significant wear, do not use vehicle until a new safety net is installed.
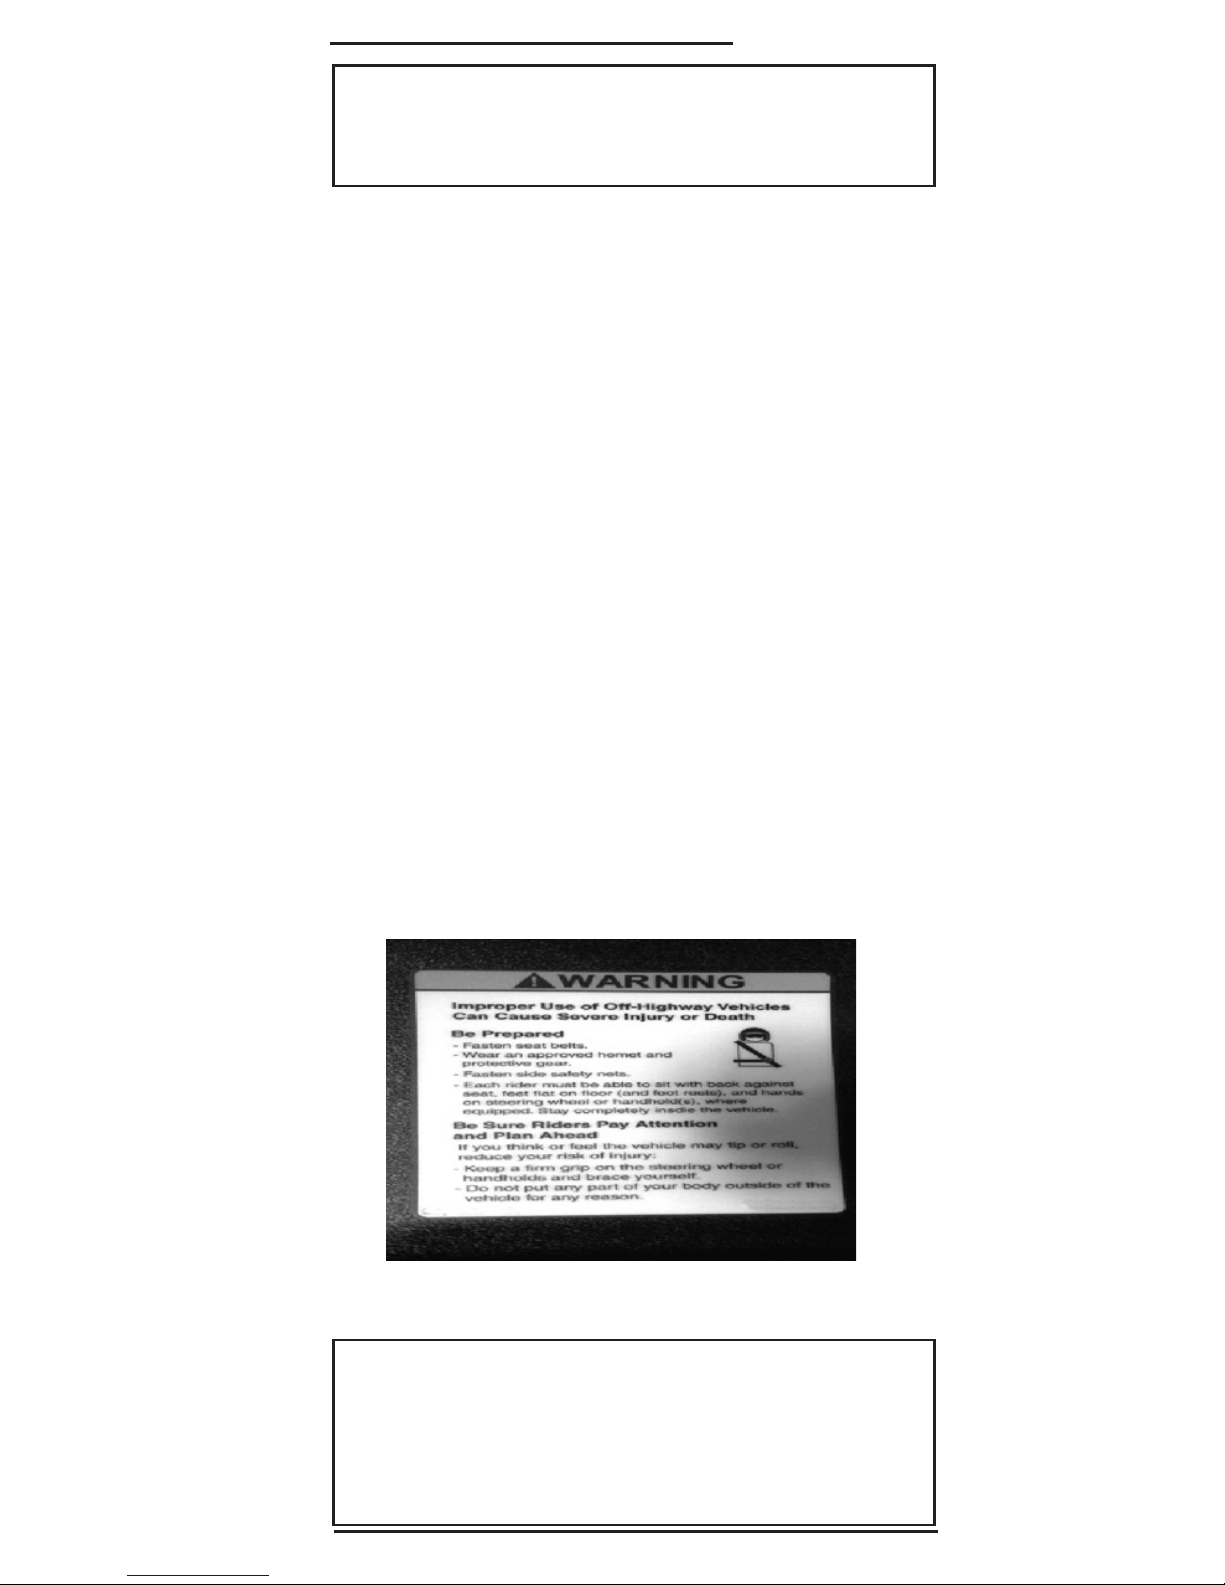
PAGE 6
Improper Use of Off-Highway Vehicles Can
Cause Severe Injury or Death.
Be Prepared:
• Fasten seat belts.
• Wear an approved helmet and protective gear.
• Fasten side safety nets.
• Each rider must be able to sit with back against seat,
feet flat on floor (and foot rests), and have hands on
steering wheel or handhold(s), where equipped. Stay
completely inside the vehicle.
Be Sure Riders Pay Attention and Plan Ahead
If you think or feel the vehicle may tip or roll, reduce your
risk of injury:
• Keep a firm grip on the steering wheel or hand-holds
and brace yourself.
• Do not put any part of your body outside of the vehicle
for any reason.
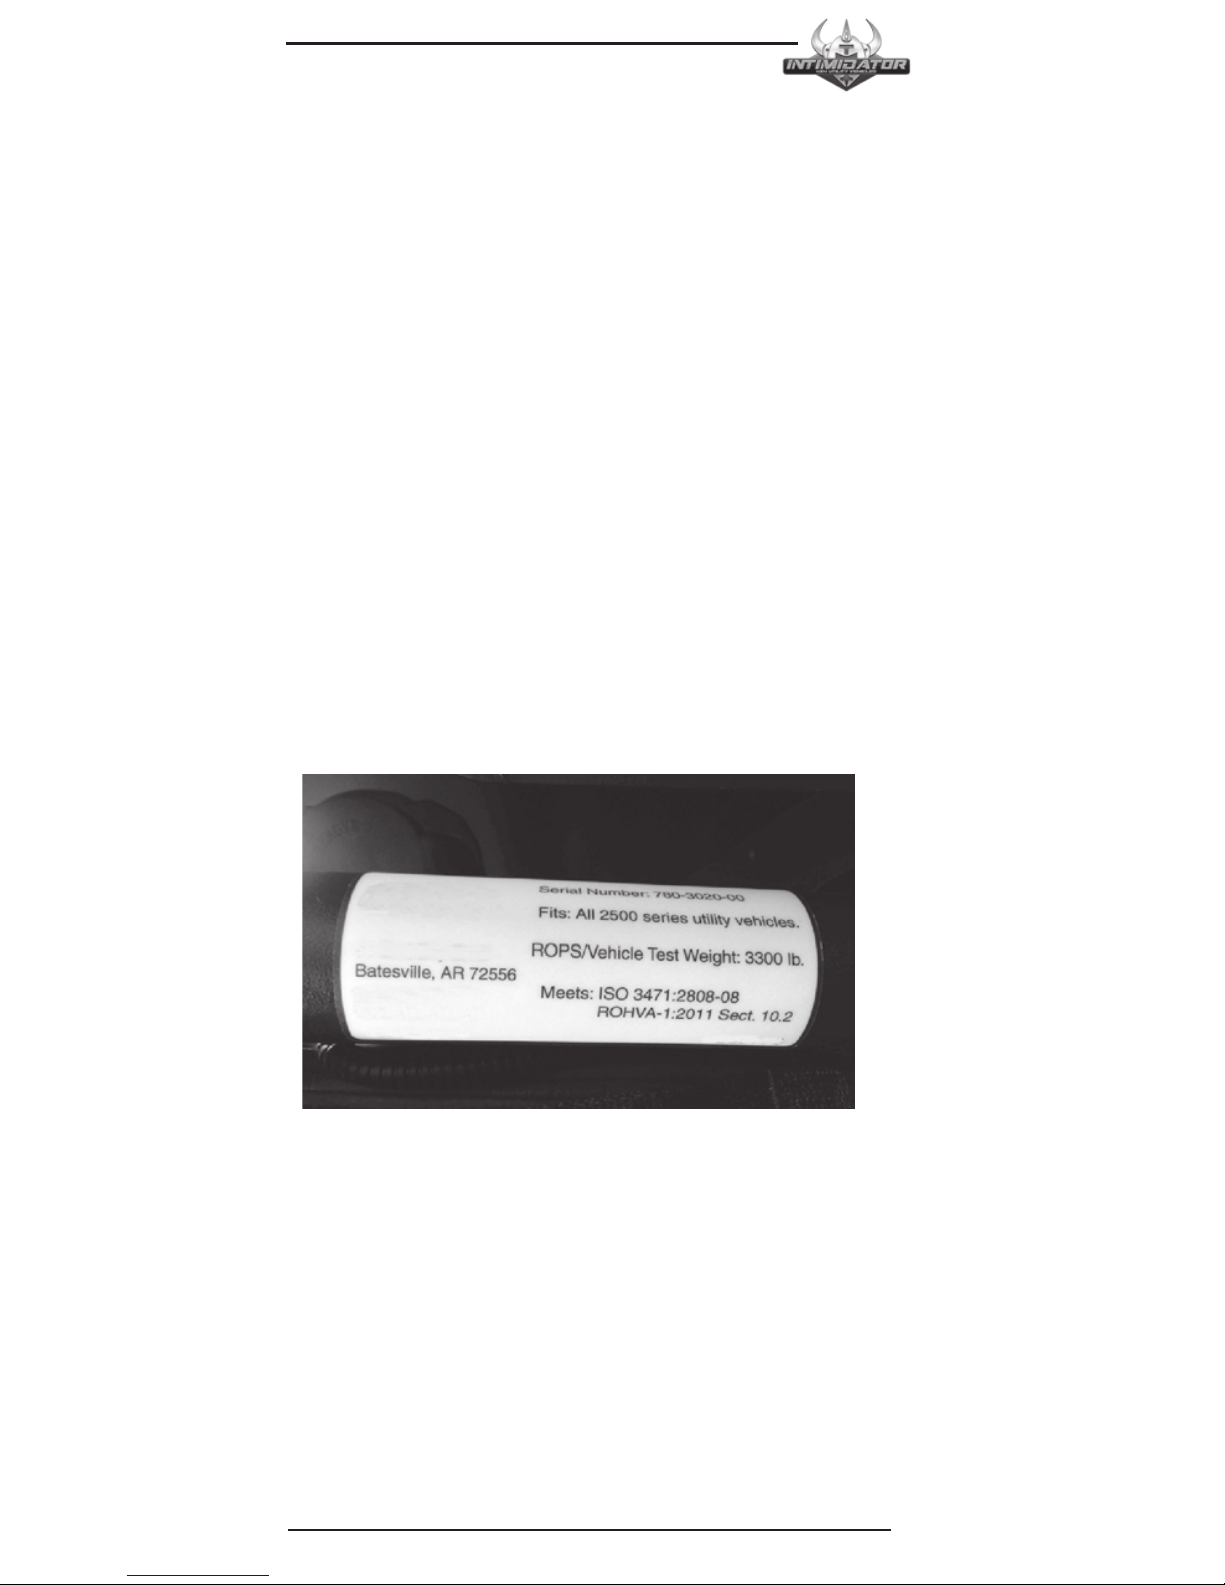
• ROHVA and ISO certification sticker – Located on the
ROPS.
PAGE 7
OWNER’S MANUAL
Cargo Bed Safety Warning– Located in the cargo bed.
Improper use of cargo bed or cage/frame can result in
severe injury or death from loss of control, overturn or
other accidents.
• Never carry passengers in the cargo bed.
• Classic and Truck-Series maximum cargo bed capacity
is 1200 lb.
• Crew-Series maximum cargo bed capacity is 1000 lb.
• Do not exceed 10mph when cargo bed is loaded over
200 lb.
• Inflate tire pressure to pressures stated on tire pressure
label (Page 8).
• Secure cargo so that it will not shift, affecting handling
or cause the cargo to strike occupants.
• Keep cargo weight centered in the bed and low as
possible to reduce the chance of rollover.
• Do not tow or pull objects from any other point on the
vehicle other than the trailer hitch to winch if installed.
• Reduce speed when making turns.
• Avoid steel inclines and tough terrain.
• Read your Owner’s Manual before loading, towing or
pulling objects.
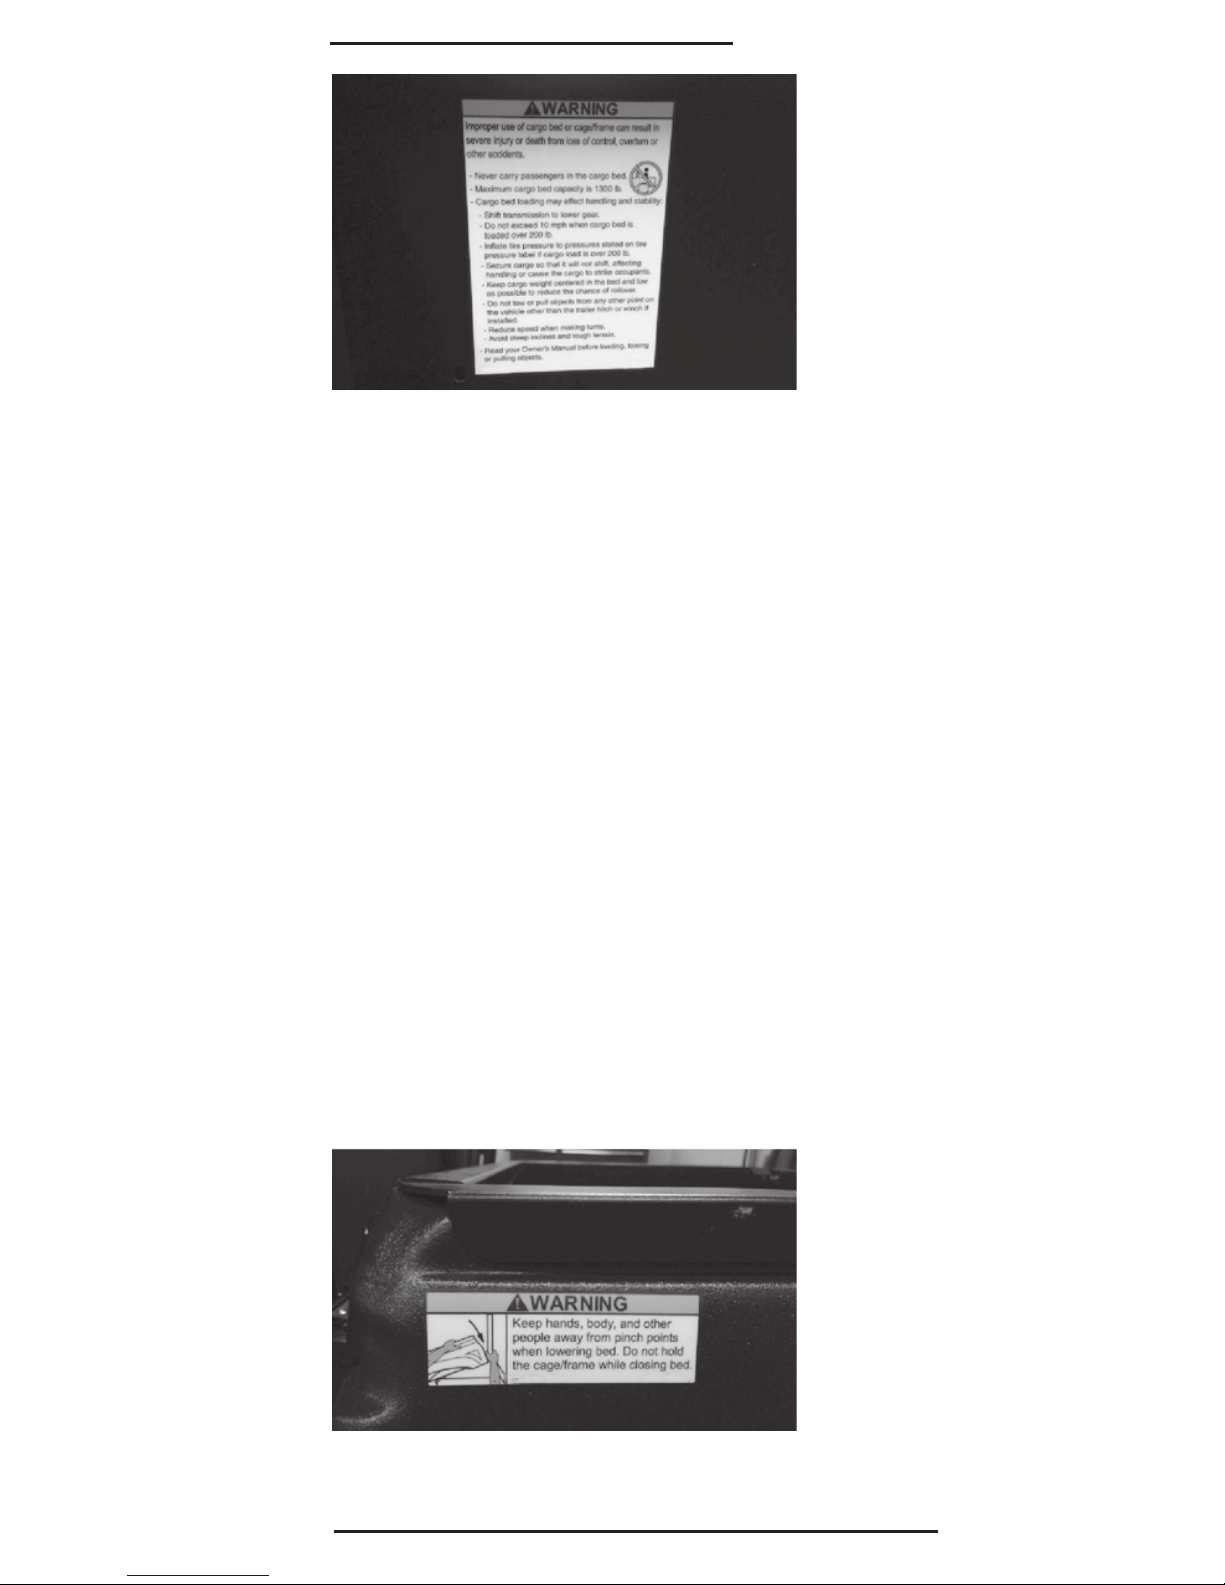
Tilt Cargo Bed Warning – Located near the handle on the
driver’s side of the cargo bed.

PAGE 8
WARNING
Keep hands, body, and other people away from
pinch points when lowering bed.
Do not hold the cage/frame while closing bed.
Tire Pressure Chart
TIRE PRESSURE AND SIZE CHART
Clutch Cover Warning (some 750EFI models only) –
Located on the CVT clutch cover.
WARNING
Cover can become hot during and after operation.
Vehicle Size Load Air Top Speed Rating Max
Position Rating (lb) Pressure (psi) (mph) @ Max Load Payload
Front 27x10R14 750 18 10 Loaded
Rear
27x12R14 1275 22 10
Front 27x10R14 680 12 35 Unloaded
Rear
27x12R14 1000 12 35

PAGE 9
OWNER’S MANUAL
Rollover Protective
Structures (ROPS)
Inspection Guide
Falling Object
Protective Structures
(FOPS) Inspection
ROPS and FOPS, like any other safety device, need to
be periodically inspected to verify that the integrity of
the device has not been compromised through normal
machine use, misuse, age degradation, modifications,
or roll-overs.
Some mechanical discretion is essential, therefore
personnel who inspect ROPS and FOPS need to
comprehend and understand the significance of issues
like structural corrosion, cracks, and deformation.
Conservatism is the essential rule – if in doubt,
remove the machine from service and contact the
ROPS/FOPS manufacturer for assistance. Certain
conditions will absolutely render the ROPS/FOPS
unusable, examples are:
• Permanent deformation or twisting.
• Missing, damaged, or loose mounting hardware.
• Mounting hardware that is of a grade lesser than
specified.
• Any cracks in the structure (structural members
and/or welds).
• Significant corrosion.
• Modifications, i.e. unauthorized welds and holes.
• Missing or unreadable ROPS/FOPS label.
• Applicable ROPS/FOPS/machine model not
specified on the ROPS/FOPS label.
• Vehicles GVW (including attachments, restrained
payload, fuel and operator) in excess of the
maximum weight specified on the ROPS label.
• Missing seatbelts.
• Any unauthorized repair.
• Incomplete/improper installation.

PAGE 10
Other conditions may require imminent service
but may not render the unit immediately unusable,
examples are:
• Faded paint.
• Faded, hard to read ROPS/FOPS label.
• Slightly corroded mounting hardware.
ROPS/FOPS must be inspected immediately after any
type of collision, rollover or impact. If any damage
is evident, the ROPS/FOPS must be removed from
service, repaired and/or replaced.
When a ROPS/FOPS is removed or reinstalled,
mounting hardware must be examined for signs of
over stressing. Damaged mounting hardware must be
replaced with proper specification hardware before
placing the ROPS/FOPS back in service.
Properly maintained seatbelts are essential to
compliment the operator crush protection designed
into the ROPS. All seatbelt and/or seatbelt anchorage
systems that show evidence of cuts, fraying or wear,
significant discolorations due to exposure to the
elements, heavily soiled especially with oil, grease,
or fuel, or any type of damage must be immediately
replaced, regardless of age.
Operators are to be instructed to properly adjust and
use seatbelts at all times.
Make sure all latches are secure and safety cab net is
tight before operating the vehicle.

PAGE 11
OWNER’S MANUAL
GENERAL SAFETY
Never Operate:
• If you are under age 16 or without a valid driver’s
license.
• At speeds too fast for your skills or conditions.
• After or while using Alcohol or Drugs.
• On hills steeper than 15 degrees.
• On public roads or paved surfaces.
• With more than two passengers (five for crew models),
or passengers who are under age 12, or may be too
young to reach grab handles.
• With passengers in cargo box.
• With non-approved accessories or modifications-they
may seriously affect stability.
ALWAYS:
• Wear your seatbelt. Vehicle rollover could cause death
or serious injury.
• Make sure all latches are secure and safety cab net is
tight before operating the vehicle.
• Wear a helmet and eye protection.
• Reduce speed and use extra caution while carrying
passengers.
• Avoid sharp turns or turns while applying heavy
throttle.
• Operate slowly in reverse – avoid sharp turns or
sudden braking.
• Make sure passengers read and understand all safety
labels.
Operator Safety
• Operator and passengers must fasten seatbelt and
both safety cab nets while the vehicle is in use.
Safety cab net must remain tight at all times and not
be damaged. If safety cab net is damaged or shows
significant wear, do not use vehicle until a new safety
net is installed.
• Never operate your vehicle in fast-flowing water or
in water deeper than the floorboard. It may void the
warranty. Wet brakes may have reduced stopping
ability. Test your brakes after leaving water. If
necessary, apply them lightly several times to let
friction dry out the pads.
• Check terrain before attempting to climb a hill. Never

PAGE 12
climb hills with excessively slippery or loose surfaces.
Never open the throttle suddenly or make sudden gear
changes. Never go over the top of a hill at high speeds.
• Always use the proper size and type of tires specified
in this manual. Always maintain proper tire pressure as
specified on safety labels
• Never modify this vehicle through improper installation
or use of accessories
• Never exceed the stated load capacity for this vehicle.
Cargo should be properly distributed and securely
attached. Reduce speed and follow the instructions in
this manual for hauling cargo or pulling a trailer. Allow
greater distance for braking.
• Always put the vehicle in Park before getting out of the
vehicle.
• Always stop the engine before refueling. Remove
flammable material containers from the cargo box
before filling them with fuel. Make sure the refueling
area is well ventilated and free of any source of flames
or sparks. Gasoline is very flammable.
• Always remove the ignition key when the vehicle is
not in use to prevent unauthorized use or accidental
starting.
• Exhaust system components are very hot during and
after use of the vehicle. Hot components can cause
burns and fire. Do not touch hot exhaust system
components. Always keep combustible materials away
from the exhaust system. Use caution when traveling
through tall grass, especially dry grass. Never start the
engine or let it run in an enclosed area.
• Do not carry a passenger until you have at least two
hours of driving experience with the Intimidator.
• Always keep hands and feet inside the vehicle at all
times.
• Always inspect the vehicle before each use to make
sure it’s in safe operating condition. Follow inspection
procedures described in this manual.
Operating a Damaged Vehicle
Operating a damaged vehicle can result in an accident.
In case of an overturn or other accident, have a qualified
service dealer inspect the entire machine for possible
damage, including (but not limited to) brakes, throttle and
steering systems.

PAGE 13
OWNER’S MANUAL
Operating at Excessive Speeds
Operating this vehicle at excessive speeds increases the
operator’s risk of losing control.
Operating on Pavement
This vehicle’s tires are designed for off-road use only,
not for use on pavement. Operating this vehicle on paved
surfaces may cause quick tire wear and may adversely
affect the handling of the vehicle and could result in loss of
control, accident or overturn. Avoid operating the vehicle
on pavement. If it’s unavoidable, travel slowly and avoid
sudden turns or stops.
Turning Improperly
Turning improperly could cause loss of traction, loss
of control, accident or overturn. Always follow turning
procedures for turning. Never turn abruptly or at sharp
angles. Never turn at high speeds. Never abruptly accelerate
while turning.
Jumps and Stunts
Attempting wheelies, jumps and other stunts increase the
risk of an accident or overturn. Never attempt wheelies,
jumps or other stunts. Avoid exhibition driving.
Improper Hill Climbing
Climbing hills improperly can cause loss of control or
vehicle overturn. Do not climb a hill or drive down a hill over
15 degrees.
Stalling While Climbing a Hill
Stalling or rolling backwards while climbing a hill could
cause an overturn. Always maintain a steady speed when
climbing a hill.
If all forward speed is lost:
• Apply the brakes. Place the transmission in reverse and
slowly allow the vehicle to roll straight downhill while
applying light brake pressure to control speed.

PAGE 14
If you begin rolling downhill:
• Never apply engine power. Apply the brakes gradually
until the vehicle is fully stopped. Place the transmission
in reverse and slowly allow the vehicle to roll straight
downhill while applying light break pressure to control
speed.
Improper Tire Maintenance,
Type or Size
Operating this vehicle with improper tire size or type may
void the warranty. See your dealer for details. Operating
this vehicle with uneven or low tire pressure could cause
loss of control or accident. Always use the size and type of
tires specified for your vehicle. Always maintain proper tire
pressure as described in the owner’s manual and on the
safety labels.
Equipment Modifications
We strongly recommend that consumers do not install any
after-market equipment that may increase the speed or
power of the vehicle, or to make any other modifications
to the vehicle for these purposes. Any modifications to the
original equipment of the vehicle create a substantial safety
hazard and increase the risk of bodily injury.
The warranty of the Intimidator will be terminated if any
unauthorized equipment has been added to the vehicle, or
if any modifications have been made to the vehicle, that
increase the speed or power.
The addition of certain accessories, including (but not
limited to) mowers, blades, large tires, sprayers, or large
racks, may change the handling characteristics of the
vehicle. Use only factory approved accessories, and
familiarize yourself with their function and effects on the
vehicle.

PAGE 15
OWNER’S MANUAL
SAFE RIDING GEAR
Always wear appropriate clothing when riding the
Intimidator. Wear protective clothing for comfort and
to reduce the chance of injury.
Helmet
Wearing a helmet can prevent a severe head injury.
Whenever riding the Intimidator or any Utility Vehicle,
always wear a helmet that meets or exceeds established
DOT (U.S. Department of Transportation) safety standards.
Eye Protection
Do not depend on eyeglasses or sunglasses for eye
protection. Always wear shatterproof goggles or use a
shatterproof helmet face shield.
Gloves
Wear gloves for comfort and for protection from sun, cold
weather and other elements.
Boots
Wear sturdy footwear. Do not drive or ride vehicle with bare
feet.
Clothing
Wear long sleeves and long pants to protect arms and legs.
PAGE 16
FEATURES, CONTROLS
and OPERATION
Ignition Key
Your key is a series type key, of which there are a high
range of numbers. It is highly recommended that you
obtain additional copies of your key. If all keys are lost, a
replacement ignition switch must be installed.
Starting the Kohler 1000 Diesel
Diesel vehicles have glow plugs that have to warm up. To
start the diesel engine, turn the ignition on and wait three
seconds before cranking the engine.
Starting the Kohler 750 EFI
For the best throttle response and performance, allow
the gas engine to idle for one minute after each cold start
before giving the vehicle acceleration.
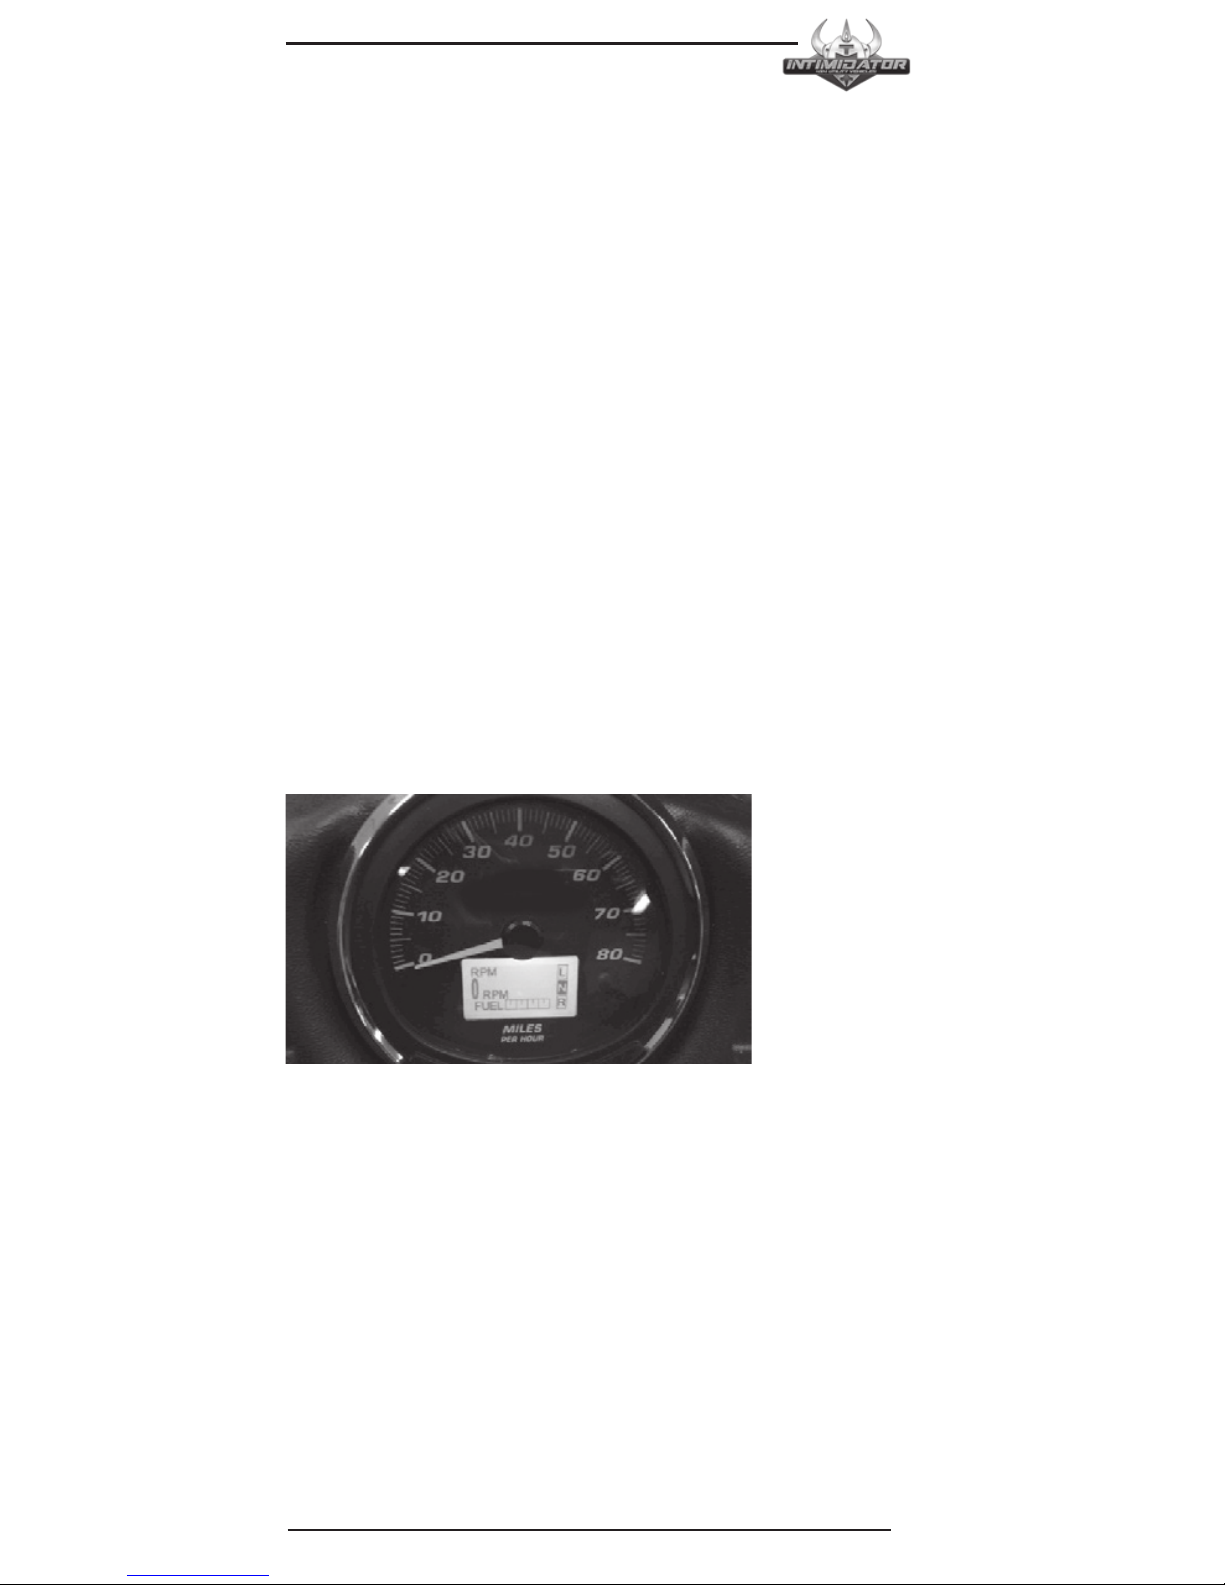
Instrument Cluster
Your Intimidator is equipped with an analog speedometer
and a digital LCD screen. High pressure water or soap
may damage components. The LCD screen will display the
following:
• Seat Belt Reminder
• Gear Indicator – Displays the gear shifter position.
P – Park
R – Reverse
N – Neutral
L – Low Gear
H – High Gear
PAGE 17
OWNER’S MANUAL
• Battery Voltage Meter – Measures the amount of
power in the battery. Normal operating range is
between 12.8 and 14 volts.
• Fuel Gauge – Shows the level of fuel in the fuel tank.
When the tank is full, all bars will be shown black.
• RPM - Engine Revolutions Per Minute.
• Odometer – Displays the overall distance traveled by
the vehicle.
• Engine Hours – Displays the overall hours the engine
has operated.
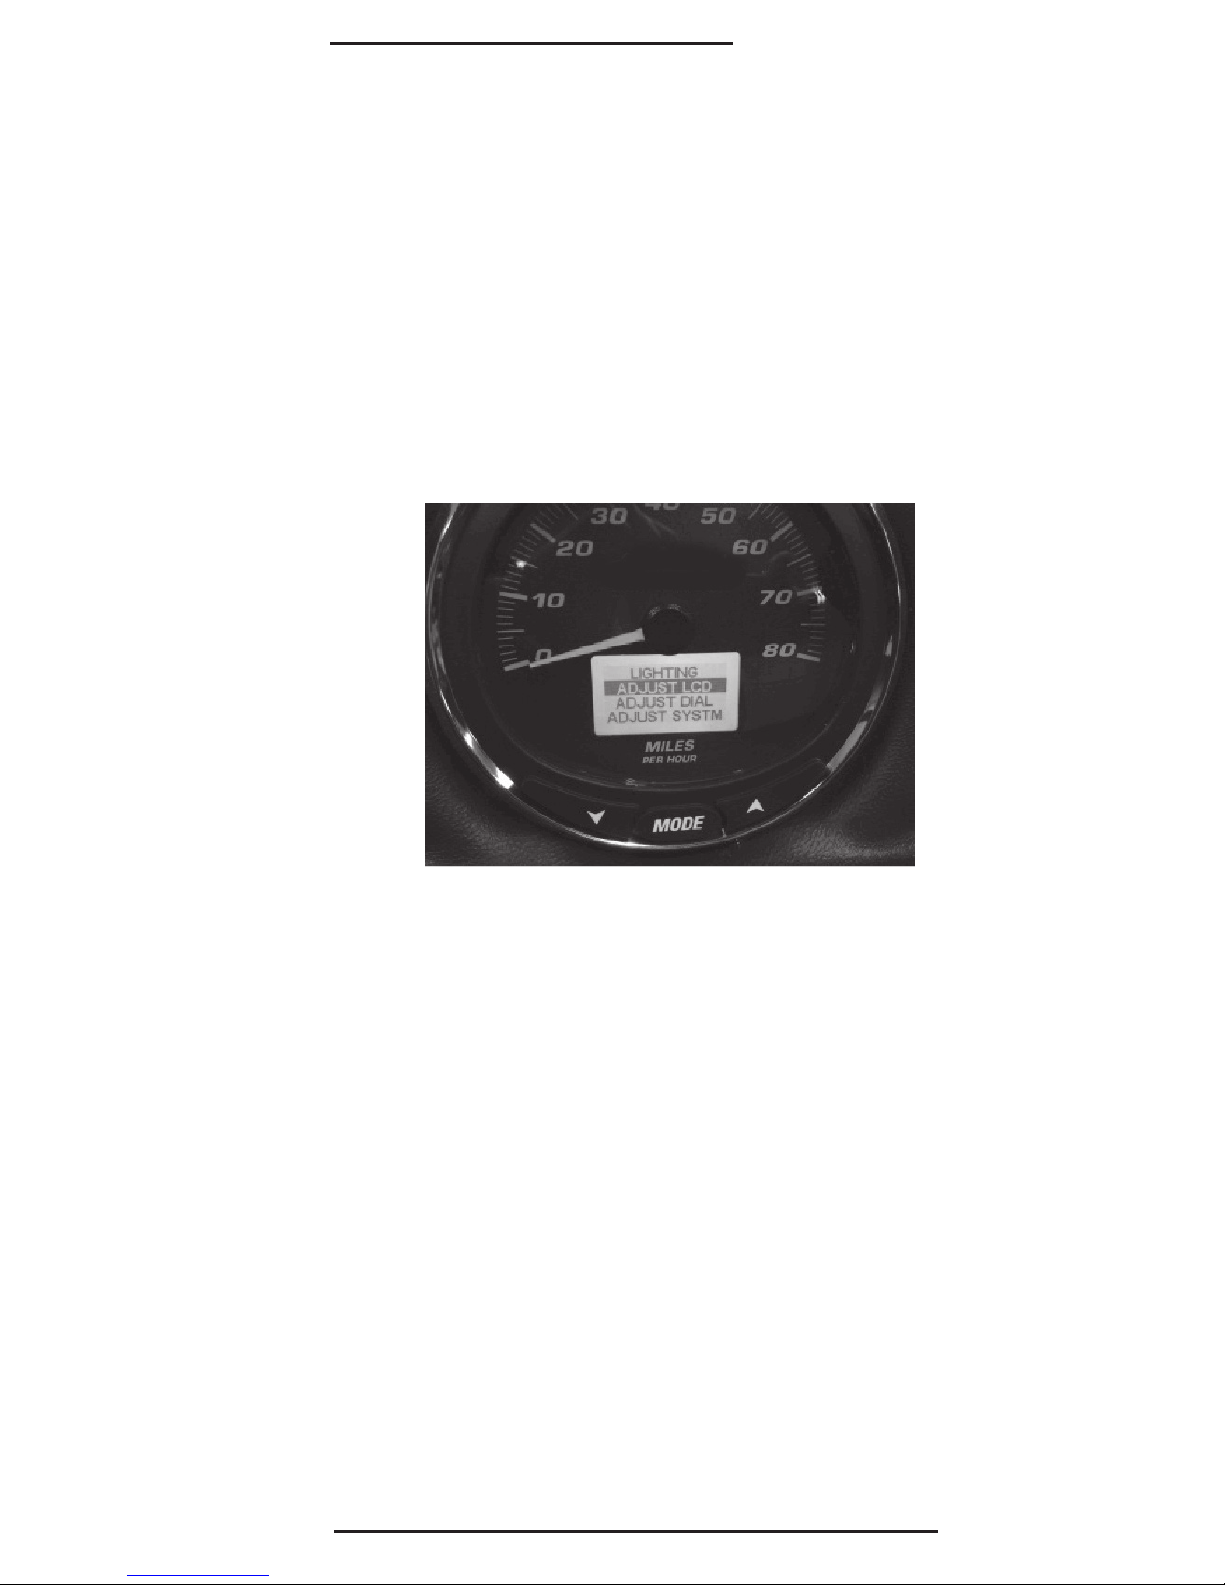
• Menu – Adjust LCD screen brightness.
To adjust the LCD backlight brightness:
• Press the down arrow button until Menu appears.
• Once menu is highlighted, press and hold MODE to
select.
• Scroll down to LCD Display, press and hold MODE to
select.
• Use up or down arrow button to adjust.
• Press and release MODE button to go back and exit.
PAGE 18
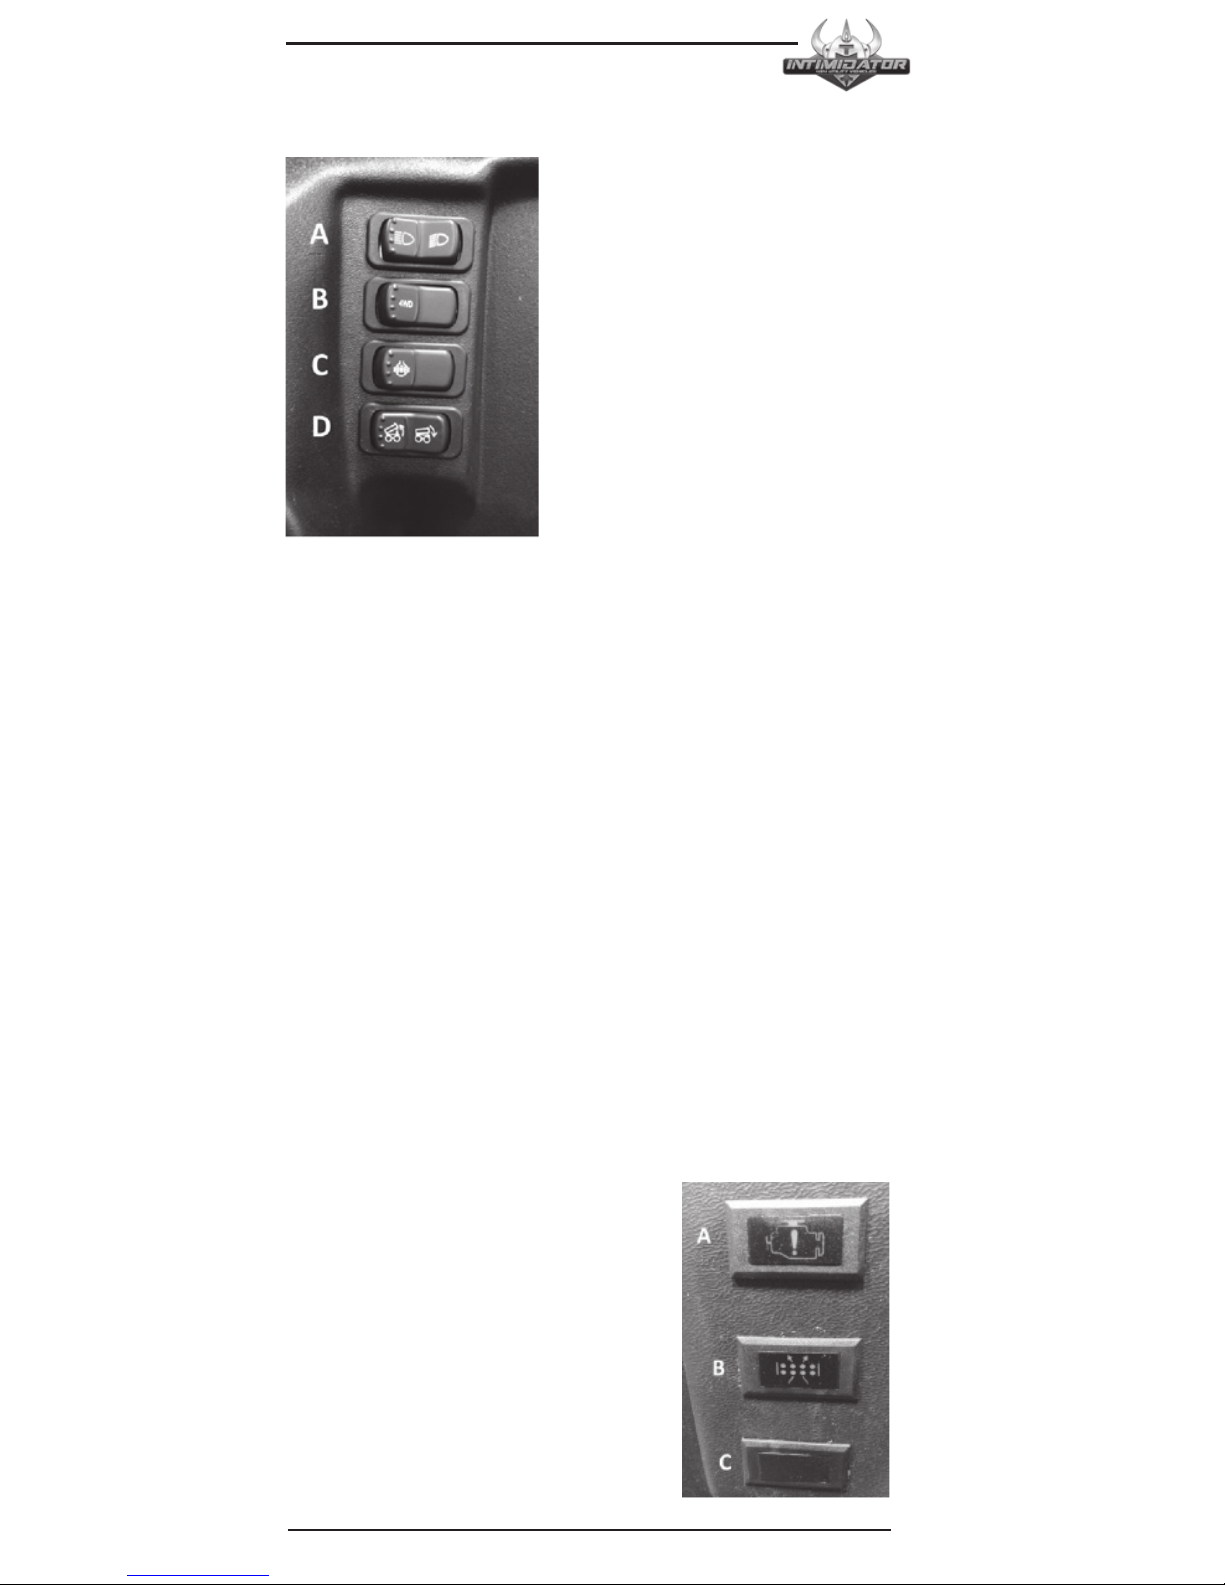
Switches
A - Light Switch
B - 2wd/4wd Switch
C - Locking Rear Differential
D - Electric Dump Bed (If equipped)
Lights
XD4 models are equipped with high beam and low beam
headlights, controlled by a rocker switch on the dash or
on the steering column. On the rocker switch, the middle
position of the switch is off. Press the left side of the
rocker switch to turn on the low beam lights. Press the
right side of the rocker switch to turn on the low and high
beam lights.
Standard Intimidator models are equipped with low beam
headlights. Press the left side of the rocker switch to turn
on the low beam lights. The right side of the rocker switch
position is off.
Dash Lights
A - Oil Pressure light on
Kohler 1000 Diesel.
Check engine and overheat light
on Kohler 750efi
B - Clean or replace air filter
C - Overheat light on Kohler
1000 Diesel

PAGE 19
OWNER’S MANUAL
Engaging and Disengaging 4WD
WARNING:
• Do not drive in 4wd on a paved surface.
• Do not engage 4wd while the rear wheels
are spinning without traction. This may
cause severe drive-shaft and clutch
damage. Always engage 4wd while the
rear wheels have traction or are at rest.
• Engage 4wd before getting into conditions
where front wheel drive may be needed. If
the rear wheels are spinning, release the
throttle before switching to 4wd.
To engage 4wd, press the 4wd dash switch so that the
switch light is illuminated. You may engage 4wd while the
vehicle is moving while taking the precautions mentioned
above.
To disengage 4wd, press the 4wd dash switch so that the
switch light is off. In some situations, the front differential
may remain locked after turning the 4wd switch off. If this
occurs, you may continue to notice increased steering
effort and some vehicle speed restrictions. Perform the
following procedure to unlock the front differential.
1.Stop the vehicle.
2.Operate in reverse for at least 10 feet.
3.Shift into a forward gear and drive.
Locking Rear Differential
The rear differential lock switch is located on the driver’s
side of the dash to the immediate right of the steering
wheel. To engage the differential lock, press the left side
of the switch and the switch light will turn on, meaning the
differential lock is engaged. If one of the rear wheels should
slip, press the switch to turn on the differential lock. Both
wheels will then turn together, reducing slippage.
When the ignition is turned off, the rear differential locker is
automatically engaged.
PAGE 20
DANGER:
• Steering and vehicle performance will be altered with
the rear differential lock engaged.
• Do not operate faster than 10 mph.
• Do not attempt to turn with the differential lock
engaged.
Electric Dump Bed (if equipped)
Press and hold the left side of the rocker switch to dump
the cargo bed. Quickly release the switch when the tilt
height has maxed out or the actuator starts to make a
clicking sound. To lower the bed, press and hold the right
side of the rocker switch. Quickly release the switch when
the bed is down or the actuator starts to make the same
clicking sound.
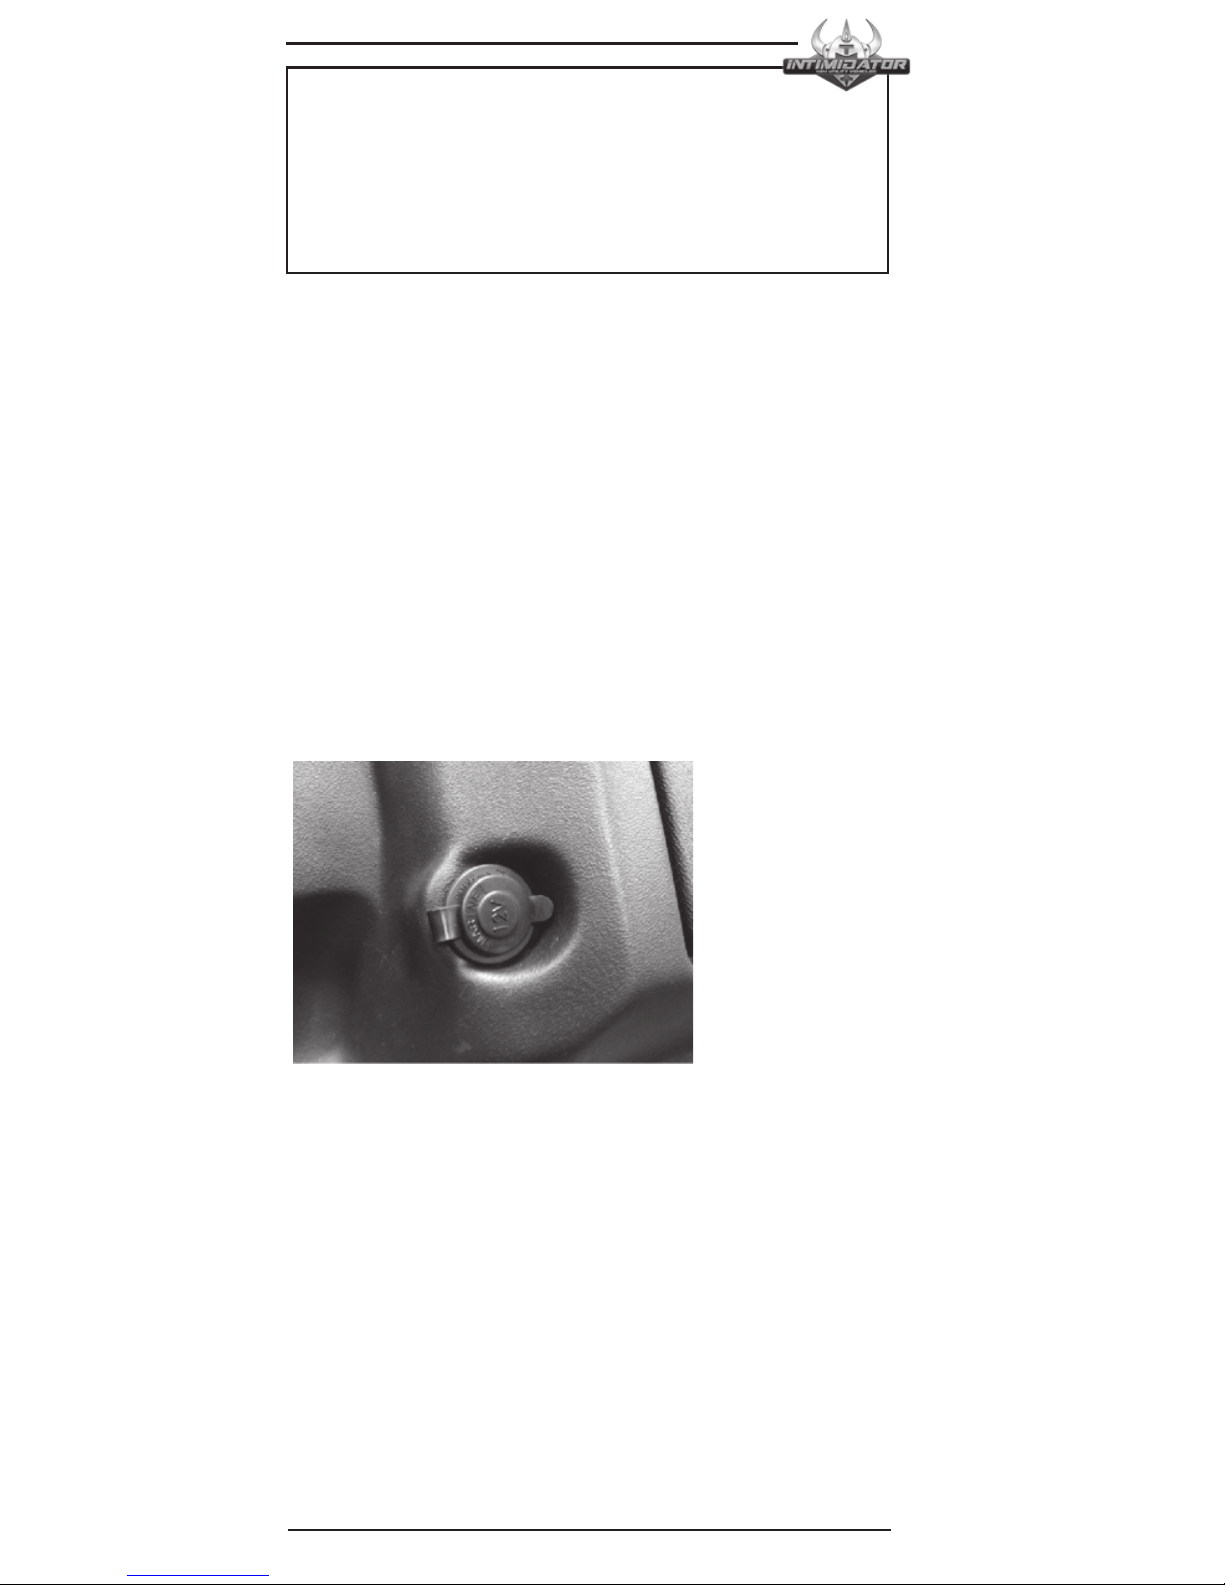
ELECTRICAL
Accessory, 12V Electrical Outlet
The 12 volt receptacle is located on the passenger side of
the dash, left of the glove box.
• This outlet is activated when the key is switch is on the
“ON” position.
• Do not connect any device that draws more than 120
watts to this connector, of the battery may discharge
very rapidly or the outlet may fail.
• Do not use as a cigarette lighter.
• Do not use when wet.
• Unplug accessory when the vehicle key is switched to
the “OFF” position.

PAGE 21
OWNER’S MANUAL
Adding switches and
in-dash accessories
Your Intimidator is designed to allow the dealer add
more switches for accessories and “built-in” accessories
like a GPS or radio in the center of the dash above the
cup holders. The dash has to be modified to fit most
accessories. To minimize the risk of damage to the vehicle,
contact your authorized dealer.
Parking Brake
WARNING: The vehicles gear shift lever comes properly
adjusted from the factory so that the Park gear is fully
engaged and will not slip out of Park. During every pre-ride
inspection, inspect that the gear shift lever is fully engaged
into Park and will not slip out of Park. Have your authorized
dealer annually inspect, lubricate, adjust or replace the
shifter cable.
Your Intimidator is equipped with a Park gear in the
gearbox. While your vehicle is in Park, both rear
wheels will lock, serving as your Parking Brake.
Your vehicles transmission should be engaged in
“P” (Park) at all times when not in use. It is okay to
engage and disengage your vehicle in “P” (Park) on
an incline. If you are hauling or towing heavy loads,
always Park on level ground.
WARNING:
While on an incline, never leave your vehicle at
any time when loaded or hooked to a trailer.
When your vehicle is not in use or key is
switched to the off position, always place the
transmission in “P” (Park).
Always tie down your vehicle with chains or
straps when being transported on a truck or
trailer. Never rely only on the Parking Brake. See
“Transporting your Intimidator” on page 42.
To Engage the Parking Brake
Use the shifter on the right side of steering wheel to
place the vehicles gearbox into Park.

PAGE 22
Rollover Protection
Structure (ROPS)
The Rollover Protection Structure (ROPS) on this vehicle
meets American National Standard Institute (ANSI)
Standards and OSHA standards for rollover performance
requirements. Always have authorize Intimidator, Inc.,
dealer thoroughly inspect the ROPS if it ever becomes
damaged in any way.
No devise can assure occupant protection in the event of a
rollover. Always follow safe operating practices outlined in
this manual to avoid a vehicle rollover.
DANGER:
• Vehicle rollover could cause
serious injury or death. Always
avoid operating in a manner that
could result in vehicle rollover.
• Do not grab or hold ROPS while
vehicle is moving. If a rollover
occurs, holding to the roll cage
could crush your hand.
• Modifying or cutting the ROPS
can cause serious injury or
death.
• Do not add any unauthorized
accessory that bolts into the
ROPS mounting points.
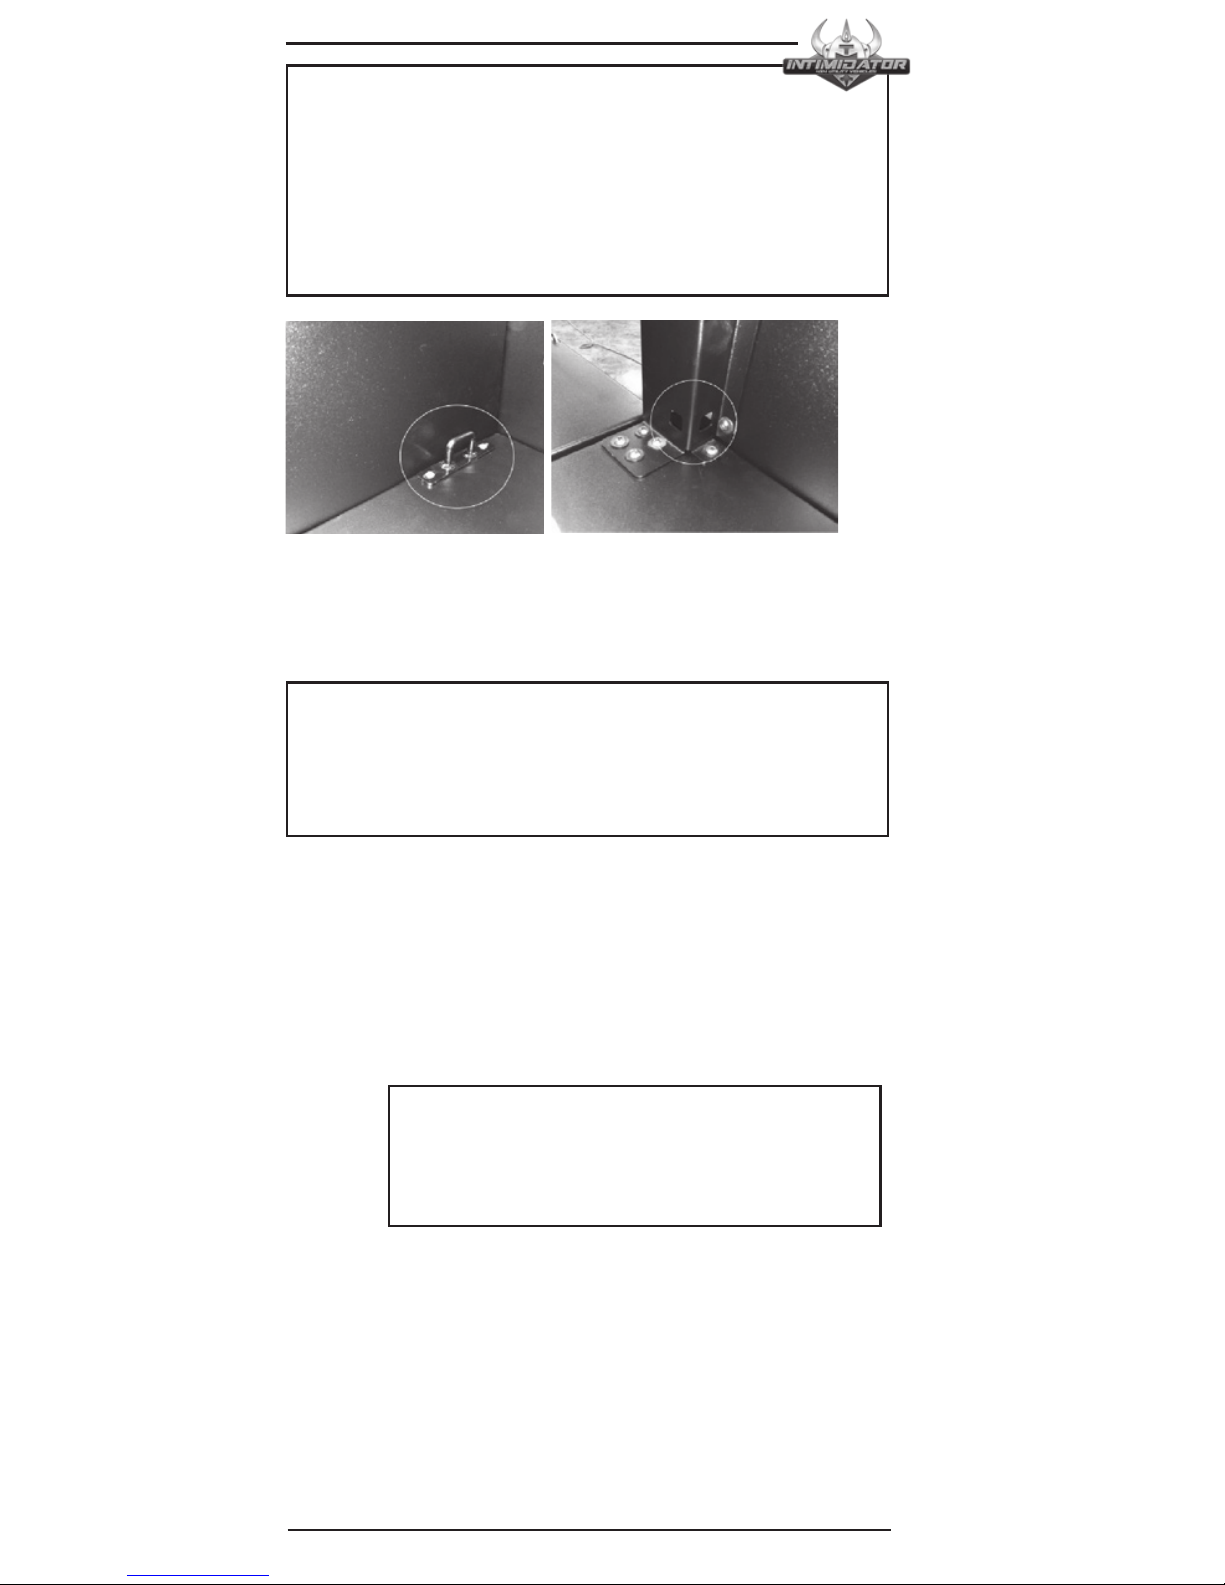
Seat Removal
Pull up on the front of the seat and slide it towards the front
of the vehicle. To install the seat, slide the seat into the rear
of the seat base until the two metal stud attached to the
front of the seat is aligned with the two rubber grommets
attached to the front of the seat base. Push down firmly on
the front of the seat until the studs are fully seated into the
grommets.
PAGE 23
OWNER’S MANUAL
Seat Belts & Safety Cab Nets
DANGER: Falling from a moving vehicle
could result in serious injury or death.
Always fasten your seatbelt and secure the
safety cab net.
DANGER: Riding in this vehicle without using
the factory installed cab nets increases the
risk of serious injury or death in the event of
an accident or overturn. They must be used
by both operator and passengers at all times.
Make sure all latches are secure before
operating the vehicle. Always inspect cab
nets for tightness, wear and damage before
each use.
This vehicle is equipped with 3-point seat
belts for occupants. Always make sure the
seat belts are secured for all riders before
operating.

PAGE 24
Tilt Steering
Your Intimidator is equipped with tilt steering that can be
adjusted by pulling the tilt-steering lever towards you, then
lifting the steering wheel up or down. The tilt steering lever
is located on the steering column, just behind the steering
wheel.
Shifting Gears
The Intimidator is equipped with a gear selection icon,
shown on the instrument clusters digital display. The brake
pedal must be applied in order to start the vehicle and
should be applied while shifting. You must to come to a
complete stop before shifting.
WARNING: The vehicles gear shifter comes properly
adjusted from the factory so that the Park gear is fully
engaged and does not slip out of Park. Have your
authorized dealer annually inspect, lubricate, adjust or
replace the shifter cable.

PAGE 25
OWNER’S MANUAL
Hauling Cargo
DANGER:
Always follow these precautions when
hauling cargo:
• Driving with passengers in the cargo
box can result in severe injury or death.
Never allow passengers to ride in the
cargo box. Passengers must always
ride in the cab with seat belts fastened
securely.
• Hauling cargo improperly can alter
vehicle handling and may cause loss of
control or brake instability, which can
result in serious injury or death.
• Never exceed the maximum weight
capacity of the vehicle. When
determining the weight you are adding
to the vehicle, include the weight of the
operator, passenger, accessories, cargo
loads and the load on the trailer tongue.
The combined weight of these items
must not exceed the maximum weight
capacit y.
• Reduce speed and allow greater
distances for braking when hauling
cargo.
• Always load the cargo box with the load
as far forward and as low as possible.
• When operating over rough or hilly
terrain, reduce speed and cargo to
maintain stable driving conditions
• Always operate the vehicle with extreme
care when hauling or towing loads.
• Slow down and drive in low range if
possible.
• Secure all loads before operating.
• Vehicle should never exceed 10 mph
(16kph) while towing a heavy load on
a level grass surface. Vehicle speed
should never exceed 5 mph (8 kph)
when towing heavy loads in rough
terrain, while cornering, or while
ascending or descending a hill.
PAGE 26
• HEAVY LOADS CAN CAUSE BRAKING
AND CONTROL PROBLEMS. Use
extreme caution when applying brakes
with a loaded vehicle. Avoid terrain or
situations that may require braking
downhill. Allow yourself extra distance
for braking.
Front cargo tie-down point Rear cargo tie-down point
(If equipped)
Dumping the Cargo Box
WARNING:
If the cargo box is loaded to full weight capacity,
it may be difficult to dump.
Use extreme caution.
To use the cargo dump box:
1. Select a level site to dump the cargo box. Do
not attempt to dump or unload the vehicle while
parked on an incline.
2. Apply the brakes. Place the gearbox in Park.
3. Dismount the vehicle.
4. Ensure that the cargo is positioned evenly.
DANGER: If the weight distribution on the box
is located towards the rear of the box when
the release lever is lifted, the box may dump
unexpectedly and cause serious injury.
5. Stand clear and pull the up on the cargo box
release lever, located on the divers-side cargo
box control handle. Lift the front of the cargo
box to dump the cargo.
6. Lower the cargo box and push down securely
to latch.
 Loading...