

interzon AirMaid C Series, AirMaid 500 C, AirMaid 5000 C, AirMaid 2000 C Operation Manual
Operation Manual
AirMaid® C
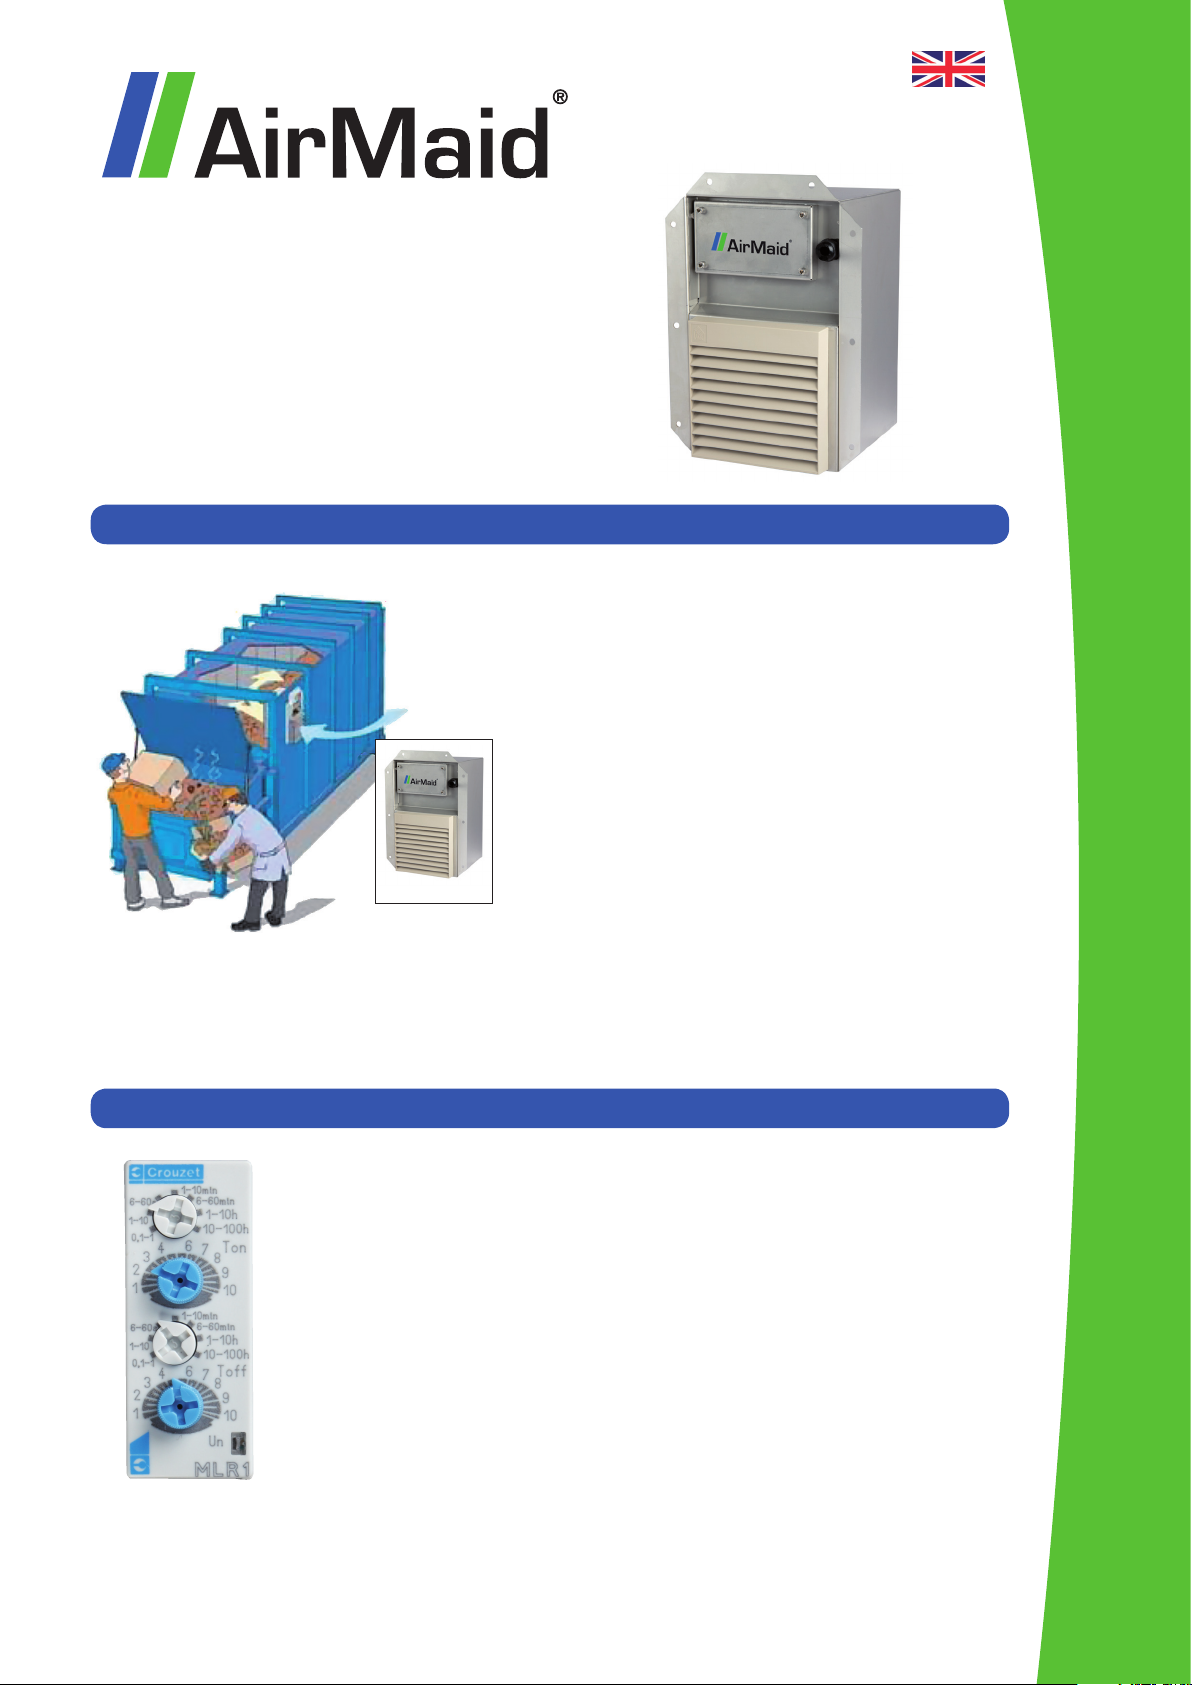
INSTALLATION
The installation of the generator MUST be vertical, like
the gure below. Make sure that the position is safe so
that the generator is not exposed to water or mechanical damage both inside and outside the container.
A typical installation is shown in the picture.
500 C
2000 C
5000 C
Prepare a rectangular hole in the container. Width
should be 185 mm and height 295 mm. Prepare l0xM6
holes according to the layout drawing on the last page
of this manual.
Fix the sealing of NEOPREN rubber around the hole
AirMaid® 2000 C
As standard the generator is delivered with a 5m cable without any connector. An authorized person should connect the cable to a 2-pole safety switch. The outgoing cable from the generator can
be either on the backside or the front side. As standard the cable is xed on the front side.
and install the generator. Make sure that the sealing is
well xed around the generator and x the stainless
steel frame at last with10xM6 screws from the outside.
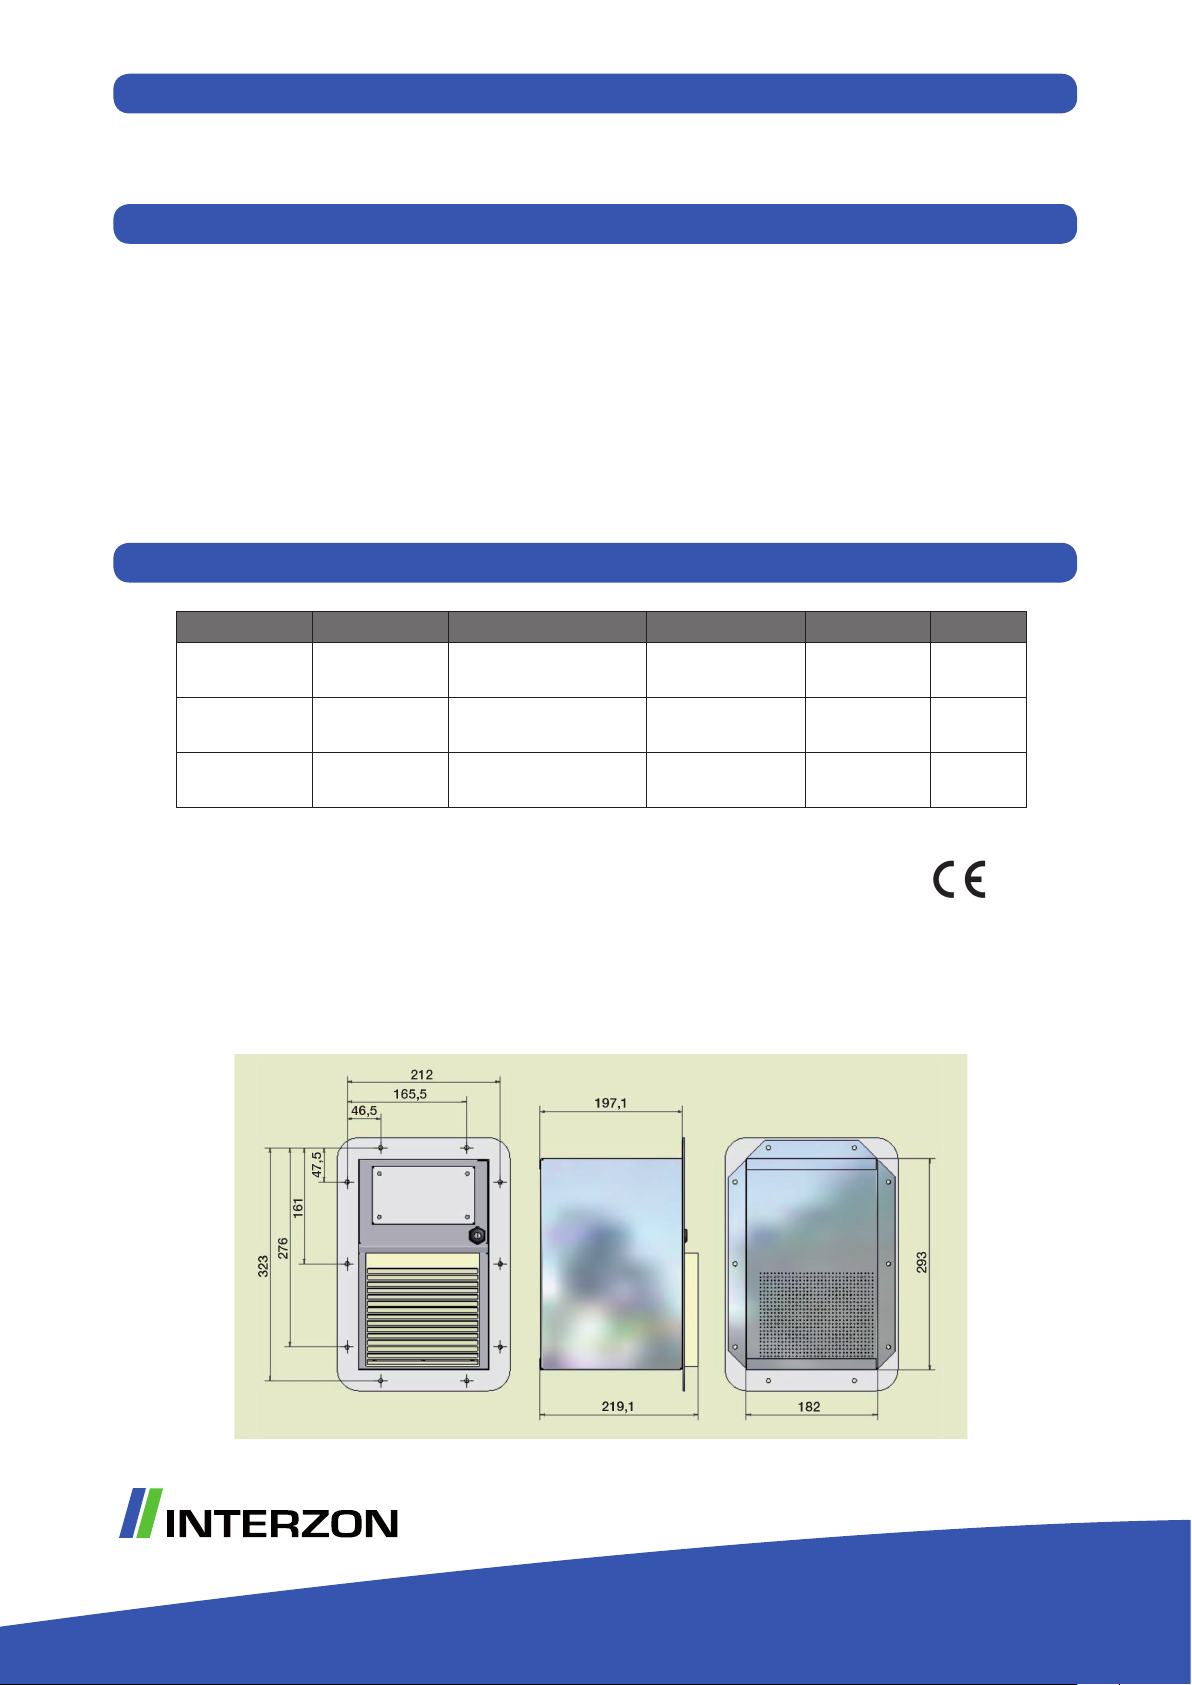
START UP
The ozone generator is equipped with an asymmetrical timer to control the ozone
production.
To adjust the timer the main power has to be switched OFF behind the front
cover. The period of ozone production (ON) can be adjusted TON. The period of
ozone production (OFF) can be adjusted by the TOFF. As standard the settings is
made according to the sample below.
Sample
The settings in the picture are made according to:
TON: 1-10 s TOFF: 0-60s
2 5
Ozone is produced in 2s and then it goes down in 30s. By combining the white knob (period) and
blue knob (range) the time period can be adjusted between 0,1s to 100h.
OPERATING LIMITS
The incoming air to the generator should be as clean as possible. The temperature should be less than 40°C.
SERVICE AND MAINTENANCE
During normal conditions the air lter should be changed at least 2 times per year. If the incoming air is
not clean the changes must be made more often. While changing the lter the main power should be
switched OFF. The frame of the lter is removed and the lter is changed.
Do also check that the fan is running properly and that the glass tubes of the ozone unit are clean from
dust. If the tubes are dirty they should be cleaned with a soft towel in combination with water.
Do never use any sharp tools to clean the glass tubes since they might break.
If the generator is not working properly please contact the manufacturer or the distributor.
TECHNICAL SPECIFICATION
Models Ozone capacity Dimensions Electrical data Fan capacity Material
AirMaid® 500 C 0-500 mg/h
AirMaid® 2000 C 0-2000 mg/h
AirMaid® 5000 C 0-5000 mg/h
WxLxD: 182x293x220mm
Weight: 5,5 kg
WxLxD: 182x293x220mm
Weight: 5,5 kg
WxLxD: 182x293x220mm
Weight: 5,5 kg
Voltage: 230V / 50 Hz
Power: 55W
Voltage: 230V / 50 Hz
Power: 10 0W
Voltage: 230V / 50 Hz
Power: 200W
160m³ / h (ideal) AISI 316
160m³ / h (ideal) AISI 316
160m³ / h (ideal) AISI 316
Reactivity of Ozone
Ozone is a strong oxidation agent and consequently high concentrations of ozone are harmful
to health. The local legislation for the permitted
concentration of ozone should be observed.
Interzon recommends that all persons using the
ozone generator should be familiar with the risks
associated with elevated concentrations of ozone.
Complies with the EMC and the low
voltage directives
For additional information please contact
Interzon AB.
Interzon AB Tel: +46 8 544 444 30
Propellervägen 4A Fax: +46 8 544 444 39
SE-183 62 Täby, Sweden Email: info@interzon.com
Internet: www.interzon.com
 Loading...