

Page 1
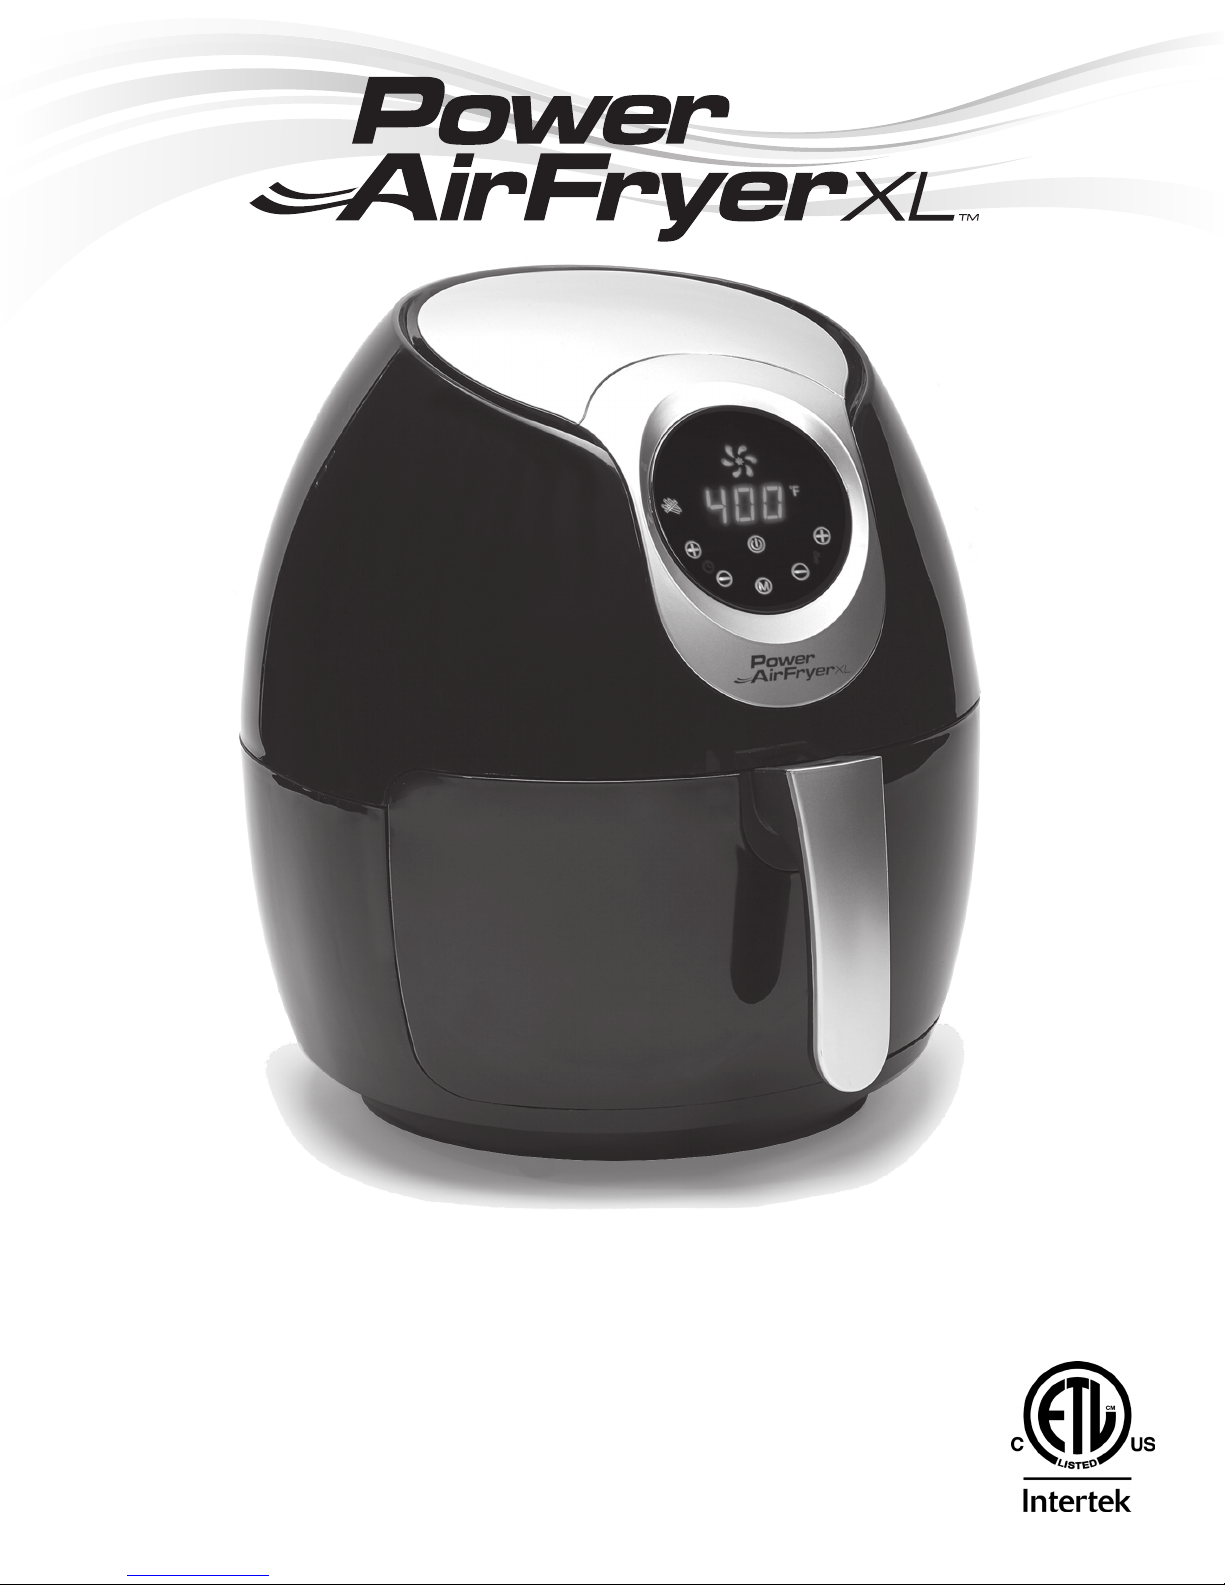
Owner’s Manual
for models: HF-509TS, HF-959TS & HF-196TS
Important: Power AirFryer XLTM Warranty information inside.
FOR HOUSEHOLD USE ONLY
Page 2
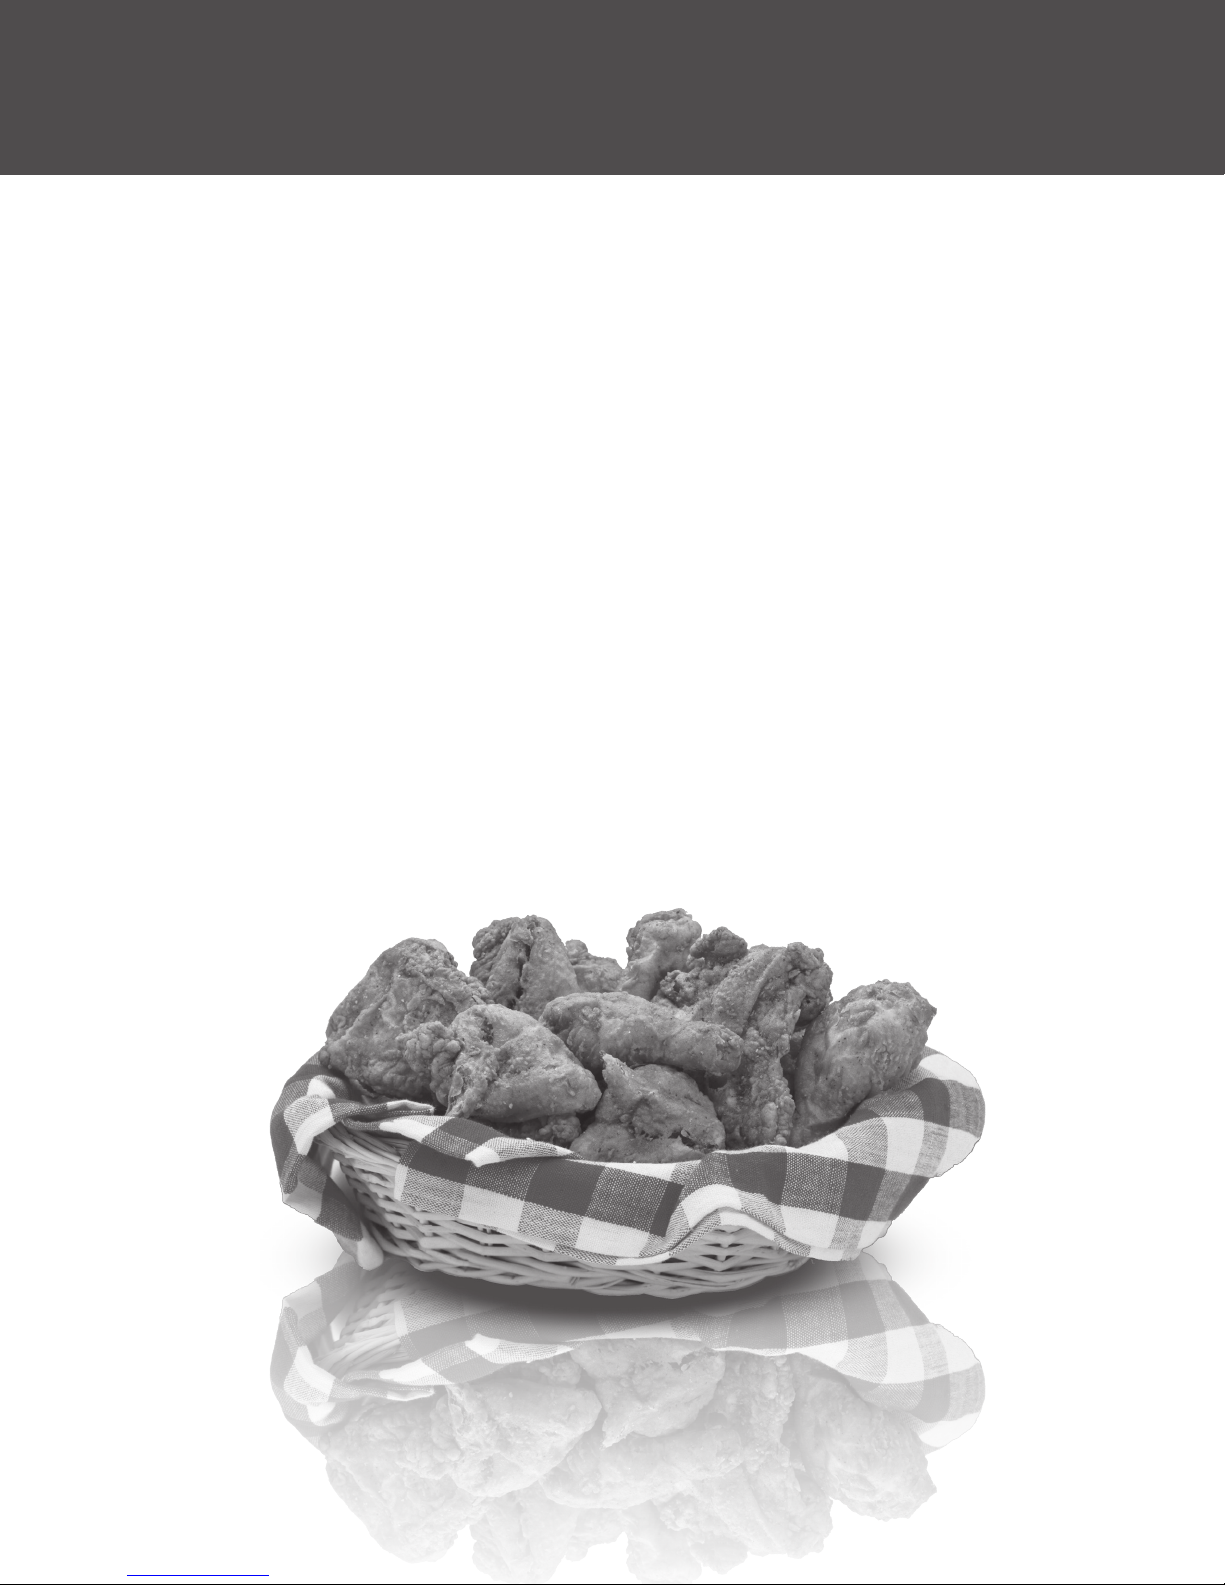
Guilt Free Frying and more...
We all love fried food...
Crispy fried chicken, french fries, coconut shrimp, chicken parmesan, crispy hot wings... the list goes on and
on. Those tasty delights have become part of our everyday diet. Until now, it was impossible to get that great
crunch and avor associated with those foods without frying in deep fat or oil.
Good News!
TM
The New Power AirFryer XL
system that virtually eliminates the oil from the process and replaces it with hot circulating air that surrounds
the food, cooking it to crisp and juicy perfection.
has changed everything. Our culinary design team has perfected a cooking
The Power AirFryer XL
Will not only cook your favorite fried foods, but it also broils and bakes many other favorites like “air fried”
burgers, calzones and doughnuts. It couldn’t be easier! “OneTouch Presets” set the time and temperature
for some of your favorites like crispy shrimp, fries and southern style chicken. You and your family will enjoy
many years of great tasting food and snacks with the Power AirFryer XLTM.
TM
Before you begin
It is very important that you read this entire manual making certain that you are totally familiar with its
operation and precautions.
Page 3

Index
Topic Page
Important Safeguards ..................................................................................................... 1 - 2
Parts & Accessories ..............................................................................................................3
Optional Accessories ............................................................................................................4
Using The Digital Panel ................................................................................................... 5 - 6
General Operating Instructions ....................................................................................... 7 - 8
General Operating Instructions (cont.)
Shaking - Cooking Chart ............................................................................................. 9 - 10
Troubleshooting ..................................................................................................................11
Cleaning & Storage ............................................................................................................12
Comparing The Units .................................................................................................. 13 - 14
Frequently Asked Questions ...............................................................................................15
Manufacturer’s 60 Day Limited Warranty ...........................................................................16
Page 4

Important
When using electrical appliances, basic safety precautions
should always be followed, including:
• READ AND FOLLOW all instructions carefully.
• NEVER IMMERSE the housing, which contains
electrical components and heating elements, in
water. Do not rinse under the tap.
• TO AVOID ELECTRICAL SHOCK, do not put liquid
of any kind into the main Unit housing containing the
electrical components.
• THIS APPLIANCE HAS A POLARIZED PLUG (one
blade is wider than the other). To reduce the risk
of electric shock, this plug is intended to t into a
polarized outlet only one way. If the plug does not t
fully into the outlet, reverse the plug. If it still does not
t, contact a qualied electrician. Do not attempt to
modify the plug in any way.
• MAKE SURE the appliance is plugged into a wall
socket. Always make sure that the plug is inserted
into the wall socket properly.
• TO PREVENT FOOD CONTACT with the heating
elements, do not overll the Fry Basket.
• DO NOT cover the air inlet and outlet openings while
the Power AirFryer XLTM is operating. Doing so will
prevent even cooking and may damage the Unit or
cause it to overheat.
• IF THE POWER CORD IS DAMAGED, you must
have it replaced by the manufacturer, its service agent,
or a similarly qualied person in order to avoid hazard.
• KEEP THE APPLIANCE and its power cord out of
the reach of children when it is in operation or in the
“cooling down” process.
• KEEP THE POWER CORD away from hot surfaces.
Do not plug in the power cord or operate the Unit
controls with wet hands.
• NEVER CONNECT THIS APPLIANCE to an external
timer switch or separate remote-control system.
• NEVER USE THIS APPLIANCE with an extension
cord of any kind.
• DO NOT OPERATE THE APPLIANCE on or near
combustible materials such as tablecloths and curtains.
• WHEN COOKING,
a wall or against other appliances. Leave at least 5” free
space on the back and sides and above the appliance.
Do not place anything on top of the appliance.
• DO NOT USE the Power AirFryer XLTM for any
purpose other than described in this manual.
• NEVER operate the appliance unattended.
do not place the appliance against
• NEVER POUR oil into the Outer Basket. Fire and
personal injury could result.
• WHILE COOKING, the internal temperature of the
Unit reaches several hundred degrees F. To avoid
personal injury, never place hands inside the Unit
unless it is thoroughly cooled down.
• THIS APPLIANCE IS NOT INTENDED FOR
use by persons with reduced physical, sensory,
or mental capabilities, or lack of experience and
knowledge, unless they are under the supervision
of a responsible person or have been given proper
instruction in using the appliance. This appliance is
not intended for use by children.
• DO NOT use this Unit if the plug, the power cord or
the appliance itself is damaged in any way.
1
• WHEN IN OPERATION, hot steam is released
through the air outlet openings. Keep your hands and
face at a safe distance from the air outlet openings.
Also avoid the hot steam and air while removing the
Outer Basket and Fry Basket from the appliance.
• THE UNIT’S OUTER SURFACES may become hot
during use. The Outer Basket and Fry Basket will be
hot... wear oven mitts when handling hot components
or touching hot surfaces.
• SHOULD THE UNIT EMIT BLACK SMOKE, unplug
immediately and wait for smoking to stop before
removing Outer and Fry Baskets.
Page 5

Safeguards
C A U T I O N
• Always operate the appliance on a horizontal
surface that is level, stable and noncombustible.
• This appliance is intended for normal household
use only. It is not intended for use in commercial
or retail environments.
• If the Power AirFryer XLTM is used improperly or for
professional or semi-professional purposes or if it
is not used according to the instructions in the user
manual, the warranty becomes invalid and we will
not be held liable for damages.
• Always unplug the appliance after use.
• Let the appliance cool down for approximately
30 minutes before handling, cleaning or storing.
• Make sure the ingredients prepared in this Unit
come out cooked to a golden-yellow color rather
than dark or brown. Remove burnt remnants.
• The Power AirFryer XLTM is equipped with an
internal micro switch that automatically shuts down
the fan and heating element when the Outer Basket
is removed.
ELECTRIC POWER
If the electrical circuit is overloaded with other
appliances, your new Unit may not operate properly.
It should be operated on a dedicated electrical circuit.
OVERHEATING PROTECTION SYSTEM
Should the inner temperature control system fail,
the overheating protection system will be activated
and the Unit will not function. Should this happen,
unplug the power cord, allow time for the Unit to cool
completely before restarting or storing.
ELECTROMAGNETIC FIELDS (EMF)
This appliance complies with all standards regarding
electromagnetic elds (EMF). If handled properly and
according to the instructions in this user manual, the
appliance is safe to use based on scientic evidence
available today.
AUTOMATIC SWITCH-OFF
The appliance has a built-in timer and will
automatically shut down when the countdown
reaches zero. You can manually switch the appliance
off by pressing the timer buttons until it shows zero
or by pressing the cancel button one time. In either
case, the appliance will automatically shut down
within 20 seconds.
SAVE THESE INSTRUCTIONS.
FOR HOUSEHOLD USE ONLY.
2
Page 6
Power AirFryerTM XL Parts
IMPORTANT: Your Power AirFryer XLTM has been shipped with the components shown below. Check everything
carefully before use. If any part is missing or damaged do not use this product and contact shipper using the
customer service number located in the back of this owner’s manual.
1. Fry Basket
2. Basket Release Button
3. Basket Handle
4. Outer Basket
1
6
5. Outer and Fry Basket Assembly
6. Food Separator Insert
7. Air Intake Vent
8. Digital Control
3
9. Air Outlet Vent
10. Main Unit Housing
4
3
5
Page 7

2
CAUTION: Never push Basket Release Button unless Fry Basket
and Outer Basket are resting on a level, heat-resistant surface.
When removing fry Outer Fry Basket, be careful not to press the Basket
Handle button. Outer Basket will seperate from Fry Basket.
7
Top View
Back View
9
10
8
Front View
4
Page 8

Using The Digital Control Panel
10
2
3
7
8
9
15
1
14
11
12
13
4
5
6
Control Panel for 3.4 Qt. & 5.3 Qt. Power AirFryerXL (2.4 Qt. is shown on page 13-14).
Button 1 - Power Button
Once the Outer Basket and Fry Basket are properly placed in the main Unit housing, the Power Button will
be illuminated. Selecting the Power Button one time will set the Unit to a default temperature of 370° F,
and the cooking time will be set to 15 minutes. Selecting the Power Button a second time will start the
cooking process. Pressing the power button during the cooking cycle will turn the unit off. The red light will
turn off, the blue fan light will continue to spin, for 20 seconds.
Buttons 2 & 3 - Timer Control Buttons
The + and - symbols enable you to add or decrease cooking time, one minute at a time. Keeping the button
held down will rapidly change the time.
Buttons 4 & 5 - Temperature Control Buttons
The + and - symbols enable you to add or decrease cooking temperature 10°F at a time. Keeping the button
held down will rapidly change the temperature. Temperature Control range: 180°F – 400°F.
5
Page 9

6. Button 6 - Preset Button
Selecting the “M” Preset Button enables you to scroll through the seven popular food choices.
Once selected, the predetermined time and cooking temperature function begins.
Note: You can override the preset function by increasing or decreasing time and temperature manually.
7 - 13. Buttons 7 through 13 - Preset Choices
Seven presets to choose from including: fries, chops and other smaller cuts of meat, shrimp, baked goods,
chicken, steak and sh.
14. Time and Temperature
This display will keep track of the temperature and remaining cook time.
15. Spinning Fan Display
The spinning fan display will appear when the Unit is turned on and for up to 20 seconds after it is turned off.
A red, star-shaped LED will appear in the center of the fan when the Unit is in “cook” or “preheat” mode.
PRESET BUTTON COOKING CHART
PRESET BUTTON TEMPERATURE TIME
French Fries 400°F 20 min
Roasts 370°F 15 min
Shrimp 330°F 15 min
Baked Goods 350°F 25 min
Chicken 380°F 25 min
Steak 380°F 25 min
Fish 390°F 25 min
Cooking with the Power AirFryer XLTM Without Presets
Once you are familiar with the Power AirFryer XLTM you may want to experiment with your own recipes. You do
not need to select a preset function. Simply choose the time and temperature that suits your personal taste.
Preheating the Power AirFryer XL
You may preheat the Unit for more efcient cooking simply by selecting a cook time of 2 or 3 minutes and cook at
the default or higher temperature. For preheating, you will need to insert the empty Fry Basket and Outer Basket
into the Unit housing.
Never ll the Outer Basket with cooking oil or any other liquid!
Fire hazard or personal injury could result.
TM
WARNING:
6
Page 10

General Operating Instructions
Before using the Power AirWave Fryer XLTM for the rst time...
Remove all packing materials, labels and stickers, then wash the Outer and Fry Basket with warm soapy water.
The Outer and Fry Basket are also dishwasher safe. Wipe the inside and outside of the cooking Unit with a clean
moist cloth. Never wash or submerge the cooking Unit in water. Never ll the Outer Basket with oil... this Unit
cooks with hot air only.
Preparing for use
• Place the appliance on a stable, level,
horizontal and heat resistant surface.
• Place the Fry Basket in the Outer
Basket properly.
• Slide the Fry Basket into the cooking Unit until it
“clicks” into place.
Note: The Unit will not work unless the Fry Basket
is inserted properly.
• Plug the power cord into the 110V,
dedicated outlet.
NEVER:
• Put anything on top of the appliance.
• Cover the air vents on the top and back of the
cooking Unit.
A Versatile Appliance
The Power AirWave Fryer XLTM is designed to cook a wide variety
of your favorite foods. The charts and tables provided within this
manual and the Recipe Guide will help you get great results.
Please refer to this information for proper time/temperature settings
and proper food quantities.
7
Page 11

Time to Fry “Hot Air” Style...
When removing the Outer Basket you may feel slight
resistance. Place your hand on top of the Unit and pull gently
on the Outer Basket.
CAUTION: WHEN REMOVING OUTER BASKET,
BE CAREFUL NOT TO PRESS THE BASKET
HANDLE BUTTON. OUTER BASKET WILL
SEPARATE FROM FRY BASKET.
WARNING:
Wear an oven mitt on the hand you use to hold the Unit in place.
Place the ingredients in the Fry Basket (g. A).
Note: Never ll the Fry Basket above the recommended amount
as this could affect the quality of the end result or interfere with
the electric heating coils.
Slide the Fry Basket back into the until it “clicks” in place, (g. B).
Never use the Outer Basket without the Fry Basket.
Caution: During the cooking process, the Outer Basket will
become very hot. When you remove it to check on the progress,
make sure you have a heat resistant surface nearby to set it
down on.
1. When the Fry Basket and food is securely in place, press the
Power Button once (page 5 g.1).
2. Select a Preset function using the “M” Button (page 5 g. 6)
or manually set the Temperature and then the Time
(page 5 gs. 2,3,4,5).
3. Press The Power Button (page 5 g. 1) once and the Power
AirWave Fryer XLTM will cycle through the cooking process.
Note: You may remove the Fry Basket at any time during the
process to check the progress. If you wish to preheat the Unit,
see instructions on page 6.
Because the rapid hot air technology instantly reheats the air
inside the appliance, pulling the Outer Basket briey out of the
appliance during hot air frying barely disturbs the process.
B
A
Consult the Charts in this manual or the Recipe Guide to
determine the correct settings.
8
Page 12

General Operating Instructions
Shaking...
To insure even cooking, some foods require “shaking” during the
2
cooking process. To do this, simply remove the Outer Basket and
Fry Basket from the Unit... gently shake the contents as needed
and place back in Unit to continue cooking. For heavier foods, you
might want to separate the Fry Basket from the Outer Basket before
shaking. To do this, place the assembled Outer Basket and Fry
Basket on a heat resistant surface. Press the Release Button (g.2)
and gently lift the Fry Basket. Shake ingredients, place the Fry
Basket in the Outer Basket and return it to the Unit to nish cooking.
Caution: The Outer Basket will be hot... wear an oven mitt
during this procedure.
Tip: Set the Timer to 1/2 the time needed for the recipe and the
Timer bell will alert you when it’s time to “shake”.
When you hear the timer bell, the pre-set preparation time has
elapsed. Pull the Outer Basket out of the appliance and place it on
a heat-resistant surface.
To remove ingredients (i.e., fries), place the Fry Basket on a heat
resistant-surface, press the Release Button (g.2) and lift the
Fry Basket out of the Outer Basket. Turn the Fry Basket over and let
the ingredients fall on a plate. Use nonabrasive utensils to remove
larger foods.
Do not turn the Fry Basket upside down with the Outer Basket still
attached... excess oil that has collected on the bottom of the Outer
Basket will leak onto the food.
When a quantity of food is cooked, the Unit is instantly ready for
preparing another batch.
Settings
• The table on the right will be help you select the correct temperature and time for best results. As you become
more familiar with the Power AirWave Fryer XLTM cooking process, you may adjust these settings to suite your own
personal tastes.
• Because the rapid hot air technology instantly reheats the air inside the appliance, pulling the Fry Basket briey out
of the appliance during hot air frying barely disturbs the process.
Tips
• Foods that are smaller in size usually require a slightly shorter cooking time than larger ones.
• Large quantities of food only require a slightly longer cooking time than smaller quantities.
• “Shaking” smaller sized foods halfway through the cooking process, assures that all the pieces are evenly fried.
• Adding a bit of vegetable oil to fresh potatoes is suggested for a crispier result. When adding a little oil,
do so just before cooking.
9
Page 13

• Snacks normally cooked in an oven can also be cooked in the Power AirWave Fryer XL
• Use pre-made dough to prepare lled snacks quickly and easily. Pre-made dough also requires a shorter
cooking time than homemade dough.
• Place a baking tin or oven dish in the Fry Basket when baking a cake or quiche. A tin or dish is also
suggested when cooking fragile or lled foods.
• You can use the Power AirWave Fryer XLTM to reheat foods. Simply set the temperature to 300°F for up to 10 minutes.
TM.
FOOD ITEM
Thin frozen fries
Thick frozen fries
Homemade fries
Homemade potato wedges
Homemade potato cubes
Hash browns
Potato gratin
Steak
Pork chops
Hamburger
Sausage roll
Chicken drumsticks
Chicken breast
Spring rolls
MIN-MAX
(cups or lb)
1 ¼ - 3 cups
1 ¼ - 3 cups
1 ¼ - 3 ¼ cups
1 ¼ - 3 ¼ cups
1 ¼ - 3 cups
1 cup 15-18 360 YES
2 cups 15-18 400
¼ -1.1 lb
¼ -1.1 lb
¼ -1.1 lb
¼ -1.1 lb
¼ -1.1 lb
¼ -1.1 lb
¼ - 3/4 lb
TIME*
(Minutes)
15-16 400 YES
15-20 400 YES
10-16 400 YES
18-22 360 YES
12-18 360 YES
8-12 360
10-14
7-14
13-15 400
18-22
10-15
15-20
TEMP °F
360
360
360
360
400
SHAKE
YES
COMMENTS
Add ½ Tbsp. oil
Add ½ Tbsp. oil
Add ½ Tbsp. oil
Use oven-ready
Frozen chicken nuggets
Frozen sh sticks
Mozzarella sticks
Stuffed vegetables
Cake
Quiche
Mufns
Sweet snacks
The table above will help you choose the basic settings for the ingredients selected.
*Add 3 minutes to cooking time when starting with a cold appliance.
Note: Keep in mind that these settings are indications. As ingredients differ in origin, size, shape and brand,
we cannot guarantee the best settings for your ingredients.
¼ -1.1 lb
¼ -1.1 lb
¼ -1.1 lb
¼ -1.1 lb
1 ¼ cups
1 ½ cups
1 ¼ cups
1 ½ cups
10-15
6-10
8-10
10
20-25 320
20-22
15-18
20 320
400
400
360
320
360
400
YES
Use oven-ready
Use oven-ready
Use oven-ready
Use baking tin
Use baking tin/
oven dish
Use baking tin
Use baking tin/
oven dish
10
Page 14

Troubleshooting
PROBLEM POSSIBLE CAUSE SOLUTION
The appliance is not plugged in.
You have not turned the Unit
on, set the preparation time, or
The AIR FRYER does
not work
temperature.
You have probably turned off the
Unit. lf you pressed the Power
button while the Unit is cooking it
will trigger the “shut down” mode.
Plug power cord into wall socket.
Press the Power On button.
Select a Preset or select
Time and Temperature. Press
Power button again and cooking
will begin.
Press the Power On button.
Select a Preset or select
Time and Temperature. Press
Power button again and
Cooking will begin.
Food not cooked
Food is not fried evenly
Outer Basket won’t slide
into Unit properly
White smoke
coming from Unit
The Fry Basket is overloaded.
The temperature is set too low.
Some foods need to be “shaken”
during the cooking process.
Fry Basket is overloaded.
Fry Basket is not placed in Outer
Basket correctly.
Too much oil being used.
Outer Basket has grease residue
from previous cooking.
Use smaller batches for more
even frying.
Use the Temperature + button
(page 5 g. 4 ) to raise the
temperature and continue cooking.
See pages 9 and 10 in
this manual.
Do not ll the Fry Basket above the
MAX level. (see chart page 10).
Gently push Fry Basket into
Outer Basket until it “clicks”.
Foods heavy with oil will cause
dripping in the Outer Basket. Oil in
the Outer Basket will smoke having
no effect on the Unit or the food.
Clean Outer Basket after each use.
Fresh fries are
not fried evenly
Fries are not crispy
11
Wrong type of potato being used.
Potatoes not rinsed properly
during preparation.
Raw fries have too much water.
Use fresh, rm potatoes.
Use cut sticks and pat dry to
remove excess starch.
Dry potato sticks properly
before adding oil.
Cut sticks smaller.
Add a bit more oil.
Page 15

Frequently Asked Questions
Frequently Asked Questions
1. Can I prepare foods other than fried dishes with my Power AirWave Fryer XLTM ?
You can prepare a variety of dishes including steaks, chops, burgers and baked goods.
See the Power AirWave Fryer XLTM Recipe Guide.
2. Is the Power AirWave Fryer XLTM good for making or reheating soups and sauces?
Never cook or reheat liquids in the Power AirWave Fryer XLTM .
3. Is it possible to shut off the Unit at any time?
Press the Power button once or remove the Outer Basket.
4. What do I do if the Unit shuts down while cooking?
As a safety feature the Power AirWave Fryer XLTM has an auto shut off device that prevents
damage from overheating. Remove the Outer Basket and set it on a heat resistant surface. Allow
the Unit to cool down. Remove the power cord from the outlet. Restart with the Power button.
5. Does the Unit need time to heat up?
If you are cooking from a “cold start,” add 3 minutes to the cook time to compensate.
6. Can I check the food during the cooking process?
You can remove the Outer Basket at any time while cooking is in progress. During this time you
can “shake” the contents in the Fry Basket if needed to insure even cooking.
7. Is the Power AirWave Fryer XLTM dishwasher safe?
Only the Fry Basket and the Outer Basket are dishwasher safe. The Unit itself containing the
heating coil and electronics should never be submersed in liquid of any kind or cleaned with
anything more than a hot moist cloth or nonabrasive sponge with a small amount of mild detergent.
8. What happens if the Unit still does not work after I have tried all
the troubleshooting suggestions?
Never attempt a home repair. Contact the manufacturer and follow the procedures set forth by the
warranty. Failure to do so could render your warranty null and void.
12
Page 16

Comparing The Units
Model Number Features Digital Control Panel Built-In Presets
HF-196TS - 5.3 Quart
HF-959TS - 3.4 Quart
• Digital Easy-Touch Panel
• 7 Preset Programs
• Timer with Auto Shut Off
• 1700 Watts (120v / 60hz)
• Large Easy-Grip Handle
• Large 5.3-Quart Fry Basket with Non-Stick Coating
• Dimensions: 13.9”w x 15.6”h x 13.9”d
• Digital Easy-Touch Panel
• 7 Preset Programs
• Timer with Auto Shut Off
HF-509TS - 2.4 Quart
• 1500 Watts (120v / 60hz)
• Large Easy-Grip Handle
• Large 3.4-Quart Fry Basket with Non-Stick Coating
• Dimensions: 12.7”w x 14.4”h x 12.7”d
• Digital Easy-Touch Panel
• 4 Preset Programs
• Timer with Auto Shut Off
• 1200 Watts (120v / 60hz)
• Large Easy-Grip Handle
• Large 2.4-Quart Fry Basket with Non-Stick Coating
13
• Dimensions: 12”w x 14.2”h x 12”d
Page 17

French Fries
Roasts
Shrimp
Baked Goods
Chicken
Steak
Fish
See page 5 of this manual for proper set up and use
of the digital control panel.
French Fries
Roasts
Shrimp
Baked Goods
Chicken
Steak
Fish
See page 5 of this manual for proper set up and use
of the digital control panel.
French Fries
Chicken
Steak
Fish
See page 5 of this manual for proper set up and use
of the digital control panel.
14
Page 18

Cleaning & Storage
Cleaning
Clean the Power AirWave Fryer XLTM after each use. The
Outer Basket and the Fry Basket are coated with a special
non-stick surface. Never use abrasive cleaning materials or
utensils on these surfaces.
1. Remove the power cord from the wall socket and be
certain the appliance is thoroughly cooled before cleaning.
Note: Separating the Outer Basket from the Fry Basket
will allow them to cool quicker.
2. Wipe the outside of the appliance with a warm moist cloth
and mild detergent.
3. Clean the Outer Basket and the Fry Basket with hot water,
a mild detergent and a nonabrasive sponge.
Note: The Outer Basket and Fry Basket are
dishwasher-safe.
Tip: Should Outer Basket and Fry Basket contain
difcult to remove food particles, leave the Fry Basket
and Outer Basket assembled, ll with hot soapy water
and soak for 10 minutes.
4. Clean the inside of the appliance with hot water, a mild
detergent and a nonabrasive sponge.
5. If necessary, remove unwanted food residue from the
heating element with a cleaning brush.
Storage
1. Unplug the appliance and let it cool down thoroughly.
2. Make sure all components are clean and dry.
3. Place the appliance in the clean, dry place.
Environment
Dispose of all unwanted appliances according to local
environmental regulations.
Preserve the planet.
15
Page 19

Manufacturer’s Sixty-Day
Limited Warranty
The manufacturer warrants that all parts and components are free of defects in materials
and workmanship for 60 days from the date the product is received. This warranty is
valid only in accordance with the conditions set forth below:
1. Normal wear and tear are not covered by this warranty. This warranty applies to consumer use
only, and is void when the product is used in a commercial or institutional setting.
2. The warranty extends only to the original consumer purchaser and is not transferable. In addition, proof
of purchase must be demonstrated. This warranty is void if the product has been subject to accident,
misuse, abuse, improper maintenance or repair, or unauthorized modication.
3. This limited warranty is the only written or express warranty given by the manufacturer. Any
implied warranty of merchantability or tness for a particular purpose on this product is limited
in duration to the duration of this warranty. Some states do not allow limitations on how long an
implied warranty lasts, so the above limitation may not apply to you.
4. Repair or replacement of the product (or, if repair or replacement is not feasible, a refund of the
purchase price) is the exclusive remedy of the consumer under this warranty. The manufacturer
shall not be liable for any incidental or consequential damages for breach of this warranty or any
implied warranty on this product. Some states do not allow the exclusion or limitation of incidental
or consequential damages, so the above limitation or exclusion may not apply to you.
5. This warranty gives you specic legal rights, and you may also have other rights which vary from
state to state.
Procedure for Warranty Repairs or Replacement:
If warranty service is necessary, the original purchaser must pack the product securely
and send it postage paid with a description of the defect, proof of purchase, and a check
or money order for $19.99 to the following address:
Tristar Products Inc.
500 Returns Road
Wallingford, CT 06495.
16
Page 20

We are very proud of the design
and quality of our
This product has been manufactured
to the highest standards.
Should you have any problem,
our friendly customer service staff
is here to help you.
1-973-287-5129
Distributed By:
Tristar Products, Inc.
Faireld, NJ 07004
©2016 Tristar Products, Inc.
PAFXL_IB_TP_ENG_V1_160314
 Loading...