

Page 1
STEP3:
UseM6*12 screws
and M6 stainless
steel square nuts
to connect the L
type mounting
rails and vertical
supports .
Refer the picture.
STEP4:
Use M4*8 self-
tapping screws to
assemble the
back panel.
Refer the piture.
STEP5:
Use M4*8 self-
tapping screws to
assemble the
mounting back
panel.
Refer the piture.
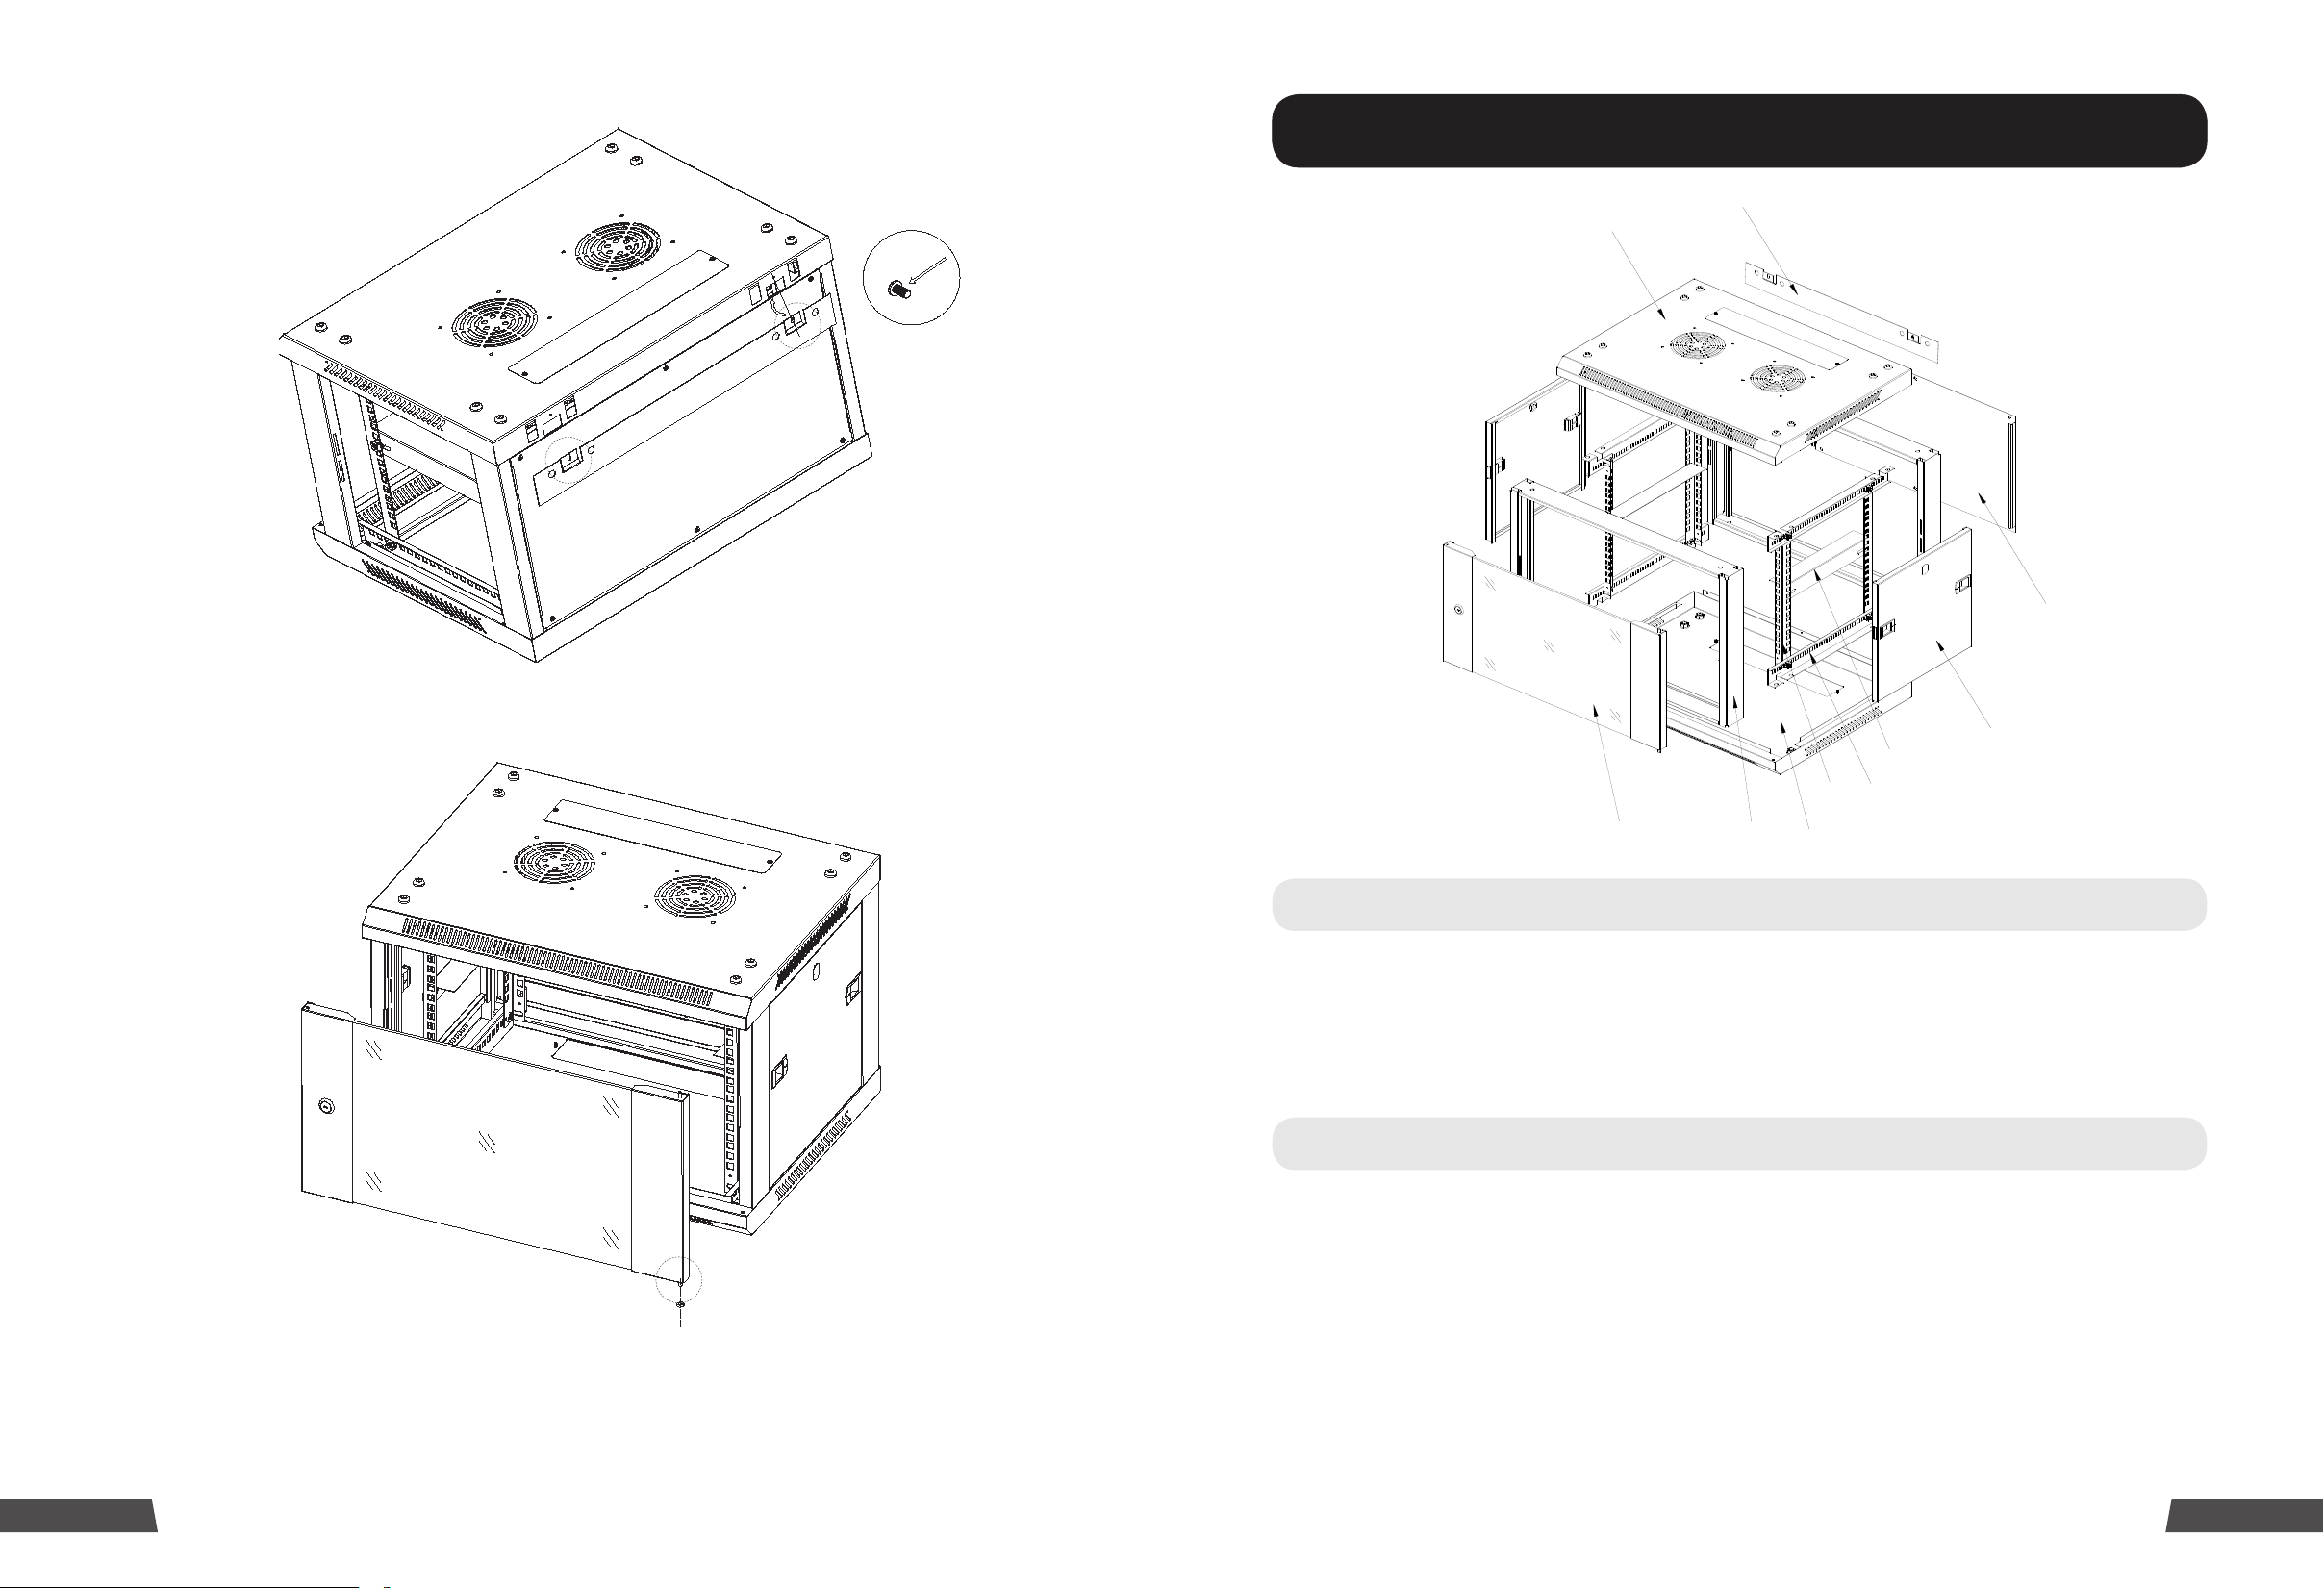
STEP6:
Assemble the
front door with the
top panel and
bottom panel.And
assemble the
side doors
Refer the piture.
STEP4:
Use M4*8 self-
tapping screws to
assemble the
back panel.
Refer the piture.
STEP6:
Assemble the
front door with the
top panel and
bottom panel.And
assemble the
side doors
Refer the piture.
1.顶盖
2.底盘
3.框架
4.前门
5.侧门
6.横支架
7.L型搁条
8.后板
9.挂墙板
10.立柱
1
2
3
4
5
6
7
8
9
10
Tips: Check the quantities of the items before assembly.
SMA Wall-mounted Cabinet (Single Section) Assembly Manual
(5) Assembly the mounting bracket by 2pcs M4*8 self- tapping screws.
1. Top panel- 1pcs 6. Horizontal Beams- 4pcs
2. Bottom Panel- 1pcs 7. L Type Mounting Brackets - 2pcs
3. Frames- 2pcs 8. Back Panel - 1pcs
4. Front Door - 1pcs 9. Mounting Bracket - 1pcs
5. Side Panels- 2pcs 10. Vertical Mounting Rails - 4pcs
Packaging List
Item List of Accessaries Packaging
(6) Assembly the front door with 1pcs white plastic washer and bolt. And toolless
assembly the side doors.
Note:After assembly,please adjust the diagonal size of the cabinet to ensure
homogeneous space for all doors and all doors work well.
04 01
Assembly Hardwares Kits:
A. M8*12 Inner Hexagon Screw - 16pcs E. M4*8 Self-tapping Screw - 12pcs
B. M8 Flange Nut - 16pcs
C. M6*12 screw - 12pcs G. Keys-2pcs
D. M6 Cage Nut - 12pcs
End User Hardwares Kits:
U Capacity <=9U, 12 sets cagenut ; U Capacity >=12U, 24 sets cagenut.
F. White Plastic Washer - 1pcs
Page 2
QA Wall Mounted Cabinet Assembly Manual
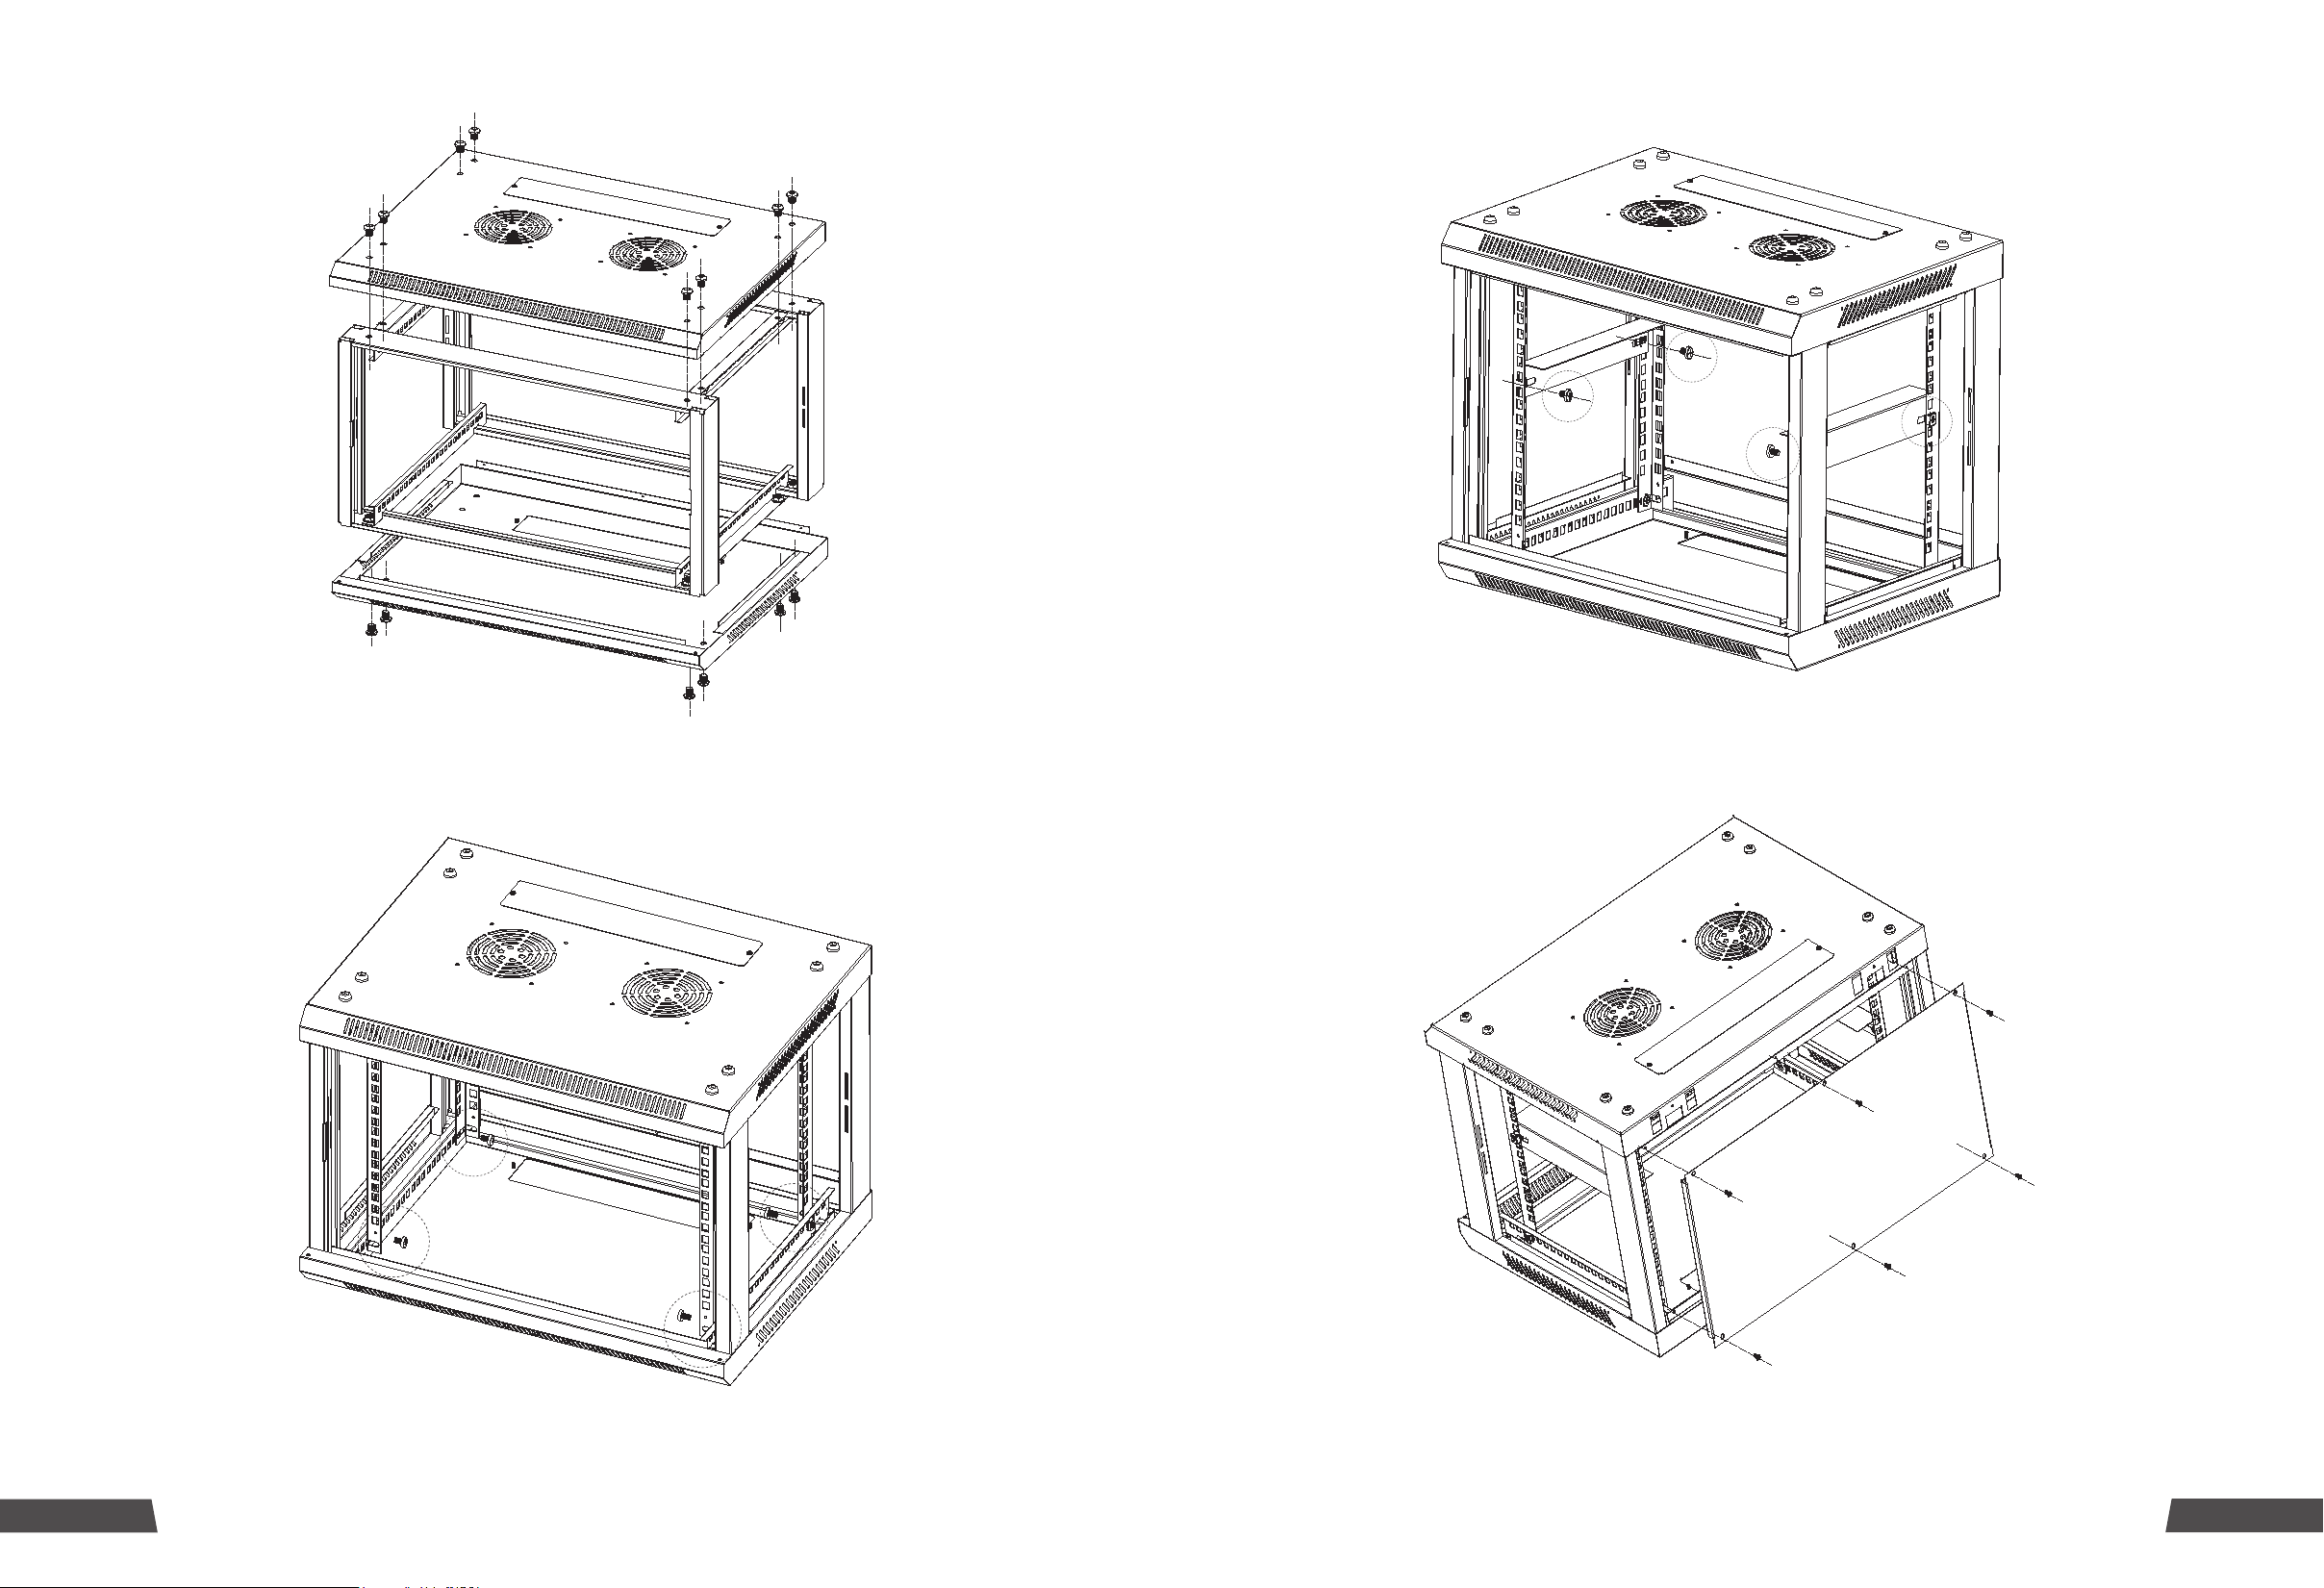
STEP1:
UseM8*12 inner six
angle screws and
M8 flange nutes to
connect the top
tray, frome and
horizontal supports.
Refer the picture.
STEP2:
UseM6*12 screws
and M6 stainless
steel square nuts
to connect the
horizontal supports
and vertical
supports.
Refer the picture.
Packing List
1.Top Tray - 1pcs
2.Bottom Tray - 1pcs
3.Horizontal Support - 4pcs
4.Vertical Support - 4pcs
5.Side Door - 2pcs
6.Cover Panel - 2pcs
7.L Mounting Rail - 2pcs
8.Back Panel - 1pcs
9.Mounting Back Panel - 1pcs
10.Front Door - 1pcs
Accessories Package list
1.M8*12 Inner Six Angle Screw - 16pcs
2.M8 Flange Nut - 16pcs
3.M6*12 screw - 12pcs
4.M6 Stainless Steel Square Nut - 12pcs
5.M4*8 Self-tapping Screw - 12pcs
6.3mm Plastic Washer - 1pcs
STEP1:
UseM8*12 inner six
angle screws and
M8 flange nutes to
connect the top
tray, frome and
horizontal supports.
Refer the picture.
STEP2:
UseM6*12 screws
and M6 stainless
steel square nuts
to connect the
horizontal supports
and vertical
supports.
Refer the picture.
STEP3:
UseM6*12 screws
and M6 stainless
steel square nuts
to connect the L
type mounting
rails and vertical
supports .
Refer the picture.
STEP4:
Use M4*8 self-
tapping screws to
assemble the
back panel.
Refer the piture.
10.Front Door - 1pcs
STEP2:
UseM6*12 screws
and M6 stainless
steel square nuts
to connect the
horizontal supports
and vertical
supports.
Refer the picture.
Accessories Package list
STEP2:
UseM6*12 screws
and M6 stainless
steel square nuts
to connect the
horizontal supports
and vertical
supports.
Refer the picture.
STEP4:
Use M4*8 self-
tapping screws to
assemble the
back panel.
Refer the piture.
(1) Assembly the top panel, frames and horizontal beams by 16pcs M8*12 inner
hexagon screws and 16pcs M8 flange nuts.
(3) Assembly the L type mounting brackets by 4pcs M6*12 screws and 4pcs M6 cage
nuts.
(2) Assembly the horizontal beams by 8pcs M6*12 screws and 8pcs M6 Cage nuts.
(5) Assembly the back panel by 6pcs M4*8 self- tapping screws.
02
03
 Loading...