

Page 1
INTERSTUHL, INC.
2. 3.
sales@interstuhl.de
interstuhl.com
NEWEVERY
IS1
EV256 AUTOLIFTSYSTEM
1
2
1.
3.
3 4 5
a.
b.
6
2.
1.
A B C
D
E
IH
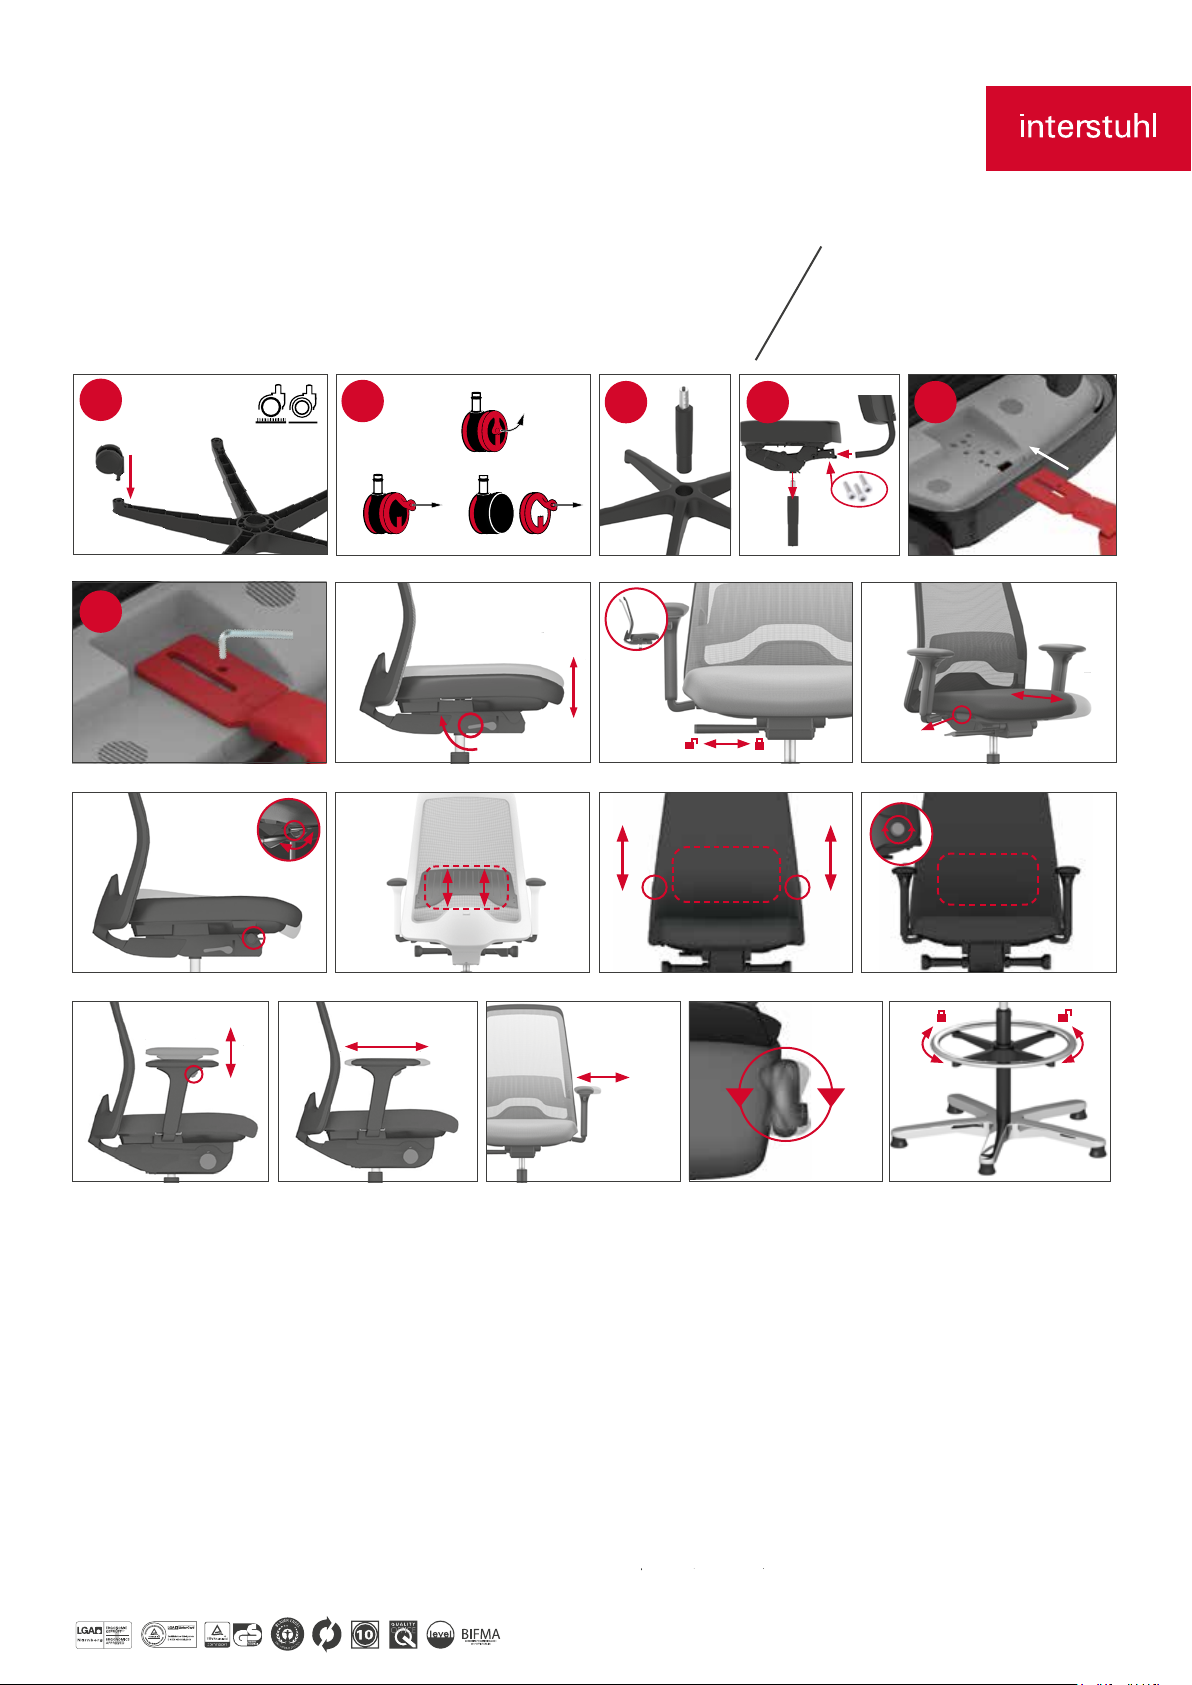
ASSEMBLY INSTRUCTIONS:
Before starting, ensure all parts are found in the box and are separated
in full view to begin the chair assembly.
STEP 1 - Remove the casters from the pack and insert each one with
applied pressure into the five base assembly holes.
STEP 2 - Place the caster caps over the sides of each caster and snap
in place.
STEP 3 - Turn the base assembly upright on the floor and insert the
pneumatic post assembly into the center hole. The post will be
further secured in place once weight is placed onto the seat once
assmebled.
+/–
F
J
STEP 5 - Turn the chair over onto a secure surface, preferably a table
or worksurface to expose the arm placement pilot holes on each
side. Identify the left and right hand arms for proper placement.
STEP 6 - Align the arm plate onto the arm cavity of the seat shell and
tighten in place using the Allen wrench supplied in the parts kit.
Once complete, turn the chair upright and sit in place to apply weight.
OPERATING INSTRUCTIONS:
Chair functions can be adjusted as shown in graphics A - K above The
manufacturer is not liable for damages due to improper use or
negligence of maintenance. Meets BIFMA industry standard for
weight capacity of 275 lbs.
K
Stools Only
G
STEP 4 - (A) First insert the lower seat back plate into the seat pan
channel at the rear and secure in place using the three bolts provided.
(B) Next place the center guide hole of the seat pan assembly over the
pneumatic post and secure in place by mildly pushing down with two
hands on the seat sides.
PNEUMATIC CYLINDER - GAS SPRING:
In the event of a gas cylinder failure, these parts can be replaced. In
the unlikely event of this occurring, it is recommended that only a
trained technician may be allowed to replace or carry out work on the
gas spring.
Stand 12/2020
 Loading...