

Page 1
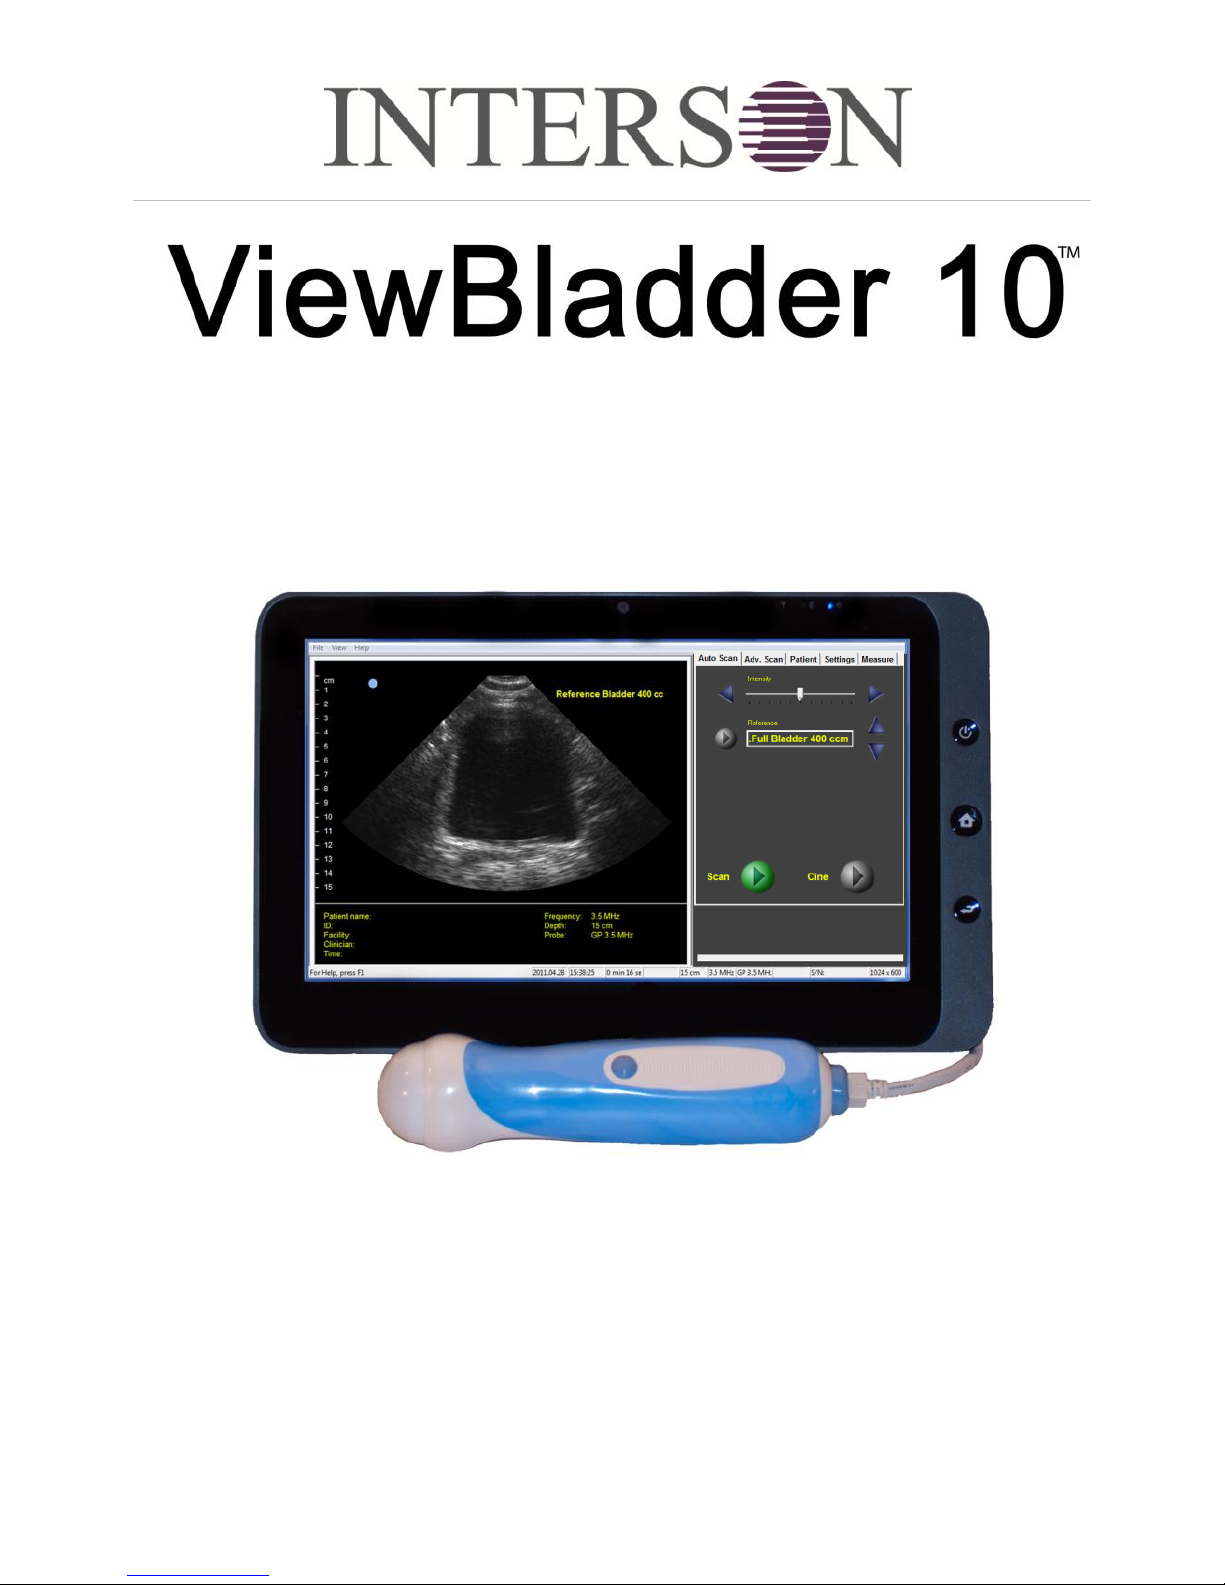
Tablet-based, Bladder Scanning System
Quick Start Guide
Assessing Post-Void Residual Bladder Volume
Windows is a trademark of Microsoft Corporation
Interson and ViewBladder 10 are trademarks of Interson Corporation
Page 2

ViewBladder 10 Quick Start Guide
Copyright – Interson Corporation 1 P/N 01-9931-00 Rev 2
Contents
Getting Started 2
Introduction to ViewBladder 10 Controls 3
Assessing Bladder Volume 4
Saving, Viewing, and Printing Images 6
Cleaning Probes – Care and Handling 6
Quick Tips 6
Warnings, Safety Information 7
Interson Customer Warranty 7
Congratulations on your purchase of the ViewBladder 10 System.
Please refer to the User Guide in the Documentation folder on the Desktop
or the ViewBladder 10 on-board help menu, for additional information.
© Copyright Interson Corporation, All rights reserved. No part of this Guide or
software may be reproduced in any form or by any means, electronic or
mechanical, including but not limited to photocopying, recording, or by any
information storage and retrieval systems, without the express written consent of
Interson.
Page 3
ViewBladder 10 Quick Start Guide
Copyright – Interson Corporation 2 P/N 01-9931-00 Rev 2
GETTING STARTED
1. Start the ViewBladder 10 System by connecting the USB probe and pressing
the power button located in the upper right corner of the tablet. This loads
both Windows and ViewBladder 10. The system is ready to use in 1 minute.
2. A Splash Video provides an overview of ViewBladder 10 functions and
capability. This Splash Video can be disabled on startup and can be
replayed at any time using the Help pull down menu.
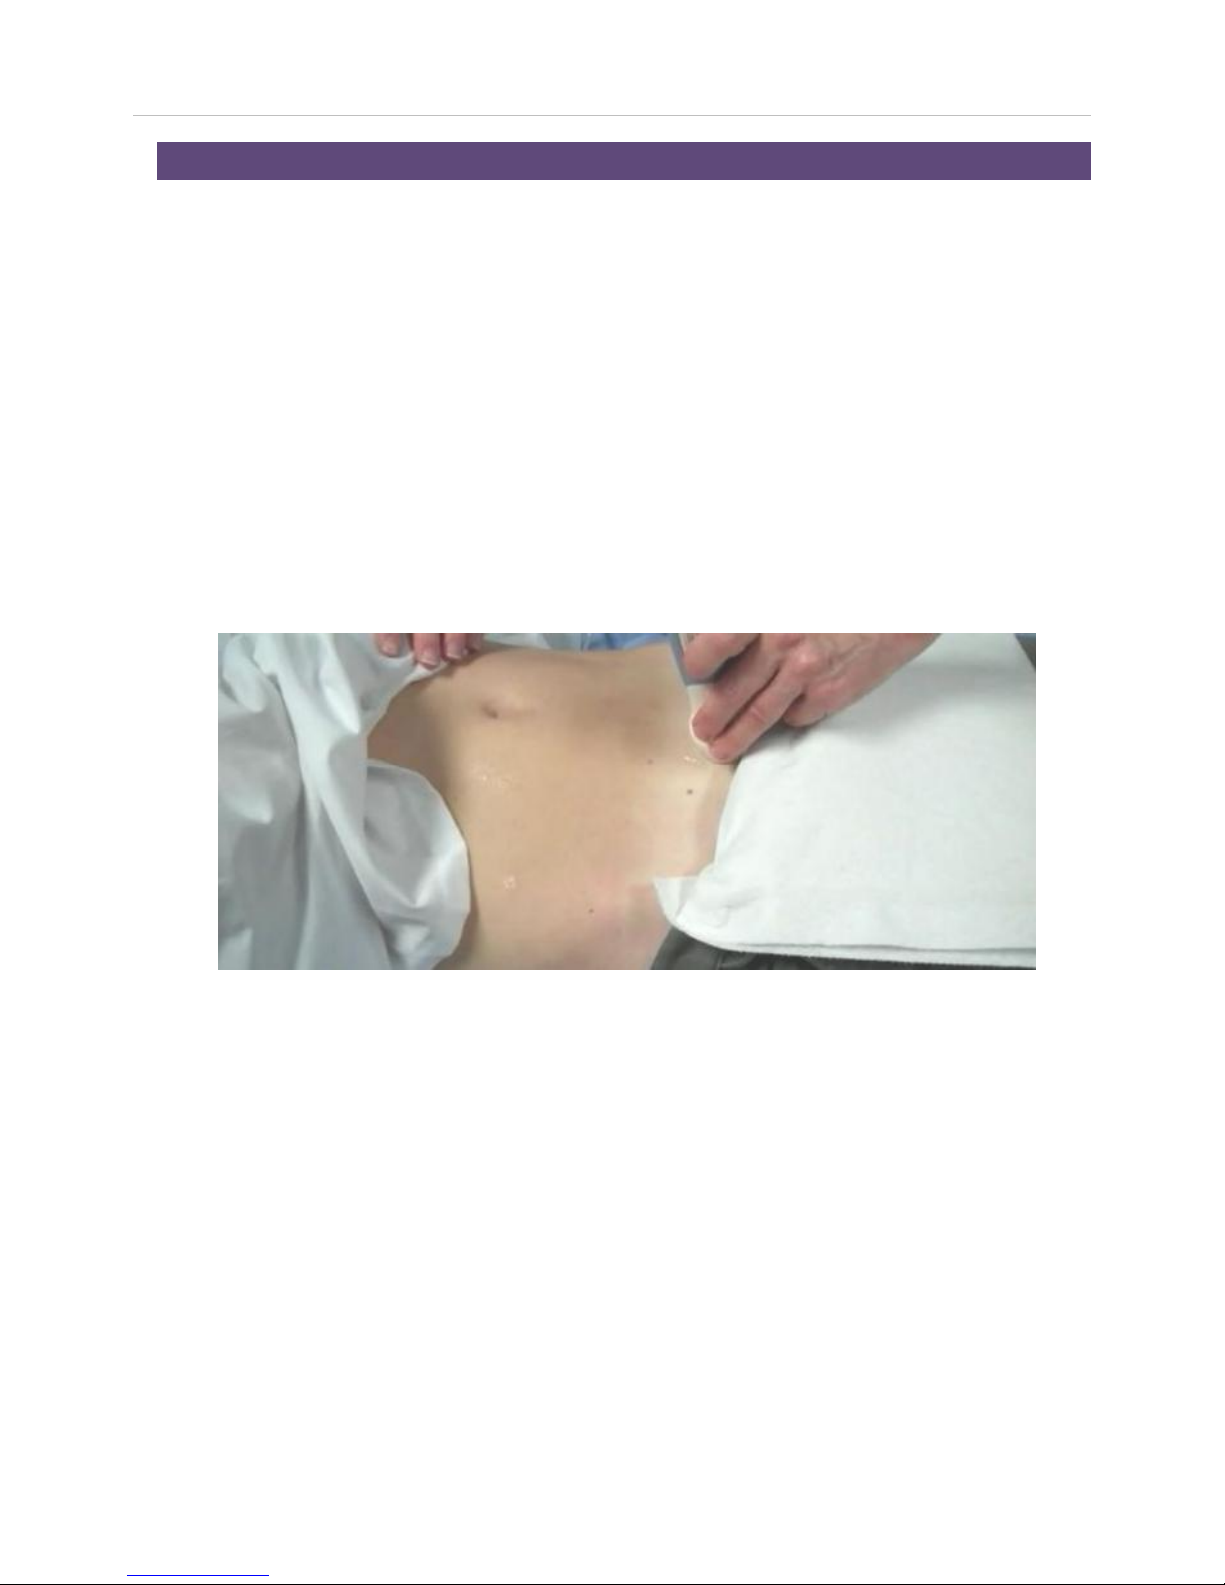
3. Press the blue scan/freeze button on the ultrasound probe to start scanning.
4. Apply ultrasound gel to the patient or probe.
5. Place the probe on the midline of the abdomen with the blue orientation
button towards the patient’s right side and the tip of the probe positioned
approximately one inch above the pubic bone and angled slightly downward
toward the patient’s feet.
6. Rotate or tilt probe until the largest cross section of the bladder is displayed.
7. Press the blue scan/freeze button on the ultrasound probe to stop scanning.
8. Place your finger on the top edge of the bladder and swipe to the bottom
edge to measure the height.
9. Similarly, place your finger on the left edge and swipe to the right edge to
measure the width.
10. The calculated volume is now displayed on the left of the screen.
Notes: Quality images are obtained through a combination of proper probe
placement, orientation, pressure, and adequate ultrasound gel.
Please refer to the included reference images to learn what can be obtained with
proper ultrasound technique.
A short video describing the proper technique can be viewed by single tapping
the displayed Full Bladder Reference image.
You can practice imaging your own bladder to develop the correct technique.
Drink plenty of water prior to imaging your bladder, as a full bladder is easier to
see. An empty bladder can be difficult to image.
Patient Feet
Patient Head
Page 4
ViewBladder 10 Quick Start Guide
Copyright – Interson Corporation 3 P/N 01-9931-00 Rev 2
INTRODUCTION TO VIEWBLADDER 10 CONTROLS
A short video can be viewed that describes the functions of each tab by selecting
a specific tab and then selecting Video Help under the Help pull down.
The Help pull down also includes a number of Help Topics to better understand
the capabilities of ViewBladder 10.
ViewBladder 10 Display
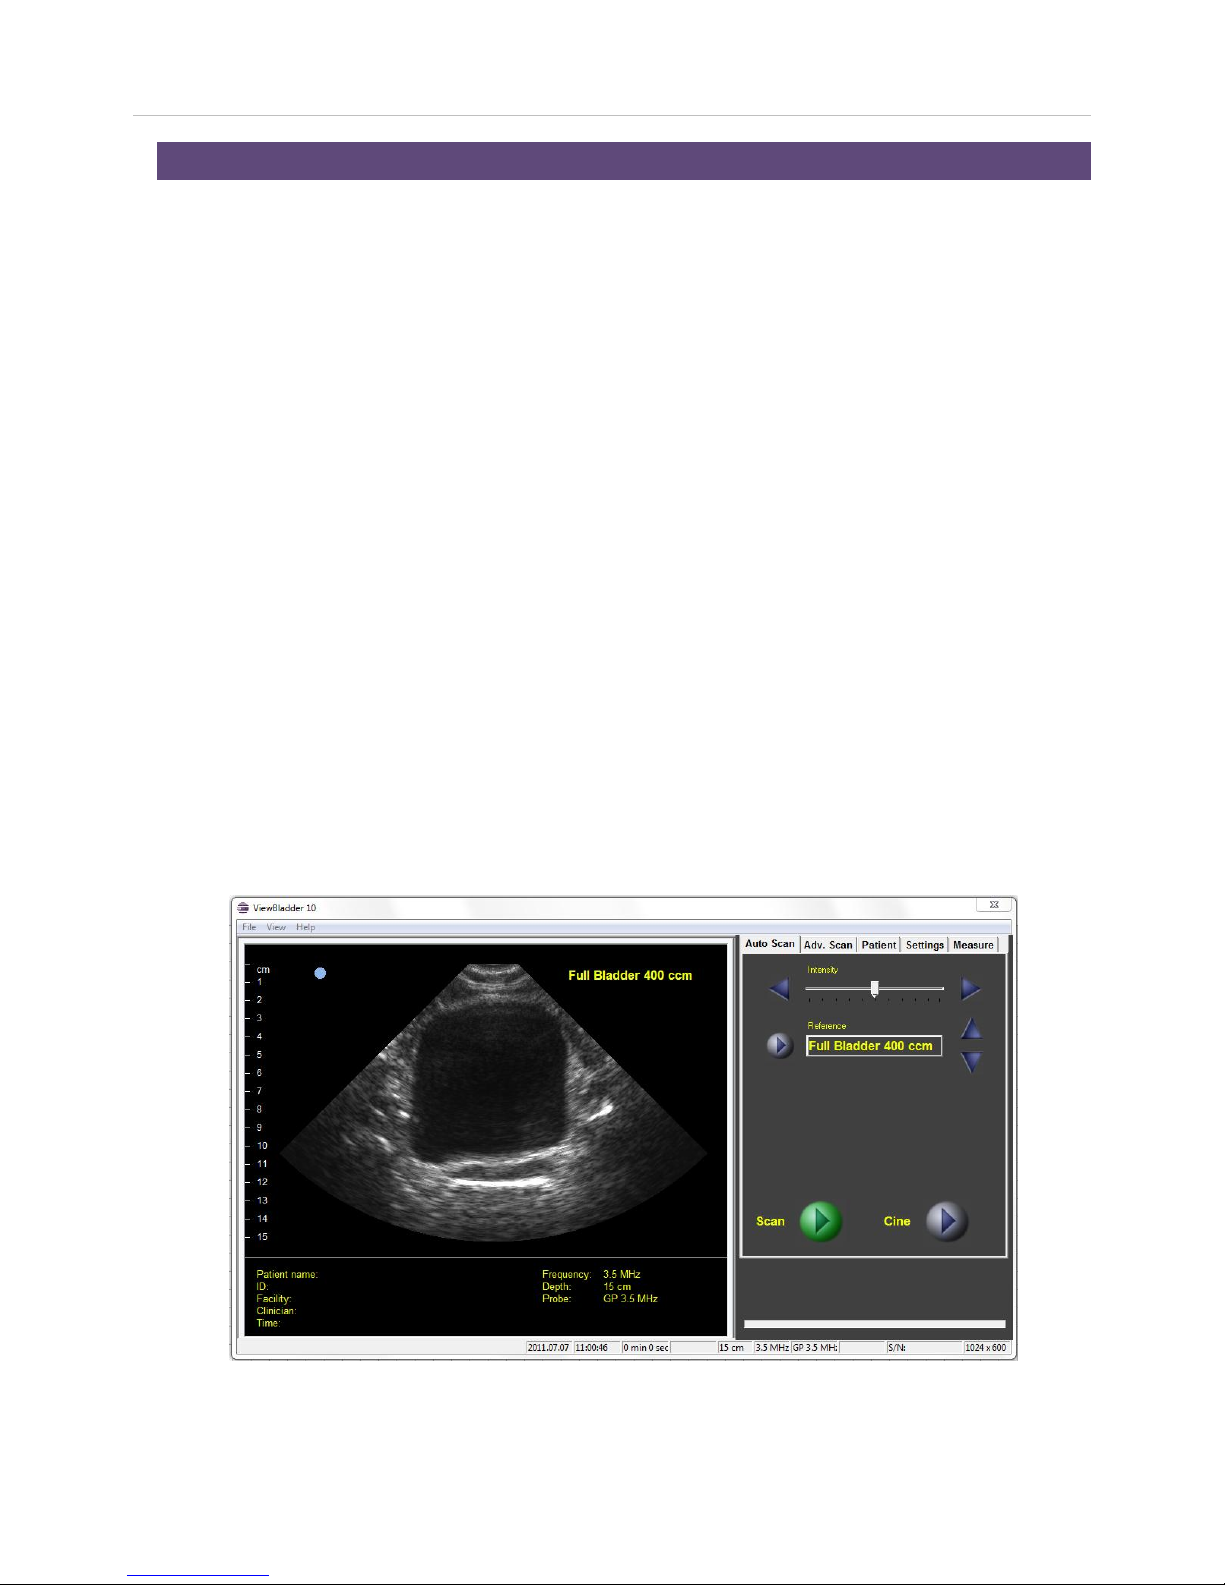
The ViewBladder 10 display is divided into three sections:
On the upper left is the Imaging Window. This window displays the ultrasound
scan, and includes measurement data from the scan.
Directly below the imaging window is the Status Window. The status window
displays the Patient information and information about the probe.
On the right side of the screen is the User Interface Section. There are five
tabs: Auto Scan, Adv. Scan, Patient, Settings, and Measure, to adjust the
displayed image, input patient and exam information, set preferences, and
perform measurements. Video Help is available for each tab by selecting a
specific tab and then selecting the Help pull down, Video Help.
Operators can perform all bladder scans and measurements from the Auto Scan
Tab – these functions are discussed here in this Quick Start Guide.
Detailed instructions and safety information are contained in the User Guide.
Note: The blue dot on the upper left side of the image window corresponds to
the blue image orientation/freeze-scan button on the probe.
The blue button on the probe is customarily pointed to the patient’s right side for
viewing the bladder.
Page 5
ViewBladder 10 Quick Start Guide
Copyright – Interson Corporation 4 P/N 01-9931-00 Rev 2
ASSESSING BLADDER VOLUME
There are four ways to assess bladder volume:
I. Quick Look
It is quick and easy to qualitatively determine if a bladder is full or empty without performing a volume calculation - a full bladder is easy to see.
II. Reference Image
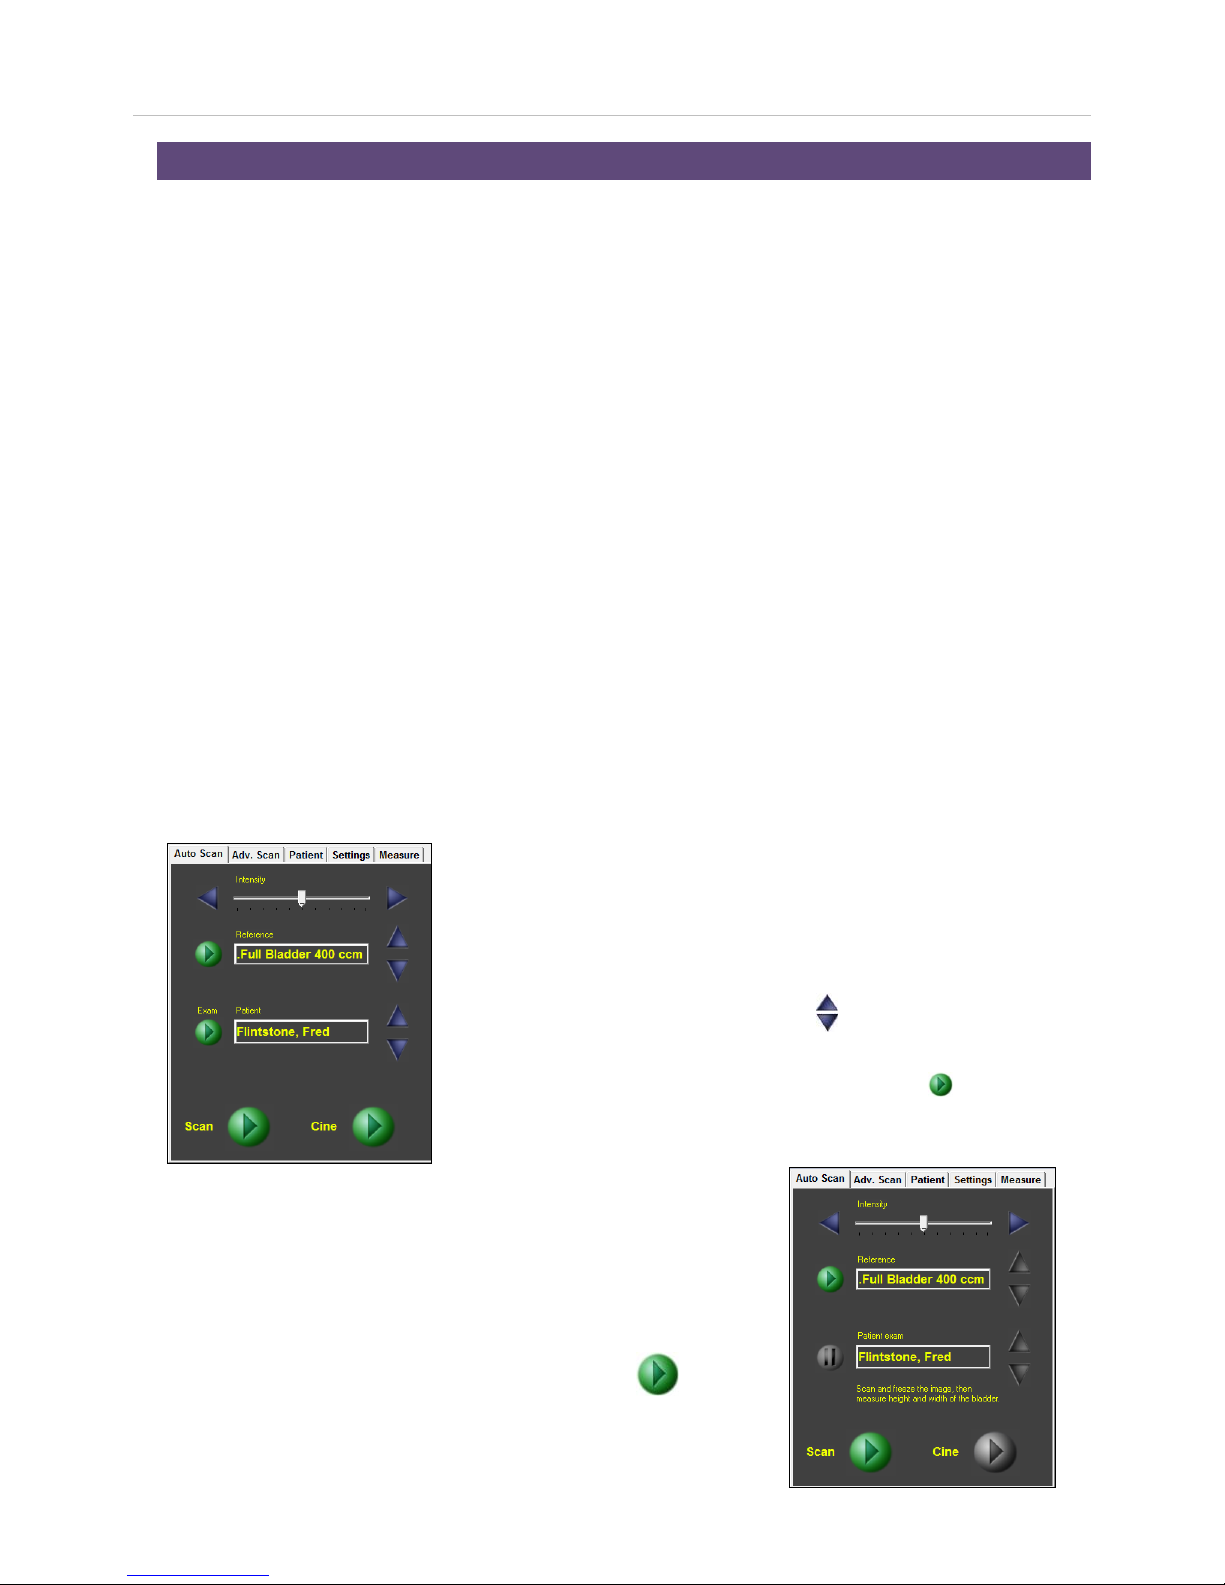
It is easy to determine if the patient’s bladder is larger or smaller than a
reference image. Select and display one of the included reference images by
using the green Play button next to the Reference list box or by selecting the up
and down blue arrows on the right side of the Reference list box. Clinic-specific
reference images with included protocol annotations can be easily saved.
III. Quick Measurement
You can quickly perform a bladder volume measurement on any displayed
image. Use your finger to swipe from one edge of the bladder to the opposite
edge. Be sure to swipe twice, once for the height and once for the width.
The height, width, and volume will be displayed on the screen.
IV. Patient Exam and Report
The Patient Exam automatically collects and saves images, volume
measurement data, and a single page report.
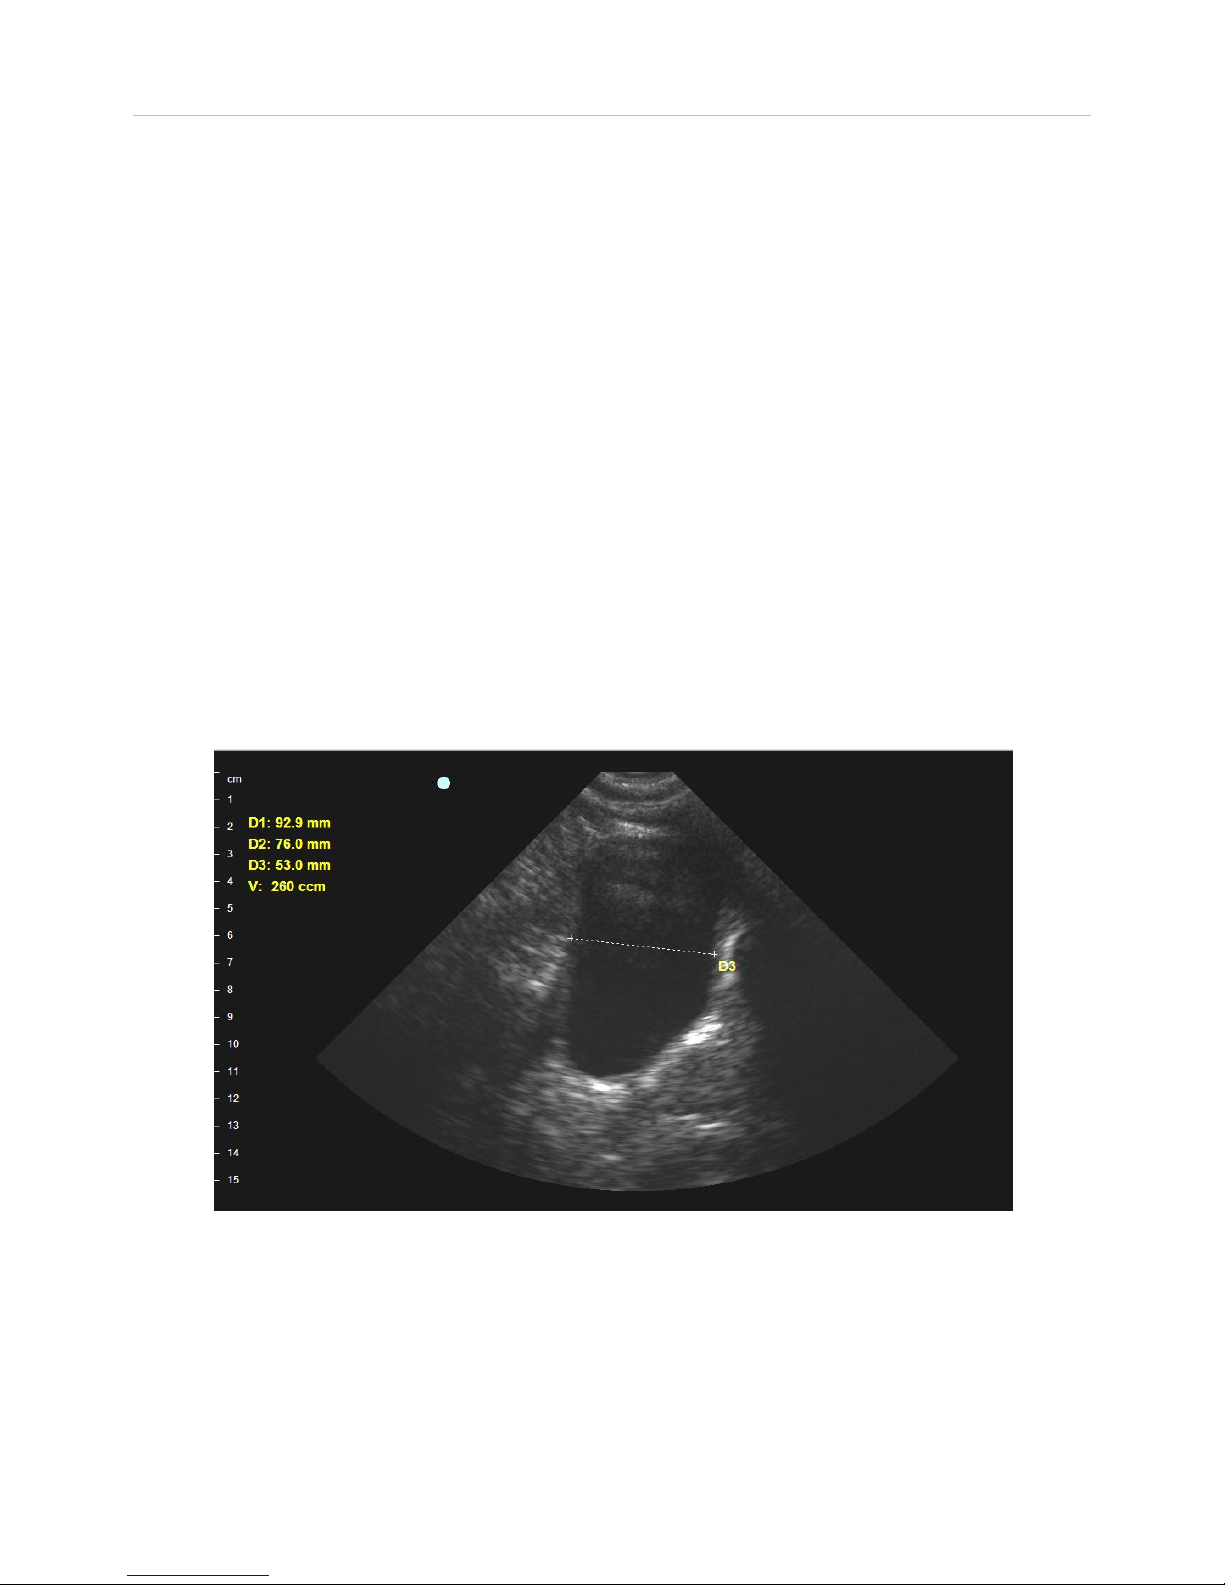
The following steps will guide you through acquiring a
transverse image of the bladder to measure the height
and width of the bladder. Followed by a mid-sagittal
scan to measure the thickness:
1. From the Auto Scan tab, press on the up and
down Patient Exam arrows to scroll through the
Patient list to select a specific patient.
2. Press the green Patient Exam button to begin
the exam. The button will change to yellow and
then inactive grey while you are in the exam.
3. Follow the on-screen instructions to acquire the
transverse image. Position the probe on the
centerline of the patient’s stomach just above
the pubic bone with the probe’s blue button
pointed to the patient’s right side. Start the scan
by briefly pressing either the blue button on the
probe or the large green Scan button on the
screen.
4. Make minor adjustments to probe position to
obtain the largest, most optimal bladder image.
Page 6
ViewBladder 10 Quick Start Guide
Copyright – Interson Corporation 5 P/N 01-9931-00 Rev 2
5. Freeze the image by pressing the blue button on the probe or the yellow
pause Scan button on the screen.
6. After freezing the image, measure the height of the displayed bladder by
placing your finger on one edge of the bladder and swiping to the opposite
side. Similarly measure the width. If you feel you did not optimally place
your finger, double tap to remove the current measurement and then swipe
your finger again.
7. Follow the onscreen prompts, displayed in yellow beneath the patient exam
box to take the mid-sagittal scan. By rotating the probe 90 degrees you will
be viewing the thickness of the bladder. Start the scan and then freeze
when you have the optimal bladder image.
8. You should see a black ultrasound shadow on the right edge of the scan.
This is the patient’s pubic bone.
9. Measure the thickness of the bladder by placing your finger on the edge of
the bladder and swiping to the opposite side. The mid-sagittal bladder
image is often displayed at a slight angle, either up or down. Therefore, to
make the most accurate measurement, always measure the thickness at the
appropriate angle.
10. ViewBladder 10 will calculate and display the bladder volume. If you find
you did not optimally place your finger, double tap to remove the volume
calculation and the D3 measurement. Repeat the D3 measurement.
11. Press the yellow pause button near the Patient Exam box to end the patient
exam and automatically generate and save the report.
12. To print the Patient report, go to the Patient Tab, select the patient from the
Last Name pull down and then press Print.
Page 7

ViewBladder 10 Quick Start Guide
Copyright – Interson Corporation 6 P/N 01-9931-00 Rev 2
SAVING & VIEWING IMAGES, PRINTING REPORTS
Saving Images - While in a Patient Exam, both the transverse and mid-sagittal
images are automatically saved in the patient folder. The measurement data is
shown on these saved images. You may also save images manually by clicking
on the “Save” button at the bottom of the Adv. Scan tab.
Viewing Saved Images - At the bottom of the Adv.Scan tab, press the Load
Image button. Select the patient folder and the specific patient exam that you
wish to review. Select images with a bs extension, as jpg images cannot be
displayed in ViewBladder 10. The current scan in the imaging window will be
replaced by the retrieved scan data. The Near Gain, Mid Gain, and Far Gain,
as well as Intensity and Contrast, may be used to adjust the image for personal
preferences. You can load and print jpg with any Windows graphics program.
Printing Reports - Select the Patient Tab. Select a patient from the Last Name
pull down list and press the Print button. The report includes: Patient
information, images, and results of the bladder volume calculation. Refer to the
full User Guide for additional printing options.
CLEANING PROBES – CARE AND HANDLING
Although Interson probes are very durable, reasonable care must be taken to
avoid damaging them. Handle the membrane on the tip of the probe and the
cable attachment at the other end of the probe with care.
Keep the probe membrane away from sharp objects to avoid damage.
To clean the probe between uses: wipe with a soft, non-abrasive cloth using any
standard hospital grade disinfectant.
QUICK TIPS
Bowel gas can obscure the bladder. You may have to reposition the patient or
exert some pressure with the probe to displace the bowel. Try rolling them on
their side, or have them sit up slightly. Remember, an empty bladder may be
very difficult or impossible to image. A full bladder is very easy to see.
Software updates can be downloaded on-line. Go to the Help pull down in the
upper left corner, and select ViewBladder 10 Update. The system will
automatically check to see if you have the latest software and ask for your
permission to download the latest version.
Contact [email protected] and ask for remote access to all of the
ViewBladder 10 customer training material.
Page 8

ViewBladder 10 Quick Start Guide
Copyright – Interson Corporation 7 P/N 01-9931-00 Rev 2
WARNINGS, SAFETY INFORMATION
Do not use heat or radiation to sterilize the probe.
This will permanently damage the probe and void its warranty.
Refer to the ViewBladder 10 User Guide for detailed safety information.
INTERSON CUSTOMER WARRANTY
Please register your purchase within 7 days of receipt at:
http://www.interson.com/registration
Interson (“The Company”) warrants that the ViewBladder 10 (the "Product") will perform in
accordance with its specifications, and is free from material and manufacturing defects. Loss or
damage caused by misuse or abuse is not covered by this warranty.
The Company agrees to replace or correct any defects or errors in the Product for a period of one (1)
year from the date of purchase from an authorized Interson dealer. The Company's sole liability and
the exclusive remedy shall be, at the Company's option, the repair or replacement of the Product.
The Company makes no additional representations or warranties, express or implied, regarding the
Product and/or its use. By way of example, but not of limitation, the Company makes no
representations or warranties of merchantability or fitness for a particular purpose. Purchaser
assumes the responsibility for the selection of the Product as being adequate for and appropriate for
purchaser's purposes.
In no event will the Company be liable for any special, incidental, indirect, or consequential damages
whatsoever arising out of the use of or inability to use the product, even if the company has been
advised of the possibility of such damages.
The warranty does not extend to defects to: (i) the Product arising out of material or workmanship not
provided or furnished by the Company; (ii) the Product resulting from abnormal use of the Product or
use in any manner other than as specified in the Product's operating manual; (iii) components or
parts warranted by another party;(iv) parts which are subject to normal wear and tear, including, but
not limited to, cables, cable connectors, or switches.
Product may be returned for service only upon issuance of a Return Materials Authorization number
by the Company ("RMA"). The RMA number must appear on all packages and paperwork in
connection with such return. The tablet is warranted by ViewSonic. Warranty or non-warranty repairs
of the tablet are handled by ViewSonic.
All shipping costs incurred in shipping Product to the Company for warranty repair will be
borne by the purchaser. The Product must be sent by freight pre-paid, and clearly marked
“Attention: Service." Please include the nature of the problem along with all contact
information and the assigned RMA number.
Interson Corporation
7026 Koll Center Parkway, Suite 201
Pleasanton CA 94566
Tel: 925.462.4948 ~ Fax: 925.462.4833
 Loading...