

ITEM NO.: SH-2660
REVISED MAR 30, 2020
Printed in Vietnam
Description
Item No.
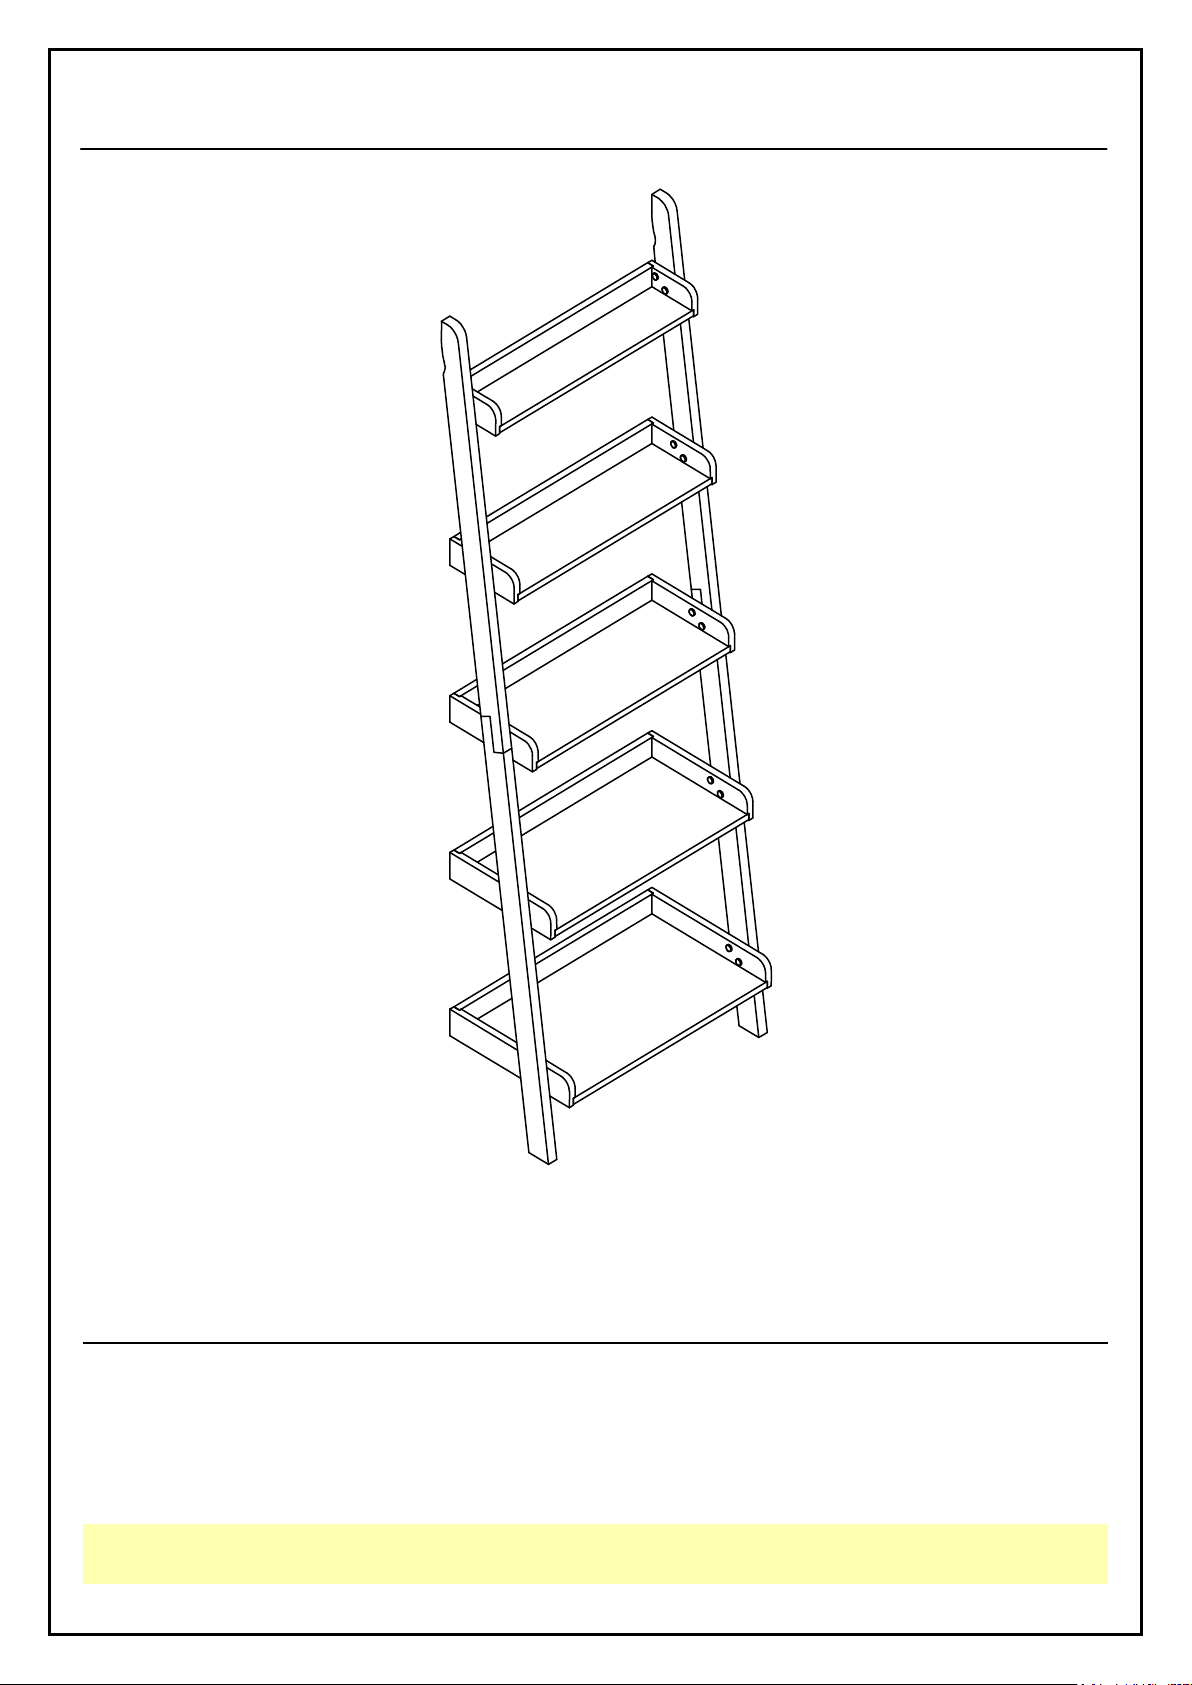
: LEANING SHELF
: SH-2660
ASSEMBLY INSTRUCTIONS
WARNING!
Serious or fatal injuries can occur from furniture tip over. Use tip over restraint
(provided) to secure this product to the wall.
- 1 -

ITEM NO.: SH-2660
REVISED MAR 30, 2020
Printed in Vietnam
BEFORE ASSEMBLY
ASSEMBLY TOOLS REQUIRED
NOT INCLUDED
Thank you for purchasing this quality product. This product has been designed for easy assembly
and constructed for durability. All parts were checked prior to packaging to insure quality. Prior to
beginning assembly, however, make sure all parts and hardware are included and free of obvious
defect. If a part is missing or defective, please contact the store where purchased. If hardware is
missing, or you need help with assembly, please call toll free 888-944-8396.
IMPORTANT NOTE:
- Place all wooden parts on a clean and smooth surface such as a rug or carpet to avoid the
parts from being scratched.
- Remove all wrapping material, including staples & packing straps before you start to
assemble.
- DO NOT tighten all screws and bolts until completely assembled.
- Keep all hardware parts out of reach of children.
WARNING:
Long exposure to rubber or soft plastic may cause a chemical reaction and damage the
finish of your product. Protect the surface of the product with cloth if you are using any
product with rubber feet or base.
- 2 -

ITEM NO.: SH-2660
REVISED MAR 30, 2020
Printed in Vietnam
PART LIST
NO
Description
Qty
Sketch
NO
Description
Qty
Sketch
A
Upper Post
(L-R)
2
B
Lower Post
(L-R)
2
C
Top shelf
(the smallest)
1
D
2nd shelf
1
E
3rd shelf
1
F
4th shelf
1
G
Bottom shelf
(the biggest)
1
HARDWARE LIST
NO
Description
Qty
Sketch
NO
Description
Qty
Sketch
1
Long Bolt
(M6 x 40mm)
4
6
Short Pan head screw
(M4 x 15mm)
2
2
Short Bolt
(M6 x 25mm)
20
7
Long Pan head screw
(M4 x 50mm)
2
3
Flat Washer
(6.5 x 13mm)
24
8
Steel Tip Bracket
4
4
Allen key
(M4 x 30mm x 110mm)
1
9
Flat Nylon Tie
2
5
Wood Plug
(14.5mm)
20
When unpacking, please be careful not to discard any parts with the packaging. Before continuing,
please make sure you have the following parts:
When unpacking, please be careful not to discard any parts with the packaging. Before continuing,
please make sure you have all of the following hardware:
- 3 -

ITEM NO.: SH-2660
REVISED MAR 30, 2020
Printed in Vietnam
STEP 1
STEP 2
G
B
B
Carefully attach posts (A) and (B) together with bolts (1), and washers (3) as shown below. Tighten
with Allen Key (4).
Carefully place the 5 shelves (C), (D), (E), (F), (G) between the 2 Side posts, Attach the shelves to the
posts with bolts (2) and washers (3) as shown below. Tighten with Allen key (4).
- 4 -

ITEM NO.: SH-2660
REVISED MAR 30, 2020
Printed in Vietnam
STEP 3
5
8
8
Attach brackets (8) to the back of the unit with screws (6) through the smaller holes in the brackets as
shown below.
Important!
Properly attach the other brackets (8) to the wall in an area of drywall or plaster with a wood stud:
Mark the attachment point(s) with a pencil at the appropriate height positioned over the wood
stud(s) in the wall.
Place the unit into position so both mounting brackets are vertically in line.
Properly attach the other brackets (8) to the wall stud with screws (7) through the smaller holes as shown
below.
Lace the end of flat nylon ties (9) through the larger holes in each mounting bracket. Bring both ends
together and slide the flat ends through the locking ends and draw it through until all slack is removed.
Confirm that the strap is securely laced and locked.
Put the wood plugs (5) over bolts to cover them, as shown below
- 5 -
 Loading...