

Page 1
NEXTGEN PROGRAMMING SOFTWARE
QUICK START GUIDE
Copyright Intermatic 2004
RECOMMENDED SYSTEM REQUIREMENTS
Processor: 500-MHz Intel Pentium-class processor (Minimum: 90MHz)
Memory: 128MB RAM (Minimum: 32MB)
Operating System: Microsoft Windows
®
Server 2003; Windows XP
Professional; Windows XP Home Edition; Windows 2000 Professional
& Server
Supported Models; ET70115C, ET70115CR, ET70115CR24,
ET70215C, ET70215CR, ET70215CR24, ET70415CR,
ET70415CR24, ET70815CR, ET70815CR24, ET71615CR, and
ET71615CR24.
Welcome to the NextGen Programming Software!!
Thank you for trying the NextGen programming software. This
software is intended for use with Intermatic© brand Next Generation time switches. Use for any other purpo se is strictly
prohibited.
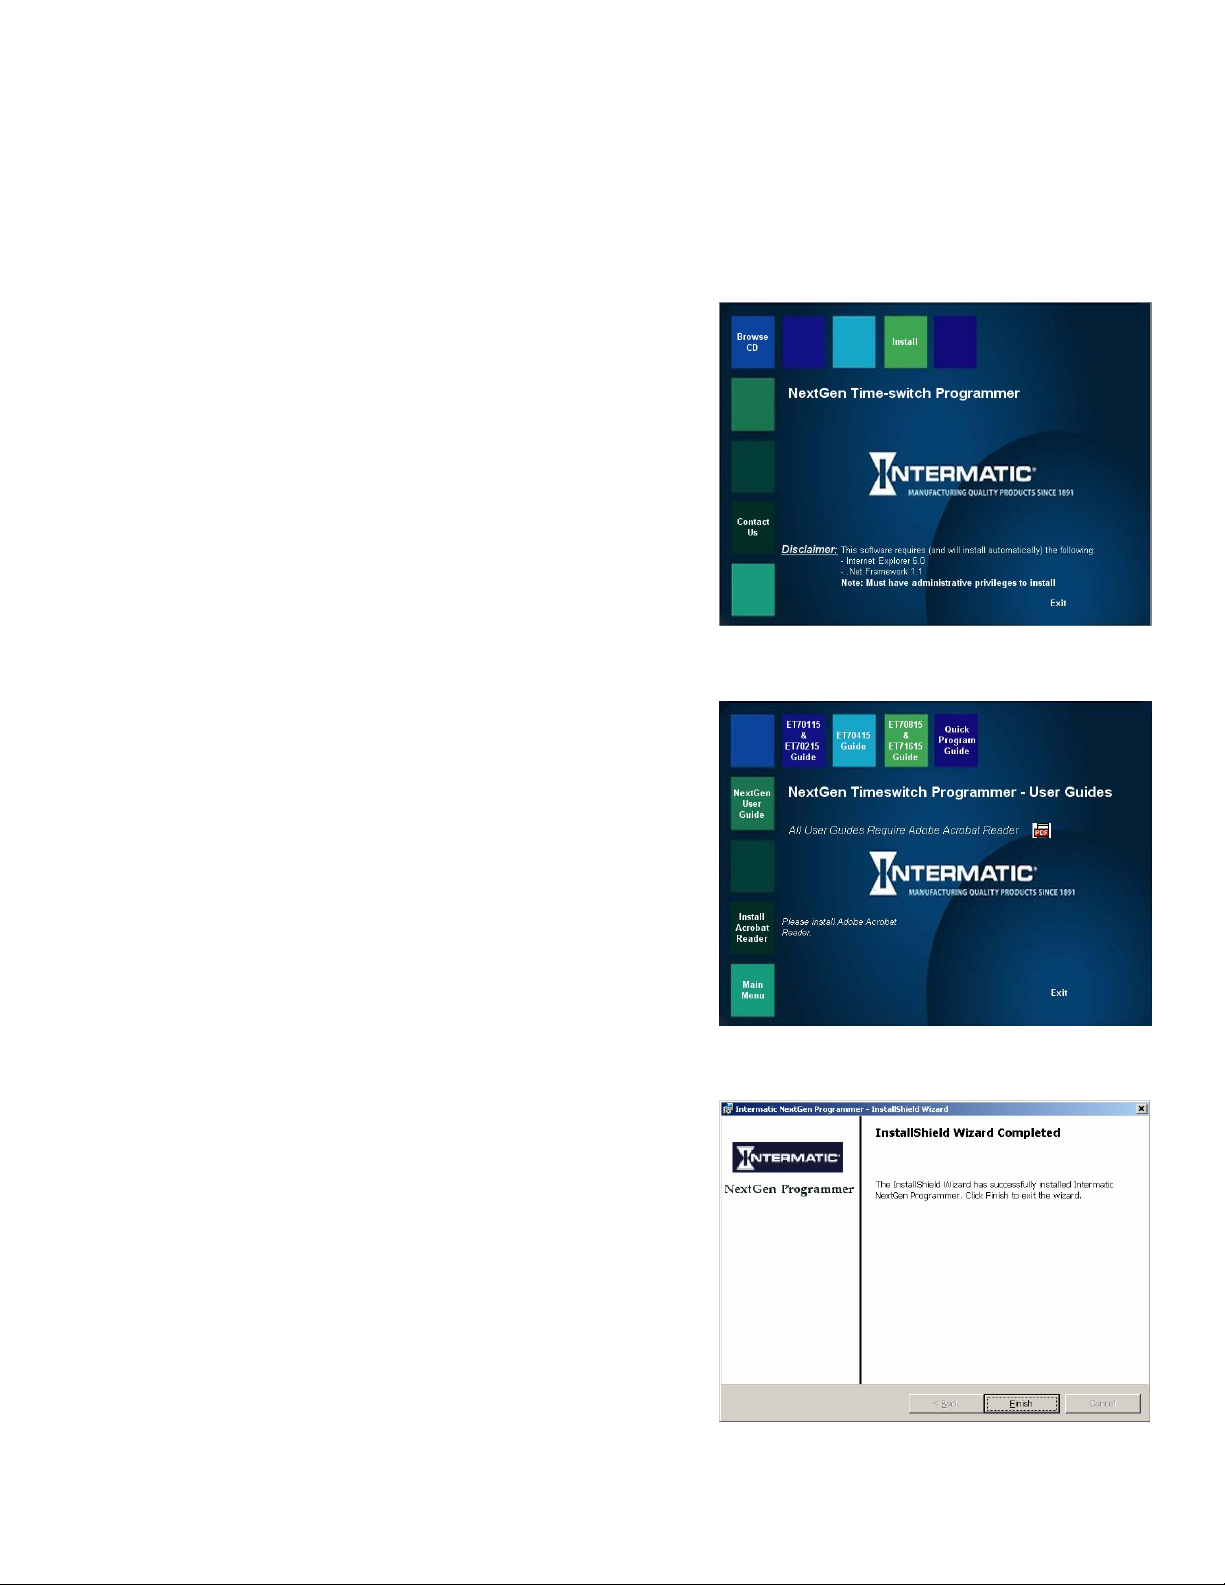
The first screen will give you the opportunity to Browse CD, Install,
Contact Us, or Exit the installation utility. To install the NextGen
programming software click “Install”.
Selecting “Browse CD” will pull up a menu of screens which will allow
you to view this manual or the various guides which ship with the Next
Generation time switch for installation and manual data entry.
To view these guides you will need the Adobe Acrobat Reader
installed on your computer. If you do not have Adobe Acrobat Reader
©
©
installed it is included along with the option to install it from the CD.
After reviewing the included information you can return to the main
menu by clicking the “Main Menu” button.
NOTE: It is not necessary to have the CD in the drive to use the NextGen programming software, however documentation
including this manual are available on the CD.
Installation
After selecting “Install”, the installation wizard will begin and ask you to
confirm the installation. You will also be presented with Intermatic
software license agreement. After agreeing to the terms of use, the
software will be loaded onto the hard drive of your computer.
When the installation is complete, the installation wizard will display
that it has completed the installation. Click finish to leave the
installation wizard.
©
’s
1 of 8
Page 2
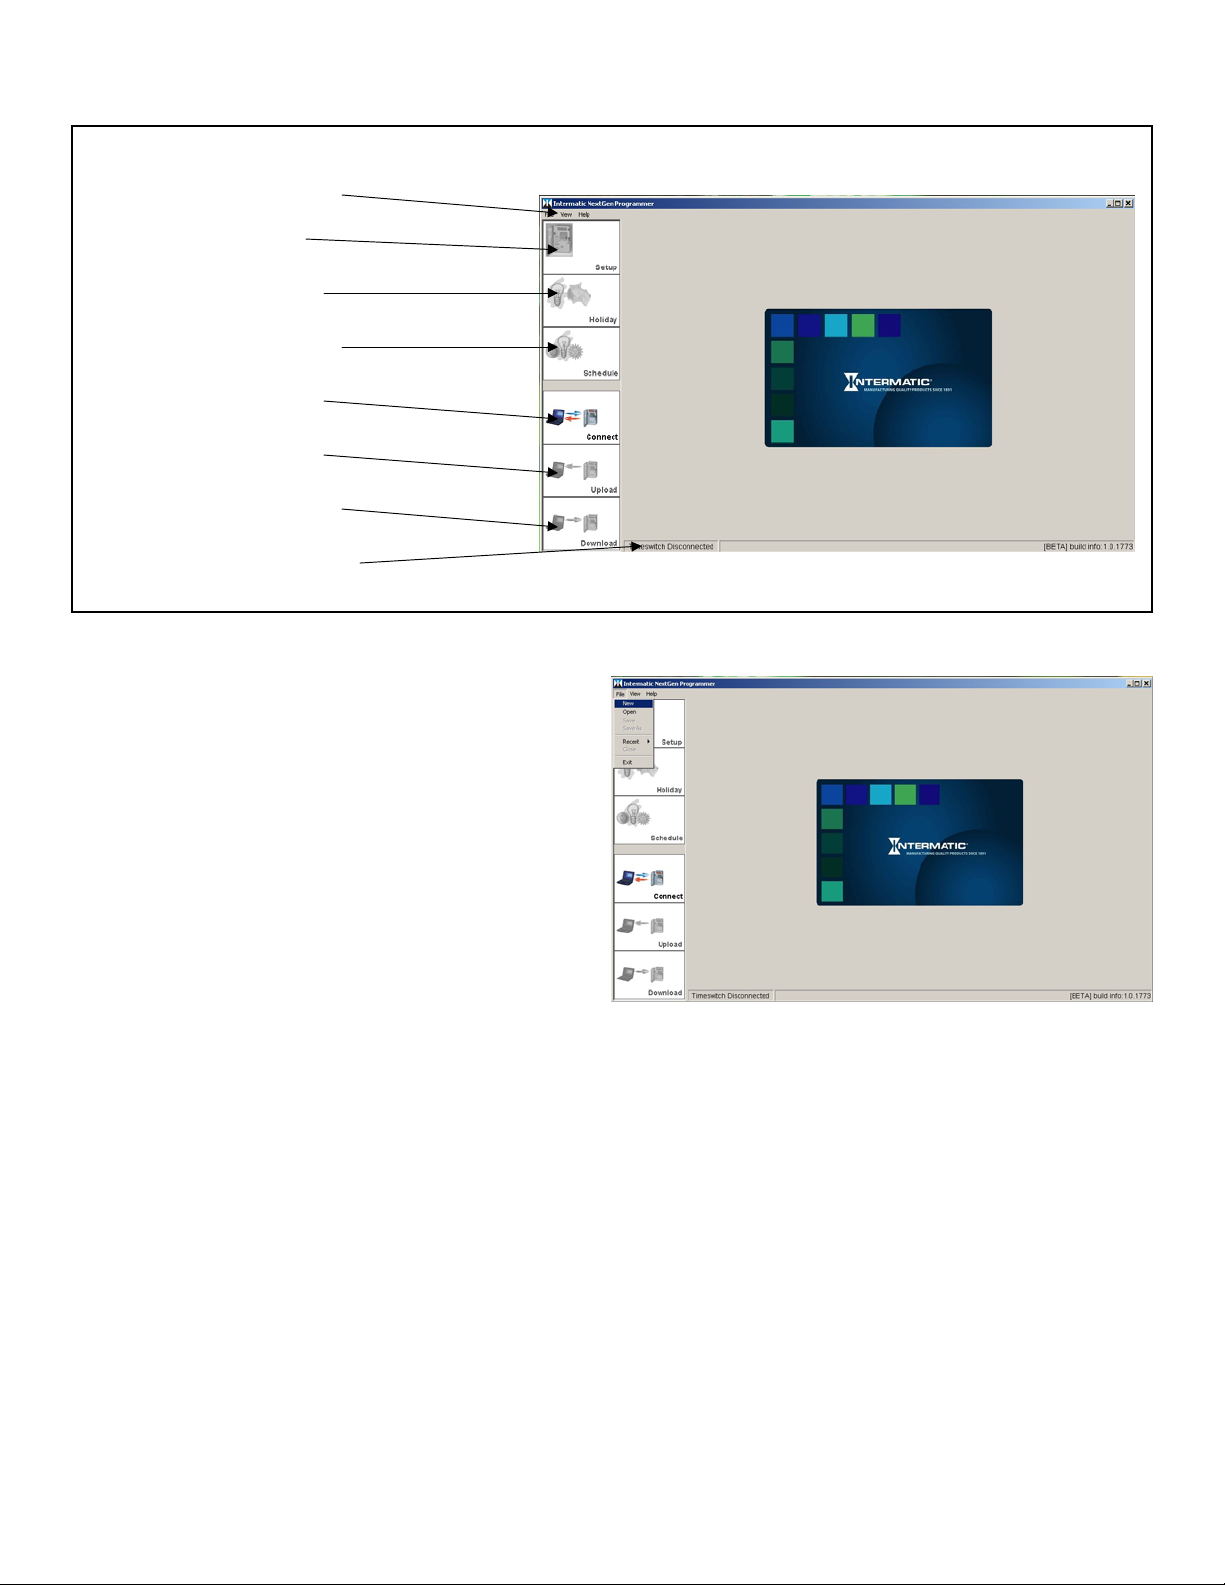
Command Bar
Setup Tab
Holiday Tab
Schedule Tab
Connect Tab
Upload Tab
Download Tab
Connect Status
GETTING STARTED
The NextGen programming software can be started from
the START menu or by selecting the NEXTGEN icon on
the desktop.
When the initial programmer screen comes up, select
either to start a new program or to connect to a timeswitch.
If you currently have a time switch and wish to connect to it
and upload its existing program, skip ahead to “Connecting
the Hardware”, otherwise begin with “Starting a New
Program”.
It is important that you become familiar with the Command
Bar. As with other Windows
®
based programs there are
menus to navigate.
File menu: The File menu allows you to start New programs, Open saved programs, Save programs that are in the PC’s
memory, or Exit the NextGen programming software.
View menu: The View menu gives you the opportunity to view the Astro map, set options, and print reports.
Help menu: The Help menu gives information about the version of the NextGen programming software you are using.
You can also pull up this programming guide from the Help menu if you should ever need to consult it.
Starting a New Program
To start a new programming file use the mouse pointer to click the File menu item from the Command Bar. Select New
from the drop down menu. This will create a new, blank programming file.
After selecting New, the display will change to the Setup screen. In the Setup screen you will be prompted to enter
specific information related to your timeswitch.
2 of 8
Page 3
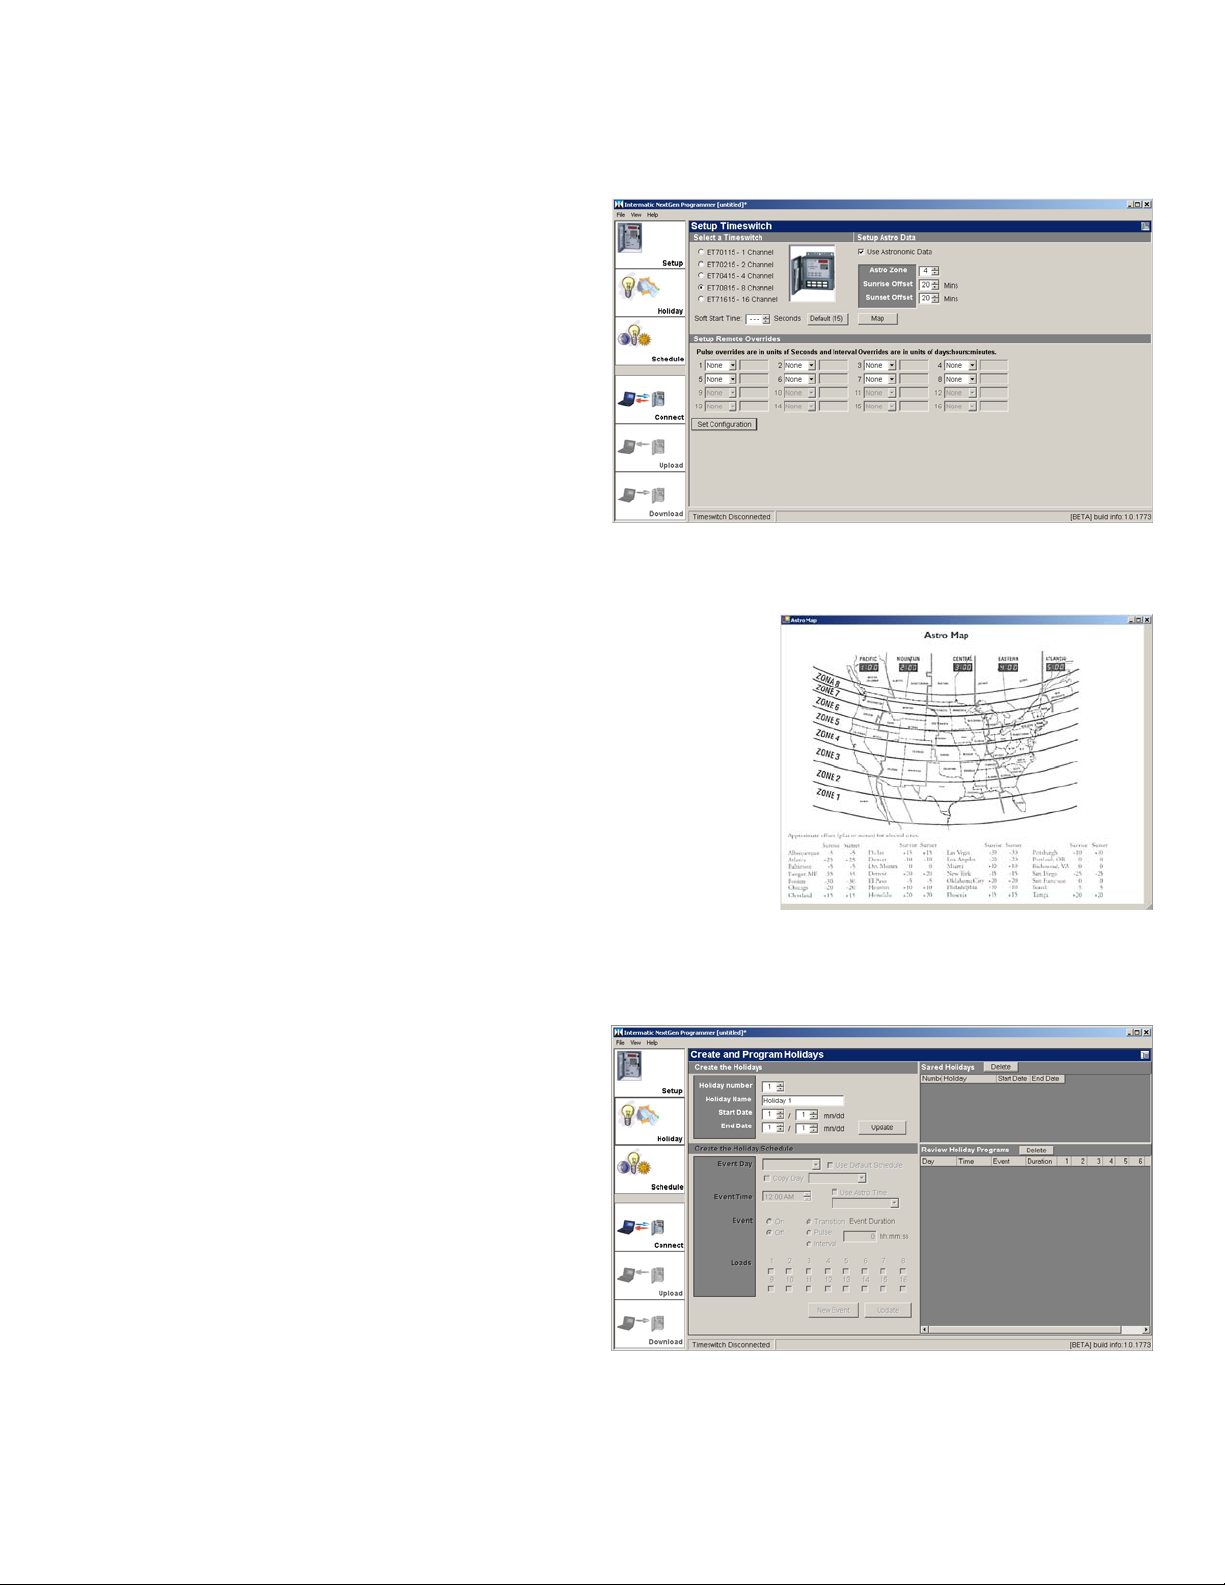
First you will want to select which model of timeswitch you will be programming. As you select the different models of
Next Generation timeswitch, the display will change to show an image of the timeswitch.
After selecting the model, you should select whether the
timeswitch will use Astronomic Data. This is the built-in
feature that allows the timeswitch to calculate Sunrise and
Sunset. This is a common feature used with the Next
Generation timeswitch.
To properly set the timeswitch to track Sunrise and Sunset
you will need to consult the astro zone map. This map can
be viewed in the Next Generation programming guide or
by clicking on the Map button. After determining which
zone your area falls in, close the map screen by clicking on
the X in the upper right hand corner of the Map screen.
Next you will need to enter that zone number in the Astro
Zone field. This will set the timeswitch to the proper
Sunrise and Sunset times as they would be in the middle of your time zone. Sunrise and Sunset offset times can be
entered to more closely align the timeswitch with the actual Sunrise and Sunset times for your area.
The Soft Start Time is the amount of time the timeswitch will delay between
switching loads ON that are set for the same time. This feature allows the
timeswitch to avoid “hitting” the power-line too hard by staggering loads that
could have an undesirable effect if allowed to switch simultaneously. The
default is set to a 15 second delay between circuits, this can be reset to
whatever delay you desire or no delay at all.
The next step on the Setup Tab is to select what will occur when an override
is activated either on the timeswitch itself or one that is remotely connected.
Overrides can be set to either None, Pulsed, or Interval depending on your
needs. None is the default function for overrides, in this mode the override
button will force a change of state either ON or OFF to the associated load
when activated. Pulsed overrides will change the state of the output to ON for
a preset duration of 1 to 127 seconds. Interval overrides will change the state
of the output to ON for a preset duration of 1 minute to 6 days, 23 hours and 59 minutes.
Finally the configuration that you have set needs to be saved. Do not leave this screen without clicking on the Set
Configuration button. As this button is clicked, the Holiday and Schedule tabs will activate allowing them to be selected as
desired.
Creating Holiday Schedules
Holidays: To the Next Generation time switch holidays are
any time periods when you would like the timeswitch to
operate differently than its normal daily schedule. For
instance, if school will be on break during the summer, the
timeswitch can be set to have a holiday period which starts
on the first day of summer break and ends on the first day
of class in the fall. During this period the timeswitch would
not ring the hourly class bells, but it would continue to
activate the parking lot lights on a slightly different
schedule.
To establish a holiday, select the Holiday Tab. Next you will need to select the holiday number from the holiday menu. If
you desire, you can change the name from the default.
3 of 8
Page 4

Next you need to set the starting day and month and ending day and month of the holiday. Click the Update button to add
the holiday to the holiday list. You will see the holiday appear in the Saved Holidays box on the right side of the display.
Up to 99 holidays can be defined to take place during the year.
NOTE: If a holiday period crosses through the end of the year (i.e. New Years break starts on the 28
ends on the 3
nd
of January). You will need to start the holiday on 12/28 and end it on 12/31 and then start a second
th
of December and
holiday on 1/1 and end it on 1/3.
Occasionally you may need to adjust the days that certain holidays fall on. To modify a holiday, either select the holiday
number using the up and down arrows or select the holiday in question in the Saved Holidays box. The holiday
information will be displayed in the fields. Make your changes and click the Update button. The new information will
replace the old information in the Saved Holidays box.
If you need to remove a holiday that was added by mistake, simply select the holiday in the Saved Holidays box. Then
click on the Delete button at the top of the box.
Now that your holidays are established, it is time to set the schedules that will take place during those periods. By clicking
on the arrow next to the Event Day field all the holidays you have defined will be displayed. Select the holiday you would
like to add events to from the list.
You will note that the “Use Default Schedule” checkbox is
checked, this will suspend all events during the holiday
period. If this is your desire, simply click the Update button
at the bottom of the screen. The event will be added to the
Review Holiday Programs box.
On the other hand, if you need a special set of events to
be executed during the holiday period, you just need to
unselect the “Use Default Schedule” checkbox. If the
event will occur at sunrise or sunset, check the “Use Astro
Time” checkbox. By clicking on the arrow beside the astro
field, you will be able to select Sunrise or Sunset.
Otherwise select the time the event will occur at in the
Event Time field. Next you will need to select whether the
event will turn output(s) ON or OFF. Select the Event radio button next to ON or OFF to make this selection.
The Next Generation time switch is capable of three types
of output modes: 1) Transition, 2) Pulse, or 3) Interval.
Transition events simply turn the output ON or OFF and
maintain that state until a second event occurs to change
it. This is the most common type of event. The Pulse
mode pulses the output from 1 to 127 seconds when
activated. Pulses are often used to ring bells or control
lighting contactors. The Interval event can be from 1
minute to 6 days, 23 hours, and 59 minutes and adds the
convenience of creating an event that can be selfterminating. For example if you would like to turn a light
on at 6:00pm and back off at 8:00pm you can create an
Interval ON event starting at 6:00pm lasting for 2 hours.
The selected loads will turn ON at the beginning of the
Interval and turn back OFF at the end of the Interval without the need for a second event. Finally you will need to select
which output(s) will be affected by the event. Simply check the boxes of the associated outputs to select or de-select
them. When you have finished creating your event click the Update button. The event will be added to the Review
Holiday Programs box.
4 of 8
Page 5

You may at some point need to adjust the time that certain events occur. To modify an event select the event in question
in the Review Holiday Programs box. The event information will be displayed in the fields. Make your changes and click
the Update button. The new information will replace the old information in the Review Holiday Programs box.
NOTE: After changing an event it is important to click the NEW EVENT button before making additional changes to the
information in the event selection area. Otherwise you may mistakenly make changes to the event that was previously
selected.
If you need to remove an event that was added by mistake simply select the event in the Review Holiday Programs box.
Then click on the Delete button at the top of the box.
After setting up all holidays and all events that will occur on those holidays, you can move on to setting your daily
schedules.
Creating Daily Schedules
Daily schedules are those events that happen during the
course of a normal week. Events can be set to happen on
specific days, all days, weekdays, or weekends. To set
your daily schedules select the Schedule Tab.
By clicking on the arrow next to the Event Day field all the
days that can have scheduled events will be displayed.
Select the day or group of days you would like to add
events to from the list.
The default setting will be to use astro times if you have
selected the use of astro times in the initial setup of the
timeswitch. By clicking on the arrow beside the astro field
you will be able to select Sunrise or Sunset.
If the event is not an astro event, uncheck the “Use Astro Time” checkbox. Select the time the event will occur at in the
Event Time field. Next you will need to select whether the event will turn output(s) ON or OFF. Select the Event radio
button next to ON or OFF to make this selection.
The Next Generation time switch is capable of three types of output modes: 1) Transition, 2) Pulse, or 3) Interval.
Transition events simply turn the output ON or OFF and maintain that state until a second event occurs to change it. This
is the most common type of event. The Pulse mode pulses the output from 1 to 127 seconds when activated. Pulses are
often used to ring bells or control lighting contactors. The Interval event can be from 1 minute to 6 days, 23 hours, and 59
minutes and adds the convenience of creating an event that can be self-terminating. For example if you would like to turn
a light on at 6:00pm and back off at 8:00pm you can create an Interval ON event starting at 6:00pm lasting for 2 hours.
The selected loads will turn ON at the beginning of the
Interval and turn back OFF at the end of the Interval
without the need for a second event.
Finally you will need to select which output(s) will be
affected by the event. Simply check the boxes of the
associated outputs to select or de-select them. When you
have finished creating your event, click the Update button.
The event will be added to the Review Schedules box.
After you have created one or more events, you may wish
to use the Copy Day feature of the timeswitch. This
feature is helpful if you want one day to act exactly as a
previously set day. For example if you were to set several
events to occur on Monday and you wanted to have the
5 of 8
Page 6

same schedule of events happen on Thursday you would simply select Thursday as the Event Day and then select the
Copy Day checkbox. In the field would be a list of days that had been previously set for you to pick from to copy. In our
example you would select Monday and then click the Update button. Now the timeswitch will perform the same se ries of
events on Thursdays that it does for Mondays with one simple function rather than manually entering all the information
again.
You may at some point need to adjust the time that certain
events occur. To modify an event select the event in
question in the Review Schedules box. The event
information will be displayed in the fields. Make your
changes and click the Update button. The new information
will replace the old information in the Review Schedules
box.
NOTE: If you are intending to create a new event without
changing an existing event, it is important to click the NEW
EVENT button before making additional changes to the
information in the event selection area. Otherwise you
may mistakenly make changes to the event that was
previously selected.
If you need to remove an event that was added by mistake simply select the event in the Review Schedules box. Then
click on the Delete button at the top of the box.
After setting up all events that will occur during the week you are ready to connect your PC to the Next Generation
timeswitch.
Connecting the Hardware
To exchange information between the Next Generation
timeswitch and your PC you will need to connect it via a serial
communications cable. The Next Generation timeswitch is
equipped with a digital communications port on the back of the
logic module. This telephone jack type port is used to connect
the timeswitch to the ET7232M1 serial interface. This interface
also allows you to connect remote overrides to the timeswitch. A standard serial extension cable (Blackbox Cat.
#BC00242 or B&B Electronics Cat. #9PAM6) is used to connect your PC’s serial port to the front of the ET7232M1.
Connection of the timeswitch through Ethernet networks is also supported with the use of a Serial Server interface (B&B
Electronics Cat. #ESP901). This device acts as an
extended serial port for your PC allowing you to attach
serial devices over an extended network. To your PC the
serial server just looks like another local serial port.
Now that your PC is physically connected to the Next
Generation timeswitch you are ready to go to the “Connect
Tab”.
The Connection Tab
The Connection Tab takes you to the Connection Screen.
In this area you can configure the serial port you will be
using with the timeswitch, query the timeswitch for current
time & date settings, and initiate a link with the timeswitch.
6 of 8
Page 7

If a password has been set on the timeswitch, fill in the 6-digit number field. If there is currently no password and you
want to establish one, you will have to enter it on the timeswitch manually using the keypad. See the Users Guide for
your specific model for details on setting a password. Save this number, it will be required to access the timeswitch in the
future. If you decide to not use a password just leave the password as the default “000000”.
Next verify the Communication Settings. The COM port setting should match the port that the serial cable is connected
to.
After verifying the proper COM port and Password click the
Connect button. Upon connecting to the clock a flashing
bar will be present on the timeswitch’s display and the
Upload and Download tabs will become active. The status
of the connection will also be displayed in the lower left
corner of the NextGen screen.
If the timeswitch has been previously programmed you can
query the timeswitch for its current time and date settings.
To do this, click the Get Date/Time button. The
information will be displayed in the fields.
To modify or set the time and date for the first time fill in
the correct information in the fields provided. If you would
like to set the timeswitch to the current time and date that your PC is set to simply click the Set Current Date/Time button.
To write the new time and date information to the timeswitch click the Set Date/Time button.
NOTE: It is necessary to set the time and date before
downloading a program to the timeswitch.
To disconnect from the timeswitch click the Disconnect
button. This is used when you have completed your
communications with the timeswitch.
Finally the Reset button can be used to reset the
timeswitch after making alterations to the program that you
want to take effect immediately. This should be used with
caution since the timeswitch will interrupt all outputs during
the reset process which may cause undesirable effects.
If you want to Upload a program that is currently in the
timeswitch you can proceed to “Uploading a Program from
the Timeswitch”. If you wish to Download the program that is in your PC to the timeswitch skip to “Downloading a
Program to the Timeswitch”.
Uploading a Program from the Timeswitch
Uploading a program from the timeswitch can only be
done after connecting to it. If you have not connected the
timeswitch to your PC or have not initiated the link
between the timeswitch and your PC then you should
review “Connecting the Hardware” and the “Connect Tab”
sections.
NOTE: If you have a program in the PC’s memory,
uploading the program from the timeswitch will overwrite it
and it will be lost. Be sure to save any programs you want
to keep.
7 of 8
Page 8

The Upload screen is very simple, all you have to do is click the upload button and provided the timeswitch is prope rly
connected and linked to the PC it will upload the complete contents of the timeswitch’s memory into the PC. This program
can then be viewed, edited, and reloaded into the timeswitch.
After the upload is complete, you will be informed by a message in the Upload Details screen.
Downloading a Program to the Timeswitch
Downloading a program to the timeswitch can only be
done after connecting to it. If you have not connected the
timeswitch to your PC yet or have not initiated the link
between the timeswitch and your PC then you should
review “Connecting the Hardware” and the “Connection
Tab” sections.
NOTE: If you have a program in the timeswitch’s memory,
downloading the program from the PC will overwrite it and
it will be lost. Be sure to save any programs you want to
keep.
The Download screen is very simple, all you have to do is click the Download button and provided the timeswitch is
properly connected and linked to the PC it will download the program from the PC’s memory into the timeswitch.
After the download is complete, you will be informed by a message in the Download Details screen. This program is now
ready to run on the timeswitch.
8 of 8
 Loading...